
No matter how long you've been shooting, there are always photography tips you never knew about that will improve your ability to conceptualize, create and capture images – or even just have fun playing around.
Photography tips aren't just for photography rookies; even for seasoned pros, there is always something fresh to learn or an old bad habit to put right. From the basics and foundational techniques to camera hacks and high level post production tricks, this collection of tips and tutorials will enable you to get the most out of your photos.
If you're looking to take perfect portraits, shoot luscious landscape, capture wonderful wildlife shots and master macro, or if you're after some quick editing tips for Photoshop, Lightroom or Affinity, this is the essential guide for you.
We've arranged these photography tips and tricks into sections, so you can use the scroll bar above to get started and improve your images right away.
For even more tips and videos, make sure to check out our best-selling photography publications, Digital Camera magazine, PhotoPlus: The Canon Magazine, Digital Photographer and N-Photo. Each issue comes with a free disc packed with photography projects, techniques and tutorials, Photoshop lessons and much more. These are broken down into detailed guides in the magazine pages, too, so you can bring the mag along and follow the steps on your next shoot.
Landscape photography tips

1. How to capture great sunsets
Getting the most out of sunsets needs patience and timing. The best pictures are usually when the sun is close to the horizon and clouds are lit from below. And a telephoto lens can often give more impact than a wide-angle.
2. Use hyperfocal distance for depth of field
You can maximise depth of field in landscapes by focusing at the 'hyperfocal' distance. This is where the far distance is at the far limit of your lens's depth of field, and this also gives you the best depth of field nearer the camera.
3. Look for foreground interest
Wide-angle lenses are great for capturing wide, sweeping landscapes, but they can also capture lots of empty foreground, so look out for rocks, trees, gates or other objects you can include to add foreground interest.
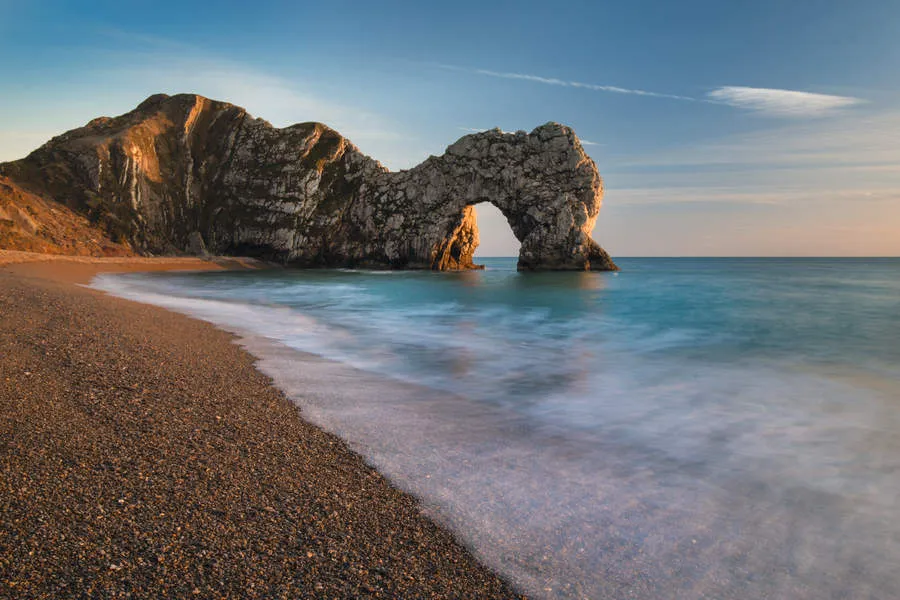
4. Blur waterfalls and rivers with long exposures
You can capture silky smooth water or softly blurred moving clouds by putting your camera on a tripod and using a long exposure. And if the light is too bright for a long exposure, you can either use an ND filter or wait until dusk!
5. Use leading lines to draw viewers in
Use 'leading lines' in your landscape photos to draw your viewers' eyes into the picture. A leading line could be a jetty on a lake, a line of rocks or a footpath winding its way into the distance.
6. Use long lenses for more effective flower shots
It's tempting to use a wide-angle lens to capture a great swathe of floral color, but this can lead to individual blooms being lost. Instead, use a telephoto lens to pick out single flowers or clumps – this will also add artistic blur to the background.
7. Enhance your landscapes with reflections in water
Lakes and rivers can produce beautiful reflections that add foreground interest and a peaceful symmetry to a scene. If you get right down low, even a small pool or puddle can provide a reflection.
8. Check your exposure with the camera's histogram
Landscape photography can often mean balancing extremes of brightness in bright skies and shadowed foregrounds. Make sure you don't clip any highlights in the sky before you shoot by checking your camera's histogram.
9. Use an L-bracket for easier vertical shots
Not all tripod heads are well adapted to vertical shooting, especially with large and heave camera and lens combinations. The solution is an L-bracket, where you mount the camera sideways on the bracket, but the bracket attaches to the tripod head normally. This is great for horizontal 'pano' shots, too.
Read more: 16 essential landscape photography tips
Portrait photography tips

10. Practice classic lighting setups
'Rembrandt', 'Clamshell', 'Backlight', 'Rim-lighting' – these are all tried and trusted portrait lighting setups, each of which gives its own distinctive look. If you practice getting these set up, it leaves you free to concentrate on your subject.
11. Headshot photography tips with a speedlight
If you're photographic head and shoulders portraits with a speedlight, the secret is to move it off-camera and use a softbox or other flash modifier to give a softer light. This will immediately give a more rounded, flattering light for faces.
12. Use asymmetric compositions for couples
Photographing couples is not as easy as it sounds. The answer is not to show them side by side in a perfectly symmetrical arrangement, but to find off-center poses or activities where your couples are at a different height.
13. Try natural light for fine art nude photography
Natural light is softer and easier to work with than flash, and by changing the distance between your model and the window, you can change the intensity and softness of the light.
14. Plan ahead for boudoir photography shoots
Work out what lighting you're going to use, the clothing your model is going to wear, and work out a list of poses you want to try. The model may have some ideas too. The more you can plan ahead, the more stress-free the session.
15. Use fill-in flash to add 'sparkle' in outdoor portraits
You don't need a high-powered professional flash here, just your camera's built-in flash or an external speedlight. The idea is to just brighten the shadows, not to overpower the existing ambient light.
16. Try off-camera remote flash
Most camera and flash makers now offer remote wireless flash control for one or more flashguns, and this is a great way to experiment with different lighting angles and setups – and there won't be any cables to trip over.
17. Achieve more natural lighting with bounce flash
It's an old technique but a great one. Instead of pointing the flash directly at your subject, you turn it to 'bounce' it off a nearby wall, ceiling or other reflective surface. This is why more advanced speedlights have tilt and swivel heads.
18. Create Gobo lighting effects
It's a classic cinema technique, using gobos (something that 'goes between' the light and the subject) to create the lighting pattern of window frames or Venetian blinds, for example, and you can use the same technique for portrait photography too.
19. Use a wide-aperture prime for soft baby pics
You can get beautiful baby and newborn portraits using soft lighting and a prime lens with a very fast maximum aperture. The shallow depth of field emphasises the softness of the subject.
20. Tips for posing group shots
Posed group shots can look very staged and static, so for smaller groups try finding an activity or an action that breaks the ice and captures movement and expressions in a more natural way.
21. Professional portraits with a single light
You can get a professional 'headshot' look in a home studio, using a single flash, a softbox and a plain backdrop. It doesn't need expensive gear, just a little practice with lighting and a little patience in setting up.
22. To get ahead, get a head!
It's not always easy to find someone to model for you as you practice your lighting techniques, so here's our top tip: Purchase a mannequin head! We agree that they're not great company, but they don't complain and they have the same shapes and features as human heads and are perfect for polishing up your portrait skills.
23. Use supplementary lighting at night
Night-time portraits can be very atmospheric and colorful, but often then need some subtle supplementary lighting to fill in the shadows and bring out your subject against a bright background. An off-camera flash is idea, or a portable LED panel may be better still, especially if you want to shoot video too.
Macro photography tips

24. Use focus stacking to get amazing depth of field
Try focus stacking to keep tiny subjects sharp from front to back. Some cameras can do focus stacking internally; otherwise you can merge 'focus stack' frames in photo editing software.
25. Use extension tubes for low cost-macro photography
Extension tubes go between the camera body and the lens to allow it to focus far closer than normal. You need to get extension tubes to fit your camera system, so check before you buy.
26. Try close-up filters for macros
Close-up filters are another low-cost route into macro photography. They are simple correction lenses that screw on to the front of your lens, and they usually come in threes, to be used individually or combined for an even stronger effect.
27. Make a DIY light tend for flower photography
You can easily create a portable DIY light tent for outdoor flower photography. It shields your subjects from wind and rain, evens up the lighting and saves you from disturbing plants where they are growing.
28. Focus bracketing with your camera
Never heard of focus bracketing? It's allied to focus stacking, where you (or the camera) shoot a series of shots at slightly different focus points and combine them later for more depth of field than you could get with a single shot.
Animal photography tips

29. Try safari photos in a wildlife park
This is a good place to practice your wildlife photography skills before you take that once in a lifetime trip to the Serengeti. It starts with choosing the right lenses, but there's more to it than that.
30. How to get great pictures of dogs
Pets make perfect portrait subjects, and the rules are similar to those for human portraits, especially those of children – you need to get down to their level!
31. Try this to get great pictures in zoos
Zoos are full of exotic animals, but they are also full of mesh fences and smeary glass windowpanes. Here's one tip to get you started: get your lens right up against the fence or window and use a wide aperture to throw it way out of focus.
32. Capturing birds in flight takes practice!
Start by researching the best location, use the longest telephoto you can afford/carry, and learn your camera's autofocus modes before you start. Then you just need to practice, practice and practice your panning technique.
33. Make your own bean bag
Get stable shots with a simple DIY bean bag to support your camera. You can put it on the ground on a wall or on the roof of your car, and mold it to fit the shape of your camera.
Street photography tips
34. What is street photography?
Professional street photographers have different interpretations of 'street photography'. Don't assume your own style has to conform with what others have done. It's your own unique 'eye' that's important.
35. Choose where you stand!
Decide where you stand – both literally, as in the best locations for your work – and ethically. What is it that you want to say about your subjects and their world, and are you representing them fairly?
36. Expect to shoot a lot of rubbish!
This is the advice from the legendary Martin Parr: “The basic theory is the more rubbish you take, the better the chances of a good photo emerging, so keep on taking the rubbish.”
37. Engage with your subjects
Street photography needn't mean 'stolen' images and subterfuge, and many photographers may be uncomfortable with this. But you can also engage with your subjects, explain what you are doing and ask permission. You may learn something about their lives that you might never have imagined.
Tips using filters

38. Get an ND filter for long-exposure seascapes
Landscape photographers love graduated filters for taming bright skies, but a 10-stop ND (neutral density) filter could prove the landscape photographer's best friend by allowing super-long exposures for silky blur effects.
39. Use a polarizing filter to cut through reflections
You can use software recreate the effect of a polarising filter on a blue sky, but polarisers do much more than this. They also cut through reflections in glass to reveal what's behind windows, display cabinets and glazed pictures.
40. Use an infrared filter for surreal effects
The world looks very different when revealed using nothing but infra-red light, and you can get lens filters which cut out visible light and leave only this invisible longer-wavelength light.
41. Try colorful cross-polarization effects
For this colorful abstract technique, all you need is a polarising filter and a selection of transparent plastic objects. A low cost school set of rulers, protractors and set squares will work perfectly.
42. Learn to use an ND graduated filter
Sometimes the sky in a landscape is just so bright that you can't find an exposure that captures both the sky and the landscape itself. This is where you need a graduated filter, which is part of any landscape photographer's essential kit.
43. A polarizing filter can help you get stunning skies
Polarizing filters have many effects, but one of them is to deepen blue skies – and the deeper the blue to start with, the stronger the effect. There is a knack to using them, though, and be aware that you can get uneven sky tone if you use them with wide-angle lenses.
44. Tricks and tactics for ND filters
ND filters let you use very long exposures in broad daylight, to product silky-smooth motion blur effects in water and skies, but they can be tricky to use because they are almost completely opaque! A mirrorless camera may be able to 'see' through them, but with a DSLR you will need to check the exposure and composition before attaching the filter – and then apply the necessary exposure correction for that filter.
Creative photography tips

45. Levitation photography: how to make objects float
You can make objects appear to hang in mid-air using a combination of clever shooting setups and quick and simple retouching techniques later. It sounds complicated, but it's really quite simple to do.
46. Get the Lensbaby look with 'freelansing'
Did you know you can take pictures with your lens detached from the body and angled manually to create Lensbaby-style tilt-shift effects? All you need to do is check your camera settings and make sure it will still shoot with no lens attached.
47. Pinhole photography is easy!
It's one of the oldest and simplest forms of photography, and doesn't even need a lens! Pinhole photography is easy – just make a tiny hole in your camera's body cap, set the camera to manual exposure, put it on a tripod and experiment with shutter speed.
48. Tips to get great POV photos
POV (point of view) photography was invented with action cams, but you can get some great angles and photo ideas by trying it out with a regular camera. All you need to do is get your hands or your face in the foreground and looking into the scene.
49. Try painting with light in night shot
Night shots can show the world in a whole new light (ahem), but very often the foreground is lost in dark shadow. All you need to do is take along an LED light or a flashlight, and 'paint' light over the objects or areas in a scene where it's needed.
50. Get a new angle with a worm's eye view
This can be a great way of capturing unique perspectives on the world of nature, with close-ups captured right down at ground level and looking up, as if each plant is a giant tree reaching up into the sky. All you need is a macro les and camera with a tilting screen.
51. Create light orbs with a flashlight
We've all seen those amazing light 'orbs' suspended in mid-air in pictures taken at night, and they look impossibly intricate to create – but they're not. You just need to swing a flashlight round in a circle by hand, or on the end of a string, and slowly move your body through 360 degrees. If you keep moving, the camera won't see you, only the light trail.
52. How to create a classic ring heart shadow on a book
It's in every wedding photographer's portfolio, but how is it done? How do you get a heart shape from a circular ring? It's because of the v-shaped fold in the spine of an open book and how it distorts the circular shadow... and how you light it, too. Clever, eh?
53. Get the most from a fisheye lens
Get low and get close! You can really exaggerate the fisheye effect by getting really close to your main subject – often until you're almost touching – this makes your subject look huge against a tiny distant background.
54. SHow to create sunbursts and starbursts
Use a wide-angle lens and a small aperture to create the 'star' effect from the sun, or any naked light source at night. Positioning is crucial, and moving just a couple of inches can make the sun peep out just enough from behind a tree or a building.
Camera hacks and DIY

55. DIY photography hack: stabilise ANY camera!
This cheeky hack really works! Screw a D-type screw from your tripod release plate into the base of your camera, hook one end of a short bungee cord into the loop, and the other end into your waistband. The tension in the bungee cord as you put the camera to your eye will stabilise your camera.
56. Mobile lighting... with your mobile!
You can use your smartphone torch for light painting in darkness, and you can use your iPad's screen as a makeshift softbox for lighting portraits or still lives. There's not much power, so you'll need a tripod or a high ISO, but the lighting effects can be beautiful.
57. DIY softbox: how to build your own lighting modifier
You can make your own softbox, with a cardboard box, a pair of scissors and some foil. It won't look as slick as a professional softbox, but light is light, and your pictures will still look great.
Astrophotography tips

58. Star trail photography is easy!
You can capture beautiful star trails with nothing more elaborate than a wide-angle lens, a tripod and a clear night away from urban light pollution. If you want to get more elaborate, you can combine multiple exposures, or use higher ISOs and shorter exposures to capture star fields without streaking.
59. Northern Lights photography: do your research
The Northern Lights are truly spectacular, but using the right camera settings is only part of it – you also need to be in the right place at the right time, plus a good deal of luck to get the perfect conditions. There are no guarantees!
Motion photography tips

60. Panning secrets
To get smooth panning shots you need a combination of the correct shutter speed (use S mode and start with a shutter speed of 1/60sec or 1/125sec) and a smooth panning motion. The camera settings are relatively straightforward; a smooth panning technique takes practice.
61. Freeze water splashes with flash
The flash duration of a speedlight is so short that it can freeze even the fastest motion, like water droplets hitting a surface. The shutter speed is not that important, as long as it's at or below the camera's flash sync speed – if you shoot in darkness, it's the ultra-short flash that captures the image, not the length of time the shutter is open.
62. Shoot multiple flash exposures with a 'strobe' effect
Some more advanced flashguns can fire a series of flashes in quick succession for a 'strobe' effect. You can use this in darkness with a longer exposure to capture a 'multiple exposure' of a moving subject like a dancer.
63. Try photographing fireworks
Capturing fireworks is easy once you know how. Put the camera on a tripod, set it to B (bulb) mode and keep the shutter open while the fireworks are going off. You can do a few tests beforehand to work out the best exposure time for the ambient lighting and the surroundings.
Still life photography tips

64. How to handle depth of field with close-ups
The closer your subject, the less depth of field there is. To make the most of it, set your camera to A (aperture priority) mode, set the lens aperture to f/11 or f/16, and with focus not on the front of your subject, but on a mid-point half way between the front and back.
Analog photography tips

65. Digitize slides and prints with your camera!
You CAN digitise your old photos using a flatbed or film scanner, but this can take time and, if you don't have one of these devices, you can use your camera! Your kit lens may focus close enough to capture prints, while for slides and negatives, consider investing in a macro lens and a lightbox to illuminate them from behind – or use your phone's screen.
66. Digitizing slides and negatives using a scanner
If you do use a scanner to digitise your old photos, a regular flatbed scanner or multi-function device will be fine for your prints, but you'll need a proper 'film scanner' to get the best from slides and negatives. These are more expensive and slower to use, but worth it for the best quality.
Camera and equipment tips

67. Cleaning a camera sensor: tips for removing sensor spots and dust
Sensor spots are an annoying fact of life with DSLRs and mirrorless cameras, so we recommend three-step approach. First, face the camera downwards and try a blower brush. If that doesn't work, try 'dry' cleaning with a specially designed sensor brush (not a regular brush!) or stick pad. If this doesn't work either, the third option is 'wet' cleaning with sensor swabs and sensor cleaning fluid.
68. Camera len cleaning tips
You'll often have specks of dust on your lenses, and a few won't matter, but if there's a lot, try a blower brush rather than a regular brush – when these come into contact with the lens surface can end up leaving smears behind. If you have smears on the lens, don't reach for the cleaning solution straight away – try 'huffing' on the lens and a gentle wipe with a microfiber cloth.
Shooting tips
69. Go eye-to-eye with nature

Take the same approach for portraits of animals and plants as you do for portraits of people. That means getting ‘eye to eye’ with the subject with a relatively long lens and using a reasonably large aperture, such as f/4, to help separate them from busy background details. At close distances, only a small part of the subject will be sharp, so care needs to be taken with focusing.
70. Find a frame to shoot through

A framing device can help to funnel a viewer’s attention to the right place in a picture, add context and structure – and mask ‘dead’ areas, too. Frames can be actual frames, such as shooting through an open door or a window, or implied, such as the branches of a tree. They can also be diffuse – try positioning the camera close to flowers and shooting a subject beyond them to add a soft, colourful frame.
71. Using flash in daylight

If you find that you’re coming unstuck with your exposures when you’re trying to mix natural light and flash, switch off the flash and set the exposure for the daylight first. Use Manual mode so that the settings stay locked in on the camera, and base your exposure on the brightest part of the scene. Finally, switch on the flash and use this to brighten up the darker areas of the scene for a balanced result.
72. Sharp shots without a tripod

There are times when it isn’t wise to set up a tripod, such as on a bustling city street, and times when you need to stay mobile. Shutter speed becomes a prime concern in these situations; increasing the ISO, employing shake reduction, firing short bursts of shots, pulling the camera strap taut and bracing yourself against a wall or other available ‘furniture’ can all help.
73. Shooting in a new location

While it’s easy to explore Google Images to get a feel for the photographic potential of a location, if you’re visiting a spot for the first time, it’s worth pausing and getting a sense of place before trying to express it in an image. It might be tempting to attach your camera to your tripod, but there’s a lot to be said for exploring different viewpoints with a handheld camera to find the right angle and height to shoot from first.
74. Include odd numbers

Odd number of objects typically give more balanced compositions than even numbers, whether you’re shooting a group portrait, a sporting event or a landscape. So three is not a crowd... it will usually look better than a pair
75. Use the dioptre adjustment

Many cameras enable the viewfinder sharpness to be improved using a feature called dipotre adjustment. Keep an eye on the readout in the viewfinder rather than looking at the image as you make any adjustments.
76. Activate highlight warning

You can set the playback display to flash a warning for highlights that are at risk of being exposed, which is a quick way to check exposure. Read more: How to always get your exposure right
77. Remember to reset your camera
If you’ve been making adjustments to your camera for a specific shot, such as dialling in exposure compensation, don’t forget to return the settings to normal when you finish shooting, ready for next time.
78. Pre-focus for action

If you’re able to predict where a moving subject is going to be, pre-focus the lens on that spot: this can speed up the time it takes for the autofocus system to lock onto the subject and give you a much better chance of grabbing the shot.
79. Try Shutter Priority

For sharp shots, you need a fast shutter speed. To guarantee this, use Shutter Priority, dialling in your preferred shutter speed, and switch to Auto ISO; the camera will adjust the aperture and sensitivity according to the light
80. Try Aperture Priority

Shooting in Aperture Priority mode enables you to control the depth of field as well as the exposure. Keep an eye on the camera’s shutter speed in the viewfinder, though, otherwise you might end up with shots ruined by camera shake.
81. Check the AF mode
Make sure that you use One Shot/Single Servo for stationary subjects and AI Servo/Continuous Servo to keep track of moving ones.
82. Close-up depth of field
The closer you are to a subject, the shallower the depth of field is. If this results in too much blur, try moving farther away and crop the shot to a tighter composition later.
83. Spot metering

For more accurate exposures, switch to spot metering and aim the metering area at a part of the subject you want to be recorded as a mid-tone. Use your camera’s exposure lock function to lock this setting before recomposing the shot.
84. Shoot sharp landscapes

Small apertures such as f/16 and f/22 increase the depth of field, or the amount of front-to-back sharpness. Perfect for landscapes, you might think. The trade-off is that they lead to softer pictures due to the effects of diffraction (where the light rays are bent out of shape as they pass through the small hole). For sharper details, it may be worth sacrificing a little depth of field and using an aperture that’s a couple of stops down from the smallest setting.
85. Working with a tripod

A tripod enables you to close the aperture of your shot down if you require a greater depth of field, and also to reduce your ISO to the highest quality setting. It’s also essential when you want to shoot longer exposures in low light, but a combination of strong gusts and spongy ground can make things tricky. In these conditions, you may have to resort to setting up on a firm area and keeping the tripod low, shielding the legs from the wind with your body. Read more: 7 golden rules of tripod stability
86. Brush up on your reflector skills

To prevent your portrait-sitter from squinting into the sun, position them so their back is towards the sun and use a reflector to bounce light onto their face, ‘feathering’ the reflected light rather than bouncing it directly into their eyes. It’s worth experimenting with different reflectors. A silver one adds a clean, crisp quality; a white one gives softer results that are often easier to blend in. Gold reflectors add warmth, but use them with care.
87. Shoot more flattering portraits

The low-contrast light afforded by cloudy but bright days is great for portraits as you won’t get ugly shadows under eyebrows and noses, or glare on people’s skin. Focal lengths of 85mm and longer are more flattering than shorter lengths. The angle you shoot at also counts: shooting from slightly below eye level implies confidence and power, while shooting from slightly above is slimming and intimate. Read more: The best portrait lenses
88. Get set up for candids

Things happen quickly when you’re shooting candids, so you need to have your camera ready to go. Avoid using a brightly coloured camera strap, and wrap it around your wrist rather than over your shoulder. Hold the camera at chest or head height, where it’s quicker to get it up to your eye. Not only does enable you to react faster, it’s less likely to attract your subject’s attention.
89. Expose to the right

To get the best-quality results, shoot in your camera’s raw file format and try to use an exposure that produces a histogram that just reaches the right-hand edge of the graph; avoid pushing the histogram over the edge, though. You can then bring the exposure to your preferred level when you process the image in raw software back at home.
90. Use the histogram

When you check the histogram on your camera display, its shape represents the dynamic range of the scene you’re photographing, while the width of the graph represents the dynamic range of the camera. If there are gaps to the far left or right of the histogram, these indicate over- or under-exposure, so some exposure adjustments may be required. Read more: How to read a histogram
91. Raw histogram
The preview and histogram that can be viewed on the camera are based on a JPEG version of the image, even if you took the shot using your camera’s raw format. The raw file holds a wider dynamic range than a JPEG, so to get a more representative histogram, set the Picture Style/Picture Control to a low-contrast, neutral setting.
92. Seeing in black and white

If you’d like total control over how your image is converted to black and white, it’s better to shoot in colour then make it mono in software. We’d recommend shooting in your camera’s raw format, as it gives you so much scope for playing around with the image later, although you can set your camera to its Monochrome picture style to get a black-and-white preview on the rear screen.
93. Getting close to wildlife

Using a long lens means that you don’t need to get as physically close to a wild animal as you would otherwise, but understanding the subject and fieldcraft are more important than camera equipment. Wear rustle-free clothing that breaks up your shape; make sure your outline doesn’t break the skyline; and approach mammals with the wind in your face so your scent isn’t carried towards them.
94. Long exposures

Yes, long-exposure seascapes have been done to death – but, done well, a bit of blur in the water and sky can still go a long way to lifting a coastal composition. Getting a shutter speed slow enough to achieve the effect in bright light requires a strong ND filter. If you’re using a square filter system, check that the filter is in the slot nearest the lens, and ensure the viewfinder is shielded. Use mirror lock-up or Live View to prevent vibrations and fire the shutter with a remote release.
95. Use a preset white balance

Your camera’s auto white balance setting will attempt to neutralise strong colour casts, but setting a preset that matches the light source can give better results. You can also use an ‘incorrect’ white balance creatively: try the Shade setting to add warmth to a sunset, for example, or Tungsten/Incandescent to cool down a daylight scene. Read more: Cheat sheet – White balance presets
96. Keep the horizon level

Use your camera’s electronic level, a hotshoe spirit level or the grid display to make sure the horizon is level in your shot. If you don’t have time to use these options, a quick and dirty option is to use the edges of the AF points in the viewfinder.
97. Shoot into the light

Shooting into the light can produce dramatic results, although you need to be conscious of lens flare. If you have square filters in place you’ll have to ditch the lens hood, so be prepared to shield the front of the lens with a hand or hat held out of the frame
98. Shoot in the blue hour

Twilight, or ‘the blue hour’ as it’s sometimes referred to, is a great time of the day to shoot cityscapes and floodlit architecture, as the sky will have some colour instead of being an empty black void. Not only does this look more interesting, it also makes for more balanced exposures.
99. Pan with action

Moving the camera at the same speed as a moving object means the subject will remain in the same position in the frame and will be recorded sharply. Experiment with the shutter speed: the slower the shutter speed, the more the background will blur, conveying greater speed.
100. Double-check the background

Details in the background can take viewers’ attention from the main subject. They don’t have to be obvious colourful road signs: even the out-of-focus line of the horizon will be a distraction if it runs directly behind a person’s head. For clean shots, look for clear backgrounds that are well separated from the subject. Darker backdrops tend to work better than bright ones, but be mindful of patches of bright sky through trees.
101. Develop an eye for abstracts

The middle of the day, during the non-magic hours like the golden hour and the blue hour, is often a great time to go looking for abstracts to shoot. With an abundance of light, you’re less likely to need a tripod, and the hard light can be used to accentuate shadow, form, texture and tone. Alternatively, head out on overcast days, when the sky acts like a giant softbox, making it easy to pick out fine details.
102. Choose good shoes

Don’t underestimate the importance of comfy shoes. Whether you’re pounding the cobbles in pursuit of street photography or chasing the light in the hills, you’ll be more inclined to walk farther and shoot for longer if your feet aren’t sore. Waterproof boots or Wellingtons are a must for shooting at the coast or when you’re photographing a waterfall, where the best views typically involve getting your feet wet.
103. Avoid camera shake
The rule of thumb when it comes to beating camera shake is to make sure the shutter speed is equivalent to or faster than the effective focal length of the lens – so at least 1/100 sec for a 100mm lens on a full-frame camera. If you’re shooting on a camera with a smaller sensor, multiply the focal length and shutter speed by the crop factor: 1.5 for APS-C sensors (1.6 for Canon APS-C models) and 2 for Micro Four Thirds.
104. Be prepared to get down and dirty

Don’t photograph everything from your eye level: finding a higher vantage point or getting down low can help your pictures stand out. Shooting from a low angle makes subjects look more imposing and allows you to draw viewers into a picture: look for leading lines to pull the eye from the foreground to the subject. A camera that has a fold-out LCD screen or Wi-Fi compatibility for seeing the Live View feed on a smartphone can help with framing.
105. Focus for close-ups

You need to be very careful to make sure your focus point is absolutely spot-on when you’re at close proximity to a subject, as the depth of field is minimal. It can often be better to put the camera on a tripod, switch to manual focus and magnify the Live View display so that you can position the focus precisely.
106. Travel light

For urban photography, you want the minimum amount of kit. A fully loaded camera bag feels heavier as the day goes on, so stick with just one or two lenses. Bag type is down to preference: backpacks spread the load, but a shoulder bag gives you faster access. Read more: The 10 best travel cameras
107. Dealing with high contrast

If a scene includes an expanse of light sky and a dark foreground, fit a graduated neutral-density filter to the lens to help balance the exposure. Alternatively, take two shots, one with the sky exposed correctly and the other with the land exposed correctly, and blend the exposures in software.
108. Background exposure
If the background of a shot is much darker than the subject, the result may be overexposed, so try setting exposure compensation to -1 or -2. To prevent a much brighter background causing the camera to underexpose, try exposure compensation of +1 or +2.
109. Use Manual exposure

If the light is consistent and you have time to set the shutter speed and aperture, use your camera’s Manual exposure mode. This locks the exposure setting in, so it makes a good choice for keeping a subject correctly exposed even when the background changes.
110. Lens corrections

If you’re planning on working up your shots in your preferred raw conversion or photo editing software, like Camera Raw or Lightroom, it pays to frame views a little wider than perhaps feels natural when you’re shooting. The reason for this is that if you correct lens distortions in software, you can end up losing detail at the edge of the picture.
111. Street smarts

Approaching strangers and asking to take their portraits can be a challenge, but a little chutzpah really pays off. Even if it sounds like your idea of hell, making it obvious that you’re taking pictures can elicit interesting reactions. In fact, skulking in the shadows and sniping with a long lens is a sure-fire way to attract the wrong kind of attention.
112. Avoid sensor dust

Although it’s easy enough to digitally remove dust spots on images, you can reduce the chances of dust being deposited on the camera sensor by avoiding changing lenses in exposed and windy locations. If you’re working in these conditions, consider fitting a zoom lens so that you don’t have to change lenses so often.
113. Set the AF point

If you let the camera choose the autofocus point automatically, it will often focus on the nearest object. Instead, set your camera to its singlepoint AF mode and move the active point so that it’s positioned over the subject that you want to be sharp
114. Use Auto ISO in Manual mode

Your camera’s Auto ISO function can be a life-saver, as you can freely adjust your exposure settings and the camera will automatically raise the ISO sensitivity at a preset shutter speed, so you don’t need to worry about camera shake. It can also be used in Manual exposure mode, allowing you to set your preferred combination of aperture and shutter speed, with the Auto ISO function ensuring you get a consistent exposure in changing light.
115. Shooting in the rain

Don’t be just a fair-weather photographer: rain’s where it’s at! The most challenging aspect of shooting in driving rain isn’t keeping yourself dry, it’s keeping raindrops off the front of the lens. The shallow hoods made for wideangle lenses are pretty useless in this regard. Our advice? Fit a UV filter and soak up any water just before you fire the shutter. It never hurts to pack more microfibre cloths than you think you’ll need, too.
116. Shooting in bright sunshine

Although the best light for shooting on a scorching summer day is typically at the start and end of the day – the so-called ’golden hours’ – a clear sky does have its advantages. There’ll be plenty of light, enabling the use of low ISOs and fast shutter speeds for sharp shots. Use a polarising filter to reduce glare and reflections in landscapes, and a reflector or burst of flash to open up the shadows in a portrait.
117. Take an extra battery

Cold weather saps battery life, so to keep your camera working when the temperature drops, keep a spare charged battery warm in an inner jacket pocket. If you start to run out of power, consider not using power-hungry functions such as image stabilisation and Live View.
Photographer tips
118. Take pictures you love

Doug Chinnery, Abstract Photographer, says: "The ‘Photography Police’ can only exist if we allow them to. No-one should tell you what your images should look like. "Make pictures that, first and foremost, you love. Then, if others love them too, so be it. But if they don’t, be proud that you are following your own creative path and not being forced to follow the herd. This takes creative courage and conviction, but leads to producing stronger, more fulfilling work."
119. Sharpness is over-rated

"Let a little blur into your life", says Doug Chinnery, Abstract Photographer. "Bring in a bit of wobble. Shallow depth of field and intentional camera movement can be used creatively, allowing your audience to make up their own stories about what’s happening in your images."
120. Print your own work

"Would you give your camera to someone else to make your photos? So why let someone else make your prints? The print is the culmination of the creative process, and nothing beats making a finely crafted print. No commercial printer cares about your images like you do. Don’t kid yourself that the prints they make are as good as they could be." – Doug Chinnery, Abstract Photographer
121. Develop your vision

Abstract photographer Doug Chinnery says: ”Copying the photographs of others is a great way to learn techniques as a beginner. But to really grow as a photographer, we need to look at the world through our own eyes and use the skills we have learned to make images that show our unique creative vision."
122. Ditch the tripod

Landscape photographer Andrew Fusek Peters says: “Go guerrilla with your landscape photography! Ditch the tripod and endless filters, and shoot hand-held, exposing for the sky at dusk or dawn. It’s much quicker to frame hand-held, and you can recover shadows and blacks in post.”
123. Straighten it out
Fine-art photographer Lorna Yabsley, author of the Busy Girl’s Guide To Digital Photography and teacher of one-to-one photography training, says "Pay attention to keeping horizons level in your frame – it can make or break a shot."
124. Process with care

Fine-art photographer Lorna Yabsley says: "Always spend a little bit of time to process your favourite images. Less is more: lifting the shadows, lightening and brightening and subtle sharpening can bring out the best in your shot."
125. Invest in a prime lens

"A prime 50mm lens is an indispensable, inexpensive piece of kit to have, giving beautiful crisp images and the ability to open up the lens really wide for maximum shallow depth of field" – Fine-art photographer Lorna Yabsley
126. Reinvent the wheel

"If you’re buying an SLR camera, it’s always worth having a dedicated command wheel to control your shutter and your aperture independently, making manual exposure easier" – Fine-art photographer Lorna Yabsley.
127. Get trained

Fine-art photographer Lorna Yabsley says "Invest in some good-quality one-to-one training, to fast-track your way to getting off auto and shooting manually. This will put you in control of your image-making. And learn basic processing techniques to give your work professional polish."
128. Trial and error

Creative photographer Mark A Hunter says: “Don’t get hung up on nailing a shot first time. For example, rather than determining exactly what depth of field to use, put your camera into Aperture Priority mode and grab a few different shots at a range of apertures – you might surprise yourself with the results.”
129. Give yourself assignments

Fine-art photographer James Stanford says: "Sometimes knowing what to shoot is a big relief. Other times, being extemporaneous is the way to go. I love to go out and see what the universe is presenting to me on any given day. Learning to be sensitive to what is out there with no preconceived idea is a wonderful way to discover new subject matter. But only looking for the shot that presents itself in the moment seldom creates new technical skills. In order to master the camera, I give myself special assignments. Giving yourself an assignment helps you to learn about photography and your equipment. By knowing what you want to achieve, you can plan things out. This way you can slow things down. Shoot and confirm. Take notes. Concentrate on getting the shot just right! You will learn to master Aperture Priority, shutter speed, ISO, manual settings, and more."
130. Research your subject

Nature photographer Roeselien Raimond says: "No matter whether it’s an animal you are trying to photograph or some kind of phenomenon, the more you know about your subject, the better you will be able to anticipate what’s to come. Learn to know when animals breed, hunt and sleep. Find out when mist or thunder is likely to occur. It might cost some time, but it’s an investment that will pay off."
131. Explore!

Travel and urban photographer Nico Goodden says: "If you want to succeed as a photographer while always learning and never being bored, do not fear exploring other genres. Instead, be wary of people who tell you to stick to a single genre or niche – it may not be the very best advice if you look at life as an opportunity to discover new things. I have found that instead of hindering my development, shooting a multitude of genres has taught me many transferable skills and brought exciting new clients and commissions through the variety of what I shoot, eventually snowballing into even more unexpected commissions."
132. Choose your moments

Architectural and travel photographer Denys Nevozhai says: "The main thing I’ve learned about photography is to not be obsessed with photography, and shoot only the most worthwhile moments or scenes. The realisation that you need to verify and edit too many photos will make you postpone the process, lose excitement and eventually pile all the set."
133. Think about light

Reportage and travel photographer Stuart Freedman says: "Light is key to photography. Learn to visualise the final image and move if it looks like it’s not going to work."
134. Relax and talk to people

Reportage and travel photographer Stuart Freedman says: "Great pictures aren’t usually luck. Often they’re the result of a negotiation between the photographer and subject. A smile goes a long way. Relax and, crucially, be honest. Explain what you’re doing: if people trust you, it’ll show."
135. Dreamy portraits
Fine-art photographer Lorna Yabsley says: "For dreamy portraits, open up your lens to the widest aperture, and shoot your subject into the light. Use exposure compensation to push your exposure and to expose for shadows."
136. Use a tripod

Natural history and wildlife photographer Adrian Davies says: "I always try to use a good solid tripod for my natural history work, particularly when I’m shooting subjects such as plants. Not only do they hold the camera nice and still, enabling slow shutter speeds, but they also slow you down, making you look carefully at all parts of the frame for distracting items, and deciding on the correct aperture before releasing the shutter." Read more: The best tripods for travel
137. Buy some smoked salmon!

Adrian Davies says: "I use a wide range of reflectors for bouncing light into shadow areas of subjects such as plants and fungi. One I use a lot with fungi in particular on dull autumn days are the pieces of card that come in smoked salmon packs, gold on one side. They give the subject a nice warm tone."
138. Visual missionary
Art photographer Paul Hill says: "The power of the medium to inform and reveal, whether publicly or privately, cannot be overestimated. Most of us see hundreds of photographs every day, but do we even look at one to find out what it ‘says’? Photography is an essential part of modern life, with millions made every day, and thousands of manufacturers and service industries dependent on it. The effect on our civilisation is enormous. Practitioners should feel uncomfortable regurgitating clichés. They should be visual missionaries, converting the public to the importance of the medium with the power of their images. Photography can be fun, of course, but its makers have to take it seriously. As well as being attracted to the unusual and unexpected, I am mindful of three things when making a photograph: frame, light and vantage point."
139. Part of a team

Wedding and commercial photographer Kate Hopewell-Smith says: "Learning to direct and pose are key skills for any people photographer, but successful portraiture is down to teamwork. The photographer needs to give energy and enthusiasm – but so does the subject, or the results will not be as successful as they should be."
140. Speak out
Art photographer Cig Harvey says: "Bear in mind that your camera is a tool to help your creativity. I love the idea that our cameras are just expensive pencils – it is what we have to say that is important."
141. Be open

Street photographer Ryan Hardman says: "Don’t hide your camera when taking street images, because this often puts people on edge. Just have the camera around your neck and when you see someone exciting, bring the camera up to your eye and snap away. If the subject stops you and asks why you are taking images of them, just politely explain why you have done so and the intentions of your image – for yourself, competitions or magazines."
142. Shoot with a theme in mind

Ryan Hardman says: "Often street photography can be lacking a theme, making the image the photographer has taken become weak or uninteresting. My best advice would be to think about a theme and reason for the capture of street photography other than because the subject was interesting. This will in turn help when you’re confronted by a person who is outraged you have photographed them. Trust your gut – if the subject feels on edge and aggressive, don’t photograph them."
143. Be street-savvy and sensitive
Ryan Hardman says: "Street photography is not about proving we are in a better place than the subjects. My greatest advice would be to stay away from the homeless or disadvantaged, to make sure as photographers that we are not taking advantage or photographing subjects unethically."
144. Break the fourth wall

Street photographer Ryan Hardman says: “I used to ask for an image of the subject first, but now I take my images without asking – the reason for this is to create exciting subjects that break the fourth wall and look into the lens of the camera, which means the viewer will connect with the image.”
145. Have 'fill' light available

Wedding and commercial photographer Kate Hopewell-Smith says: “Location portraits come into their own when there is some beautiful back light to give separation and mood. However, this does leave your subject’s face in shade, so use a reflector or an on-camera flash (probably in high-speed sync mode due to fast shutter speeds outside)."
146. Aim for a response

Travel photographer Lottie Davies says: “When processing your files, think about the emotional response of your audience. Do you want people to feel positive about the subject of the image? If so you might tend towards warm, rich tones. If you’d like a sense of calm contemplation, consider a less punchy interpretation."
147. Follow your heart

Nature photographer Roeselien Raimond says: "I firmly believe that your photos reflect what you put into them. So if you choose a subject that you love and that truly fascinates you, this will show. Working from the heart will certainly improve your work."
148. Have a tale to tell

Documentary photographer Marc Wilson says: "The most important aspect of any photograph is the story behind it and whether it will be of interest to the viewer."
149. Don't spread yourself thin

Commercial photographer Maria Falconer says: "When I first started out, I believed that I needed to photograph everything. I dabbled with practically every style and subject available, except maybe wildlife… unless you count pigeons! And yes, of course I learned a few skills along the way, but I quickly discovered that my best images were made when I was shooting something that was important to me – and that could be anything from dance to political issues."
150. Five words
Documentary photographer Marc Wilson says: "Shoot less and shoot better".
151. Go on a photo adventure

Quintin Lake says: "The spirit of adventure is about seeing with fresh eyes rather than venturing to distant lands. Travelling by foot for a prolonged period is the best way of seeing a place anew as the odds are stacked in your favour of encountering an unusual or beautiful event. Remember that photography is but one of many forms of human visual expression. Looking at the other visual arts can give you new ideas for subjects, colour usage, tonality and composition that you can use in your own work. "
152. What and when

"A truly successful photograph can be broken down into two simple components: what is in the frame and when do you press the button? Everything else you control will help shape the success or otherwise of the photograph: the light, the composition, movement, stillness, empty space, colour, focus and depth of field" - Documentary photographer Marc Wilson.
153. Keep calm and create
Commercial photographer Maria Falconer says: "Don’t look too hard. Relax and let the photographs come to you."
154. Shoot less, see more

Landscape and fine art photographer Paul Sanders says: "I would rather come home with one shot I have worked hard to perfect in the field than a memory card filled with mediocre images. Far too often we’re challenged by our insecurities to shoot more and more, when actually it’s better to take your time, refine the image in the viewfinder, carefully compose, and check everything before pressing the shutter button. It’s also a cop-out to say, 'I’ll fix it in post.' Get it right on-site and in the camera before you leave the location. You should choose the moment you press the button after really seeing into the subject. So once you commit to an image, don’t keep shooting unless the lighting dramatically improves. When you are happy, walk away and don’t look back!"
155. Behind the photo

Documentary photographer Marc Wilson says: "Technique is important, but the power behind a photograph is the story it tells."
156. The art of light
Maria Falconer says: "Photography itself is a simple matter of using light to make marks. There are no actual rules – just ones that men have made up."
157. Use your screen

Landscape & wildlife photographer Francis J Taylor says: "Learn to use the histogram on your camera’s rear screen. When this is used in conjunction with the very useful highlight alert feature, you can ensure you quickly nail the perfect exposure every time."
158. Shoot what you love

Travel photographer Lottie Davies says: “Photograph the things you love. For instance, if you love food, shoot food – if you love adventures, shoot travel or cars, if your favourite place is at home with your family, photograph them. The energy of your enthusiasm will show through and make your images sing."
159. Accept the rain

Francis J Taylor says: "Don’t be a fair-weather photographer. Often the most interesting images are created in challenging and adverse conditions."
160. Smile and be selfish

Paul Sanders says: "We are guilty of taking our photography far too seriously, whether we are trying to impress our friends, fellow club members or that tricky judge. Photography is a hobby for many people, and even for professionals it’s a privilege to do a job that many would pay to do; so smile, enjoy your time with the camera and, yes, be selfish – this is time invested in you, so shoot what you like and not what you think will win things. It really doesn’t matter what other people think of the images you take, but if you truly enjoy what you take pictures of and the time you spend doing it, you may be surprised at the results, and possibly the prizes too."
161. Read this book!

Digital Camera Magazine editor Ben Brain says: "Read 'On Being a Photographer: A Practical Guide' by Bill Jay and Magnum legend David Hurn. It’s a delight!"
162. Plan ahead

Francis J Taylor says: "Research your location to find the best time to visit. Remember that the position of the sun changes throughout the year so a location that doesn’t work in summer may be perfect in winter."
163. Get inspired by the arts
Ben Brain says: "Don’t limit yourself only to photographers for inspiration. Turn to painters, poets, musicians, authors et al..."
164. Use one prime lens

Ben Brain says: "Try using only one focal length (say 35mm or 50mm) for one year: I guarantee it’ll make you a better photographer."
Editing tips
165. Hide selection lines
If the dotted line of a selection is making it difficult to see an adjustment you’re making, press H to hide the ‘marching ants’ then make the adjustment without any distractions. Pressing H again will reveal the selection.
166. Stretch out a sky

If you want more blue sky above your subject, go to Image > Canvas Size. Put 20 % in Height, tick the Relative box, and click the middle-bottom Anchor box. Click OK, then make a thin selection along the top edge of the existing sky using the Rectangular Marquee tool. Press Ctrl/Cmd+T to go into Transform mode. Pull the top-middle handle upwards to create headroom.
167. Lose your palettes
To see a pic without distractions, press Tab and you’ll hide all the palettes and tools. To restore them, press Tab again. To lose everything except the Toolbox, press Shift+Tab.
168. Lose your unwanted layers

Getting rid of layers you don’t need is slow going if you drag them to the trash icon in the Layers panel. To quickly delete one layer, right-click on it and select Delete Layer. If you want to delete multiple layers, hold down Ctrl/Cmd and click on their names to select them, then right-click on one and select Delete Layers.
169. Go full screen
To see your image as large as possible on-screen, press Ctrl/ Cmd+0 (zero). Repeatedly press F to see the pic in different view modes.
170. Add a white border

To apply a swift white border, first open your pic then press D to reset the colours to black and white. Now press Ctrl/Cmd+A to select the image, and Ctrl/Cmd+T to enter Transform mode. Hold Alt +Shift and drag in a corner handle to make a white surround in proportion. Press Return, and you’ll have a clean white border with very little fuss.
171. See a single layer
With a multi-layered image, there are times when you want to see what’s on a particular layer. Alt-click on the eye icon of the layer in the Layers panel. This will turn off all the other layers.
172. Add a bleach bypass in seconds

To boost contrast and give a stylised look to a pic, press Ctrl/Cmd+J to duplicate the image onto a new Layer, and then press Ctrl/Cmd+Shift+U to get rid of the colour. You’ll see a mono image, but change the Blend mode to Soft Light in the Layers panel, and the black-and-white layer will be blended with the colour to boost contrast and tone down the saturation, giving an attractive bleached look.
173. Speed up filter use
To repeat a filter and boost its effect, press Ctrl/Cmd+F to reapply the last filter you used. This is a fast way of making blur filters more blurry.
174. Save for the web with precision

When you’re saving JPEGs of pictures for web use, make sure you use the dedicated File > Export > Save for Web feature. Set the Preset to JPEG High, and use the options to resize, adjust and compare different quality settings – and even preview it on a web page. You’ll find it’s a much smarter way than using File > Save As, choosing JPEG, and guessing the rest!
175. Change your mind on filter settings
If you’ve gone too far with a filter effect and want to dial back the settings, press Ctrl/Cmd+Z to undo the filter. You’ll see the image return to its pre-filtered state. If you now press Ctrl/Cmd+Alt+F, you’ll bring up the Filter dialog box without having to reselect it. Change the settings and click OK.
176. Use Dehaze for contrast
Found in the FX panel of Lightroom or Camera Raw, the Dehaze slider is designed to reduce atmospheric haze in scenic shots, but it can also be used as a powerful contrast control. To quickly apply a contrast boost, slide it to the right; and to reduce contrast, take it to the left.
177. Pick the right colour

When you need a pure colour in the Color Picker, it’s impossible to directly click right in the corner to get pure white, pure black or the colour you have. To get your cursor right to the edge, click anywhere on the Picker and drag the cursor to the corner you want. This will get you the pure colour you’re after.
178. Get moving
You can move a layer or a selection in any direction by selecting the Move tool (shortcut V) and dragging the mouse. But if you want to be really precise, you can tap the cursor keys on the keyboard to move the item in 1-pixel amounts. If you hold down the Shift key while tapping the cursor keys, you’ll move the item in 10-pixel increments.
179. Be consistent in cropping

When you need a set of pictures all the same size, make life easy by creating a crop preset. Select the Crop tool and in the Options bar, key in the width, height and resolution you want (eg, 21 cm, 29.7 cm, 300 px/in). Now click the first drop-down menu and select New Crop Preset. In the dialog box, change the name if required, and click OK to save your custom size. Use this whenever you need it!
180. Before and after views: the easy way

When you convert a raw file, it’s handy to see a ‘before’ and ‘after’ version of your changes to keep track of how your picture is progressing. Clicking repeatedly on the Y icon at the bottom of the interface in Lightroom or Camera Raw will cycle through the different modes. To exit, click on the full-screen icon alongside.
181. Recompose with Transform

The Crop tool isn’t always the best way to reframe an image. Instead press Ctrl/Cmd+A to select the image, then Ctrl/ Cmd+T to enter Transform mode. Now hold down Ctrl/ Cmd and pull out the corner handles of the bounding box to reshape your image to the frame. When you’re done, press Return to confirm. With this method, you can improve composition while you crop.
182. Set your black point
When converting raw files in Lightroom or Camera Raw, Set your black point by Alt-dragging the Blacks slider to the left. You’ll see a mask view where true black occurs: this provides a great way to set the darkest parts of an image. You can do the same with Alt and the Whites slider to set a white point.
183. Correct your lens
Before doing anything else to a raw file in Lightroom or Camera Raw, go to Lens Corrections and tick the Remove Chromatic Aberrations and Enable Profile Corrections boxes. This will automatically detect the lens used and compensate for any colour fringing or distortion that’s present.
184. Go back in time with Undo
To undo the last thing you did, press Ctrl/Cmd+Z. If you want to step back further, press Ctrl/Cmd+Alt+Z. At the default settings, you can go back up to 20 states, but if you want more, you can increase the number of History States in Edit > Preferences. (Select Photoshop > Preferences if you’re using macOS).
185. Make a calculation

To get a great mono conversion, open your image and go to Image > Calculations. In the dialog box, the Source and Layer boxes will be identical, but by varying Channel, Blending mode and Opacity, you’ll get different black-and-white results. For high-impact scenes shot with bags of contrast, try Red, Red, Multiply. Make sure the Result box is set to New Document, and when you click OK you’ll get a great-looking mono pic.
186. Make a Background layer editable
If you want to move a Background layer higher in your Layers stack, you need to convert it into an editable layer first. To do this quickly, hold Alt and double-click on the layer’s name. It will be instantly turned into an editable layer.
187. Clone like a pro!

If you need to clean up an image with some cloning, create a new layer in the Layers panel. With the Clone Stamp or Healing Brush tool selected, make sure that Sample: All Layers is selected in the Options bar. Now clone or heal away, and all the cloning work will be placed on the new layer, leaving your original untouched if you change your mind later.
188. Apply a slick keyline border
To add a crisp, thin, black border to an image, press D to reset your colours to black and white, then press Ctrl/ Cmd+A to select it all. Now go to Edit > Stroke, and in the dialog box, set Width to 10 px and choose Inside under Location. Click OK.
189. Streamline your layers
If you’ve used a lot of layers, you may find yourself scrolling up and down to find the appropriate one. To get more of them on-screen and avoid wasting time scrolling, click on the flyout menu at the top right, select Panel Options and reduce Thumbnail Size to the smallest option. In cases where you have a lot of layers, you can also pick None to show no thumbnails in the panel at all. Click this and you’ll return to your starting point without having to exit the palette and reopen it.
190. Fill with colour the quick way
To flood-fill a layer or selection with your foreground colour, press Alt+Backspace. Use Ctrl/Cmd +Backspace to fill with the background colour.
191. Check your colours will print
Not all colours captured by a camera can be printed, as a mix of CMYK inks can’t reproduce the RGB light that created the image. To get a good idea of what will or won’t print, press Ctrl/Cmd+Y to view the image in a CMYK preview. You can work on the image in this mode too, so you’re always aware of the colours that are out of range.
192. Sharpen in style

To sharpen a pic in Lightroom or Camera Raw, go to the Detail panel and set the Amount that gives a crisp result on a detailed, in-focus area on the preview. (Radius and Detail are often fine on their defaults of 1.0 and 25.) Now hold Alt and increase Masking until only the edges show in white. This prevents you sharpening areas that don’t need it.
193. Switch Lasso tools on the fly
When making a selection with the Polygonal Lasso tool, you can quickly switch to the Freehand Lasso by holding the Alt key. Draw around your area, and when you release Alt, you’ll be returned to the Polygonal Lasso.
194. Make new layers without fuss
To create a new layer above the one that’s currently active, press Ctrl/ Cmd+Shift+N and you can give it a name in the dialog box before clicking OK. To do it even quicker without a custom name, press Ctrl/ Cmd+Alt+Shift+N.
195. Build up grads gradually
After applying a Graduated Filter to darken a sky in Lightroom or Camera Raw, use gentle settings at first, then right-click on the Pin and select Duplicate. This gives you a second grad and a stronger effect, which you can drag into position and edit further, This is faster than creating new grads from scratch.
196. Warm up a shot the fast way

To add a swift warm-up effect on a landscape, press Ctrl/Cmd+L to open the Levels palette, and click RGB. Select the Red Channel from the list, and move the middle slider a little to the left. Now select the Blue channel and move it a little to the right. This creates an amber colour cast to the whole image, giving an instant warm-up effect.
197. Balance your colours
Colour temperature isn’t fixed in a raw file, and both Lightroom and Camera Raw make it easy to warm up or cool down your shots. The best starting point is to pick the appropriate preset (such as Daylight or Cloudy) from the drop-down menu next to White Balance in the Basic panel. Then, you can fine-tune the results to your liking using the Temperature slider.
198. Change your mind on filter settings
If you’ve gone too far with a filter effect and want to dial back the settings, press Ctrl/Cmd+Z to undo the filter. You’ll see the image return to its pre-filtered state. If you now press Ctrl/Cmd+Alt+F, you’ll bring up the Filter dialog box without having to reselect it. Change the settings and click OK.
199. Darker edges

To quickly create a vignette around an multi-layered image, click on the top layer in the stack and press Ctrl/Cmd+Alt+Shift+E. This will collapse everything visible into a new layer. Now go to Filter > Camera Raw Filter, and select the FX tab. Under Post Crop Vignetting, move Amount to the left for a dark vignette, or right for a bright one, and adjust the look with Feather Roundness.
200. Stay in control of contrast

Curves is an amazing tool that offers the connoisseur’s route to contrast control. With it, you can create an S-curve that darkens lower midtones and brightens upper midtones at the same time. Make a Curves Adjustment Layer, then pull the line down at the bottom and push it up at the top.
201. Zoom smarter
To zoom and out in a smarter way, assign the zoom function to the scroll wheel of your mouse. Go to Edit > Preferences > Tools and tick the Zoom With Scroll Wheel box to enable it.
202. Control your adjustment layers

If you add an Adjustment Layer, it will affect all the layers beneath it in the Layers stack. To make it only affect the layer immediately beneath it, hold Alt and click on the line between the Adjustment Layer and the layer beneath. This ‘clips’ the layer and restricts its effect.
203. Get help with composition
Call up a little assistance in framing by choosing the right Crop Overlay. Click on the dropdown menu in the Crop tool’s option bar, and you can choose from six different options to get you composing like a pro.
204. Spot-on selections
When you’re making a selection with a Marquee tool, it can be tricky to be precise with your starting point. Start to drag out the selection then immediately hold the spacebar without releasing the mouse. You can now move the starting point around to get it exactly right before continuing.
205. Sample a colour – fast!
When you’re painting with the Brush tool and want to switch to a different colour within the image, hold down Alt, click anywhere on the image and the colour will be imported into the foreground colour swatch.
206. Check your masks
When masking, it’s easy to miss out areas when you’re absorbed in the imaging process. To check your mask is well-made and complete, hold Alt and click on the mask thumbnail in the Layers panel. This will show the mask alone, and allow you to paint in any gaps. To revert, just Alt-click on it again.
207. Reset if you fluff it!
If things go wrong when you’re adjusting the settings in a palette and you mess up the image, the obvious bail-out is the Cancel button. This will exit the palette and restore your original pic. Instead of doing this, hold Alt and the Cancel will become a Reset button. Click this and you’ll return to your starting point without having to exit the palette and reopen it.
208. Boost or cut specific colours

Within the HSL panel in Lightroom and Camera Raw, you can radically enhance the colours in a scene by adjusting any of eight individual hues. To ramp up the blue in a sky, click on the Saturation tab and increase Blues, then click on Lightness and decrease Blues. To adjust the colour of the sky, use the same slider under the Hue tab.
209. Benefit from adjustment layers
Because they change data rather than alter pixels, Adjustment Layers are more flexible than pixel-based layers. Instead of copying a layer and making changes to it, click the Adjustment Layer icon and select the type you want from the list. You’ll get the same palette, but the changes you make are not permanent. To change the settings later, double-click the Adjustment Layer’s thumbnail.
210. Add mono toning treatments

To apply a single colour tint such as sepia or blue toning to a shot, click on the Adjustment Layer icon in the Layers panel and select Hue/Saturation from the list. In the dialog box, tick the Colorize box, then adjust the Hue and Saturation sliders to get the colour and intensity you want.
211. Copy and move layers quickly
If you’ve placed a cutout on a separate layer and want to use it elsewhere in an image, select the Move tool by pressing V, then hold Alt and drag the mouse. This copies the selection to a new layer and positions it wherever you drag it.
212. Invert your masking errors
When you use layer masks, it’s easy to hide or reveal the wrong part of the image by getting black where you should have white. If this happens, simply click on the mask to make it active, and press Ctrl+I to invert the colours. This is much quicker than making the mask correctly from scratch.
213. Flatten the smart way
To crunch all your visible layers into a single layer, click on the top layer in the stack then press Ctrl/ Cmd+Alt+Shift+E. This merges the image into a new layer.
214. See sensor dirt

Smudges of sensor dirt are easy to miss, but if you select the Spot Removal tool in Lightroom or Camera Raw, there’s a great way to see them much more clearly. Tick the Visualize Spots box and adjust the slider alongside to see blemishes in low-detail areas like skies. Click on them to clean up.
215. Split-tone a shot

To split-tone a shot and get highlights and shadows in contrasting colours, go to Filter > Camera Raw Filter and in the HSL/ Greyscale tab, tick the Convert to Grayscale box. Now select the Split Toning tab, and adjust the Hue and Saturation sliders for the Highlights and the Shadows to get the colours you want. Use the Balance slider to mix them together.
- To get expert photography tips and tricks every month,
subscribe to Digital Camera magazine from just £12.50
Read more:
- 32 tips and tricks to make a basic camera more powerful
- 6 ways to improve your composition
- Get our free photography cheat sheets
Stay tuned as we will be constantly updating this page with the latest techniques, photo projects, instructionals and camera guides to help you get the most out of your photography.
And for even more videos, make sure to check out our best-selling photography publications, Digital Camera magazine, PhotoPlus: The Canon Magazine, Digital Photographer and N-Photo. Each issue comes with a free disc packed with photography projects, techniques and tutorials, Photoshop lessons and much more. These are broken down into detailed guides in the magazine pages, too, so you can bring the mag along and follow the steps on your next shoot.

