My commercial real estate photography tips will help you avoid bad-quality realtor photos
Not all real estate agent photographs are made equally, so if you’ve got the right kit, why not capture your own?
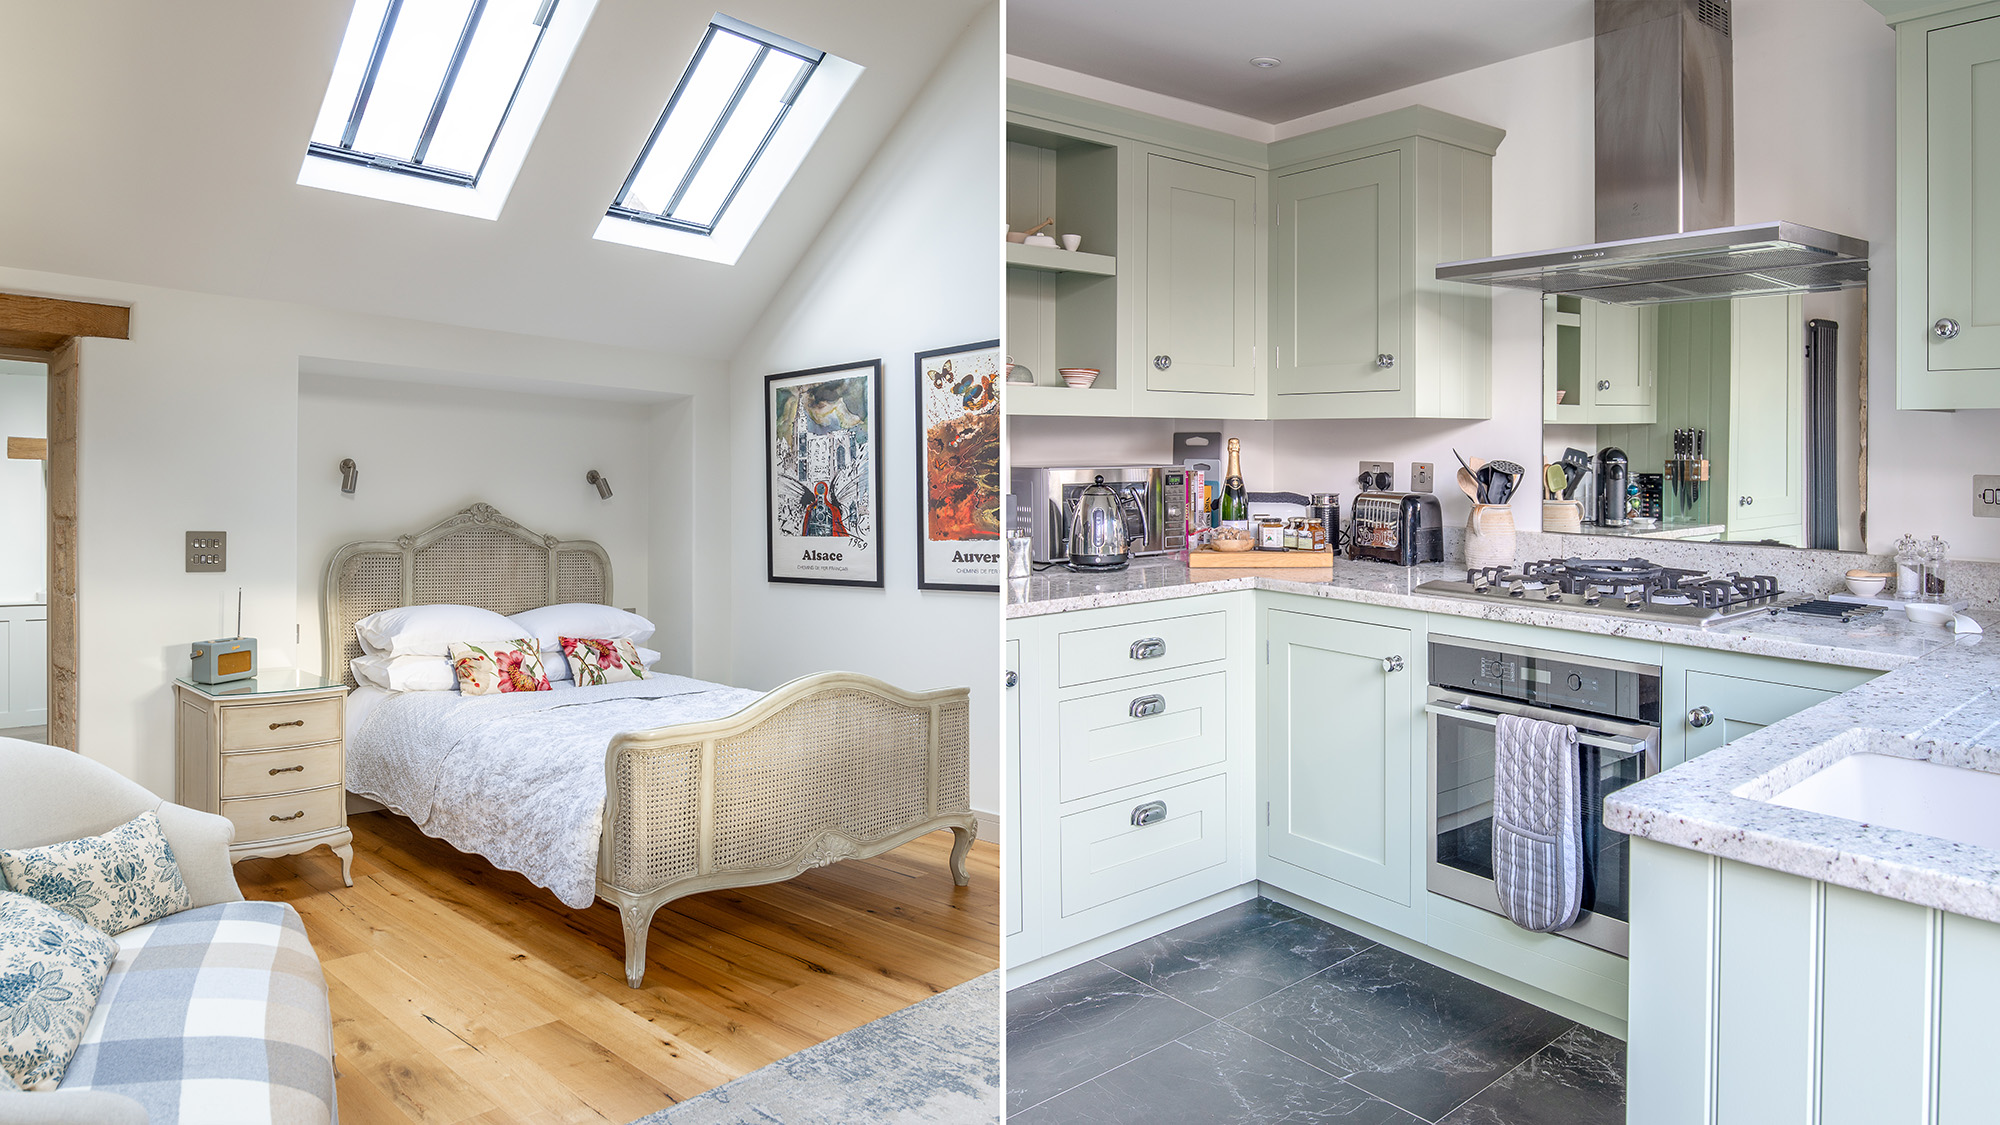
Real estate photography is an extremely useful genre to familiarize yourself with. You can put it to good use if you’re selling your home, promoting a business, or by offering your services as an interior photographer. Not all realtors provide professional-quality real estate photography, with some simply using the best camera phones. Thankfully, plenty of realtors are happy to accept images that meet their expectations. And of course, a growing number of sellers are now using online realtors, meaning they have no choice but to supply their own images.
Real estate photography is just as important for small businesses. If you rent a holiday property or own premises such as an independent shop or cafe, you may need commercial real estate photography for your website and/or social profiles. And if you’re looking to turn photography into a business, real estate photography – like wedding photography – is a genre that’s not threatened by AI (for the foreseeable future at least). So, if you decide to put your photography skills to good use, here are my top tips for commercial real estate photography…

I went on tens of professional photography shoots – including real estate photography – as N-Photo: The Nikon Magazine's Deputy Editor. And that's why I’m Digital Camera World’s How To Editor. You’d struggle to find a photography genre that I haven’t tried or written a tutorial about, so whether you’re a complete beginner or a seasoned photographer looking to pick up the odd tip, I’ve got you covered.
Best camera for real estate photography
An ultra-wide-angle lens and tripod (mentioned next) are far more important than the camera you use. However, you’ll need a device that can accommodate them. For those with the least amount of photography experience, editing know-how, and the smallest budget, your camera phone’s widest lens will do the trick. However, it’s imperative that you pick up a tripod and a phone-compatible tripod head/mount.
The ideal camera is a modern interchangeable lens APS-C or full-frame camera. This will have a decent sensor with enough resolution, dynamic range, and low-light performance to stand you in good stead. Just be aware that an APS-C camera has a crop factor (usually 1.5x). This means that ultra-wide-angle lenses are a little harder to come by. Check out a detailed list of options for the best camera for real estate photography.
1. Use an ultra-wide-angle lens
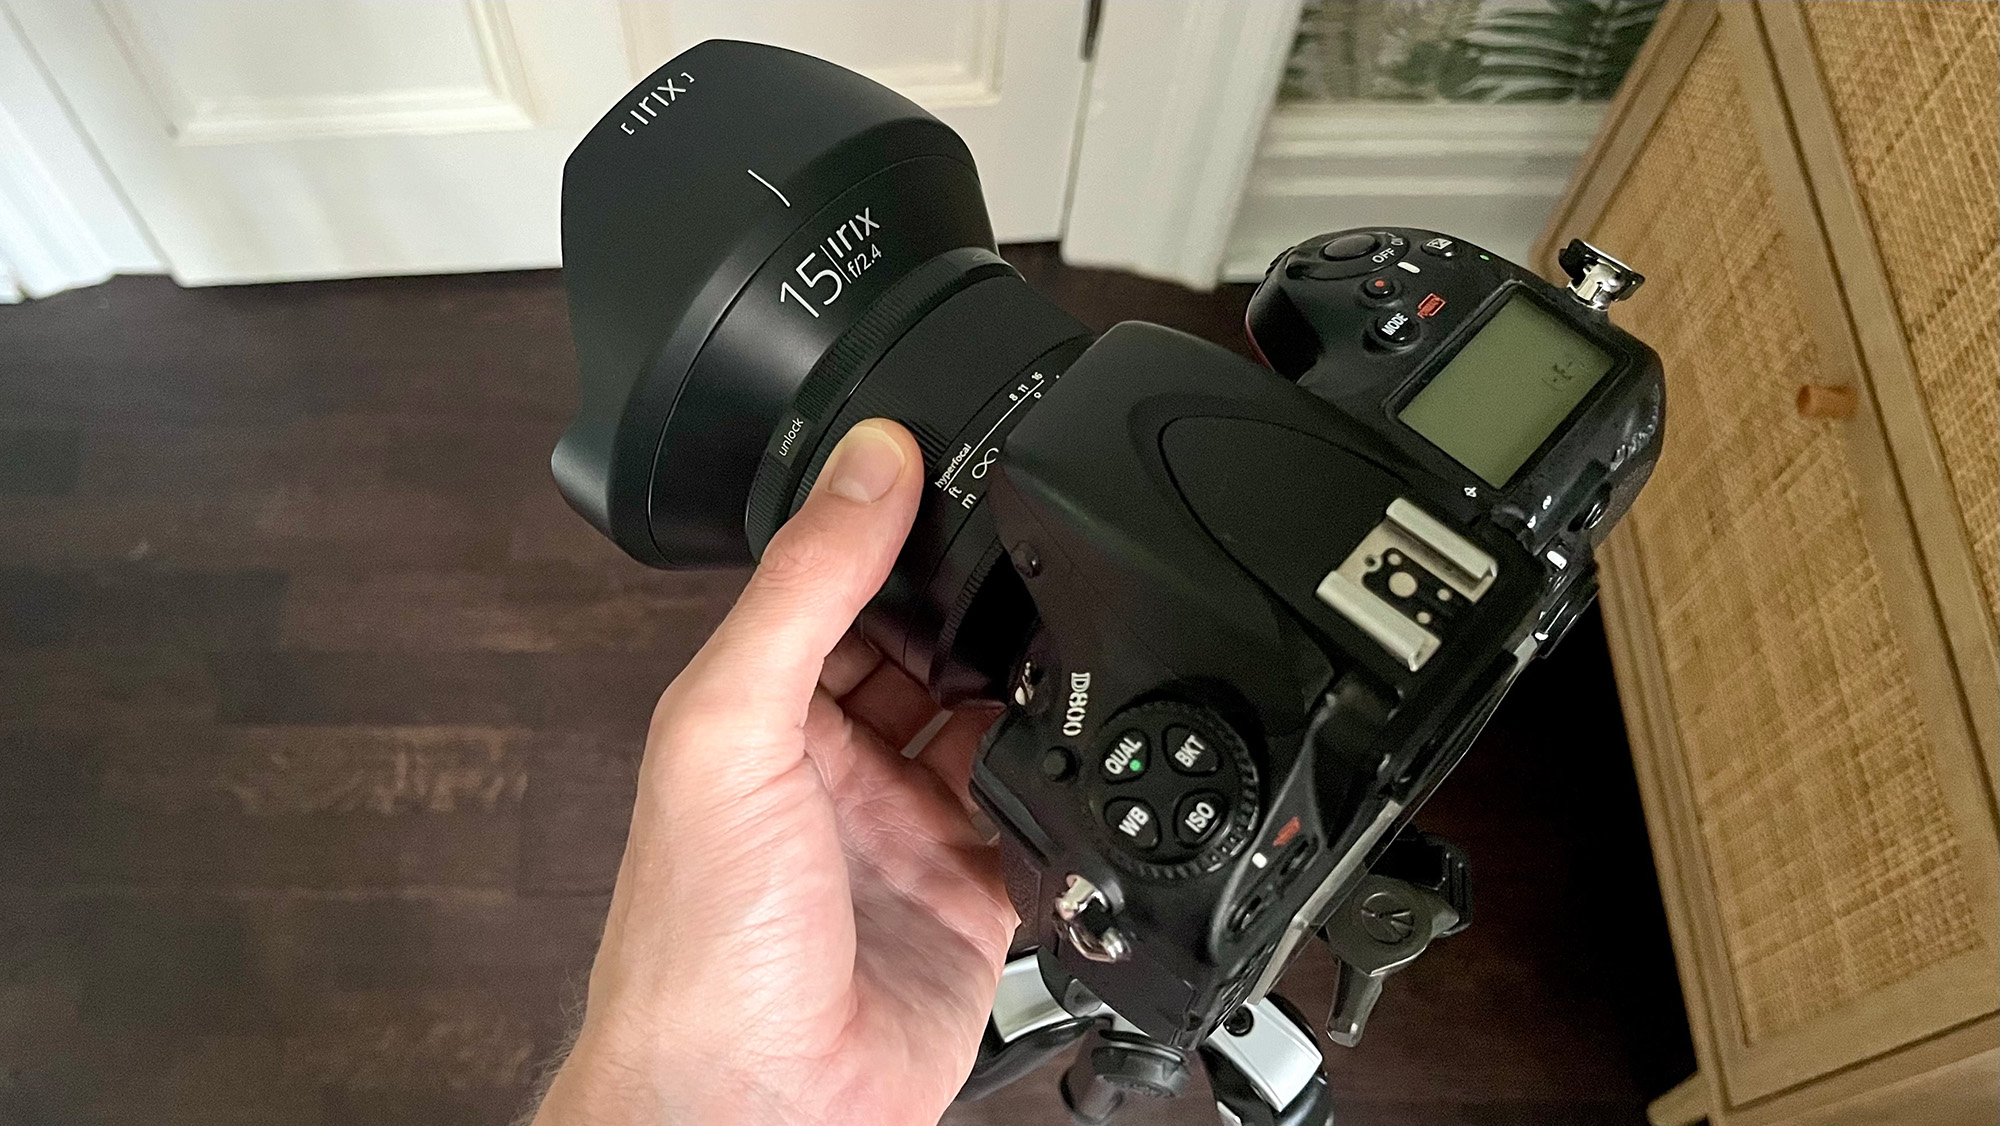
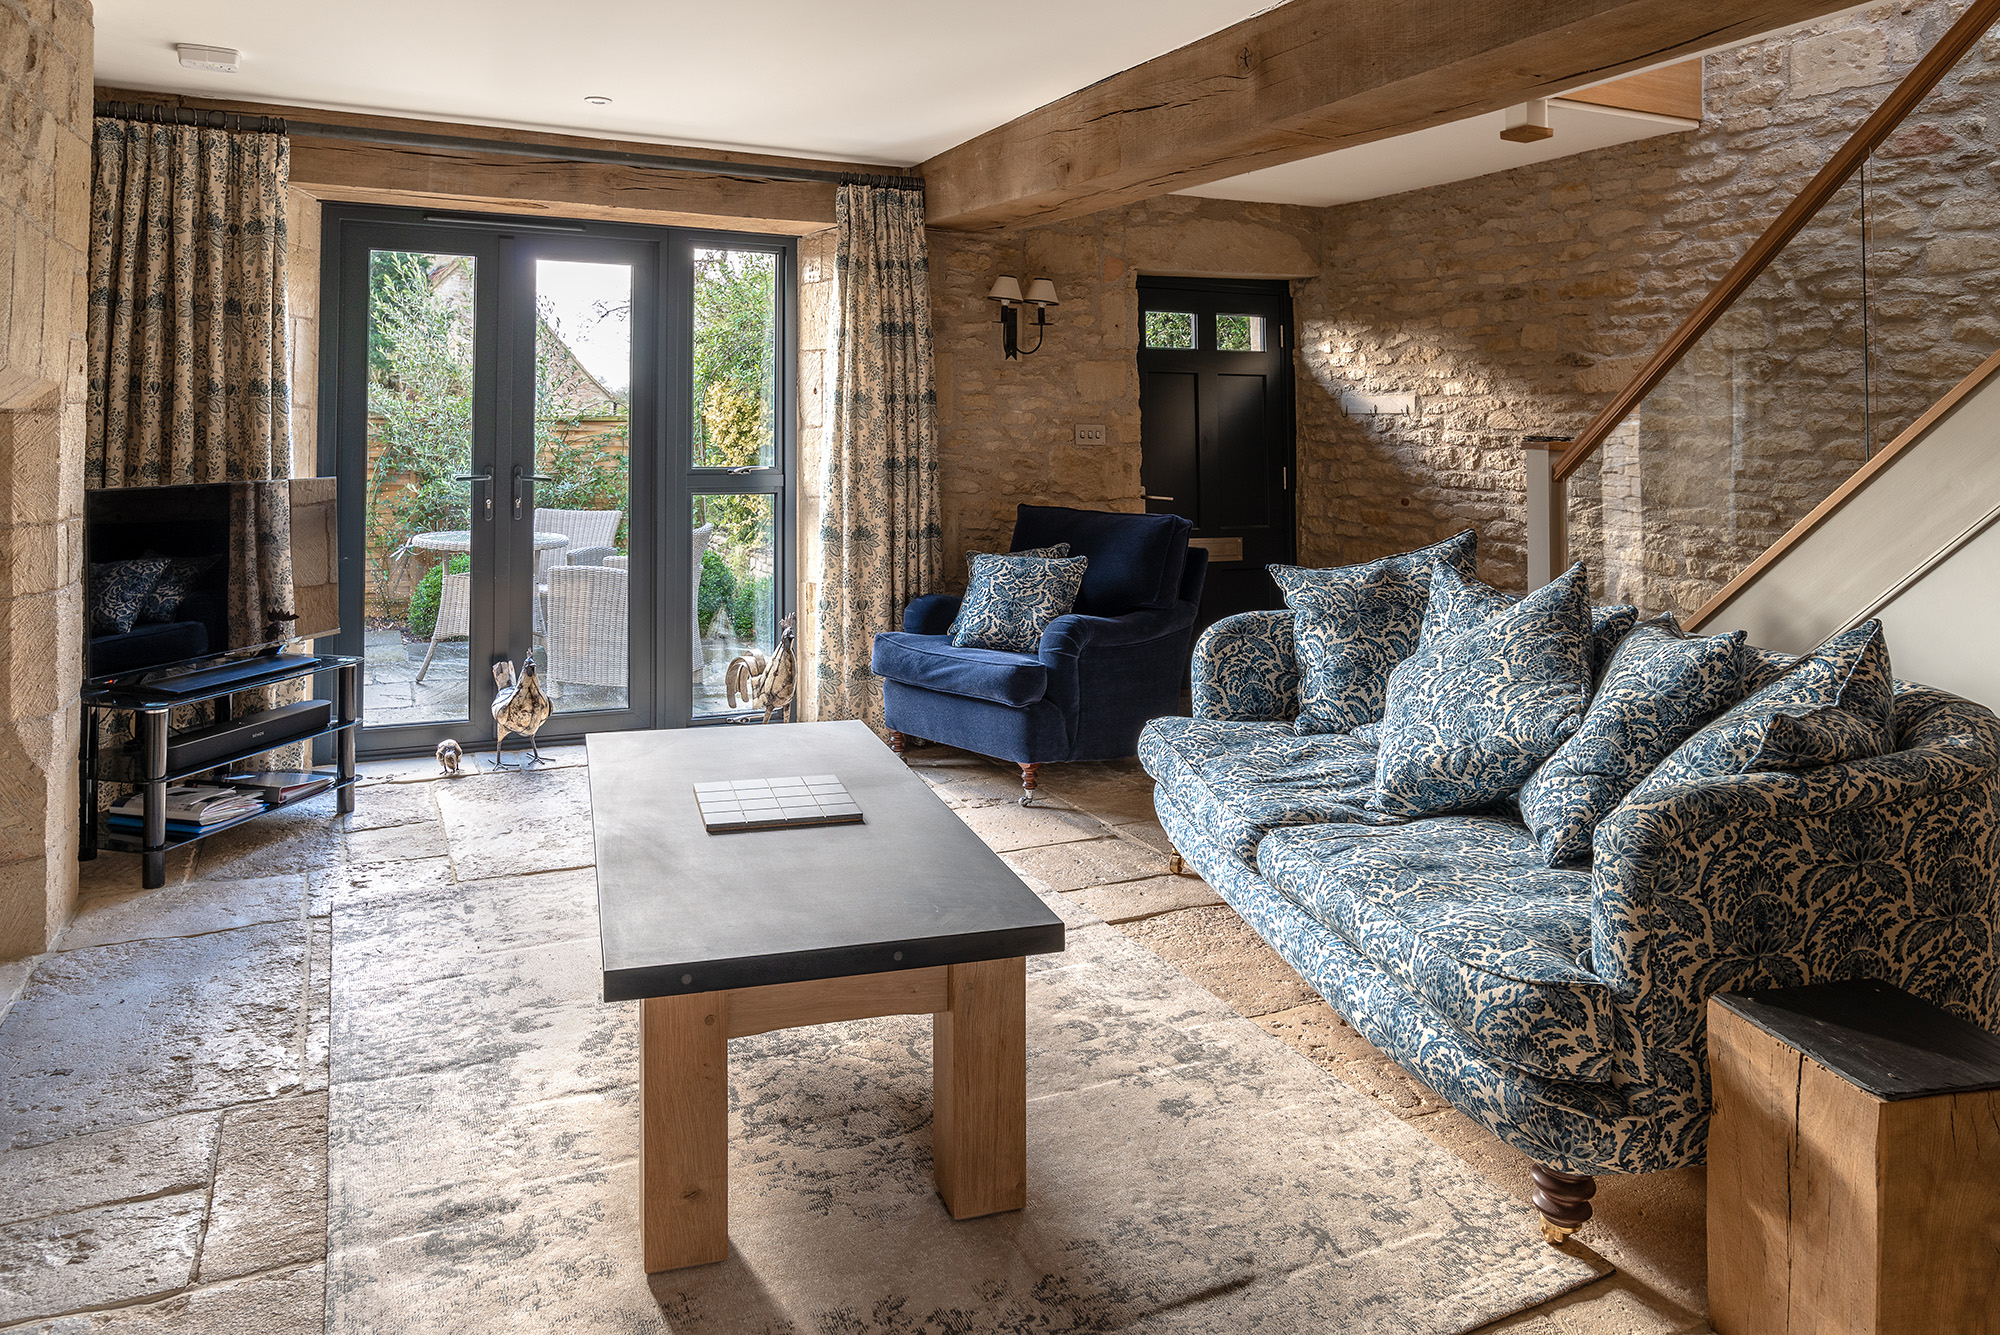
An ultra-wide-angle lens will allow you to cram as much of the room into the frame as possible, while also making the room seem larger than it is. I use a 15mm lens on a full-frame camera, so that would equate to a 10mm lens on an APS-C camera (factoring in the 1.5x crop factor). I will occasionally use tighter focal lengths, such as 35mm, if I’m shooting something square on to minimize barrel distortion. Since you’ll be photographing a static subject on a tripod, you don’t have to worry about having a super-fast lens. I tend to shoot at f/8 or f/11 to maximize my depth of field and make everything appear sharp.
2. Use a good-quality tripod
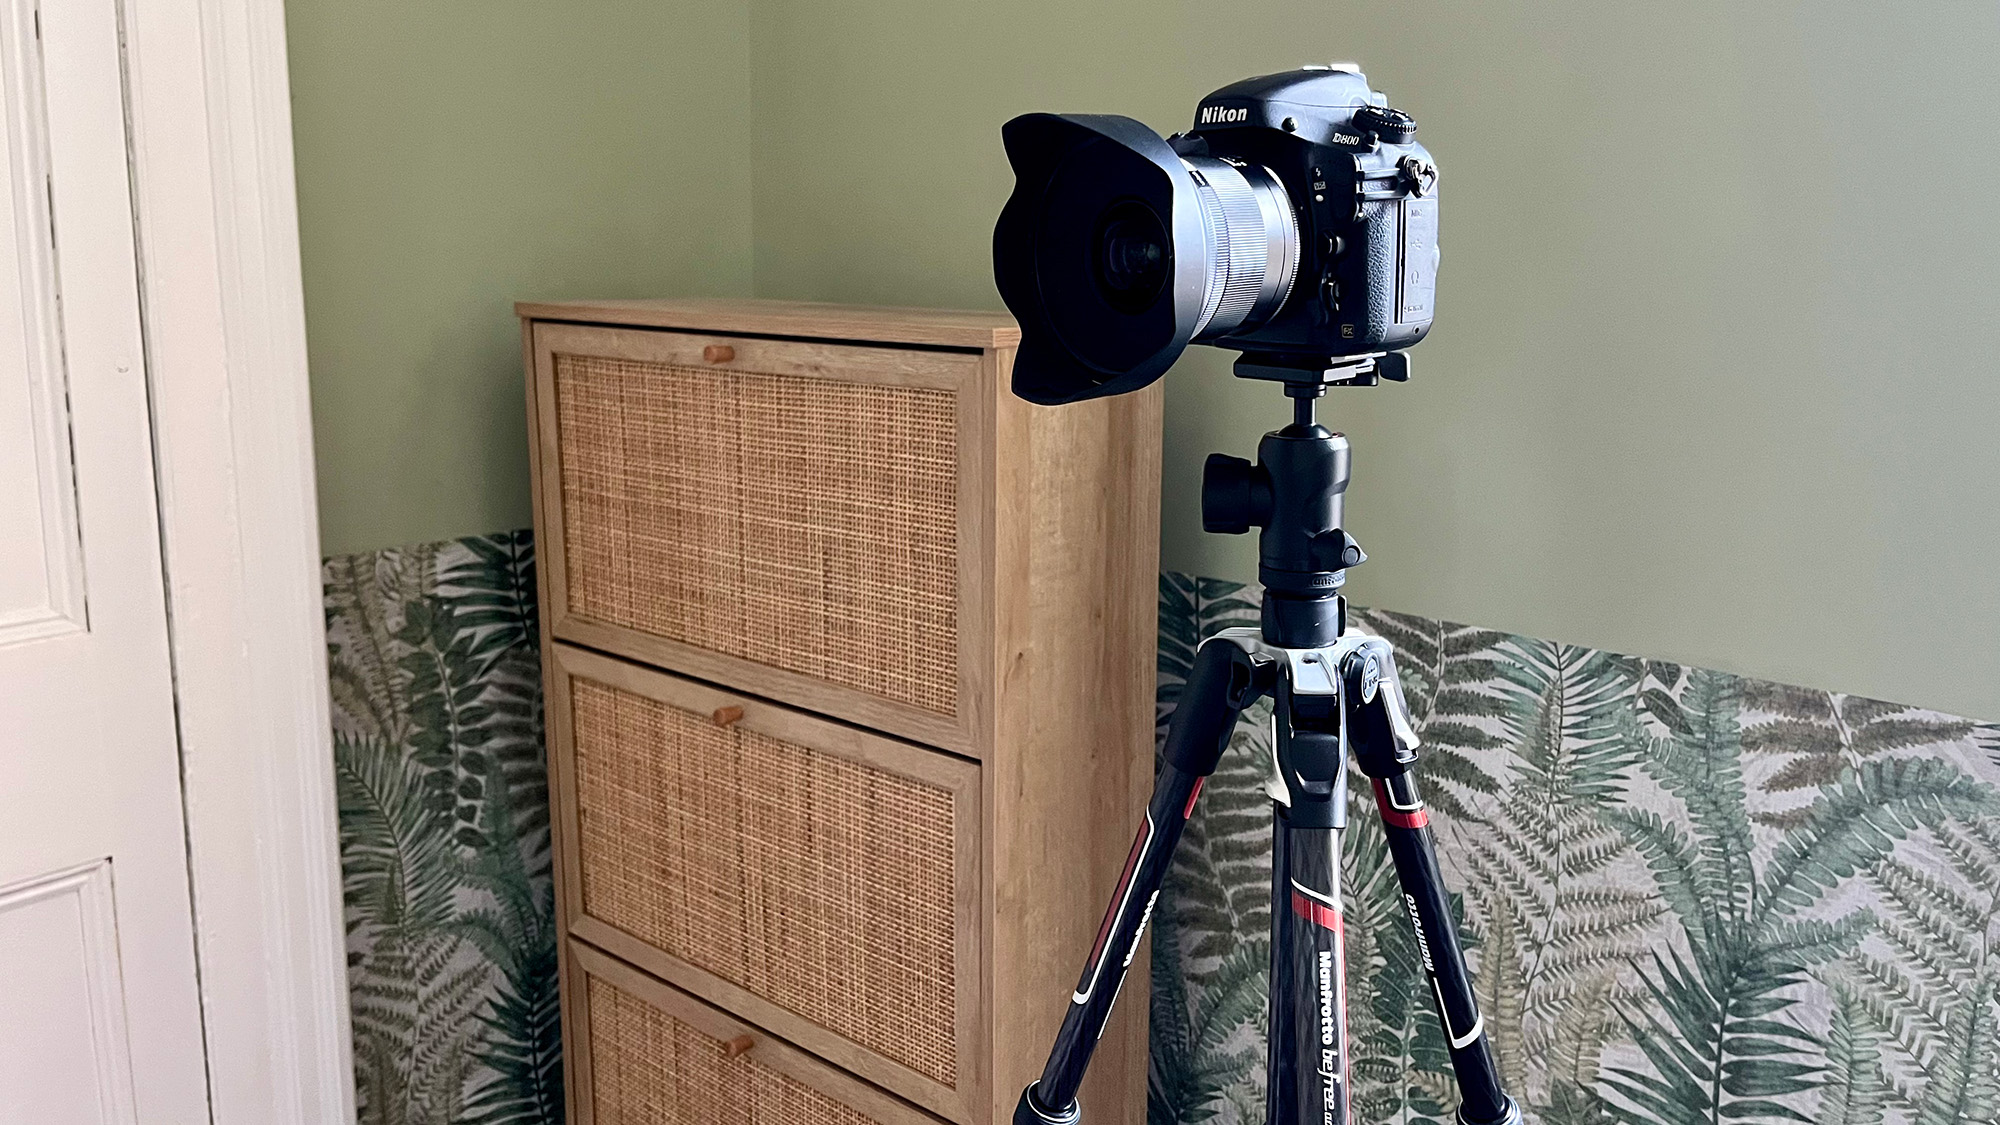
A tripod is the single most important piece of kit you’ll need to capture real estate photography. At the very minimum, I’d recommend a sturdy tripod that can reach a little over chest height and a decent ball head. If you shoot interior photography more regularly, then you might want to invest in a more heavy-duty tripod that’s built like a tank and tall, with a geared tripod head or tilt-shift head so you can precisely refine your compositions and even correct the perspective of your lens.
When using a tripod, it’s important to use exposure-delay mode (if your camera has it), a self-timer, or use a remote shutter release. These will help to prevent camera shake at slow shutter speeds, since physically pressing the shutter button of your camera can introduce enough vibrations to soften the image.
The best camera deals, reviews, product advice, and unmissable photography news, direct to your inbox!
3. Always shoot RAW
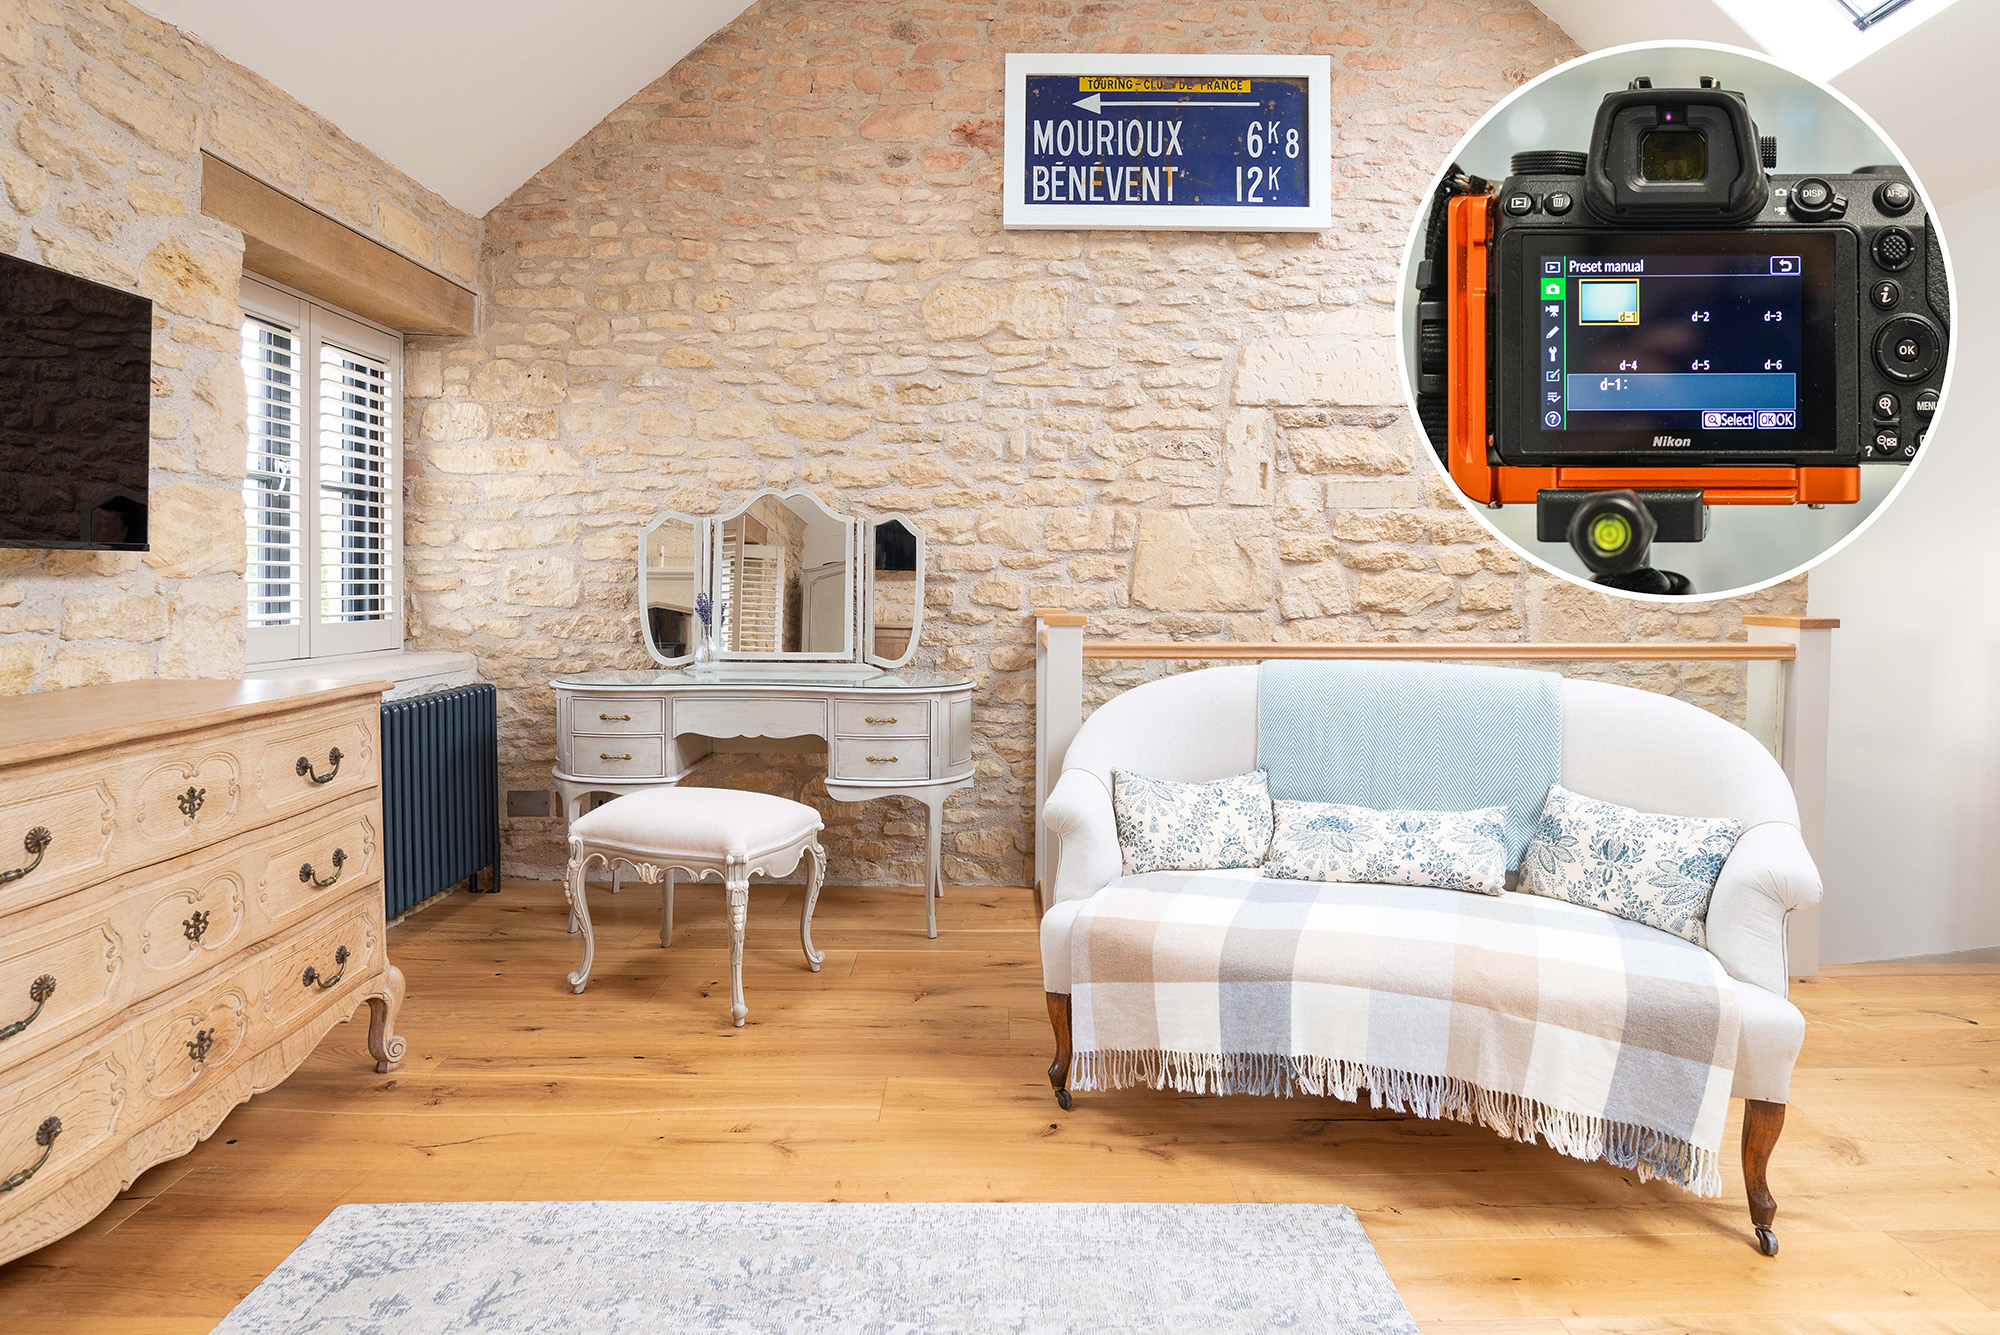
If you’re shooting some cool-looking evening real estate photos, then you’ll likely want to use a white balance preset or even set it manually, but for daytime shooting, most modern cameras boast decent auto white balance. However, it’s imperative that you shoot RAW. Not only does this provide you more flexibility when editing, but it means you’re free to alter the color temperature of your images (the white balance) in post-production. So, if you’ve made a mistake or the image looks a little off on a large monitor screen, you can quickly and easily correct it, with virtually no penalty at all. When shooting JPEG, if your white balance is off, the image could be completely ruined.
4. Turn off the lights
Professional interior photographers might elect to shoot luxury properties at night and may occasionally use additional photography lighting, but most real estate photography is shot during daylight hours. As such, I recommend turning off all lighting and only working with natural light. While you might think it’s helpful to turn on overhead lights and lamps, they’ll make it harder to balance your exposure, play havoc with your white balance as your camera fights with different color temperatures, and cast ugly shadows. The exception would be neon signs or fairy lights that are part of a property's character, but even then, I’d recommend shooting a safety shot with these turned off.
5. Dress the room
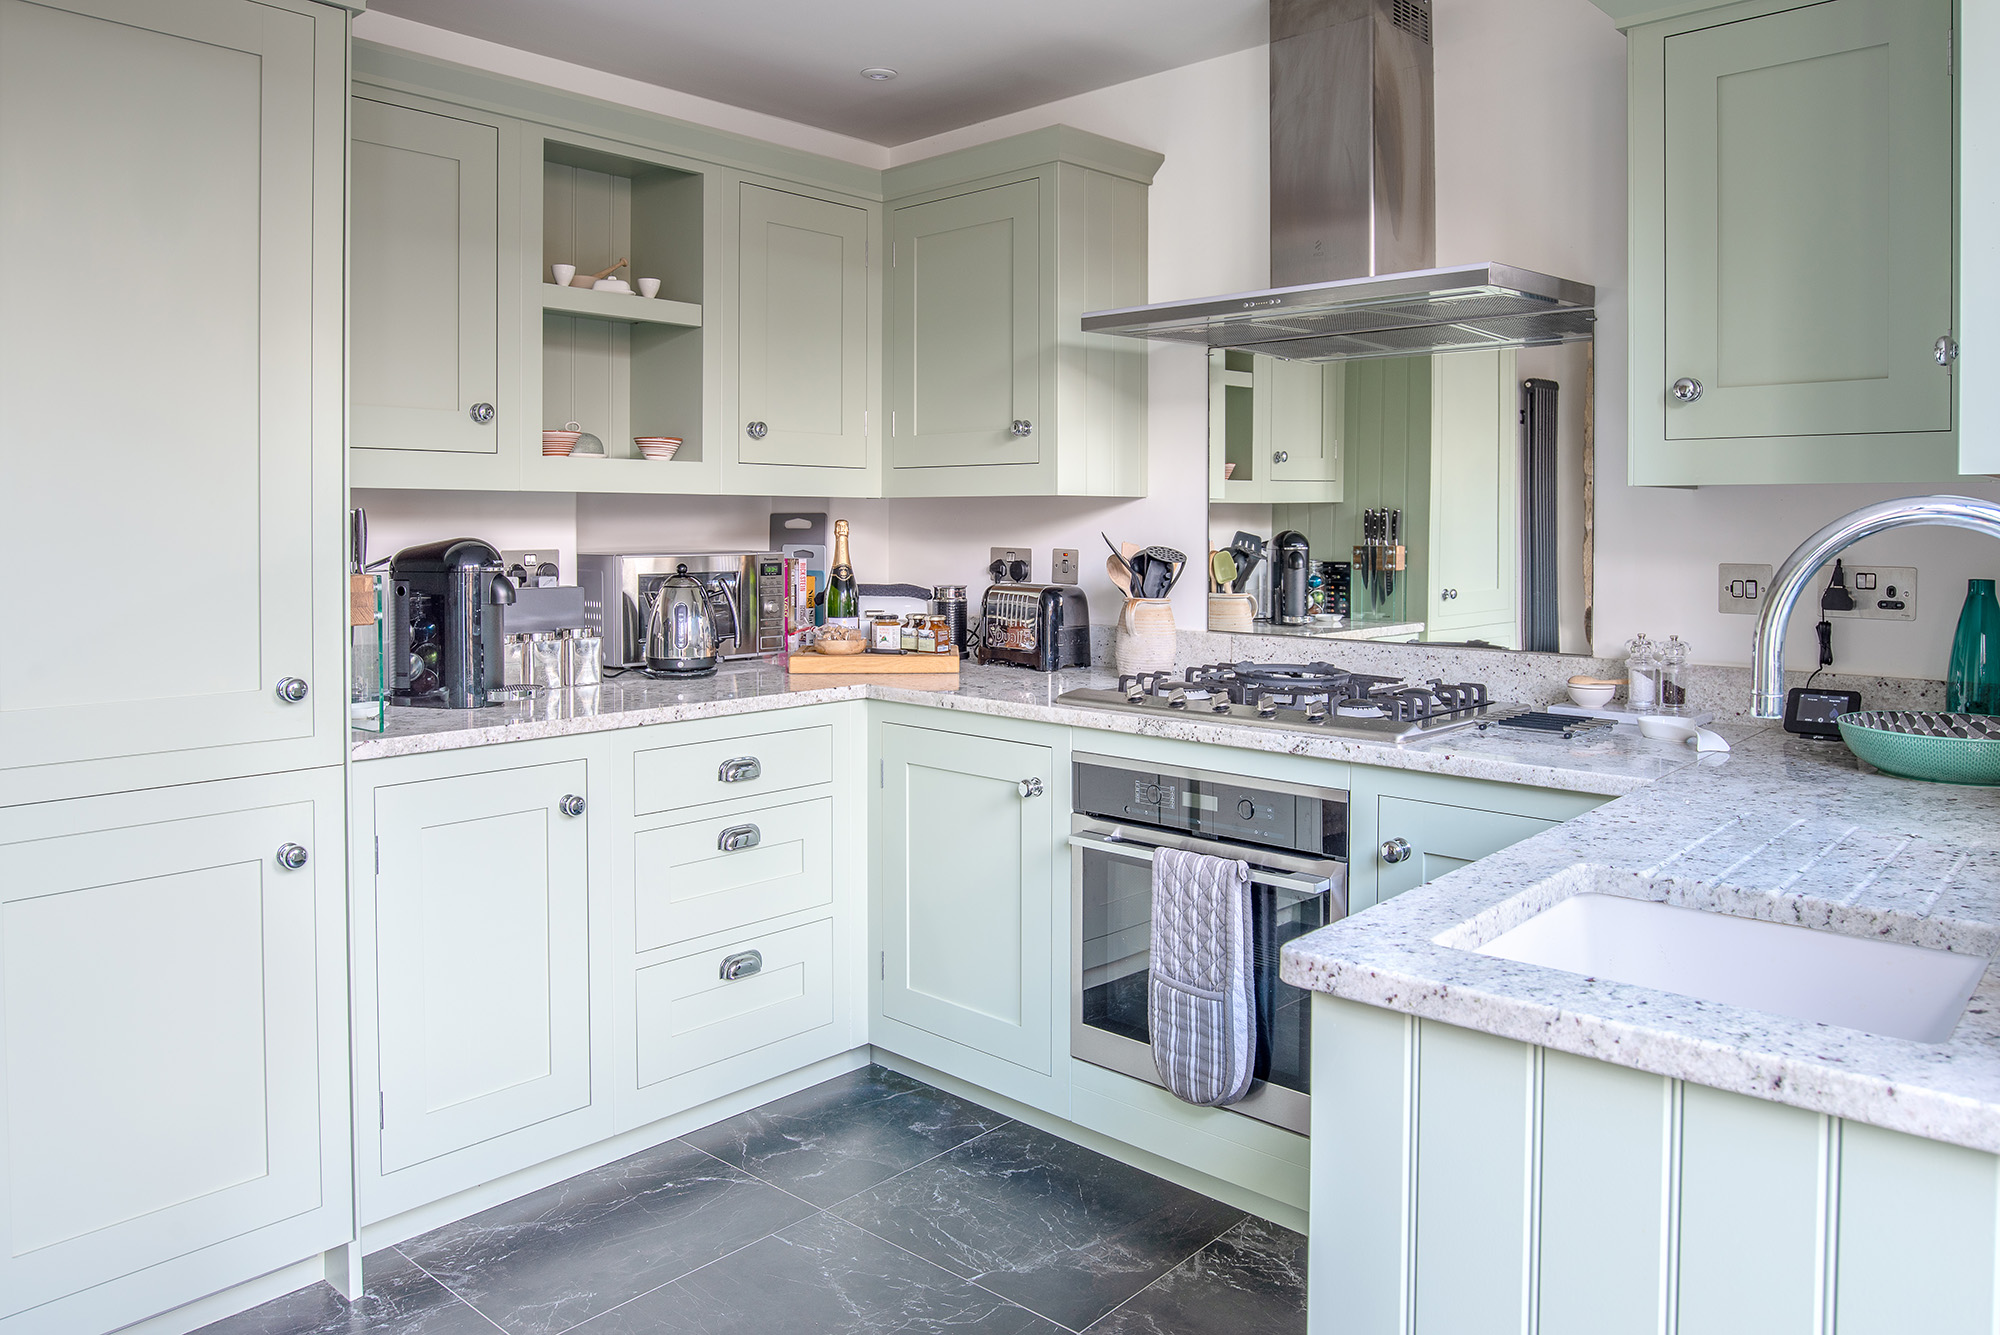
Take the time to dress the room for your shoot. This means ensuring the location is clutter-free and clean. The last thing you want to be doing is wasting your time laboriously cloning out cobwebs, dust, dirt, and unwanted items. If you’re shooting a luxury property, holiday home, or business, you might like to sell the dream of spending time at the location by making it appear tastefully lived in. For example, you might set the dining table, add a vase of flowers, or place a couple of books on a side table.
6. Lighting
Ideally, I’d recommend photographing your property on a bright overcast day or during the early morning/late evening to capture flattering, soft light. I’d recommend that beginners avoid shooting with direct sunlight flooding into rooms, altogether, as this can be complicated to get right, but you should always avoid harsh, daytime sunlight spilling into rooms as this will create harsh shadows and hotspots that will distract the viewer from the room as a whole. The golden hours are a great time to shoot exterior shots, but I would still go careful with direct sunlight hitting the property. You want soft shadows and highlights, not harsh shadows and hotspots.
7. Keep your camera level
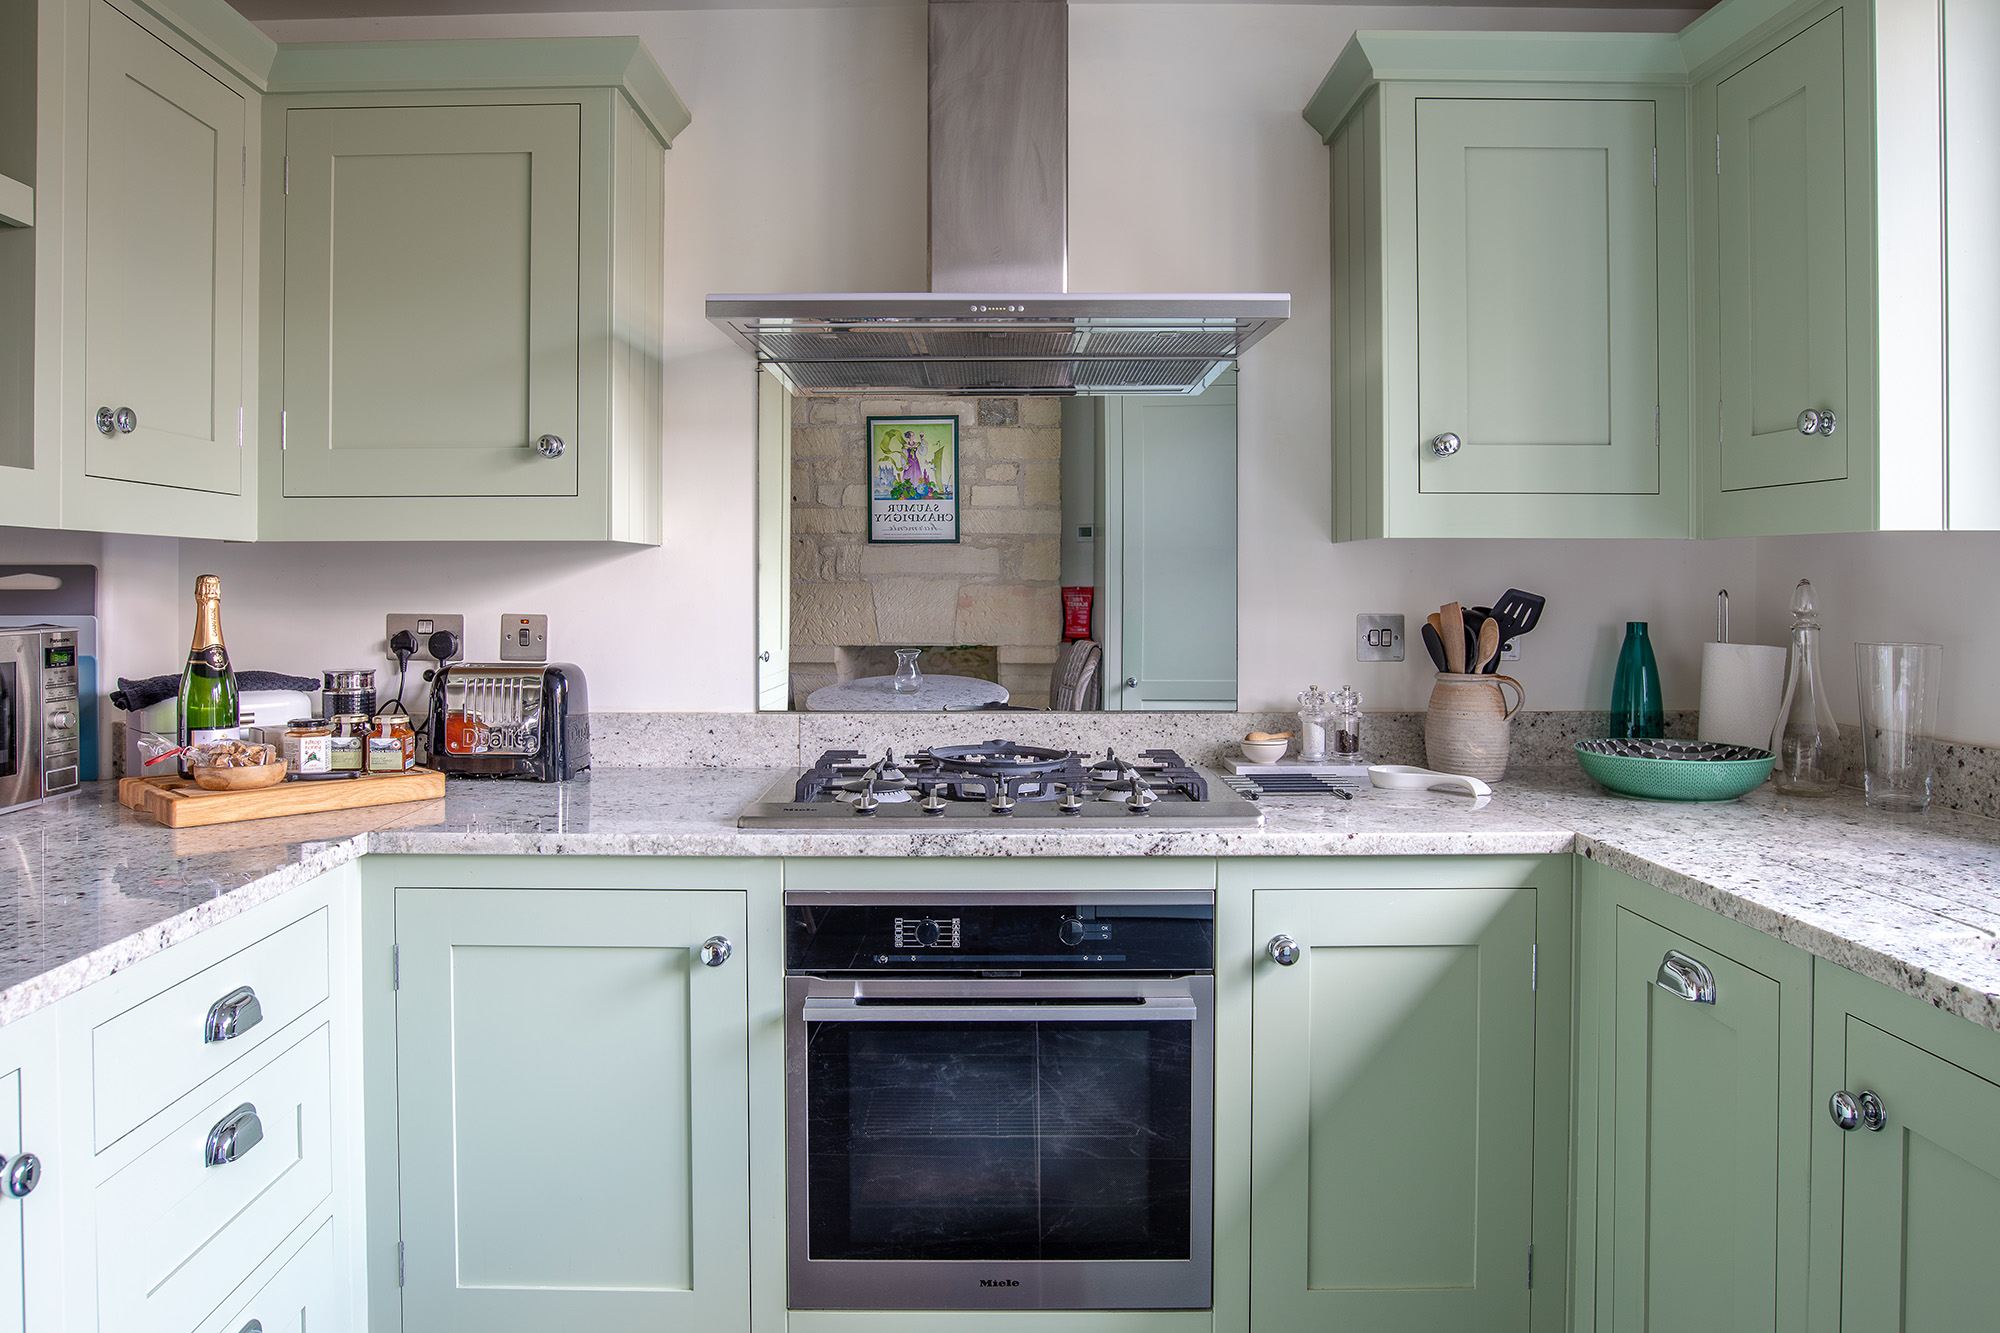
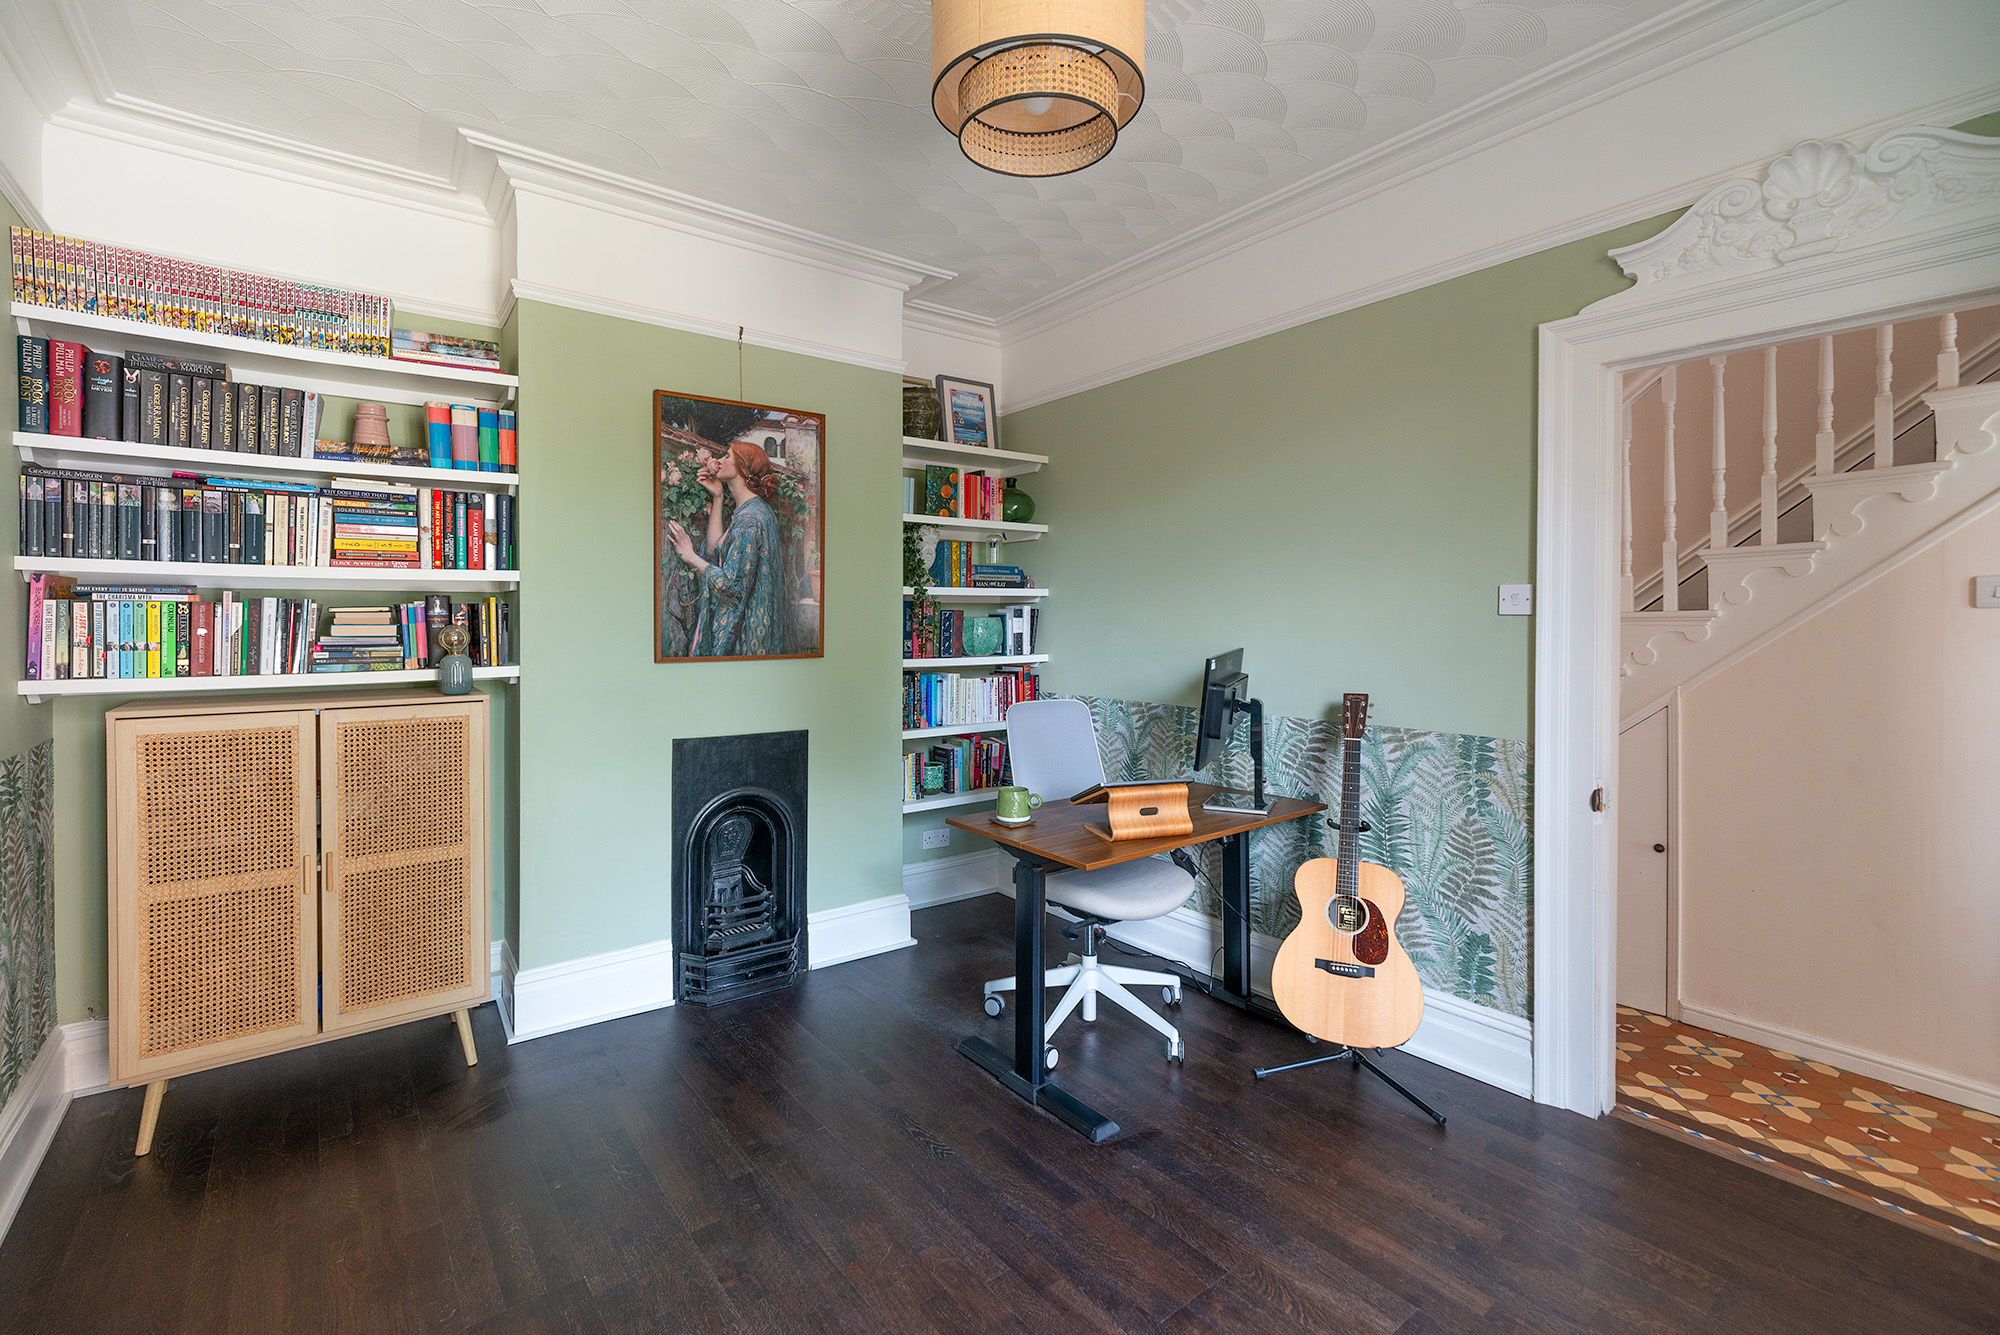
A professional interior photographer might use tilt-shift lenses and/or a tilt-shift tripod head to help correct perspective in-camera. But these are specialist pieces of kit that most photographers don’t have. As such, your best bet is to use your camera’s built-in level or a hot-shoe mounted bubble level to ensure that your camera is level. You can then use a live view grid overlay to further line up verticals and horizontals. But remember, perspective distortion and architectural imperfections will make it impossible to line up every vertical and horizontal perfectly. I tend to ensure verticals in the center of the frame are as straight as possible and then fix the rest in post-production.
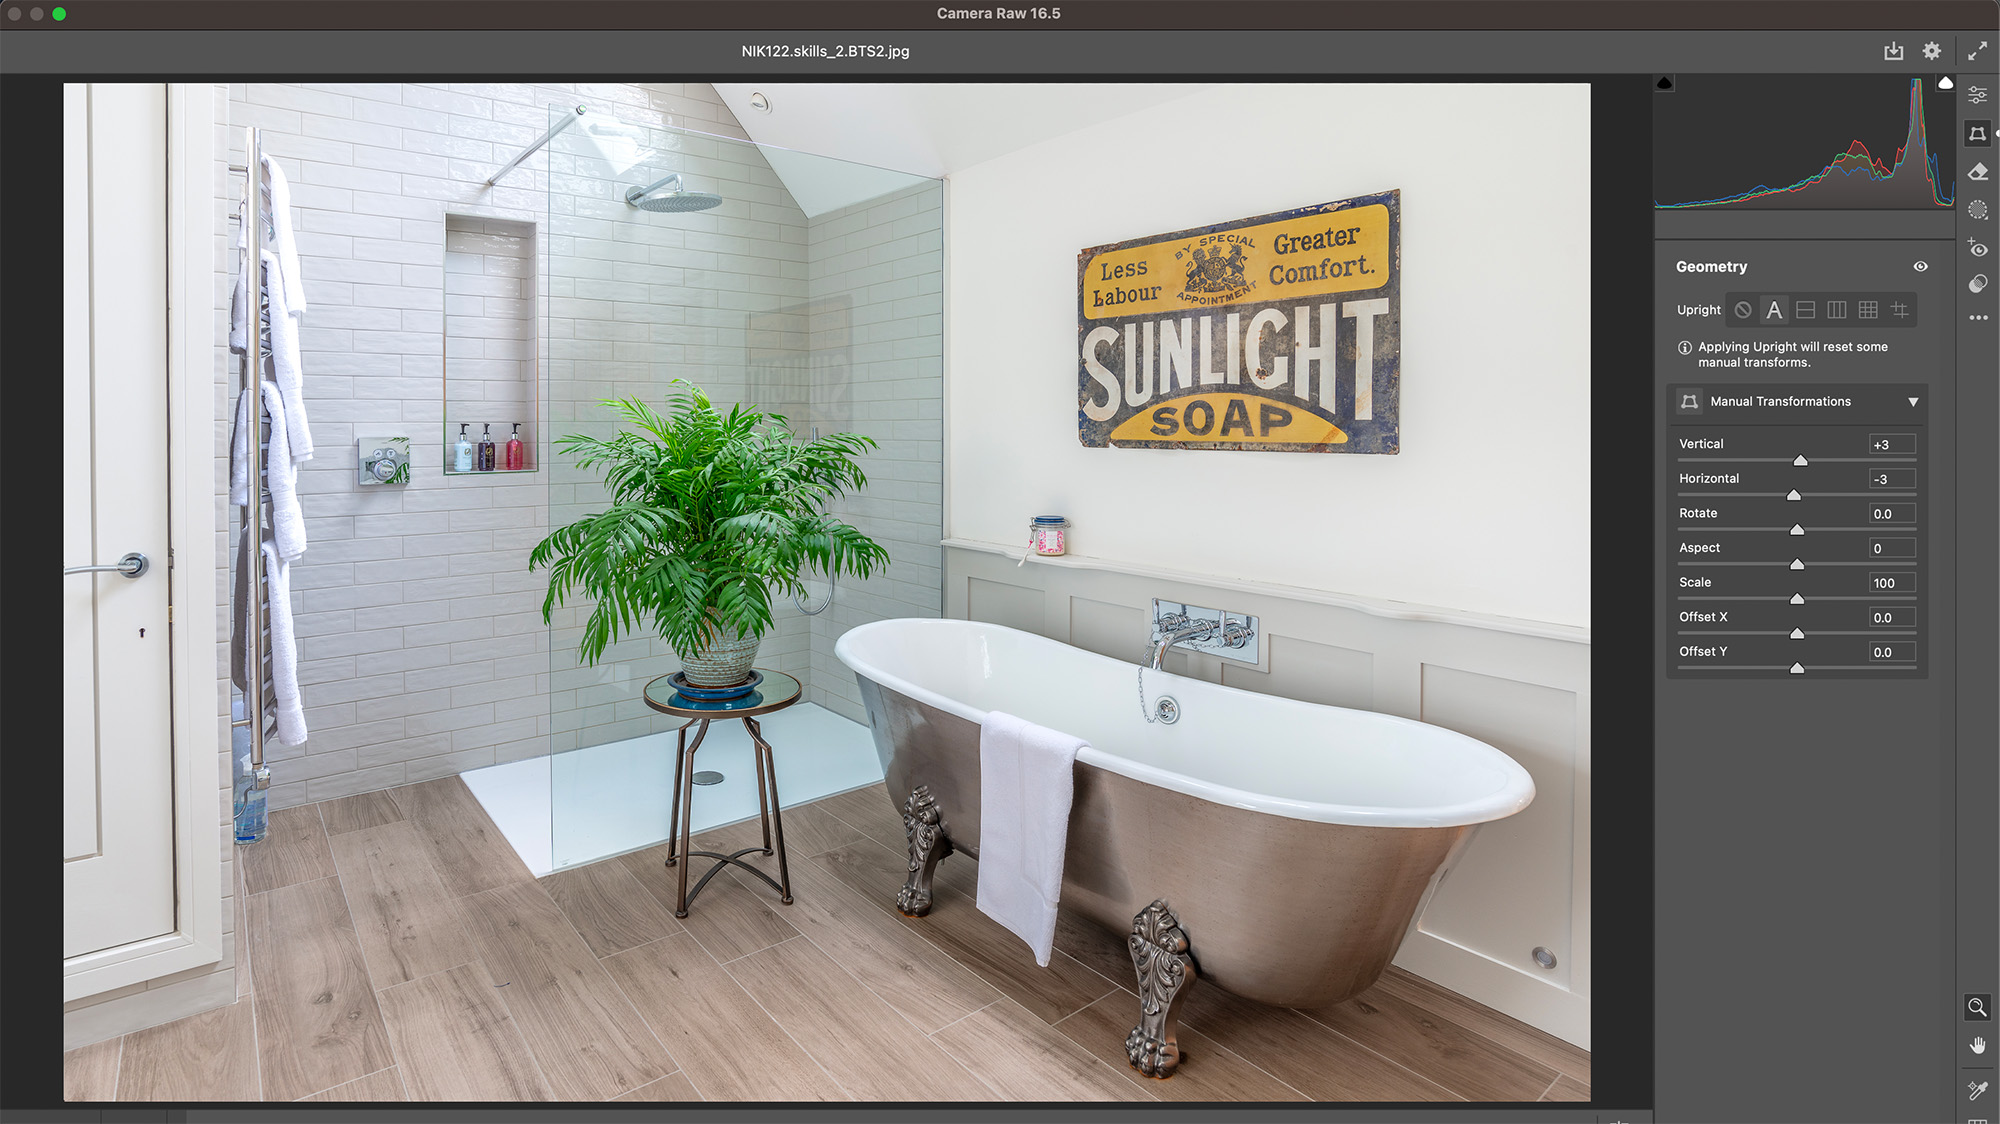
8. Fix your verticals in post
The best photo editing software applications tend to feature tools to correct perspective distortions. I find that the Auto functions on Adobe Camera Raw and Adobe Lightroom Classic work well enough, before making any refinements thereafter with the necessary sliders. It’s worth noting that fixing geometric distortions will require the image to be warped, thus forcing the corners of the image inwards or outwards. This means you’ll have to crop the image to varying degrees, depending on how much the verticals need to be fixed.
9. Bracketing
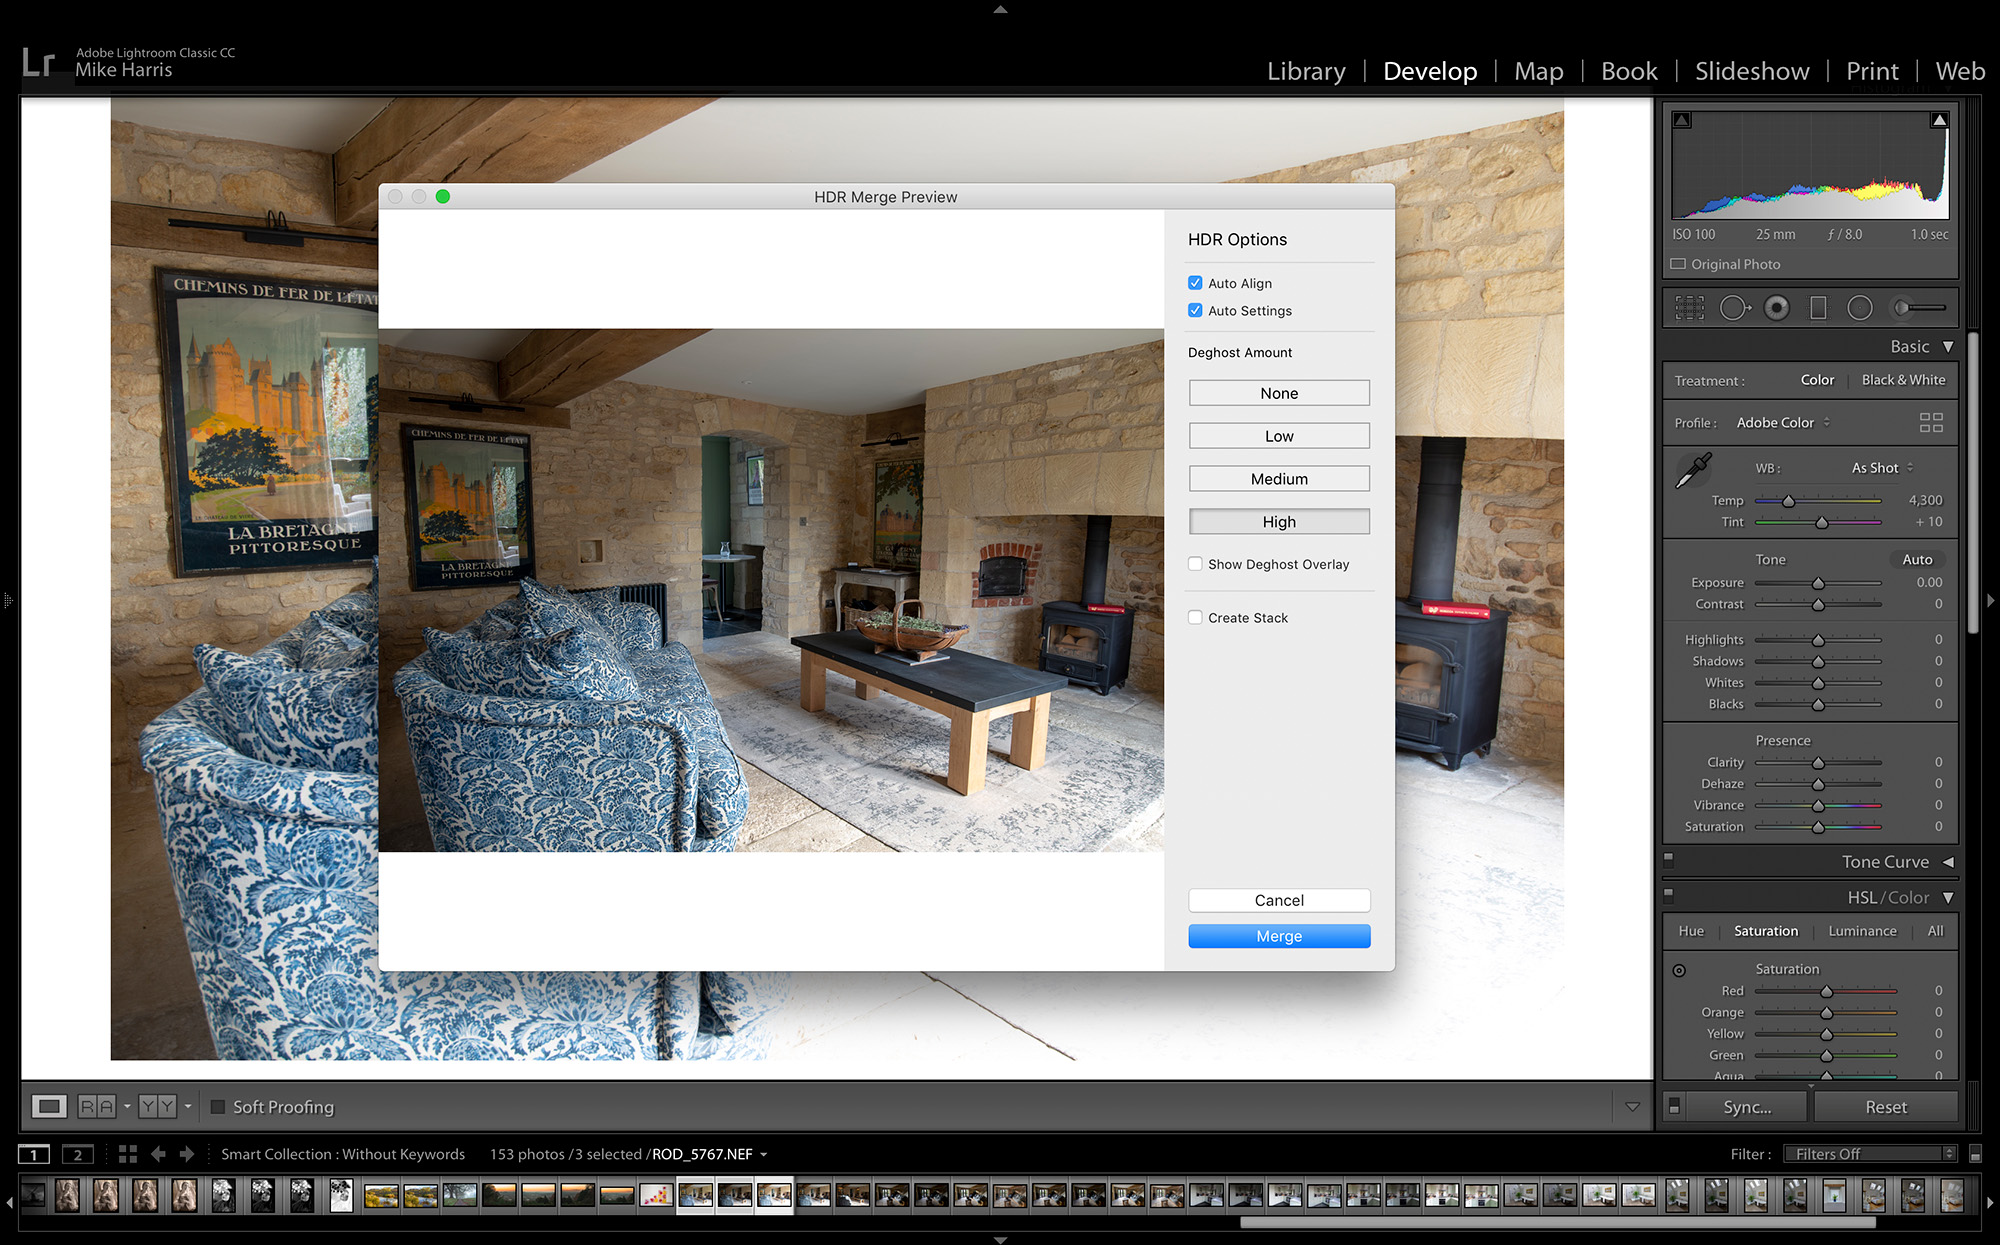
Balancing the exposure of a single image can be tricky because an exposure that’s bright enough for the room will often blow out inherently brighter windows. To get around this, I use exposure bracketing. This means I capture multiple images with identical framing at different exposures. I then merge them together in Adobe Lightroom Classic by selecting all of the exposures in question, right-clicking on them, and selecting Photo Merge > HDR. The software will then merge these multiple exposures seamlessly into an image with a much higher dynamic range. Just make sure that you don’t pull out the shadows and drop the highlights so much that the image looks fake. You still want some contrast between light and dark to add depth.
You might also like...
Thinking of buying a new camera? Here are the best mirrorless cameras. If you really get into real estate photography, drone photos will help sell a home 68% faster says study. And if you want more home-based projects, here's how to photograph a classic still life.

Mike studied photography at college, honing his Adobe Photoshop skills and learning to work in the studio and darkroom. After a few years writing for various publications, he headed to the ‘Big Smoke’ to work on Wex Photo Video’s award-winning content team, before transitioning back to print as Technique Editor (later Deputy Editor) on N-Photo: The Nikon Magazine.
With bylines in Digital Camera, PhotoPlus: The Canon Magazine, Practical Photography, Digital Photographer, iMore, and TechRadar, he’s a fountain of photography and consumer tech knowledge, making him a top tutor for techniques on cameras, lenses, tripods, filters, and more. His expertise extends to everything from portraits and landscapes to abstracts and architecture to wildlife and, yes, fast things going around race tracks...
You must confirm your public display name before commenting
Please logout and then login again, you will then be prompted to enter your display name.
