Still life photography: use depth of field to get your entire subject sharp
How do you get everything in your picture to look sharp? We explain the mysteries of depth of field
Watch the video: how to control depth of field
If you use a point-and-shoot camera or a smartphone, it’s often almost impossible not to get everything from your feet to the distant horizon in focus. However, the large sensors that are built into DSLRs and mirrorless cameras mean that it can be surprisingly difficult to get everything in the frame looking sharp.
That’s because the bigger sensors used these cameras mean less depth of field. While blurred backgrounds can be a real bonus for subjects such as portraits, the limited zone of sharpness can be a problem for other types of photography.
Outdoors, you need to set up your camera carefully if you’re going to get the boulder in the foreground and the mountain in the distance both appearing in focus in the shot. However, the same difficulties can also present themselves when you’re shooting a set of subjects that are close together, as they would be in a still life on your kitchen table.
• Best camera for product photography
This is where you need a proper understanding of depth of field. In theory, only the object you focus on will be sharp; in practice, though, there’s a zone of apparent sharpness that extends behind and in front of the point on which you’ve focused. So one of the most important photography tips is to start thinking in terms of zones of sharpness, rather than fixed focus points, and plan your camera settings accordingly.
Several factors affect depth of field, including the focal length you’re using, the lens aperture, your distance from the subject and where you focus.
The best camera deals, reviews, product advice, and unmissable photography news, direct to your inbox!
Our walkthrough shows how it’s done. It’s a tricky subject, because our peppers are at different distances from the camera – so we need to make sure that we have enough depth of field to cover all of them.
1. Choose Aperture Priority mode
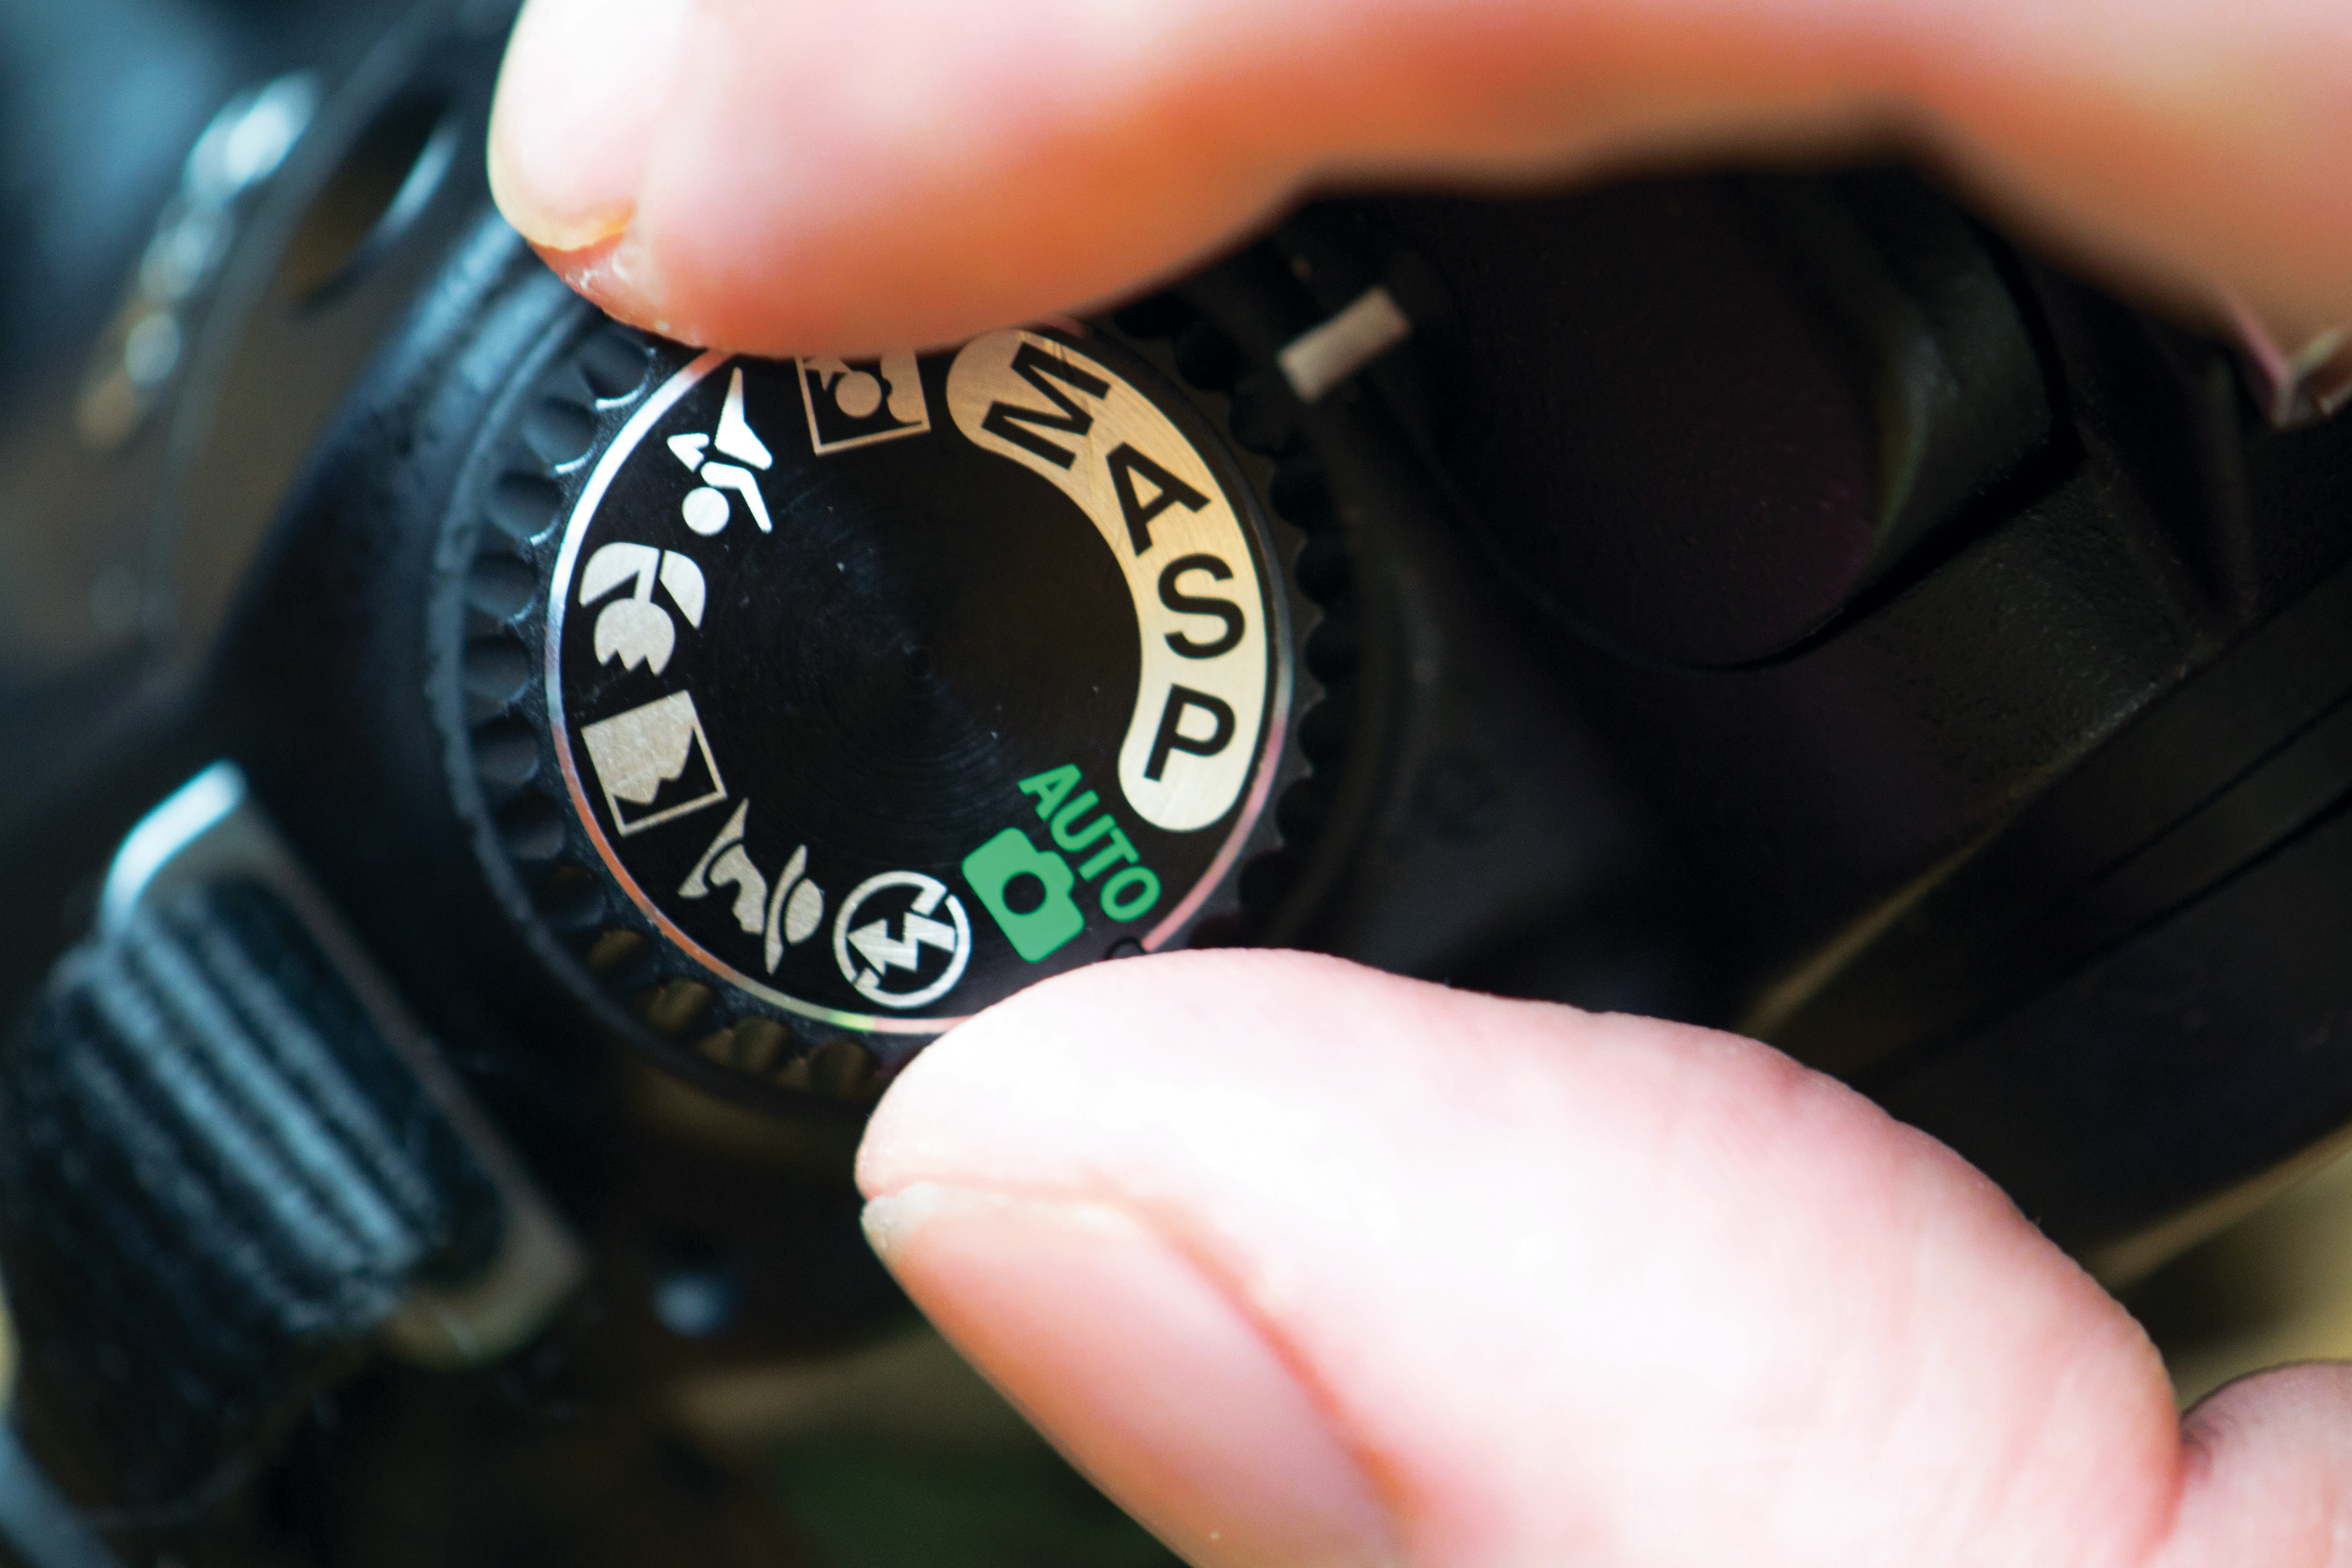
To control depth of field, you need a mode that enables you to choose the aperture setting directly. Aperture Priority mode is best for this, because the camera will then set the shutter speed automatically to produce the correct exposure. This leaves you free to concentrate on focusing and depth of field.
2. Select a small aperture
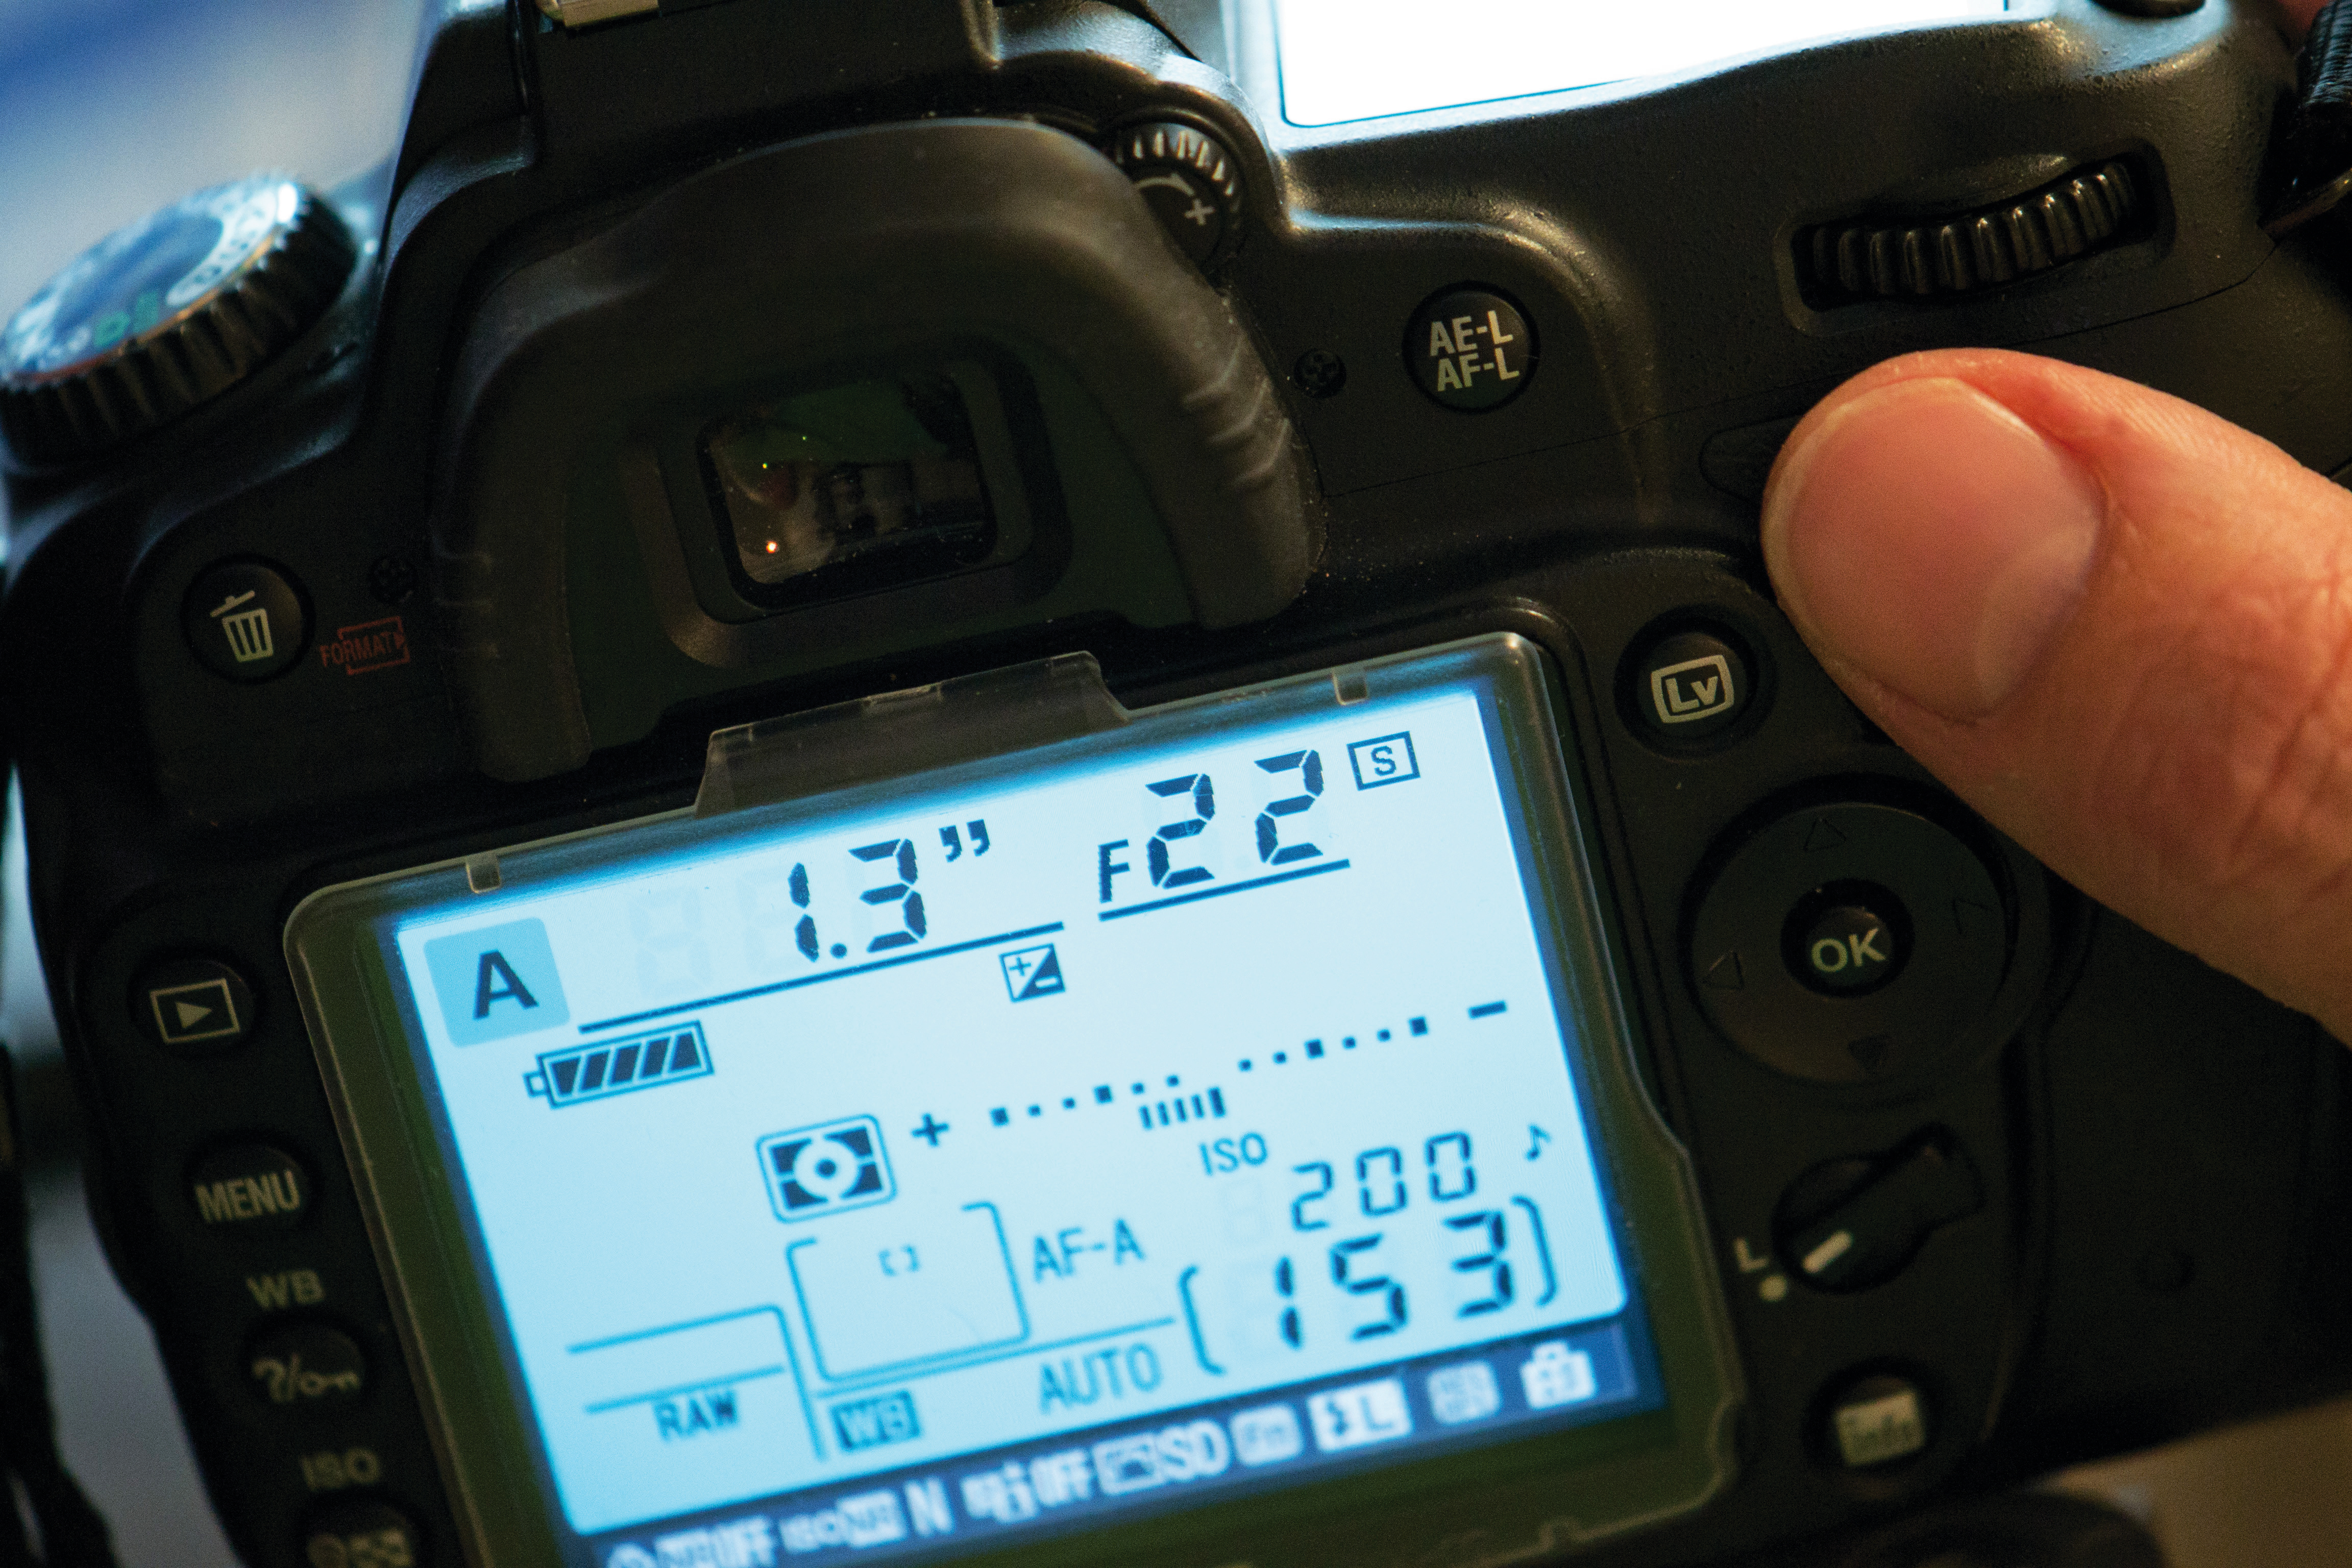
You can now use the command dial on your camera to close down the lens aperture to the smallest available setting. For most lenses this is likely to be about f/22, although some macro lenses will stop down even further. This will increase the exposure time, which goes up to 1.6 seconds for the shot we’re taking here.
3. Use a tripod
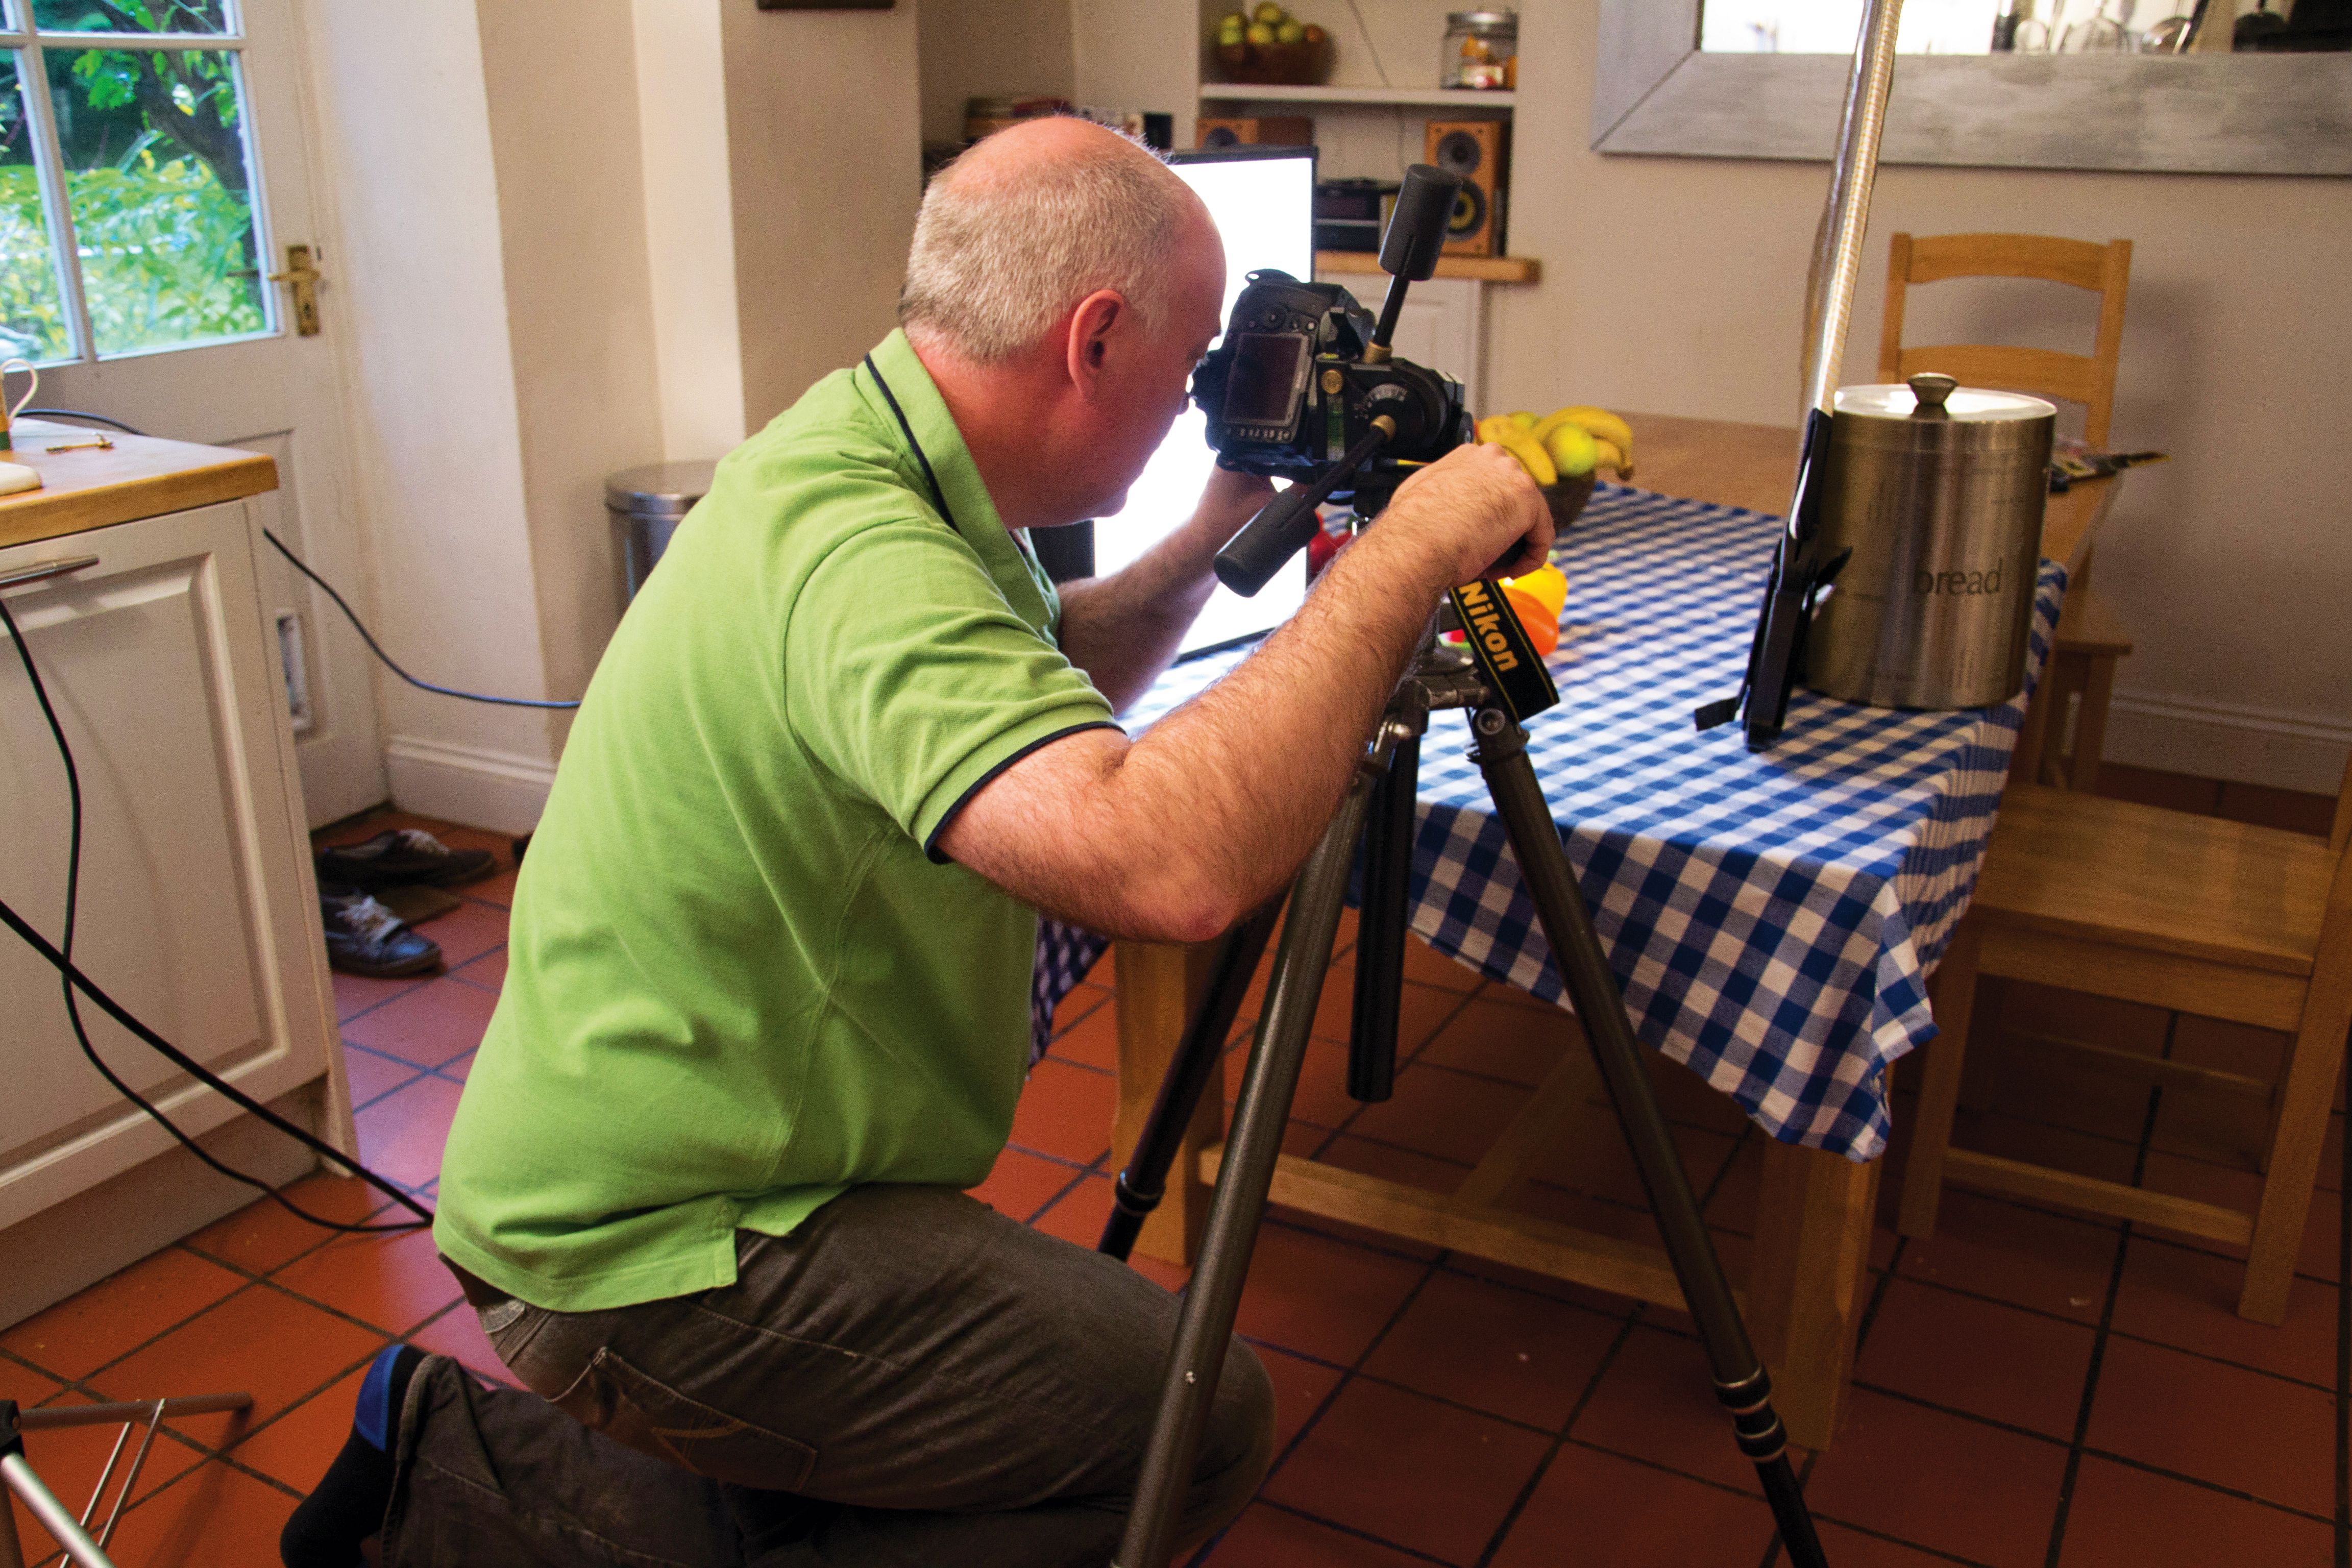
You can’t get shake-free handheld shots with exposures this long, so a tripod is essential. It will also fix the camera position so that you can focus precisely. This is crucial for careful control of depth of field, because any slight shift in the camera position will affect the focus point.
04 Choose the focus mode
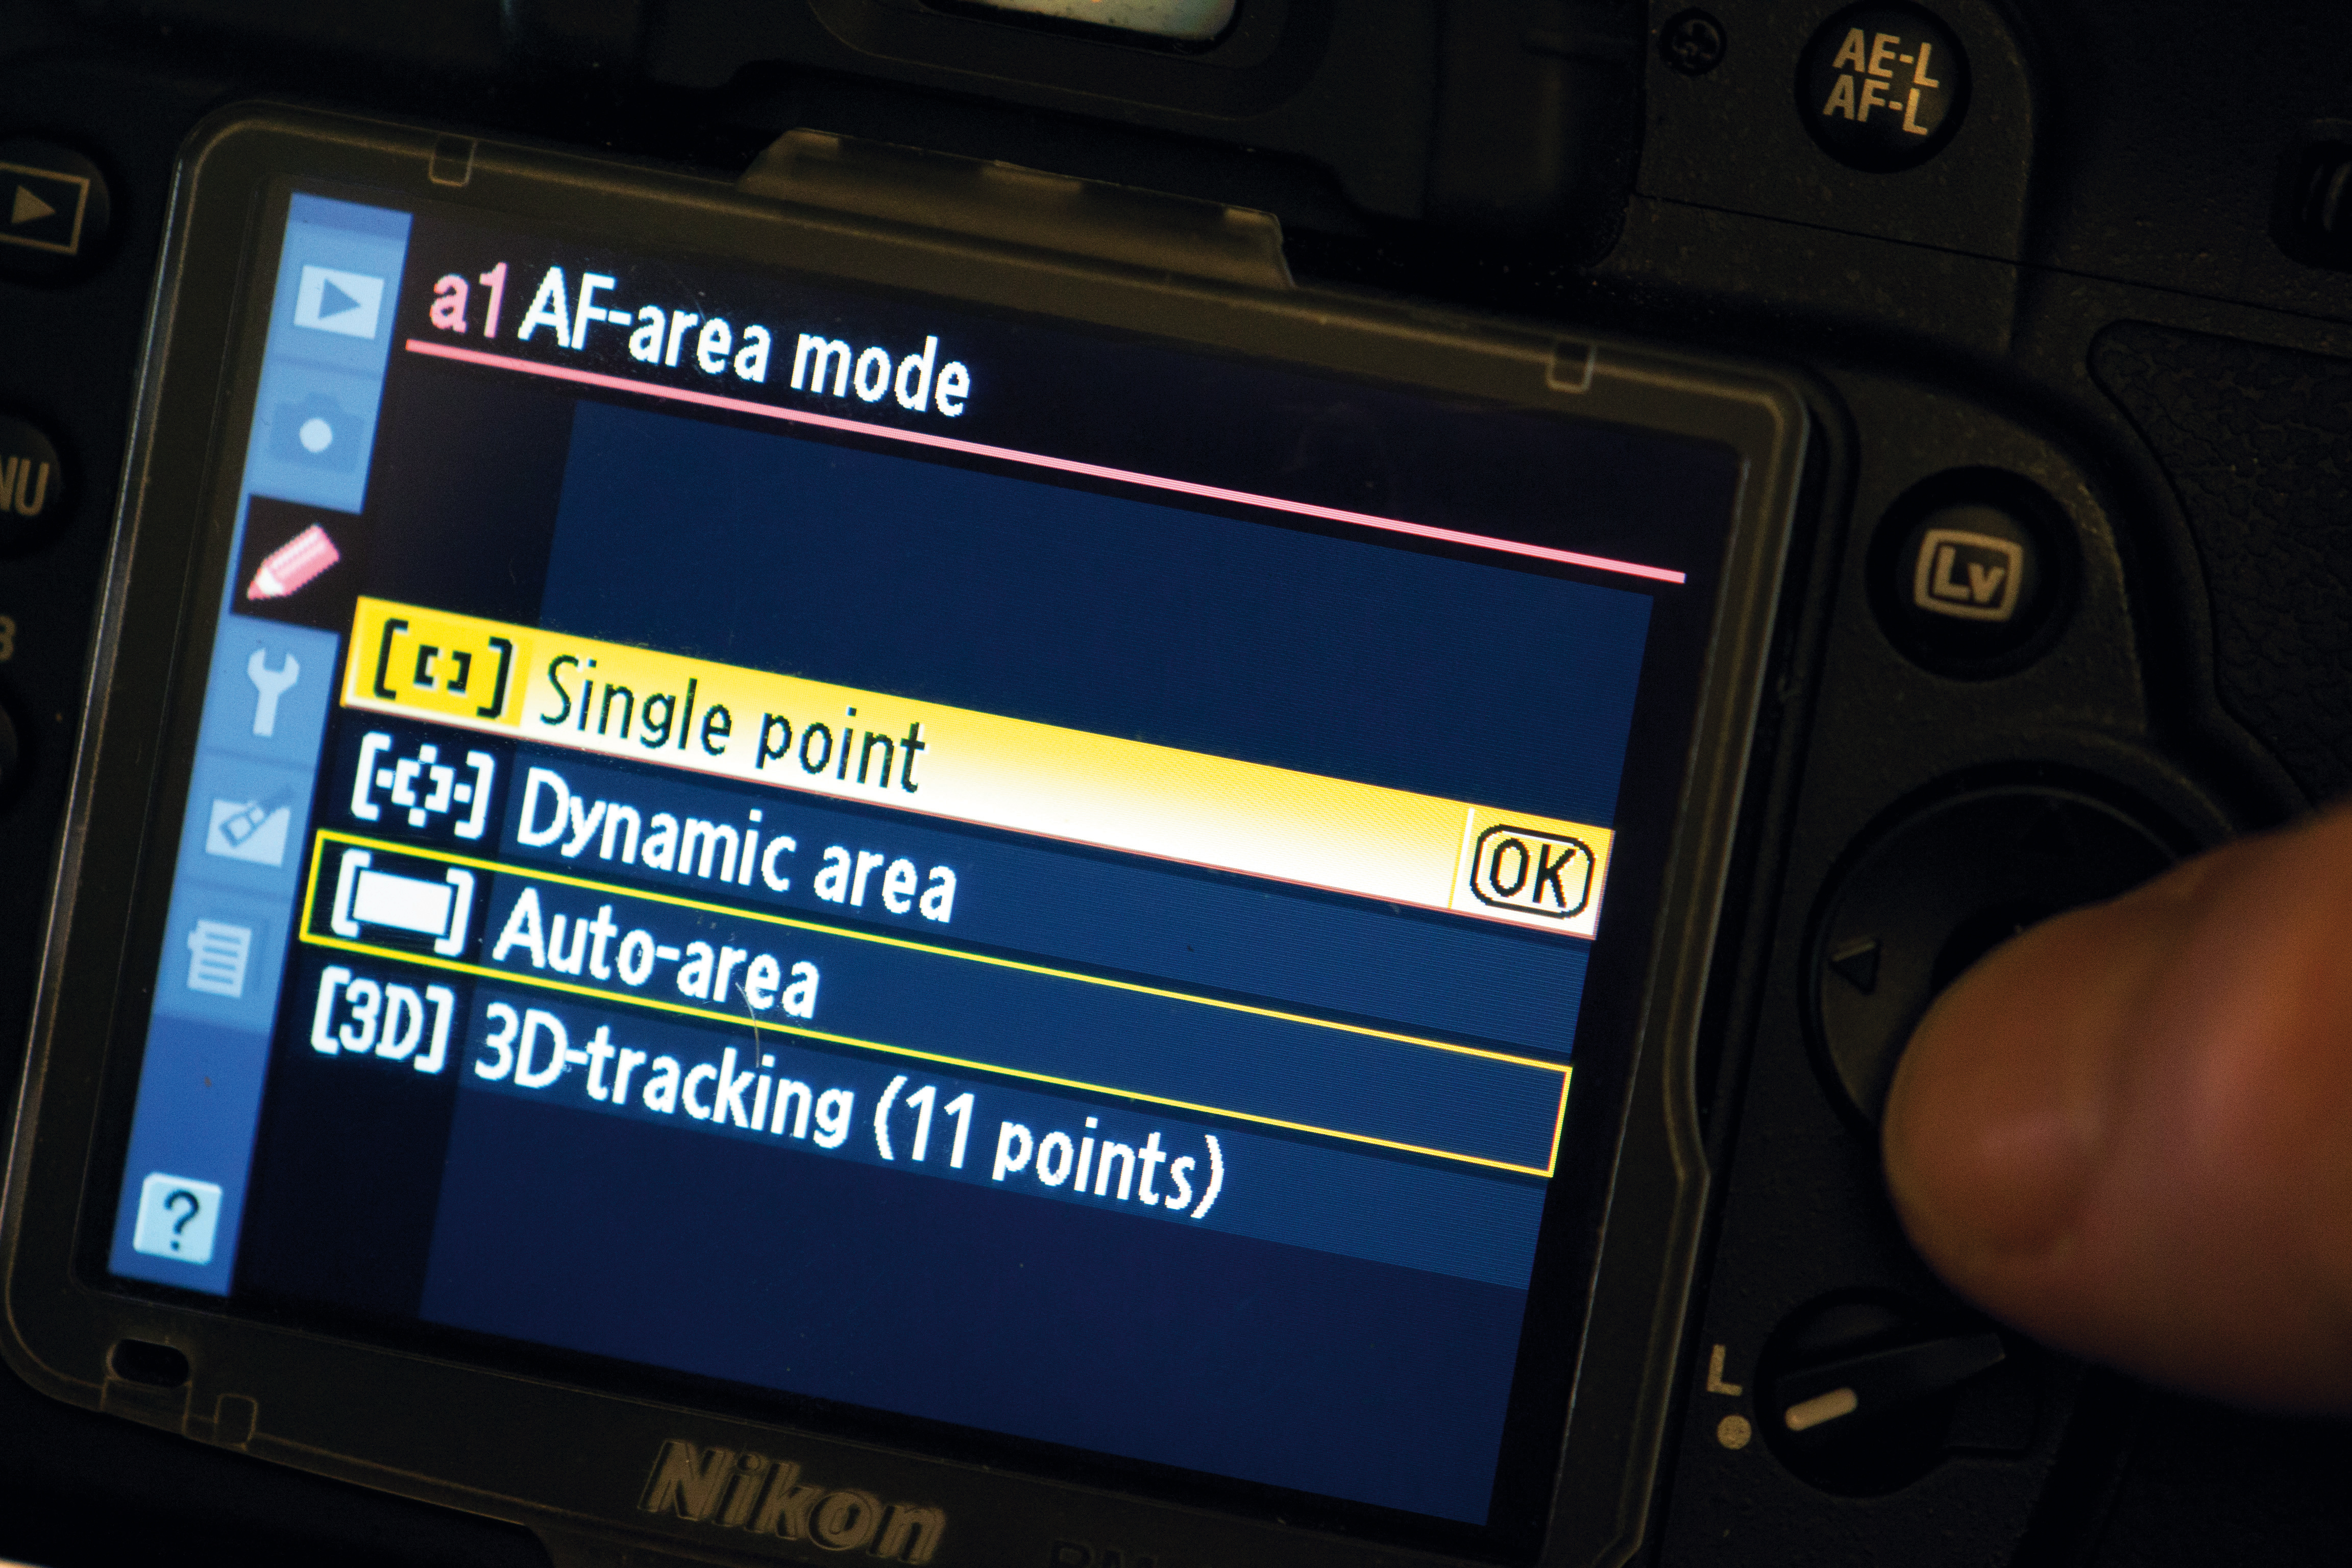
You also need to take control of the camera’s focus point, so open the menus to check the AF area mode setting. In the automatic area mode, the camera sets the focus point according to what’s nearest, so make sure that you swap to single point mode.
05 Set the focus point

With landscapes, you should aim to focus about a third of the way into the frame. With close-ups such as this, though, you should pick a point nearer to the centre of the frame. Depending on your camera, you can use the joystick, four-way D-pad, or touch the screen to move the focus point, which shows up in both the viewfinder and on the LCD.
06 Use Live View
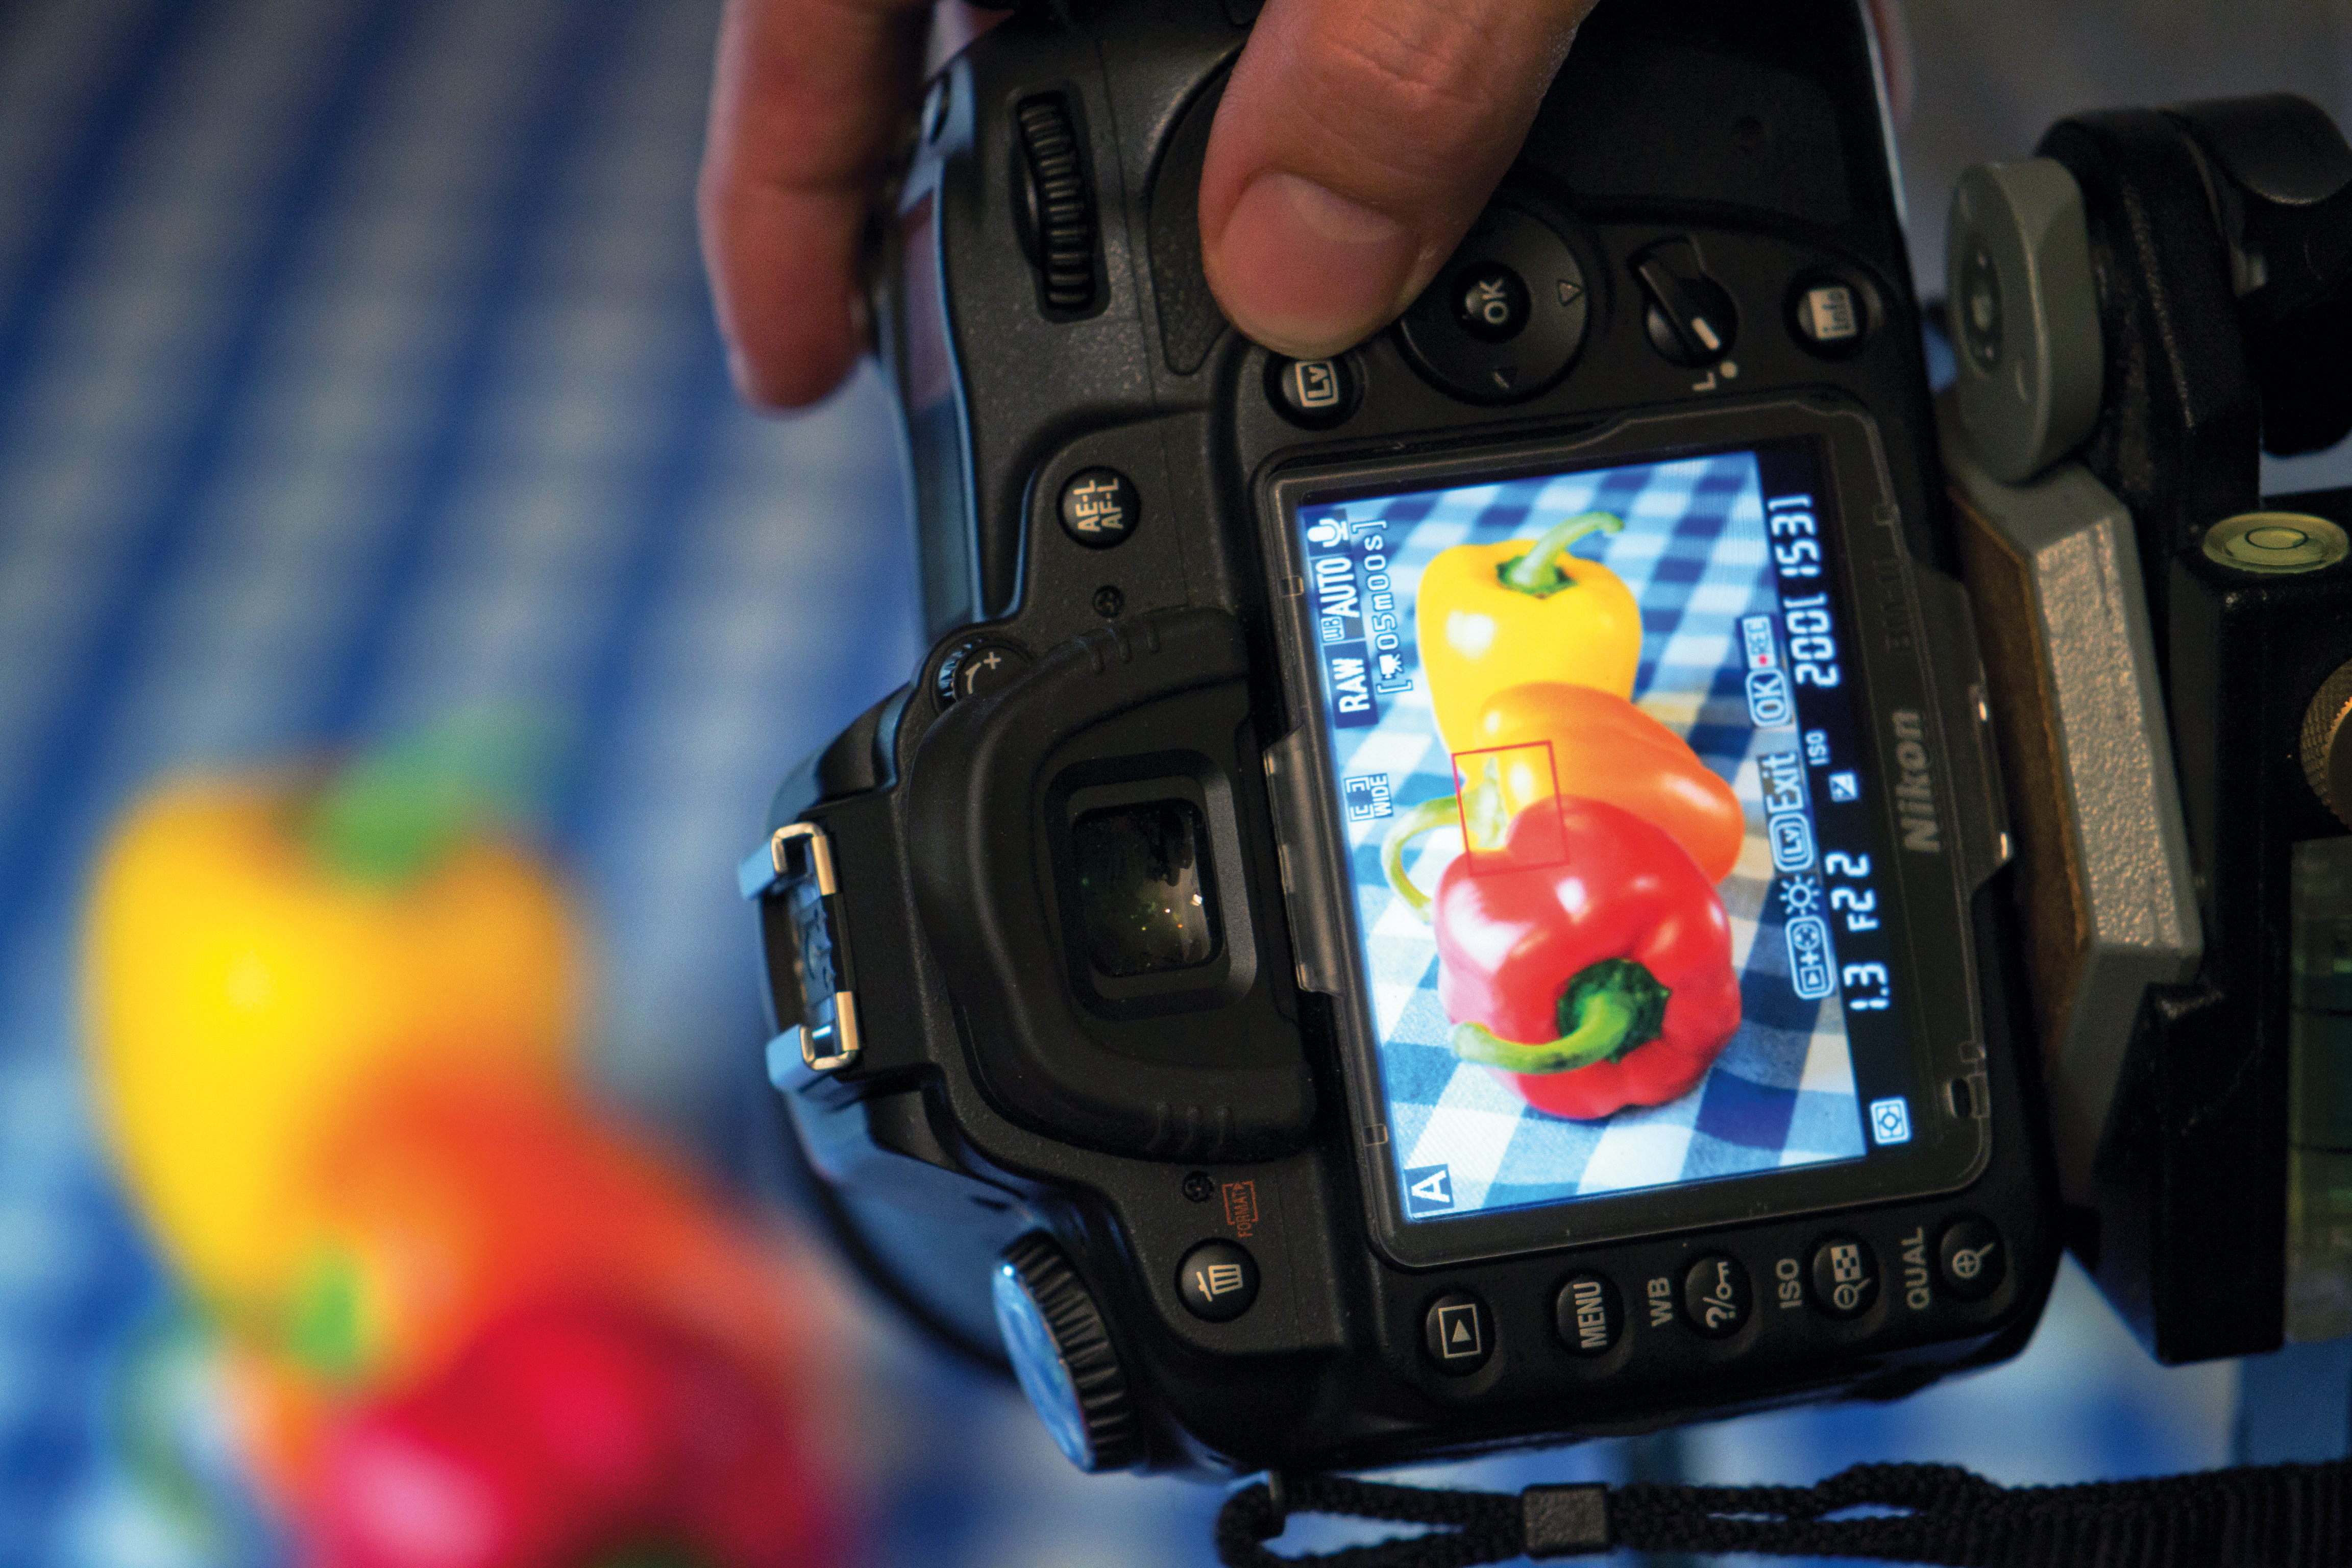
You might find this much easier to do in Live View, where you can position the focus point more precisely. Here, for example, we’ve placed it right over the stalk of the second, orange pepper. This is the perfect position to maximize the available depth of field, almost halfway up the frame.
07 Precise manual focus
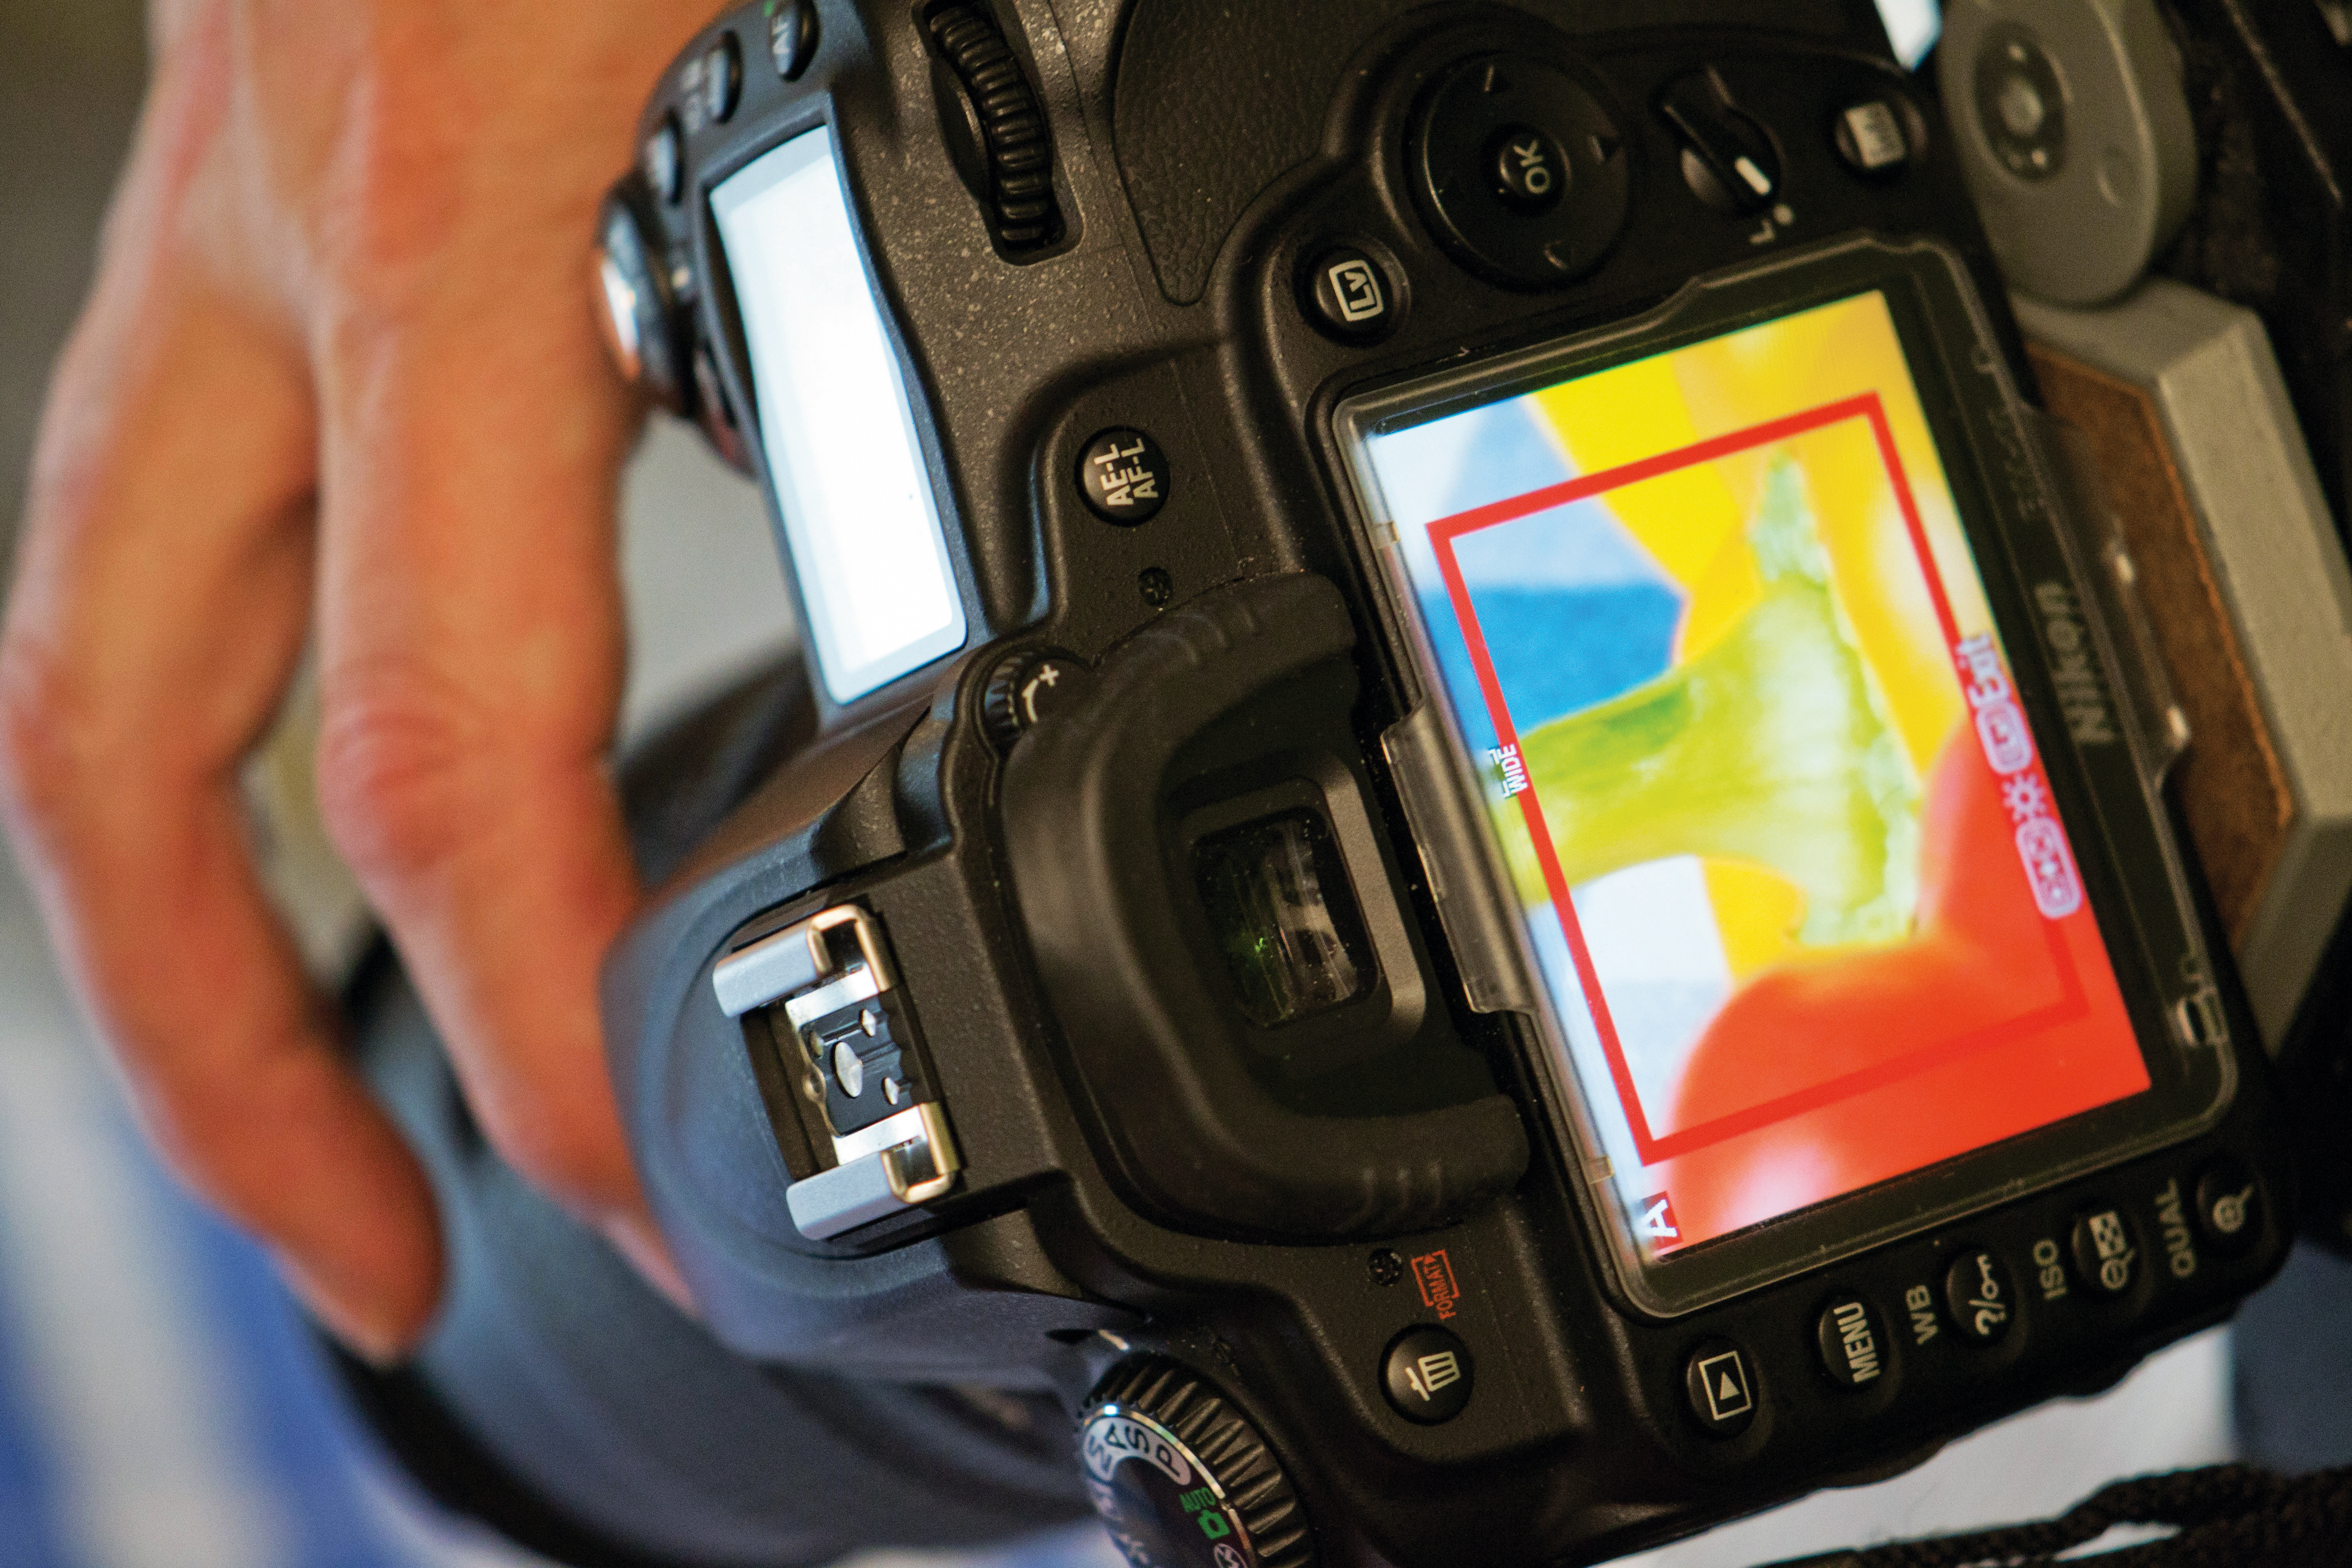
The alternative is to zoom in on the LCD in Live View mode, and switch to manual focus (usually achieved via a switch or retracting the focus ring on the lens, or by changing the focus mode in your camera's settings). Turn the focus ring manually, judging when the area you want looks sharpest on the screen. This stops any tendency for the camera to refocus between shots.
08 Depth of field calculations
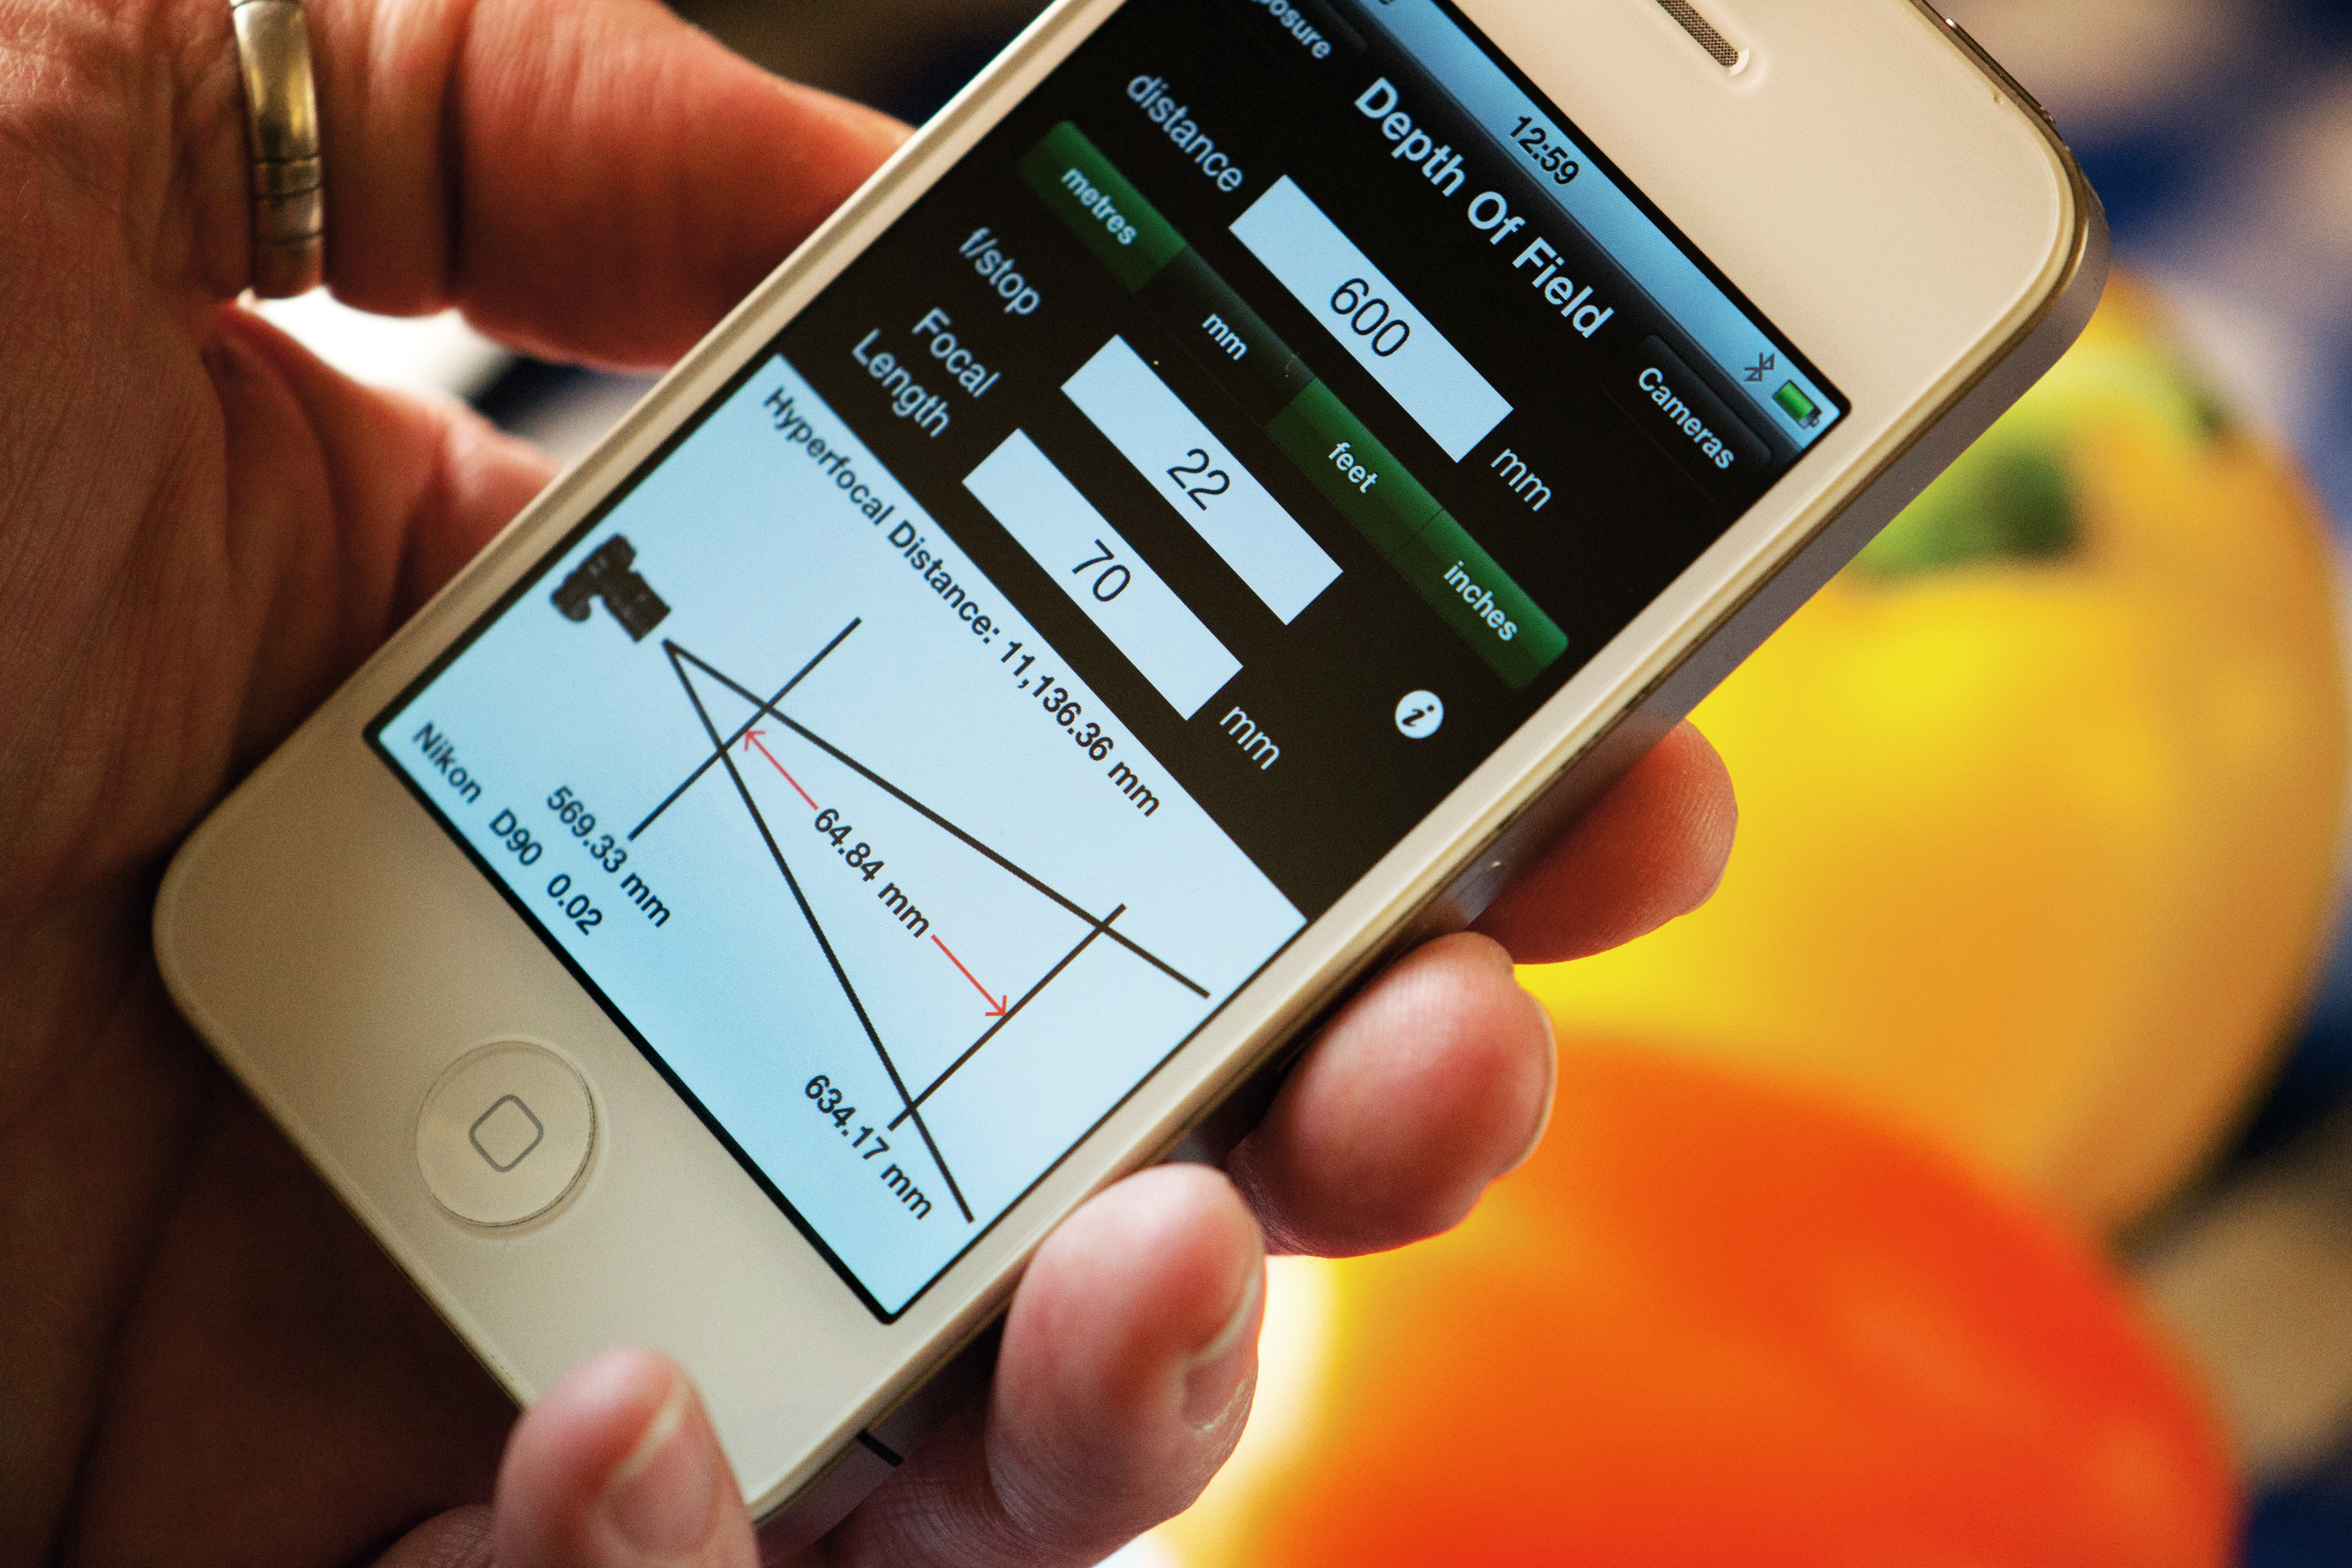
You can look up precise distances with online tables, or use an app such as Depth of Field Calculator for iOS. Here, we type in the focus distance, focal length and aperture, and it calculates that the depth of field will be 6.5cm.
More videos:
The best photography tips videos
Free lensing: get the Lensbaby look and take macro shots with a standard lens
Create colorful cross-polarization effects
The best light tents for photography
Chris George has worked on Digital Camera World since its launch in 2017. He has been writing about photography, mobile phones, video making and technology for over 30 years – and has edited numerous magazines including PhotoPlus, N-Photo, Digital Camera, Video Camera, and Professional Photography.
His first serious camera was the iconic Olympus OM10, with which he won the title of Young Photographer of the Year - long before the advent of autofocus and memory cards. Today he uses a Sony A7 IV, alongside his old Nikon D800 and his iPhone 15 Pro Max.
He is the author of a number of books including The Book of Digital Photography, which has been translated into a dozen different languages.
In addition to his expertise in photography and videomaking, he has written about technology for countless publications and websites including The Sunday Times Magazine, The Daily Telegraph, What Cellphone, T3 and Techradar.
