The best camera deals, reviews, product advice, and unmissable photography news, direct to your inbox!
You are now subscribed
Your newsletter sign-up was successful
Watch the video: focus stacking photography tips
Focus stacking is a great photography technique for getting everything sharp, even when you are extremely close to the subject with no depth of field to play with.
Macro photography enables you to get up-close and personal with your subject, capturing it at a ratio of 1:1 so the that image on the sensor is the same size as the thing you’re shooting. What if you want to get closer, though? To pick out the delicate hairs on a bug, for example, you’ll have to up the magnification, but this increases the size of the problems that can arise!
• More photography tips: how to take pictures of anything
The first issue is depth of field. When you’re working just a few centimeters from your subject, even an aperture such as f/22 will only resolve a small area of focus. This is when knowledge of hyperfocal distance can be helpful, to determine how much of the subject is going to look sharp on either side of the focal point.
The other issue is lens diffraction, which is caused at smaller apertures and results in a loss of finer detail. As a general rule of thumb, for most lenses on an APS-C format body f/16 is as high as you can go before diffraction starts to become obvious.
So how can you get round these problems and make every area of a macro image look sharp, with no warping? One of the best photography tips is focus stacking – a technique that enables you to 'stack' a selection of pictures with different focal points. You then blend them together to make a final image in which the whole subject is in focus.
The best camera deals, reviews, product advice, and unmissable photography news, direct to your inbox!
To get these pictures, you’ll need a few specialist bits of kit. First is a micro positioning plate. We’ve used the Velbon Super Mag Slider, which costs about £75 ($120).
A close-up filter or reversing ring (which enables you to mount your lens the wrong way round) will magnify your subject even more. As for the beetle itself, we bought a dead sample from eBay for £5 ($8) from a certified UK dealer.
Once you have your shots, use Photoshop or a dedicated focus stacking application such as Helicon Focus (the basic version of which costs $30 for a one-year license).
1. Create the backdrop
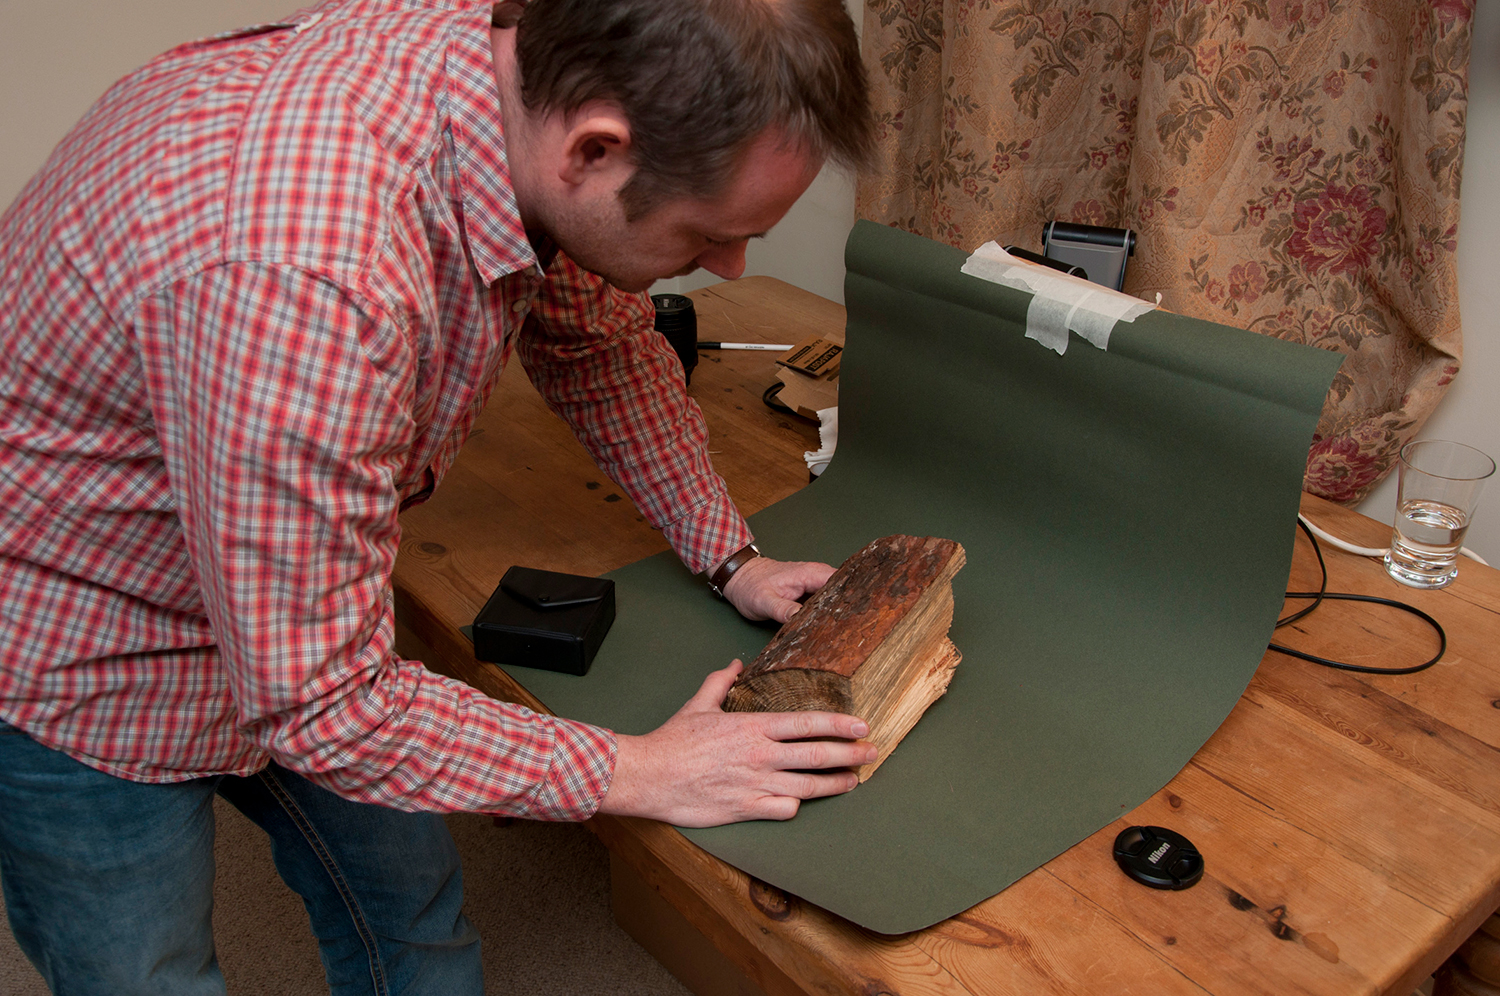
Start by placing a piece of A3 card on a table, positioning it so that it forms a curve – this will create a plain, solid background color for the shot, making your insect stand out. Make sure that the card is secured firmly. Now attach a pin or piece of wire to the bottom of your insect, to make handling and positioning it easy.
2. Position the insect
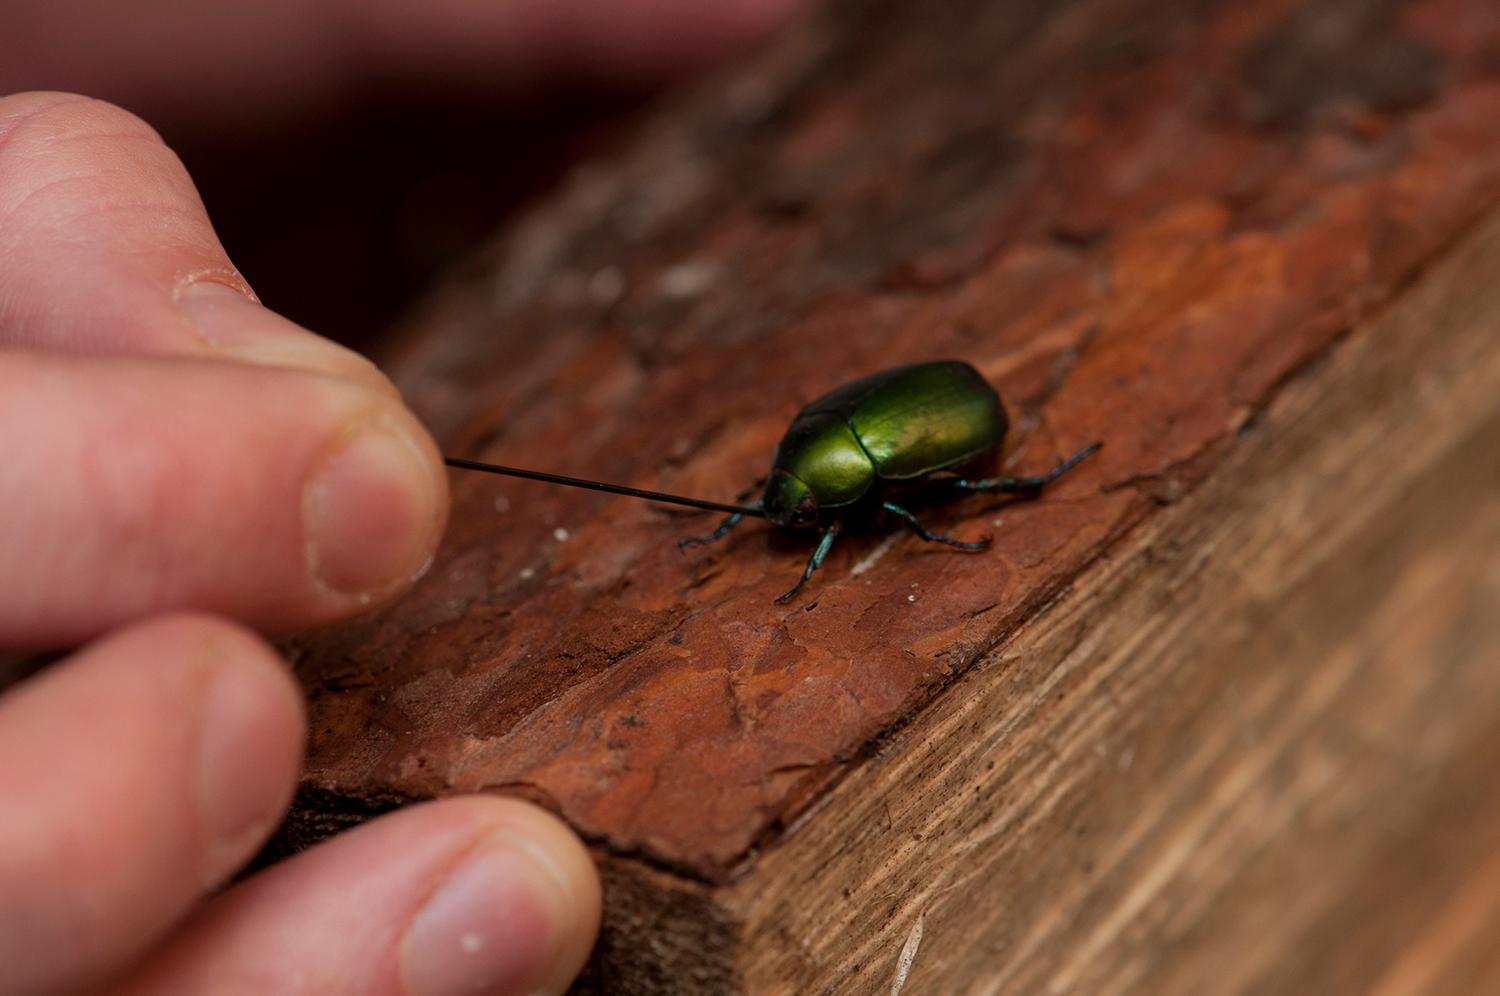
Stick the pin into a piece of tack. Position the insect with its head facing where the lens will be, and at an angle that hides the pin. You can remove the tack and pin in Photoshop if they are visible but, if it does appear in the shot, make sure there’s an area of clean space between the tack and the insect. This will make it easier to edit it out.
3. Get close up
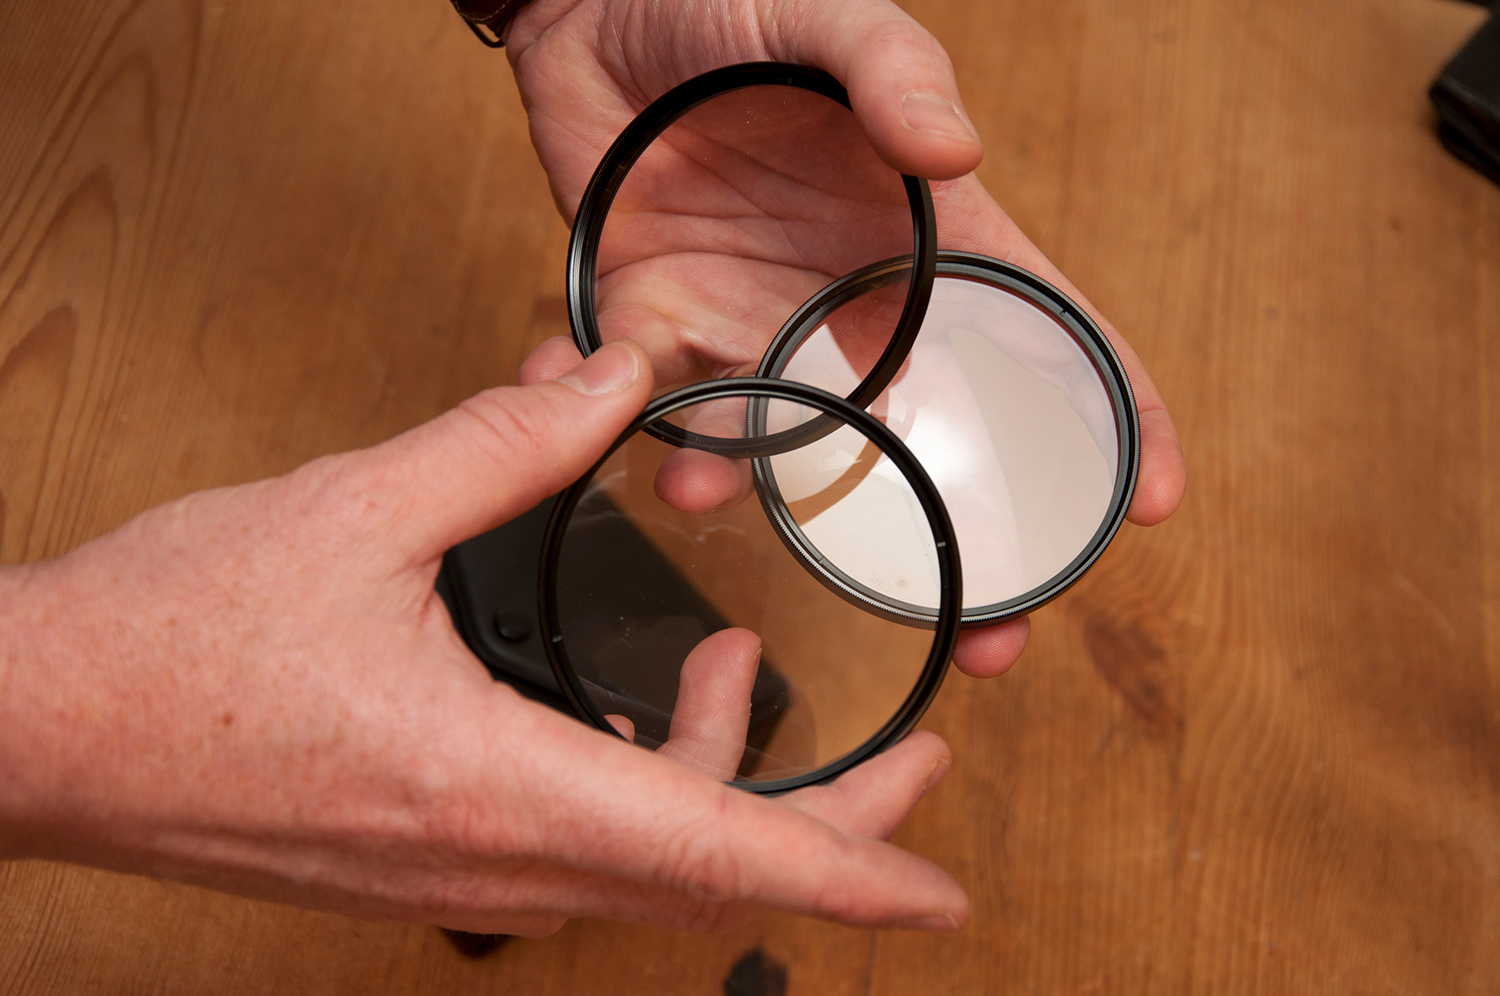
To get as close to the subject as possible, use a macro lens and close-up filter. We’re using a Kood set costing about £30 ($48). This will confuse our lens’ autofocus features, so we’ll need to focus manually, but we will be able to enlarge our subject more than we would with our standard 60mm macro lens.
4. Set up the plate
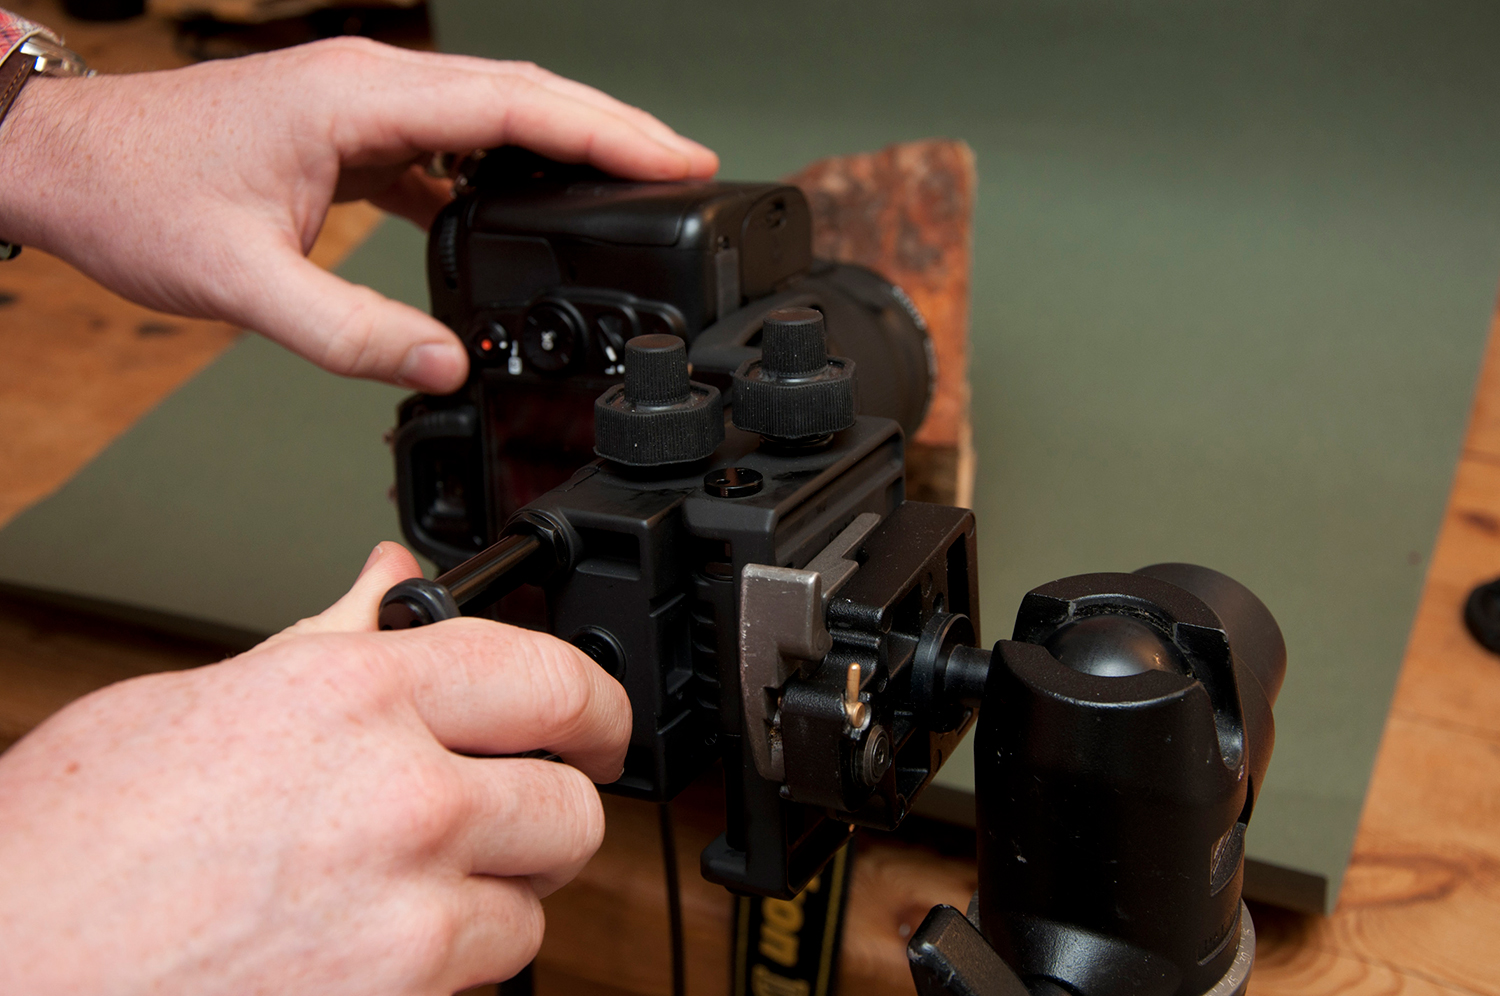
Place your tripod in front of the scene and attach a micro positioning plate to it. This will enable you to move your camera in small increments, adjusting the point of focus. Attach your camera and focus on the area of the insect closest to the lens. Then focus at all points along the length of the bug to check that it stays in frame.
5. Shine a light
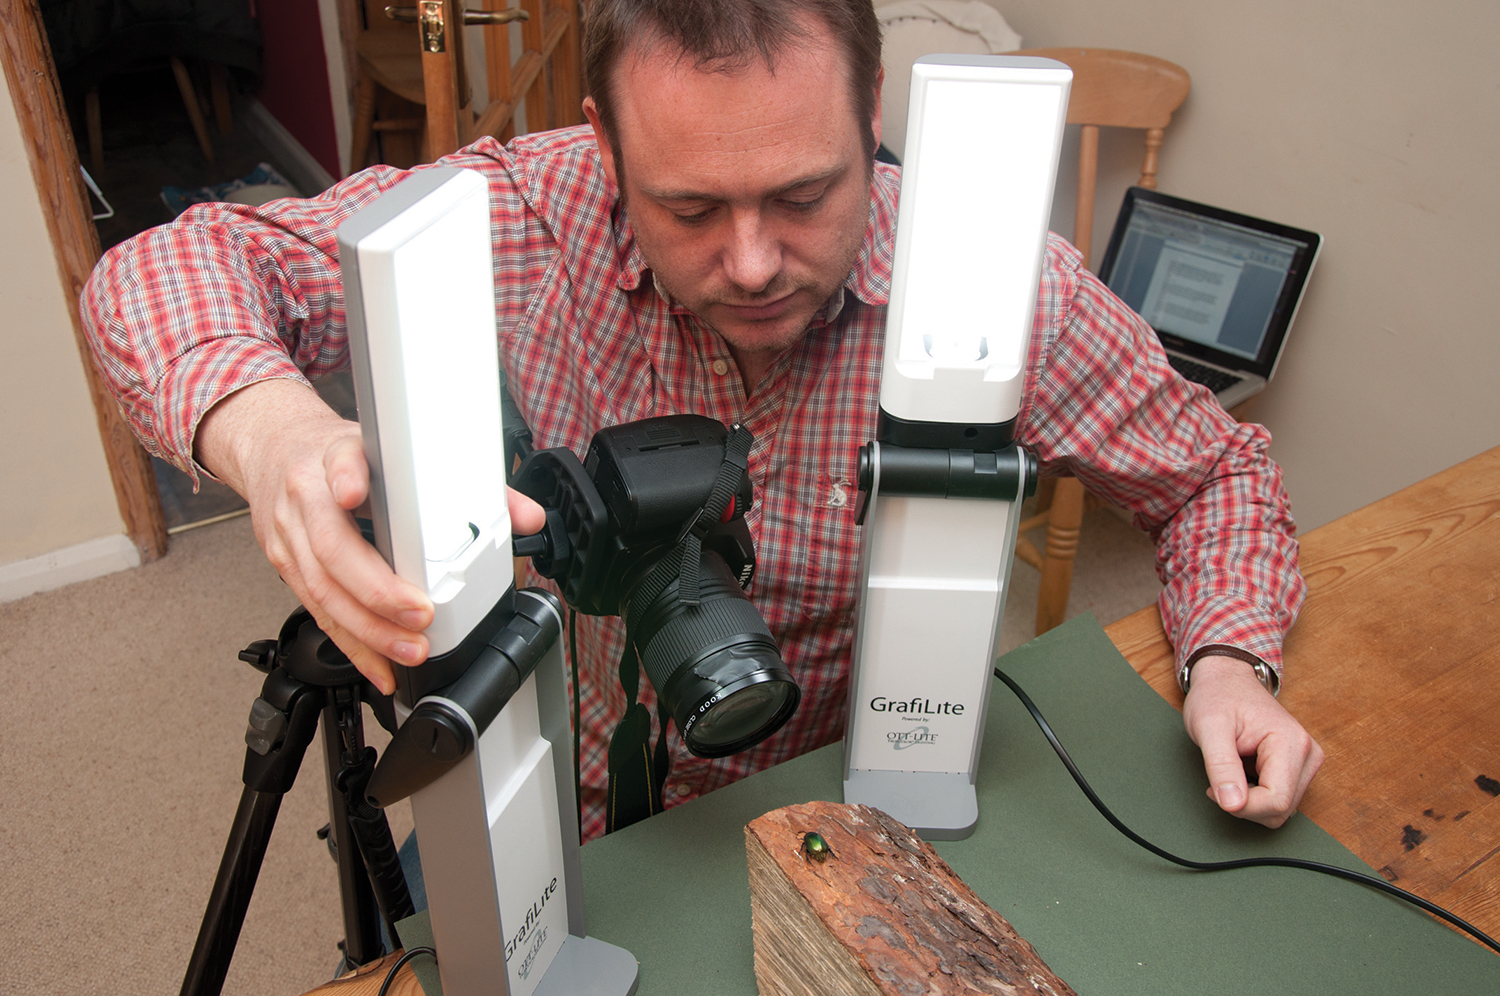
Position lights on both sides of the tripod, adjusting them so that there’s little or no shine on the surface of the insect’s body. If you find that there is some glare, tape a piece of thin white paper over the lights to help diffuse the beam. Use the viewfinder or Live View to double check the exposure. Set the camera to Aperture Priority at f/16 and ISO100.
6. Set up the camera
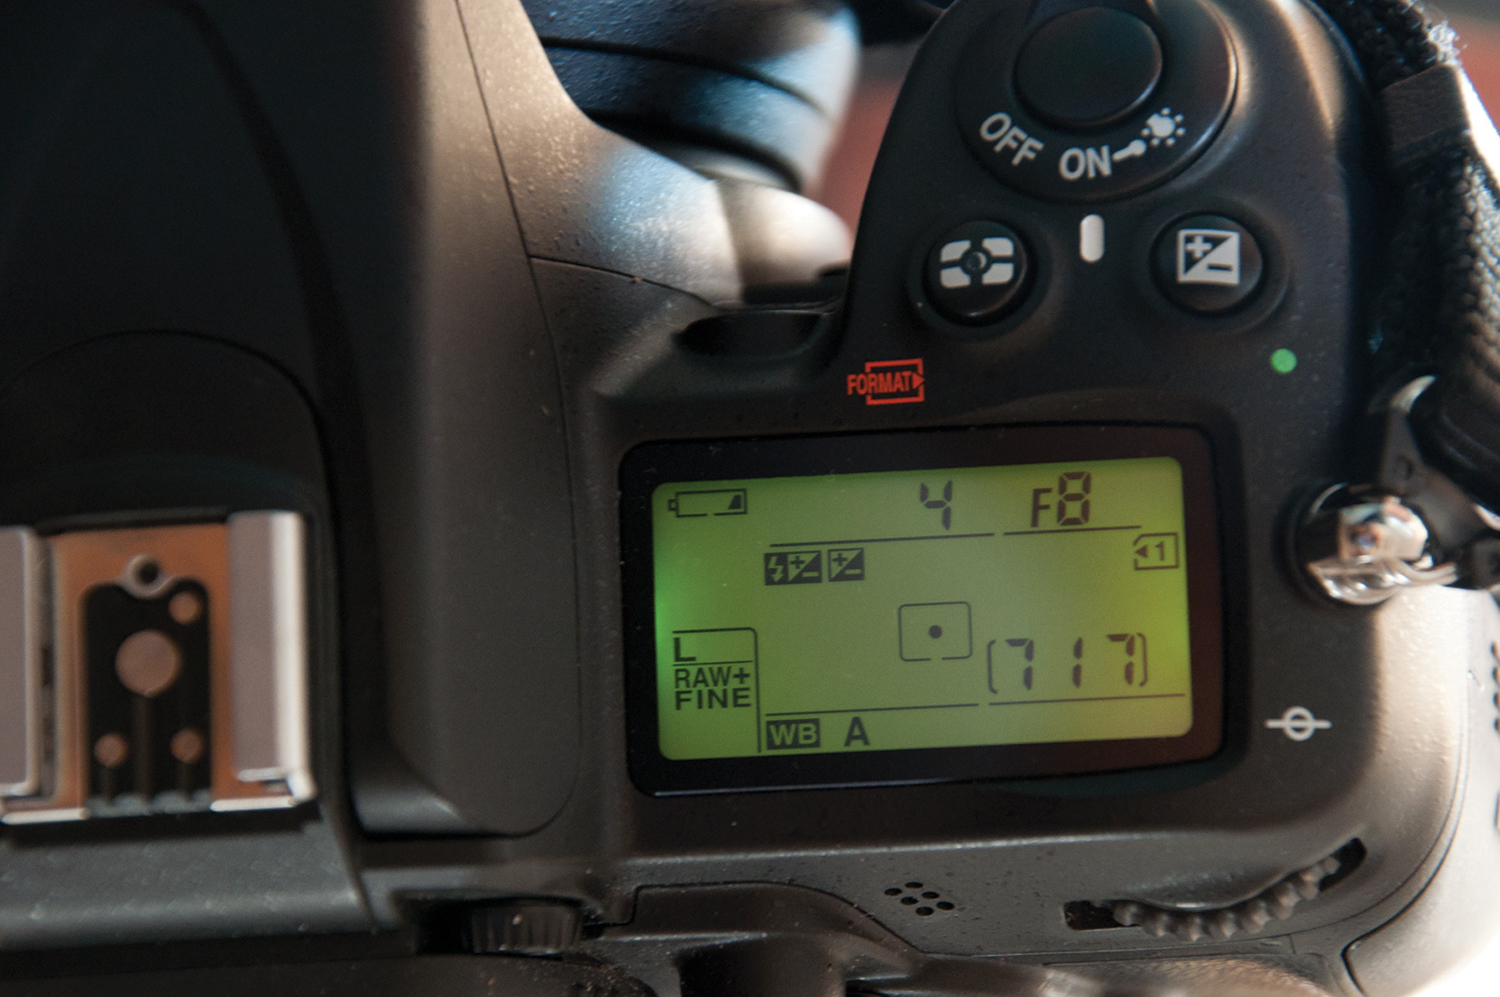
The small aperture means a long shutter speed, so make sure that there’s no movement. Use a cable release, and if you're shooting on a DSLR use mirror lock-up mode as well. Take a shot and zoom in on the preview screen. The close-up filter will cause a slight loss of quality at smaller apertures, so check closely – if it looks 'painterly' at all, decrease the aperture to f/11 and try again.
7. See the focal points
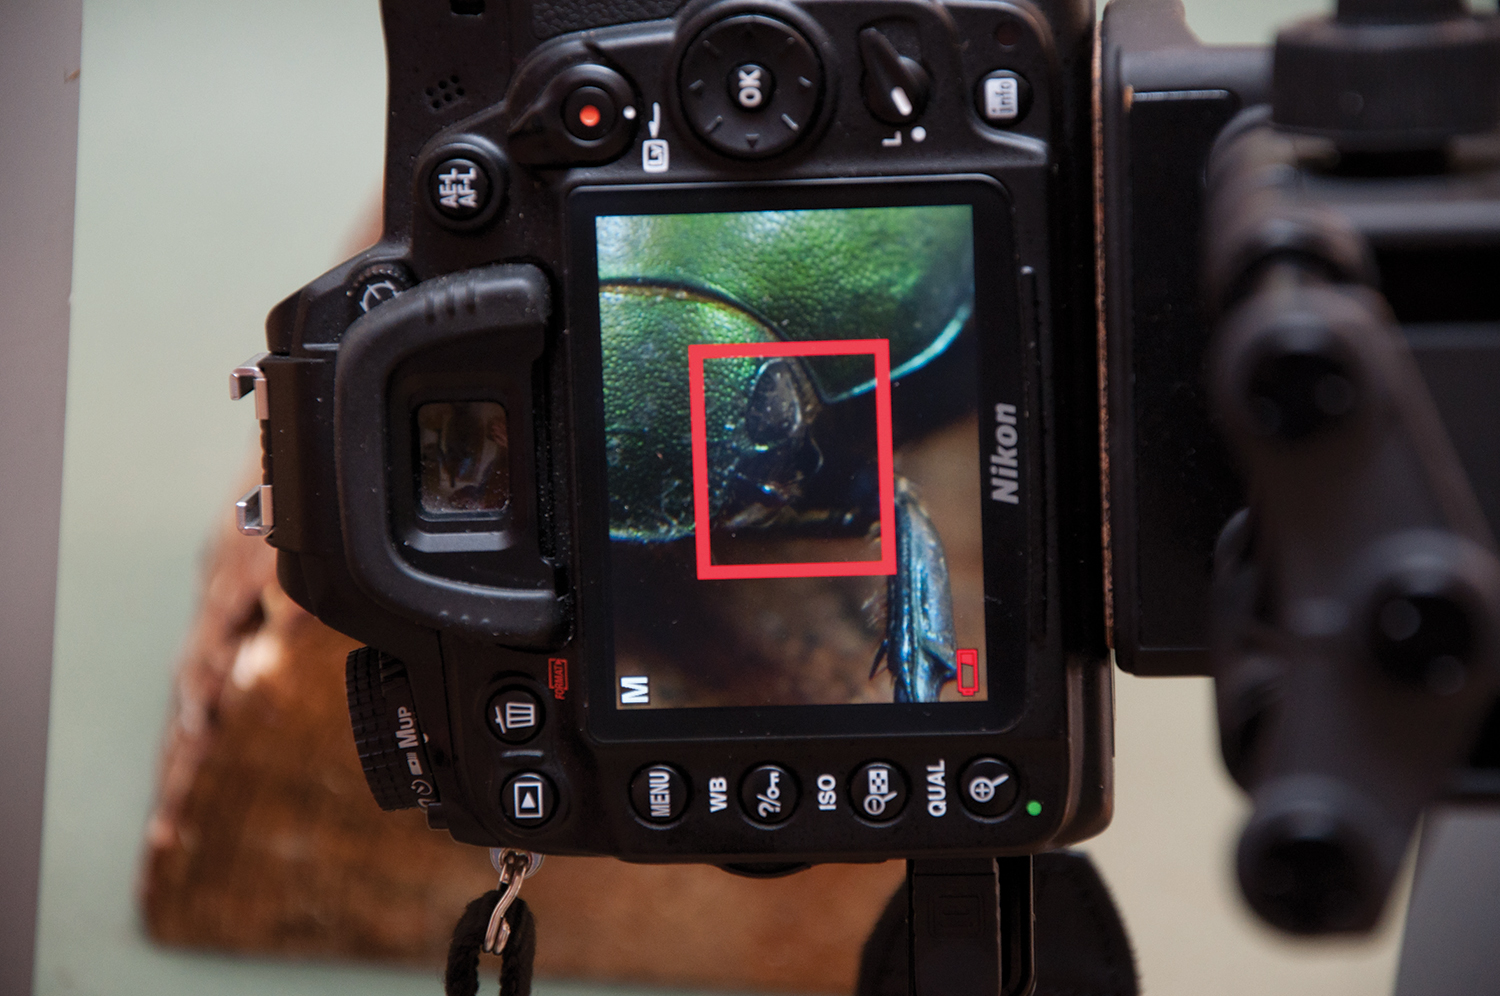
Focus on the closest point, where the insect is nearest the lens. Set the lens to manual focus, as a close-up filter can cause problems with autofocus systems. Now check the preview to determine the depth of field. Keep adjusting the micro positioning plate and repeat the tests with different parts of the insect’s body in focus.
8. Take the shots
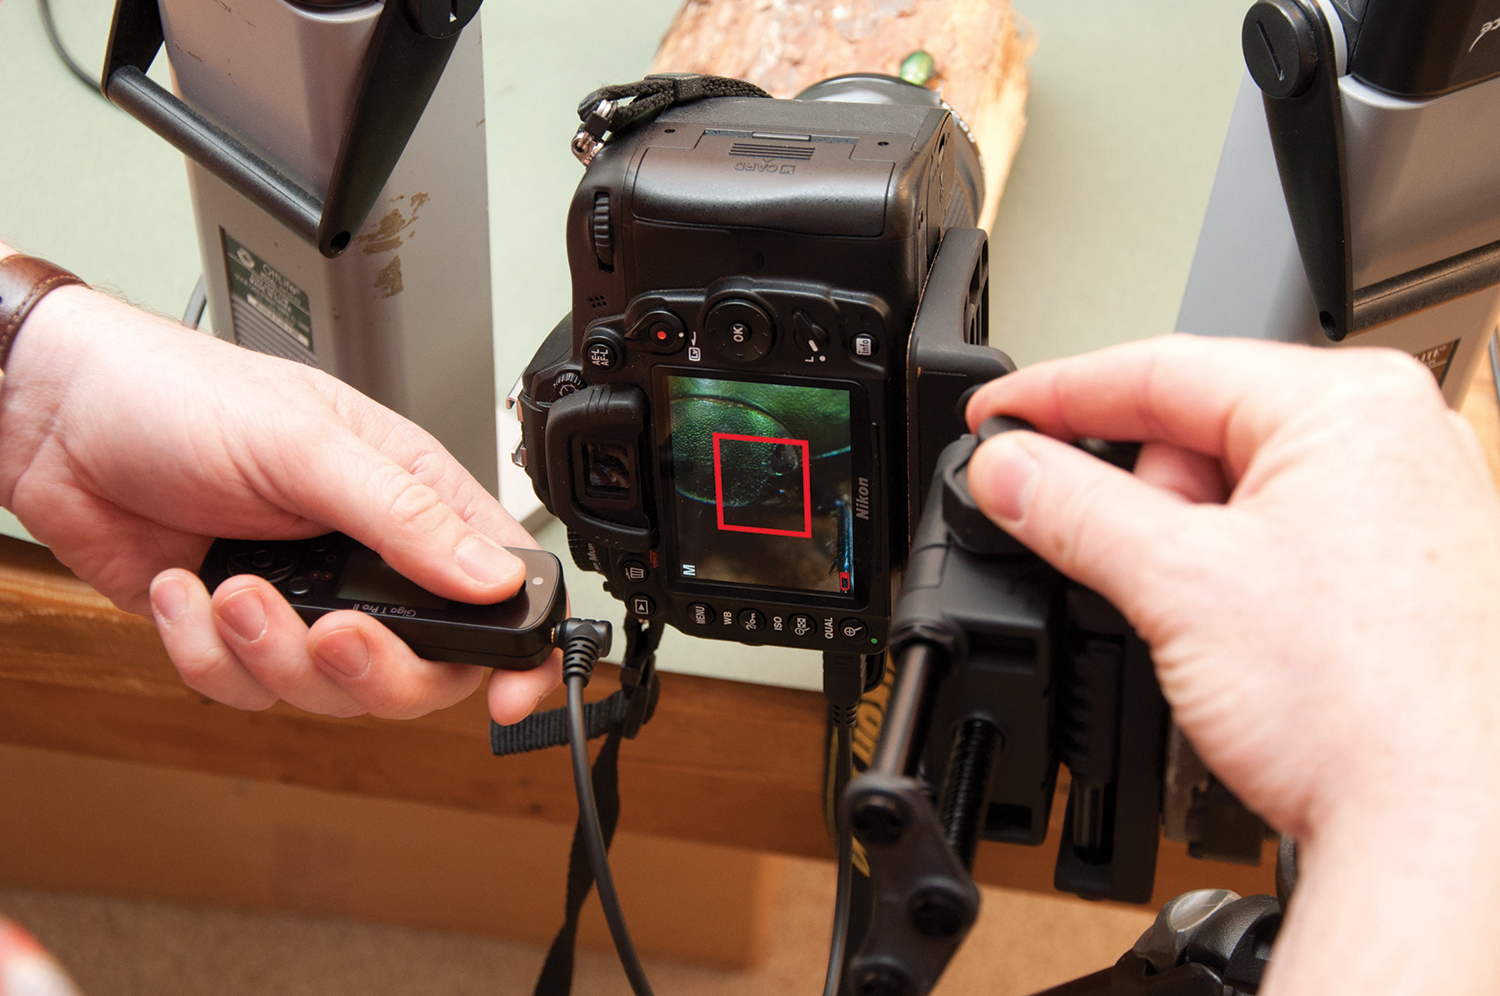
Start taking the sequence of images, beginning at the head and moving down the body. After each shot, use the micro positioning plate to move the camera and focus point; our plate has distance marked, so for each image we move the camera 2mm. Once you’ve captured the sequence, check that each shot’s focus and exposure are correct.
9. Open in Bridge
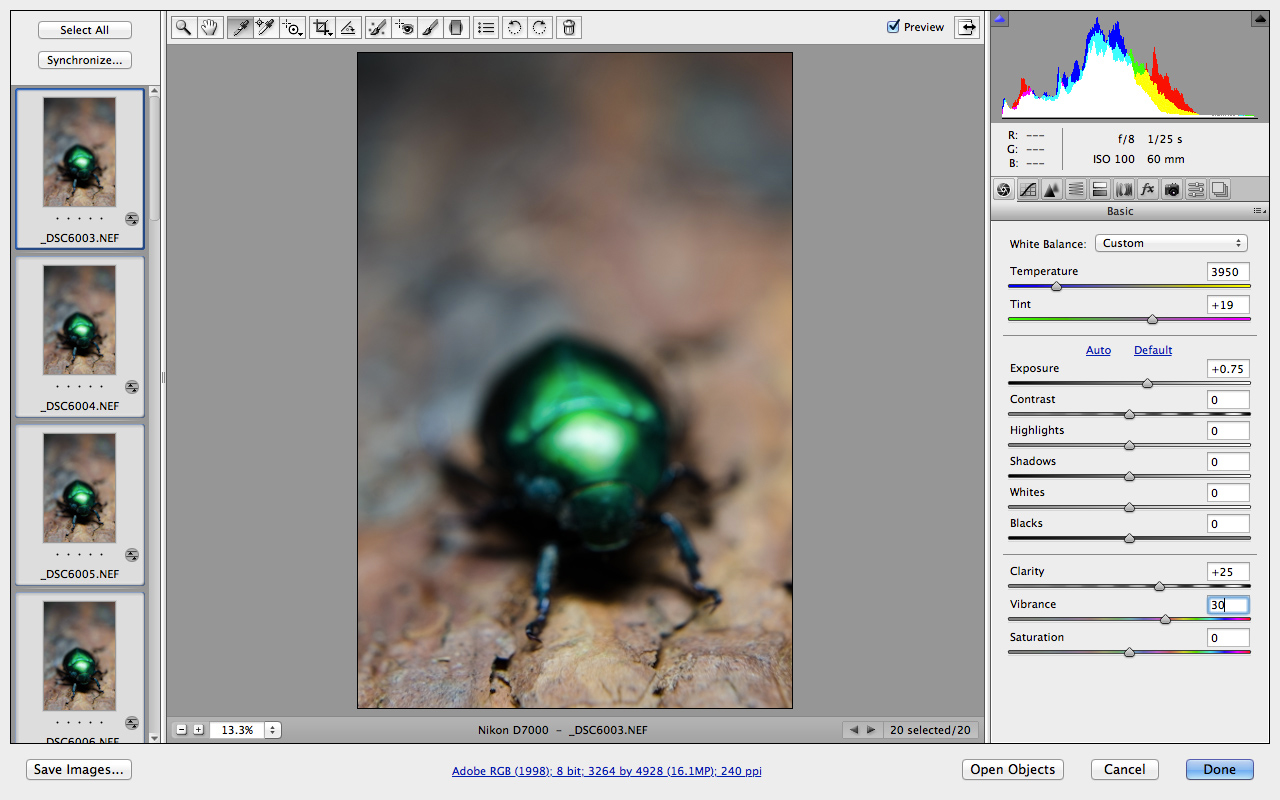
Download the images, open Adobe Bridge (the browser application that comes as part of Adobe Photoshop CC) and select the files you need to create your stack. Right-click one of the images and select 'Open In Camera Raw'. Adobe Camera Raw will open with the images listed on the left. Click 'Select All', then select the White Balance tool and click into an area of neutral grey. On the right, increase the Exposure slider to +0.75.
10. Use Photomerge
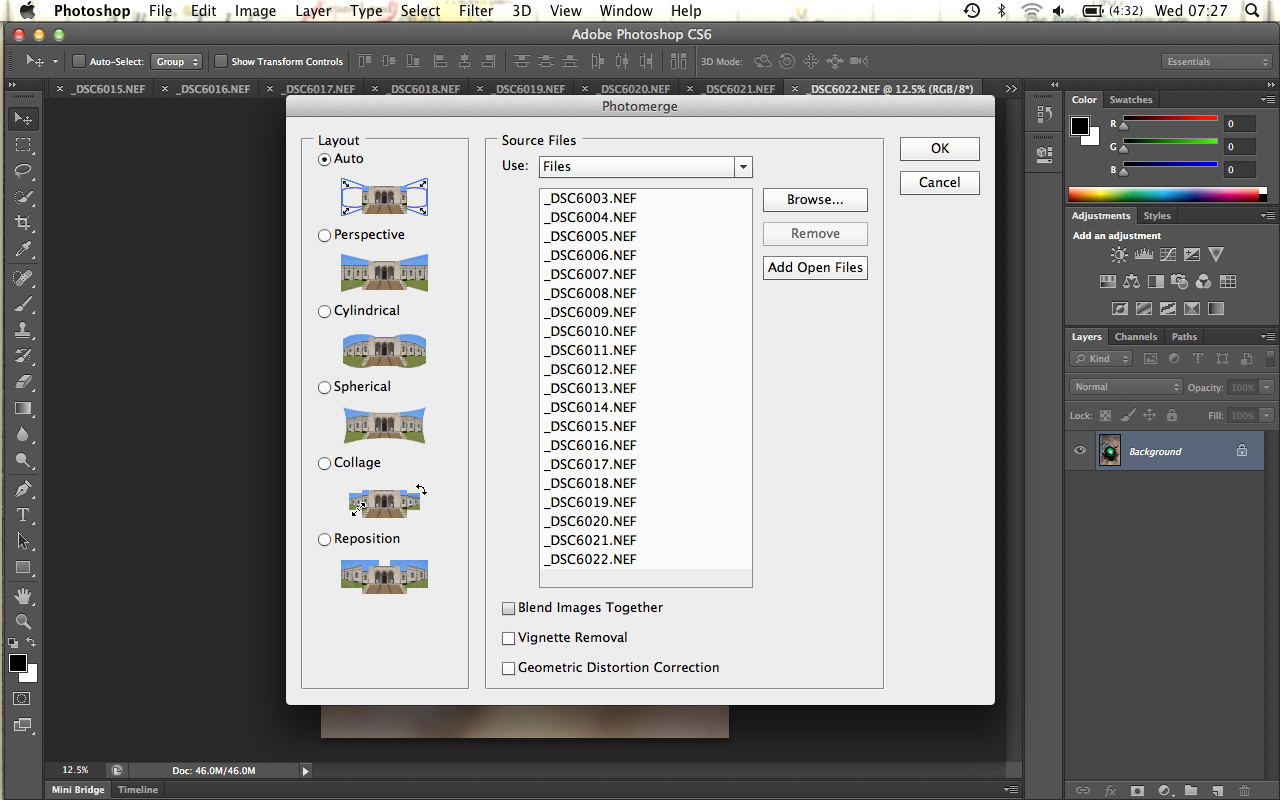
Set Clarity to 25 and boost the color by increasing Vibrance to 30. Click 'Open Images' to work in Photoshop. From the top menu, select File > Automate > Photomerge. Now click 'Add Open Files' and select Auto from the Layout options. Untick 'Blend Images Together' and click OK. Photoshop will now layer and align each image into a new document.
11. Blend layers
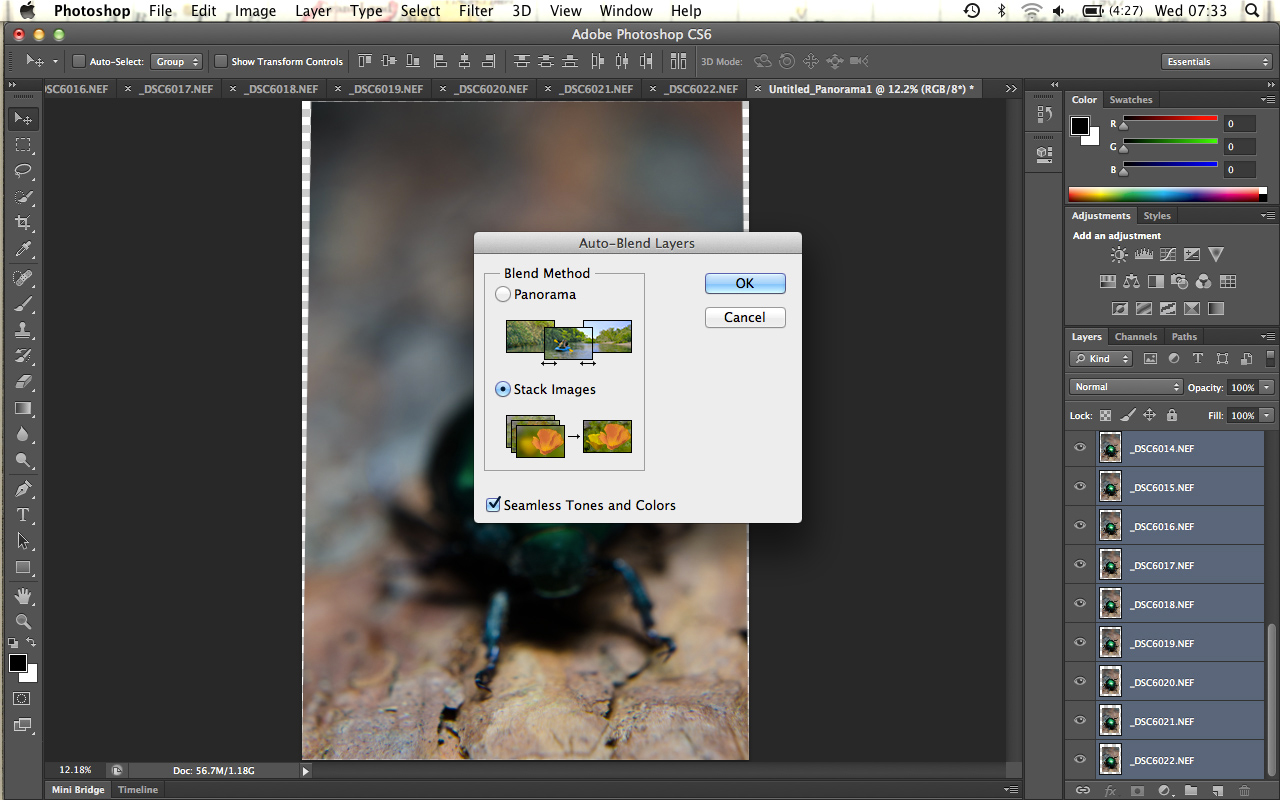
Select the top layer, then click on the bottom layer while holding down the Shift key. To blend the images, go to Edit > Auto-Blend Layers. Make sure that 'Stack Images' and ‘Seamless Tones and Colors’ are selected before hitting OK. Photoshop will automatically blend the layers, masking out any blurred areas. We now have our focus stacked image!
12 Raise the tone
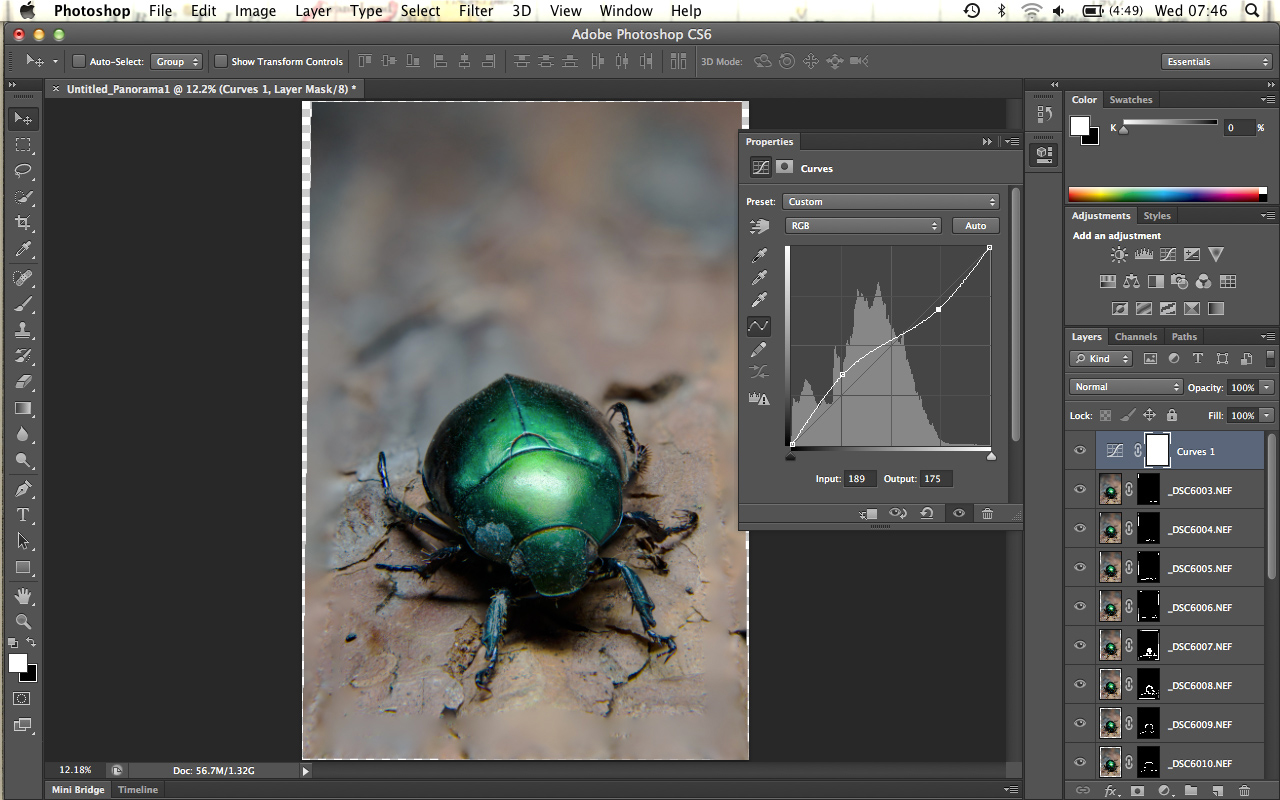
Click the New Adjustment Layer icon and select Curves. Create two points on the histogram, one in the bottom quarter and one in the top. Move the bottom point up and the top point down so that the curve resembles an ‘S’. For point one, set Output to 84 and Input to 65. For point two, set Output to 185 and Input to 191. Now choose Layer > Flatten Image to finish.
More videos:
147 photography techniques, tips and tricks for taking pictures of anything
How to use extension tubes for low cost-macro photography
How to use an ND graduated filter for stunning landscape photography
Headshot photography tips: how to shoot the perfect head-and-shoulders portrait
Digital Camera World is one of the leading authorities on camera and photography news, reviews, techniques, tutorials, comparisons, deals and industry analysis. The site doesn't just specialize in cameras, but all aspects of photography, videography and imaging – including camera phones, gimbals, lenses, lighting, editing software, filters, tripods, laptops, printers, photo books, desks, binoculars and more.
Whether you're using, looking to buy or trying to get the most out of a compact camera, action camera, camera drone, cinema camera, beginner camera or professional camera, Digital Camera World has a roster of experts with combined experience of over 100 years when it comes to cameras, photography and imaging.

