Let it snow in Affinity Photo
Create a snow brush in Affinity Photo and transform a photo into a winter wonderland
Start here
• Affinity Photo tutorials
The tutorials
1. Affinity Photo vs Photoshop
2. RAW editing with Affinity Photo
3. Focus merge with Affinity Photo
4. Replace a sky in Affinity Photo
5. Moody mono in Affinity Photo
6. Six Affinity Photo landscape tips
7. Color correction in Affinity Photo
8. Live Filters in Affinity Photo
9. Create a classic wet plate look
10. Remove objects in Affinity Photo
11. Paint an abstract portrait
12. Enhance skintones in Affinity Photo
13. Create HDR in Affinity Photo
14. Replace a sky in Affinity Photo
15. Affinity Photo double exposures
16. Affinity Photo Denoise tool
17. Affinity Photo retouching
18. Restore old family portraits
19. Change clothes in Affinity Photo
20. Create super-charged sunsets
21. Fix faces with a flourish
22. Get creative with composites
23. Liquify faces with Affinity Photo
24. Make a tropical composite
25. Let it snow in Affinity Photo
26. Create an immaculate conception
Watch video: Let it snow in Affinity Photo
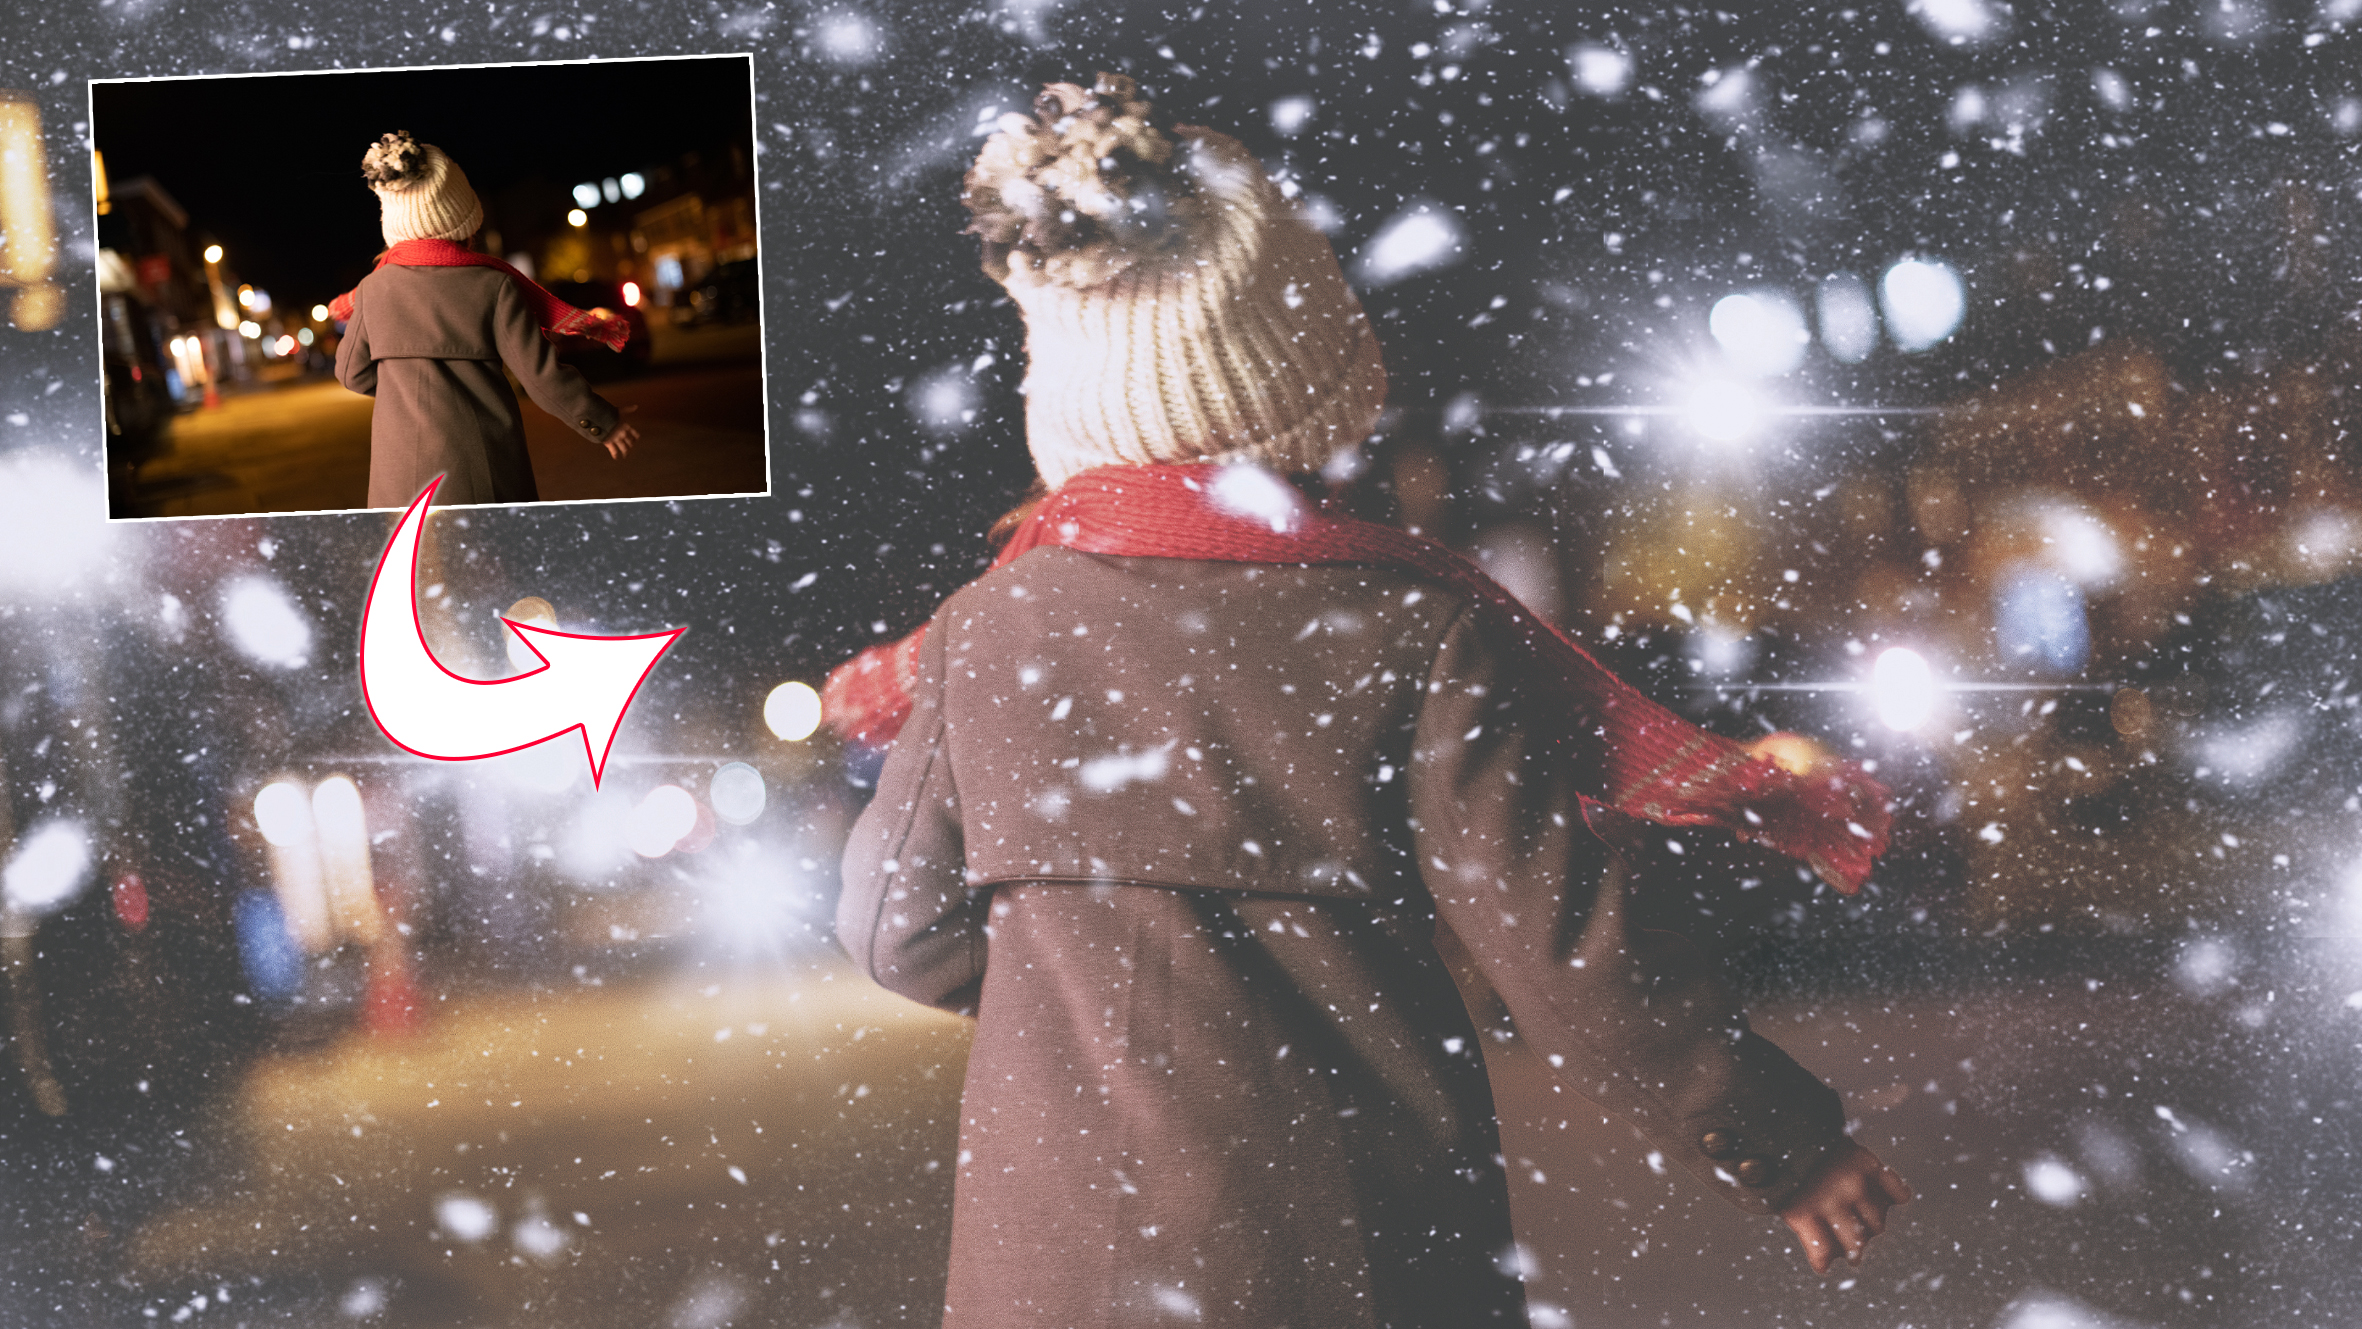
It may not be a white Christmas for all of us this year, but we can still give our photographs a festive snowstorm, whatever the weather. In this tutorial we’ll show you how to do so with Affinity Photo’s powerful Brush tool.
We’ll also explain how to create your own brushes, and how to change your brush settings to build up a random scatter effect for the snow. Whether you want to add a wintry effect to your photos, or get creative with all kinds of amazing brush tricks, the technique here will show you how.
Affinity Photo’s Brush tool offers a rewarding array of powerful tools and hidden features that you can utilize. Not only can you choose from all kinds of fantastic brush tips, you can also create your own from any shape or image you like. We’ll take advantage of this here, beginning by painting a few simple blobs. Once done, we can save our image as a PNG file (which preserves transparency), then load the picture as a brush tip and begin painting white snow over the image.
Of course, we can save these brushes for use in future designs and effects as well. We can also experiment with brush settings that allow us to scatter, rotate and spread out our brush.
These fun features and settings let us randomize our snow brush effect, as if we were throwing handfuls of snow across the scene ourselves! By experimenting with these brilliant ‘jitter’ settings, we can blast a blizzard across the photograph in a matter of seconds and with relative ease.
Read more:
The best camera deals, reviews, product advice, and unmissable photography news, direct to your inbox!
Step 1: Paint black blobs
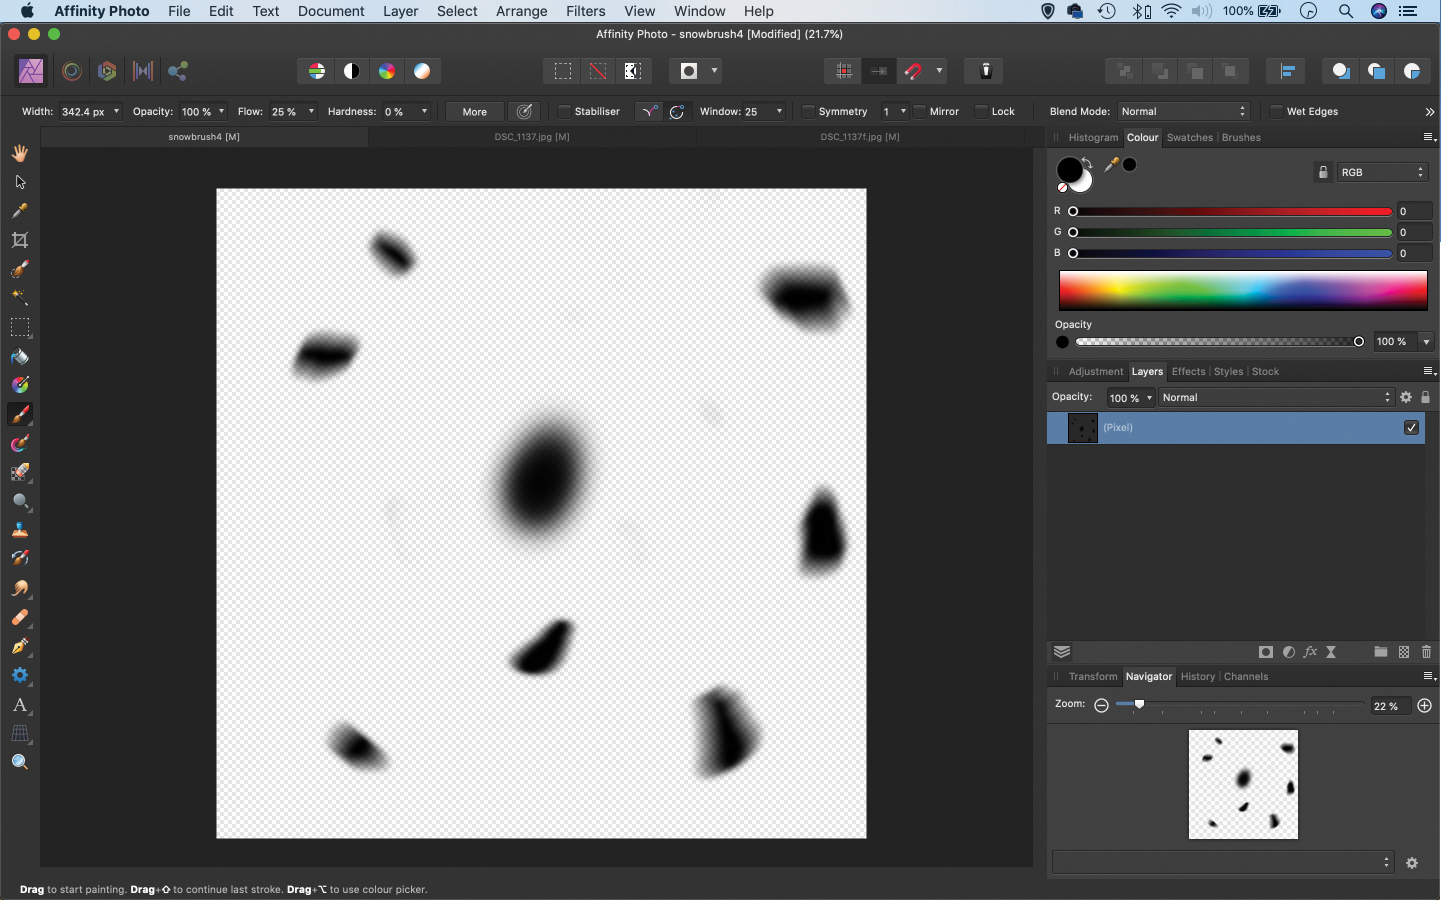
Go to File>New, set the page width and height to 10 inches, check ‘Transparent Background’ and hit OK. Next, get the Brush tool, set colour to black and paint a few random spots. Next, go to Filter>Blur>Motion Blur and blur a few pixels. You can use Filter>Blur>Gaussian Blur to add more.
Step 2: Add more dots
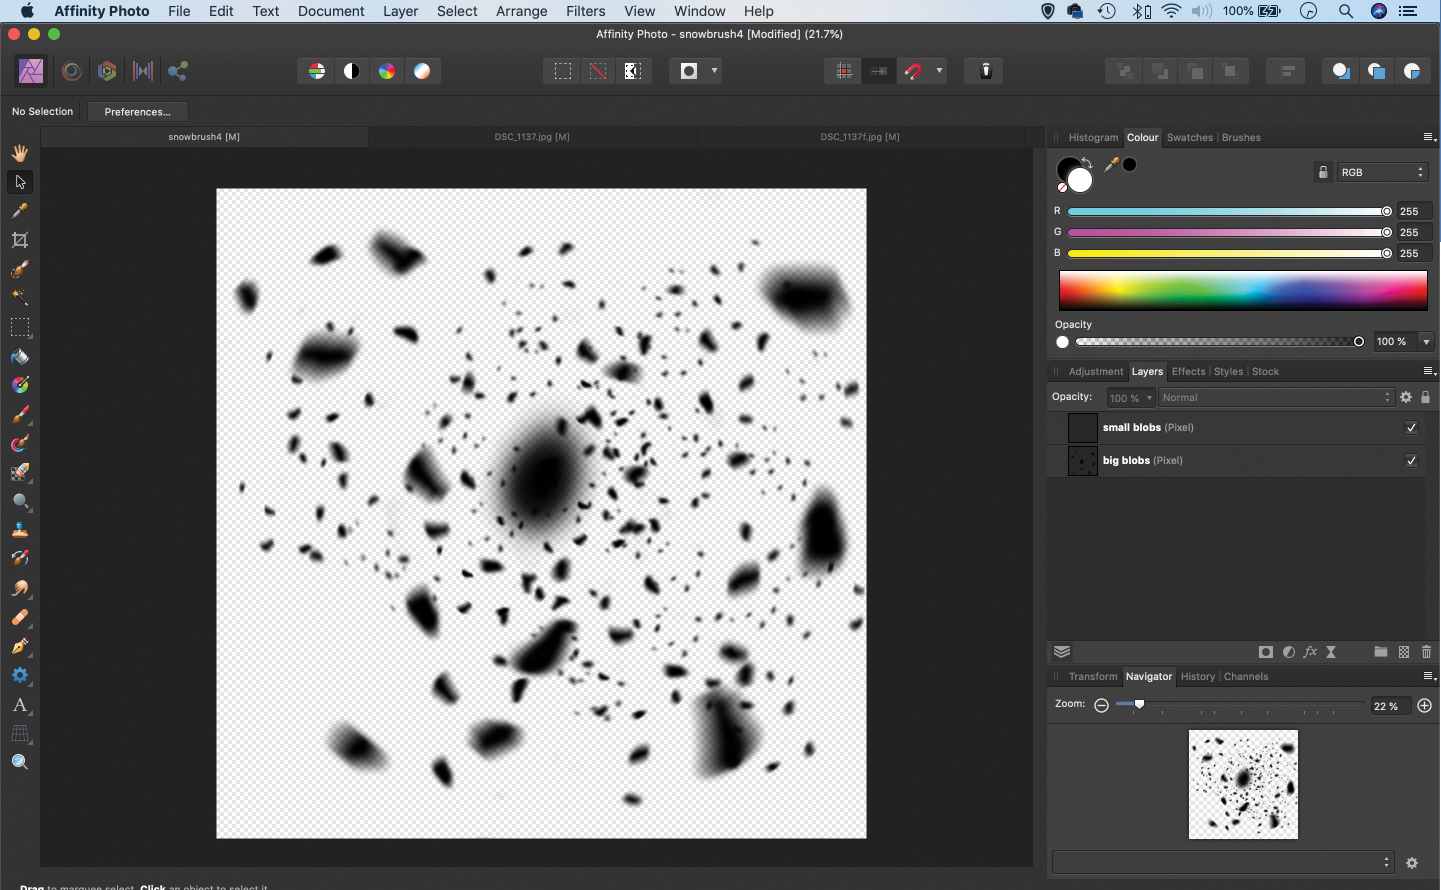
Name the layer ‘big,’ and make a new layer called ‘small,’ then paint some smaller dots. To speed things up, grab the Move tool, hold Alt and drag the blobs to make a copy, then move it. Do this a few times, then highlight the copied layers (Cmd/Ctrl-click to select several) and go to Layer>Merge Selected.
Step 3: Create a brush tip
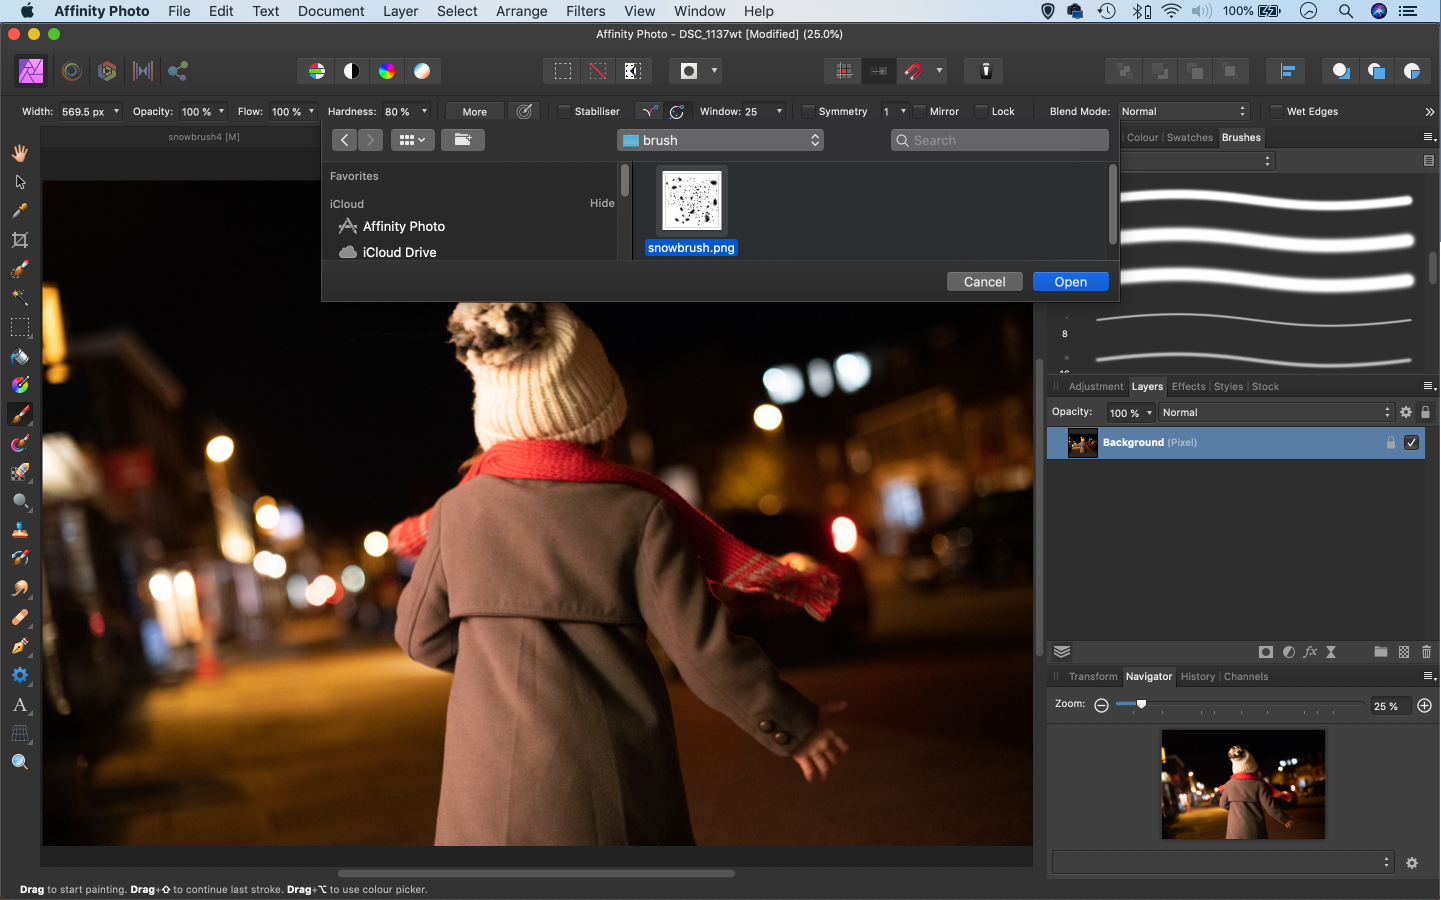
When you’re happy with the shapes go to File>Export, select PNG and save the file. Next, open the image you want to add snow to, and go to the Brushes panel (go to View>Studio>Brushes if you can’t see it). Click the top-right menu in the panel, choose New Intensity Brush and load in the PNG.
Step 4: Make it snow
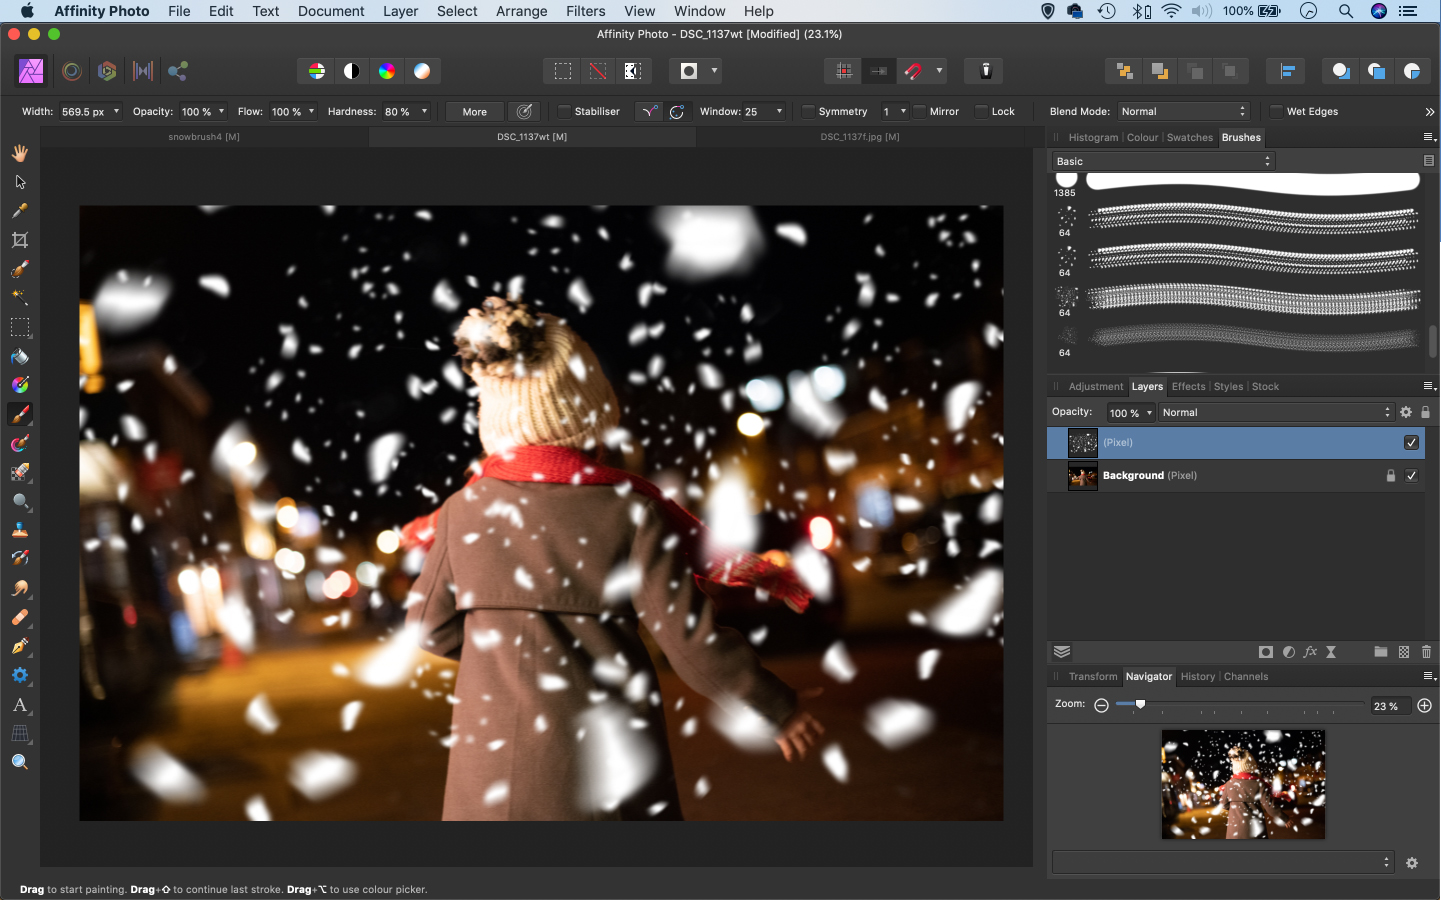
Grab the Brush tool from the toolbar on the left and choose the newly loaded brush from the list of brushes in the Brushes panel. Set the colour to white, then make a new layer, resize the brush tip with the ] and [ keys, and paint a few times to add various levels of snow around the frame of your photograph.
Step 5: Add to the blizzard
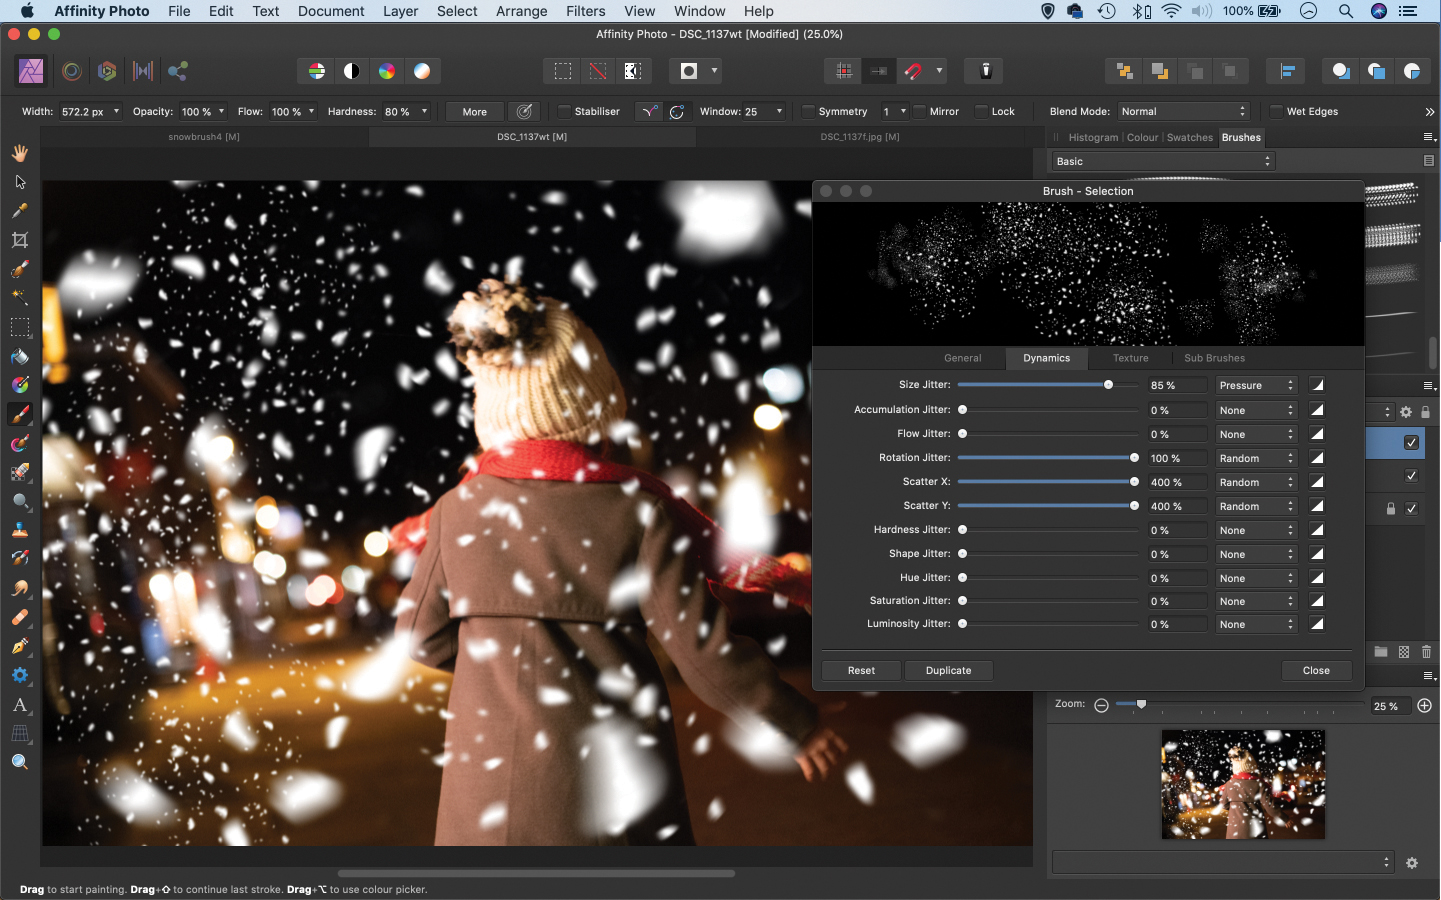
Go back to the snow image and turn off the big layer so that just the smaller blobs are visible, then export as a PNG and create another brush. Once loaded, click More in the brush options. In Dynamics, increase the Jitters for Size, Rotation, Scatter X and Y, then paint around the image to add these smaller flakes to the snow effect.
Step 6: Cool the image
Once you’re happy, make a new layer and press Cmd/Ctrl+Shift+Alt+E to merge all the layers. We’ll take this into the Tone Mapping Persona at top left for final toning. Choose a preset – we used ‘Neo Gothic Novel’ here for a blue desaturated look, then decreased Local Contrast.
Quick tip
The snow effect can look more natural if you add levels of snow both in front of and behind the subject. To do so, you can select the subject by painting over them with the Selection Brush (set it to ‘Snap to Edges’ in the tool options to lock on to the outline of the figure). Once done, you can copy the selected area to a new layer (Cmd/Ctrl+J), then add layers both on top and below it. We’ve done so here to create a hazy effect, as if the street beyond is thick with falling snow.
About N-Photo magazine
This tutorial originally appeared in N-Photo, the monthly newsstand magazine for Nikon photographers. Why not subscribe to a print edition, and have the magazine delivered direct to your door every month?
Alternatively, we have a number of different digital options available, including:
• Apple app (for iPad or iPhone)
• Zinio app (multi-platform app for desktop or smartphone)
• PocketMags (multi-platform app ideal for Android devices)
• Readly (all-you-can-eat digital magazine subscription service)
If you wanted a printed version of any of our most recent issues we have a selection of back issues to choose from in our online store.
Read more:
• Photography tips and tutorial videos
• The best photo editing tools and accessories
• The best desktop computers for photo editing
• The best photo-editing laptops right now
• The best photo editing software today
N-Photo: The Nikon Magazine is a monthly publication that's entirely dedicated to Nikon users. As a 100% independent magazine, you can be assured of unbiased opinion from a trustworthy team of devoted photography experts including editor Adam Waring and Deputy Editor Mike Harris.
Aimed at all users, from camera newcomers to working pros, every issue is packed with practical, Nikon-specific advice for taking better photos, in-depth reviews of Nikon-compatible gear, and inspiring projects and exciting video lessons for mastering camera, lens and Photoshop techniques.
Written by Nikon users for Nikon users, N-Photo is your one-stop shop for everything to do with cameras, lenses, tripods, bags, tips, tricks and techniques to get the most out of your photography.
