Add atmospheric light rays to forest scenes with this simple combination of effects in Affinity Photo
Learn how to add atmospheric light rays to forest scenes in Affinity Photo with our editing pro James Paterson
The best camera deals, reviews, product advice, and unmissable photography news, direct to your inbox!
You are now subscribed
Your newsletter sign-up was successful
Watch video (above): Add light rays in Affinity
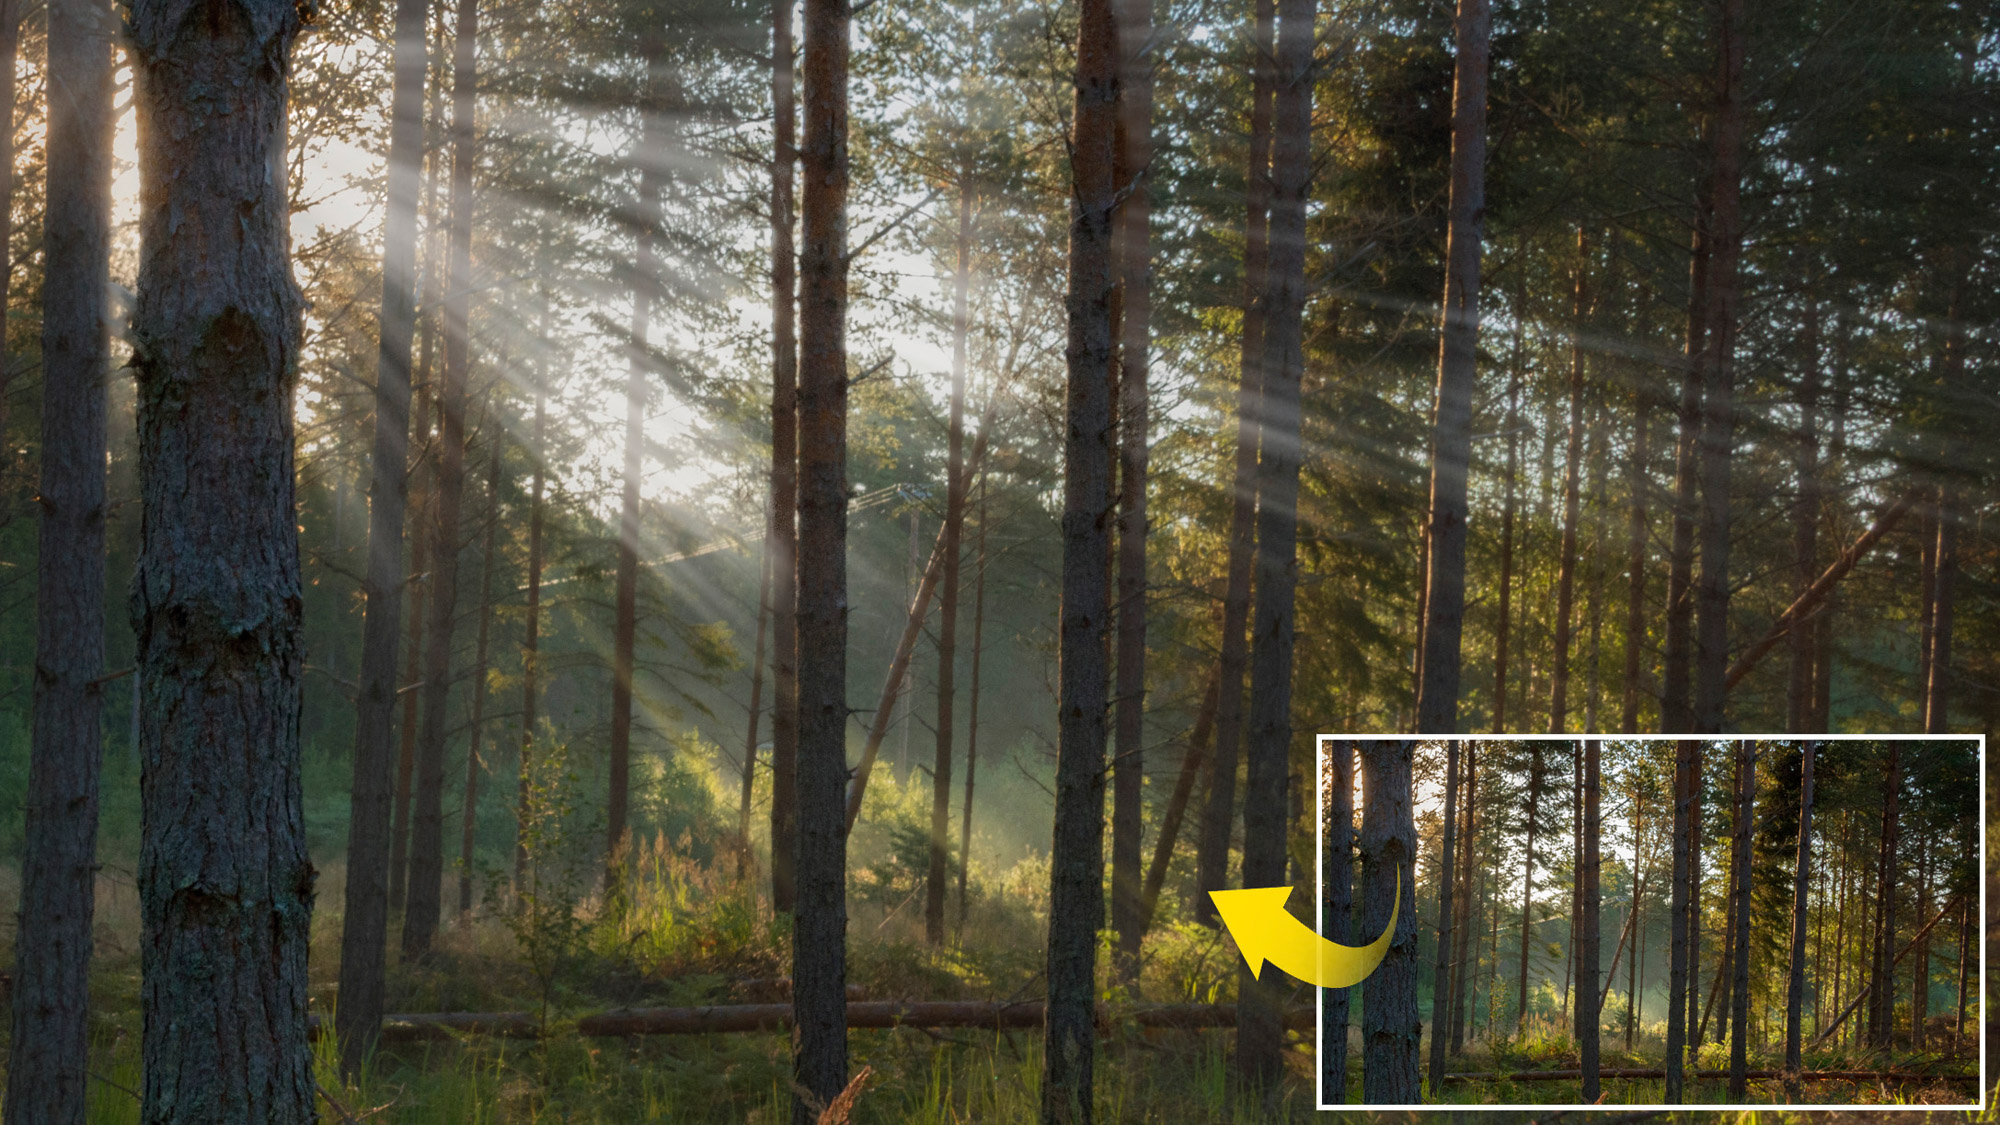
There’s something truly magical about shafts of sunlight, especially when coupled with low-lying fog and a woodland scene. If you’re lucky enough to come across them with your camera, then it’s possible to capture beautiful photos even in the most mundane of forests. Without the atmospheric fog, these kinds of scenes can often seem overly busy, with an abundance of detail but no clear composition to draw the eye.
As such, mist and fog can be a great simplifier in forest scenes because it softens the details, fades the distant scenery and helps to create a sense of depth. Of course, there’s nothing better than heading out to the woods in the early morning light to capture beautiful light rays in the flesh. But if this isn’t possible, then there are ways to recreate the effect in Affinity Photo. In this project, we’ll show you how.
We’ll begin here with a simple trick to select the highlights in the scene, before adding a blur effect to transform those highlights into shafts of light. From here we can refine the effect by softening the harder lines with another blur filter. Finally, we can use layer masks to control exactly where the light ways fall, weaving them in and out of the trees to make the effect look more natural.
We’ve supplied the rays_before.jpg in the start files (download here) but if you use your own, it’s best to use a backlit scene, with the sun low in the backdrop. This way the effect mirrors the direction of light in the original scene.
1. Select the highlights
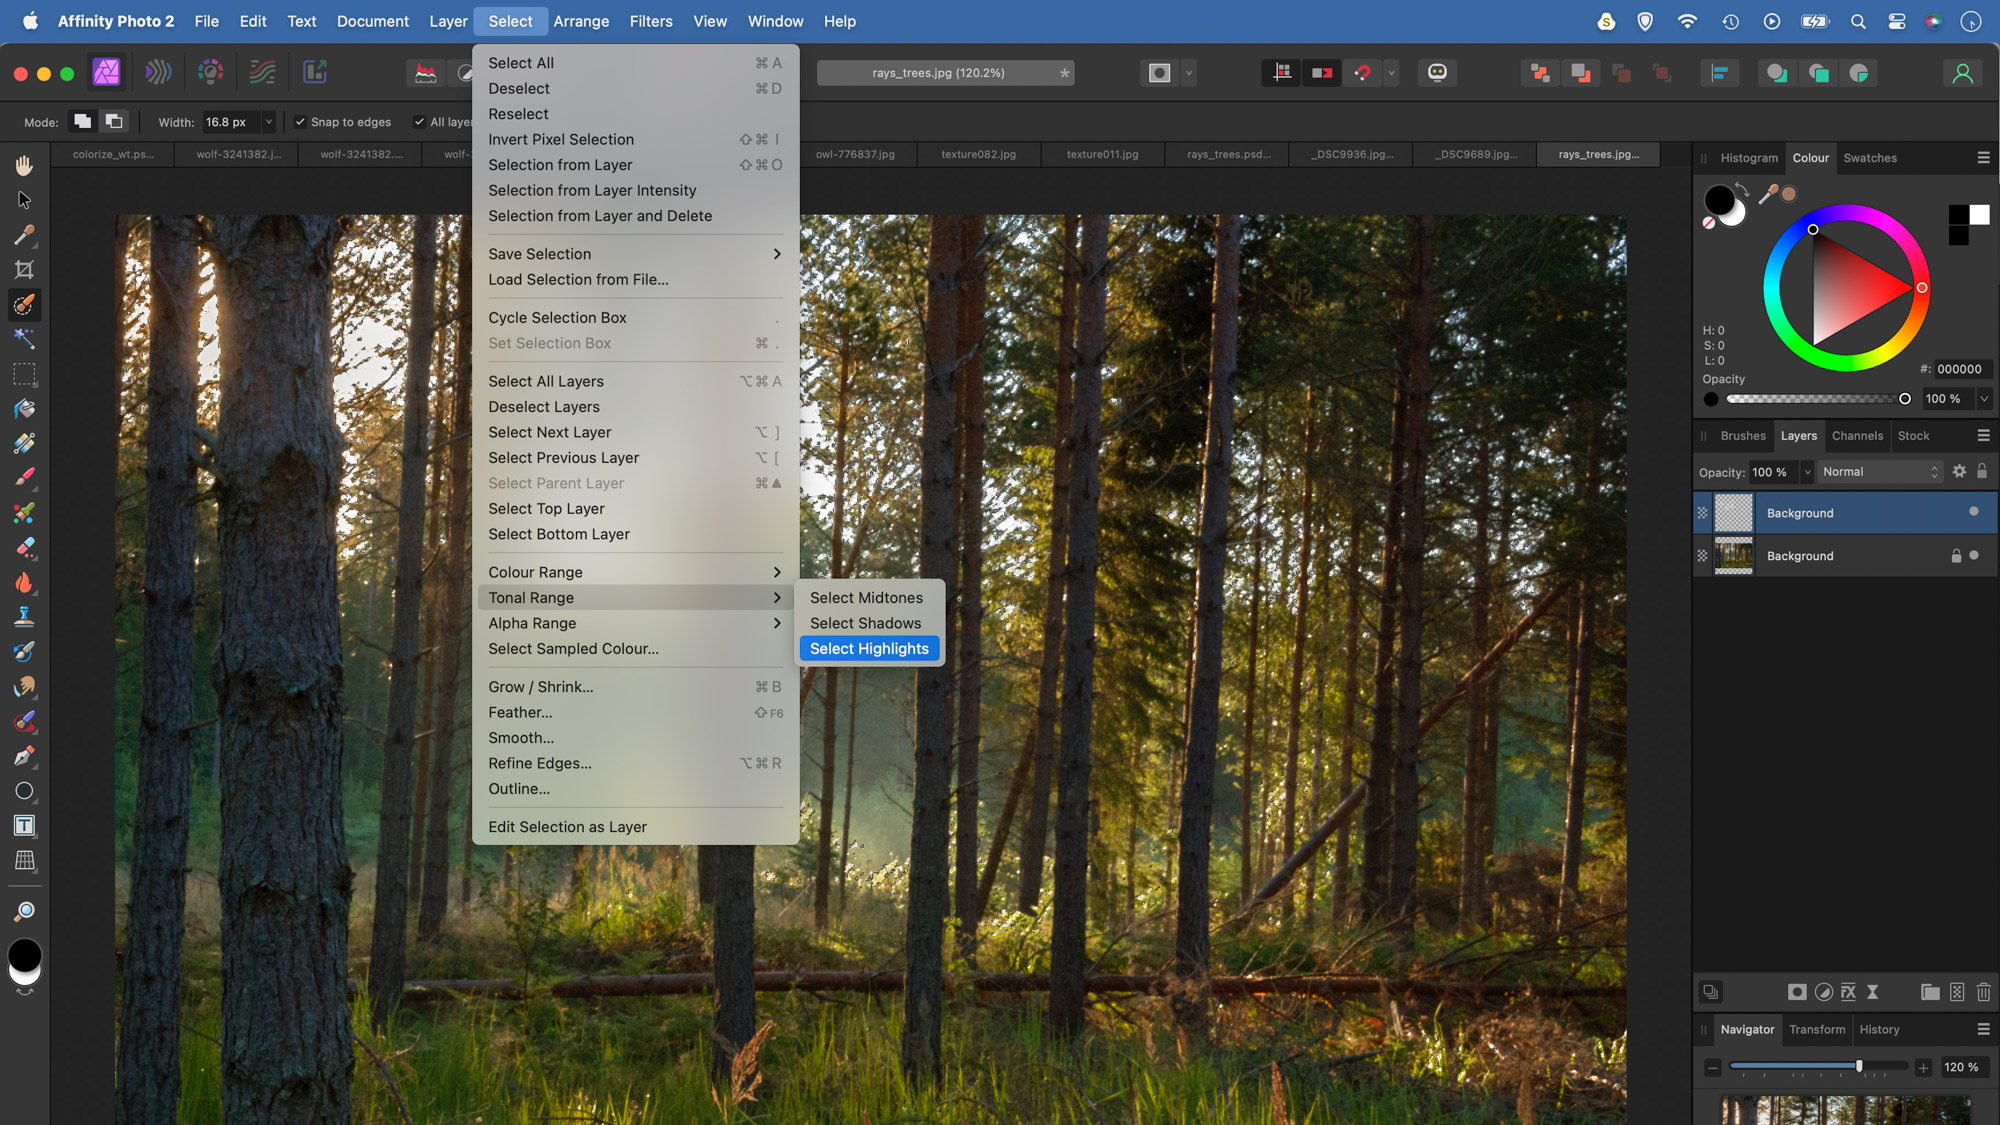
Open the start image or a forest scene of your own into Affinity Photo (it works best with images that have the sun shining through the trees from behind). Go to Select>Tonal Range>Select Highlights. Once selected, press Cmd/Ctrl+J to copy the selected areas to a new layer. Hit Cmd/Ctrl+D to deselect.
2. Use Zoom Blur
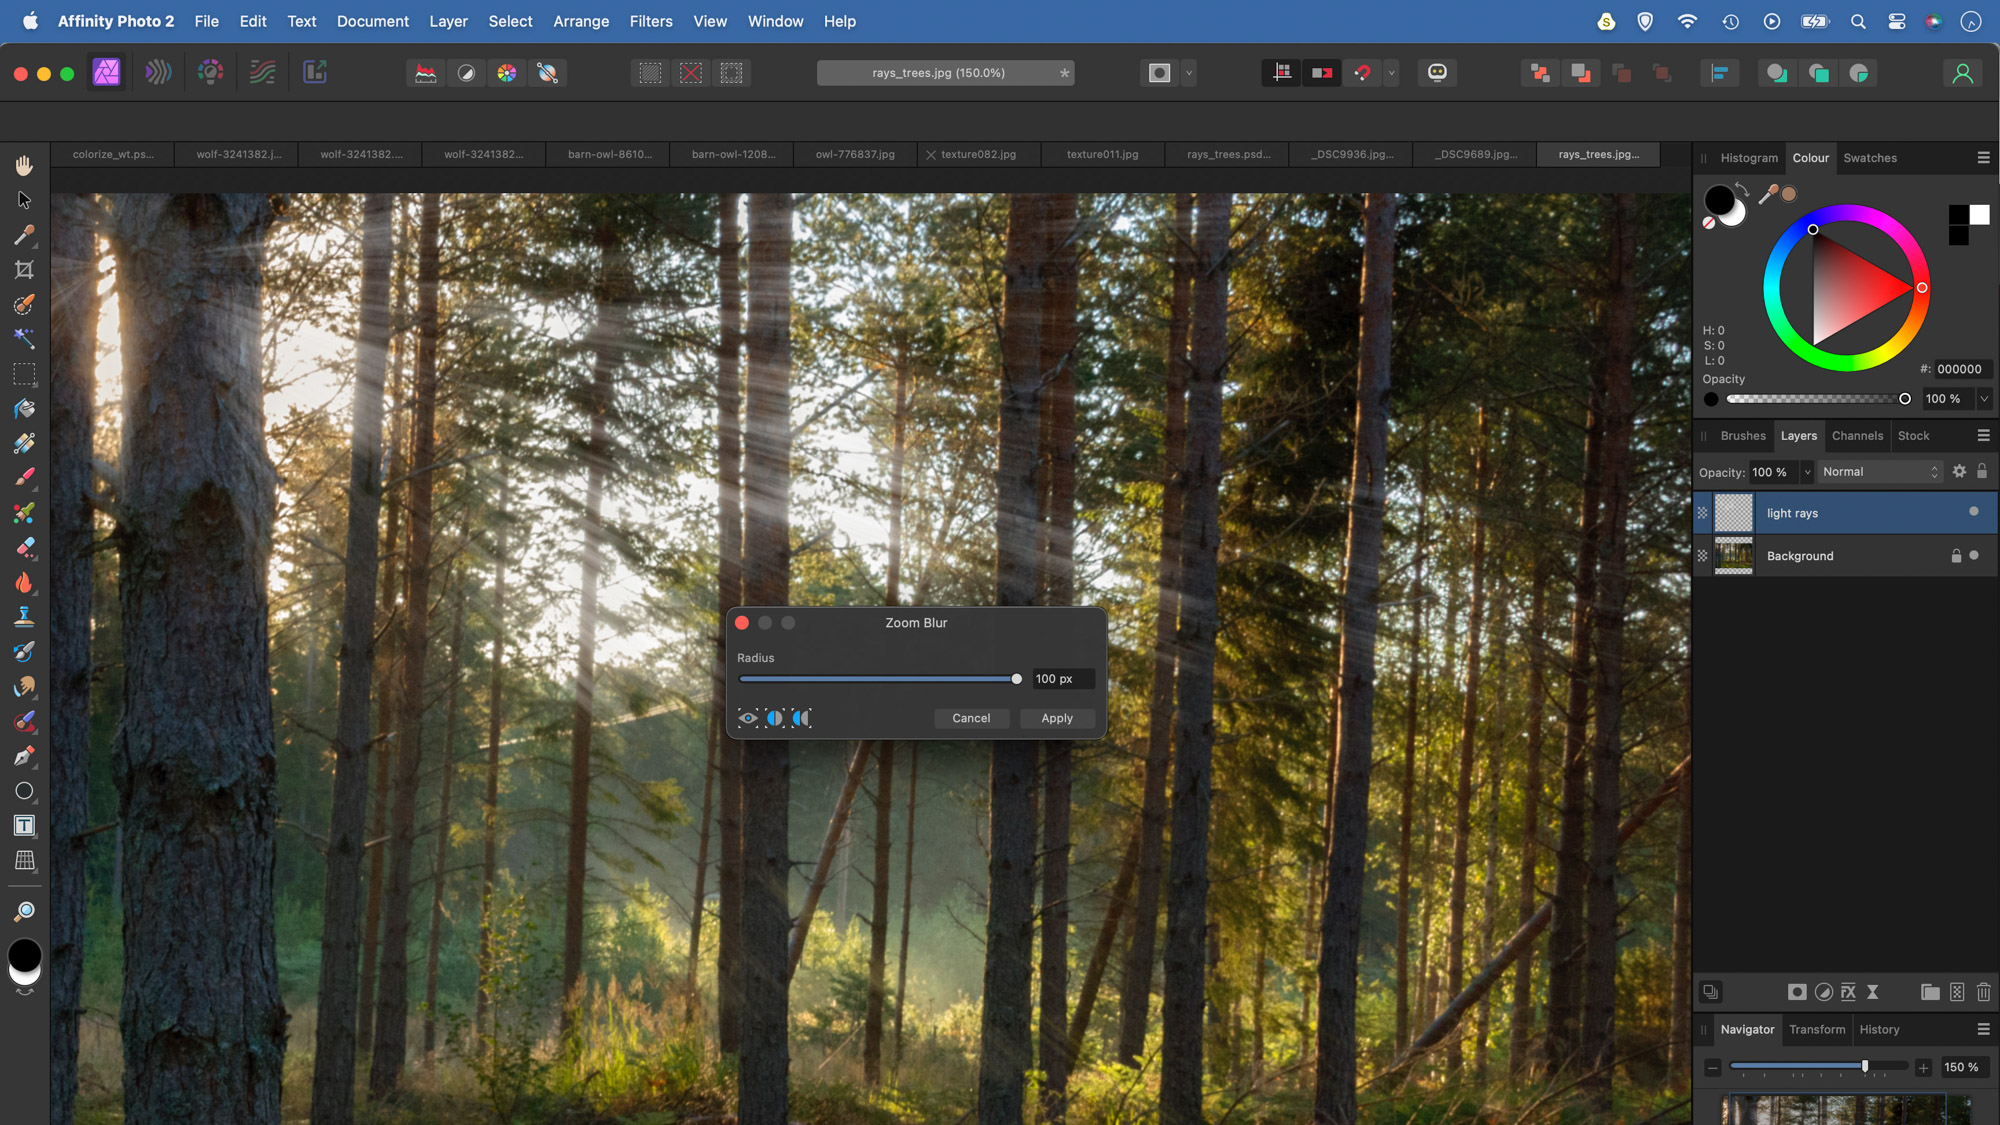
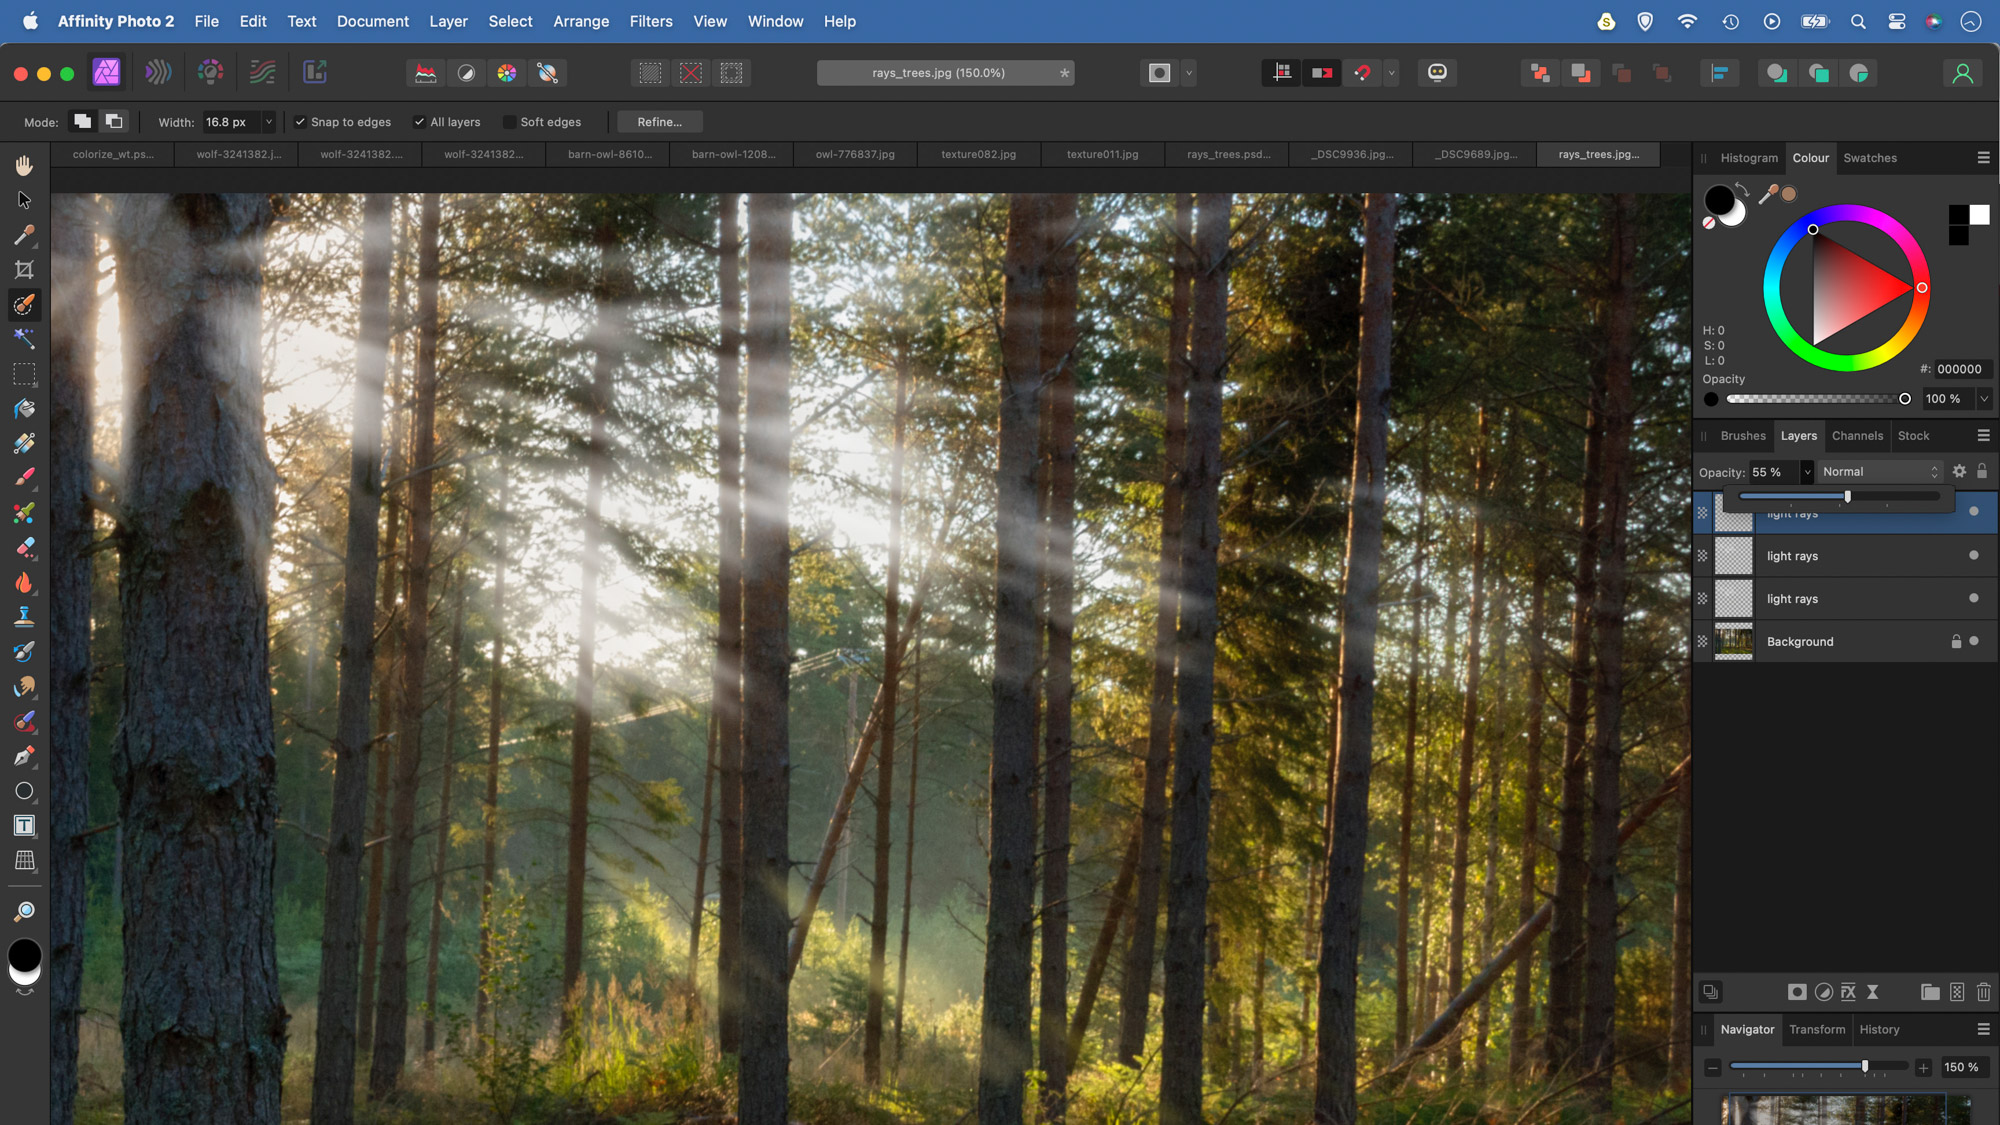
Name the newly created layer ‘light rays’. Go to Filter> Blur>Zoom Blur. Increase the blur strength slider to 100. Initially the zoom blur effect works outwards from the image’s centre, but you can click anywhere to change the centre point. Here we clicked in the top left corner to mimic the direction of the sunlight.
The best camera deals, reviews, product advice, and unmissable photography news, direct to your inbox!
3. Use Gaussian Blur
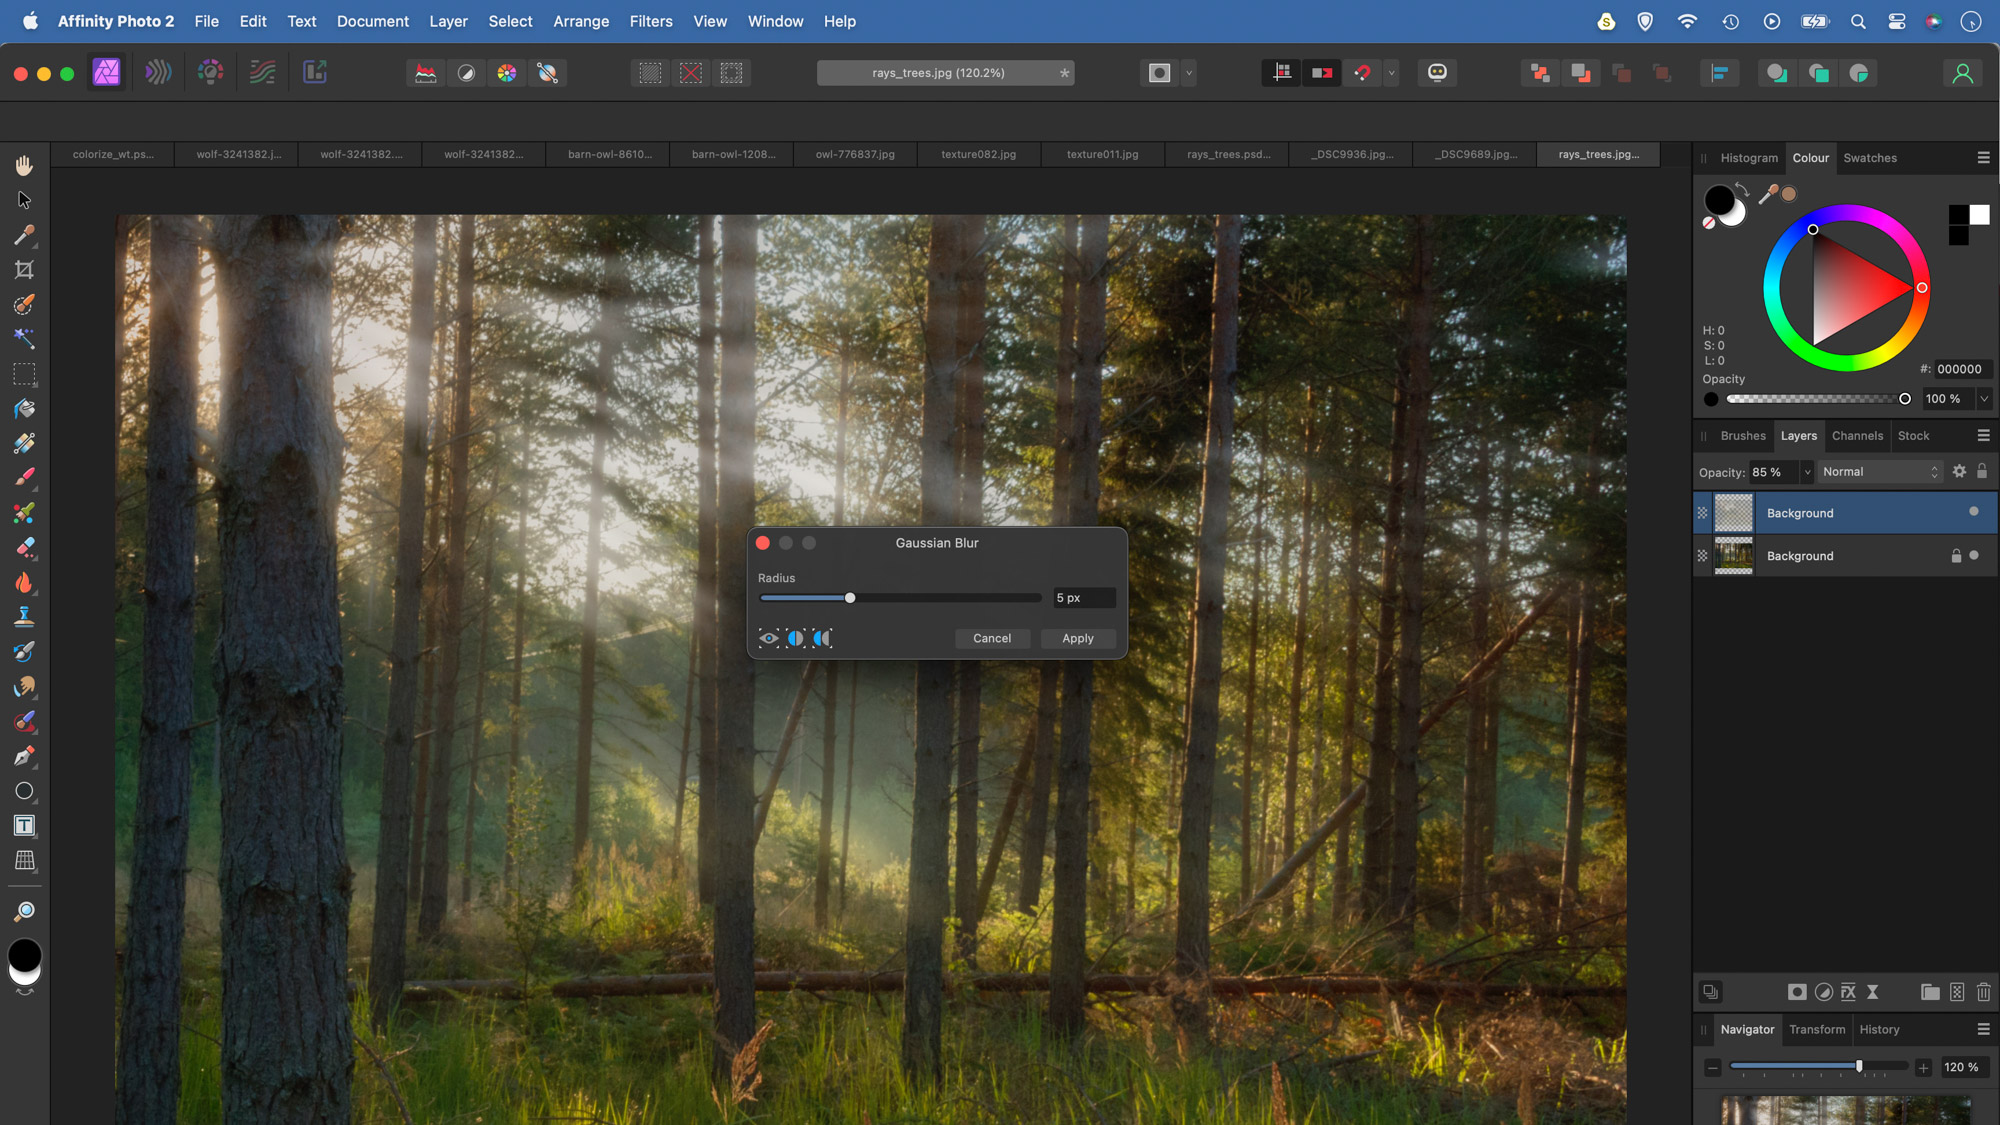
After using the Zoom Blur filter, you may want to run it again (click to set the same centre spot) for a stronger result. Once done, the rays can look a bit hard-edged and unnatural, so we need to soften them with another blur filter. This time go to Filter>Blur> Gaussian Blur. Add about a 3-5 pixel blur to the layer.
4. Stronger or weaker
If the rays look weak, duplicate the layer with Cmd/Ctrl+J to double the strength of the effect. If this looks too strong, you can also reduce the layer opacity to fine-tune things until it has just the right amount of light. Once done, hit Cmd/Ctrl+E to merge the layer down into a single rays layer.
5. Mask the trunks
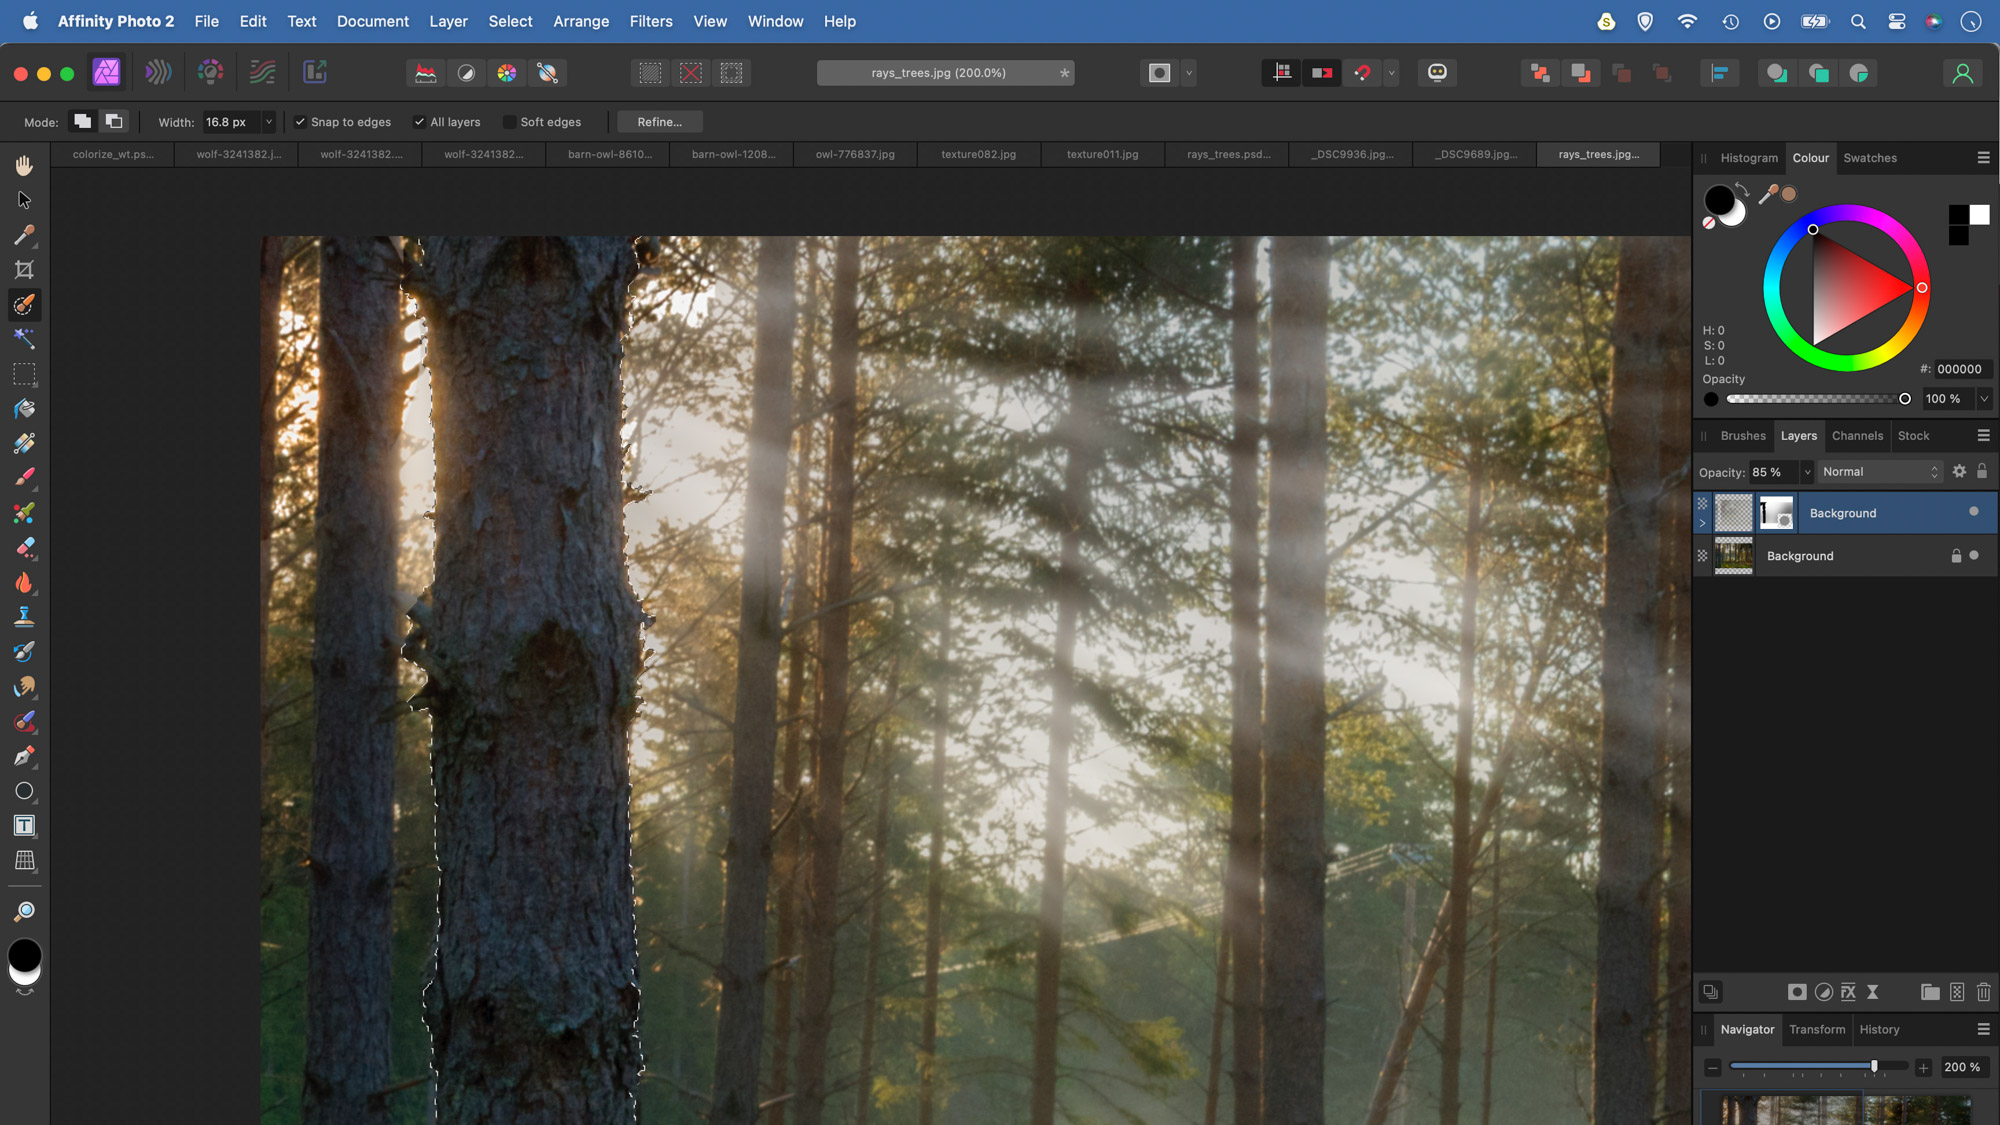
Click the mask icon in the Layers Panel to add a mask to the light rays layer. Grab to Selection Brush tool, check ‘Snap to Edges’ then paint over the tree trunk in the foreground to select it. Switch to the Brush tool and paint black over the selected area to hide the rays in the foreground tree.
6. Fade with Curves
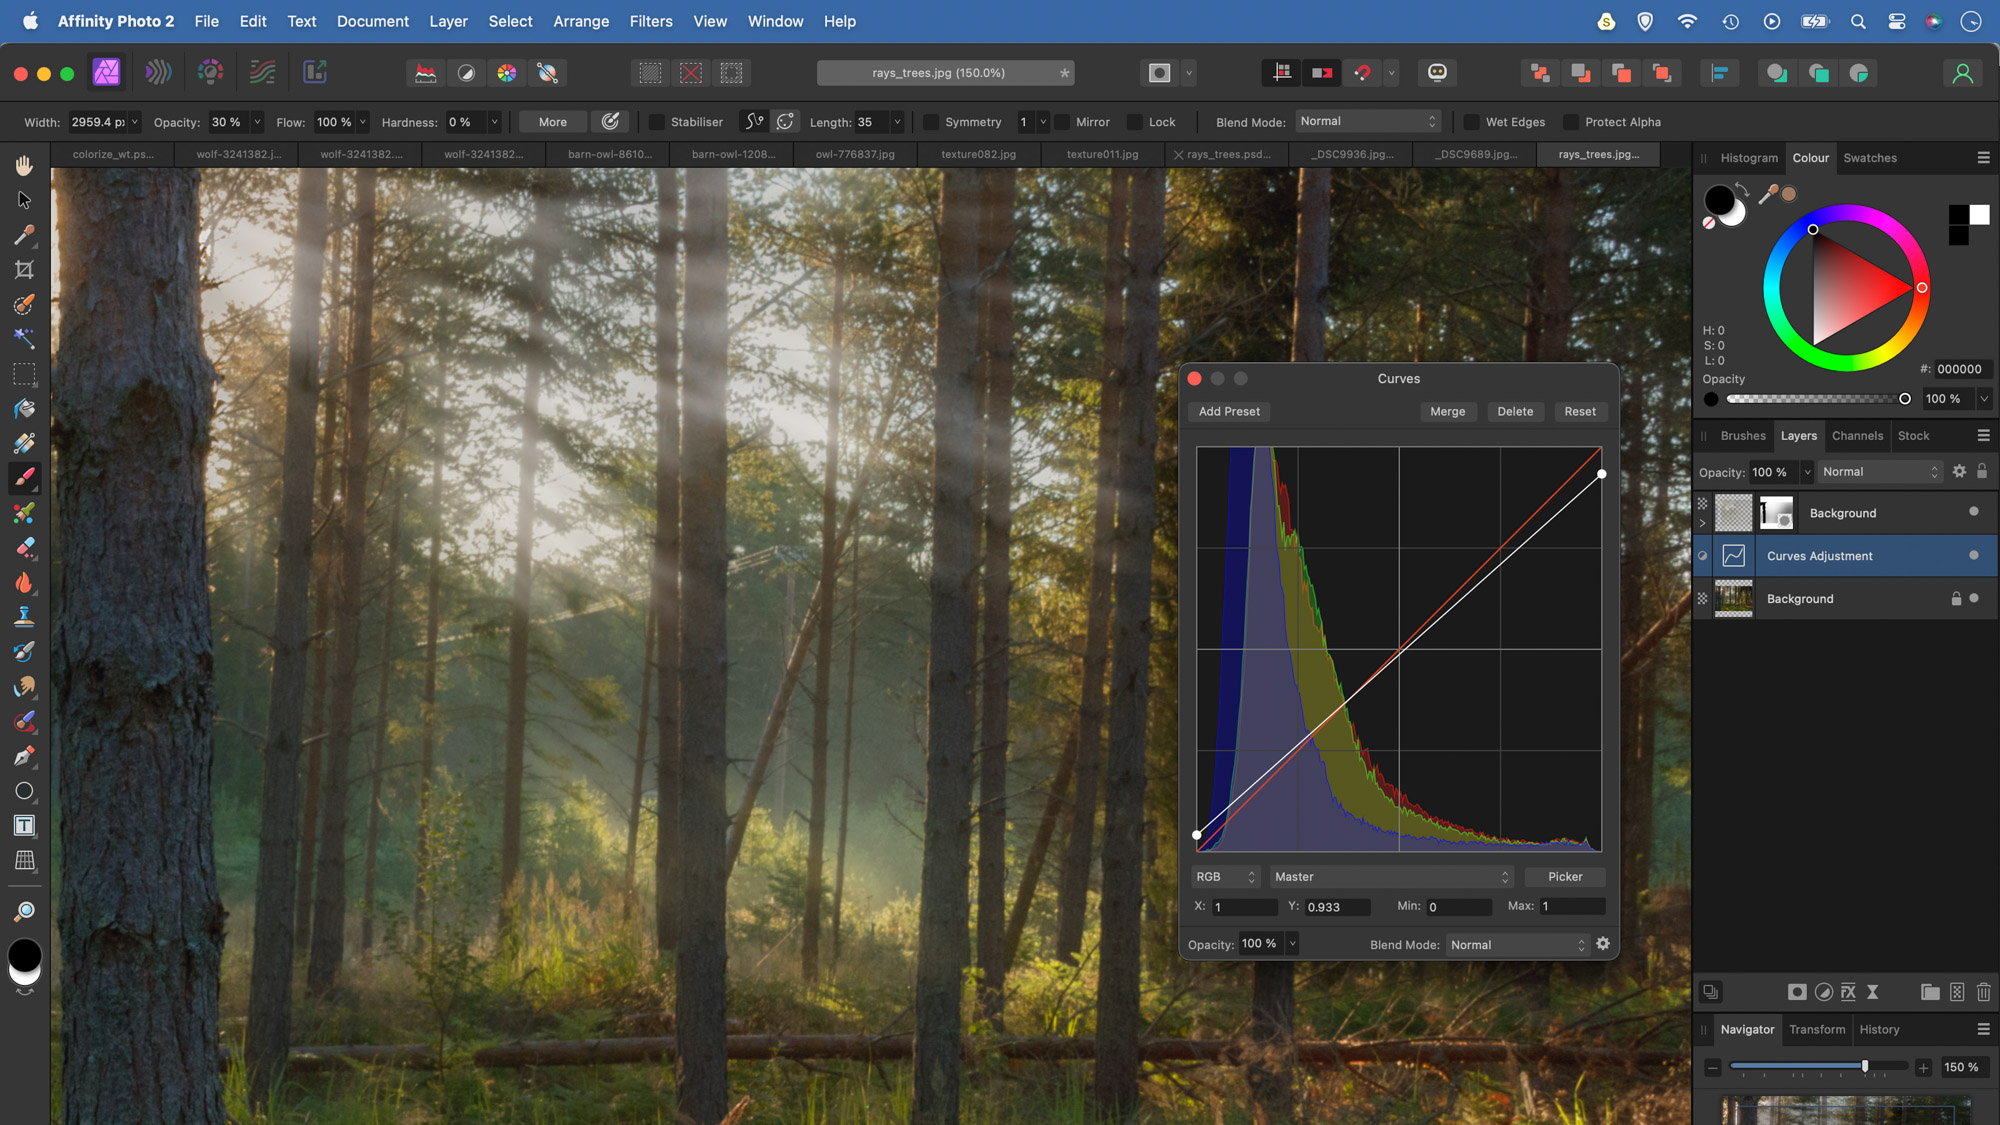
Highlight the bottom layer then click the Adjustment icon in the Layers Panel and choose Curves. Drag the bottom left point of the diagonal curve line up slightly as shown, to fade out the shadows. Drag the top right point down to fade the highlights. This reduces contrast for a hazy atmosphere.
• See more of our Affinity Photo tutorials
If you enjoyed this tutorial but want a bit more power from your laptop, why not look at the best photo-editing laptops? If you're really keen to improve your skills further then online photography courses could be the way to go.
PhotoPlus: The Canon Magazine is the world's only monthly newsstand title that's 100% devoted to Canon, so you can be sure the magazine is completely relevant to your system.
The lead technique writer on Digital Camera Magazine, PhotoPlus: The Canon Magazine and N-Photo: The Nikon Magazine, James is a fantastic general practice photographer with an enviable array of skills across every genre of photography.
Whether it's flash photography techniques like stroboscopic portraits, astrophotography projects like photographing the Northern Lights, or turning sound into art by making paint dance on a set of speakers, James' tutorials and projects are as creative as they are enjoyable.
He's also a wizard at the dark arts of Photoshop, Lightroom and Affinity Photo, and is capable of some genuine black magic in the digital darkroom, making him one of the leading authorities on photo editing software and techniques.
You must confirm your public display name before commenting
Please logout and then login again, you will then be prompted to enter your display name.
