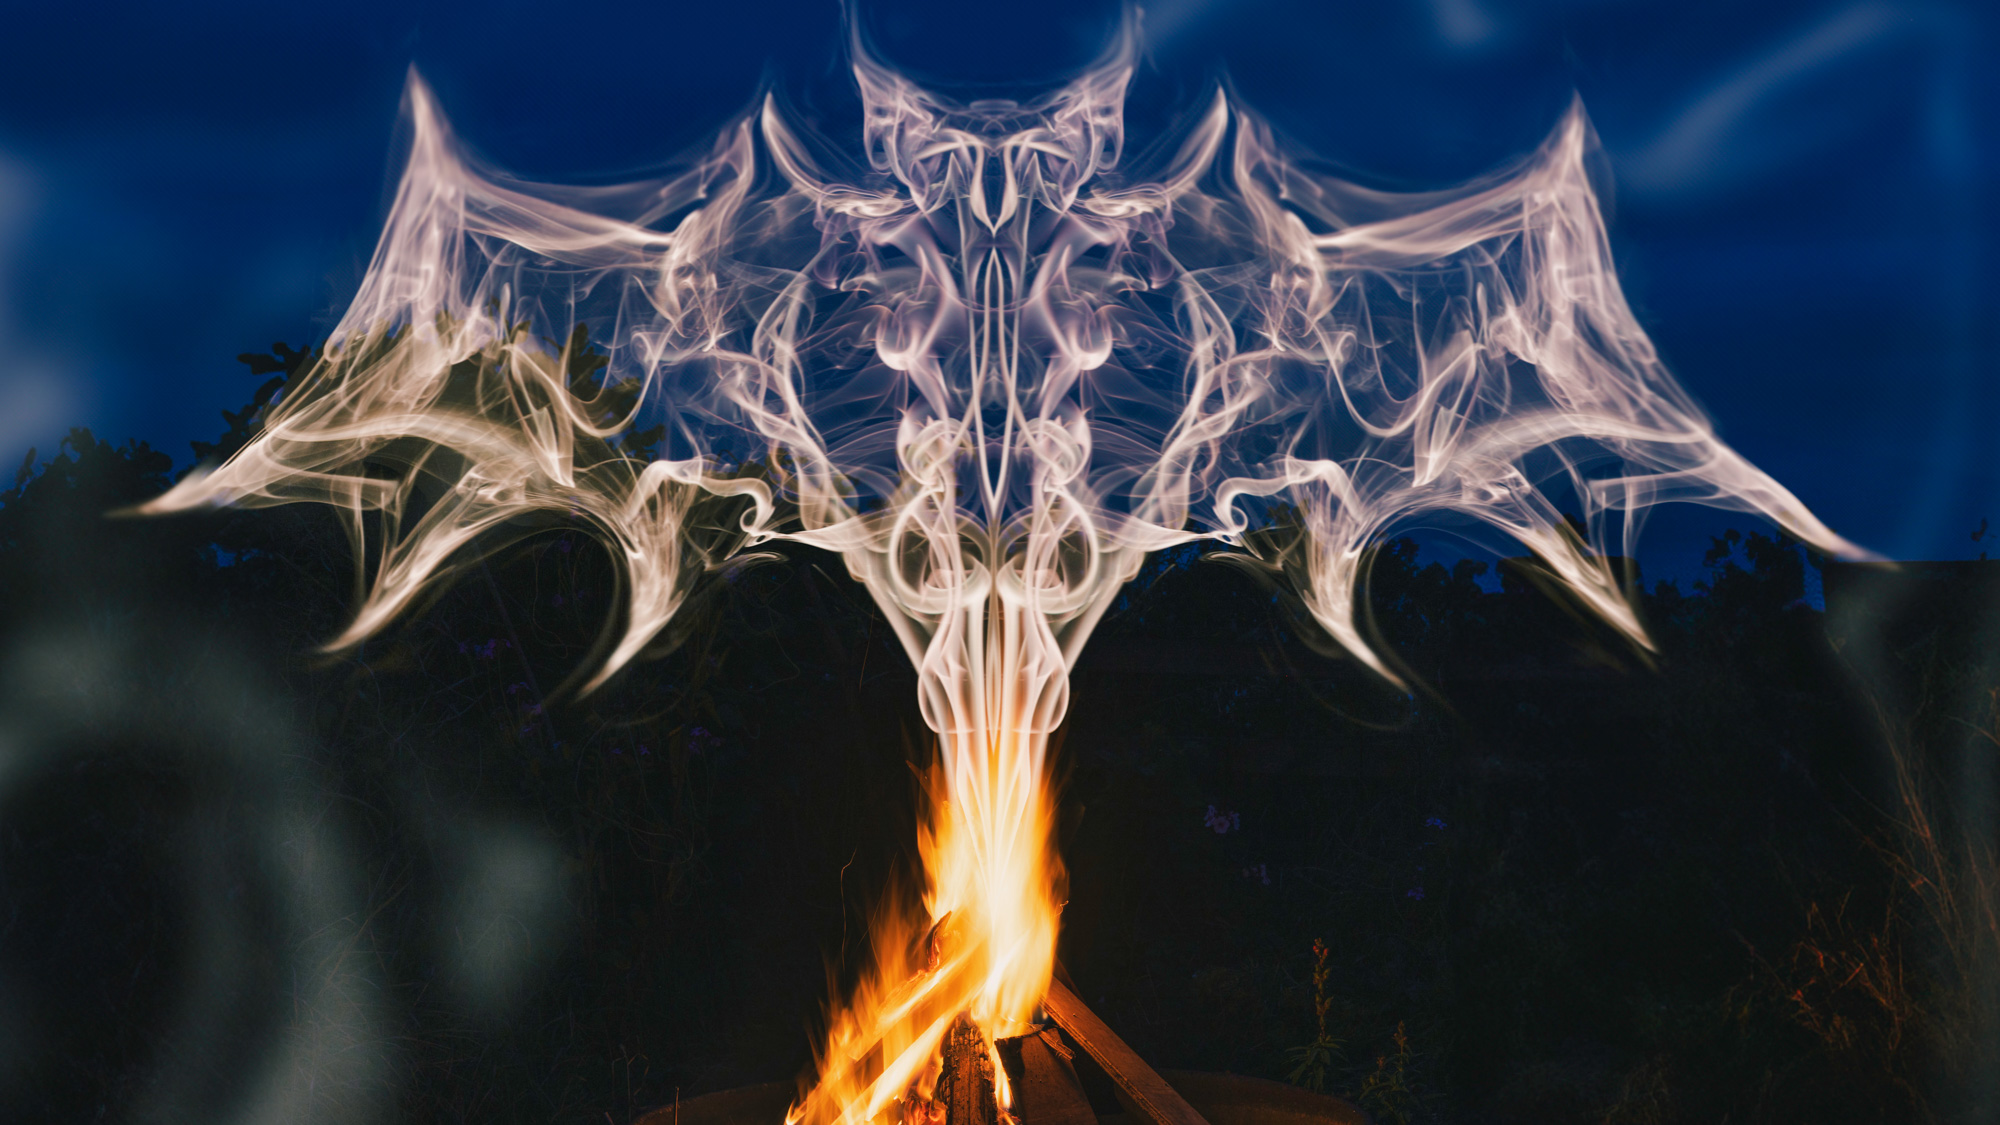
Affinity Photo expert James Paterson shows you how to make your images go up in smoke
Make a smoky shape in Affinity Photo and get to grips with the amazing Liquify Persona under the guidance of James Paterson
The best camera deals, reviews, product advice, and unmissable photography news, direct to your inbox!
You are now subscribed
Your newsletter sign-up was successful
Watch video (above): Up in smoke
There are several tools for pushing and pulling pixels around in Affinity Photo, but none can rival the Liquify Persona. This dedicated workspace offers a range of features that allow you to reshape objects and people. As such it has all sorts of uses. Here it lets us craft a smoky shape from a series of simple photos of smoke.
An effect like this might look complicated but it’s really very easy to carry out and encompasses many key features in Affinity Photo. We begin by making a new black background and bringing in a shape to use for our smoky structure. We’ve used a bat shape here but you could experiment with all sorts of different things. Once done, we copy in pieces of smoke and blend them in. This is where Screen – one of the most useful layer blend modes – can help us by only allowing the lighter pixels to show through.
After blending smoke, we can head to the Liquify Persona to gently push and pull it around until it roughly conforms to the shape of the bat. It’s best to do this in stages, using different pieces of smoke for each part of the shape. We can speed it up by choosing a symmetrical shape. This way, we only have to fill half of it with smoke, then simply copy, flip and blend one half to make the other. Download the free bat_shape.jpg and bat_background.jpg start images and your free smoke textures to follow along here.
1. Prepare the shape
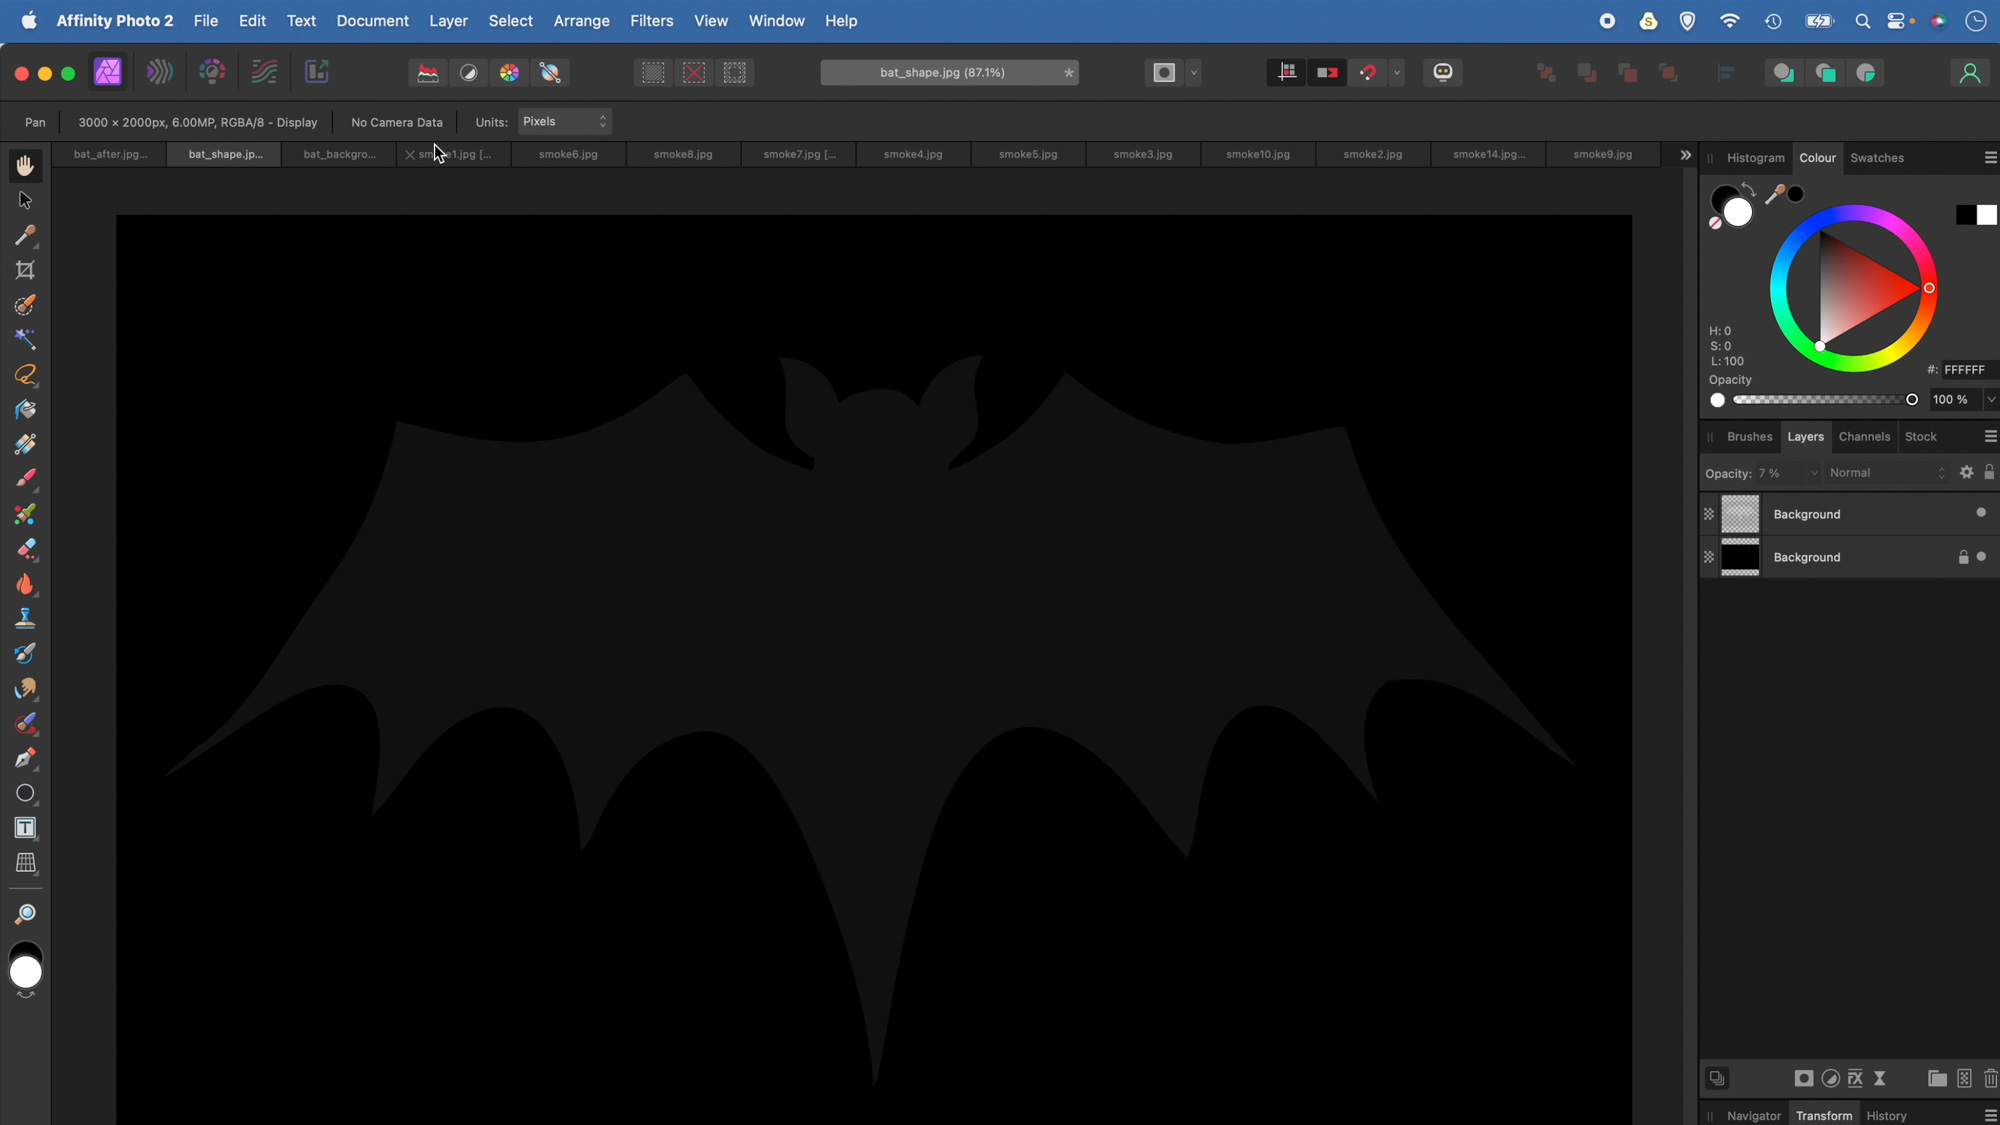
Open the bat shape image into Affinity Photo then duplicate the layer (Cmd/Ctrl+J). Highlight the background layer and go to Edit > Fill. Choose fill, set colour to black and hit Apply. Next highlight the shape layer above and lower the layer opacity to about 7% so you can only just see the shape.
2. Blend the smoke
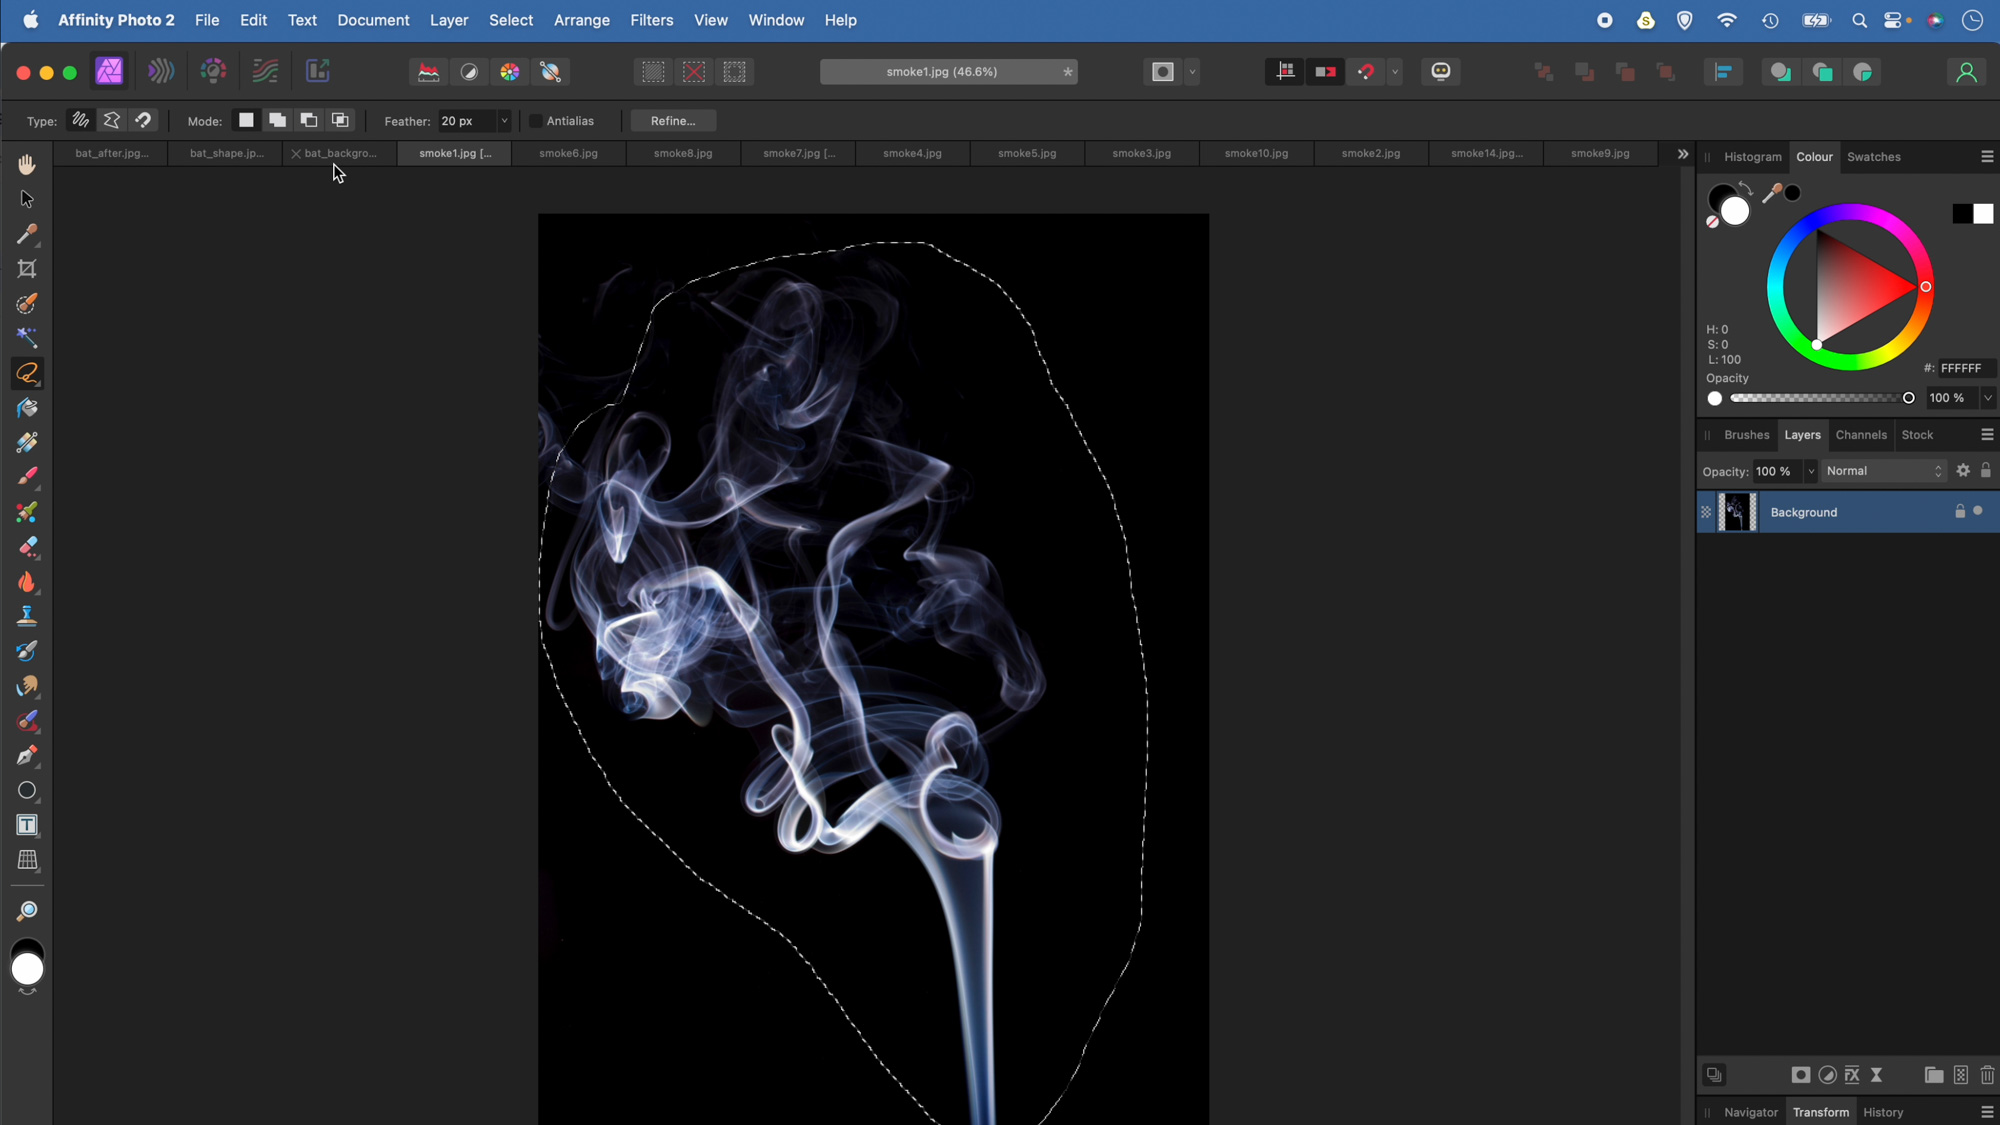
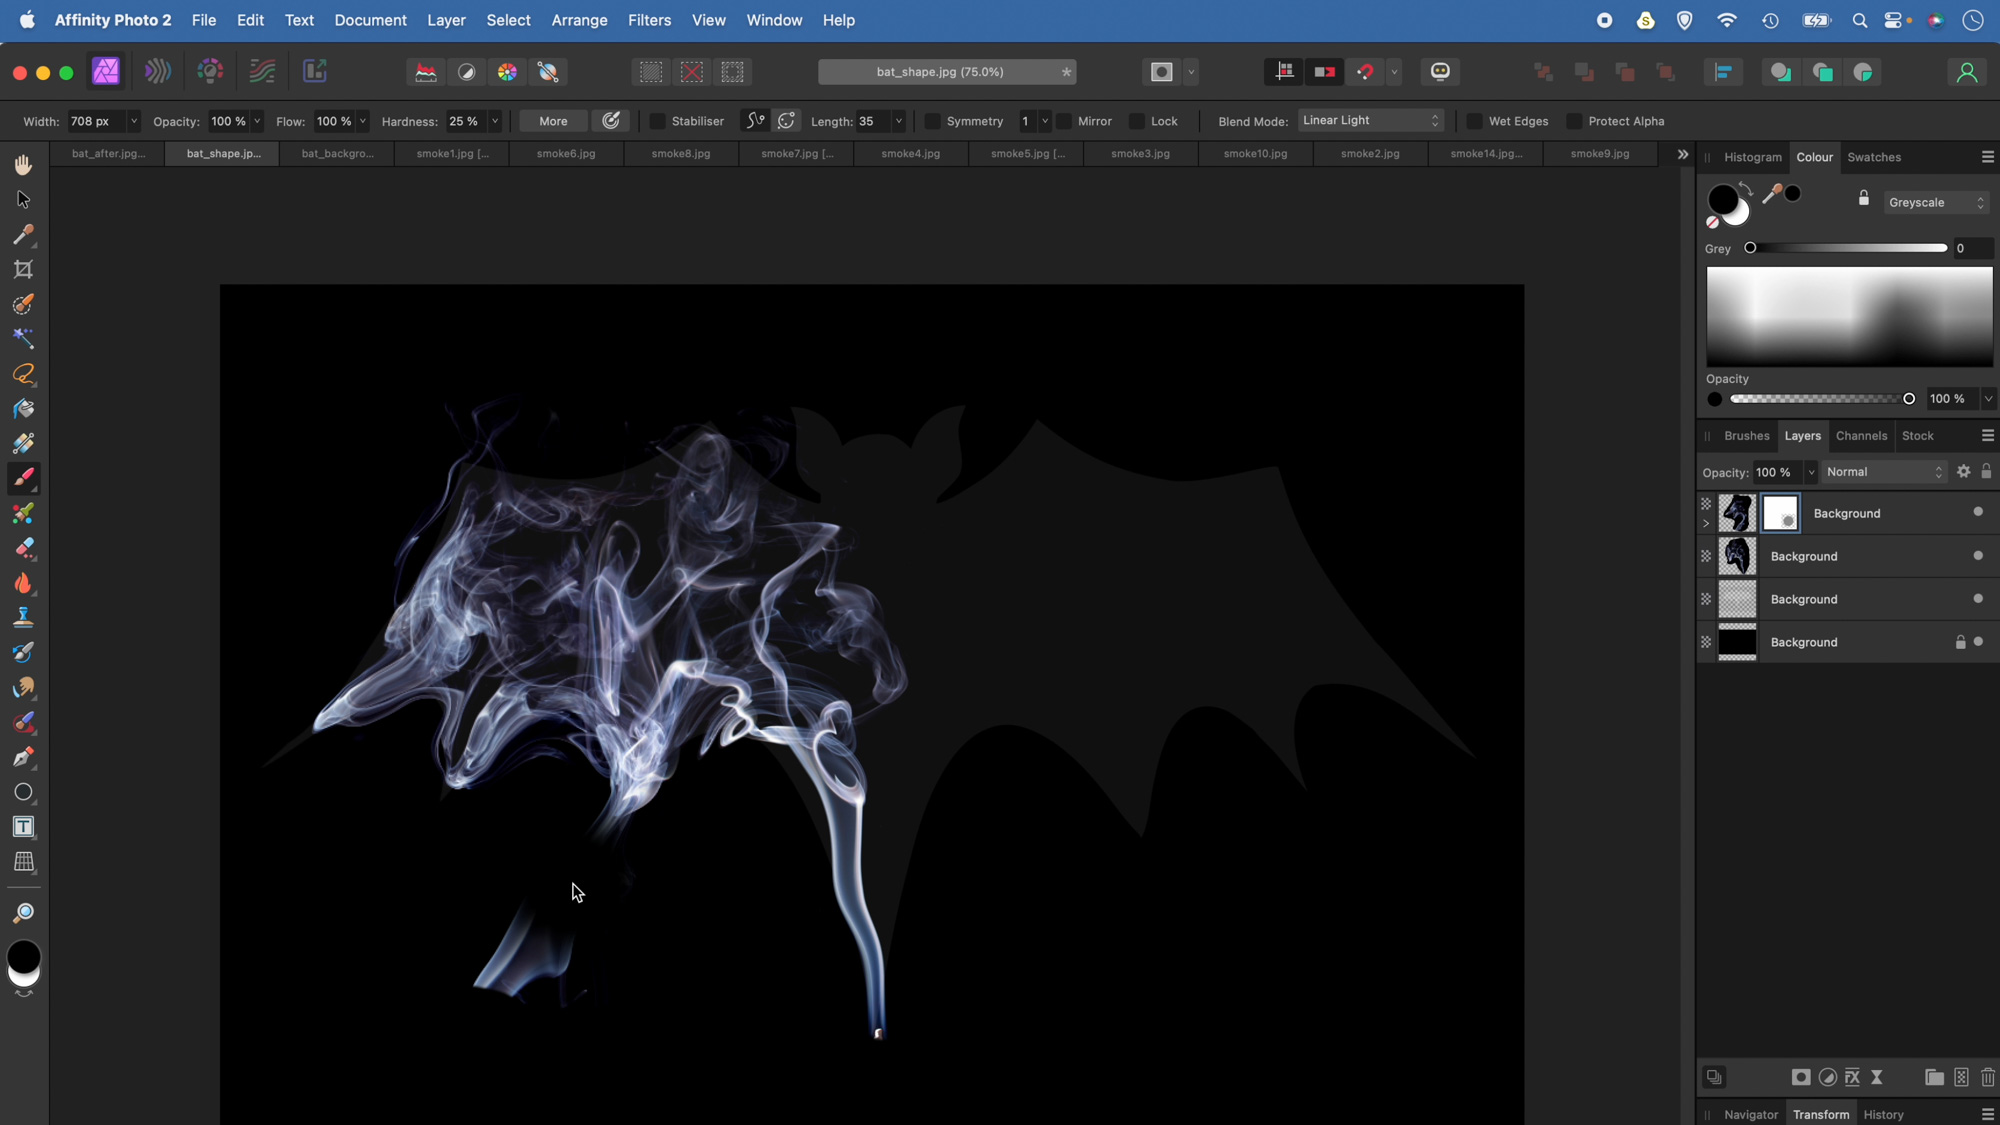
Open the smoke images. Grab the Lasso tool and make a selection around part of the smoke. Hit Cmd/Ctrl+C to copy, then go to the shape image and hit Cmd/Ctrl+V to paste. Go to the Layers Panel and set the blend mode to Screen. Grab the Move tool and drag the bounding box to position and resize the layer.
3. Liquify the smoke layer
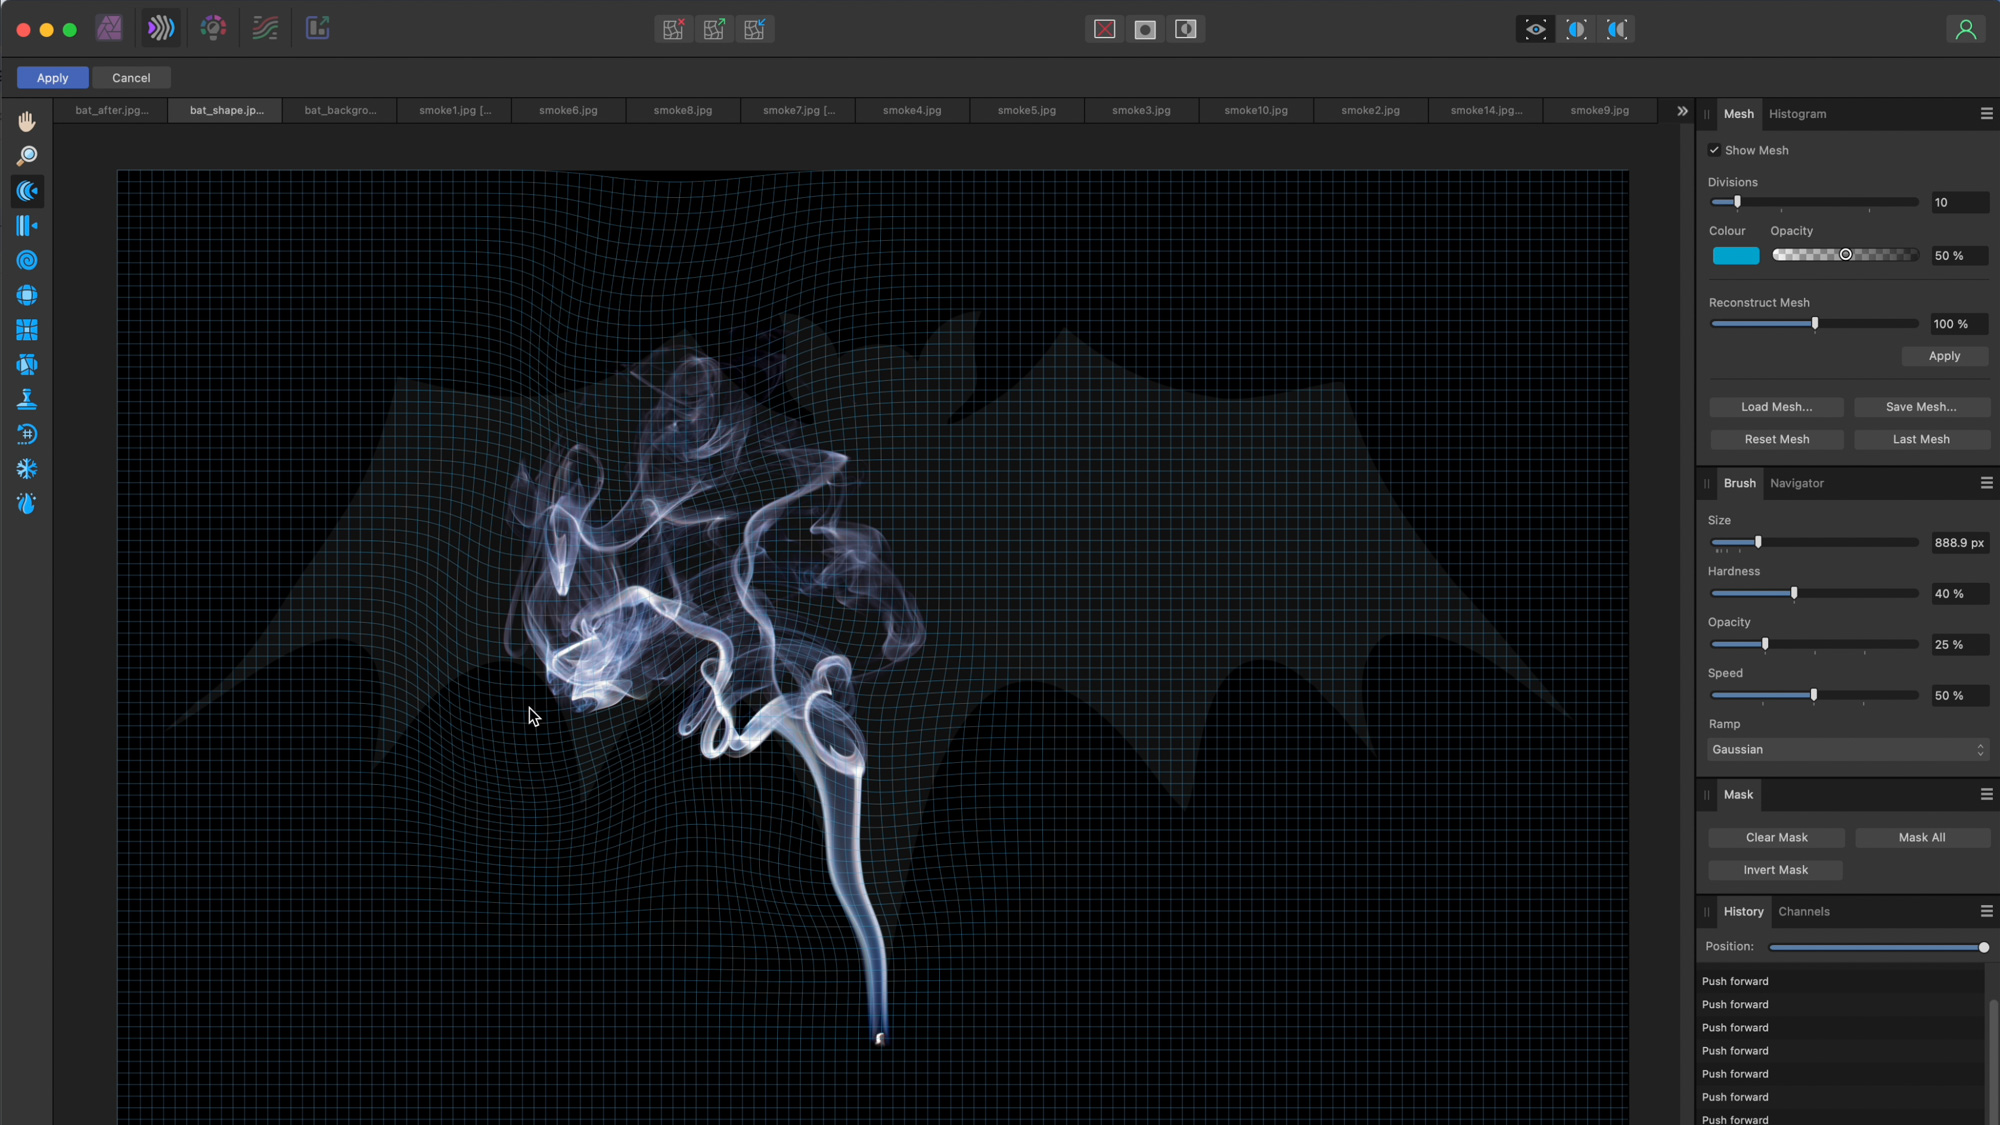
Click on the Liquify Persona icon at top left. Grab the Liquify Push Forward tool and use it to reshape the smoke to fit the outline of the bat shape. Use the ] and [ keys to resize the brush tip as you go. Once you’re happy, hit Apply at top left. Next copy in more smoke.
The best camera deals, reviews, product advice, and unmissable photography news, direct to your inbox!
4. Build up the smoke effect
Continue blending and liquifying pieces of the smoke until half of the bat shape is filled in. You might want to hide parts of the smoke. If so, add a layer mask, grab the Brush tool and paint with black to hide parts of the layer, or white to reveal them again.
5. Mirror the smoke
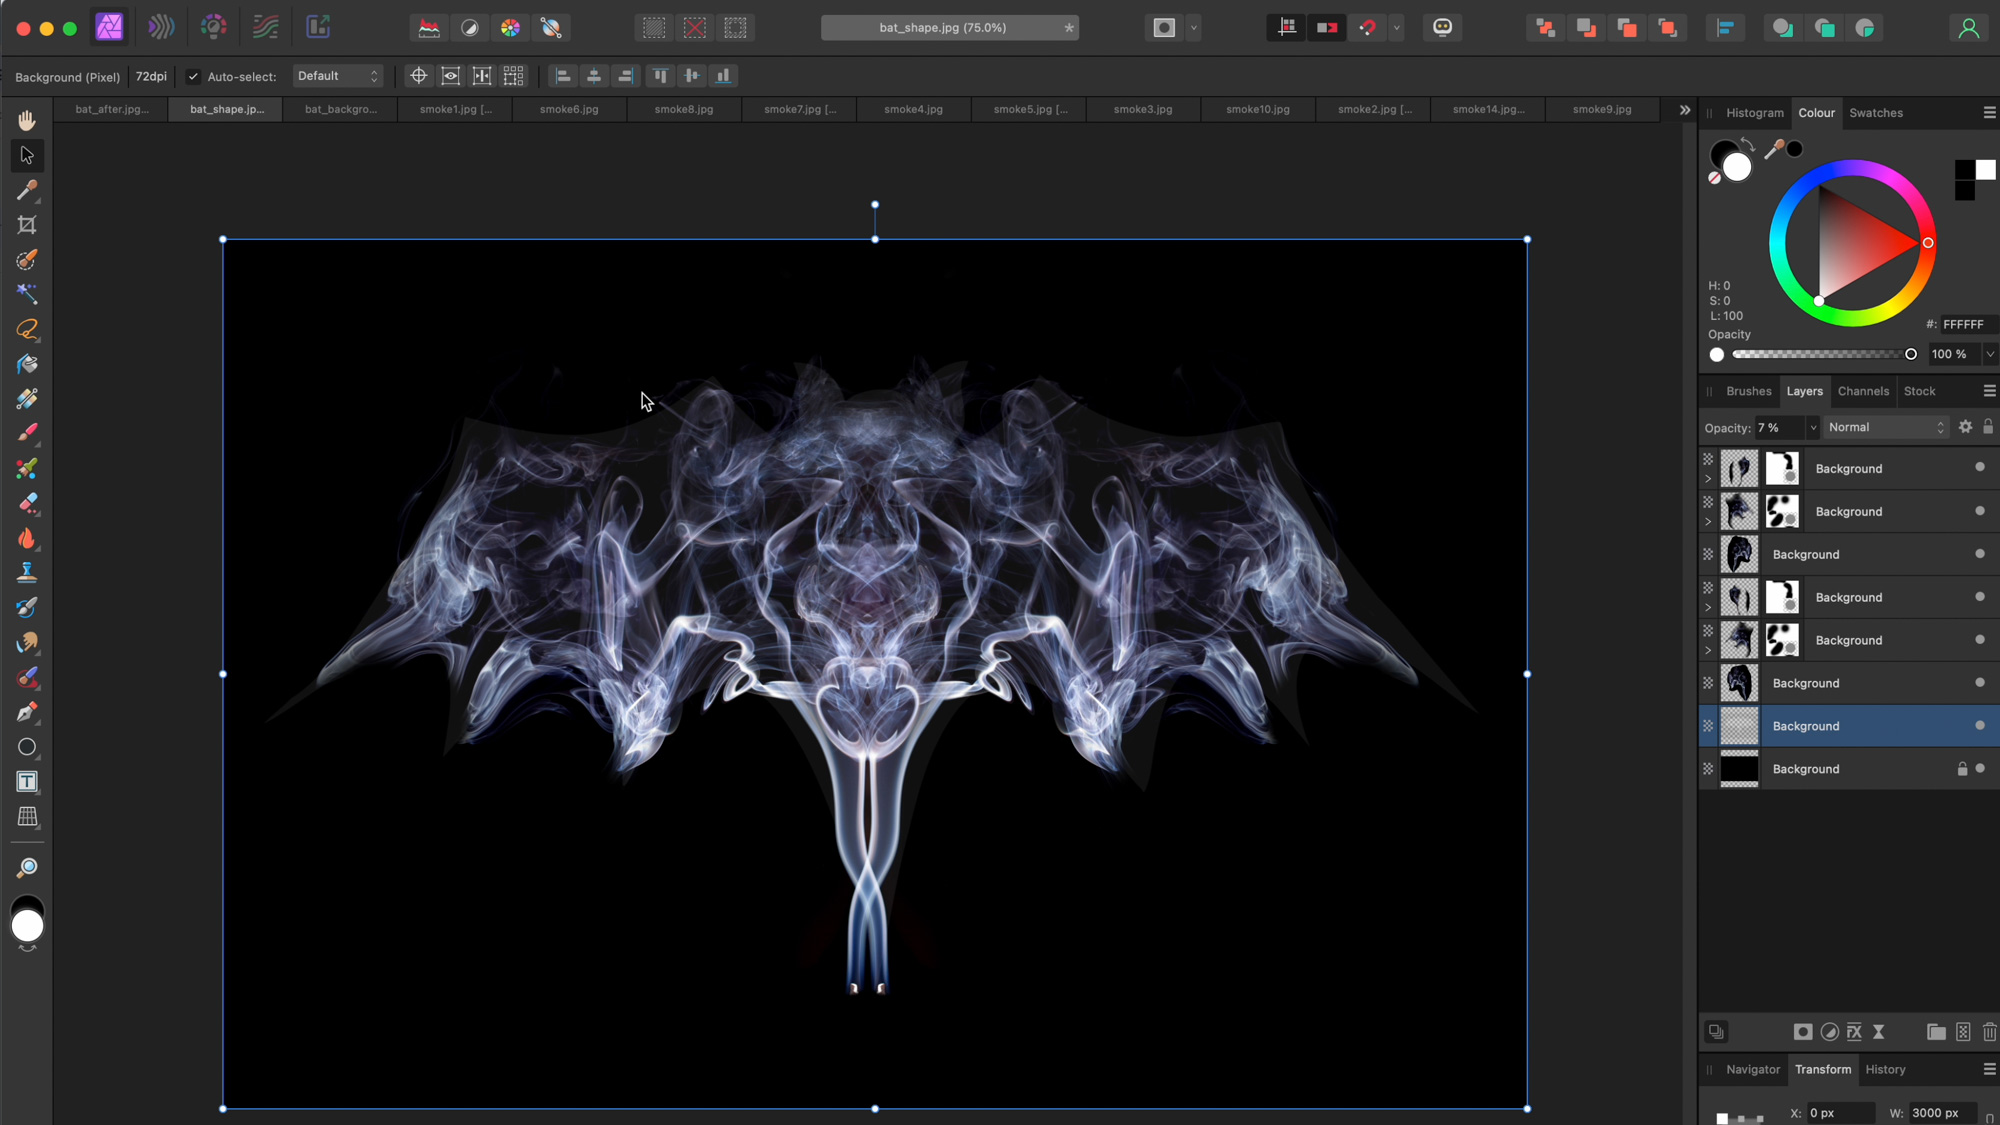
Once half of the bat is done, highlight the bottom smoke layer, hold Shift and click on the top smoke layer to select them all. Hit Cmd/Ctrl+J to copy all the layers. Grab the Move tool, right-click on the image and choose Transform > Flip Horizontal. Hold Shift and drag the layers to the side to make a mirror image.
6. Add a backdrop
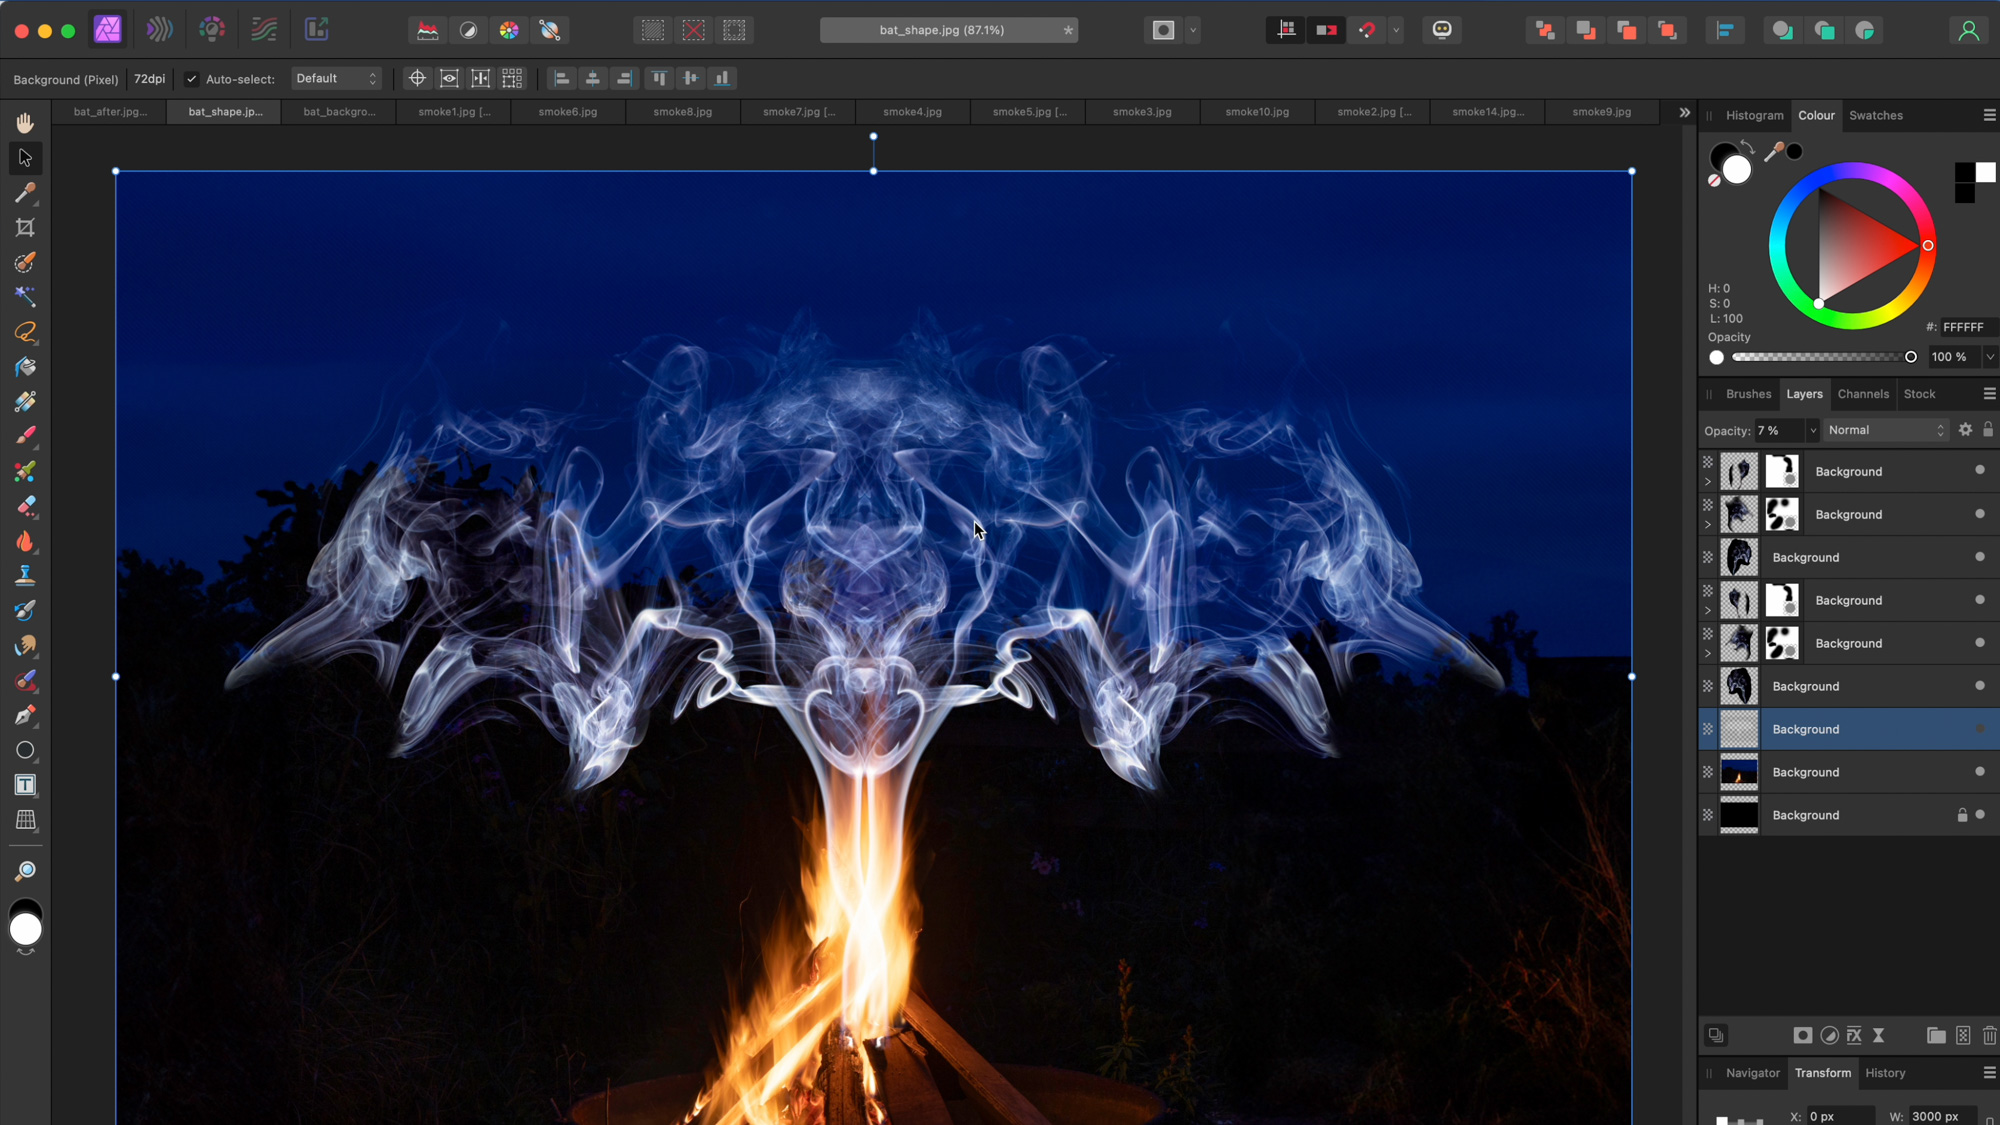
Go to the bat_background.jpg start image (or use one of your own night-time images. Copy and paste it in, then drag the layer just above the bottom layer. Use the Move tool to resize it to fit. Finally, hide the smoke shape layer and make any colour adjustments you like to finish things off.
• See more of our Affinity Photo tutorials
If you enjoyed this tutorial but want a bit more power from your laptop, why not look at the best photo-editing laptops? If you're really keen to improve your skills further then online photography courses could be the way to go.
The lead technique writer on Digital Camera Magazine, PhotoPlus: The Canon Magazine and N-Photo: The Nikon Magazine, James is a fantastic general practice photographer with an enviable array of skills across every genre of photography.
Whether it's flash photography techniques like stroboscopic portraits, astrophotography projects like photographing the Northern Lights, or turning sound into art by making paint dance on a set of speakers, James' tutorials and projects are as creative as they are enjoyable.
He's also a wizard at the dark arts of Photoshop, Lightroom and Affinity Photo, and is capable of some genuine black magic in the digital darkroom, making him one of the leading authorities on photo editing software and techniques.
You must confirm your public display name before commenting
Please logout and then login again, you will then be prompted to enter your display name.
