Get creative with composites in Affinity Photo
Learn how to use key montaging skills and craft incredible composite images with ease
Start here
• Affinity Photo tutorials
The tutorials
1. Affinity Photo vs Photoshop
2. RAW editing with Affinity Photo
3. Focus merge with Affinity Photo
4. Replace a sky in Affinity Photo
5. Moody mono in Affinity Photo
6. Six Affinity Photo landscape tips
7. Color correction in Affinity Photo
8. Live Filters in Affinity Photo
9. Create a classic wet plate look
10. Remove objects in Affinity Photo
11. Paint an abstract portrait
12. Enhance skintones in Affinity Photo
13. Create HDR in Affinity Photo
14. Replace a sky in Affinity Photo
15. Affinity Photo double exposures
16. Affinity Photo Denoise tool
17. Affinity Photo retouching
18. Restore old family portraits
19. Change clothes in Affinity Photo
20. Create super-charged sunsets
21. Fix faces with a flourish
22. Get creative with composites
23. Liquify faces with Affinity Photo
24. Make a tropical composite
25. Let it snow in Affinity Photo
26. Create an immaculate conception
Watch video: Get creative with composites in Affinity Photo
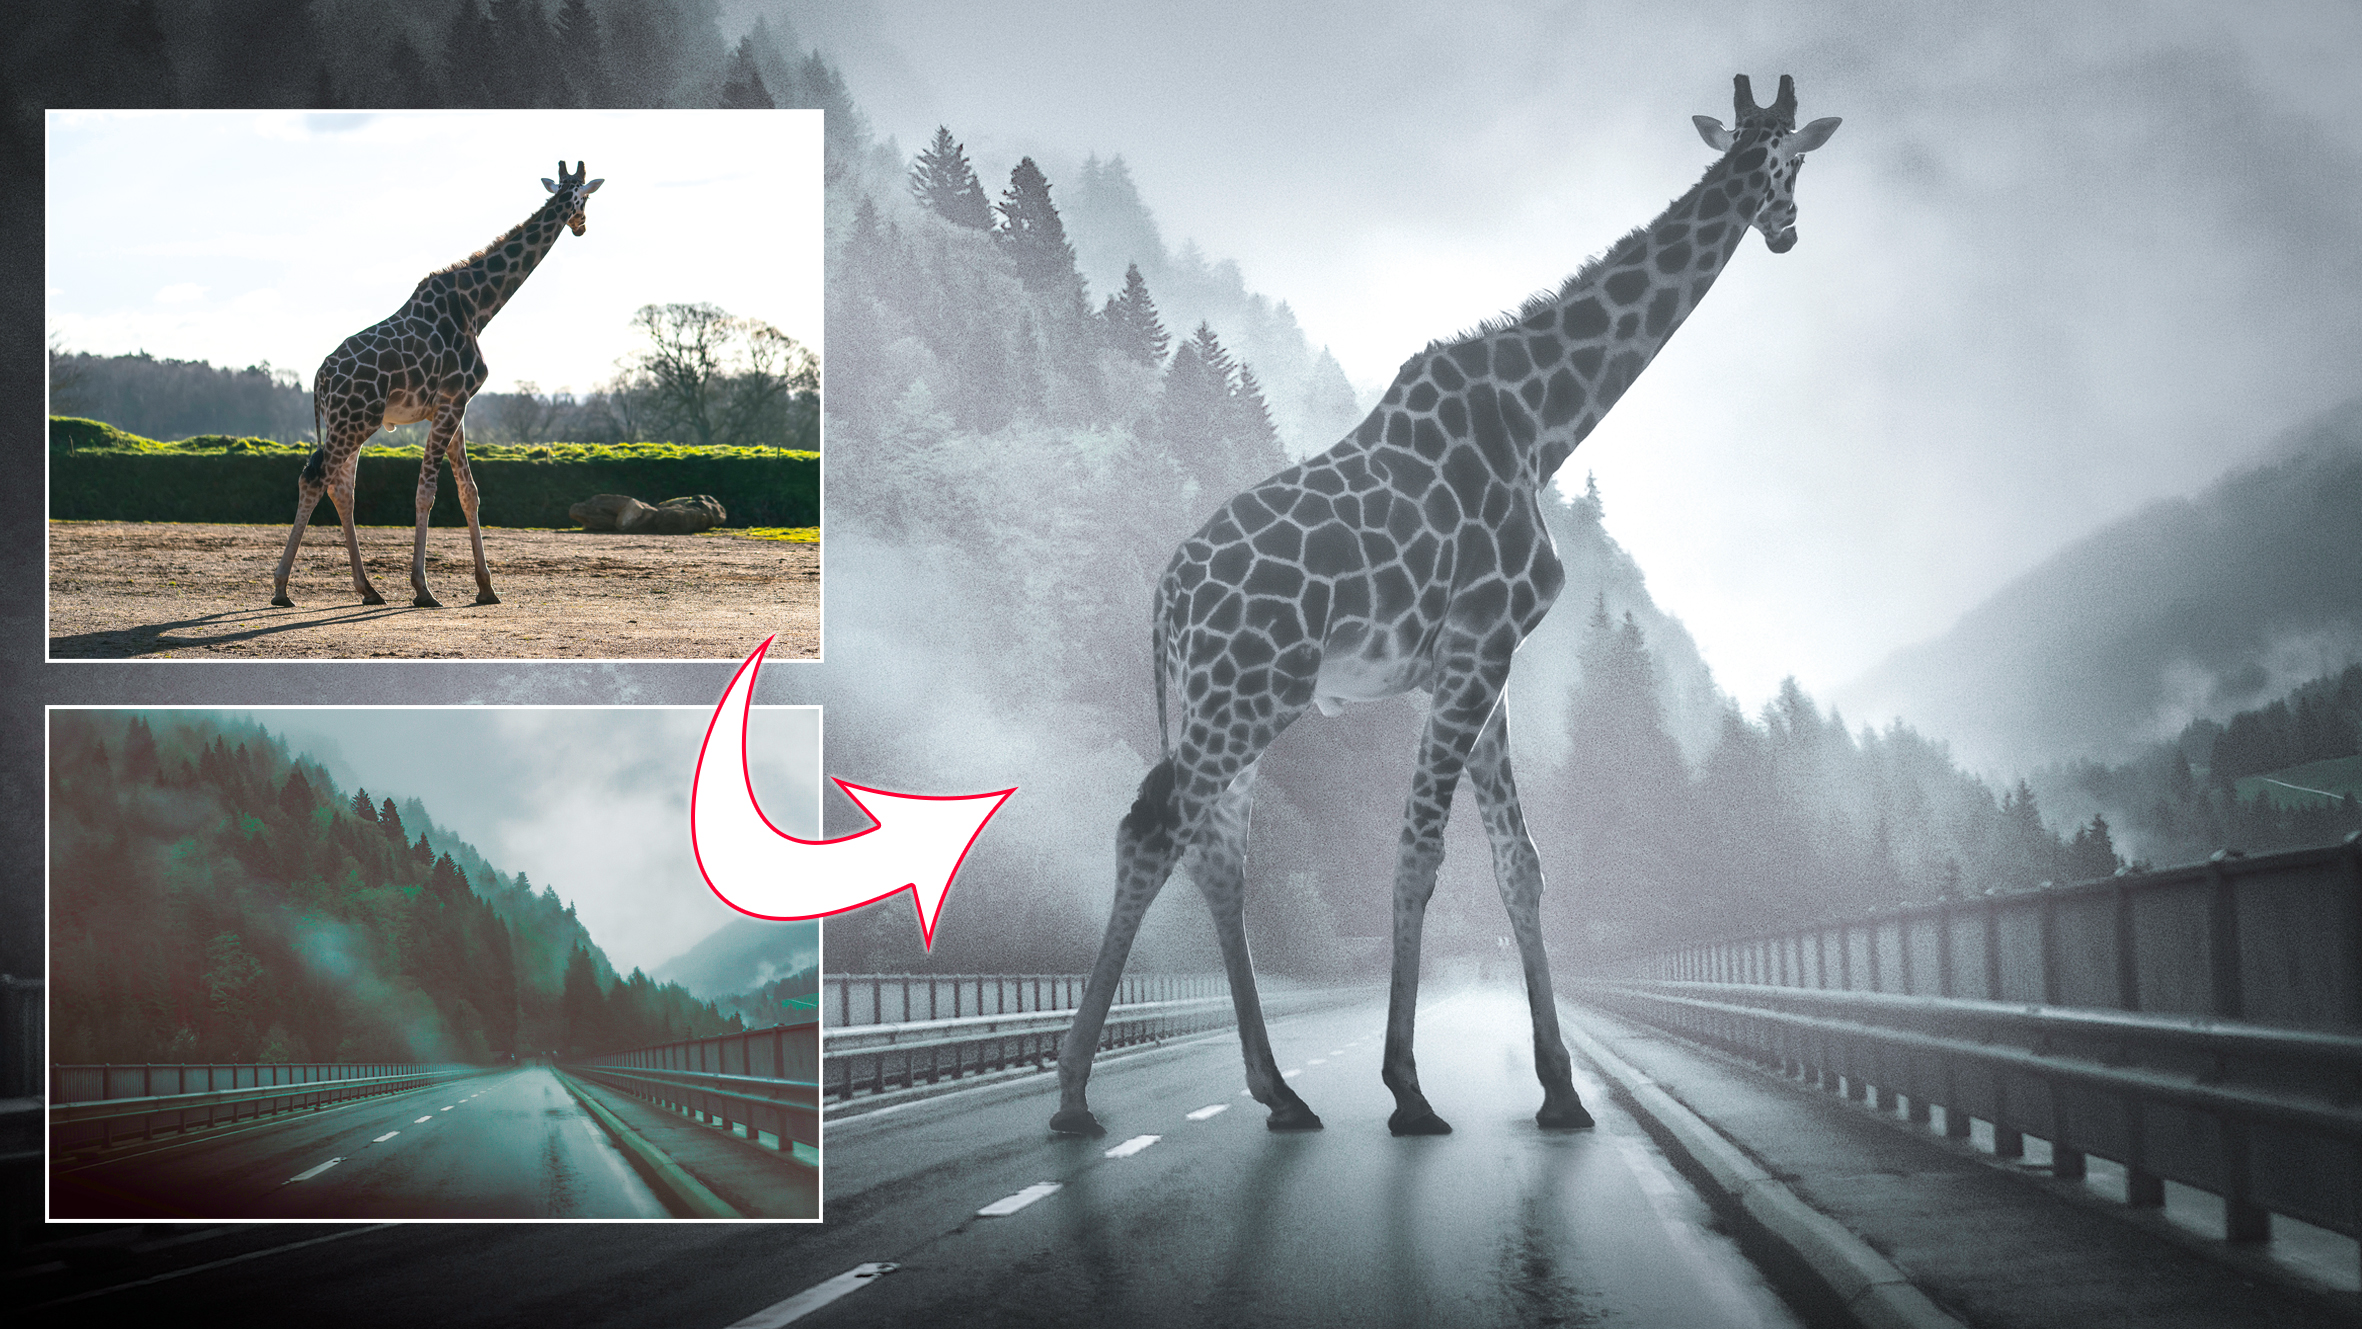
One of the things Affinity Photo does best is enable you to combine two or more photos in creative ways. Like its pricier forebear Photoshop, Affinity Photo utilizes layers for editing. This means you can cut out different parts of photos and layer them on top of one another, in order to create a composite image like this.
In this tutorial we’ll explain how to make a simple but grand-looking composite. There are three key stages to making a natural-looking composite like the above. First we use selections to isolate the subject and a mask to remove the background. Next we copy in and position the subject against its new backdrop. Finally we use tonal tools and add shadows to match the two images, so that it looks like they belong together.
This last part is where composites often fall down. It can be tricky to match the images, but it helps if you master a few tonal tools. Shadows can help to sell the effect by grounding the subject in their new scene. It helps too if both images share a similar feel in terms of the lighting. Here, the giraffe and the road scene are softly backlit from behind, giving both a moody feel that helps them to gel together.
Throughout this technique we’ll use several key compositing skills that can be replicated on any images you choose. We’ve used a free image from pixabay.com for our backdrop, but why not try a different scene?
Read more:
The best camera deals, reviews, product advice, and unmissable photography news, direct to your inbox!
Step 1: Select the giraffe
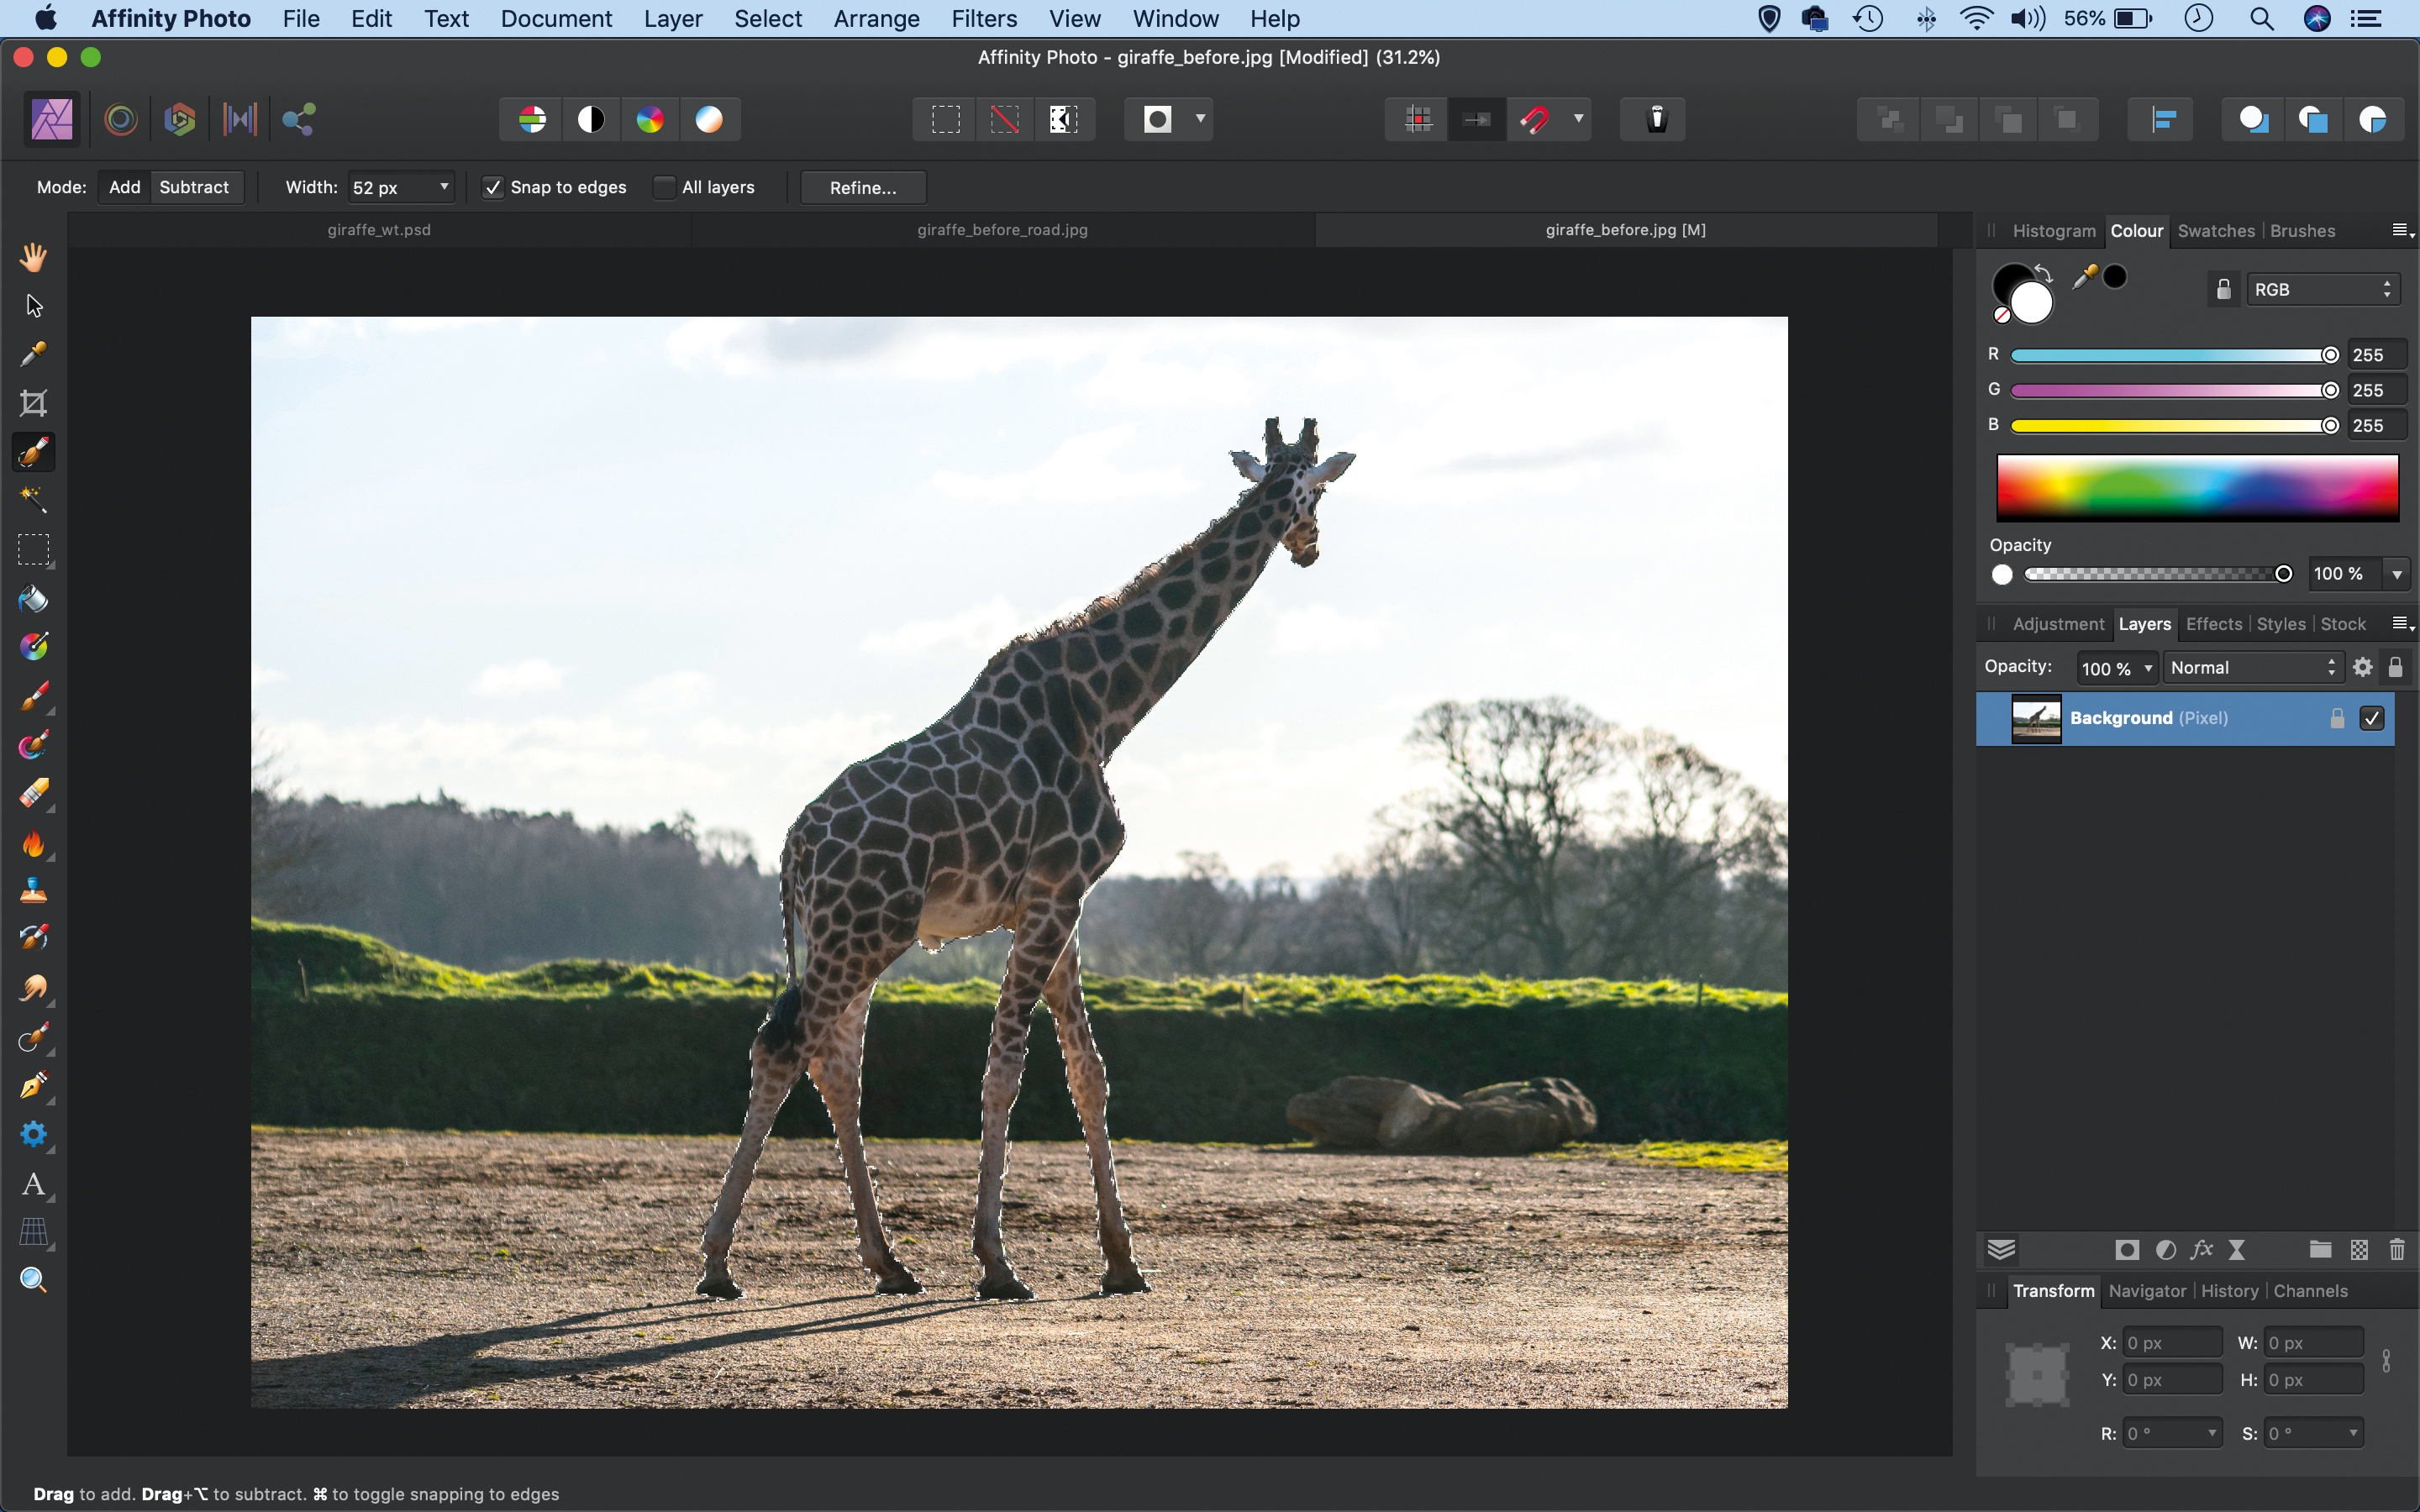
Open the giraffe and background images in Affinity (we used a pixabay.com image – road-2616728). Go to the giraffe shot, then get the Selection brush. Check ‘Snap to Edges’ in the options and paint over the giraffe to select it. Hold Alt and paint to subtract if the selection goes wrong.
Step 2: Improve the cutout
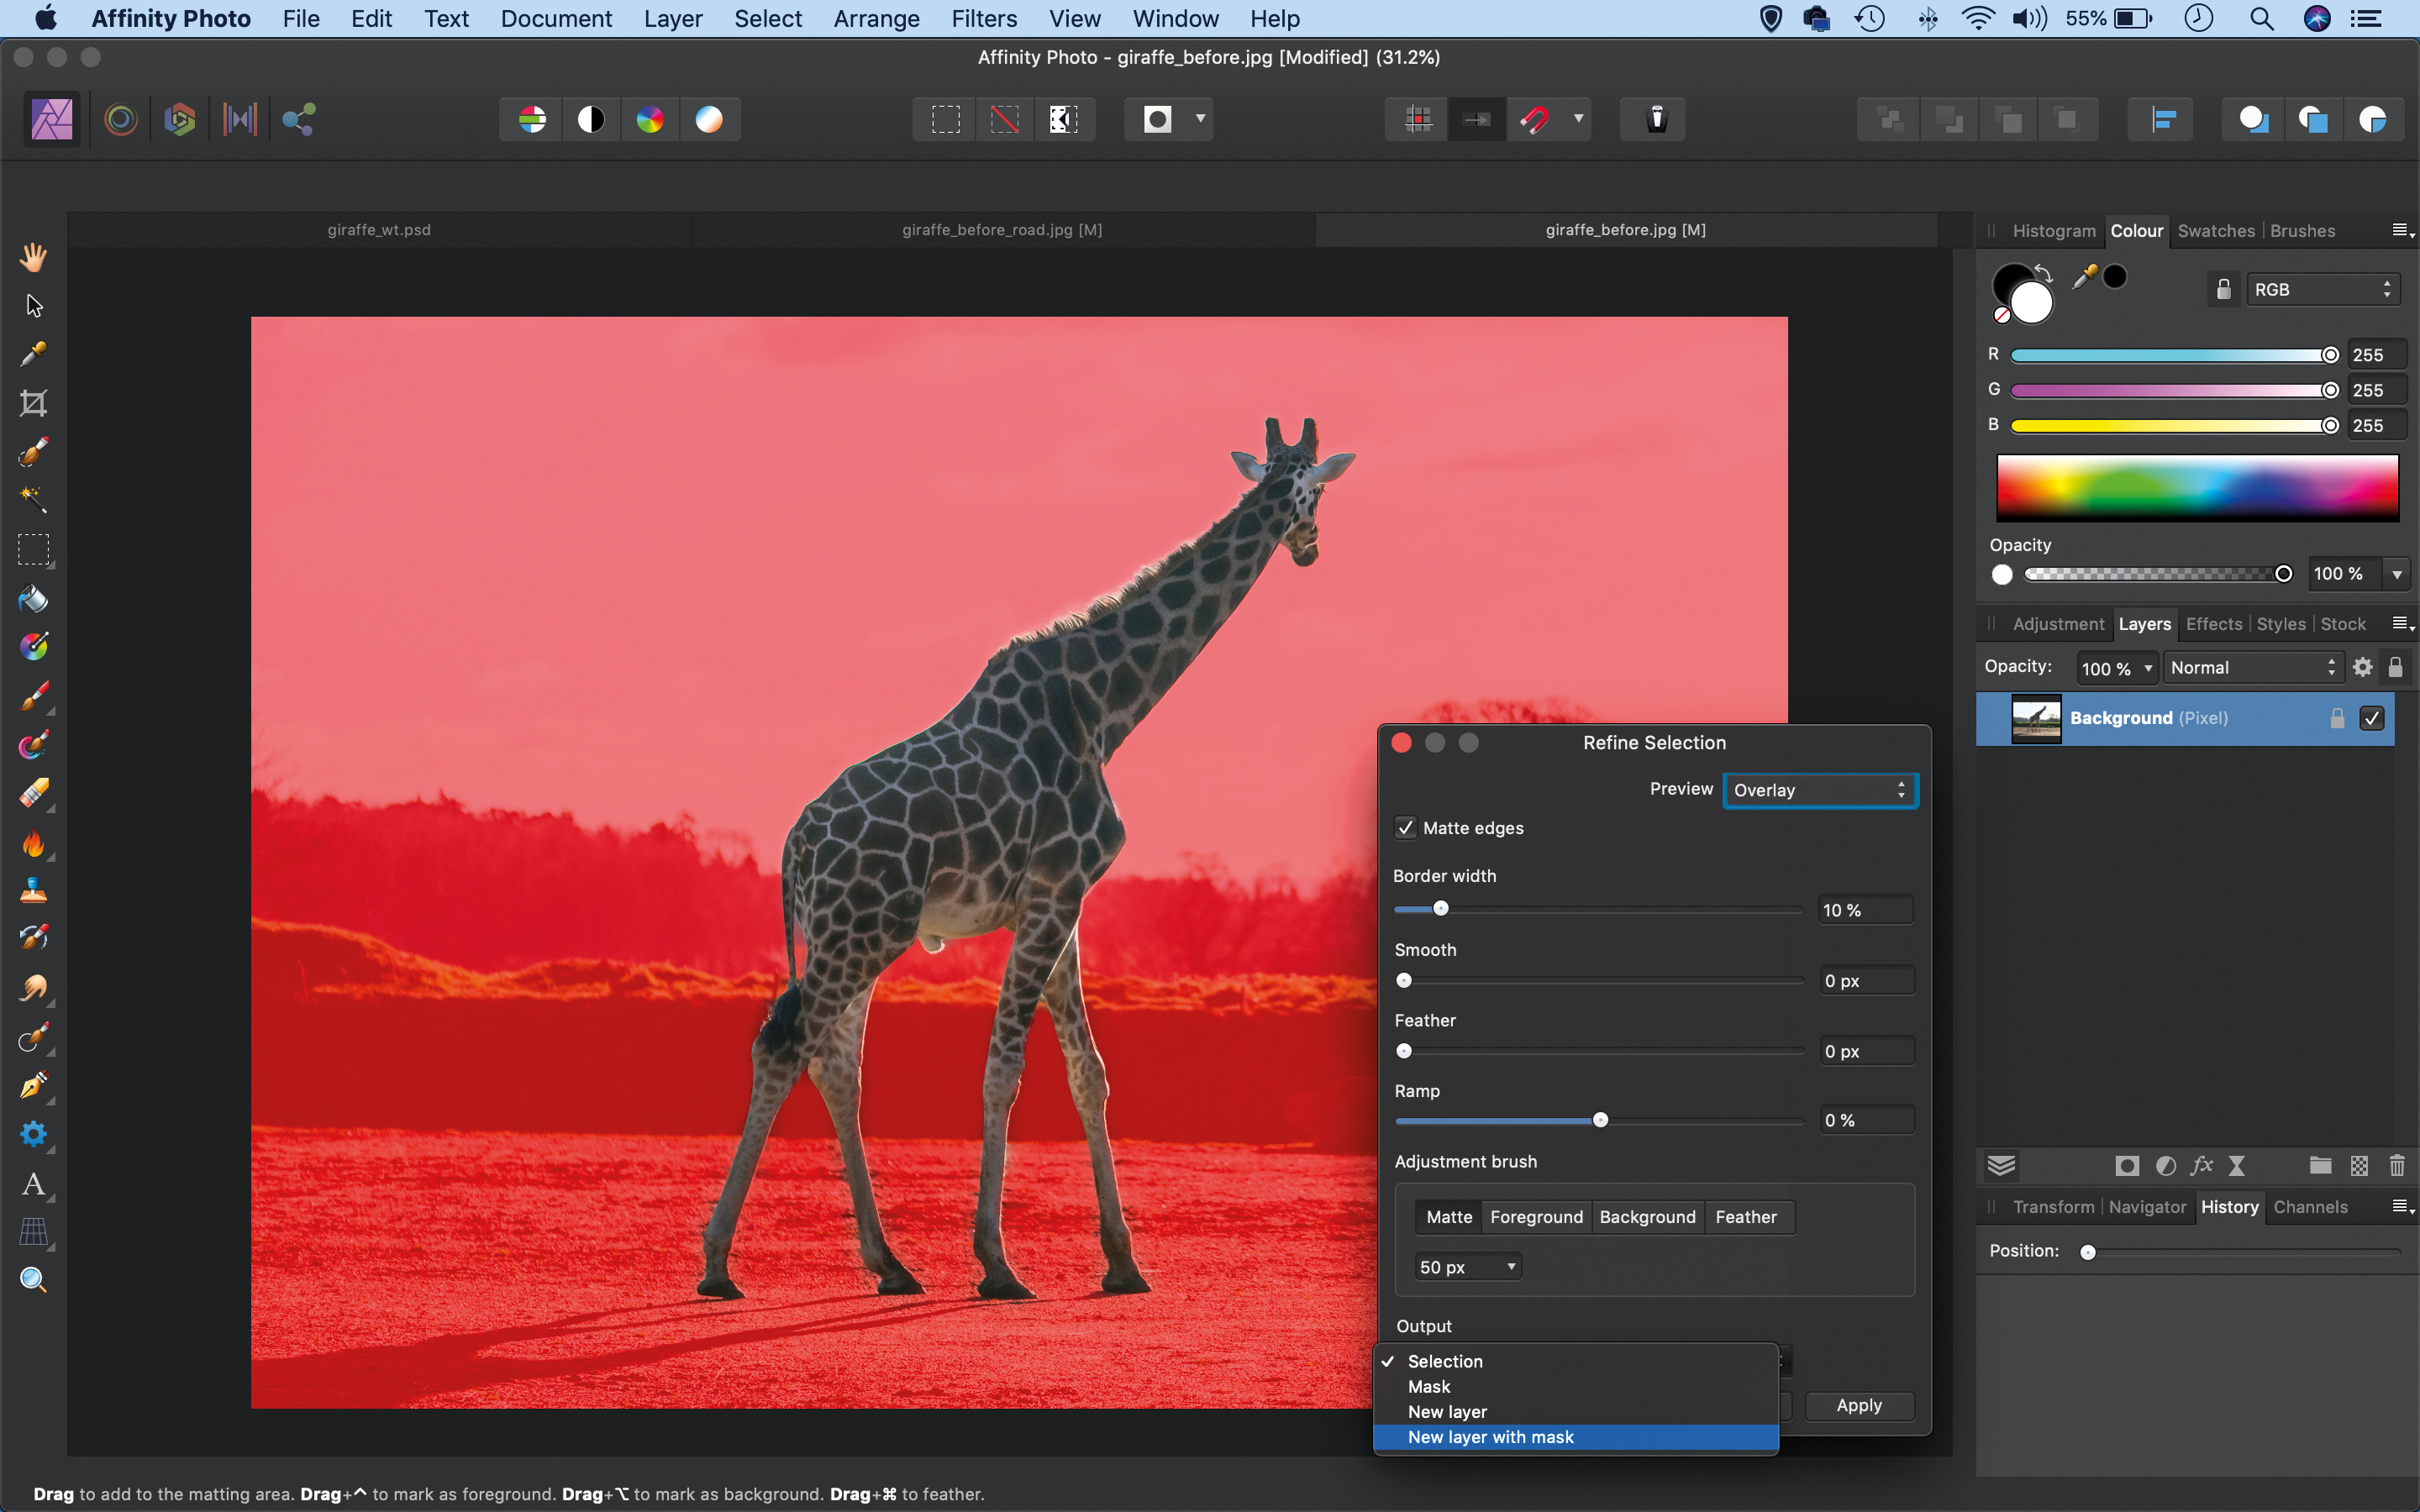
Click Refine in the options, then use the Refine box to improve the selection edge. Increase Border Width to 10%, click Background and paint over any parts of the edge that show the backdrop, such as the gap in the giraffe’s tail here. Once happy, set Output: New Layer with Mask and hit Apply.
Step 3: Position the giraffe
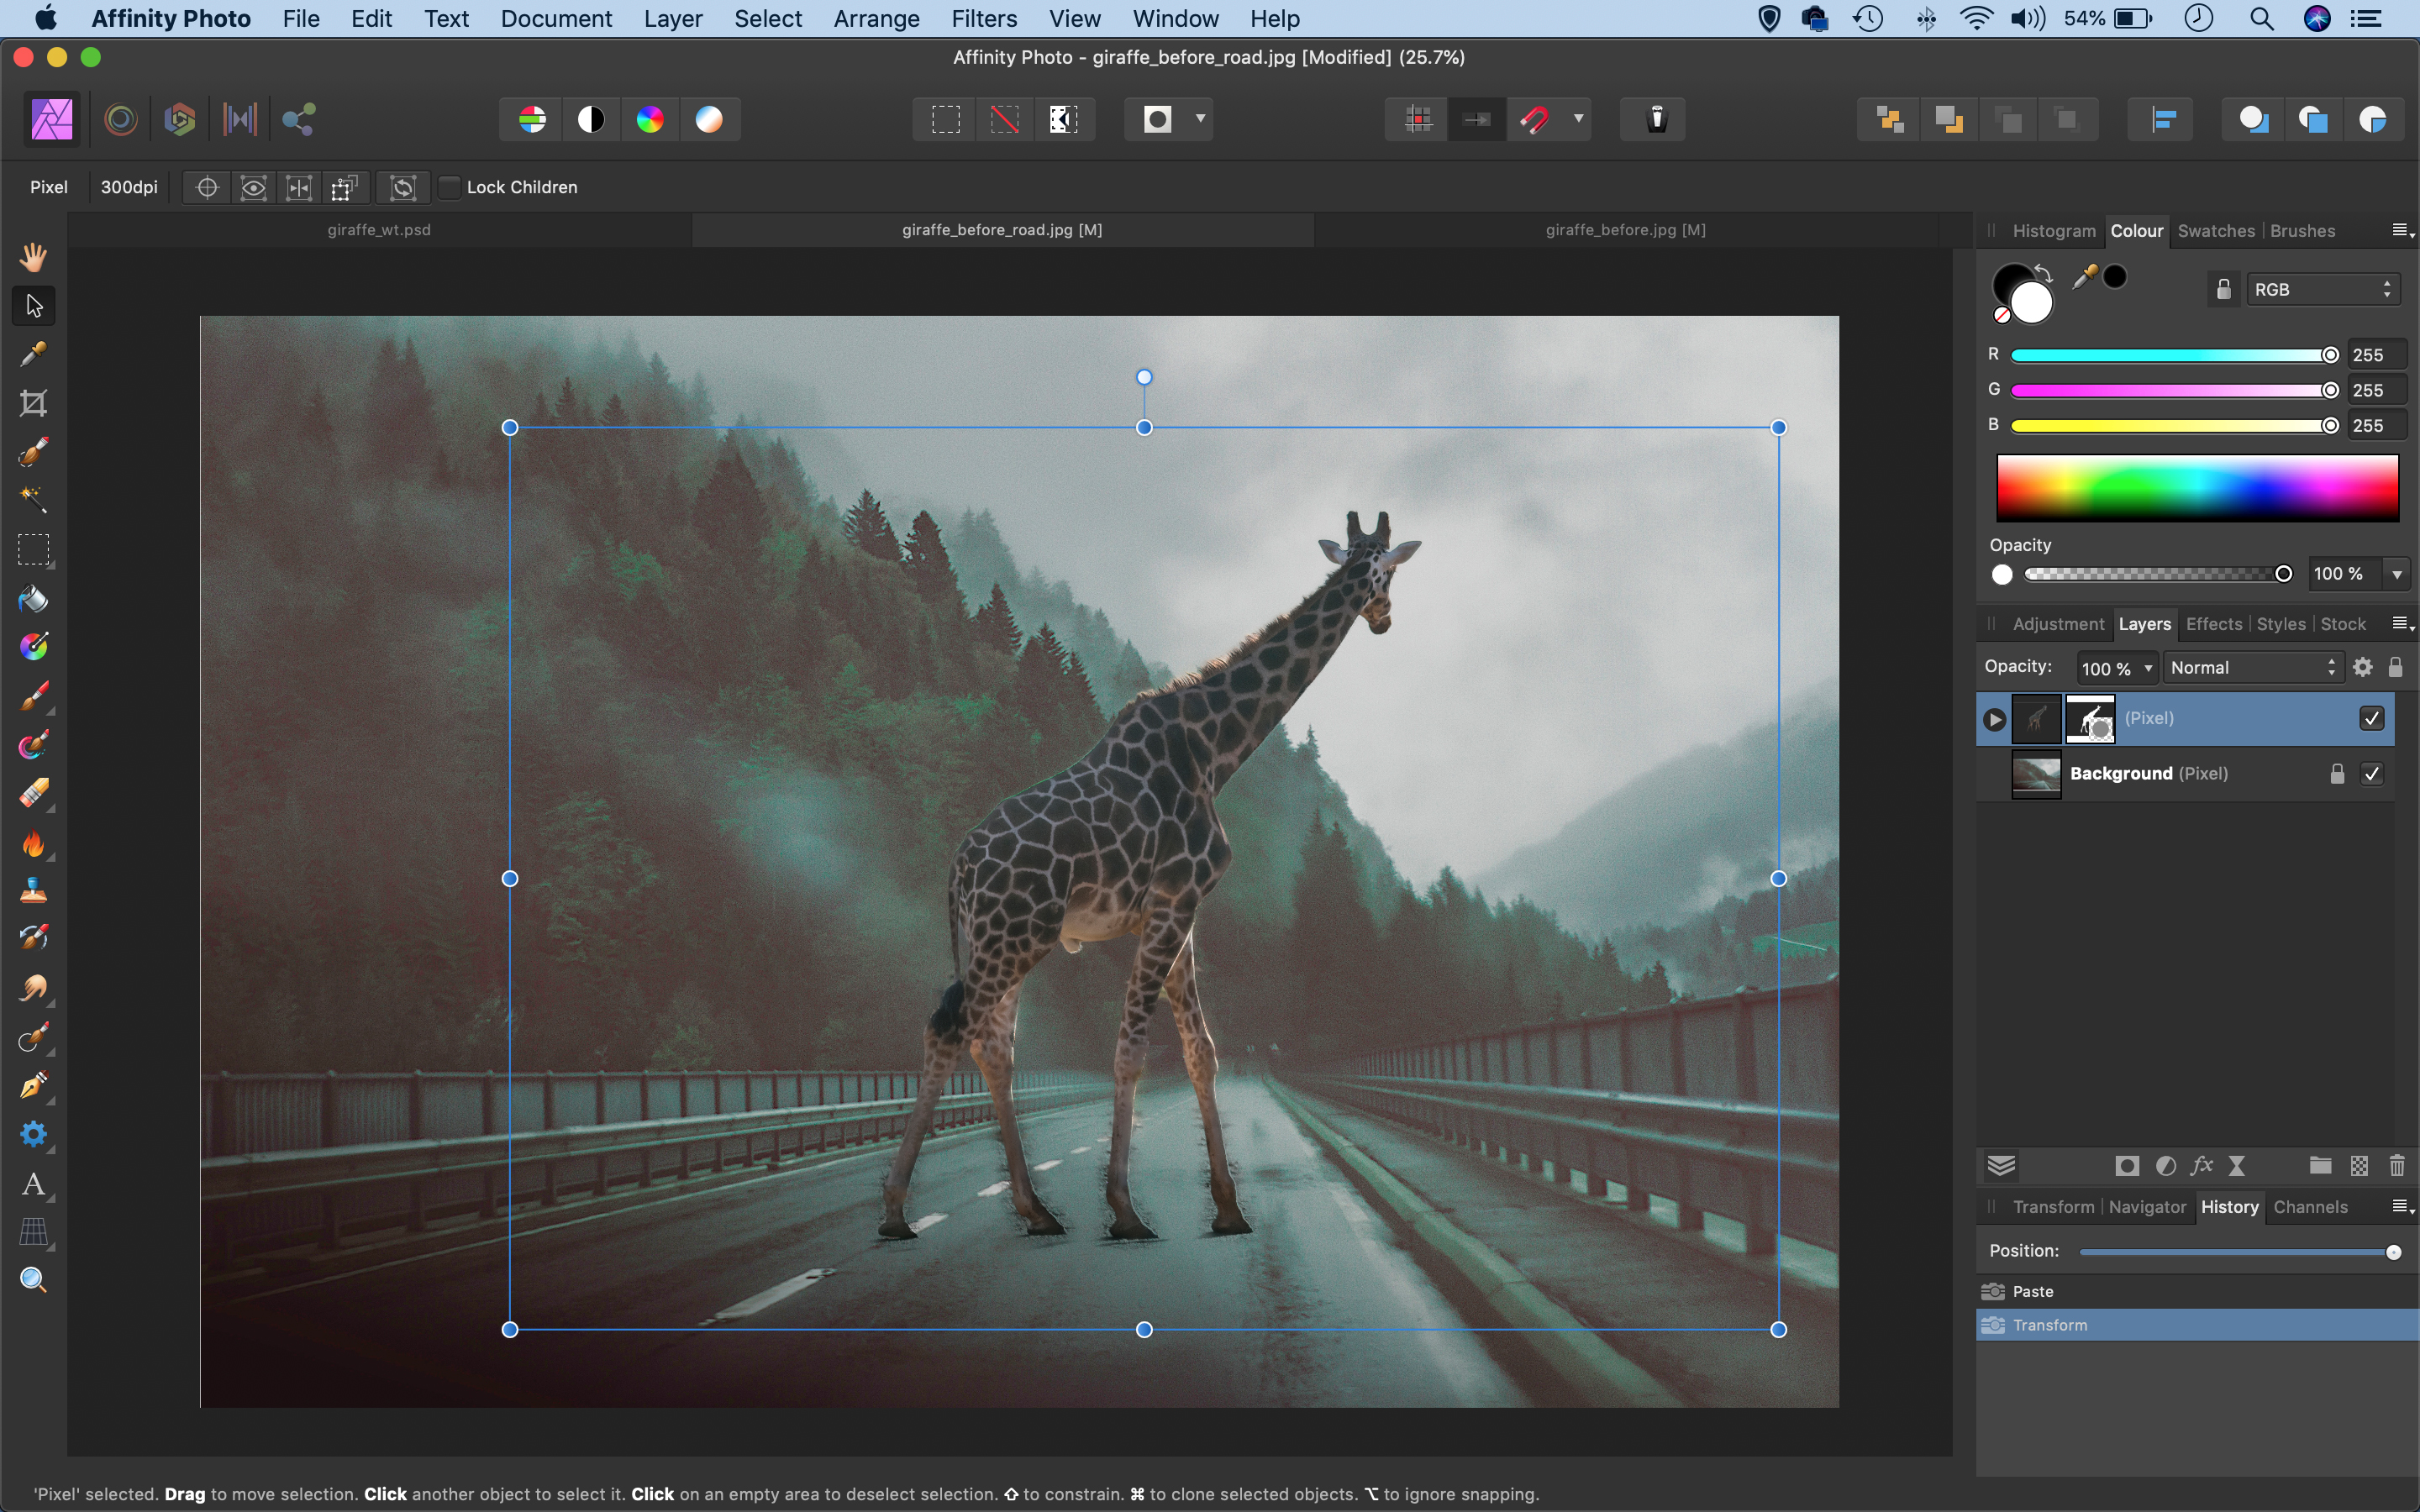
Hit Cmd/Ctrl+C to copy the giraffe, then go to the other photo (or your choice of image) and hit Cmd/Ctrl+V to paste it in. Grab the Move tool and use it to position the giraffe on the road, so that it looks as if it’s walking along the path. If you need to resize then drag the corners of the bounding box.
Step 4: Brush the edges
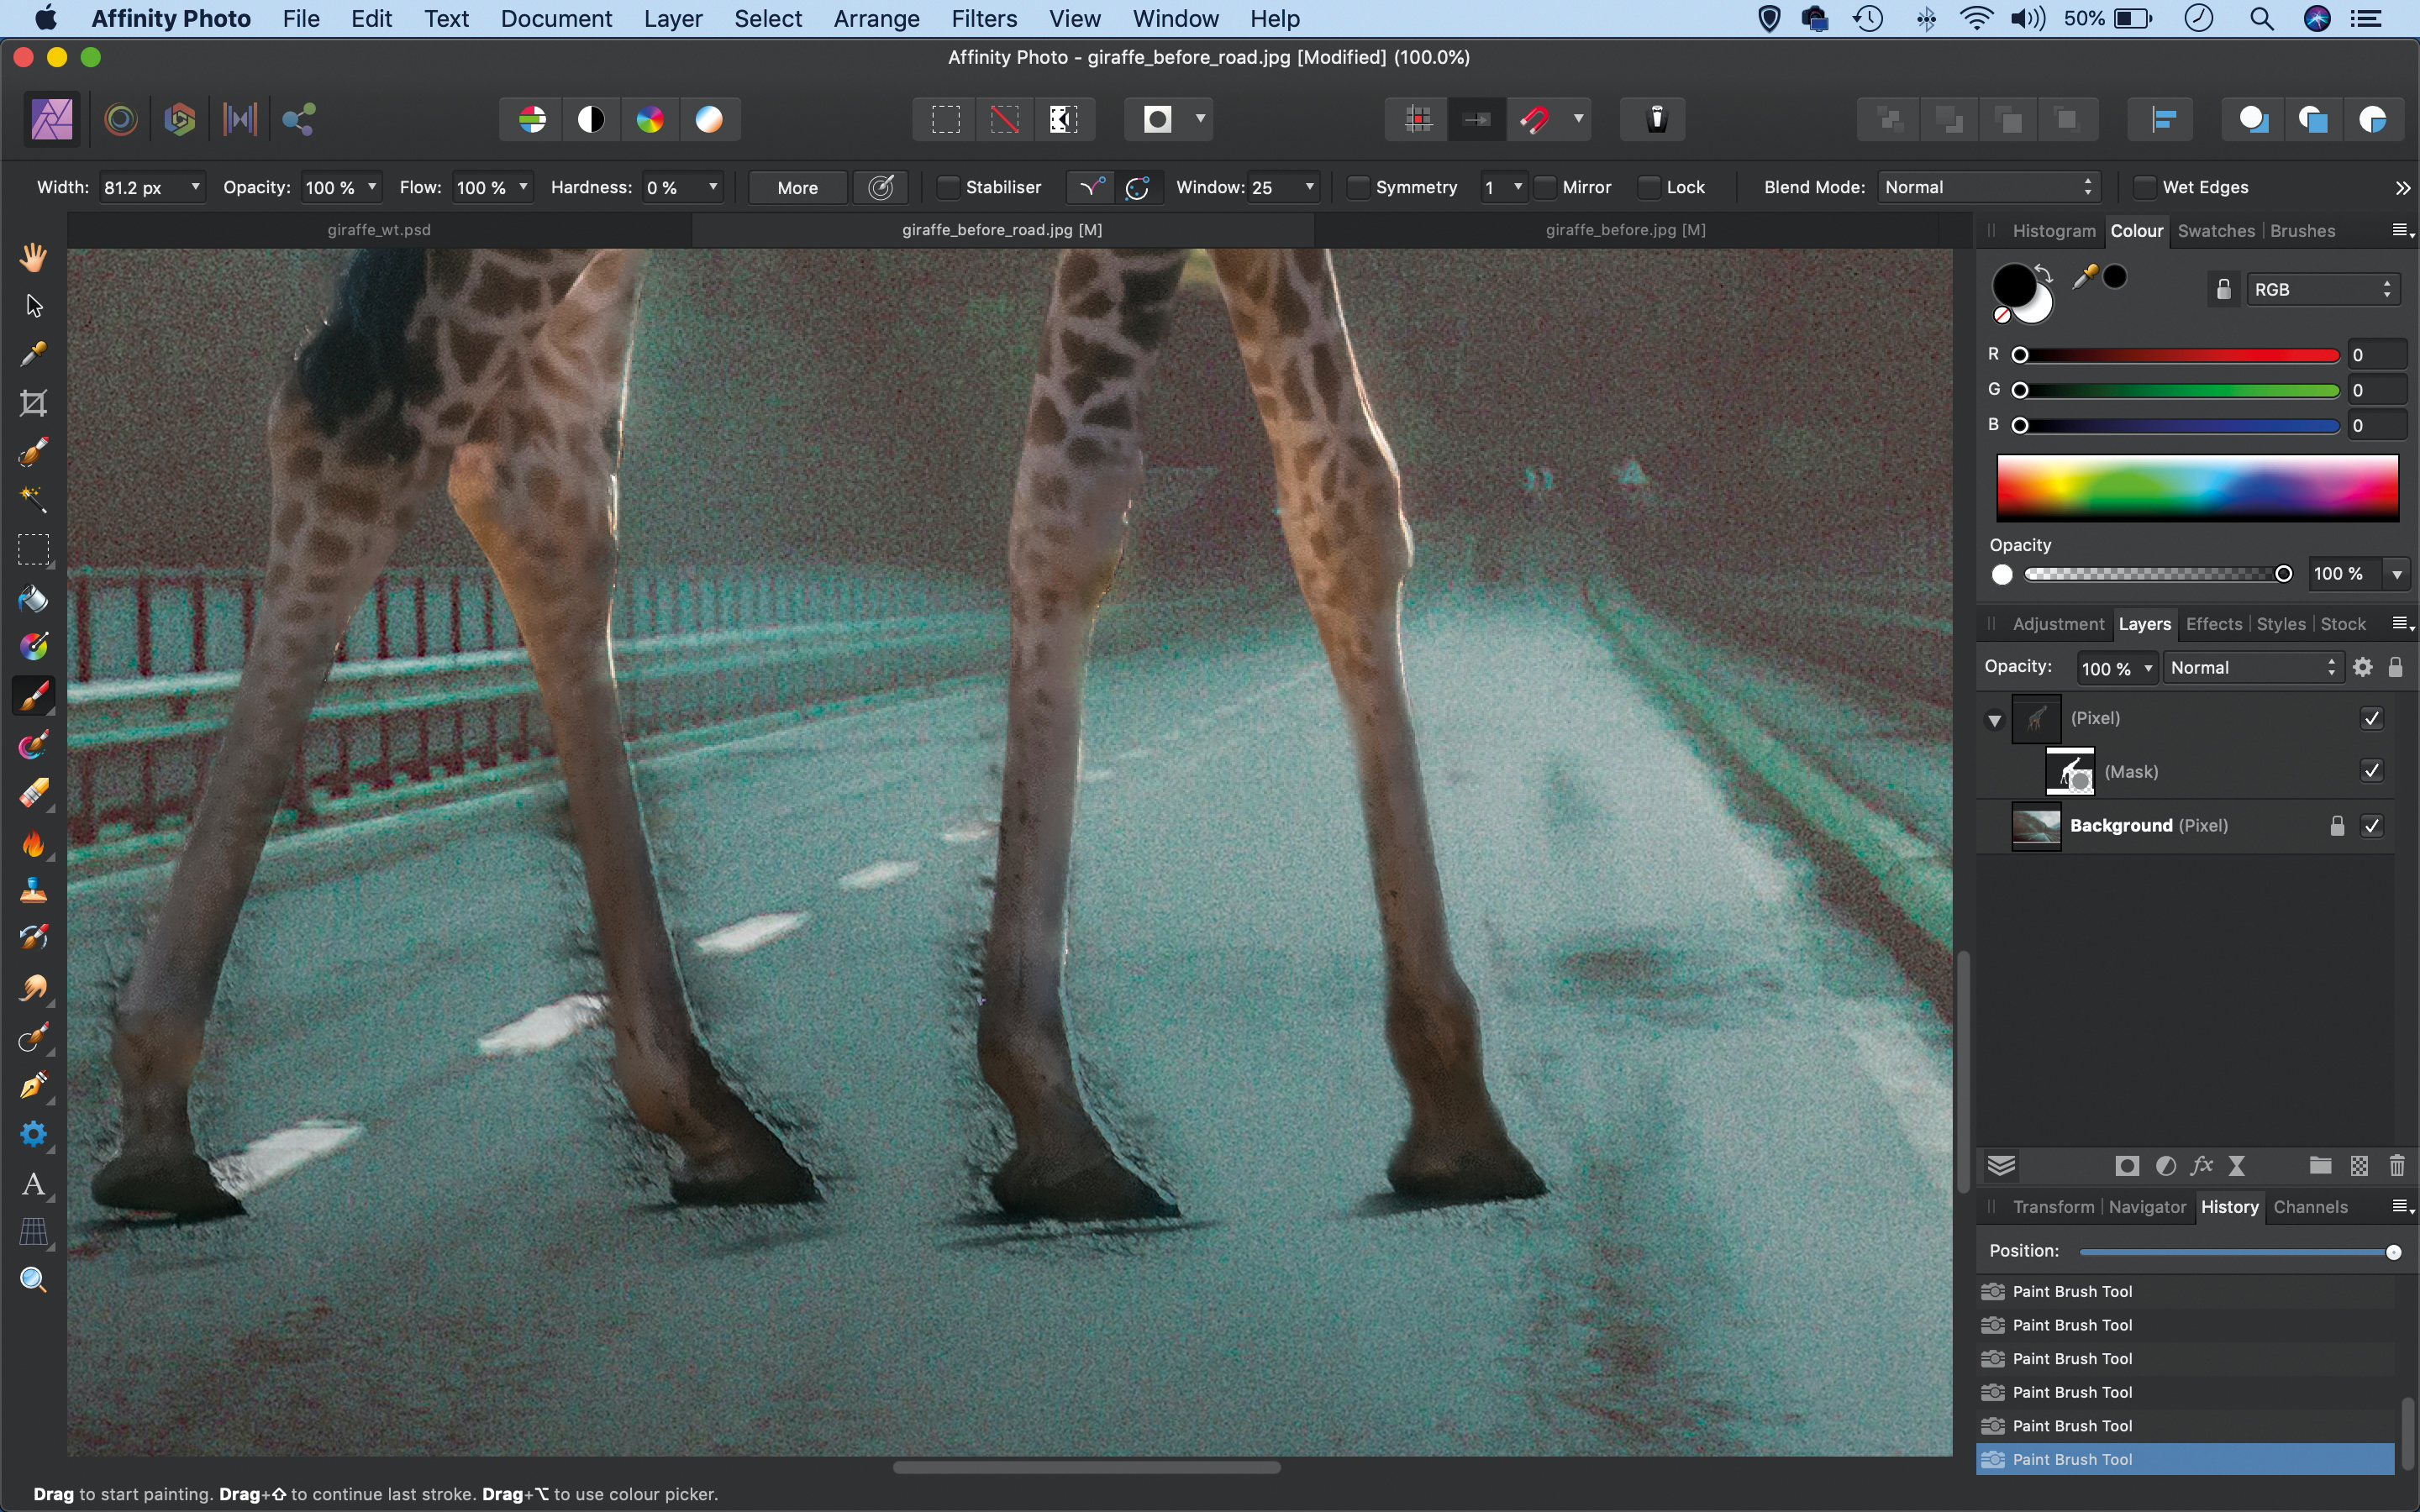
The edges of the mask may need tidying. Click on the mask thumbnail in the Layers panel, then grab the Brush tool. Zoom in close and paint black to hide parts of the giraffe layer where the backdrop shows through, or paint with white to reveal parts of the giraffe that may be hidden.
Step 5: Paint shadows
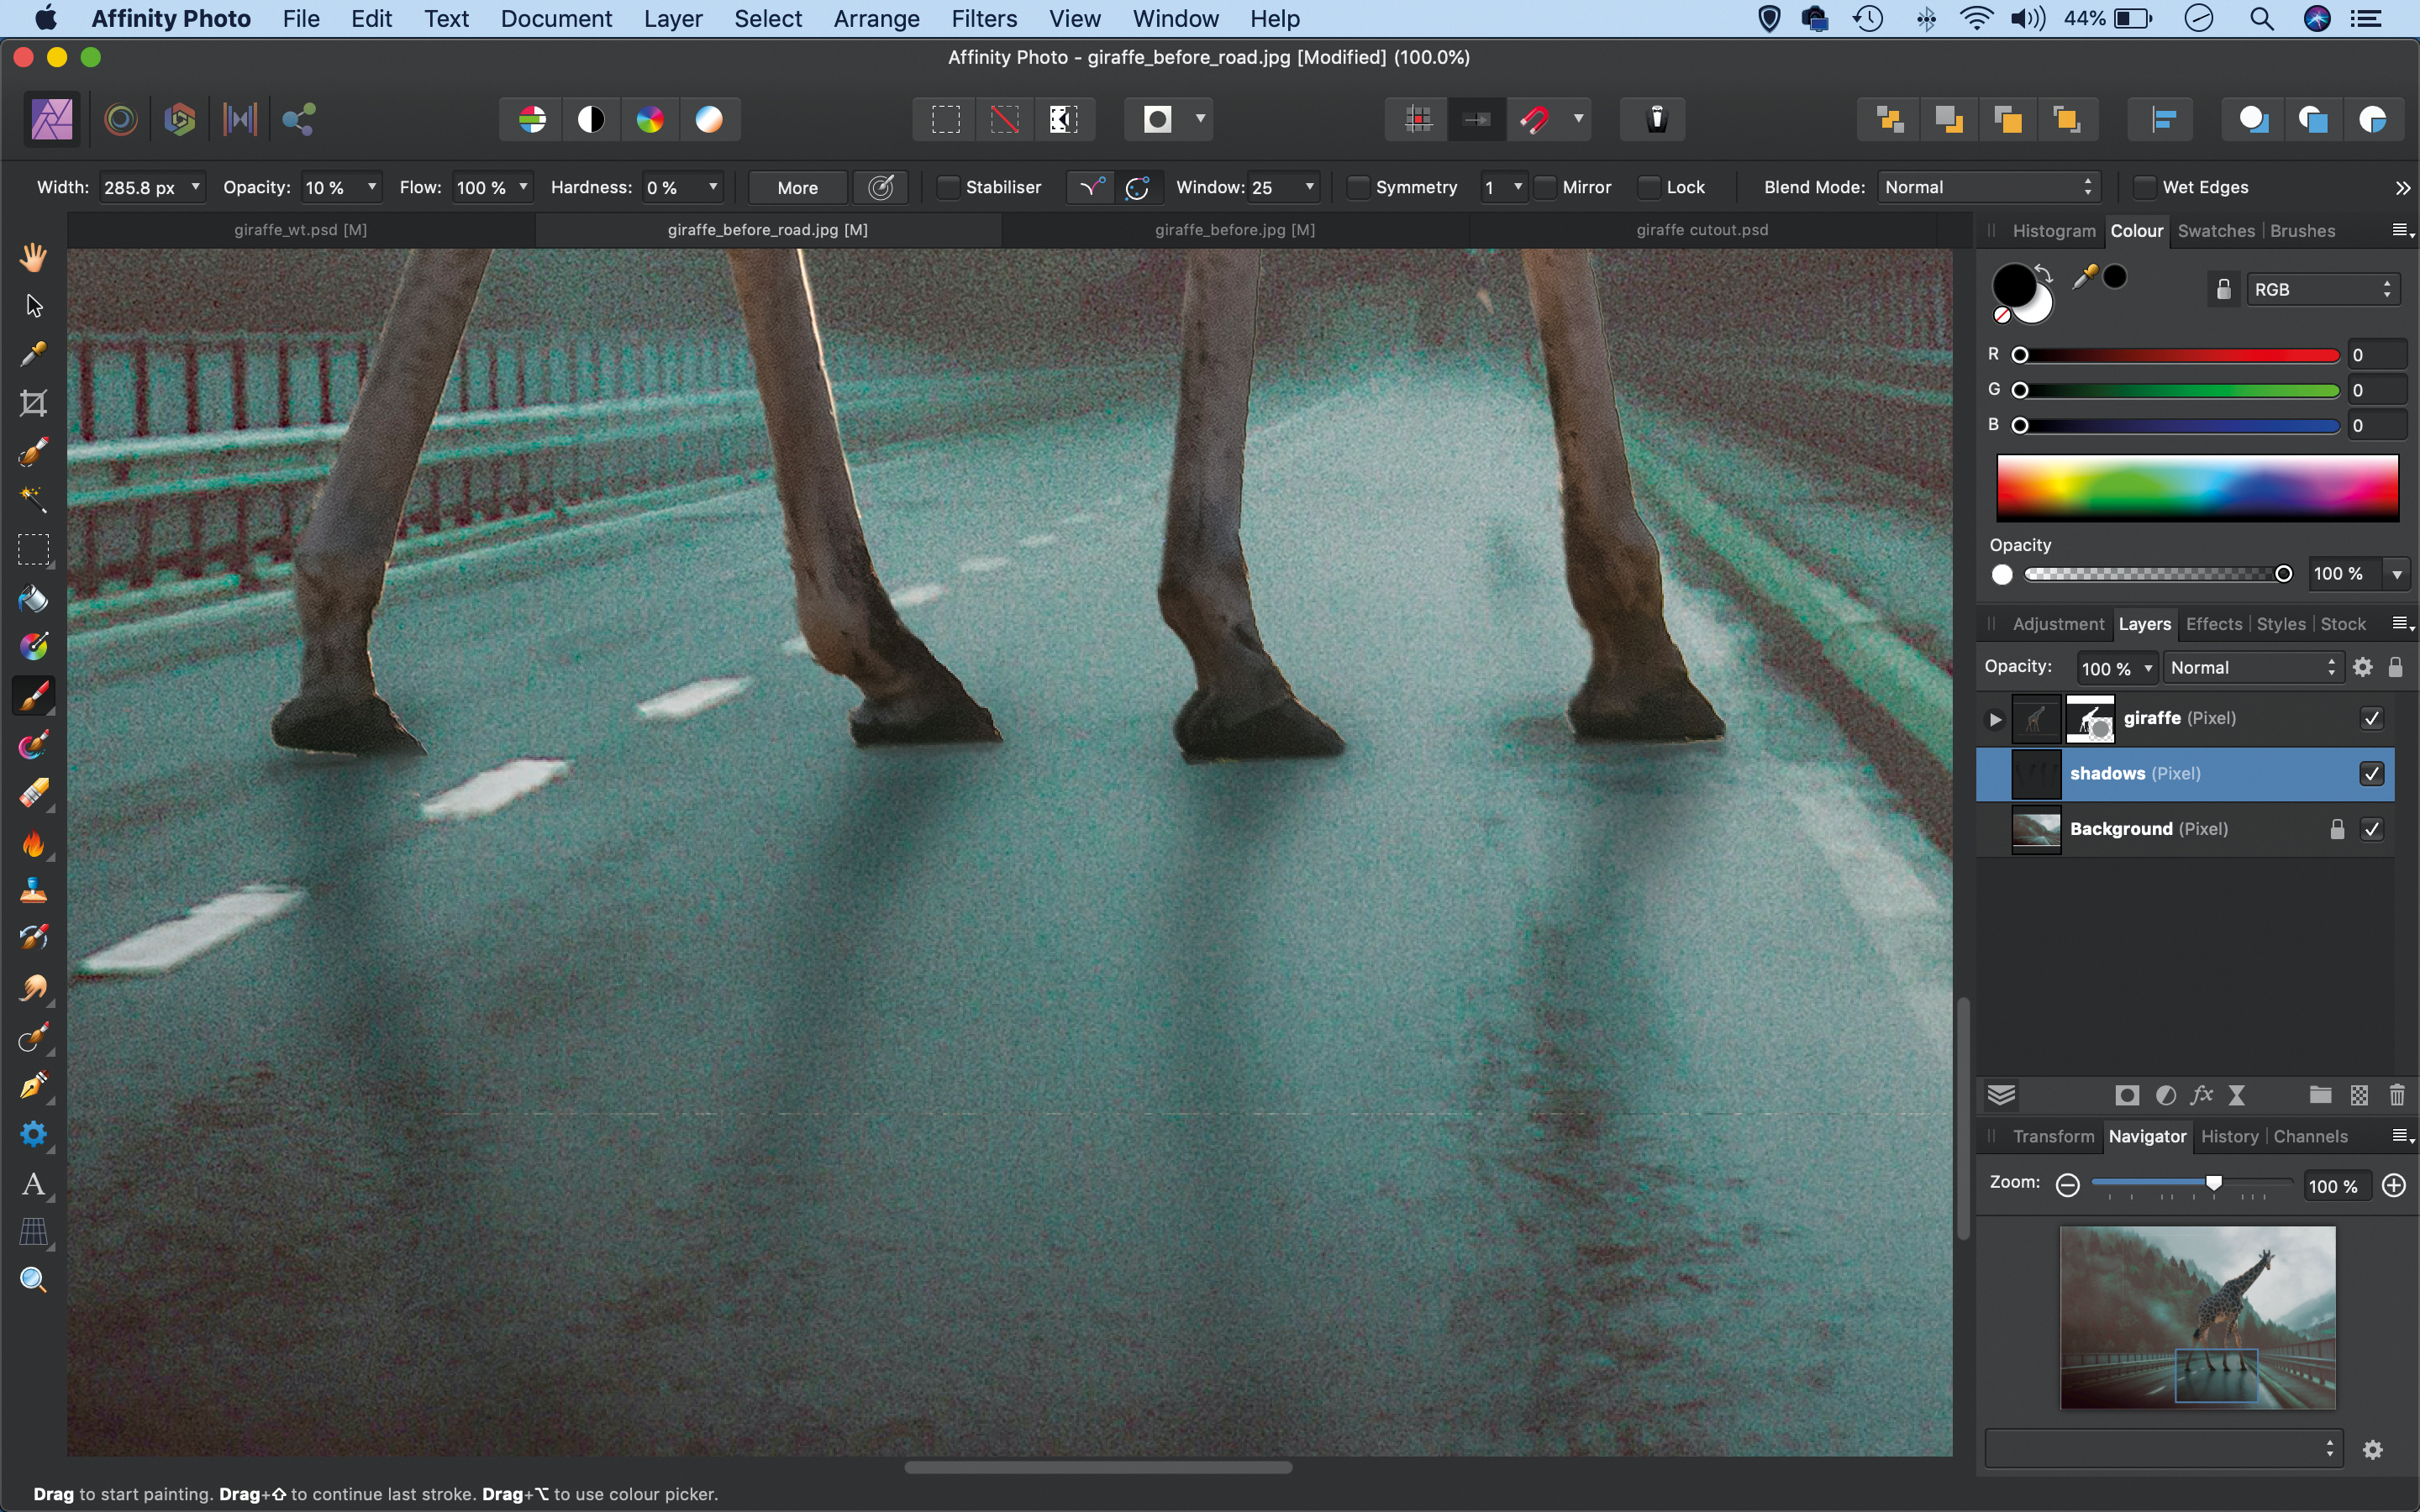
Grab the Brush tool, hit 1 for 10% opacity and set the colour to black. Highlight the bottom layer, then make a new layer. Brush to add gentle shadows below the giraffe’s feet. Next, make a new layer above the giraffe layer. Grab the Clone tool, set ‘Current and Below`~’ in the options, then clone to tidy up any other messy areas.
Step 6: Finish the tones
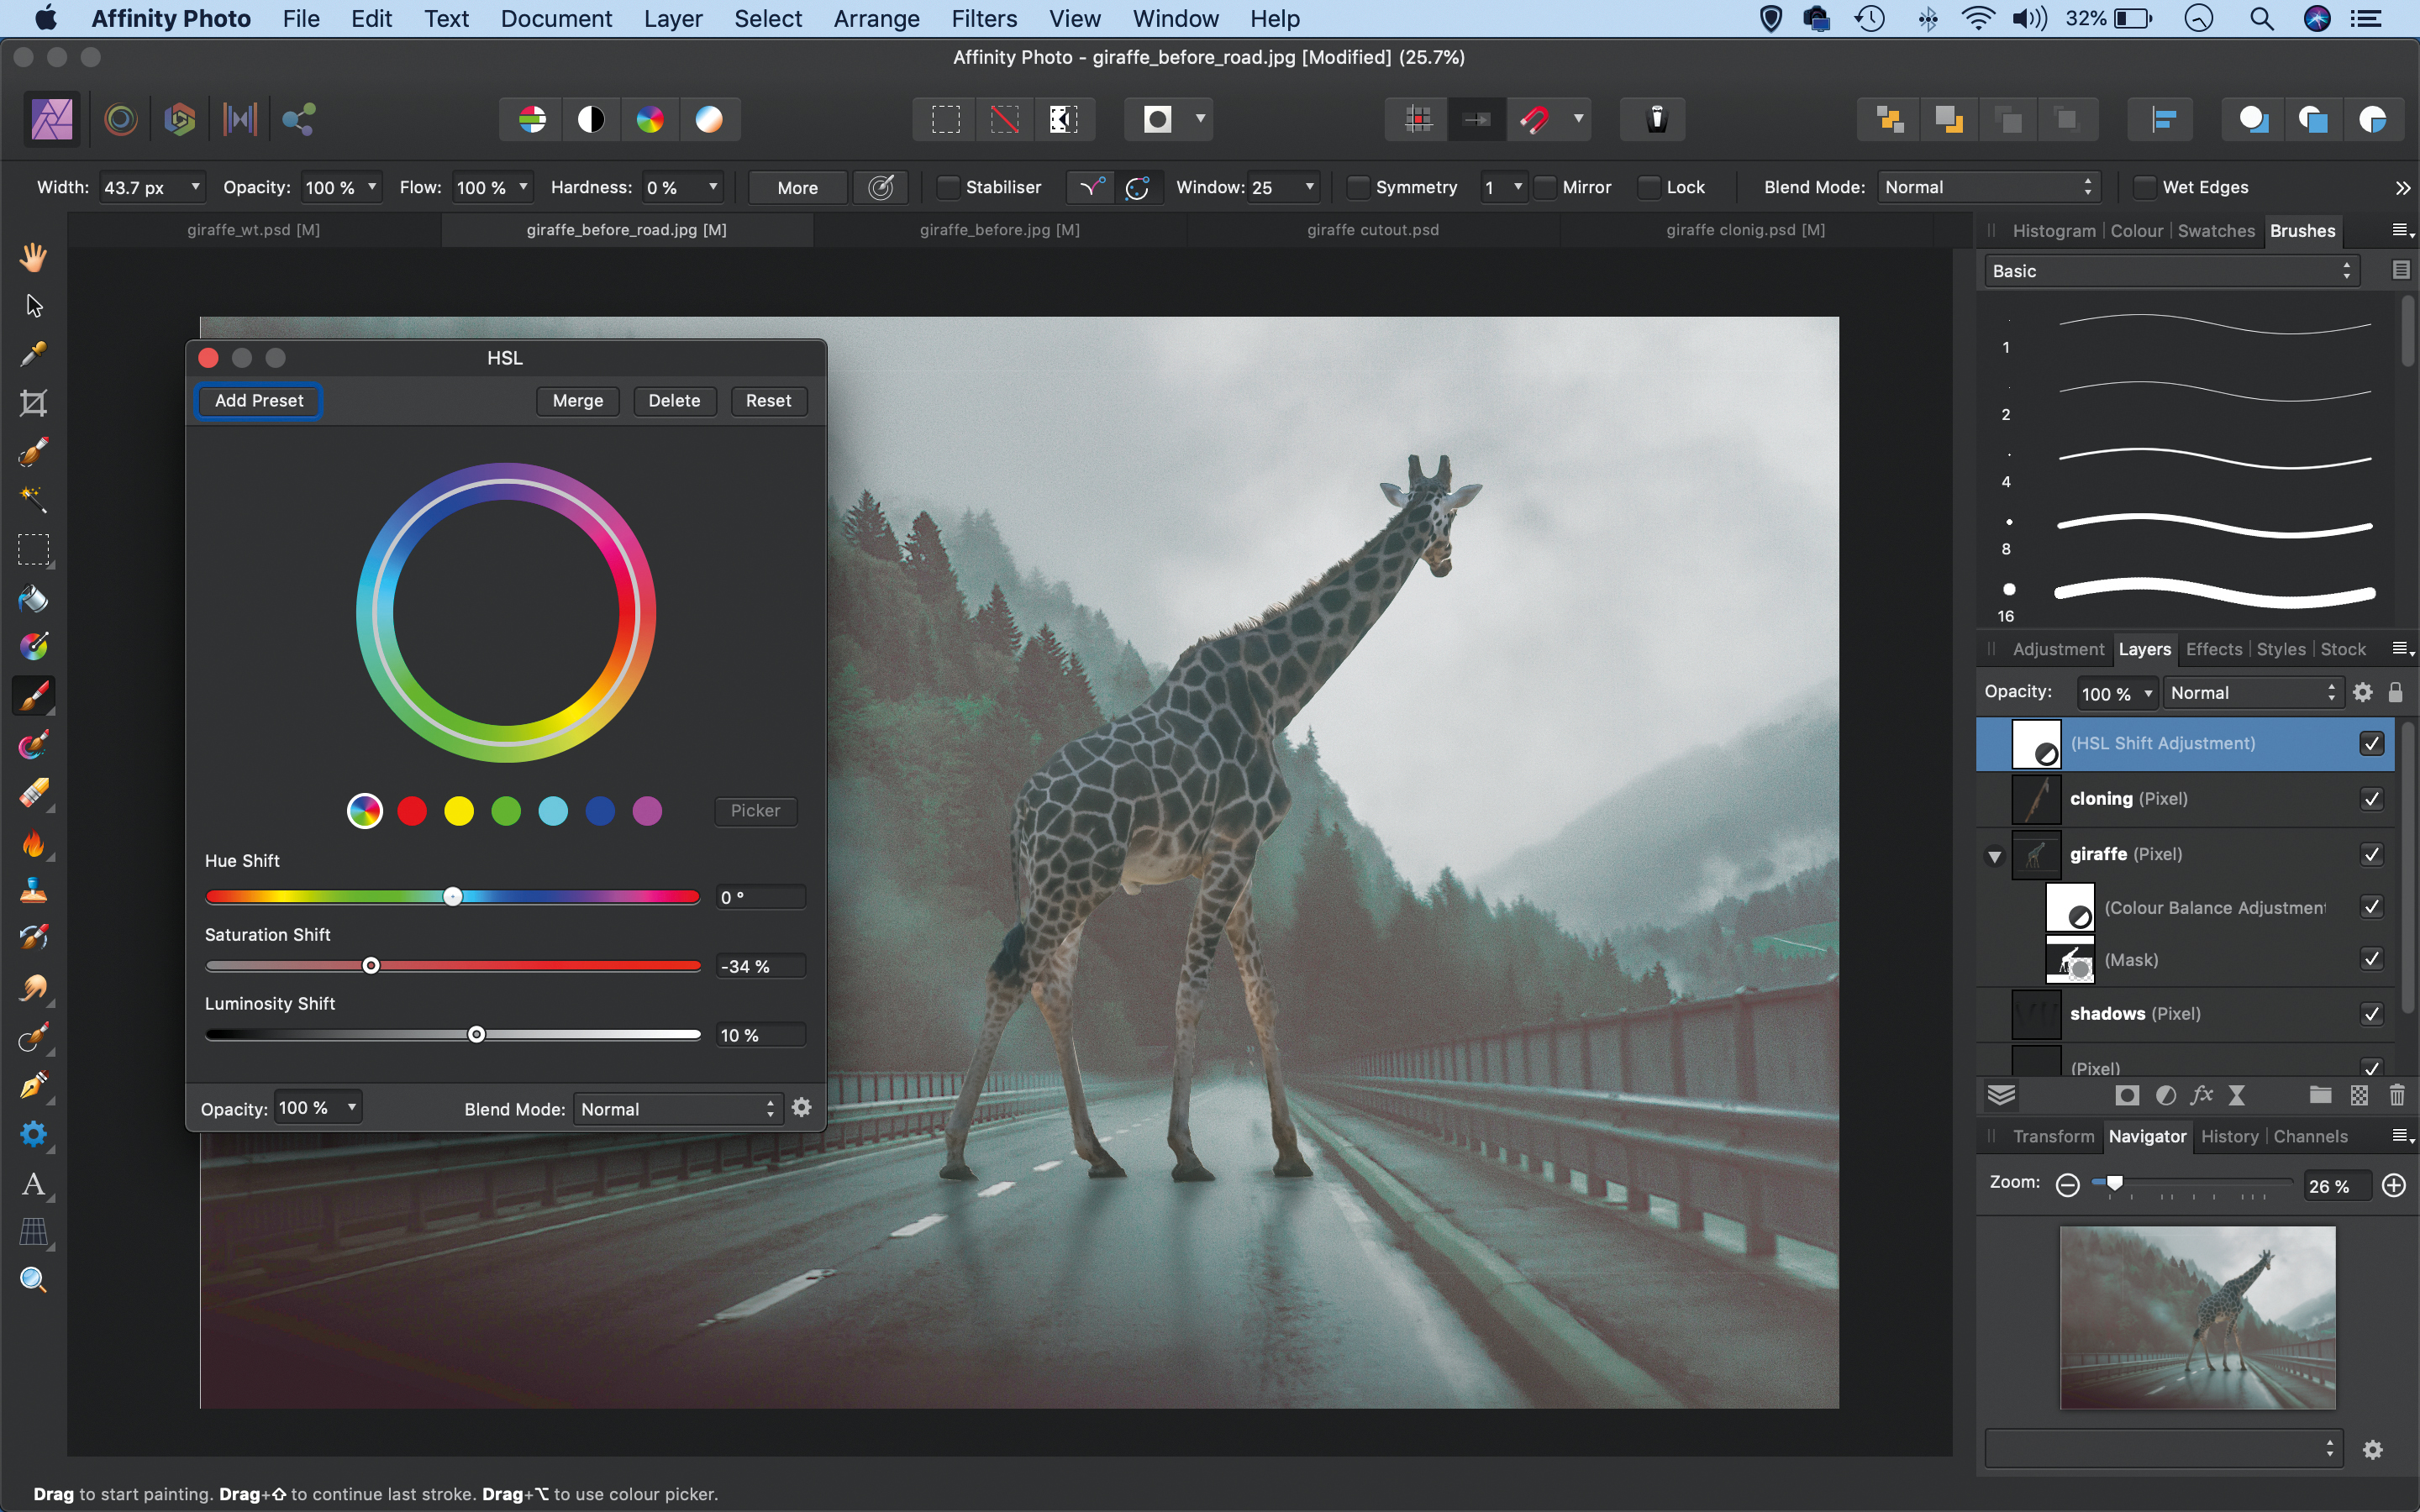
Click the Create Adjustment Layer icon and choose Colour Balance. Drag the new layer on top of the giraffe layer and shift the colours to cyan and green to match it with the backdrop. Finally, make an HSL adjustment layer at the top of the stack and reduce the saturation.
Quick tip
It can help a composite look more natural if you add effects and tonal shifts on top of everything, so it looks like the separate images contained within belong together. We’ve added a touch of mist in front of and behind the giraffe by making two layers, one underneath, one above. We painted on these layers with the Brush tool set to white at a low opacity to add a gentle haze.
About N-Photo magazine
This tutorial originally appeared in N-Photo, the monthly newsstand magazine for Nikon photographers. Why not subscribe to a print edition, and have the magazine delivered direct to your door every month?
Alternatively, we have a number of different digital options available, including:
• Apple app (for iPad or iPhone)
• Zinio app (multi-platform app for desktop or smartphone)
• PocketMags (multi-platform app ideal for Android devices)
• Readly (all-you-can-eat digital magazine subscription service)
If you wanted a printed version of any of our most recent issues we have a selection of back issues to choose from in our online store.
Read more:
• Photography tips and tutorial videos
• The best photo editing tools and accessories
• The best desktop computers for photo editing
• The best photo-editing laptops right now
• The best photo editing software today
N-Photo: The Nikon Magazine is a monthly publication that's entirely dedicated to Nikon users. As a 100% independent magazine, you can be assured of unbiased opinion from a trustworthy team of devoted photography experts including editor Adam Waring and Deputy Editor Mike Harris.
Aimed at all users, from camera newcomers to working pros, every issue is packed with practical, Nikon-specific advice for taking better photos, in-depth reviews of Nikon-compatible gear, and inspiring projects and exciting video lessons for mastering camera, lens and Photoshop techniques.
Written by Nikon users for Nikon users, N-Photo is your one-stop shop for everything to do with cameras, lenses, tripods, bags, tips, tricks and techniques to get the most out of your photography.
