Clean up backgrounds in Affinity Photo: how to remove unwanted objects
Use the powerful retouching tools in Affinity Photo to fix a messy background without leaving a trace!
The best camera deals, reviews, product advice, and unmissable photography news, direct to your inbox!
You are now subscribed
Your newsletter sign-up was successful
Start here
• Affinity Photo tutorials
The tutorials
1. Affinity Photo vs Photoshop
2. RAW editing with Affinity Photo
3. Focus merge with Affinity Photo
4. Replace a sky in Affinity Photo
5. Moody mono in Affinity Photo
6. Six Affinity Photo landscape tips
7. Color correction in Affinity Photo
8. Live Filters in Affinity Photo
9. Create a classic wet plate look
10. Remove objects in Affinity Photo
11. Paint an abstract portrait
12. Enhance skintones in Affinity Photo
13. Create HDR in Affinity Photo
14. Replace a sky in Affinity Photo
15. Affinity Photo double exposures
16. Affinity Photo Denoise tool
Watch video: Clean up backgrounds
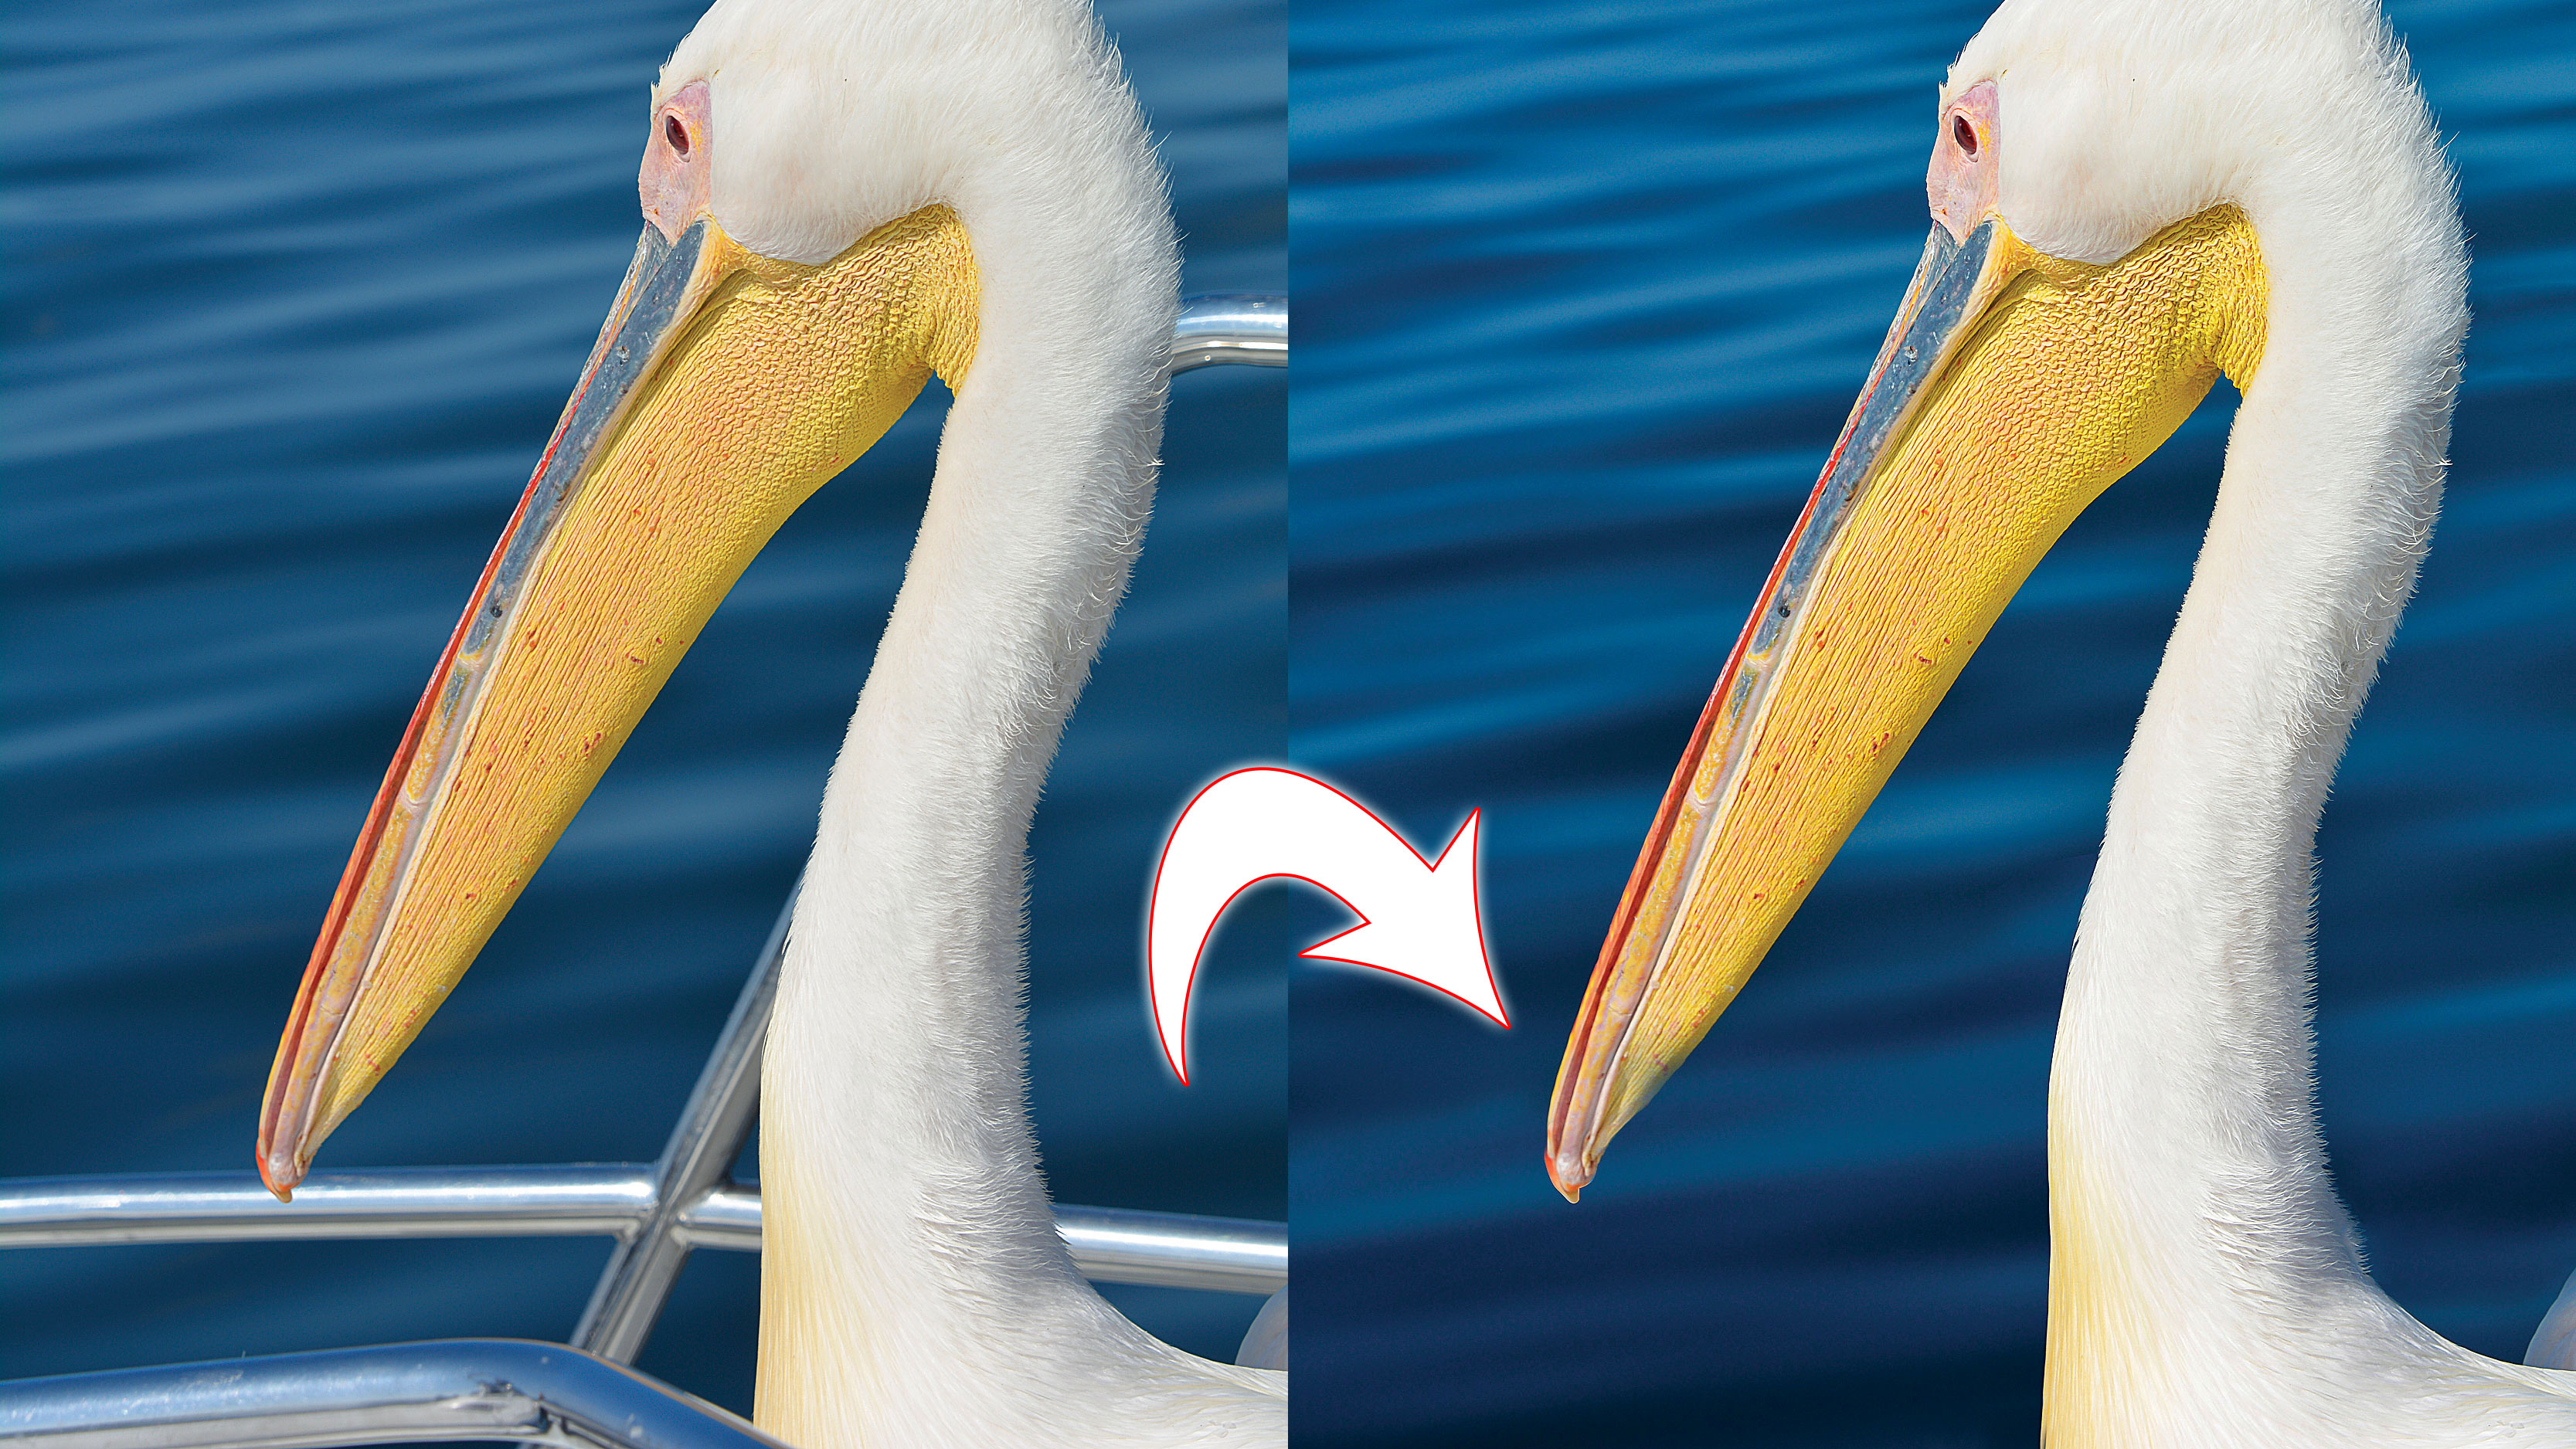
Sometimes a photo-worthy moment happens so quickly that it’s near impossible to compose the frame properly, like when a great white pelican suddenly appears next to your boat.
At moments like this, a messy, distracting backdrop is often hard to avoid. Here, the metal bars intrude on the composition rather than enhance it. But if we like we can remove distractions like this with simple retouching tools in Affinity Photo.
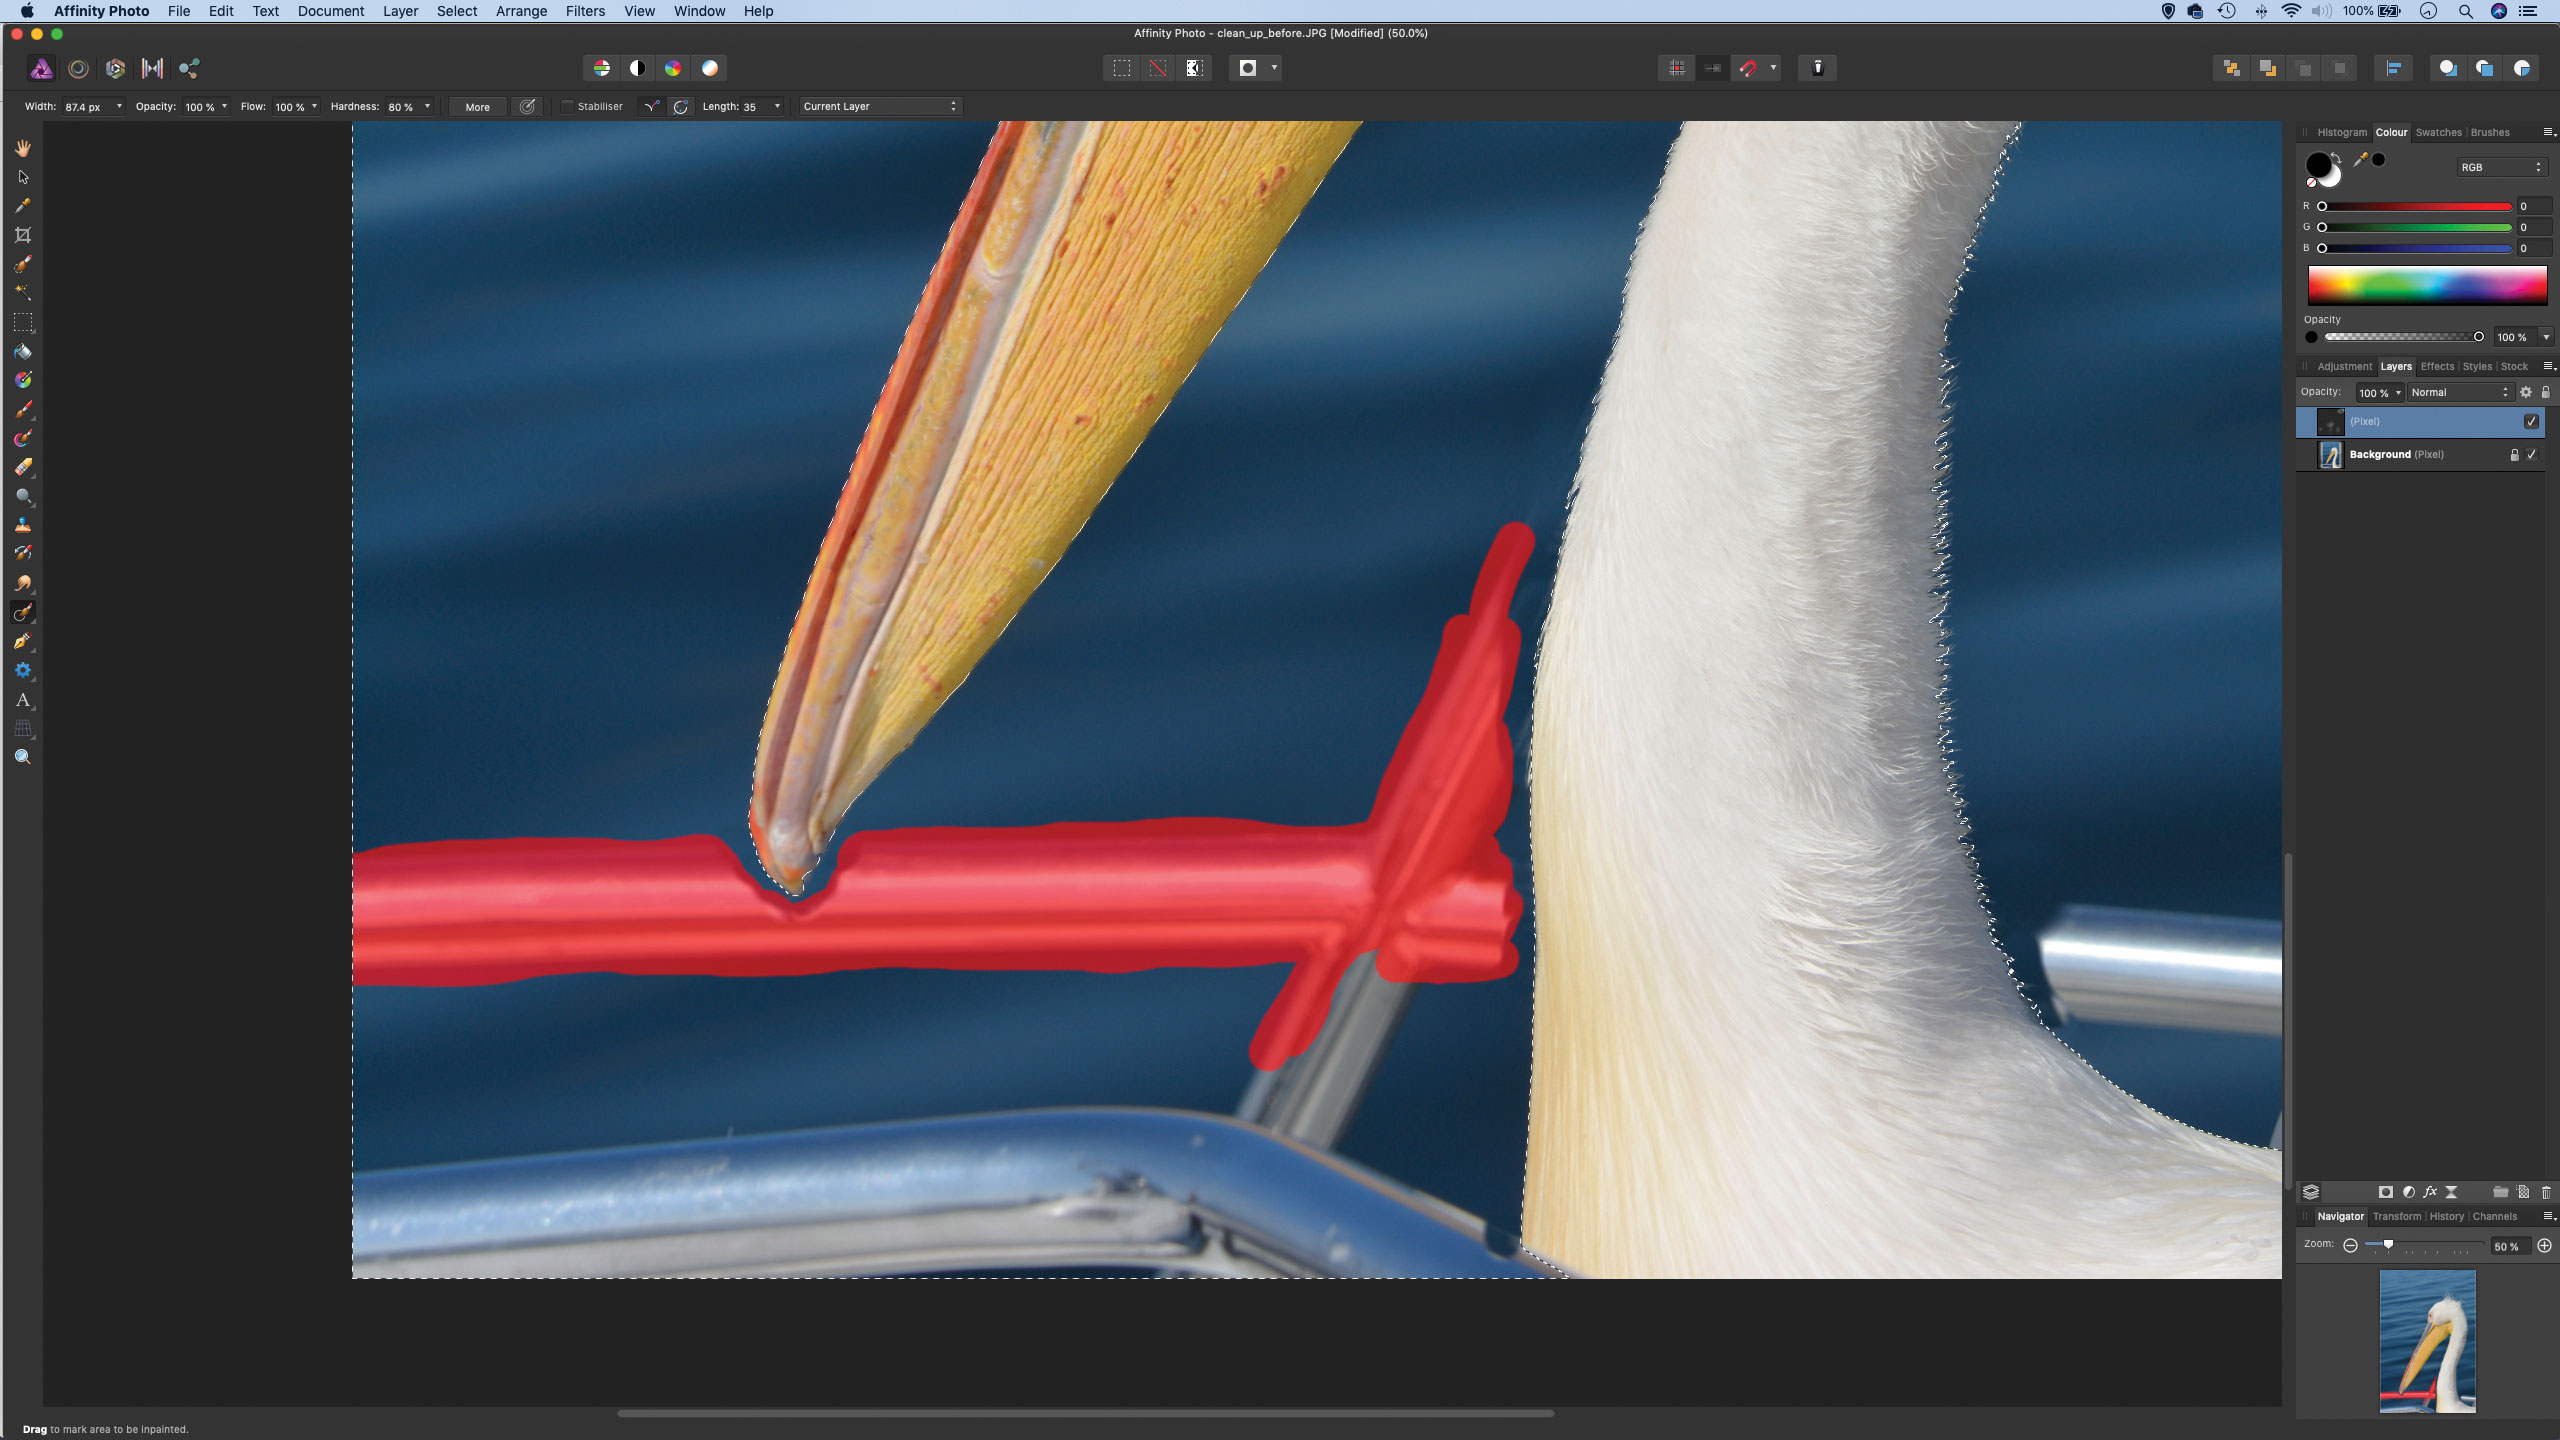
One of the most powerful is the Inpainting tool. It’s a clever feature that’s conveniently easy to use, even for a complete beginner. We simply paint over parts of the image and the tool intelligently analyses the area, determines what we’d like to remove, then replaces the offending pixels by sampling and replicating those nearby. Here it means we can add extra waves to cover the bars.
Of course, like all automated tools it’s not infallible. It works brilliantly for removing imperfections against otherwise clean areas, like a pimple on skin or a sensor mark in a sky. But when the object we’re attempting to remove intersects with something we want to preserve – like where the bars meet the body of the bird here – the result can be a blotchy mess.
However, there are steps we can take to prevent this happening. Here we can use the Clone tool to ‘cut off’ the bars where they intersect the body of the bird, then use Inpainting to finish off. By employing Affinity’s intelligent selection tools, it’s a quick and easy task.
The Selection Brush works very similarly to any other brush, allowing you to paint a selection over your image. But the clever part is the way it seeks out edges and changes in colour or tone as you paint. This makes it easy to snap the selection to the edges of complex objects like the bird we have here. If the tool manages to accidentally pick up unwanted areas in the selection, click the subtract button at top left (or hold Alt) and paint to remove areas until it’s perfect.
The best camera deals, reviews, product advice, and unmissable photography news, direct to your inbox!
Read more:
Step 1: Remove the bar
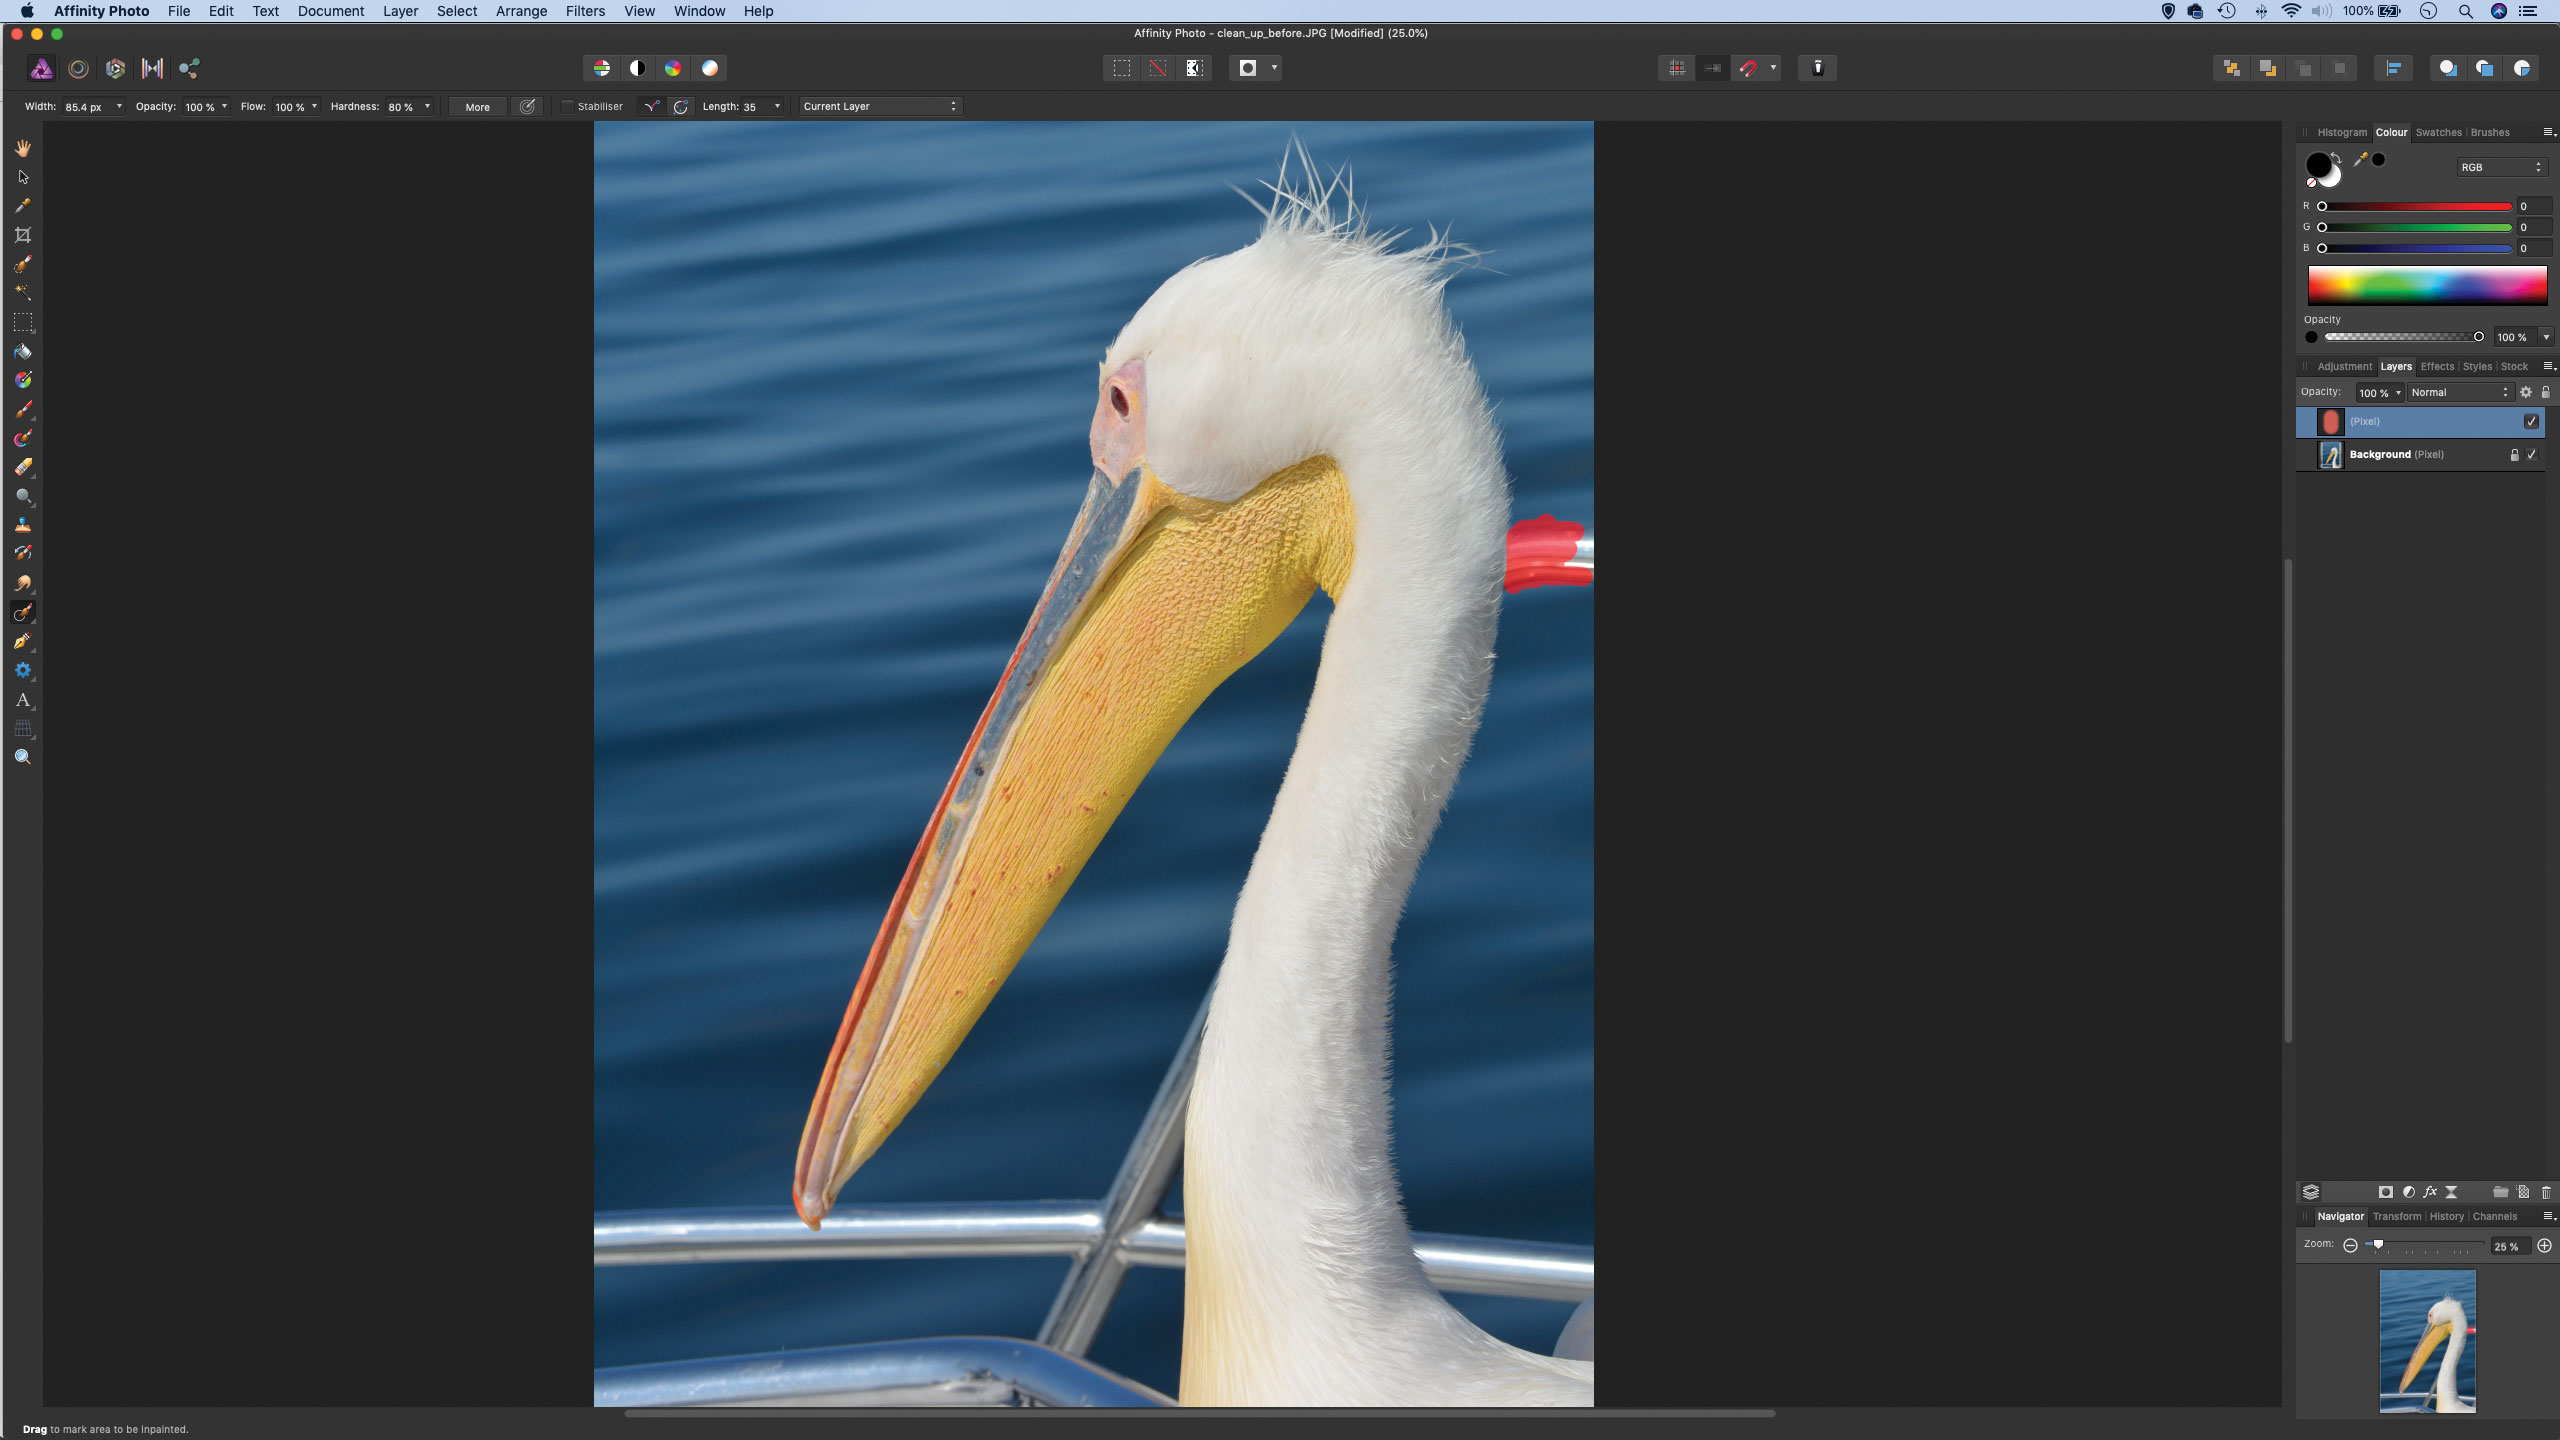
We've opened our image in Affinity photo and headed to the Layers panel to click the New Layer icon at the bottom. Next, we grab the Inpainting tool from the toolbar (next to the healing tools). After we set ‘Current and Below’ in the tool options at the top, we zoom in close and paint over the bar to the right of the bird’s head.
Step 2: Clone to tidy
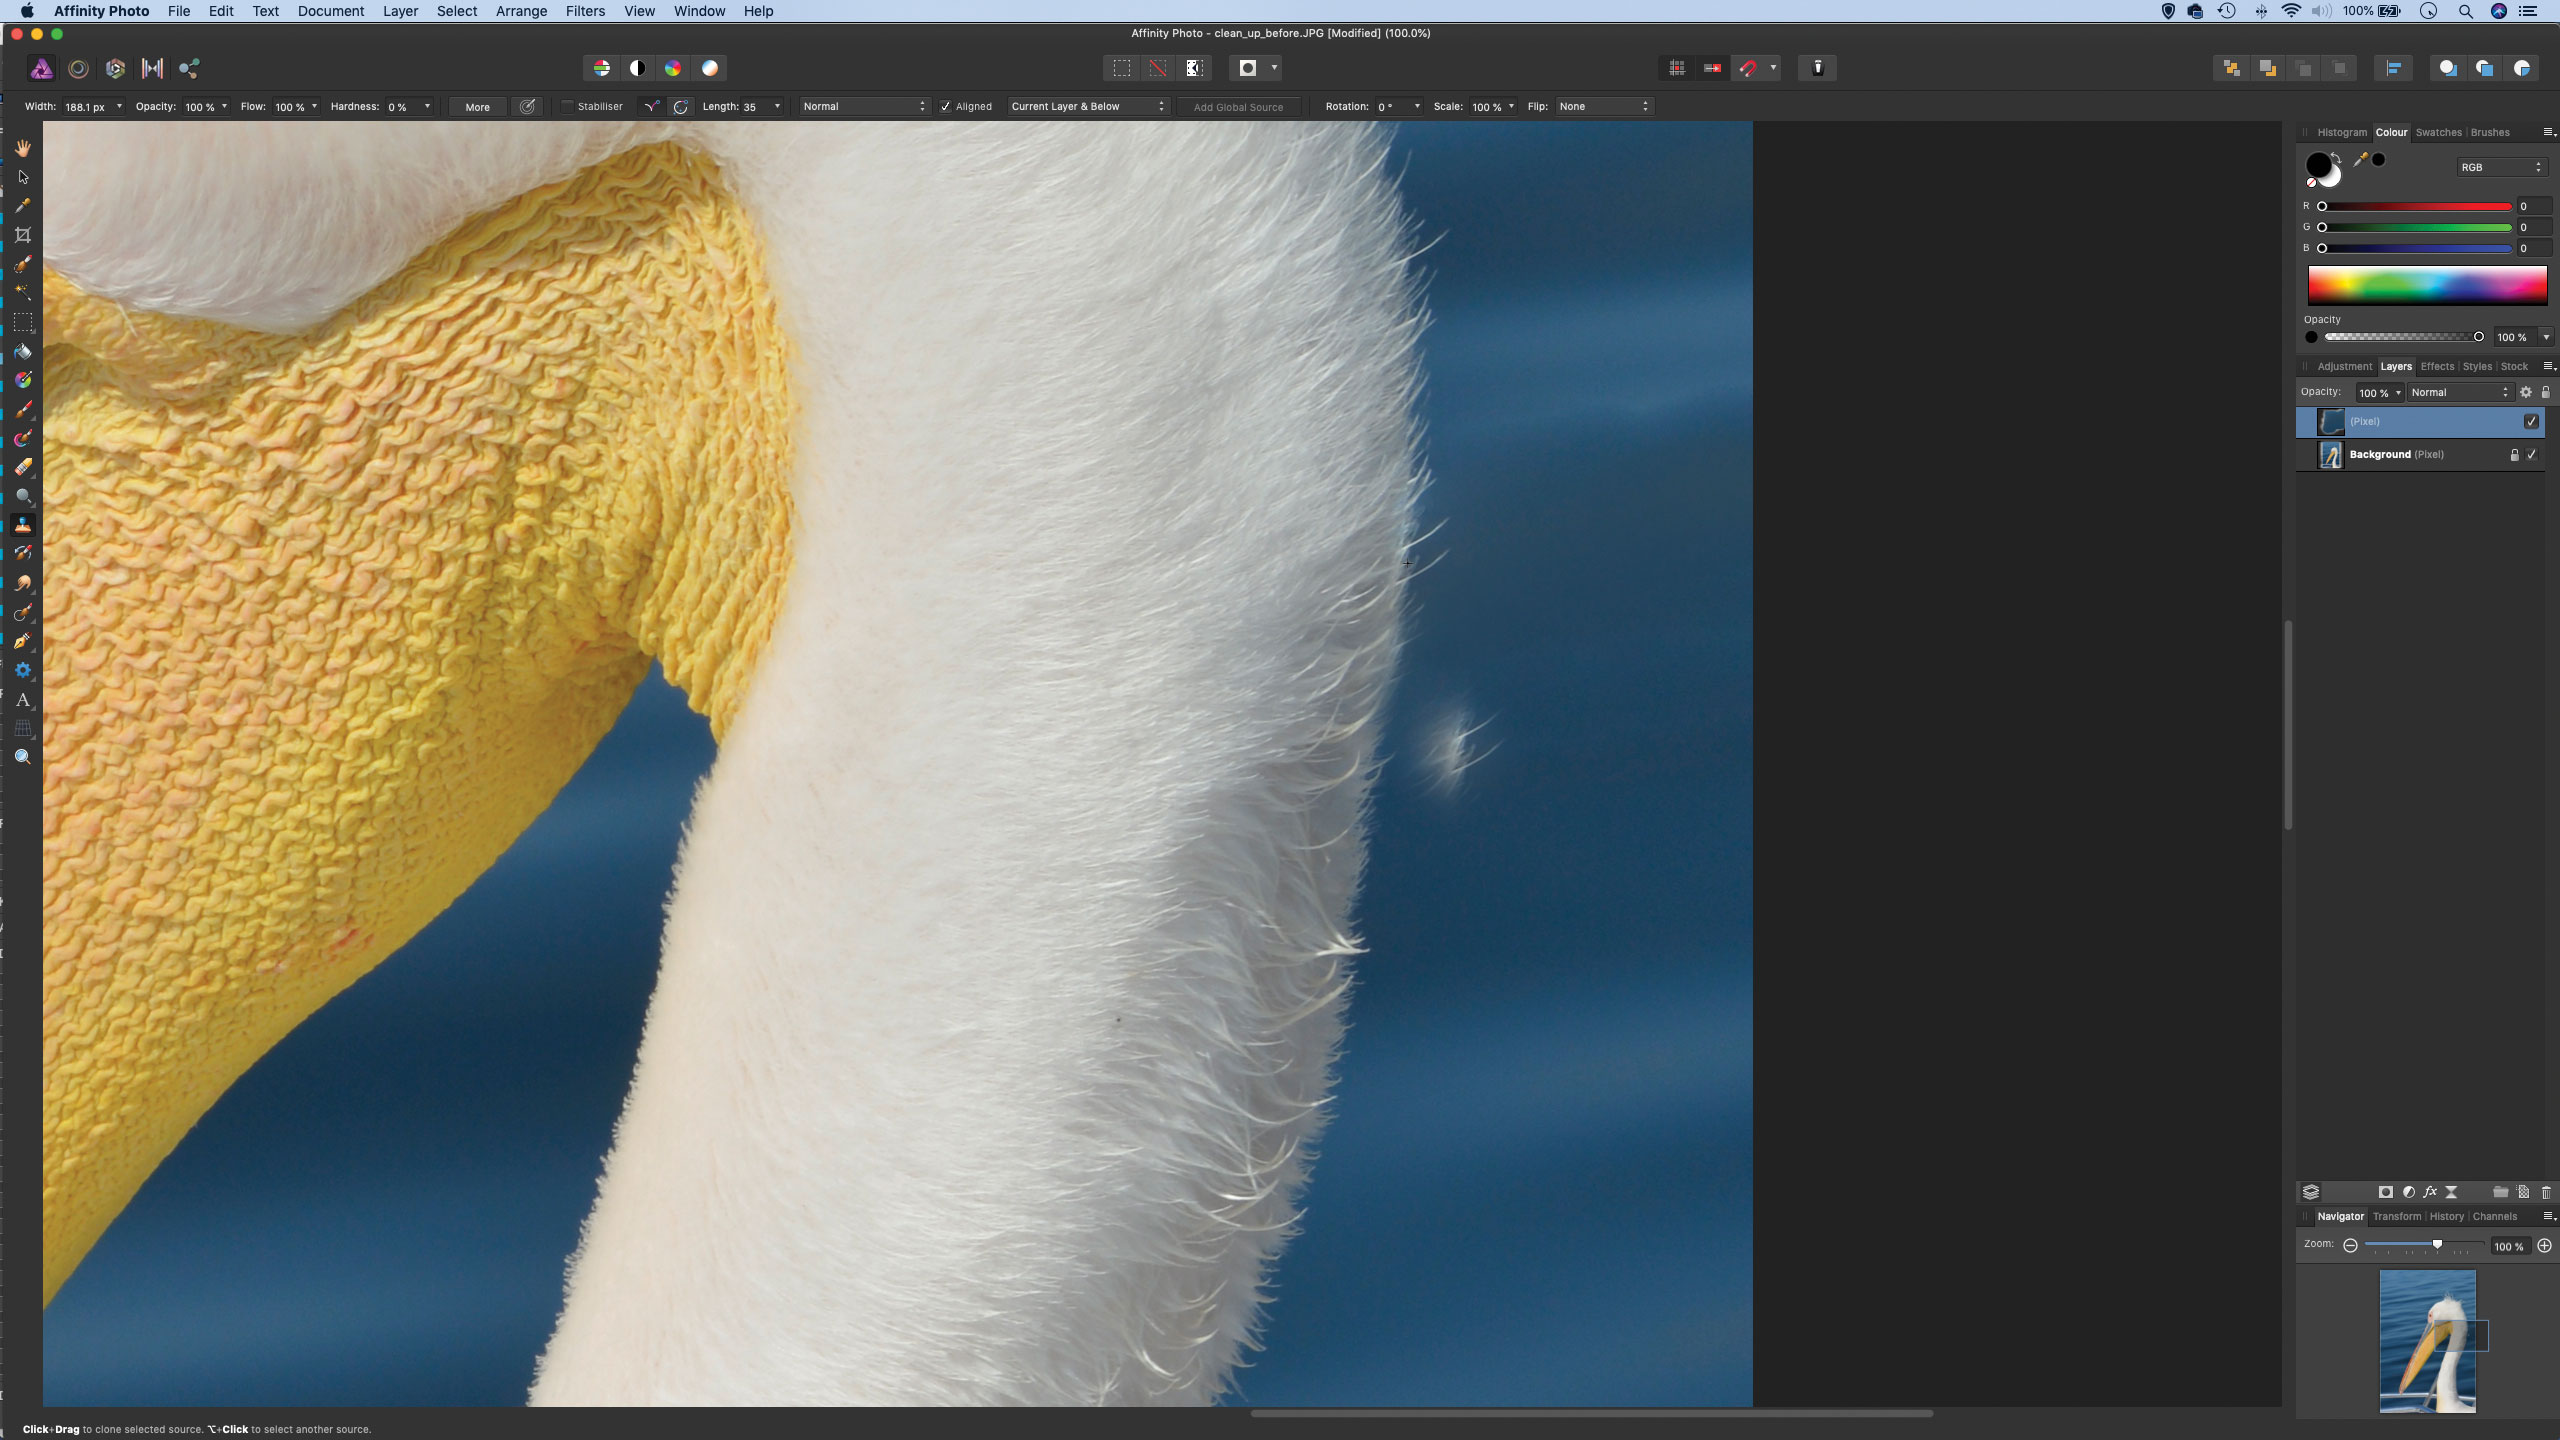
The Inpainting can leave slight blotchiness along the edge of the correction, so we switch to the Clone Tool (S) and again set ‘Current and Below’ in the options, then hold Alt to sample a clean part of the sea or bird near to the messy area. Now we can paint to clone the pixels from one place to another.
Step 3: Select the bird
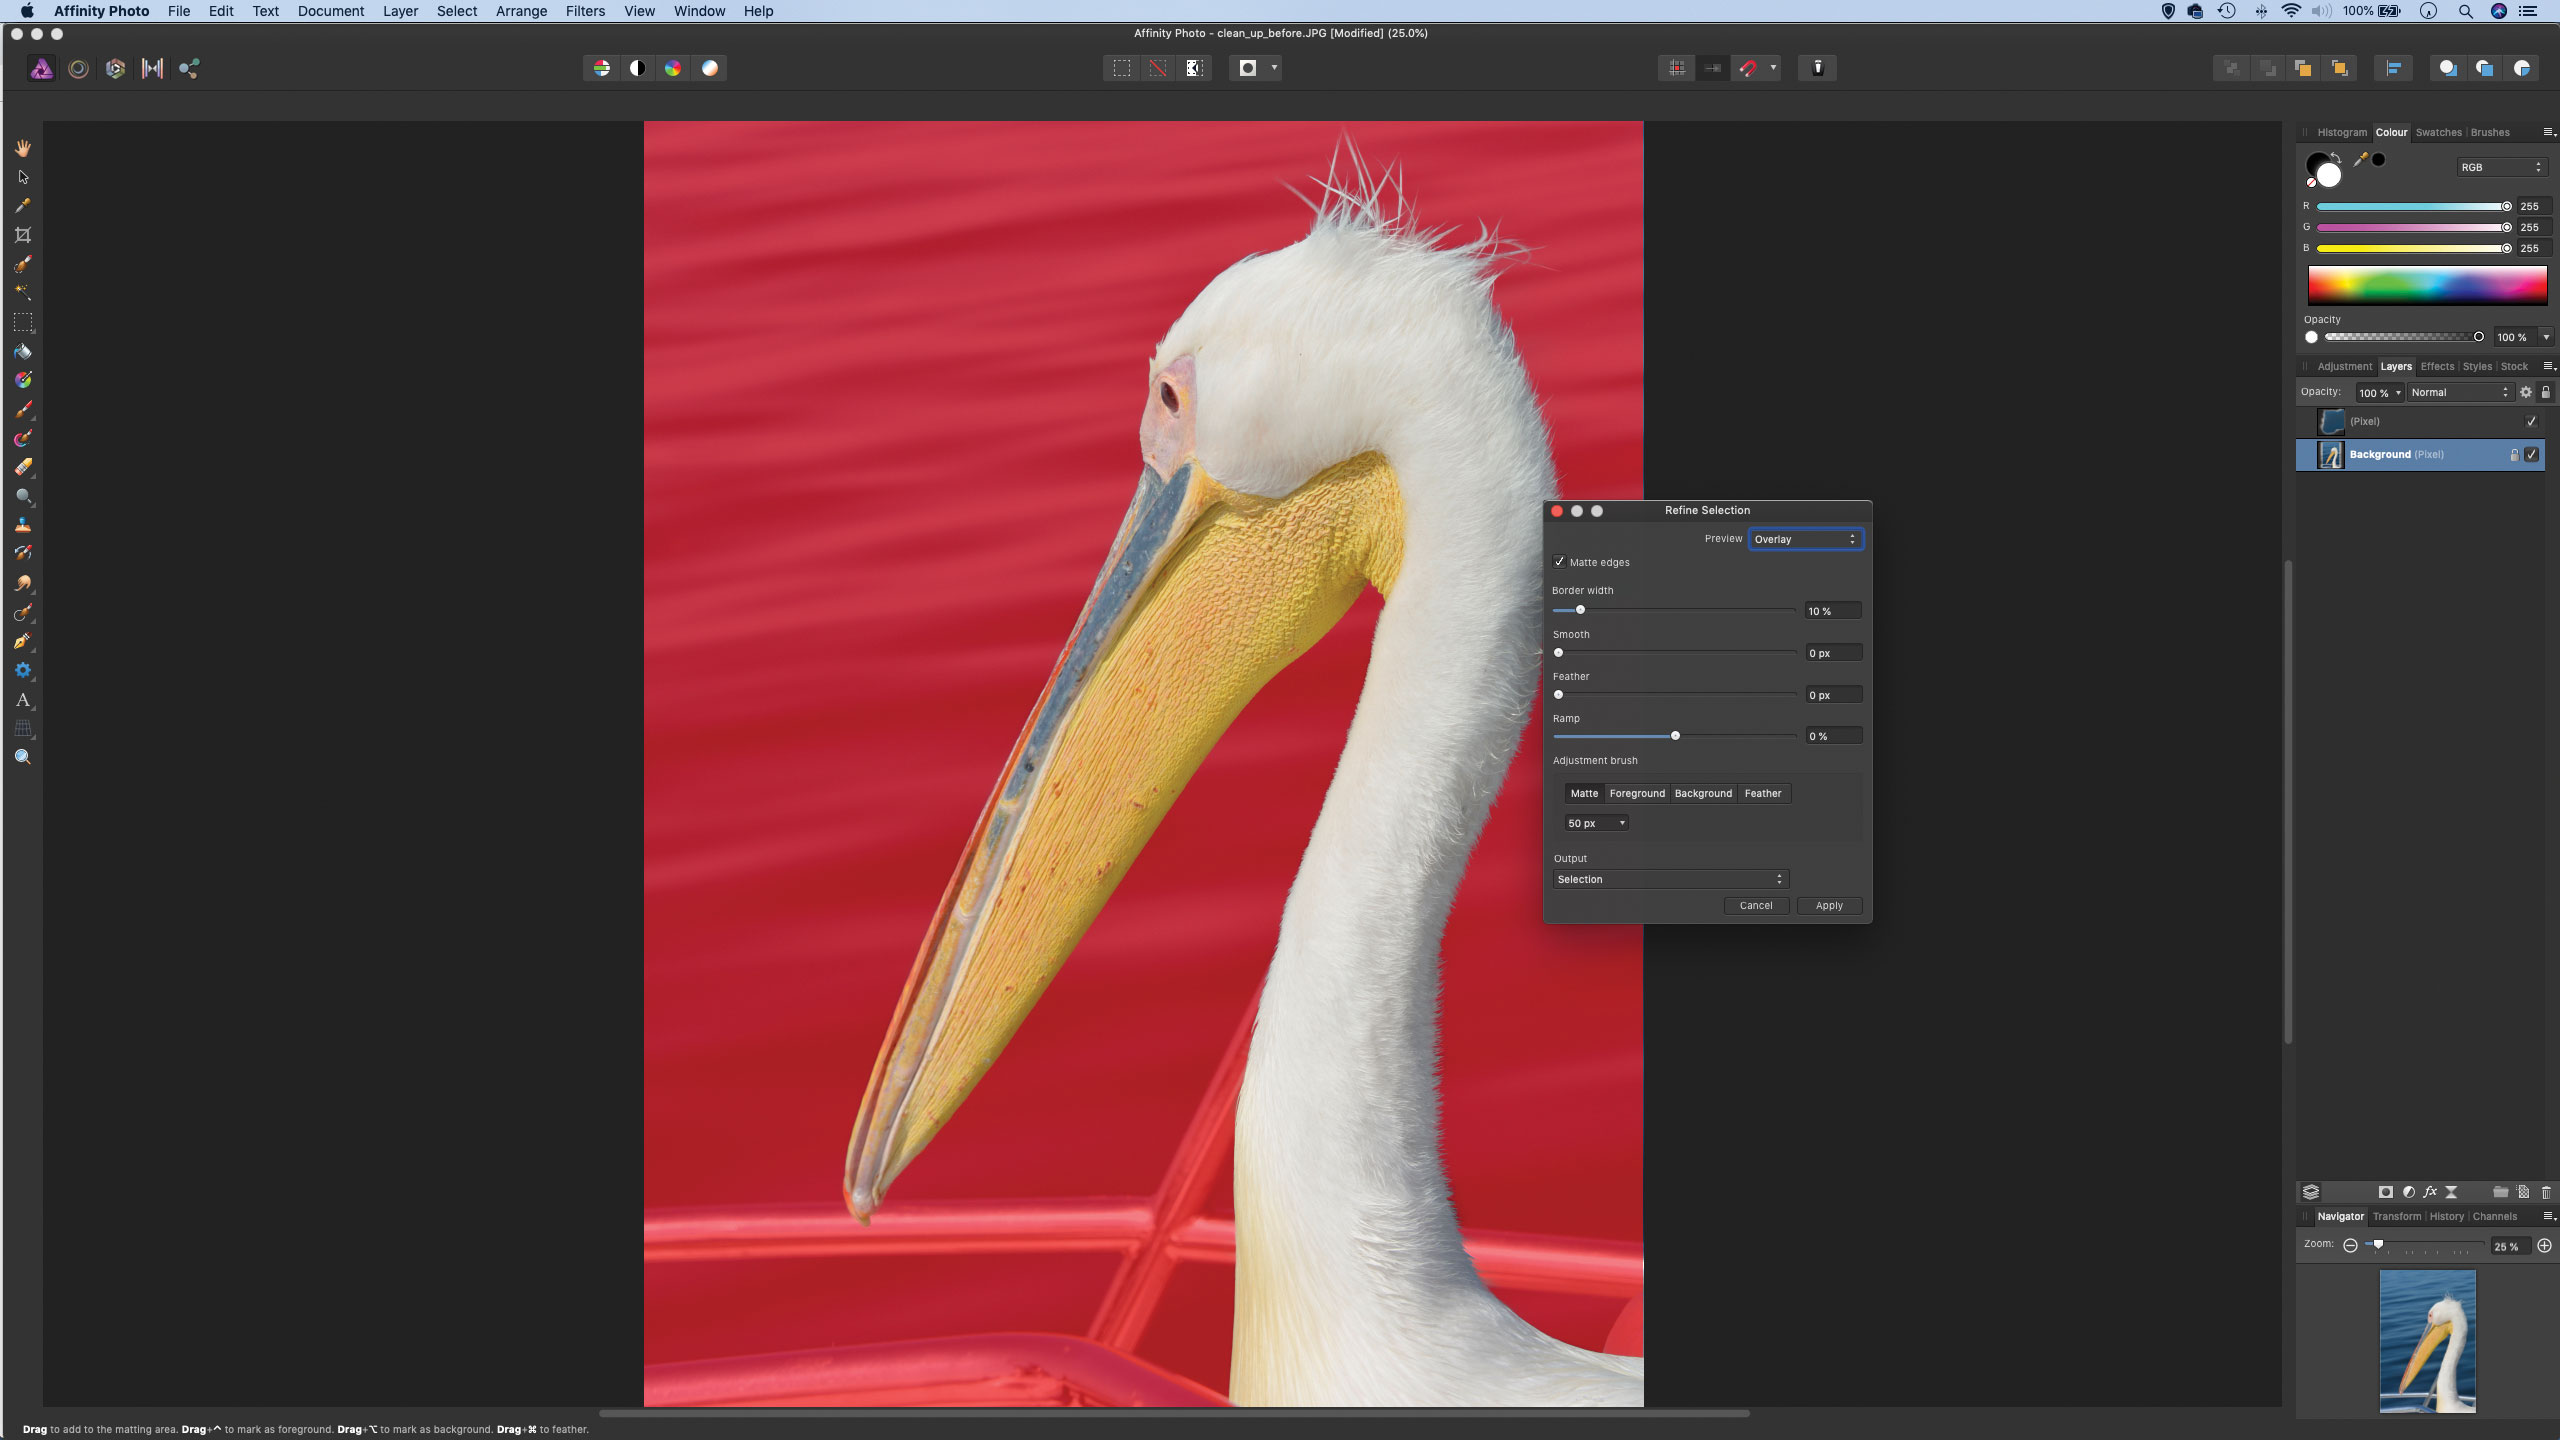
Often it makes our cloning easier if we first select which parts to isolate in the image. Here, we grab the Selection Brush and highlight the bottom layer, then paint over the bird to select it. The tool automatically snaps to the edges. Now we can go to Select > Refine Edges then increase the Radius slightly and hit OK.
Step 4: Clone the edges
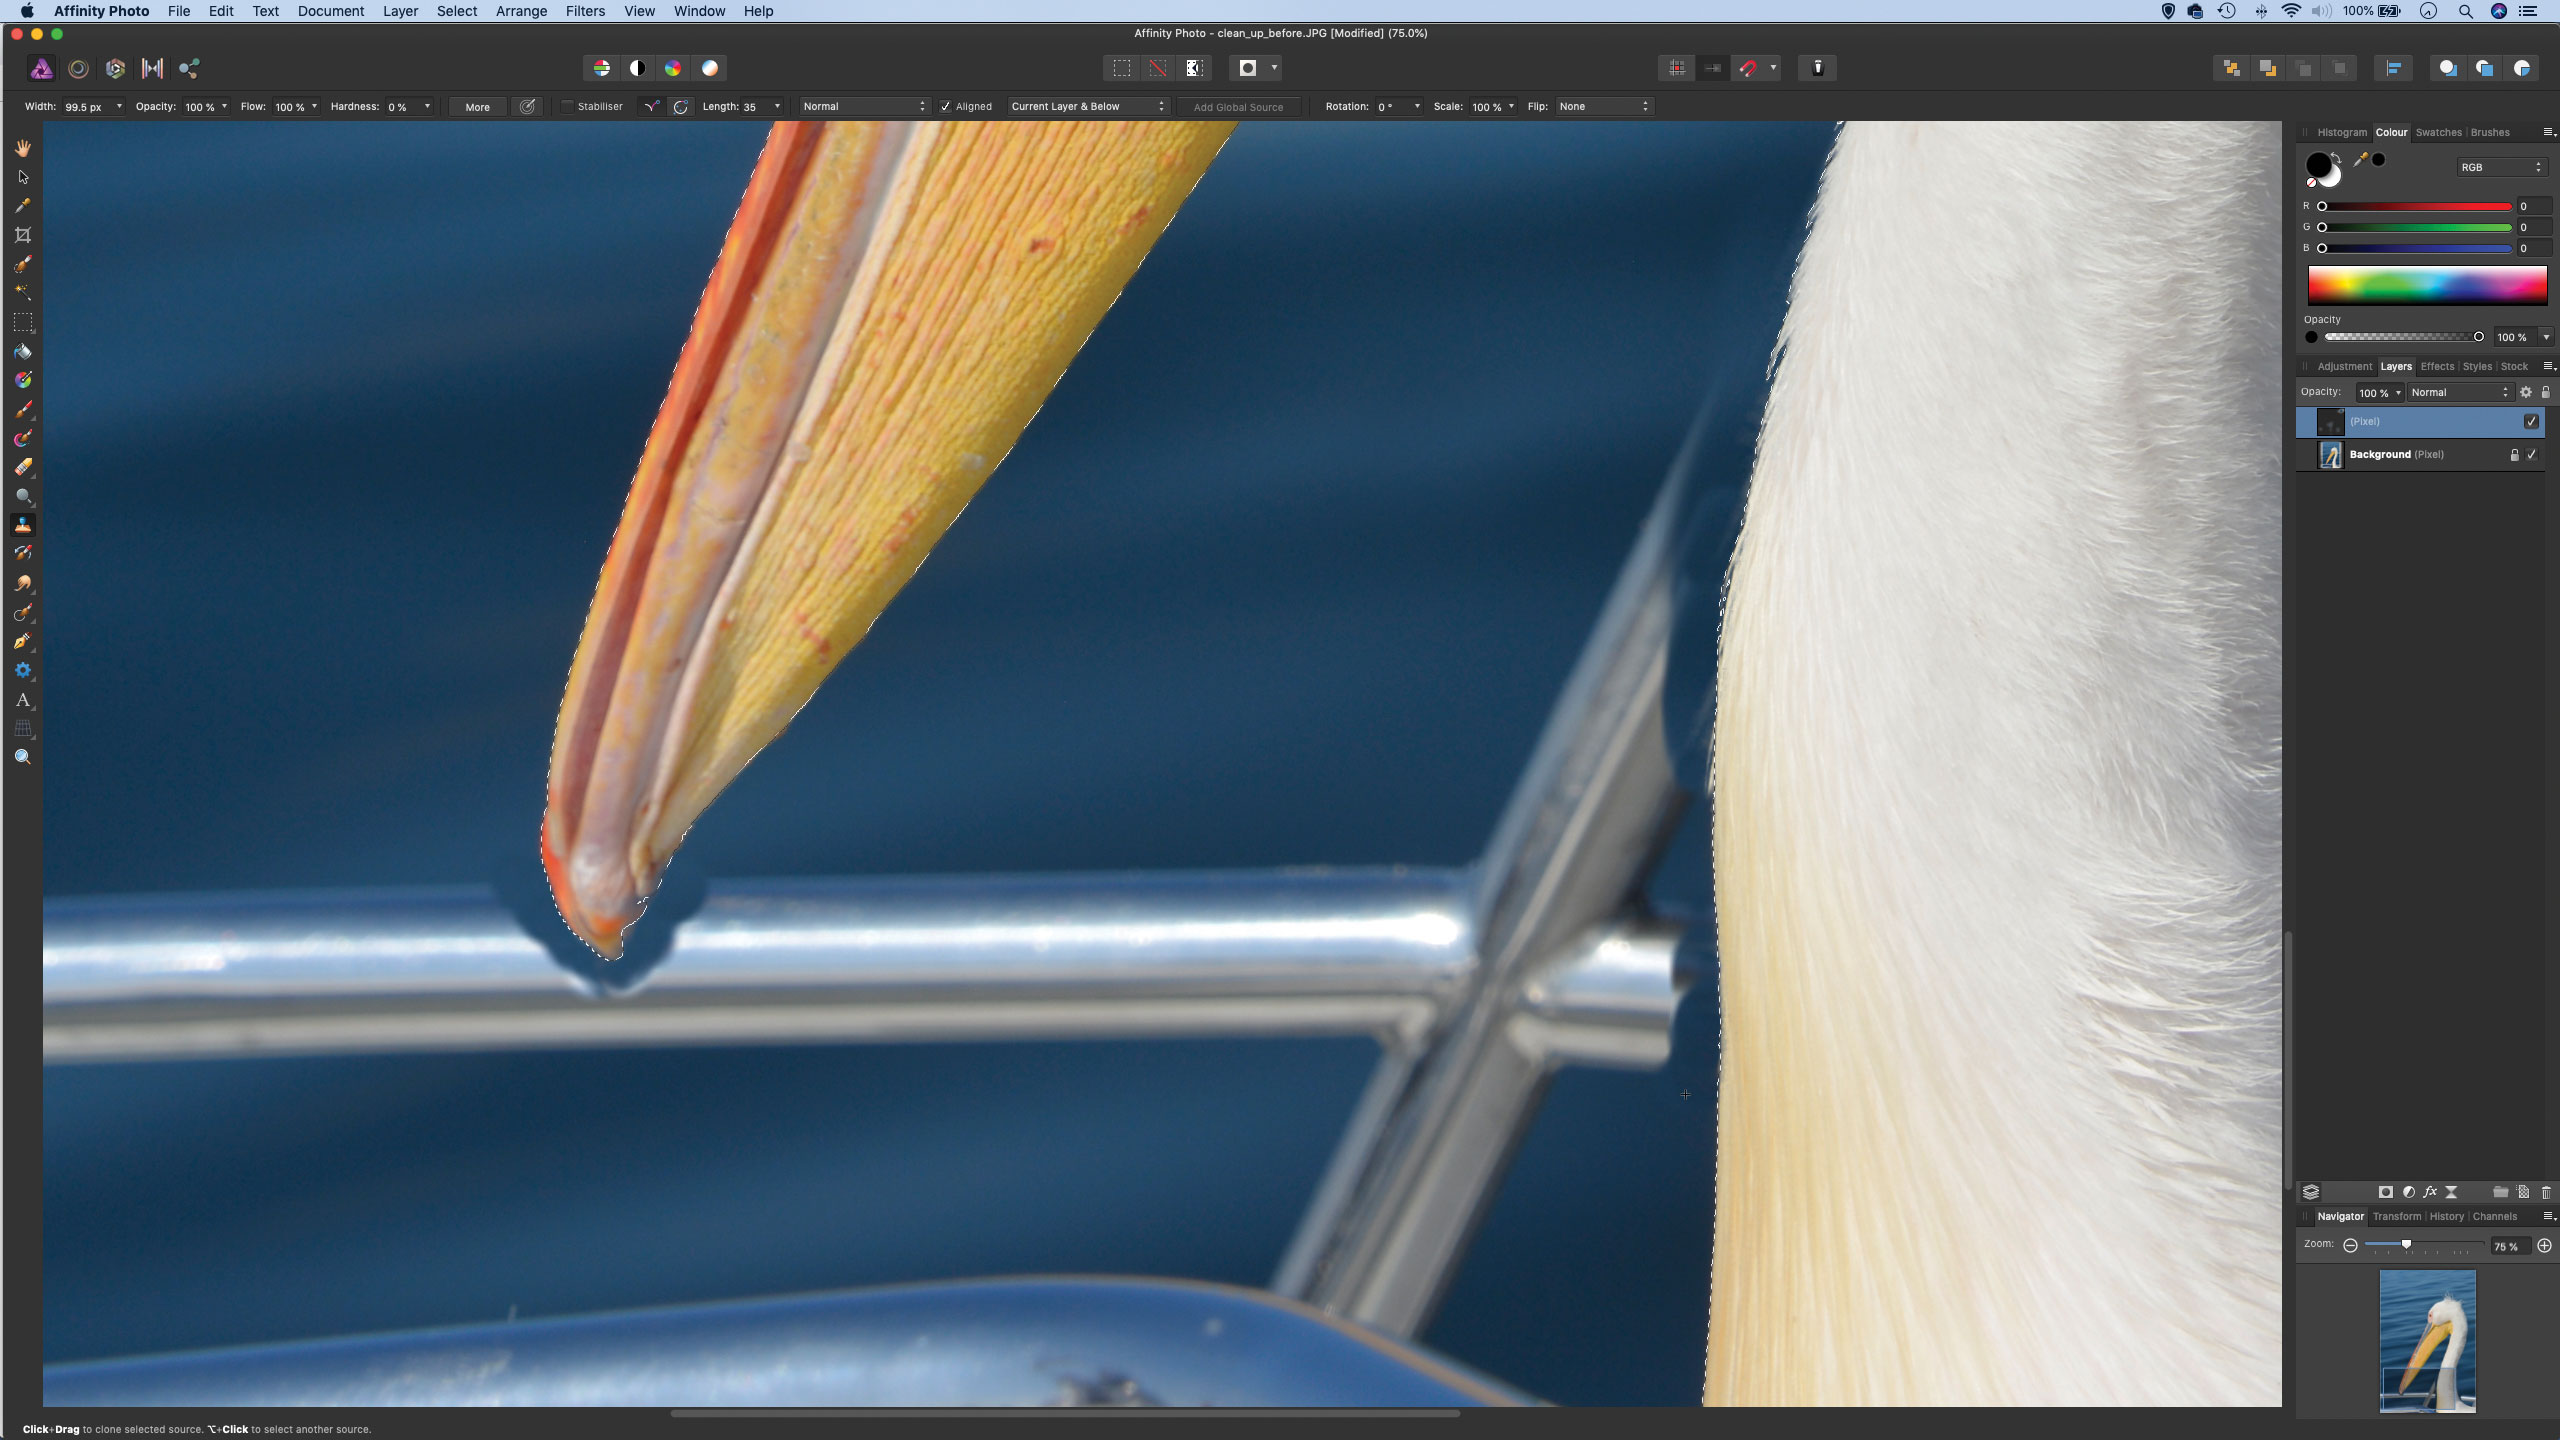
Now we go to Select > Invert Pixel Selection. We highlight the upper layer again then grab the Clone tool. We can zoom in close and then clone along the edges in order to break the connection between the messy metal bars and the edges where they intersect the bird’s body. When sampling areas like these, try to follow any lines in the background, like the lines of the waves here.
Step 5: Paint over the bars
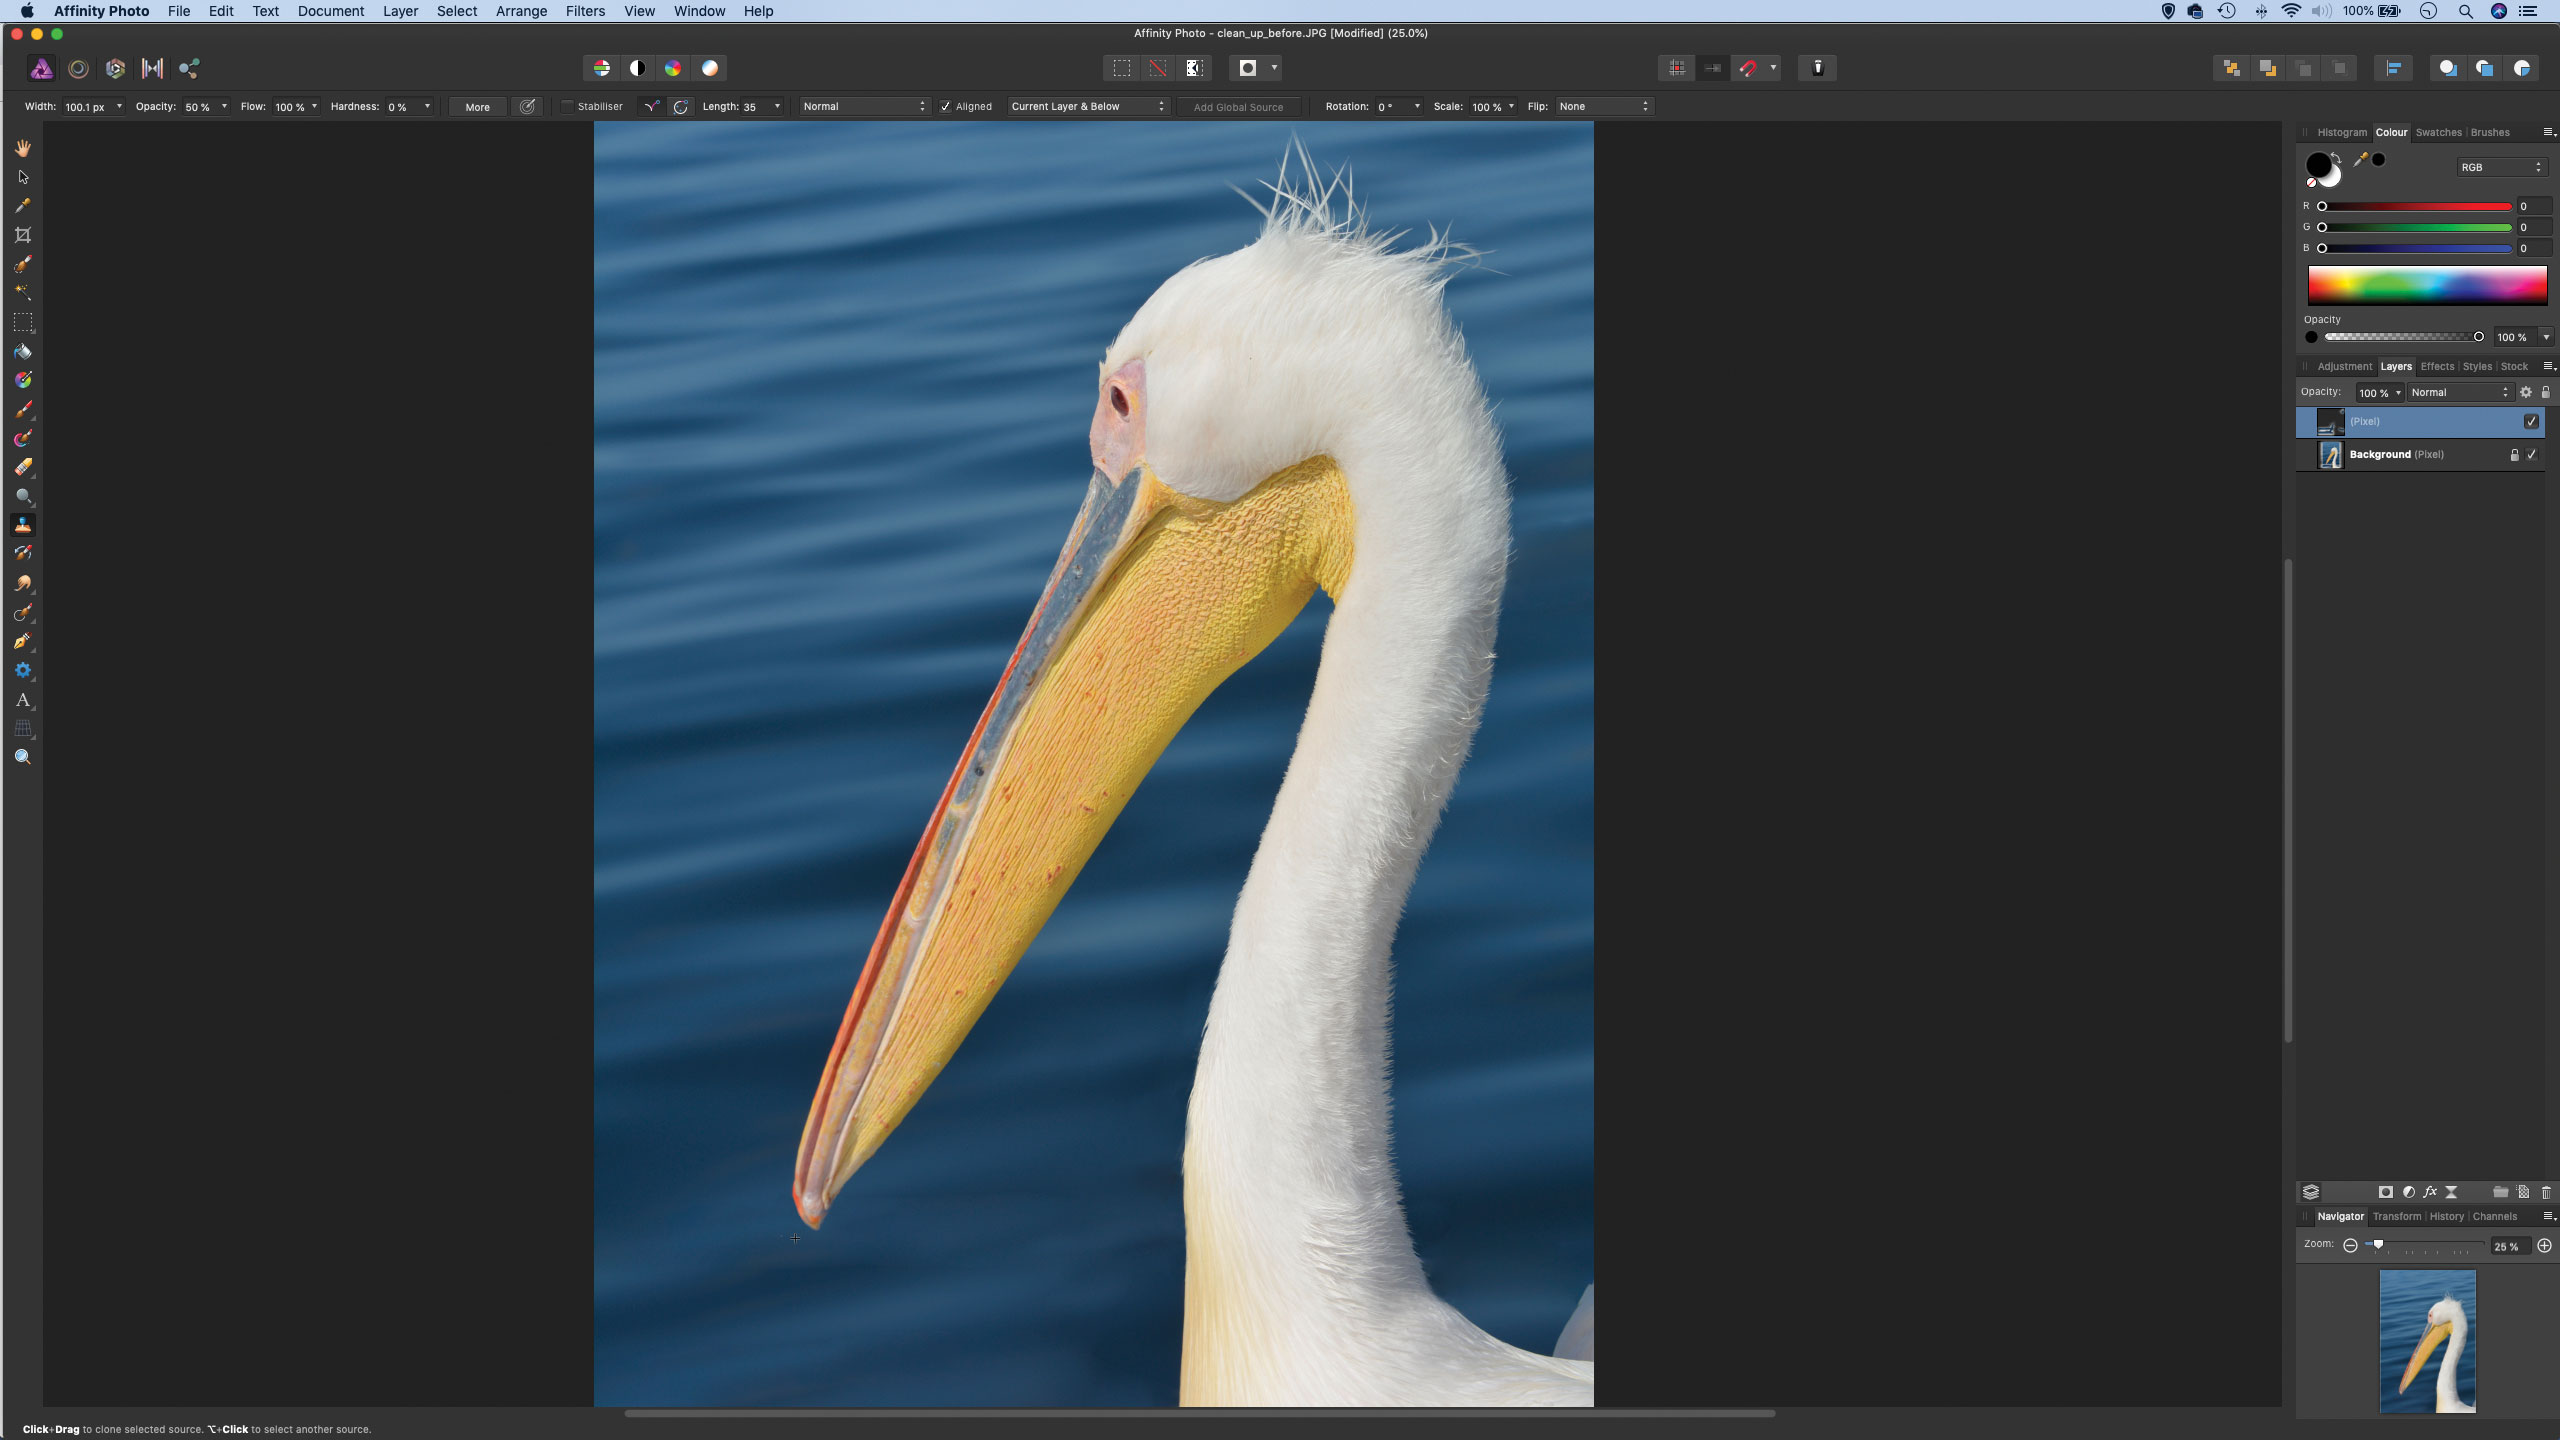
We can grab the Inpainting tool again then carefully paint over the remaining bars in our photo's background. Now, because the bars are not ‘connected’ to the body of the bird, the results of using the Inpainting tool are much better than if we were to simply paint over the bars without first cloning the edges.
Step 6: Finish it off
To finish off, we hit Cmd/Ctrl+D to deselect then zoom in and check all the edges for blurriness or mess. The Clone tool is useful for blending rough pixels when used at a low opacity. Here, we set the tool opacity to 30% then Alt-click to sample a nearby source and clone away any remaining messy pixels.
Quick tip
The Selection Brush is one of the most powerful tools available in Affinity Photo.
It works very similarly to any other brush, allowing you to paint a selection over your image. But the clever part is the way it seeks out edges and changes in colour or tone as you paint. This makes it easy to snap the selection to the edges of complex objects like the bird we have here. If the tool manages to accidentally pick up unwanted areas in the selection, click the subtract button at top left (or hold Alt) and paint to remove areas until it’s perfect.
About N-Photo magazine
This tutorial originally appeared in N-Photo, the monthly newsstand magazine for Nikon photographers. Why not subscribe to a print edition, and have the magazine delivered direct to your door every month?
Alternatively, we have a number of different digital options available, including:
• Apple app (for iPad or iPhone)
• Zinio app (multi-platform app for desktop or smartphone)
• PocketMags (multi-platform app ideal for Android devices)
• Readly (all-you-can-eat digital magazine subscription service)
If you wanted a printed version of any of our most recent issues we have a selection of back issues to choose from in our online store.
Read more:
• Photography tips and tutorial videos
• The best photo editing tools and accessories
• The best desktop computers for photo editing
• The best photo-editing laptops right now
• The best photo editing software today
N-Photo: The Nikon Magazine is a monthly publication that's entirely dedicated to Nikon users. As a 100% independent magazine, you can be assured of unbiased opinion from a trustworthy team of devoted photography experts including editor Adam Waring and Deputy Editor Mike Harris.
Aimed at all users, from camera newcomers to working pros, every issue is packed with practical, Nikon-specific advice for taking better photos, in-depth reviews of Nikon-compatible gear, and inspiring projects and exciting video lessons for mastering camera, lens and Photoshop techniques.
Written by Nikon users for Nikon users, N-Photo is your one-stop shop for everything to do with cameras, lenses, tripods, bags, tips, tricks and techniques to get the most out of your photography.
