Restore old family portraits in Affinity Photo
We show you how to repair, tidy and hand-color a faded vintage print in Affinity Photo
Start here
• Affinity Photo tutorials
The tutorials
1. Affinity Photo vs Photoshop
2. RAW editing with Affinity Photo
3. Focus merge with Affinity Photo
4. Replace a sky in Affinity Photo
5. Moody mono in Affinity Photo
6. Six Affinity Photo landscape tips
7. Color correction in Affinity Photo
8. Live Filters in Affinity Photo
9. Create a classic wet plate look
10. Remove objects in Affinity Photo
11. Paint an abstract portrait
12. Enhance skintones in Affinity Photo
13. Create HDR in Affinity Photo
14. Replace a sky in Affinity Photo
15. Affinity Photo double exposures
16. Affinity Photo Denoise tool
17. Affinity Photo retouching
18. Restore old family portraits
19. Change clothes in Affinity Photo
20. Create super-charged sunsets
Watch video: How to restore old family portraits in Affinity Photo
Many of us will have old family photos and vintage prints tucked away at home, so now might be the perfect time to dig them out, brush them off and digitize them with a scanner or your camera.
Once done, you can open the image in Affinity Photo to perform all kinds of impressive restoration work and breathe new life into these beloved old prints. Even the most well-cared-for prints will eventually show signs of age. Dust and grime will accumulate, creases and scratches will damage the surface, edges will become bent or torn. The good news is that this kind of damage can be improved with simple tools in Affinity Photo. Given a little time and attention, we can reverse the ravages of time and restore our prints to their former glory.
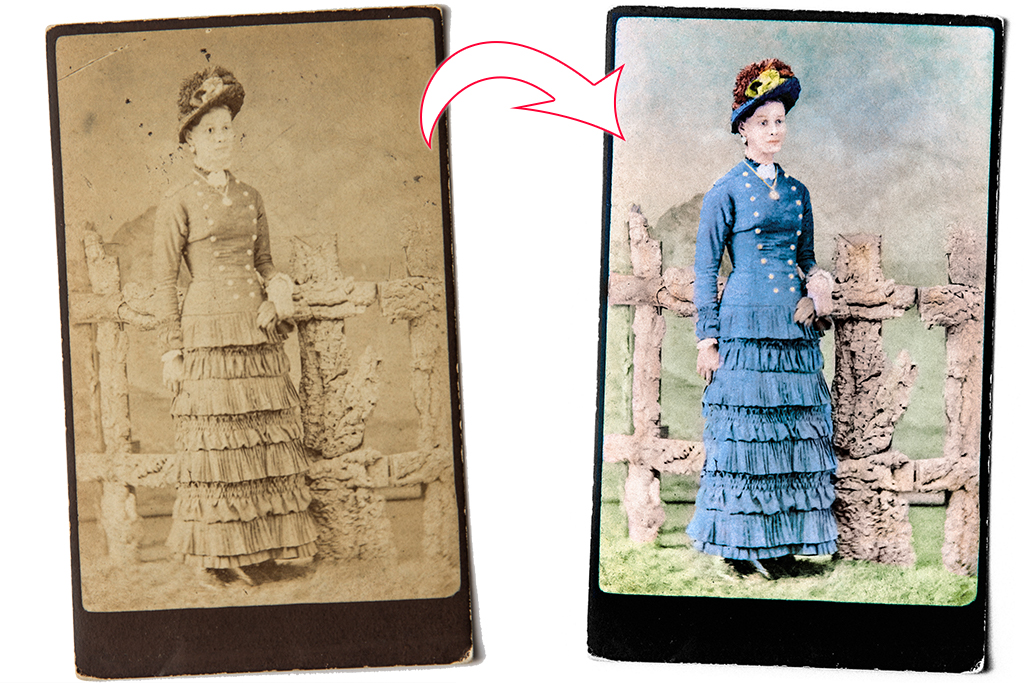
In this project we’ll explain how it’s done. We’ll start by using Affinity Photo’s Inpainting tool to tidy up the print. The portrait here is very faded, but we can bring back definition to the face with subtle dodging and burning. Once the grime is removed and the tones are improved we could leave it at that. But if we want to go one step further, we can add a hand-colored treatment. This is done with a simple combination of layer blending modes and painting. We simply build up the colours on different layers and experiment with shades until everything comes together.
Read more:
Step 1: Fix marks & scratches
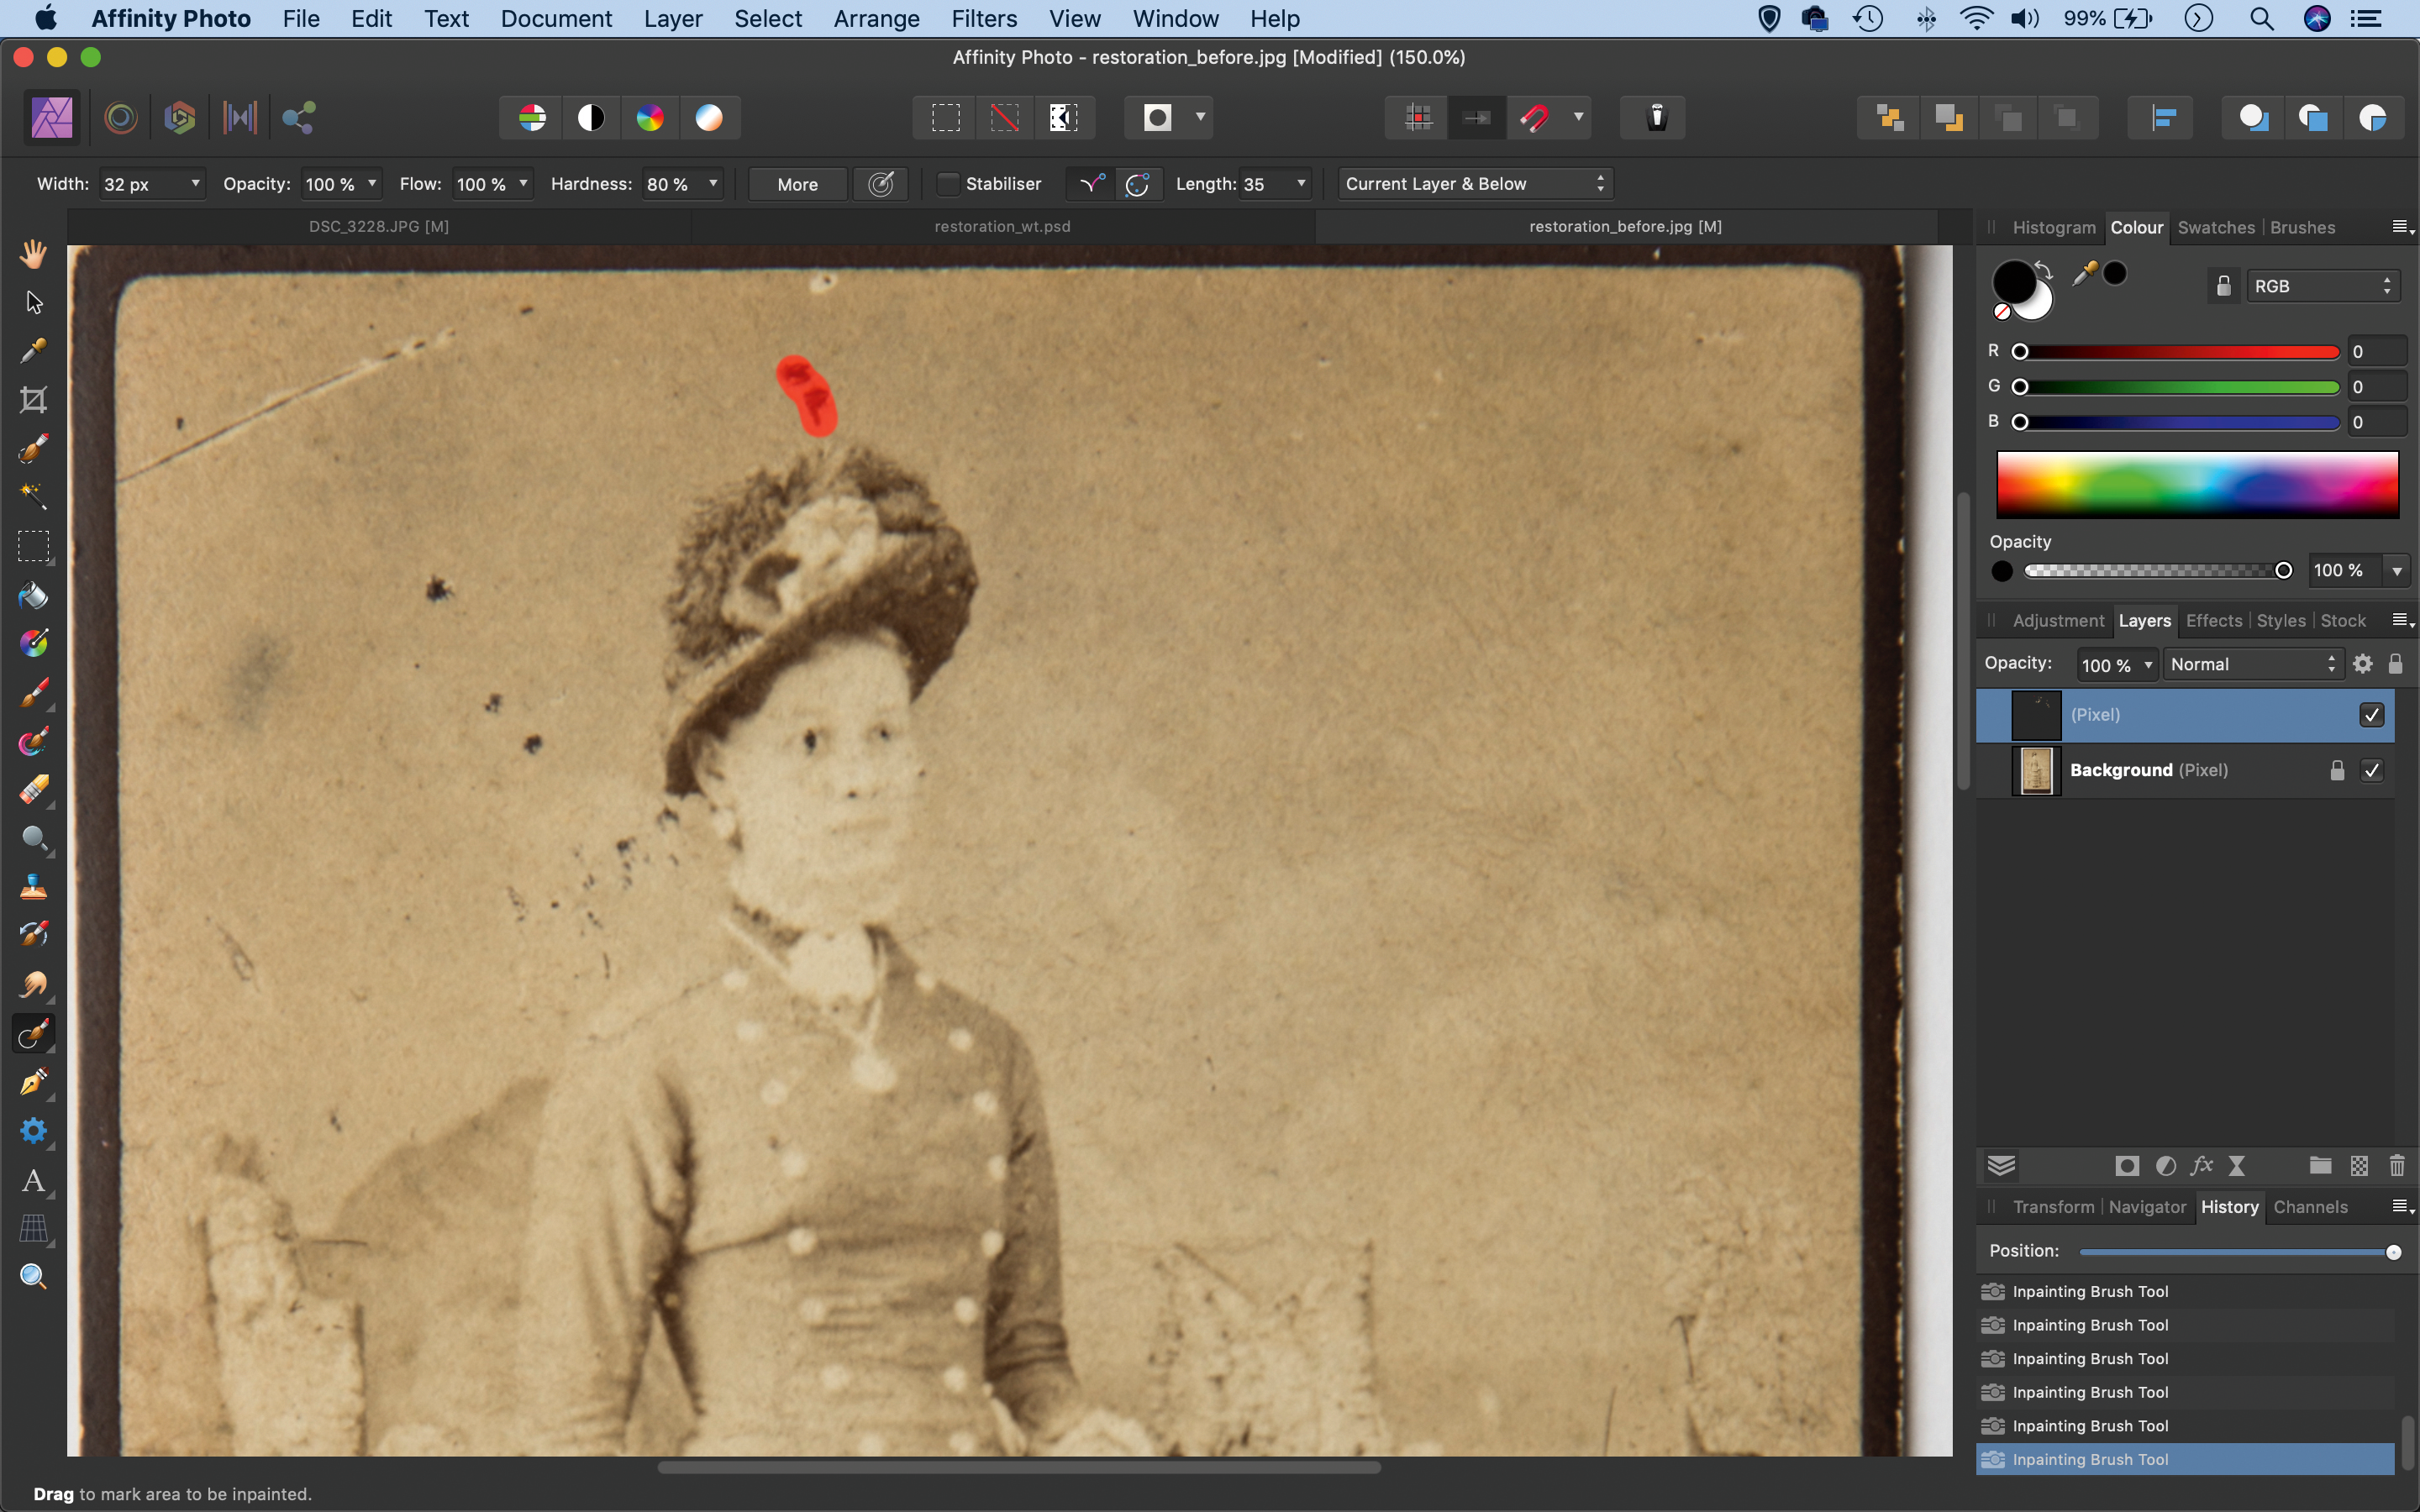
Open the portrait, go to the Layers panel and click the new layer icon. Grab the Inpainting tool from the toolbar. Go to tool options and set ‘Current Layer and Below’. Paint over scratches to remove them. Hold Cmd/Ctrl+Space and drag to zoom in or out, and press ] and [ to resize the brush.
The best camera deals, reviews, product advice, and unmissable photography news, direct to your inbox!
Step 2: Enhance the tones
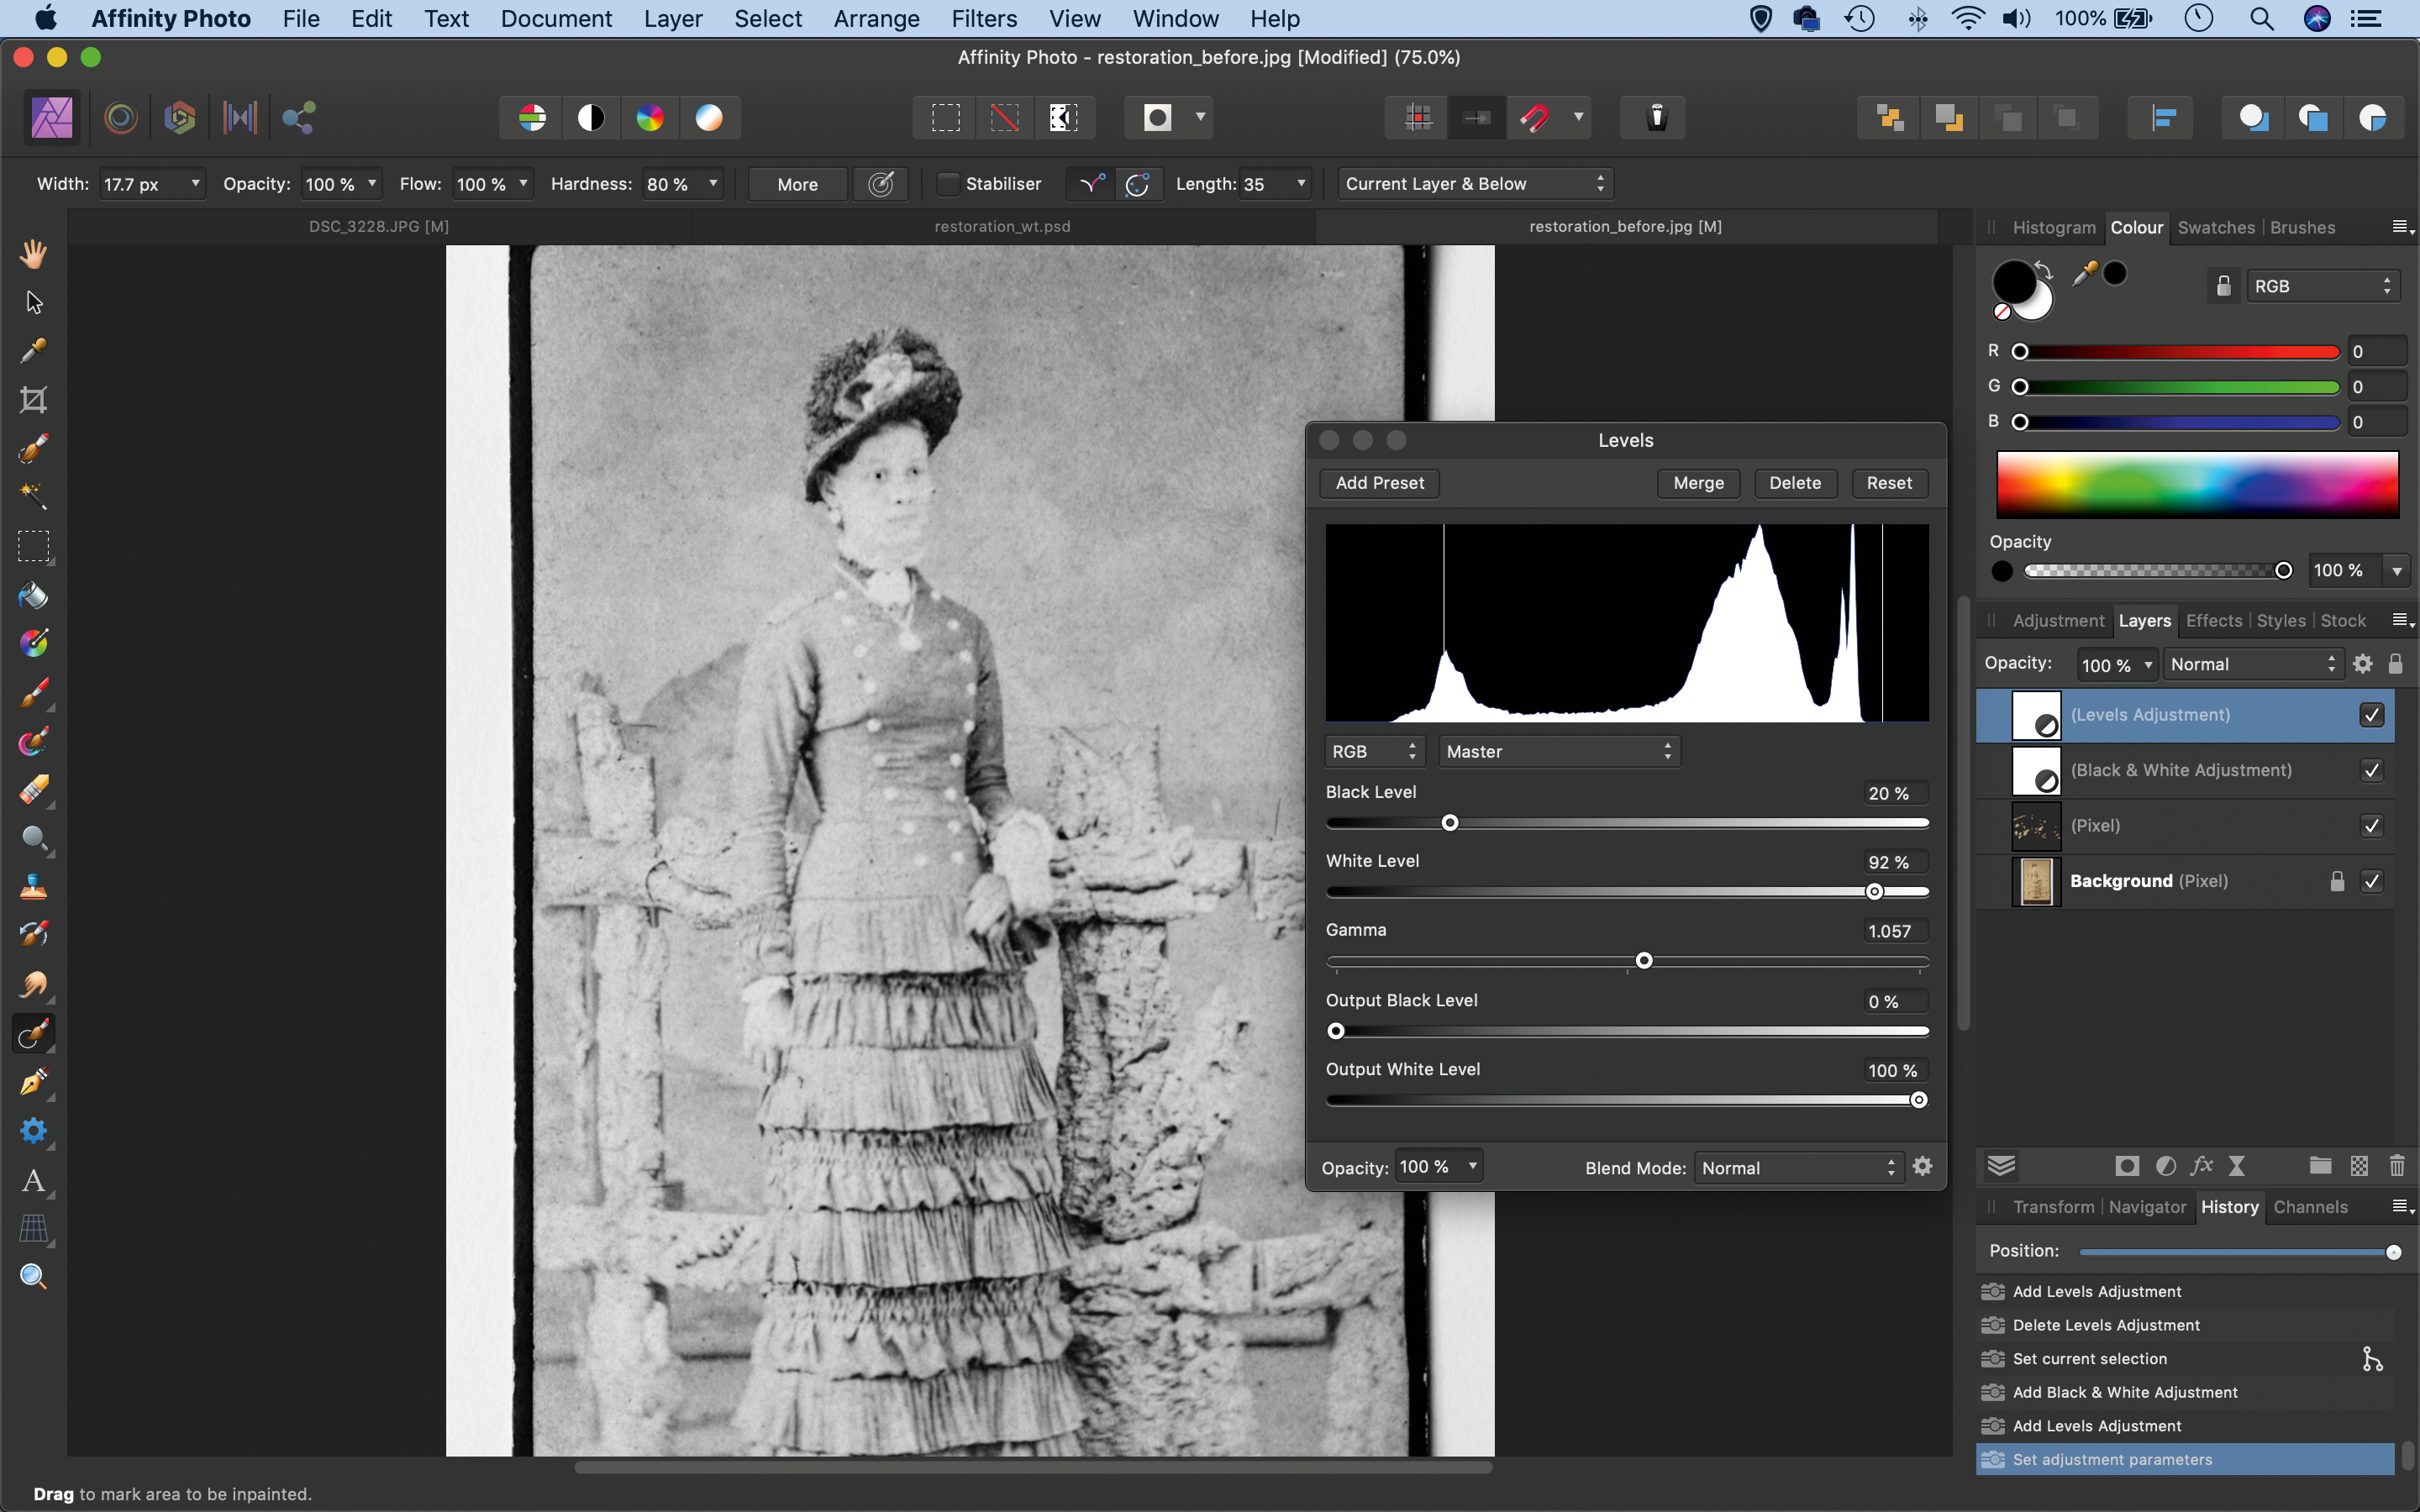
Click the Create Adjustment Layer icon in the Layers panel and choose Black and White. Next, click it again and choose Levels. Drag the Black and White points inwards to boost the contrast, then use the Gamma slider to control the overall brightness of the picture.
Step 3: Dodge & burn the face
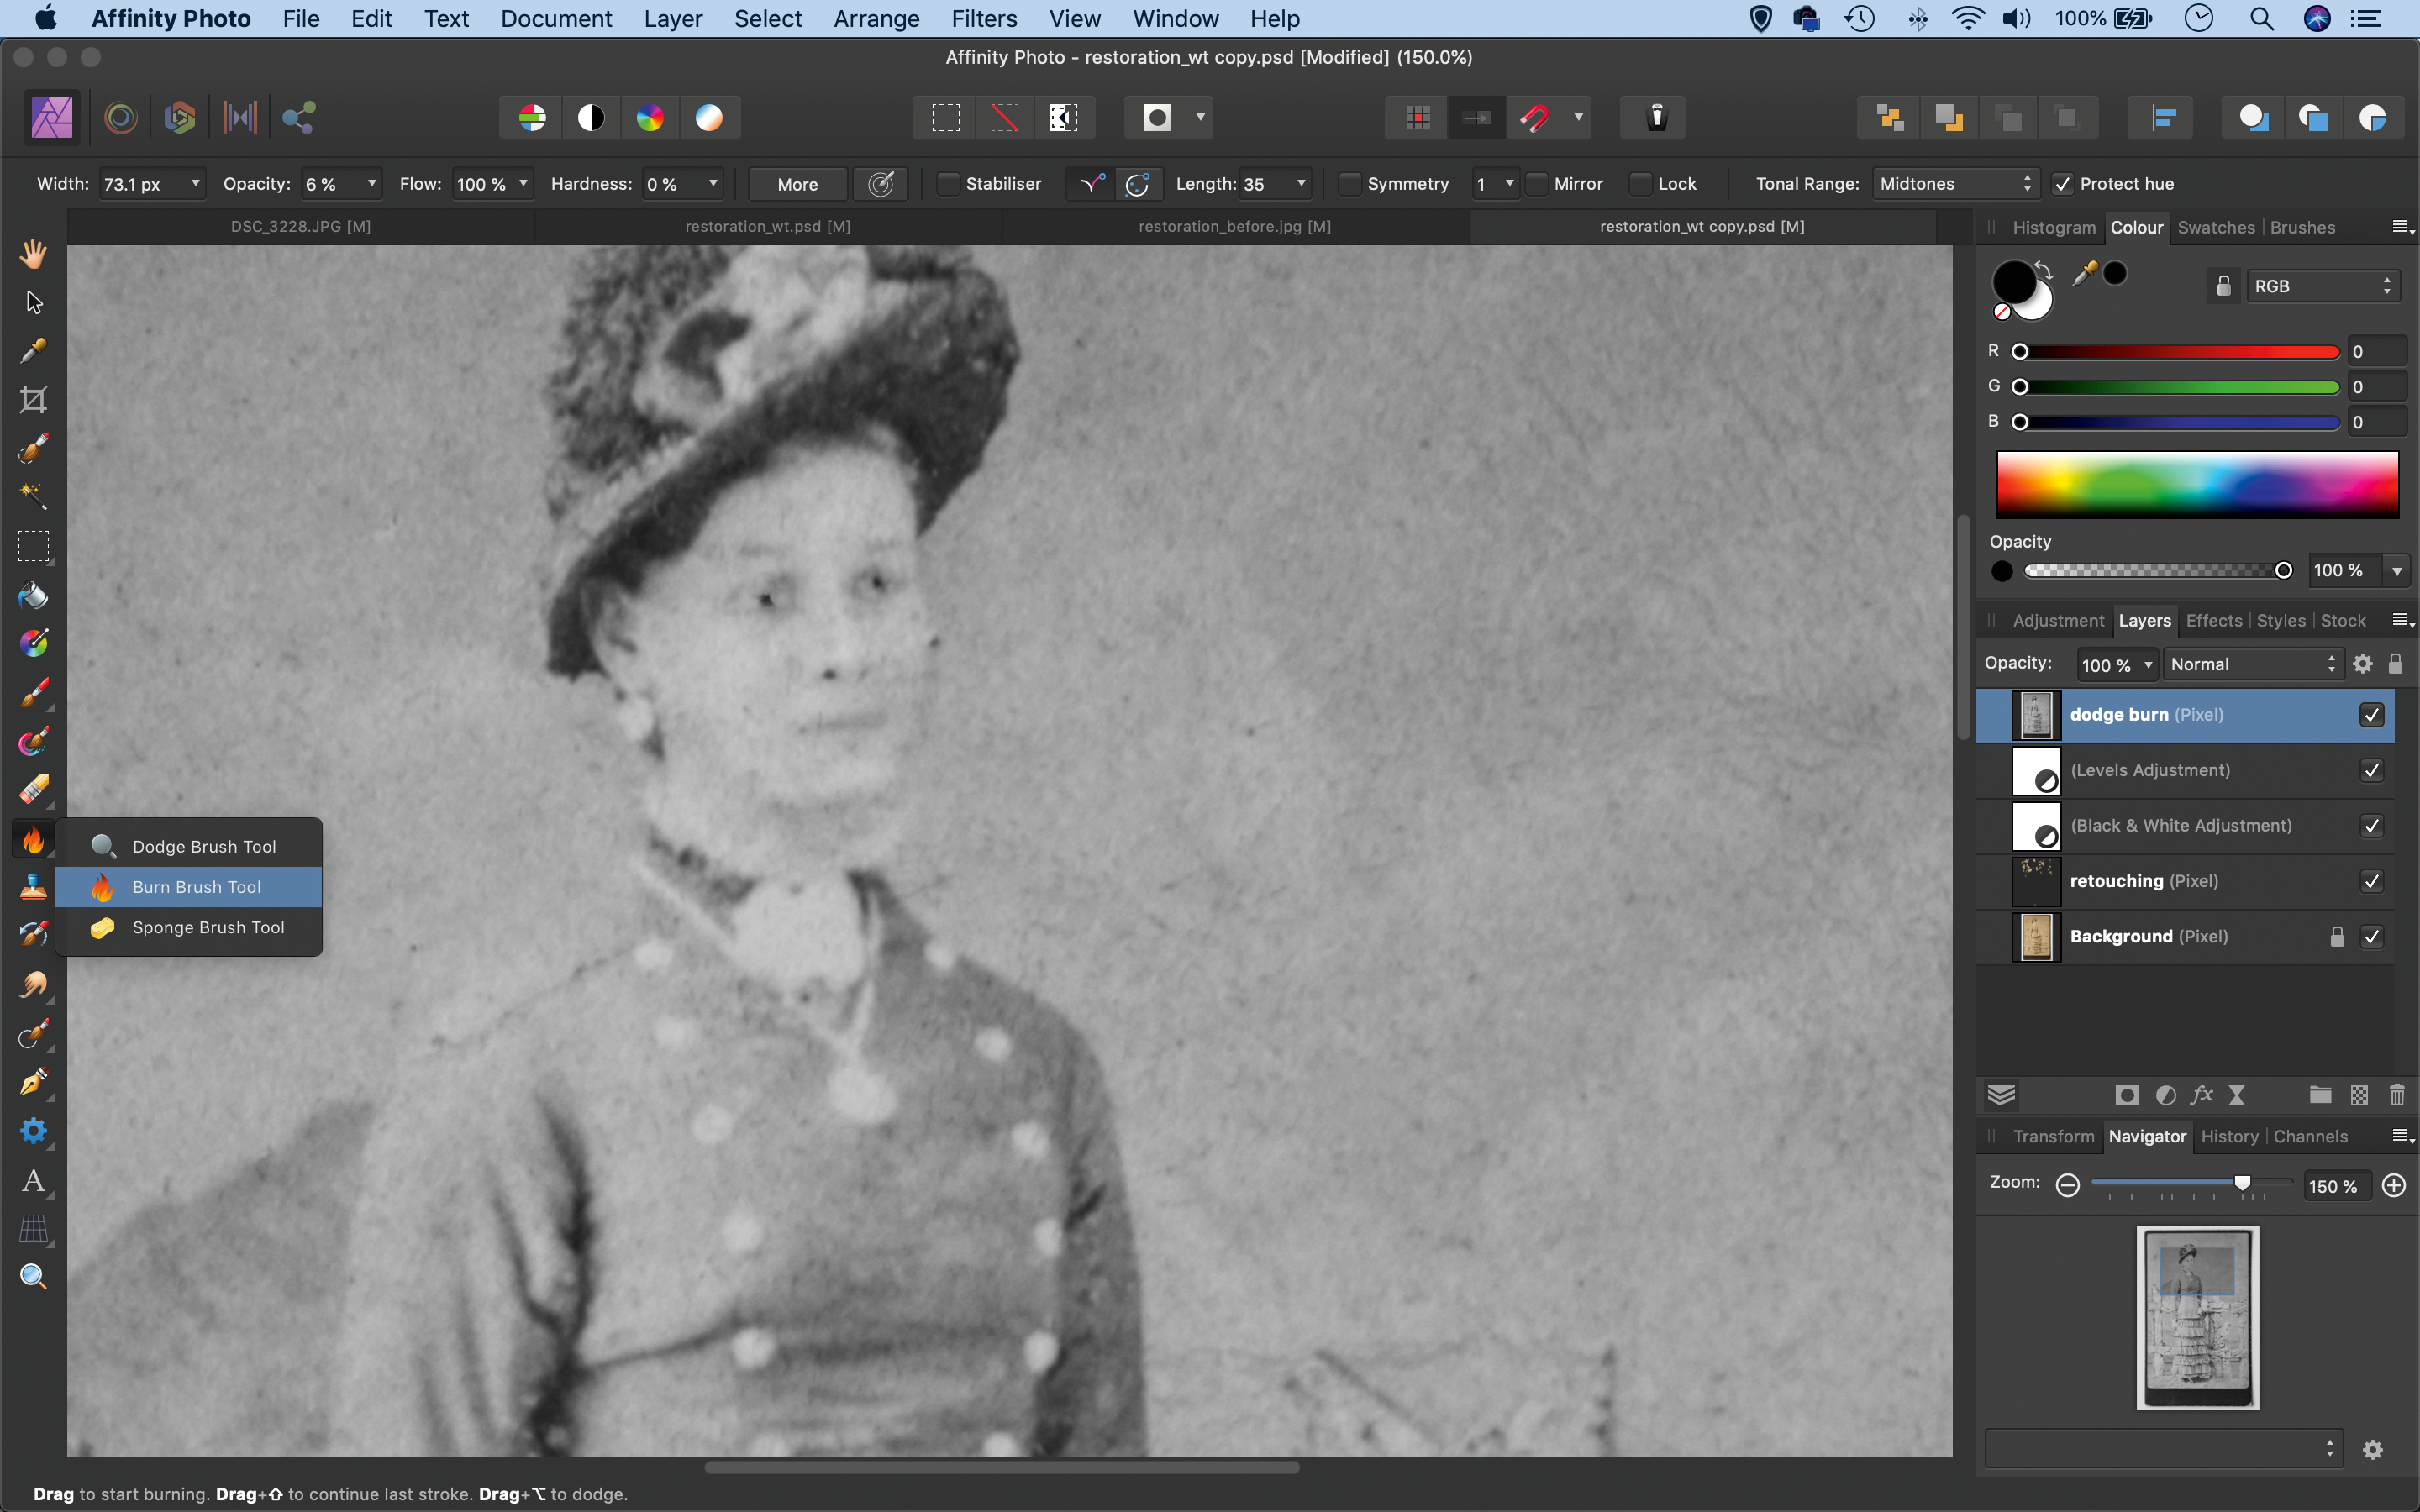
Use the Dodge and Burn tools to add some definition. Press Cmd/Ctrl+Shift+Alt+E to merge a copy of all layers. Grab the Burn tool and set Tonal Range: Midtones, Opacity 5%, and paint under the chin, cheekbones and lips to deepen shadows. Use the Dodge tool to lift the forehead, cheeks and nose.
Step 4: Paint the dress
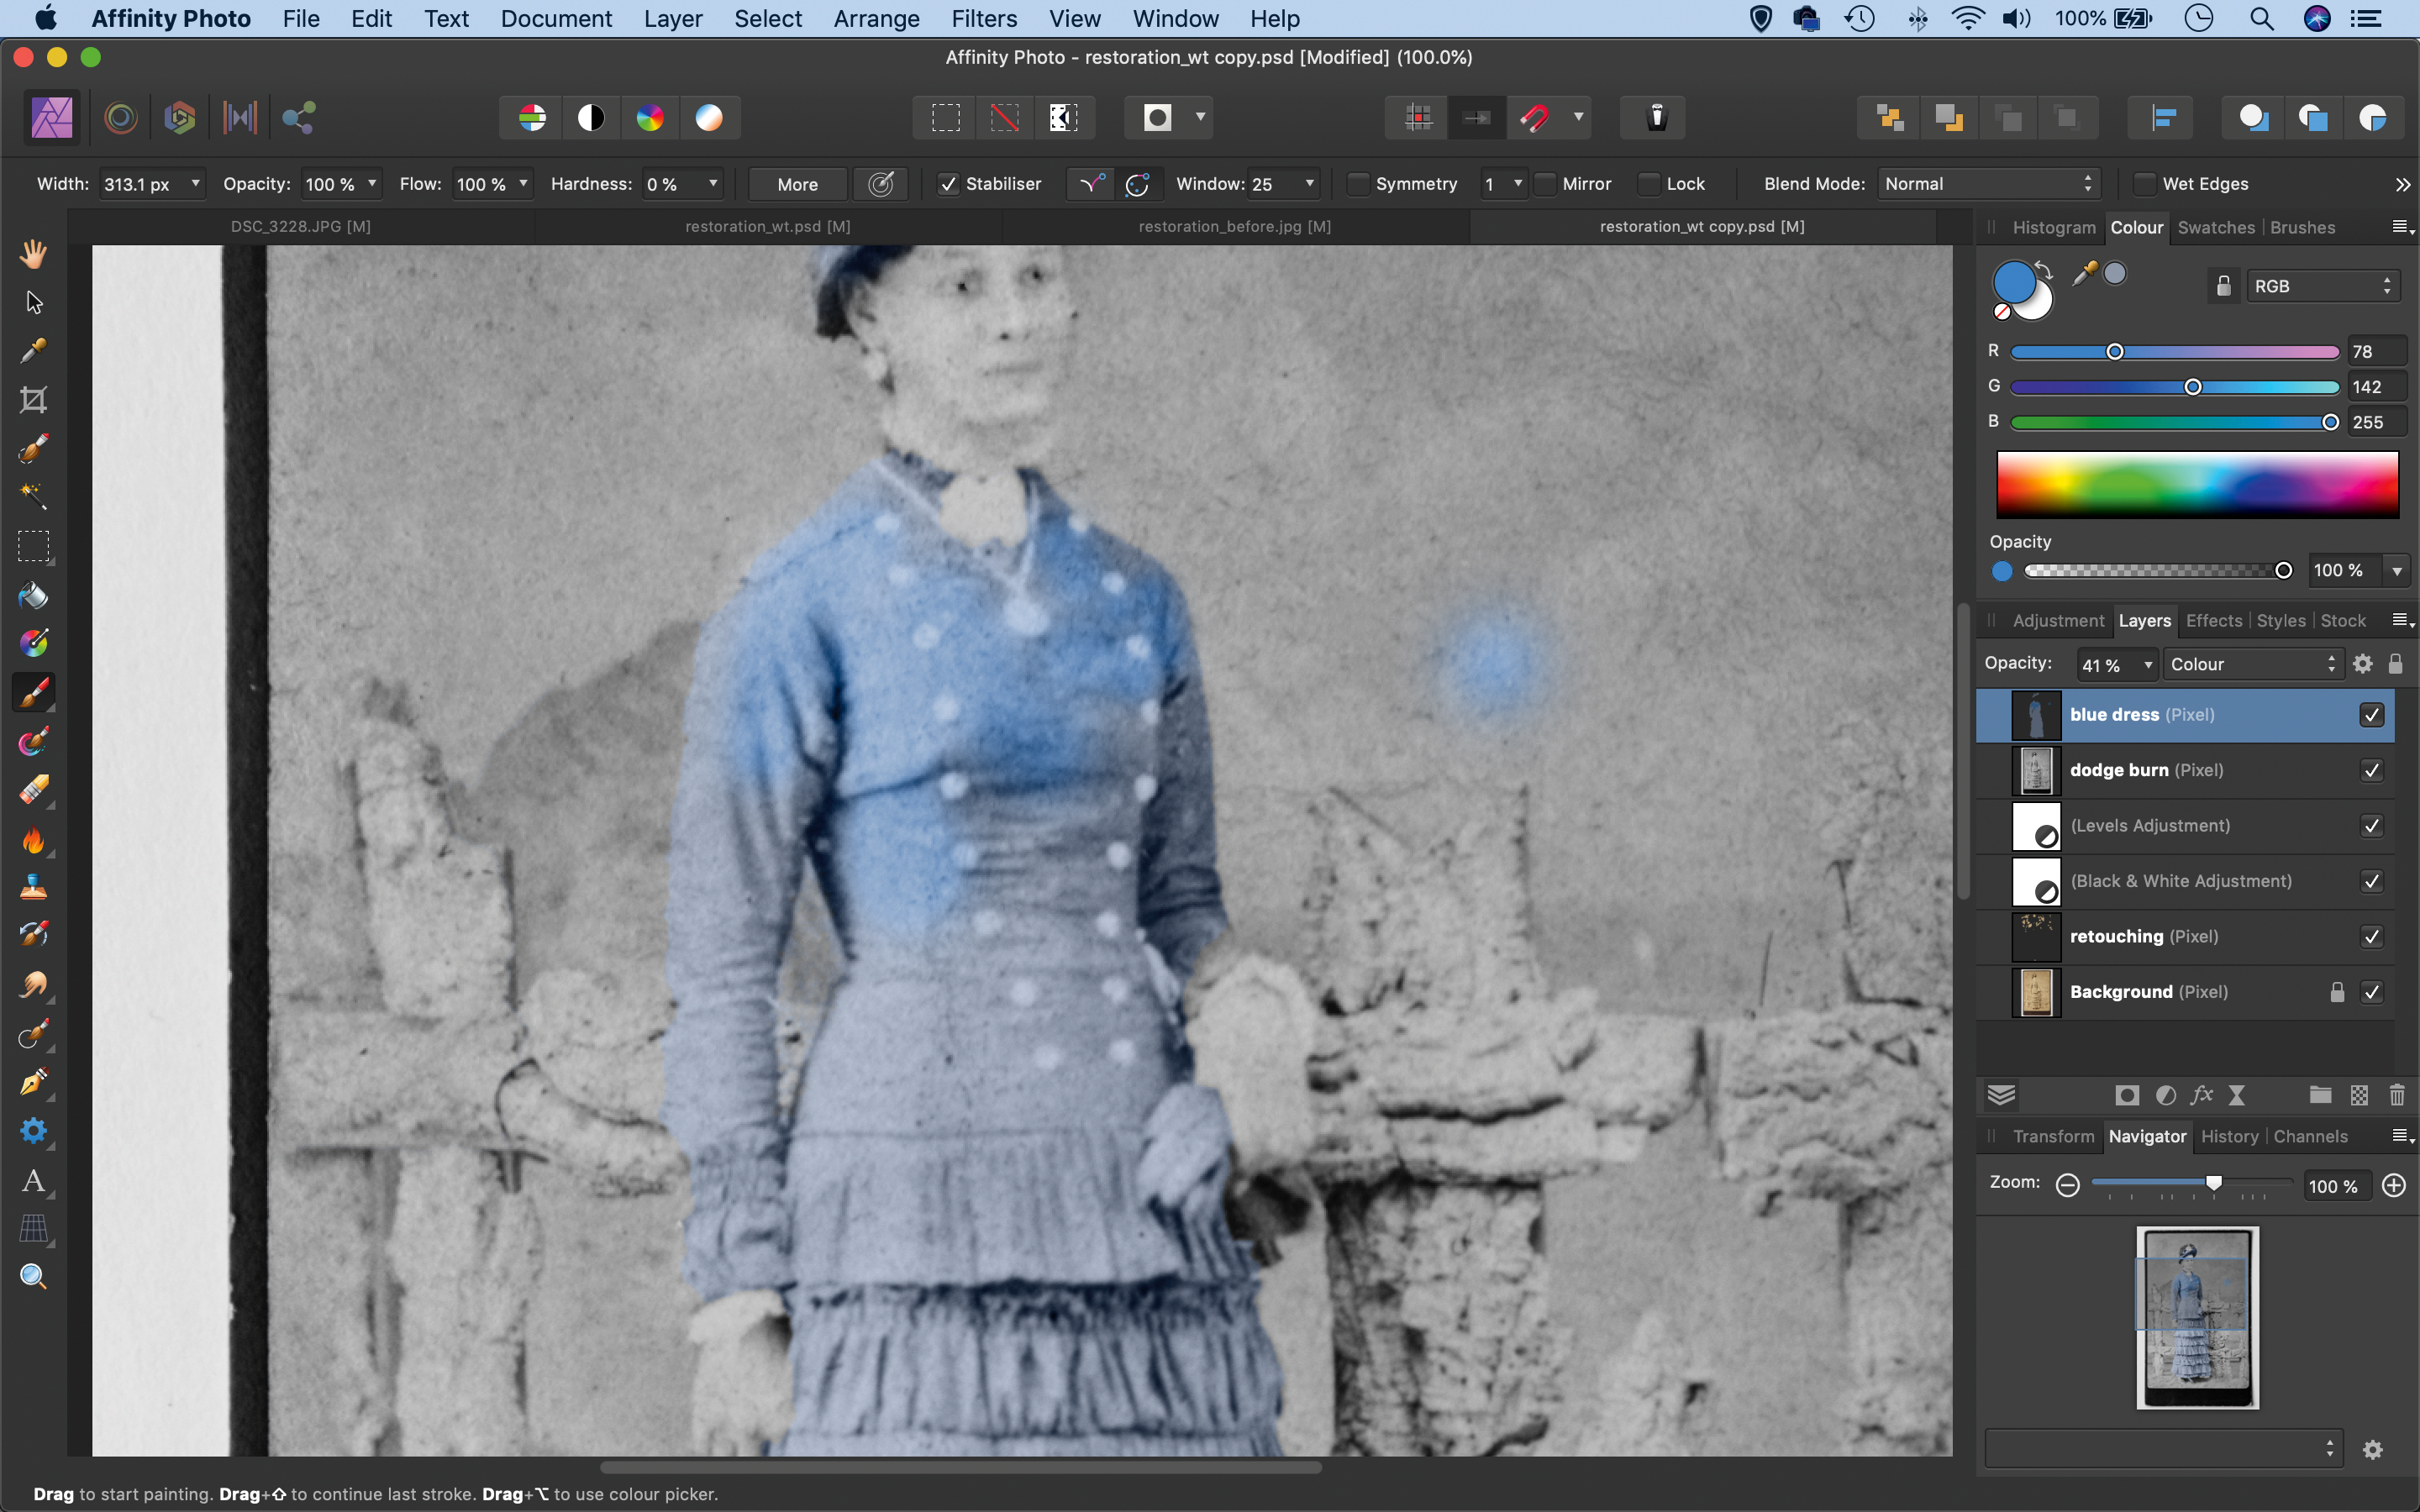
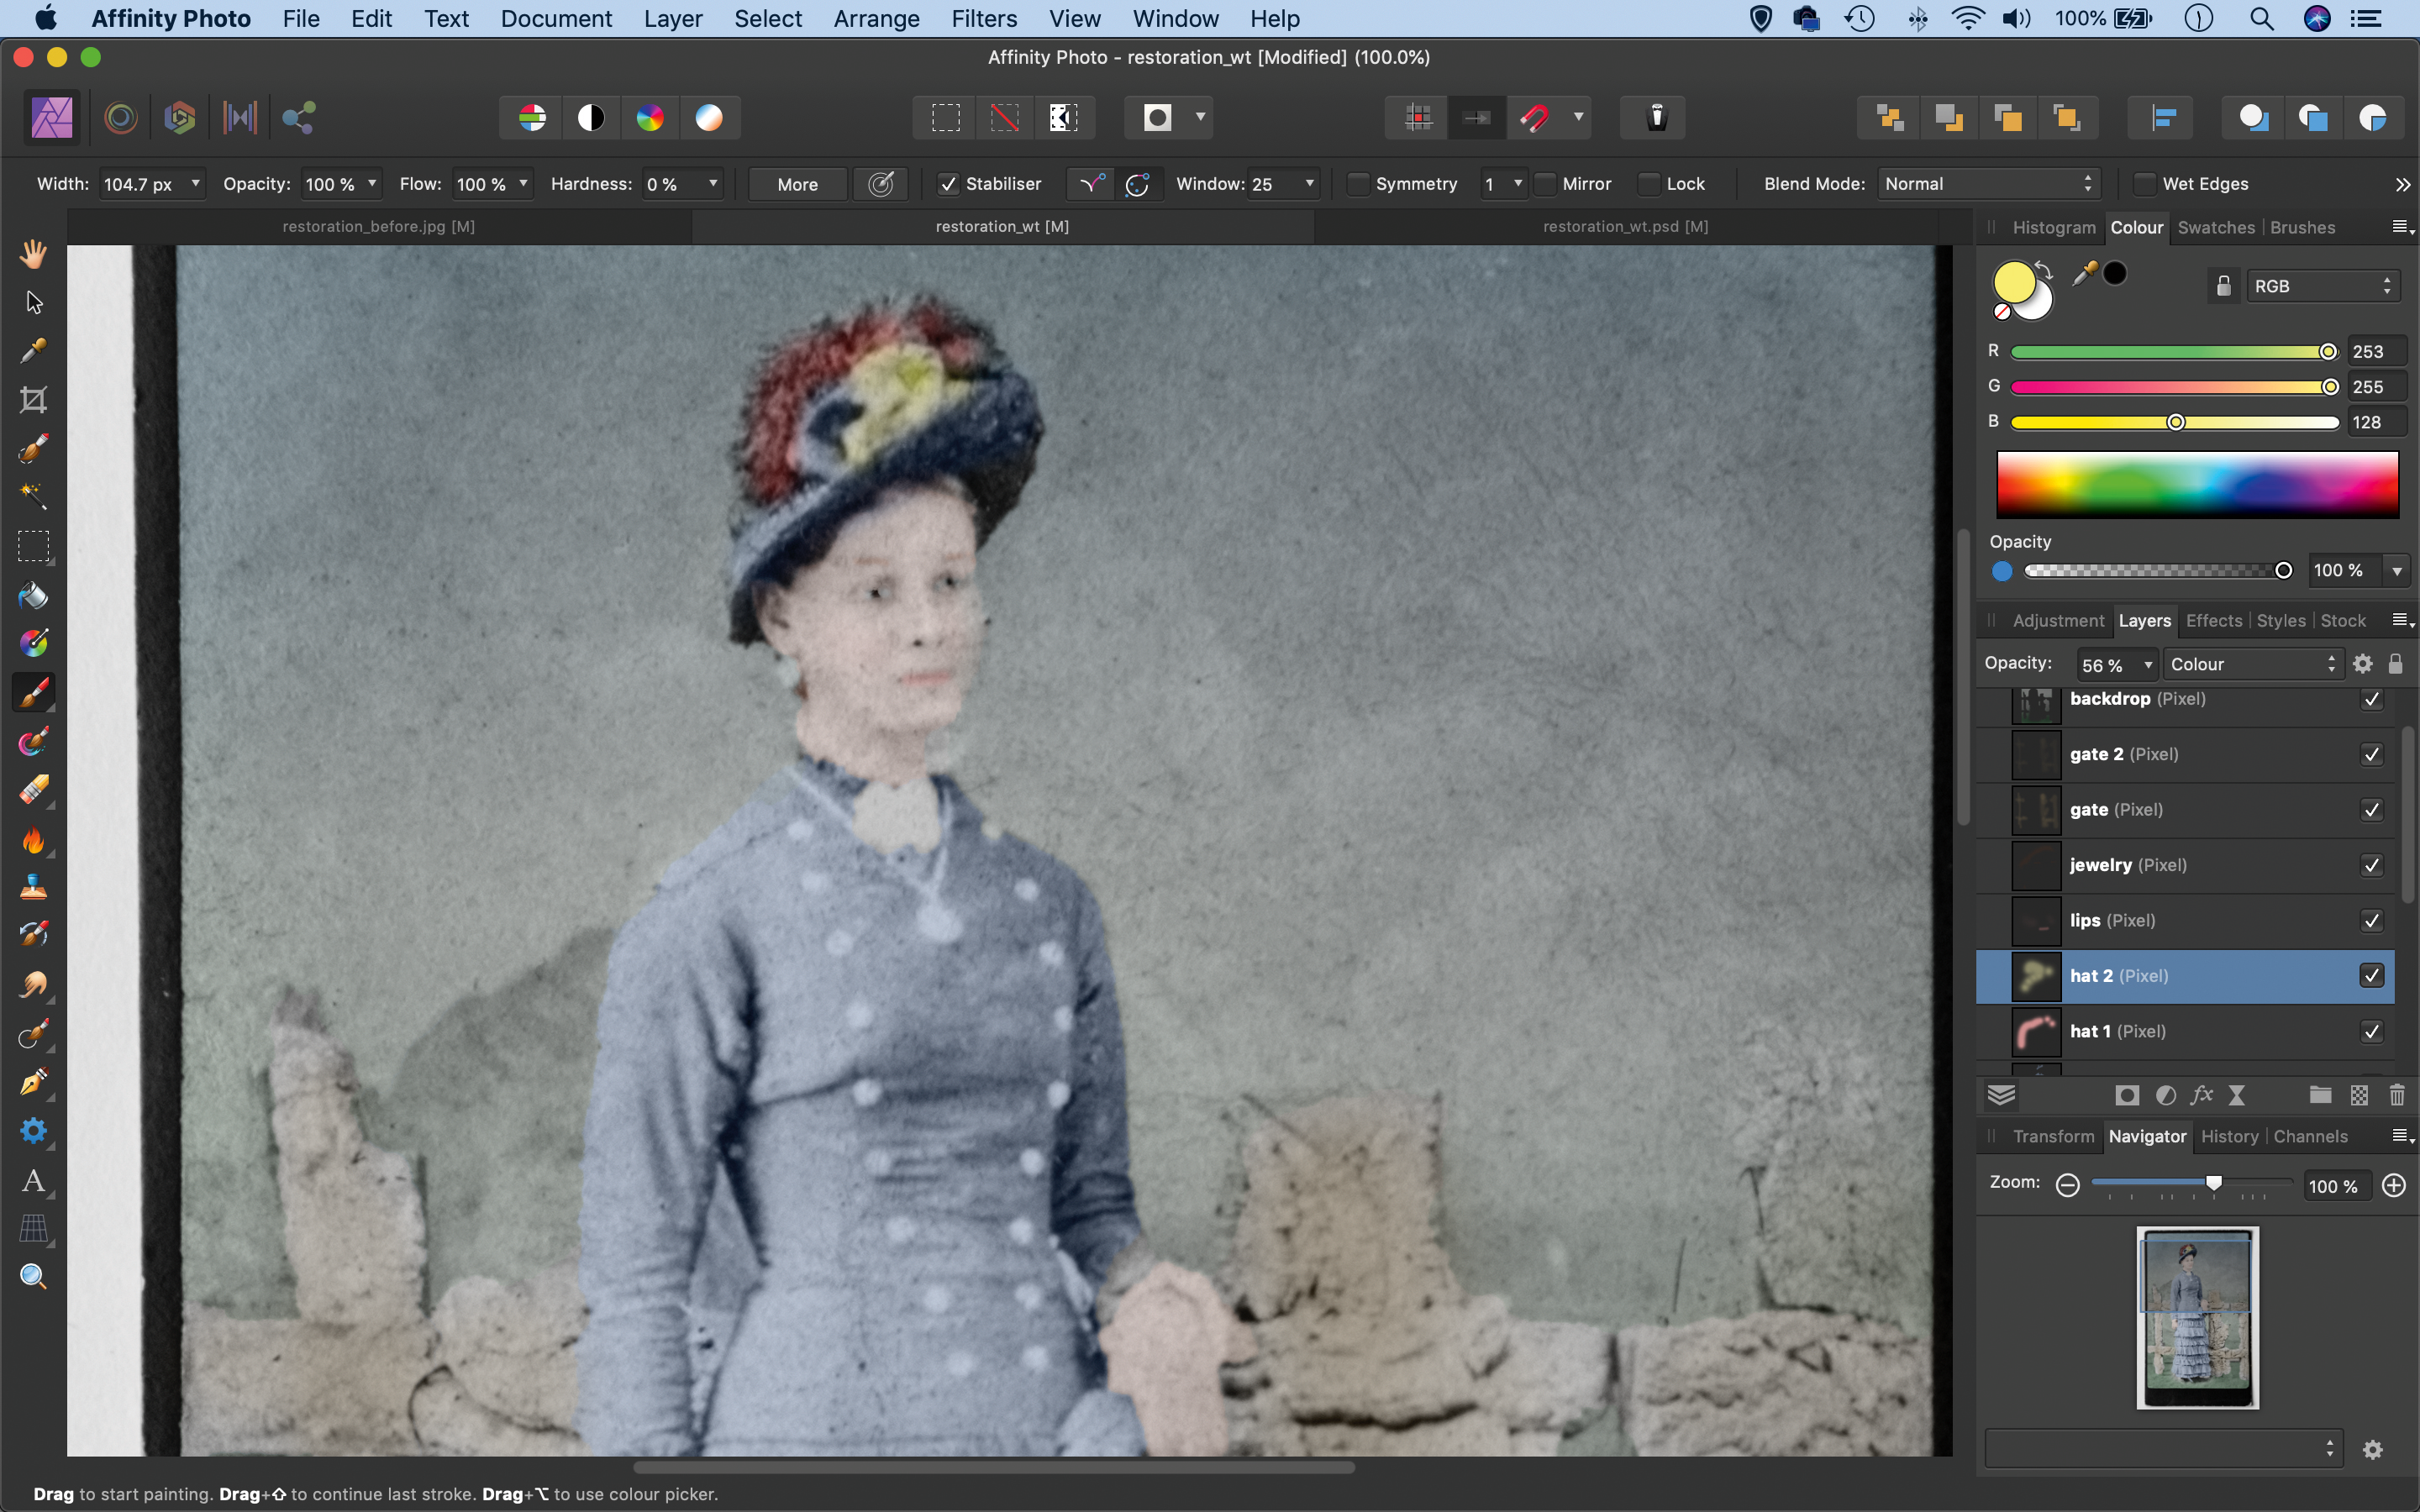
Make a new layer, then click the blend mode dropdown at the top of the Layers panel and change it from Normal to Colour. Grab the Brush tool, choose a colour, then begin painting over the dress to apply the colour. It’s likely going to be far too strong, so go to the Layers panel and lower the layer opacity to gently tone it down.
Step 5: Build up the layers
Make another new layer. Again, set it to the Colour blending mode, then paint a colour for the skin. Continue adding more layers to build up the colours. If a colour looks too light, try duplicating the layer and changing the blending mode to Multiply to darken the area, then lower the layer opacity to suit.
Step 6: Enhance the colours
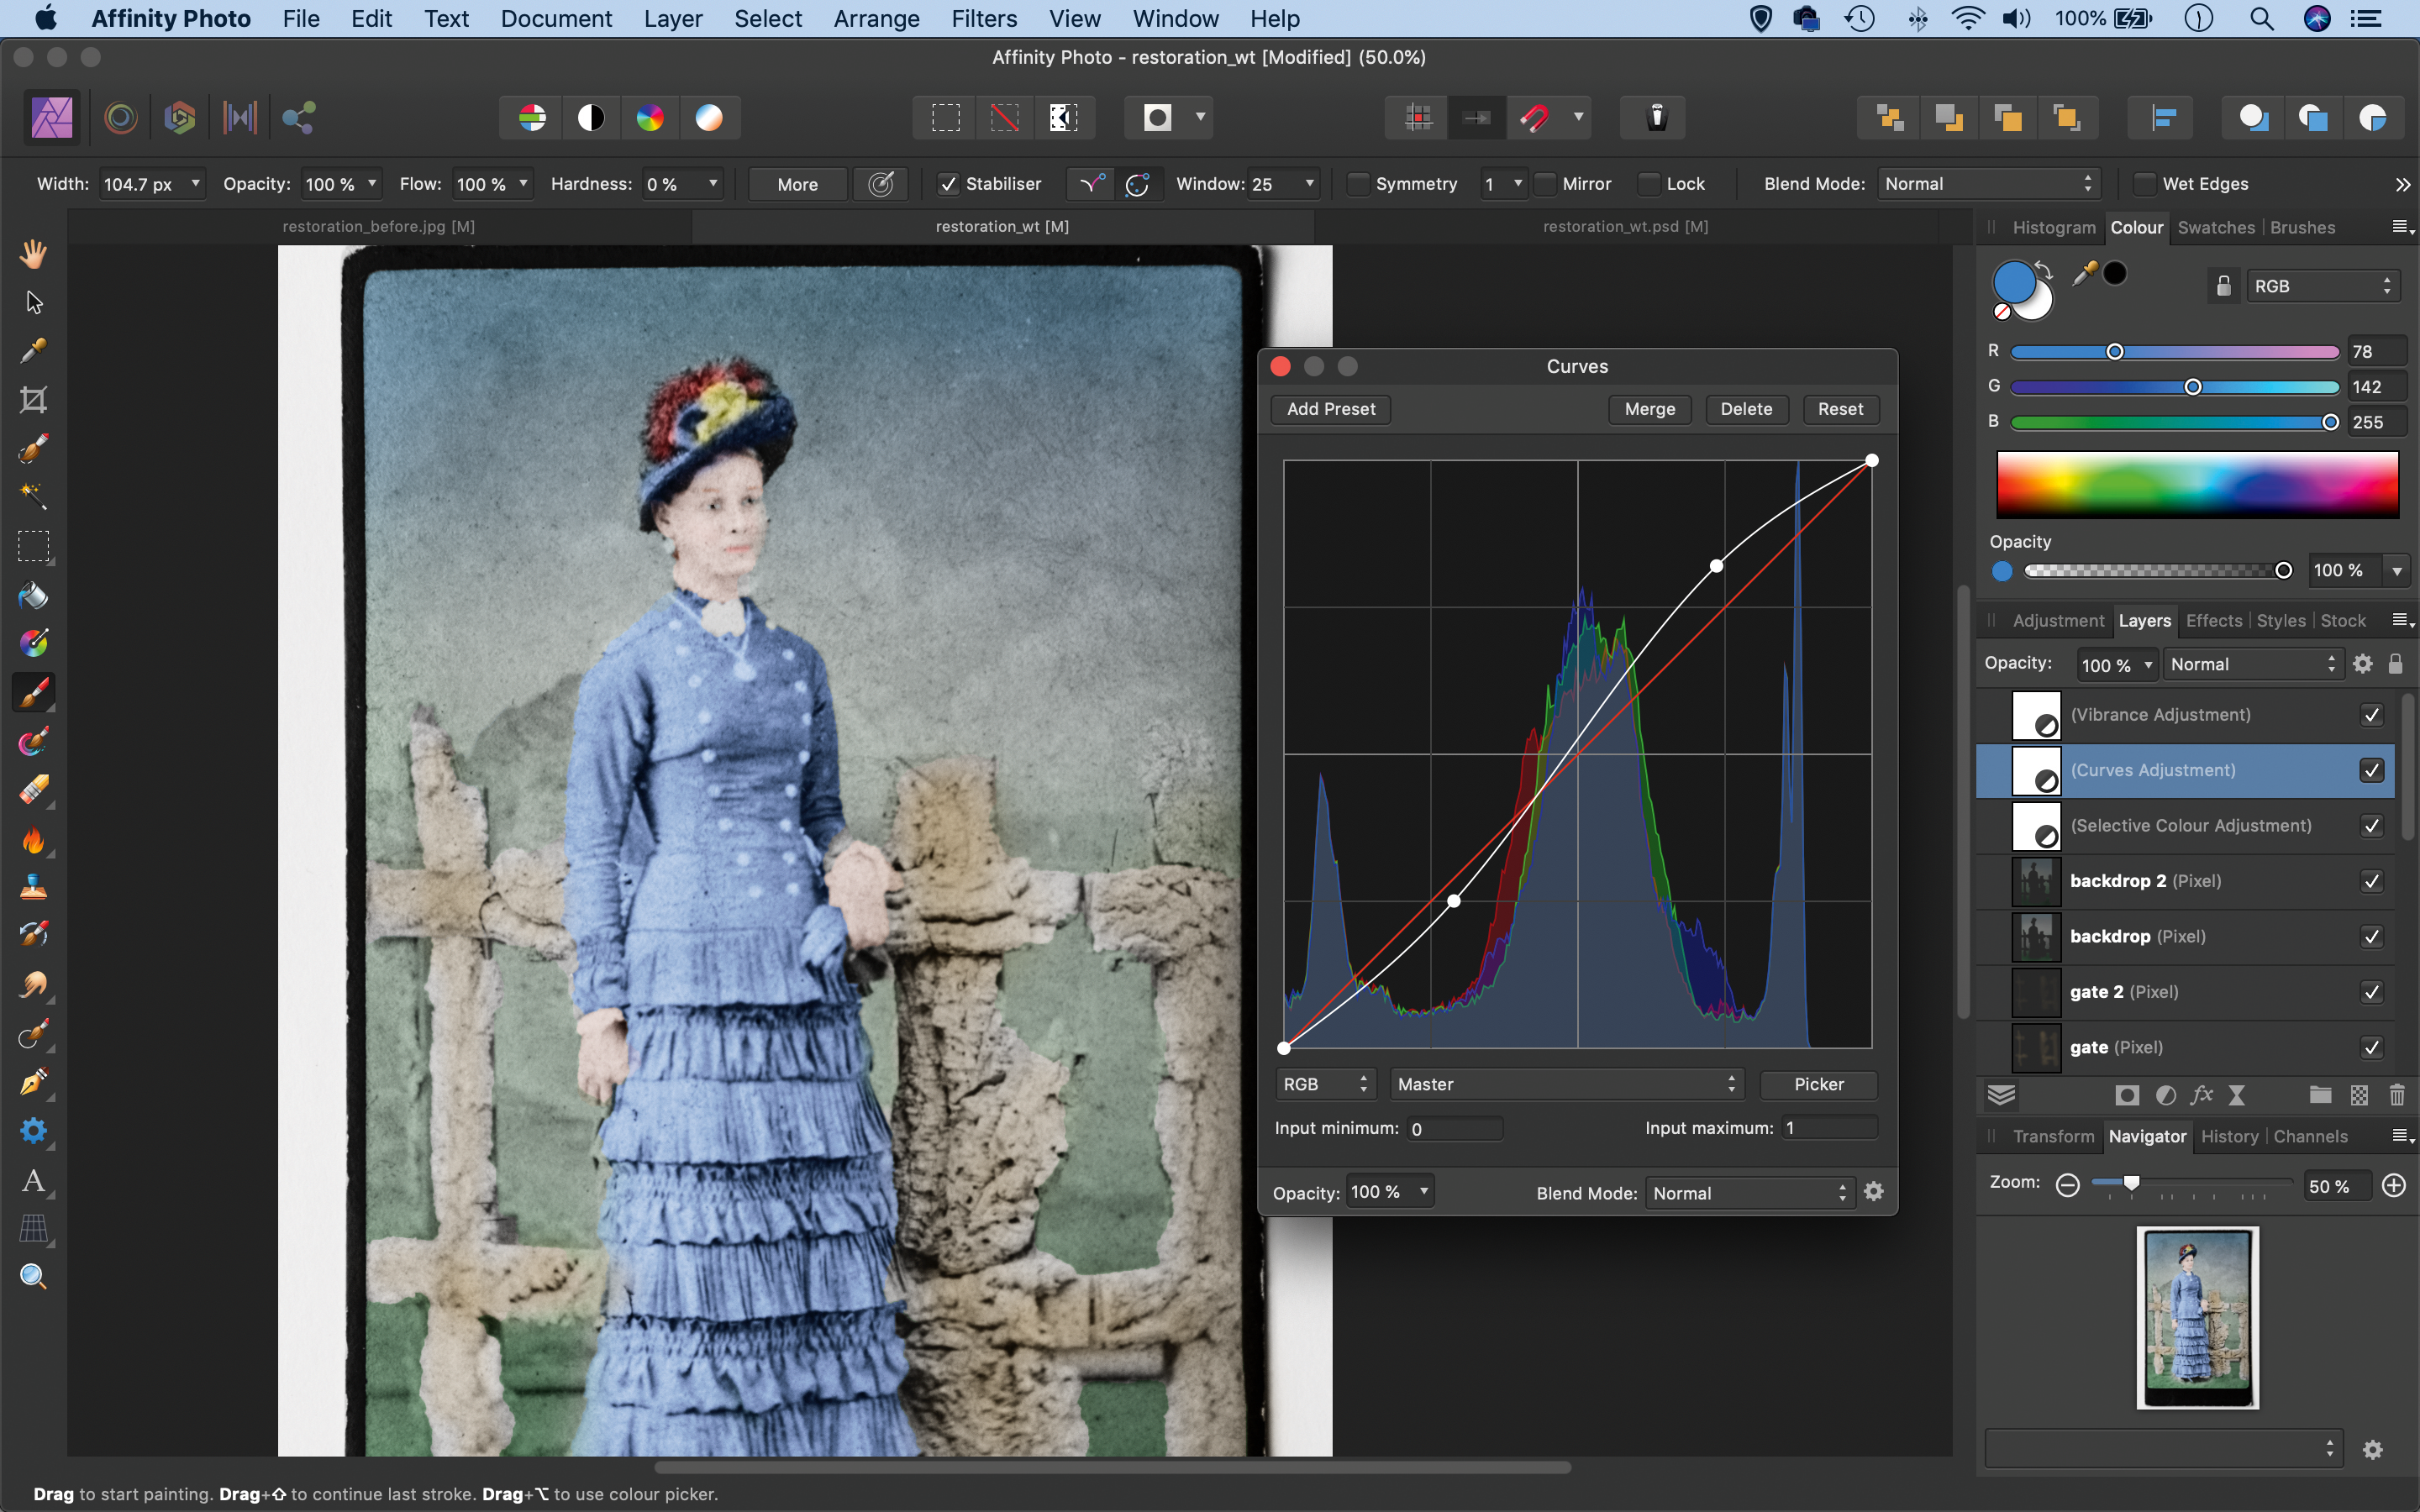
Click the Adjustment Layer icon in the Layers panel and add a Selective Colour Adjustment, then target and darken the blues. Add a Curves Adjustment and plot an S-shaped curve line to add contrast. Finally, add a Vibrance Adjustment and increase Vibrance and Saturation.
Quick tip
The first stage in restoring old photos is to digitize them. This is best done with a scanner. If you don’t have one you could take a shot of the print with your camera. Keep the light even, ideally with two lamps either side of the print at 45 degrees. Use a tripod, shoot at a low ISO, like ISO100, to keep noise to a minimum and select a mid-range aperture, such as f/8, as this is where lenses tend to be at their sharpest.
About N-Photo magazine
This tutorial originally appeared in N-Photo, the monthly newsstand magazine for Nikon photographers. Why not subscribe to a print edition, and have the magazine delivered direct to your door every month?
Alternatively, we have a number of different digital options available, including:
• Apple app (for iPad or iPhone)
• Zinio app (multi-platform app for desktop or smartphone)
• PocketMags (multi-platform app ideal for Android devices)
• Readly (all-you-can-eat digital magazine subscription service)
If you wanted a printed version of any of our most recent issues we have a selection of back issues to choose from in our online store.
Read more:
• Photography tips and tutorial videos
• The best photo editing tools and accessories
• The best desktop computers for photo editing
• The best photo-editing laptops right now
• The best photo editing software today
N-Photo: The Nikon Magazine is a monthly publication that's entirely dedicated to Nikon users. As a 100% independent magazine, you can be assured of unbiased opinion from a trustworthy team of devoted photography experts including editor Adam Waring and Deputy Editor Mike Harris.
Aimed at all users, from camera newcomers to working pros, every issue is packed with practical, Nikon-specific advice for taking better photos, in-depth reviews of Nikon-compatible gear, and inspiring projects and exciting video lessons for mastering camera, lens and Photoshop techniques.
Written by Nikon users for Nikon users, N-Photo is your one-stop shop for everything to do with cameras, lenses, tripods, bags, tips, tricks and techniques to get the most out of your photography.
