I'm a photography expert and here's how I use just one flash for studio-perfect portraits
I'm here to prove that you don't need a huge studio full of kit to capture stunning studio portraits. In fact, you can do it with just one light!
The best camera deals, reviews, product advice, and unmissable photography news, direct to your inbox!
You are now subscribed
Your newsletter sign-up was successful
There is no one ‘correct’ setting for flash photography, but here’s a good stock setting for indoor flash portraiture like this. Set your camera to manual exposure mode at 1/200 sec and ISO100. Choose a mid-range aperture like f/8 then take test shots. You might want to adjust your aperture as you shoot to allow for more or less light. Along with ISO, aperture and shutter speed, the flash is a fourth factor that turns the exposure triangle into an exposure square, as the flash power can be used to control the amount of light.
If you want to shoot polished, professional-looking portraits, then knowing how to light a face with a flash is one of the most worthwhile skills you can master. To the uninitiated it can seem a bit daunting, but if you break the technique down into fundamentals then there’s no need for concern.
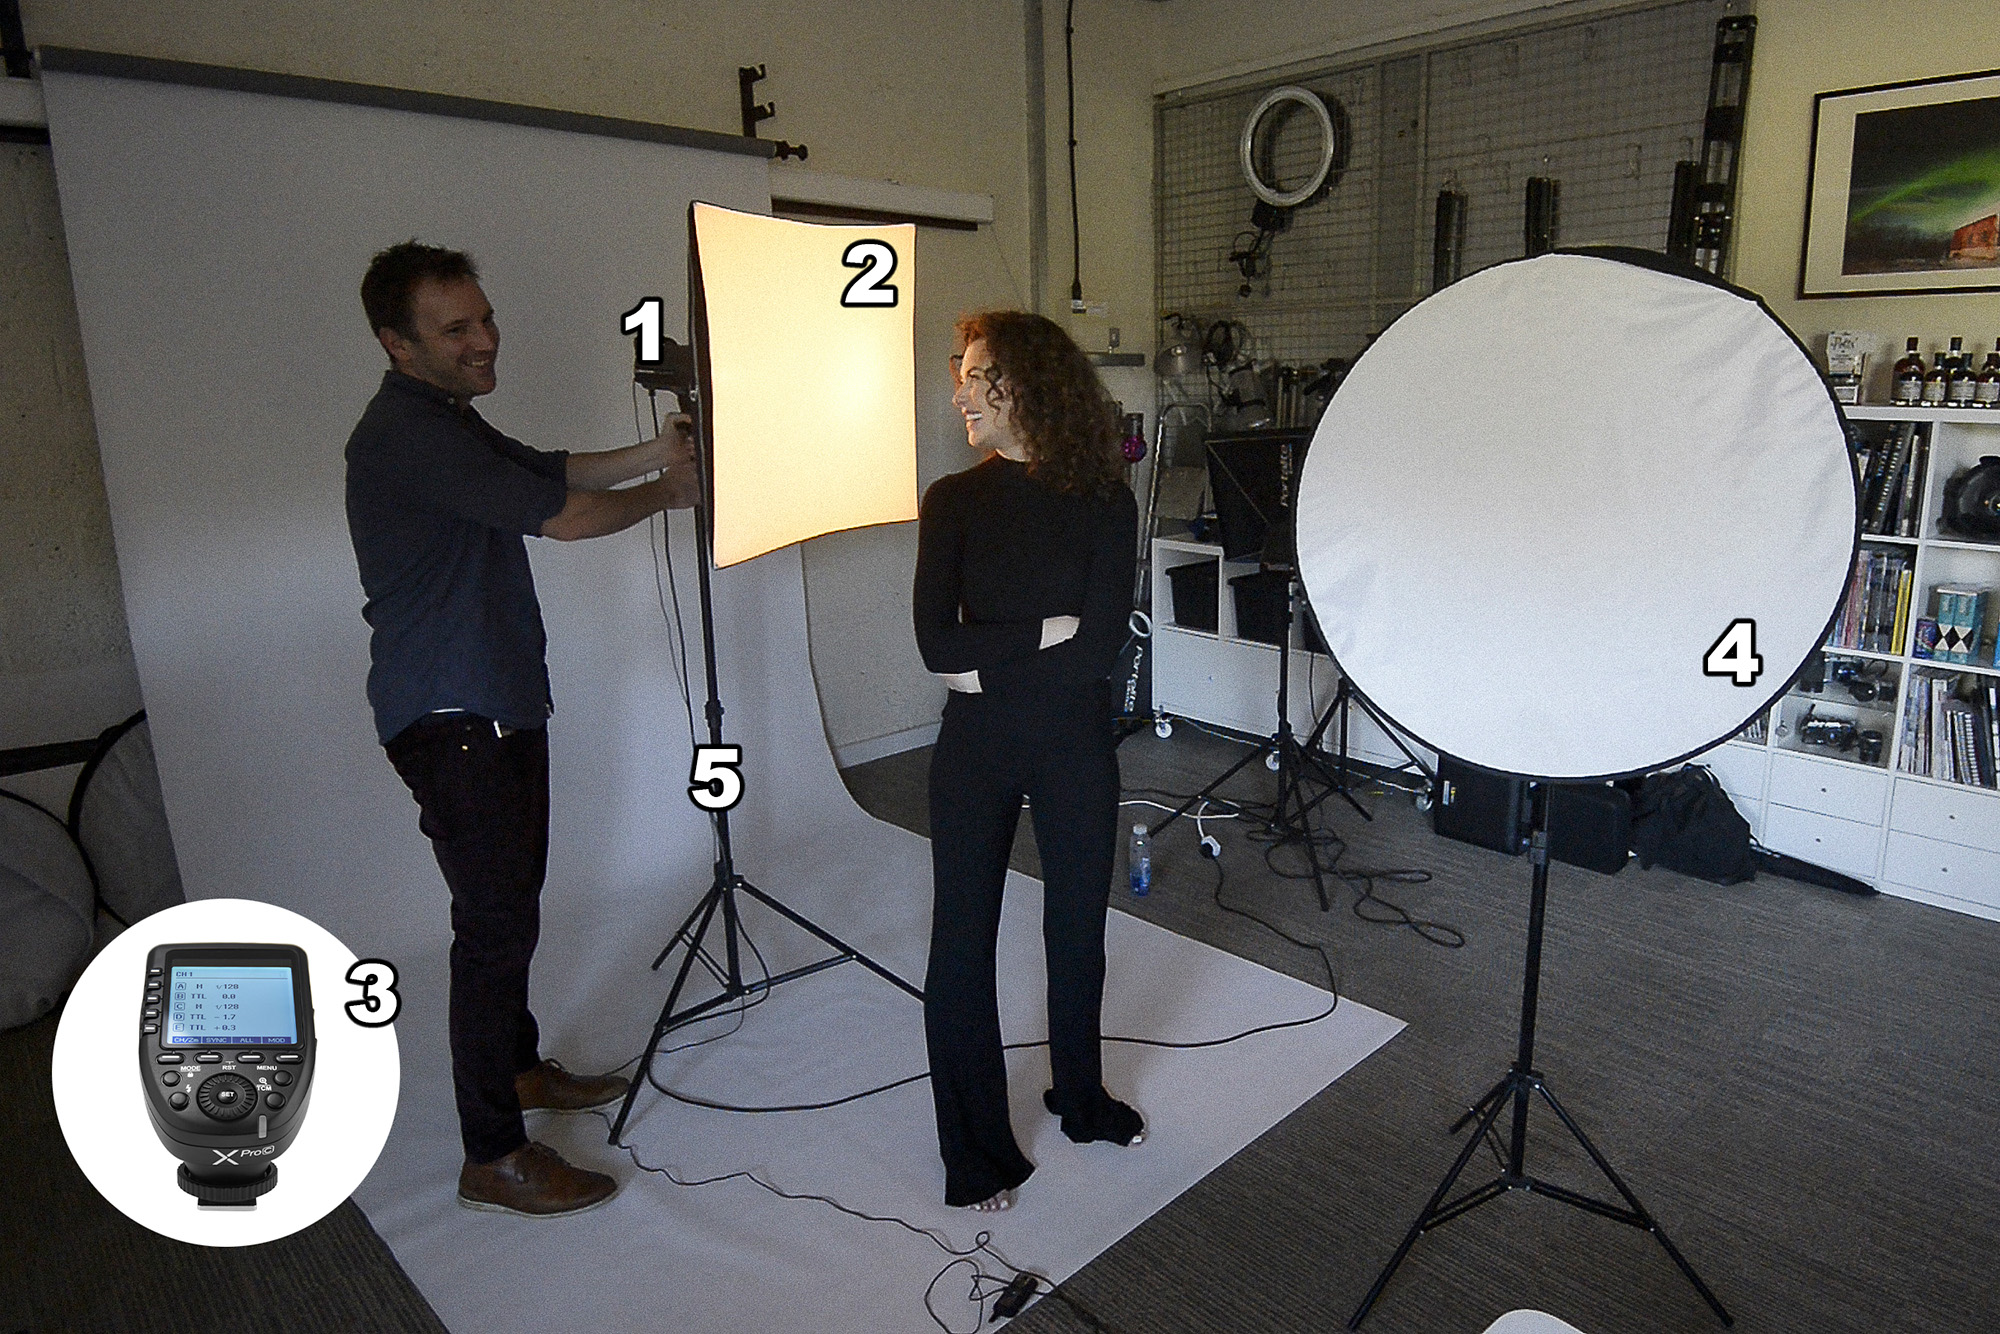
To get started, all you need are a few basic bits of kit – a flash, a softbox, a light stand, a trigger and a reflector or large piece of white card. There are lots of good budget flash options out there, and you don’t need anything with fancy settings; all you need is a flash that pops.
With this single light source, a willing subject and a decent-sized space to shoot in, you can craft all sorts of interesting looks. In this project, I'll show you how to use light for a variety of different portraits.
Article continues belowUsing a single light source keeps things simple. If you jump straight in with multiple flashes, then it becomes about different outputs and lighting ratios, and this is where things tend to get complicated. However, with a single flash you can move it around the subject and see immediately how the angles affect your photos. With a slight tweak to the position, you can create wildly different results.
I'll start by explaining the camera skills you need, then we’ll explore a host of different set-ups – from bright high-key looks to moody low-key portraits. Alternatively, you can watch the video below:
How I set up portraits with a single flash
- Flash unit
A single studio head unit like this is ideal, as it enables you to fit modifiers with ease. But you could equally use any speedlight (you’ll need a suitable attachment to use it with a softbox). A modelling light is useful for instant feedback, but if you don’t have one you can simply take test shots instead. - Softbox for better light
The larger a light source, the softer and more diffused the light. A softbox is the ideal light modifier for portraits, as it transforms the small, hard light from a bare flash into a broad, flattering source of light that – unlike an umbrella – is still easy to control and direct. - Flash trigger
You’ll need a trigger so that the off-camera flash goes off when you press the shutter button on the camera. Any flash trigger will do; you don’t need one with TTL or high-speed sync. In a pinch, you can also use an on-camera flash to fire the off-camera flash in optical trigger mode. - Reflector
A reflector is a cheap and useful tool for studio lighting. When placed opposite the main light, it enables you to bounce light back into the shadows to soften facial contrast. Here, it enables you to create a high-key effect by lighting the front of the face when the flash is positioned directly behind the head. - Light stand
A light stand means that you can place your light exactly where you want it – in front, behind, to one side, up above, down below. Often they have a thread at the top that – if using a speed light – you can use to attach the flash using the little plastic stand it came with. - You have the power!
You don’t have to adjust your camera settings for different exposures – adjust the flash power instead. Set the flash to manual power mode and use a mid-range setting, then take test shots and adjust power as you shoot. You can also change power by moving it closer or further away.
1) Flash unit
A single studio head unit like this is ideal, as it enables you to fit modifiers with ease. But you could equally use any speedlight (you’ll need a suitable attachment to use it with a softbox). A modelling light is useful for instant feedback, but if you don’t have one you can simply take test shots instead.
2) Softbox for better light
The larger a light source, the softer and more diffused the light. A softbox is the ideal light modifier for portraits, as it transforms the small, hard light from a bare flash into a broad, flattering source of light that – unlike an umbrella – is still easy to control and direct.
The best camera deals, reviews, product advice, and unmissable photography news, direct to your inbox!
3) Flash trigger
You’ll need a trigger so that the off-camera flash goes off when you press the shutter button on the camera. Any flash trigger will do; you don’t need one with TTL or high-speed sync. In a pinch, you can also use an on-camera flash to fire the off-camera flash in optical trigger mode.
4) Reflector
A reflector is a cheap and useful tool for studio lighting. When placed opposite the main light, it enables you to bounce light back into the shadows to soften facial contrast. Here, it enables you to create a high-key effect by lighting the front of the face when the flash is positioned directly behind the head.
5) Light stand
A light stand means that you can place your light exactly where you want it – in front, behind, to one side, up above, down below. Often they have a thread at the top that – if using a speed light – you can use to attach the flash using the little plastic stand that came with it.
6) You have the power!
You don’t have to adjust your camera settings for different exposures – adjust the flash power instead. Set the flash to manual power mode and use a mid-range setting, then take test shots and adjust power as you shoot. You can also change power by moving it closer or further away.
My top tips for one-light portrait setups
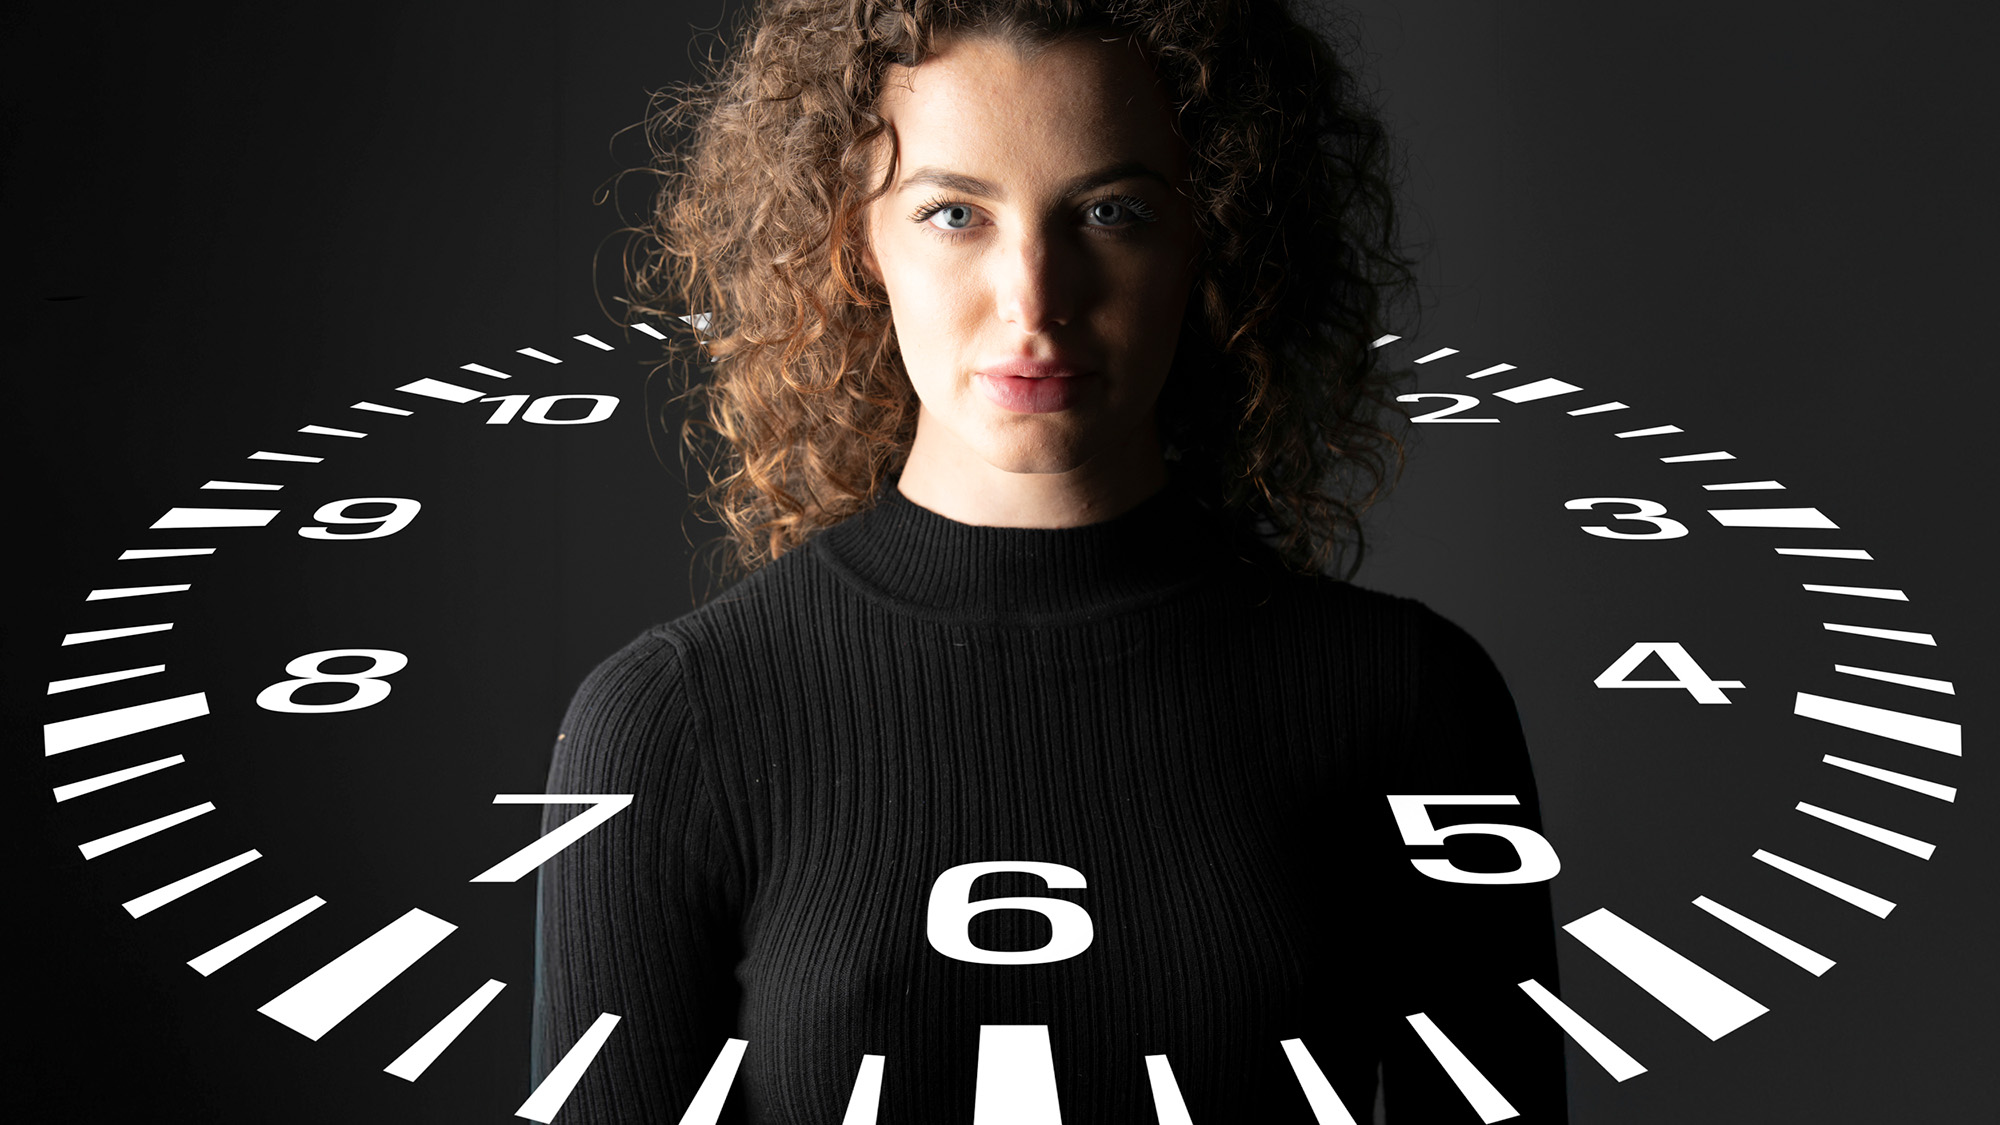
1) Side lighting
Imagine a clock face around your subject’s head like this. By moving the light around the face, changing the height and adjusting the pose, you can craft all sorts of looks. Here the flash is directly side-on at 9 o’clock for moody side-lighting.
2) High-key backlit
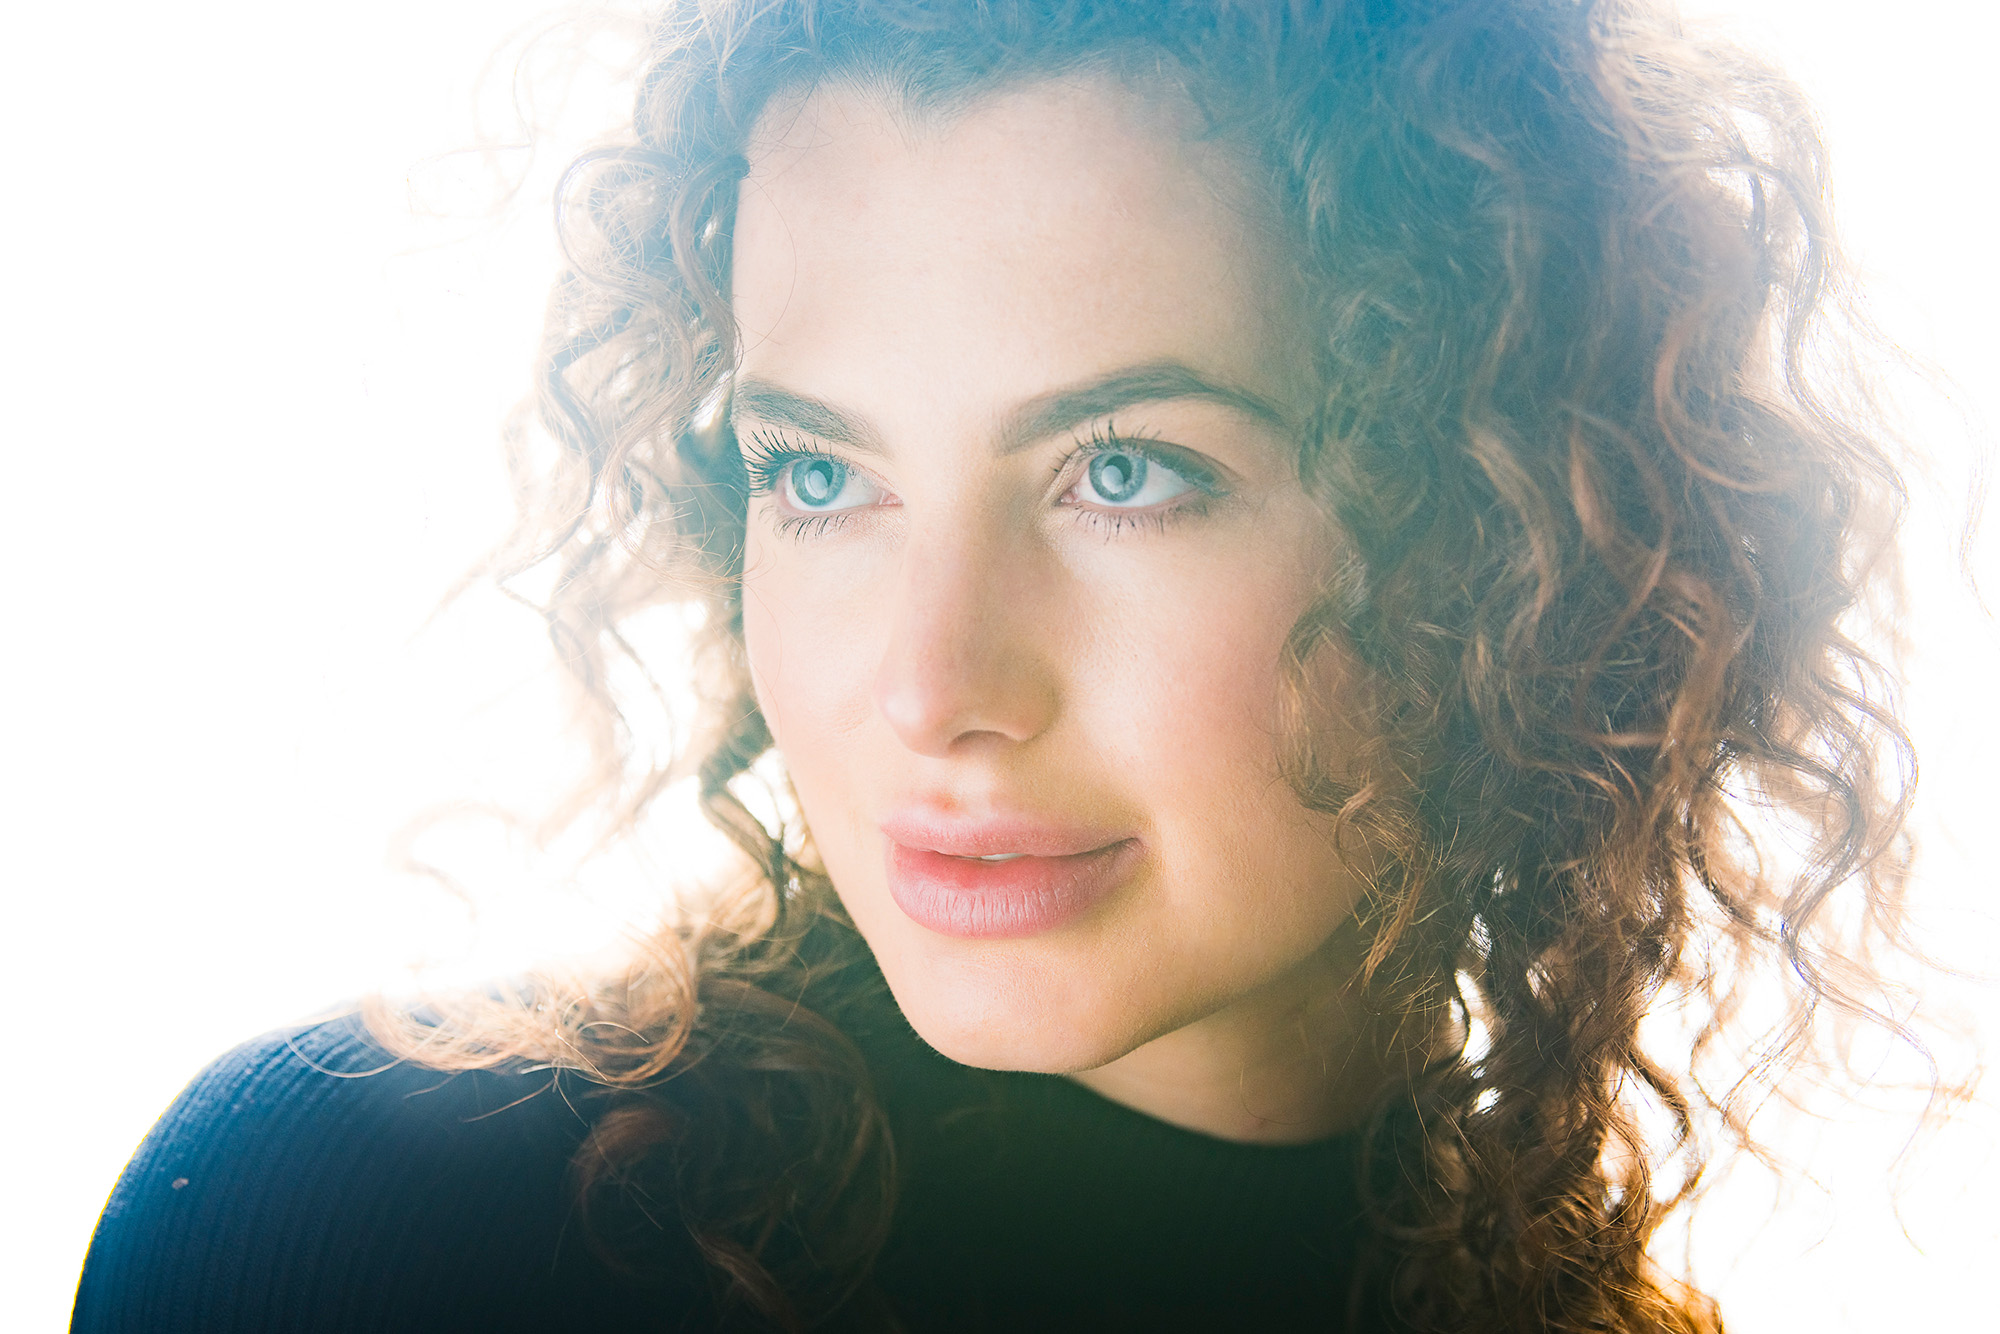
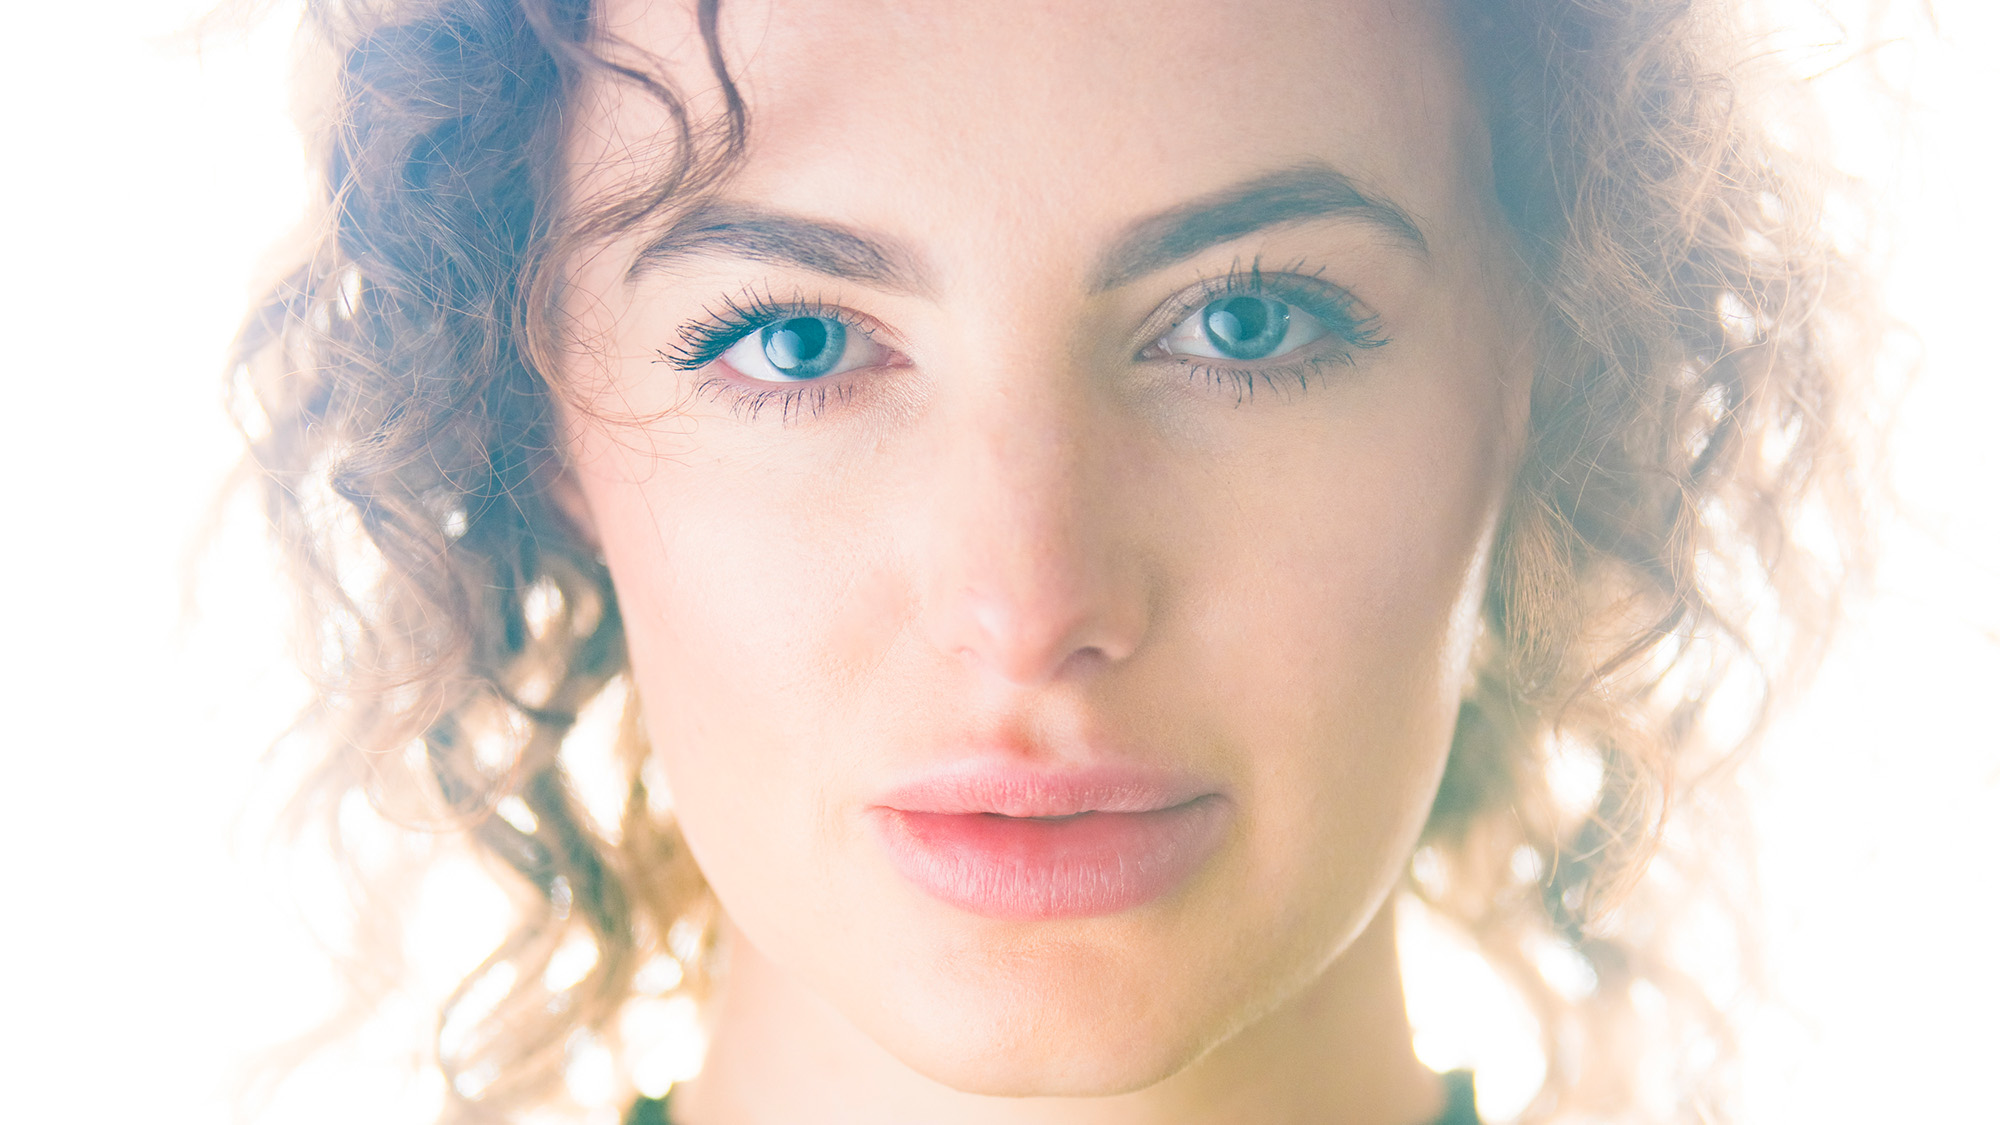
The softbox is behind the head at 12 o’clock, creating a blown-out backdrop. A reflector is positioned next to the camera to bounce light back into the face (hence the catchlight in the subject’s eyes). For this, you may need to open your aperture to allow in more light.
3) Butterfly lighting
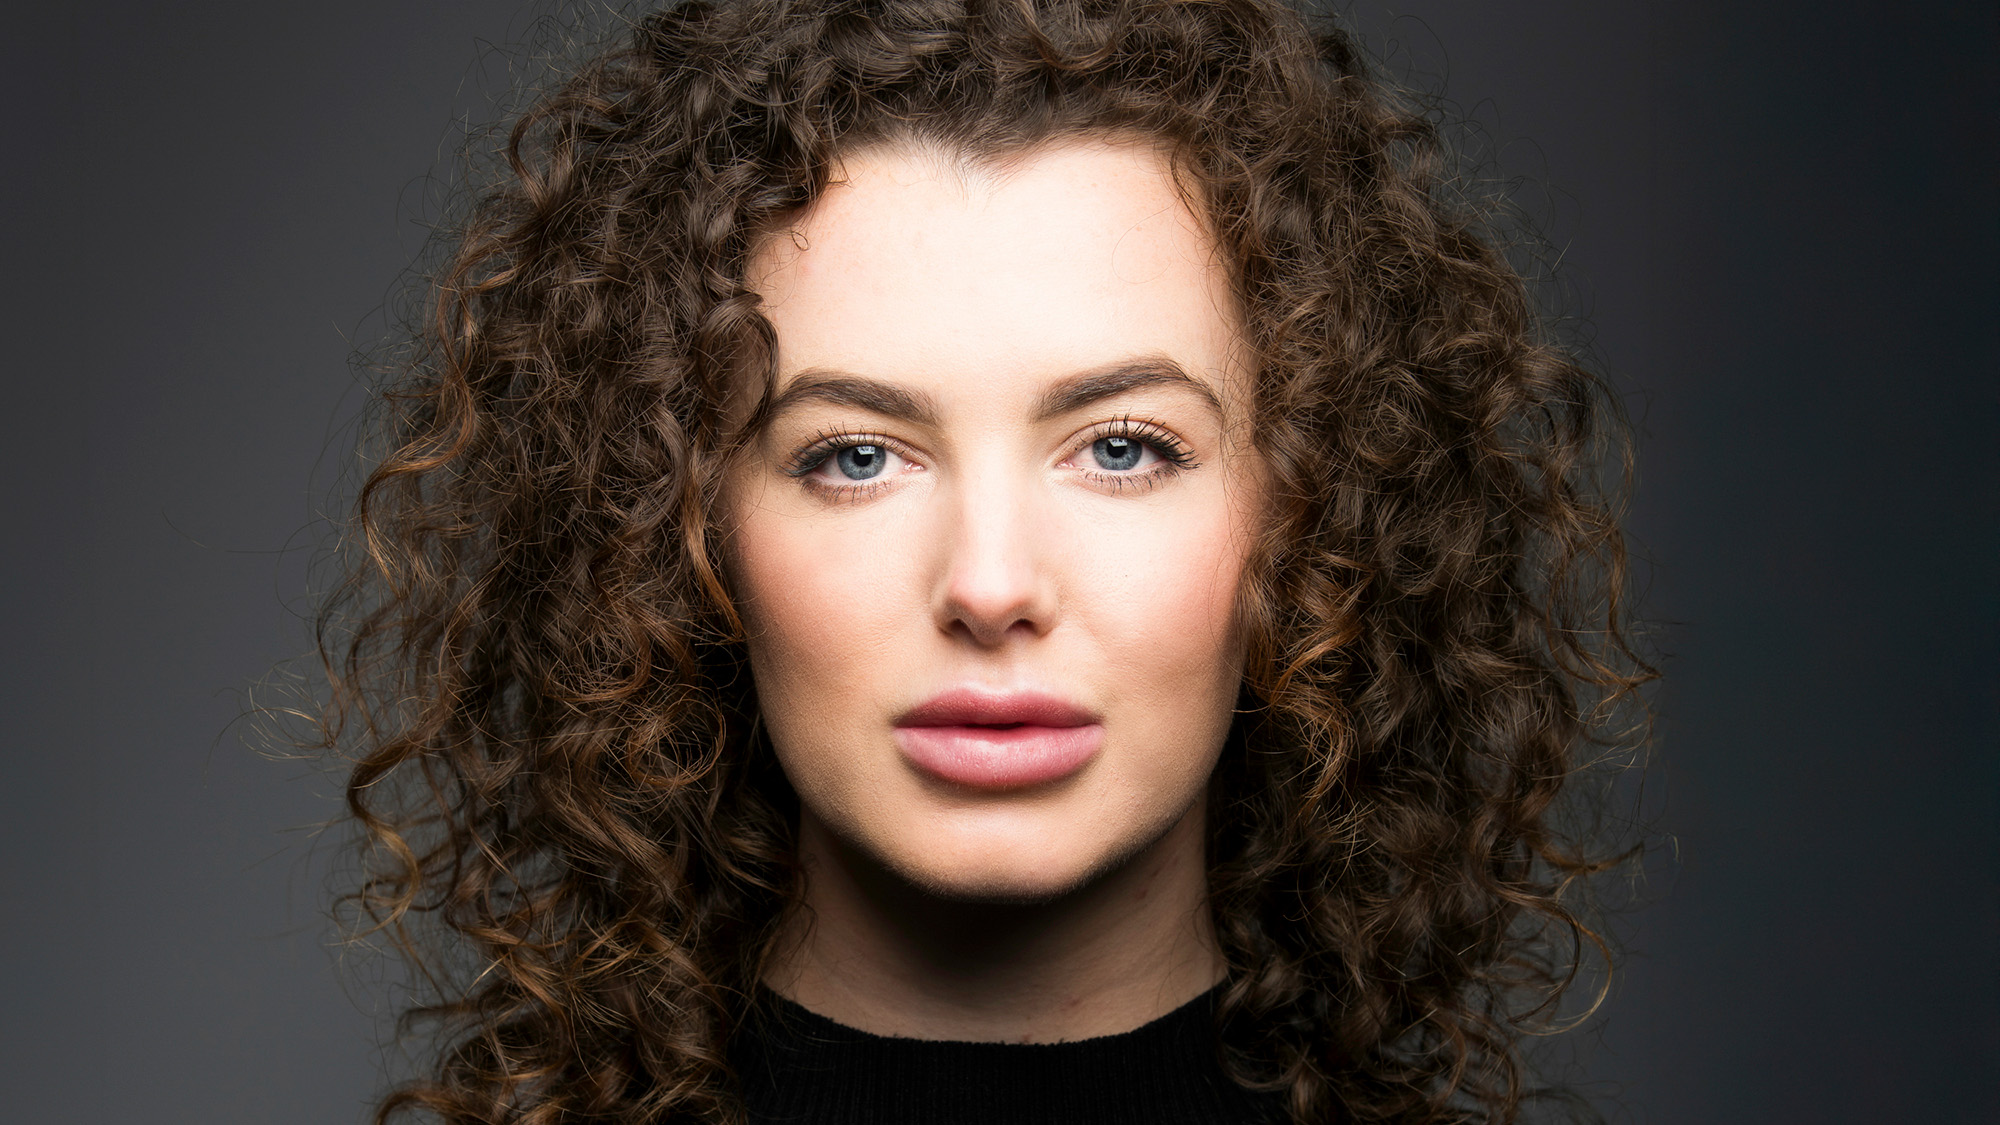
The flash is directly overhead at 6 o’clock, angled from above. This is a classic beauty lighting set-up. The high angle accentuates cheekbones. It’s sometimes known as butterfly lighting, as the straight-down shadow from the nostrils creates a butterfly shape.
4) Short lighting
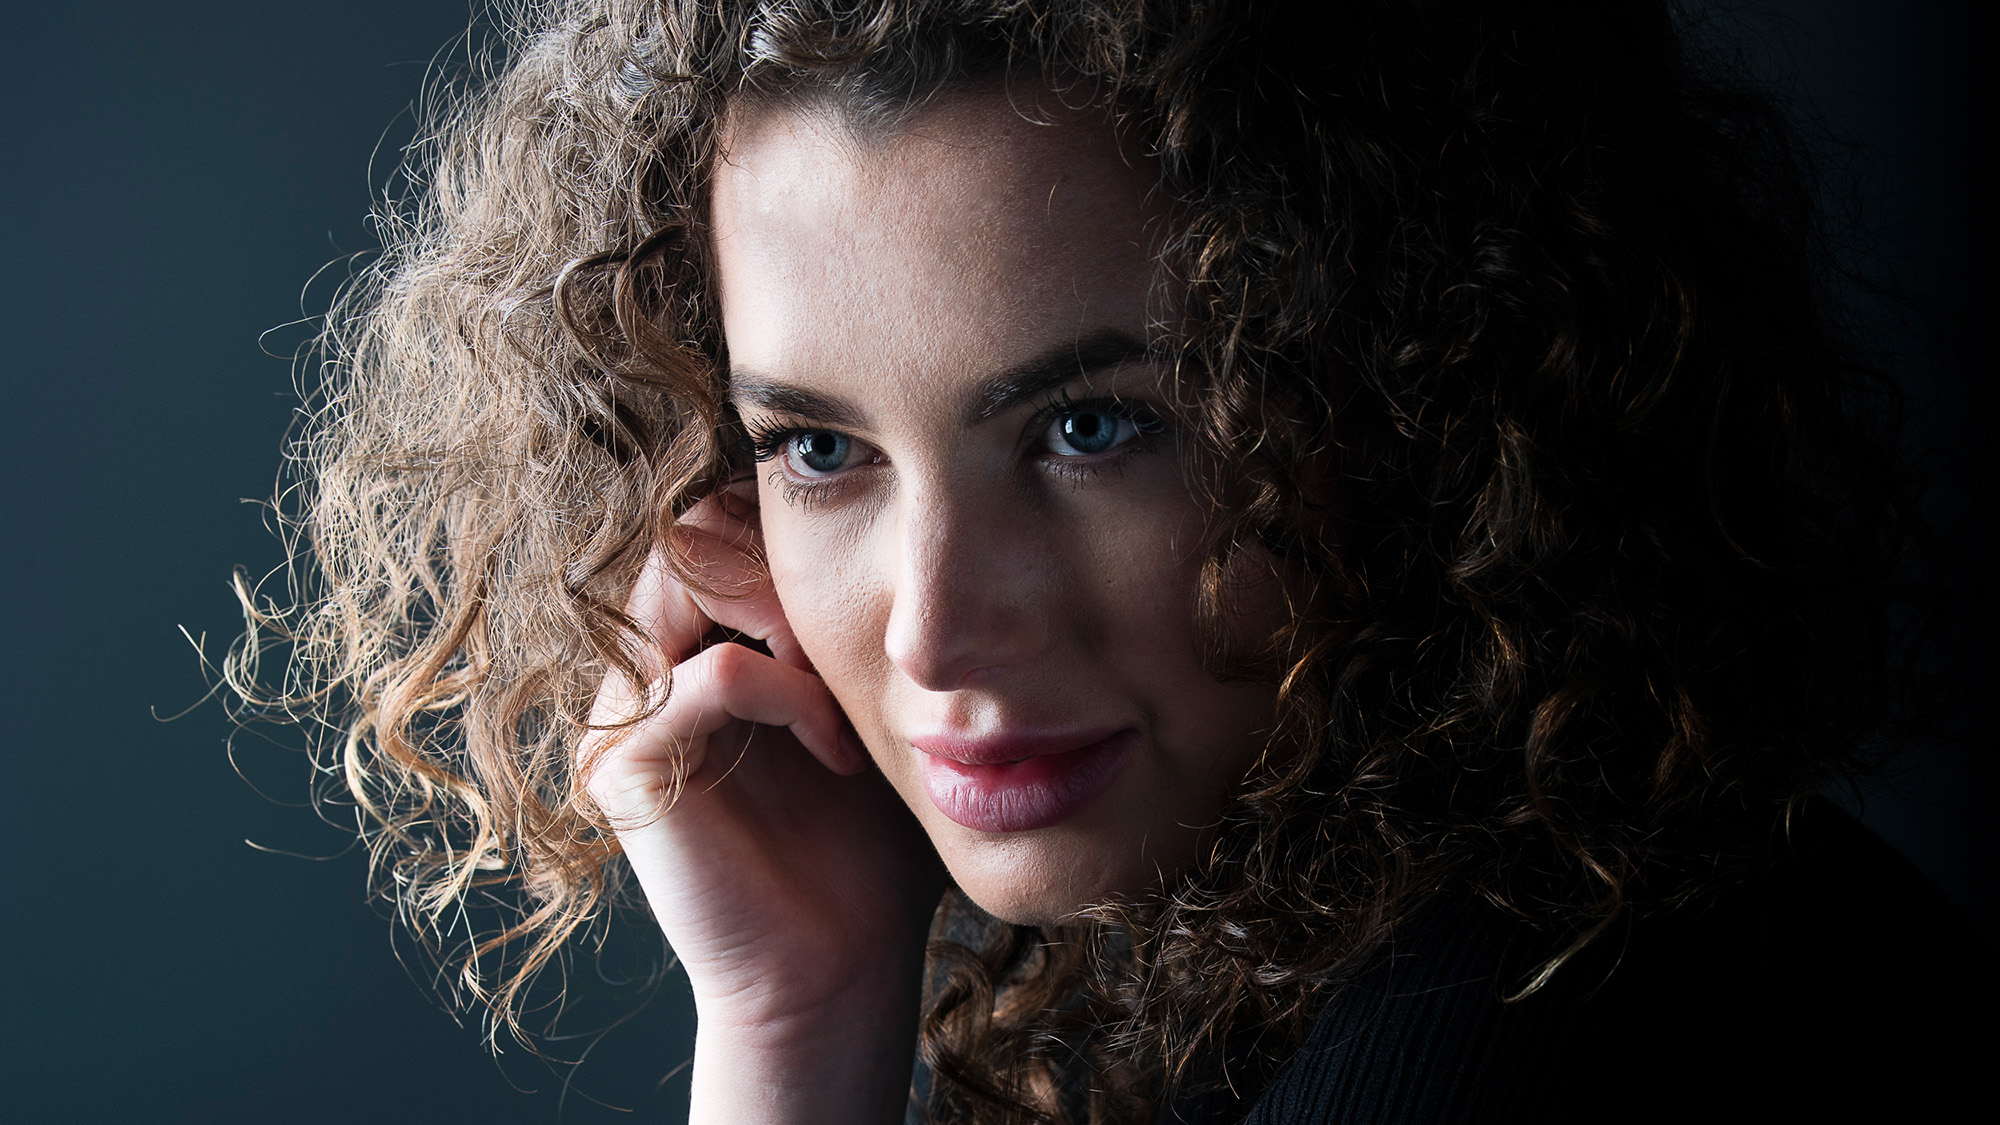
Put the light at 2 or 10 o’clock and ask your subject to stand side-on, so light glances off the face. Sometimes called short lighting, the light hits the side of the face angled away from the camera. Direct the flash back to the camera to stop it hitting the backdrop.
5) From below
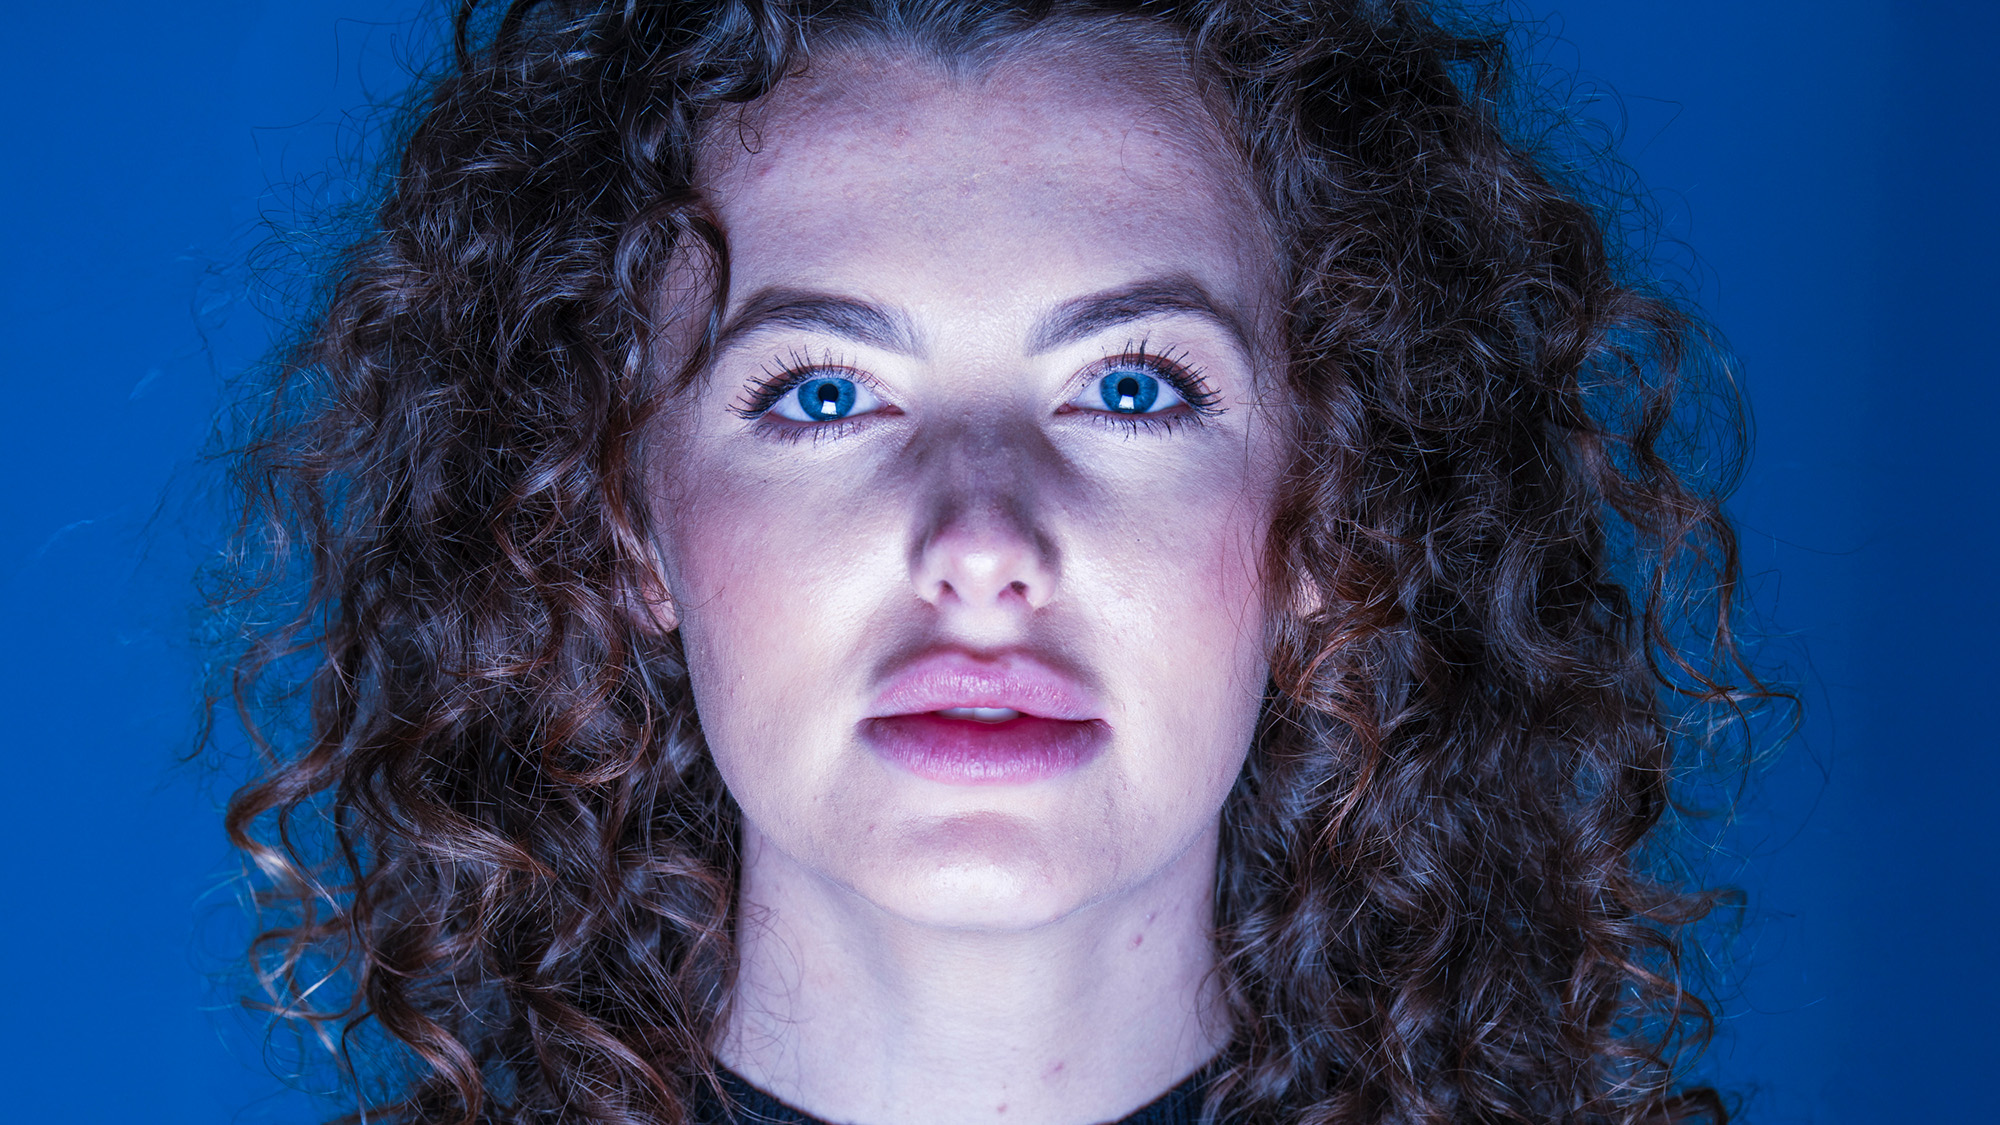
Put the light at 6 o’clock, below the camera. This makes for ‘horror movie’ lighting. Light from below looks unnatural (we’re used to seeing light from above) and can be unflattering. I’ve cooled the white balance to go with the unnatural effect.
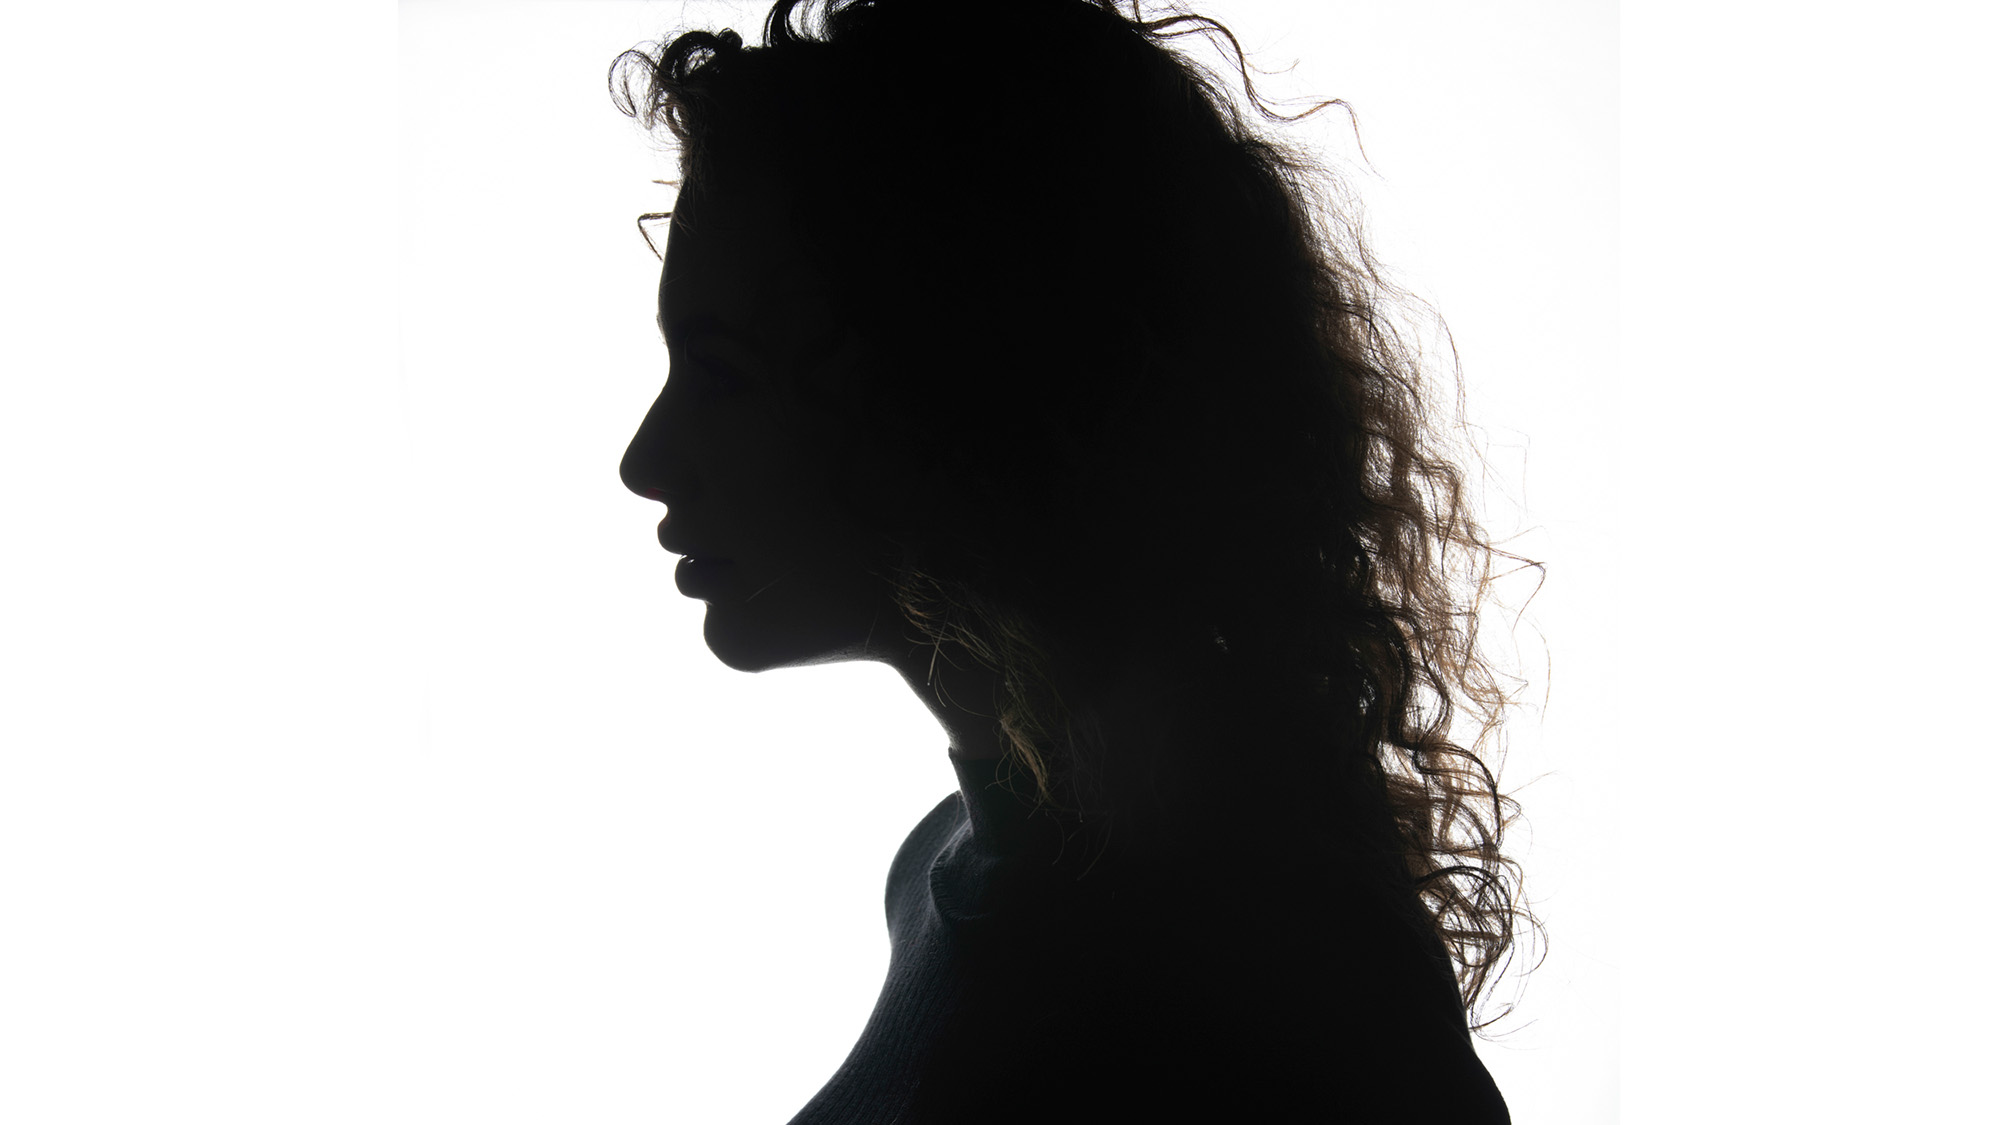
6) Silhouette
You don’t necessarily need to light your subject to create interesting portraits. Here the light is at 12 o’clock, but rather than angled at the subject it’s trained on the backdrop instead. This blows out the backdrop and leaves our subject in stark silhouette.
My simple 5-minute retouch for portraits
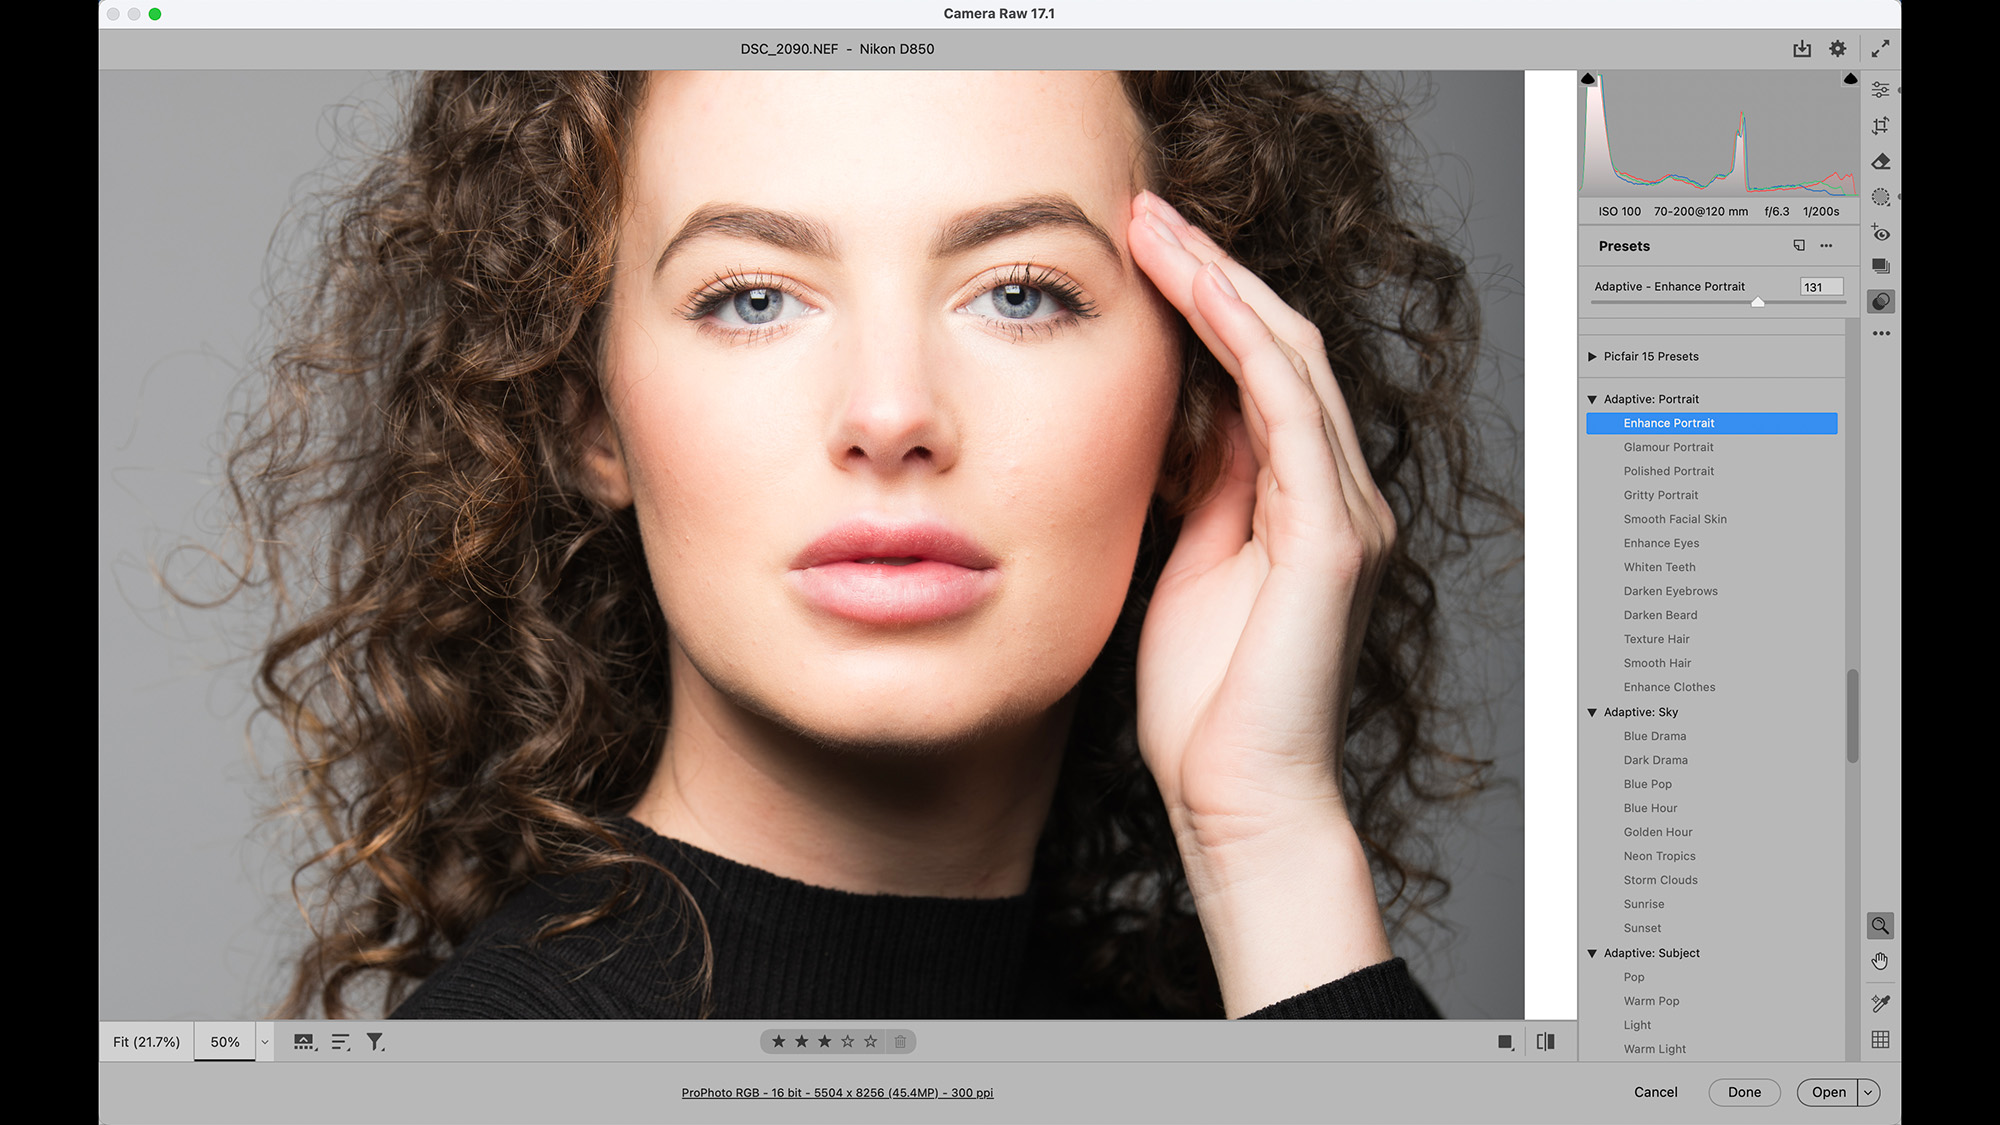
1) Try adaptive presets
Open the image into Adobe Photoshop’s Camera Raw or Lightroom and go to the Preset Panel. Here you’ll find a variety of one-click ‘Adaptive Presets’ that detect facial features like eyes and skin and apply targeted presets. Here, the ‘Enhance Portrait’ preset boosts facial features.
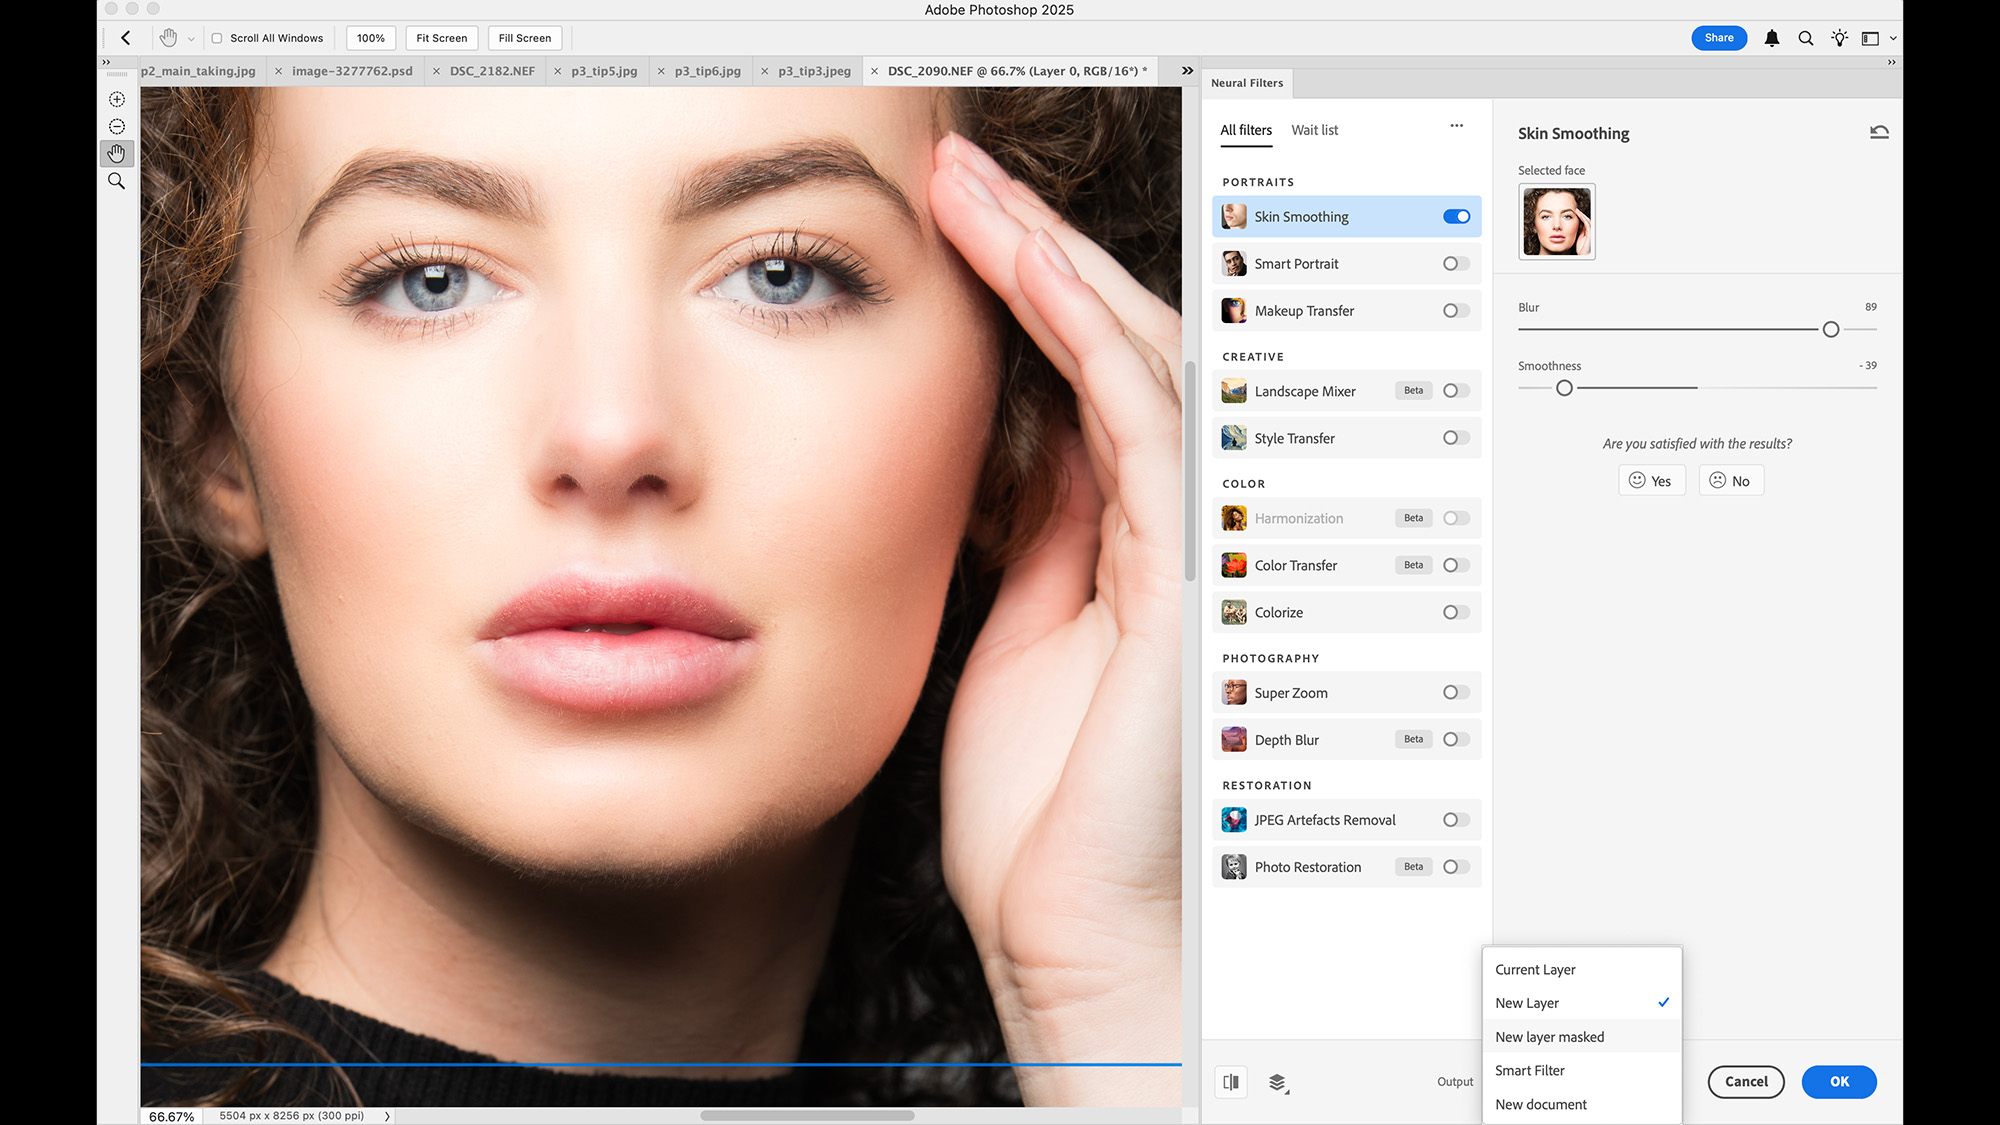
2) Skin-smoothing filter
In Photoshop under Filter > Neural Filters > Skin Smoothing, this handy filter enables you quickly soften skin. Such effects can leave skin looking unnatural, but this one gives subtle results – especially on a separate layer that masks it where you want it to be.
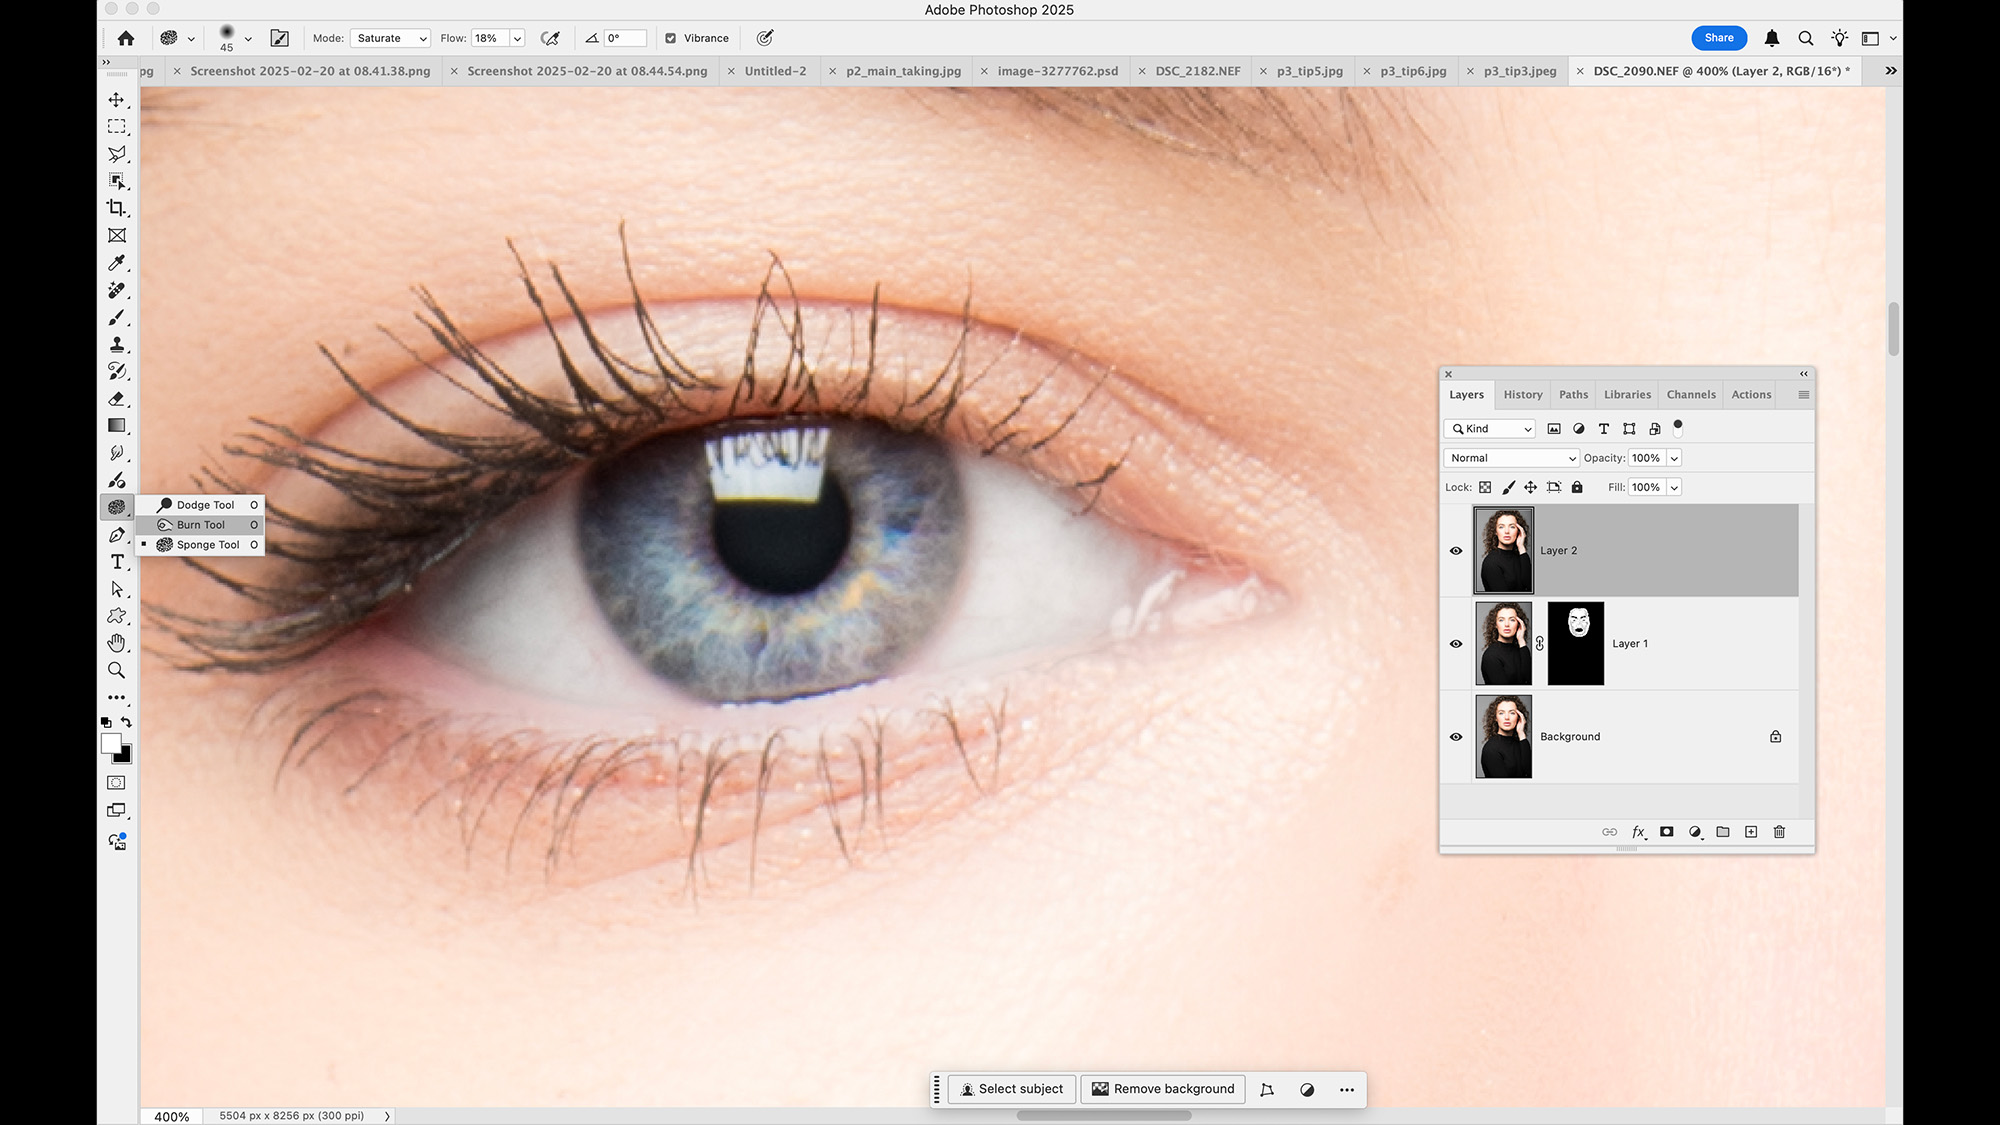
3) Boost the eyes
Eyes can benefit from subtle dodging and burning in Photoshop. Use the Dodge tool (at a low strength) to lift the white and the inside of the iris. Use the Burn tool (set to target Shadows) to darken the lashes and the outer rim of the iris. Use the Sponge tool to saturate the iris.
My essential editing skills for mono portraits
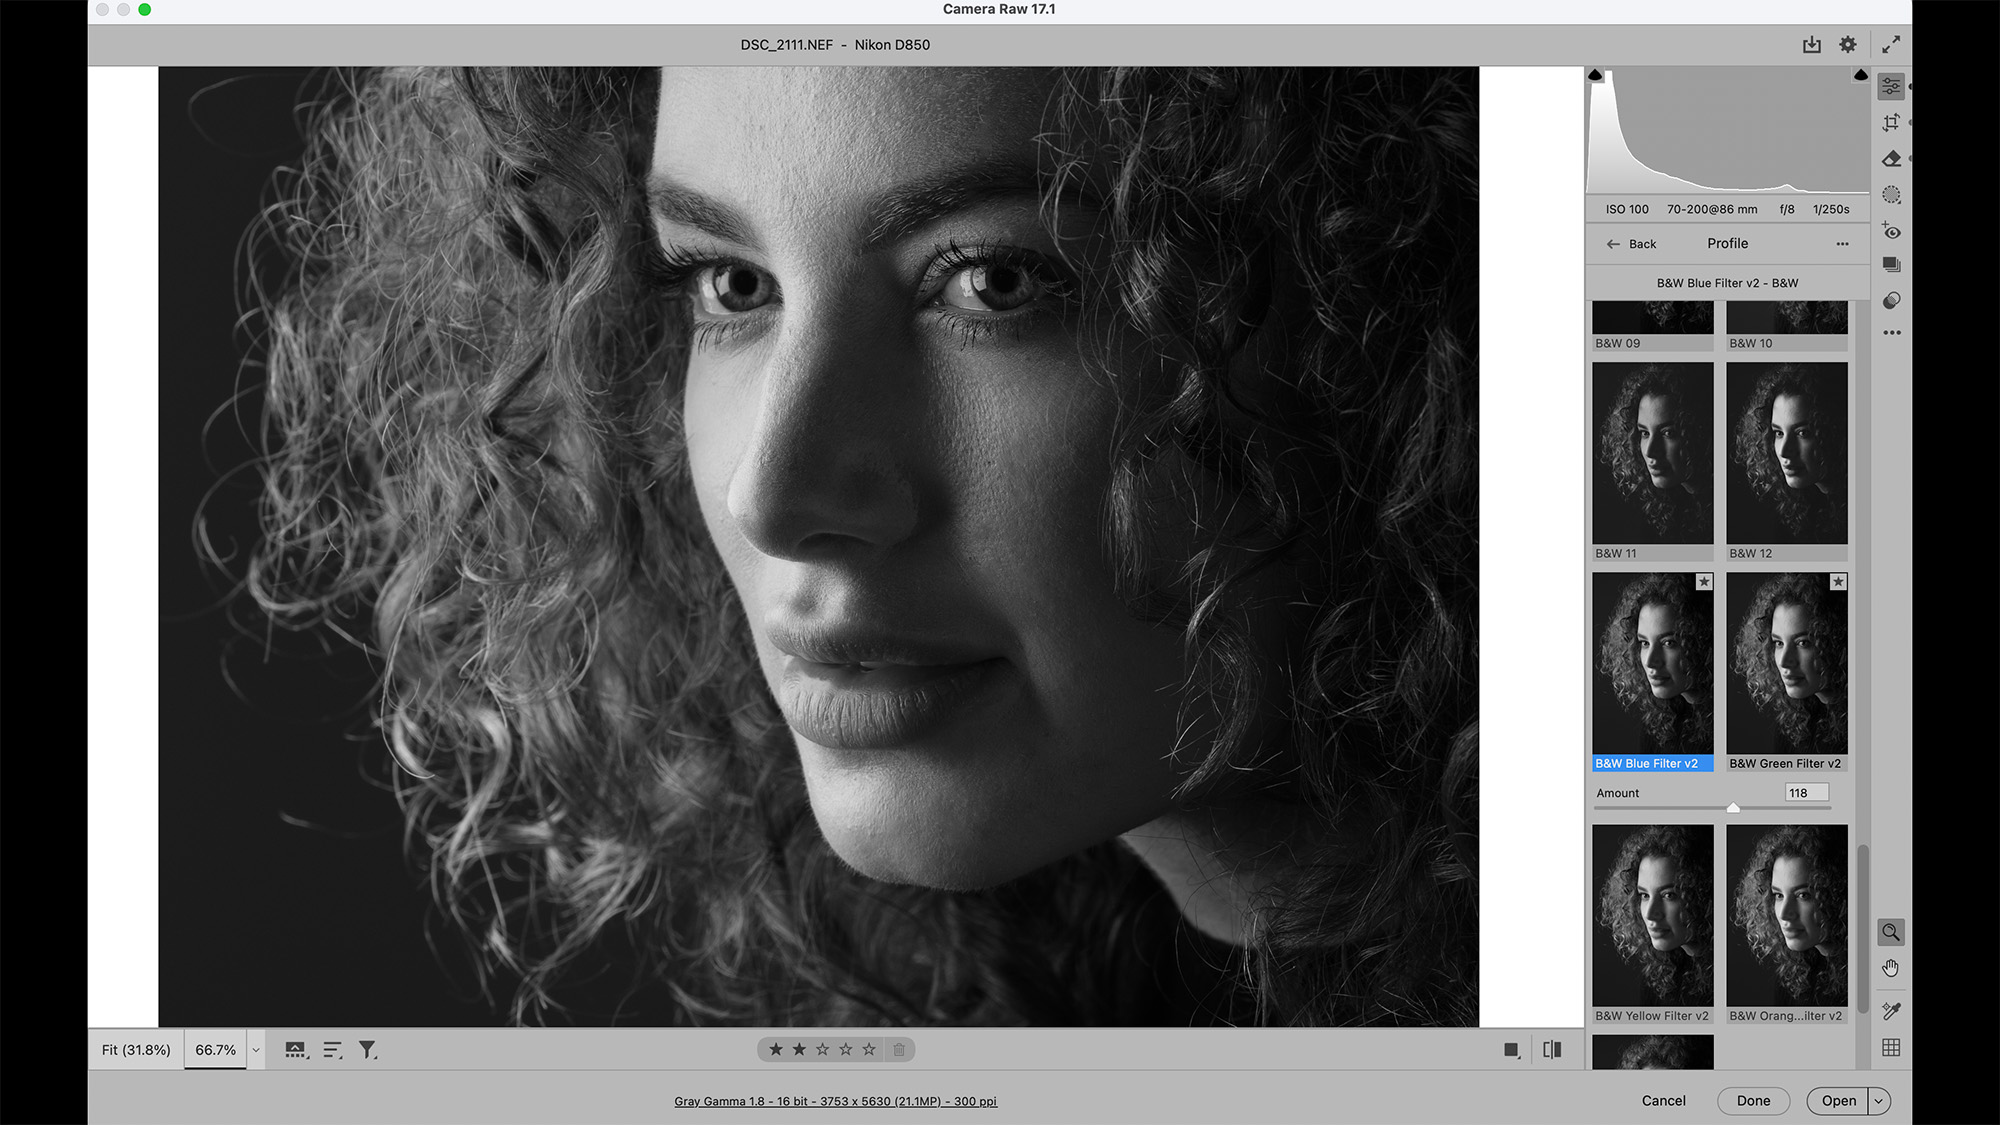
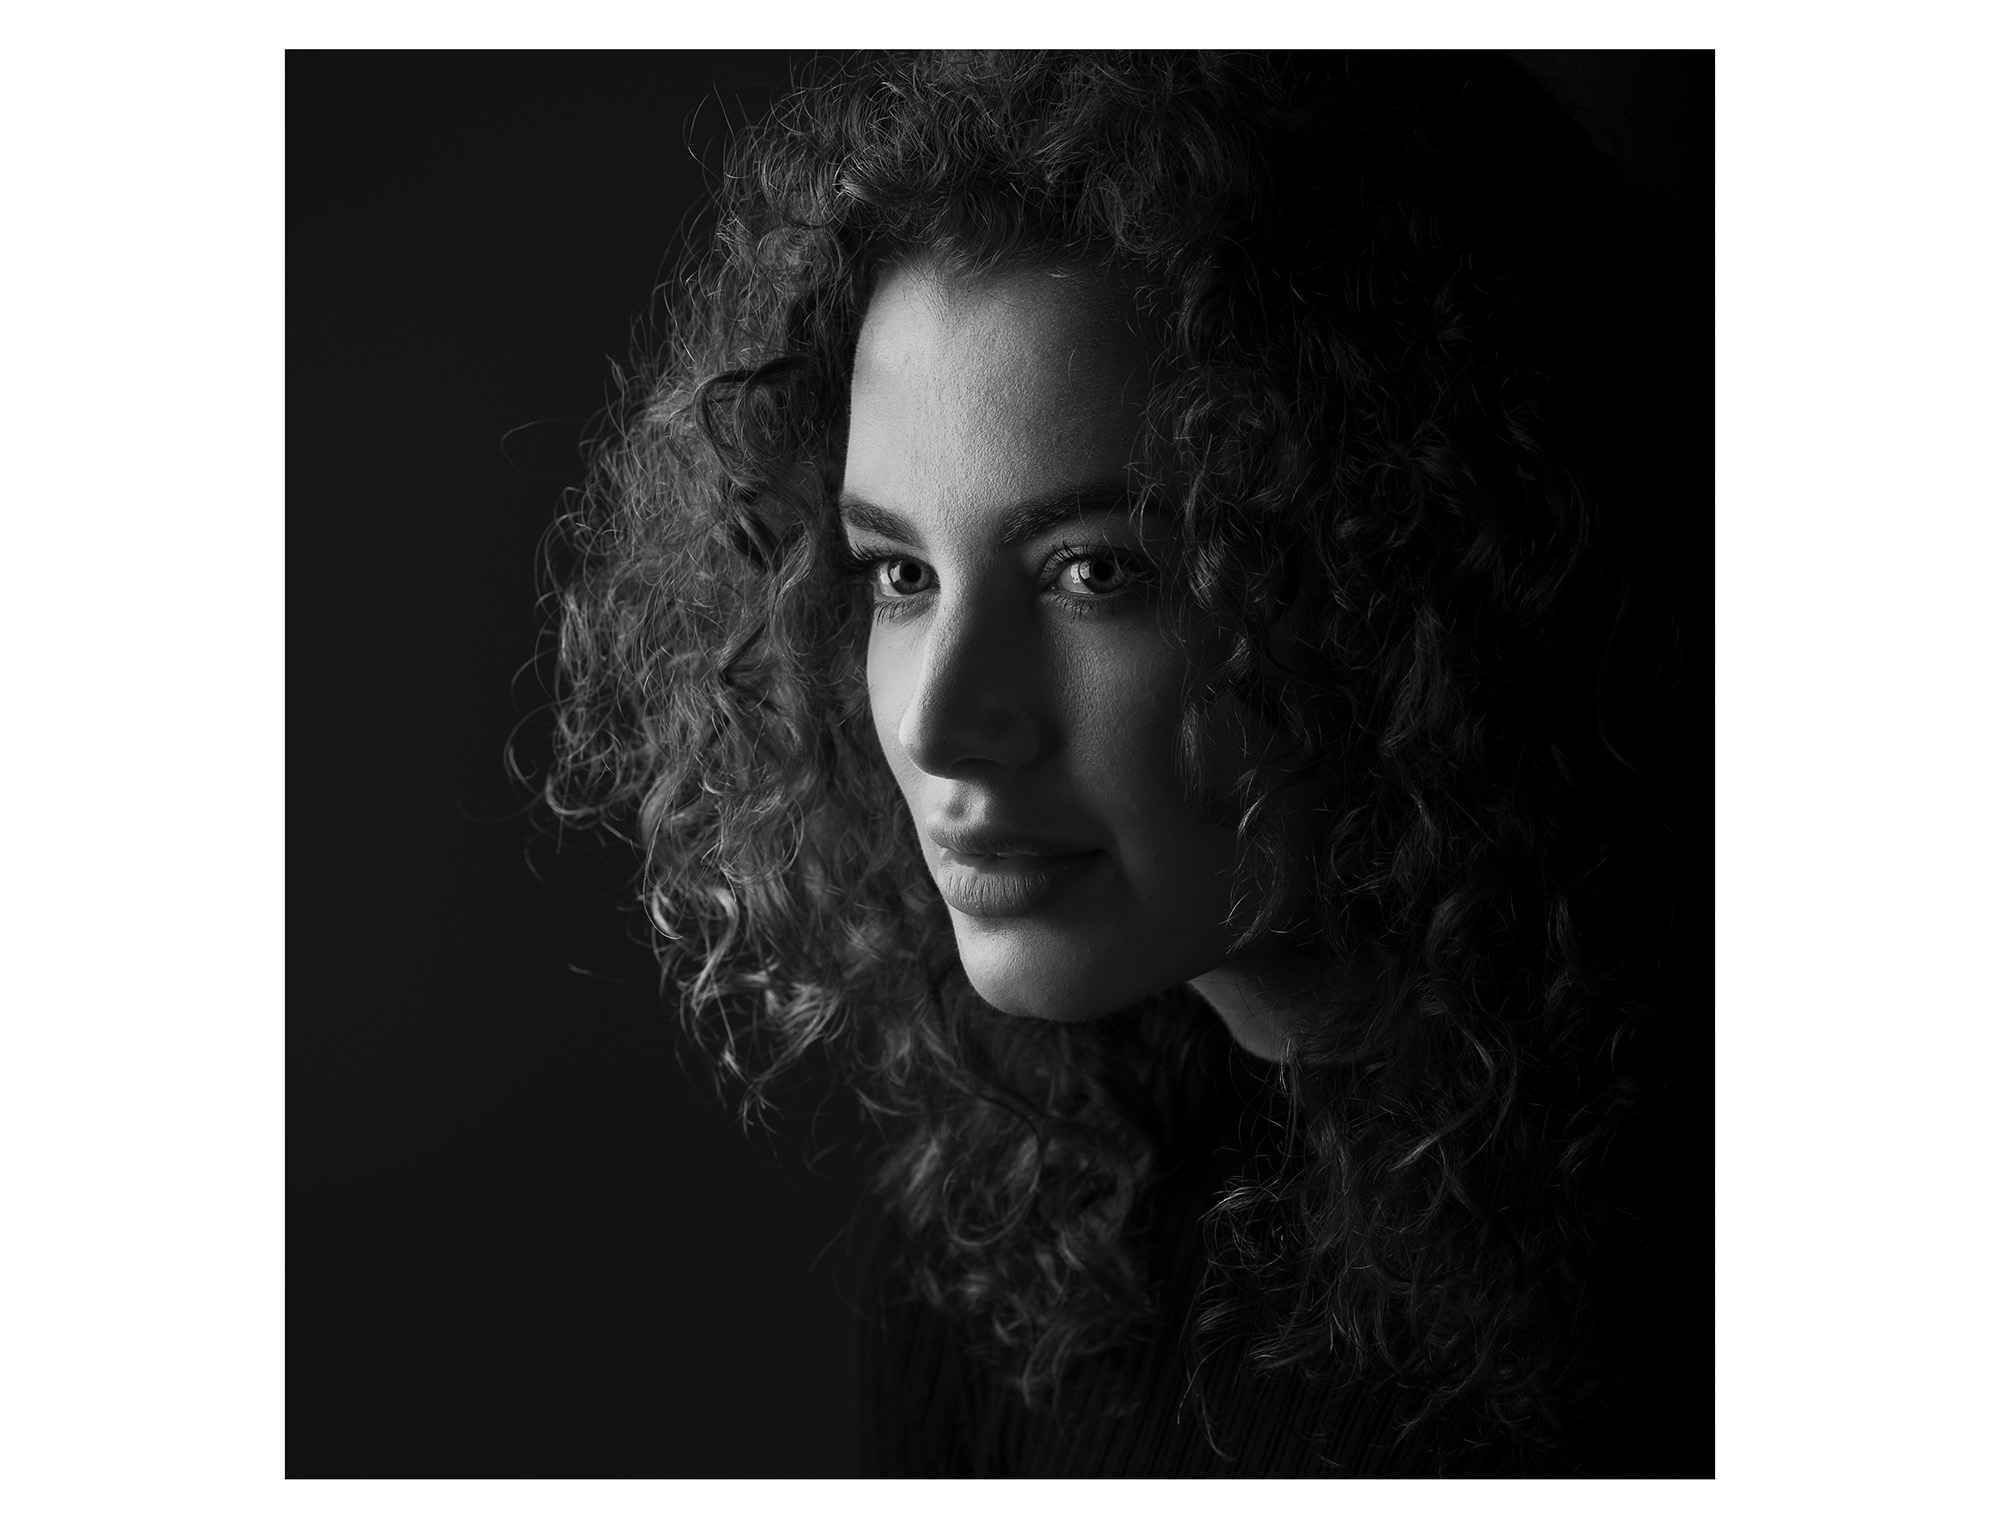
One of the great things about using a single light source for portraits is how it often gives you good contrast between light and dark. The gentle mix of shadows and highlights accentuates the shape of a person’s face. This also makes it ideal for a classic black-and-white treatment.
Black-and-white is made for faces. Without color, it enables the viewer to focus on other aspects of the face like expression and form. There are umpteen ways to craft a black-and-white treatment. One of the simplest is to use the B&W Profiles in Lightroom and Photoshop’s Camera Raw.
You might also like...
Looking to upgrade your portrait setup? Here are the best lenses for portraits and the best cameras for portraits. If you're looking for inspiration, here are the best books on portrait photography.
The lead technique writer on Digital Camera Magazine, PhotoPlus: The Canon Magazine and N-Photo: The Nikon Magazine, James is a fantastic general practice photographer with an enviable array of skills across every genre of photography.
Whether it's flash photography techniques like stroboscopic portraits, astrophotography projects like photographing the Northern Lights, or turning sound into art by making paint dance on a set of speakers, James' tutorials and projects are as creative as they are enjoyable.
He's also a wizard at the dark arts of Photoshop, Lightroom and Affinity Photo, and is capable of some genuine black magic in the digital darkroom, making him one of the leading authorities on photo editing software and techniques.
You must confirm your public display name before commenting
Please logout and then login again, you will then be prompted to enter your display name.
