
Getting your printer to reproduce exactly what you see on your screen is not always straightforward! You can go straight into full-on color management and printer profiling, but that's not straightforward either and may be overkill for a printing problems which can actually be fixed quite easily.
Adobe trial downloads
• Download Photoshop
• Download Lightroom
• Download Premiere Pro
See all 15 instalments
• 15 common photo fixes
Computers and photo editing
• Best photo-editing software
• Best laptops for photographers
• Best desktop computers for photo editing
Photo tips and ideas
• 11 home photo projects
• 44 tips cards to cut out and keep
• Photography tips for beginners
Welcome to the 11th instalment in our 15-part series on how to fix common photo problems in Photoshop, Lightroom and Adobe Camera Raw.
If like us you're confined to home working during the current COVID-19 crisis, then it is at least a chance to catch up on some image editing jobs that have been on the back burner, and perhaps finally print out those pictures you've been planning to hang on your wall.
In this instalment we'll show you how tackle a tricky printing problem that's actually quite common – your photos look great on-screen with plenty of subtle shadow and highlight detail, but your prints have too much contrast and just go to solid black or white in those key areas.
Output levels explained
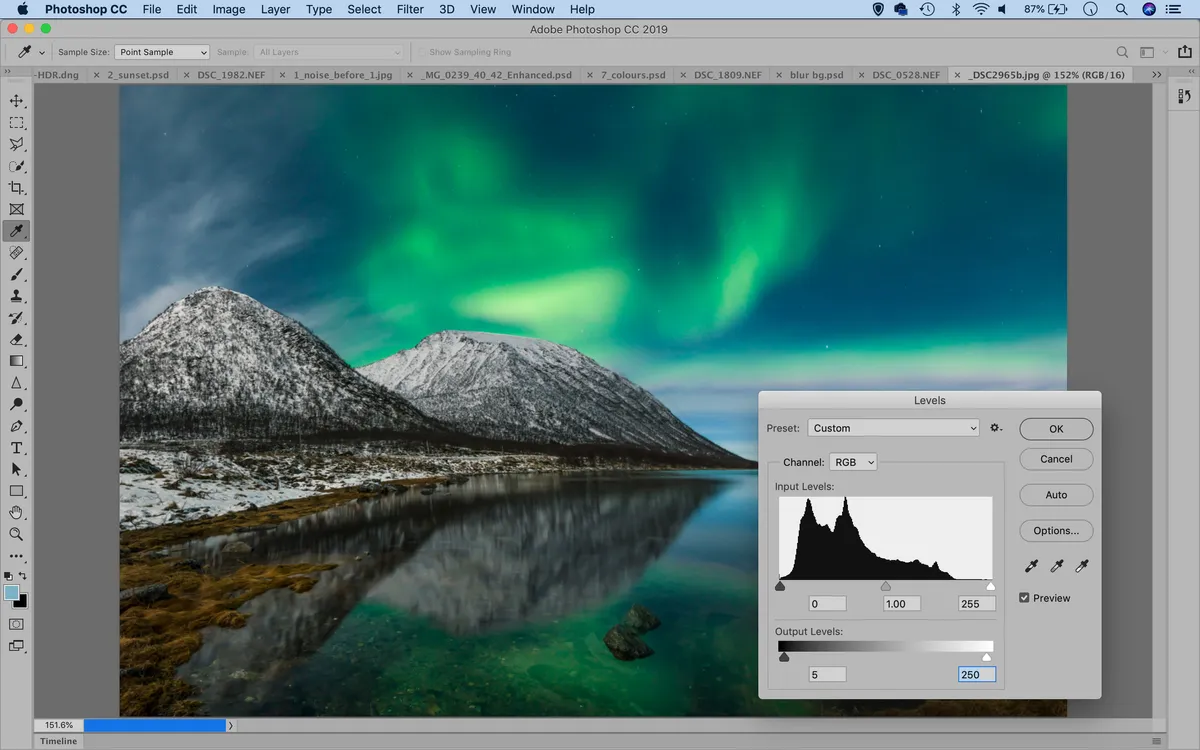
If you find after making a print that either the highlights look blown out or the shadows are clipped, you can try lowering the maximum white and black values in the picture.
You can do this with a Levels adjustment (Cmd/Ctrl+L). Normally, you adjust the Input values in the Levels dialog, but this time look for the Output Levels at the bottom of the dialog.
By default, these are set to the maximum black and white values (0 and 255), but you can drag the sliders inwards slightly to set different max white or max black points. This will reduce contrast in the print, but can also bring the darkest and lightest pixels within the gamut of your printer. It's a quick and simple alternative to proper color management and printer profiling, but do remember this adjustment is only for making prints, so you should disable it afterwards.
Jargon buster
Output Levels: The Levels and Curves dialogs are generally used to change the Input values in images to change the way they map on to the full tonal scale available. However, you can also change the Output levels if you are printing pictures on devices that struggle to reproduce subtle shadow and highlight details.
Next instalment: #12 My HDRs lack contrast
If you don't use Photoshop or Lightroom, why not sign up for the trial version? You can use this free for a period of 7 days and then decide which of three Photography Plan subscriptions would suit you best.

