Digital Camera World Verdict
Adobe Lightroom Classic is still the software choice for countless photographers, from keen amateurs to busy professionals. Visually, it's hardly changed since its launch in 2007, but along the way it’s acquired ever-more-powerful editing, AI masking and retouching tools, and today it’s a formidable photo editor at the forefront of AI imaging. But it’s showing its age, and while its desktop-based workflow is great for old-school photographers, it’s limiting for a new generation of mobile creators.
Pros
- +
Local, not cloud-based storage
- +
Now with integrated raw Enhance tools
- +
Excellent AI masking
- +
Powerful cataloguing and search tools
Cons
- -
Dated interface
- -
Module-based workflow
- -
Limited cloud sync capabilities
Why you can trust Digital Camera World
Adobe Lightroom Classic has become one of the most widely used photo editors of all, even surpassing the mighty Photoshop, thanks to its all-in-one combination of powerful image organizing and searching tools and increasingly sophisticated non-destructive editing tools. Many photographers now find Lightroom has all the photo editing tools they need, and they hardly use Photoshop at all. Today, it's one of the best photo-editing software applications.
Lightroom Classic is the (relatively) new name for the original desktop-based Lightroom. When Adobe launched the web-first Lightroom CC (now Adobe simply calls it ‘Lightroom’) 10 years later in 2017, it changed the name of the original to ‘Lightroom Classic’. These programs offer the same editing tools but a very different workflow, so be sure to check out my separate Lightroom review. In the meantime, does Lightroom Classic still handle everything that digital photographers might need today?
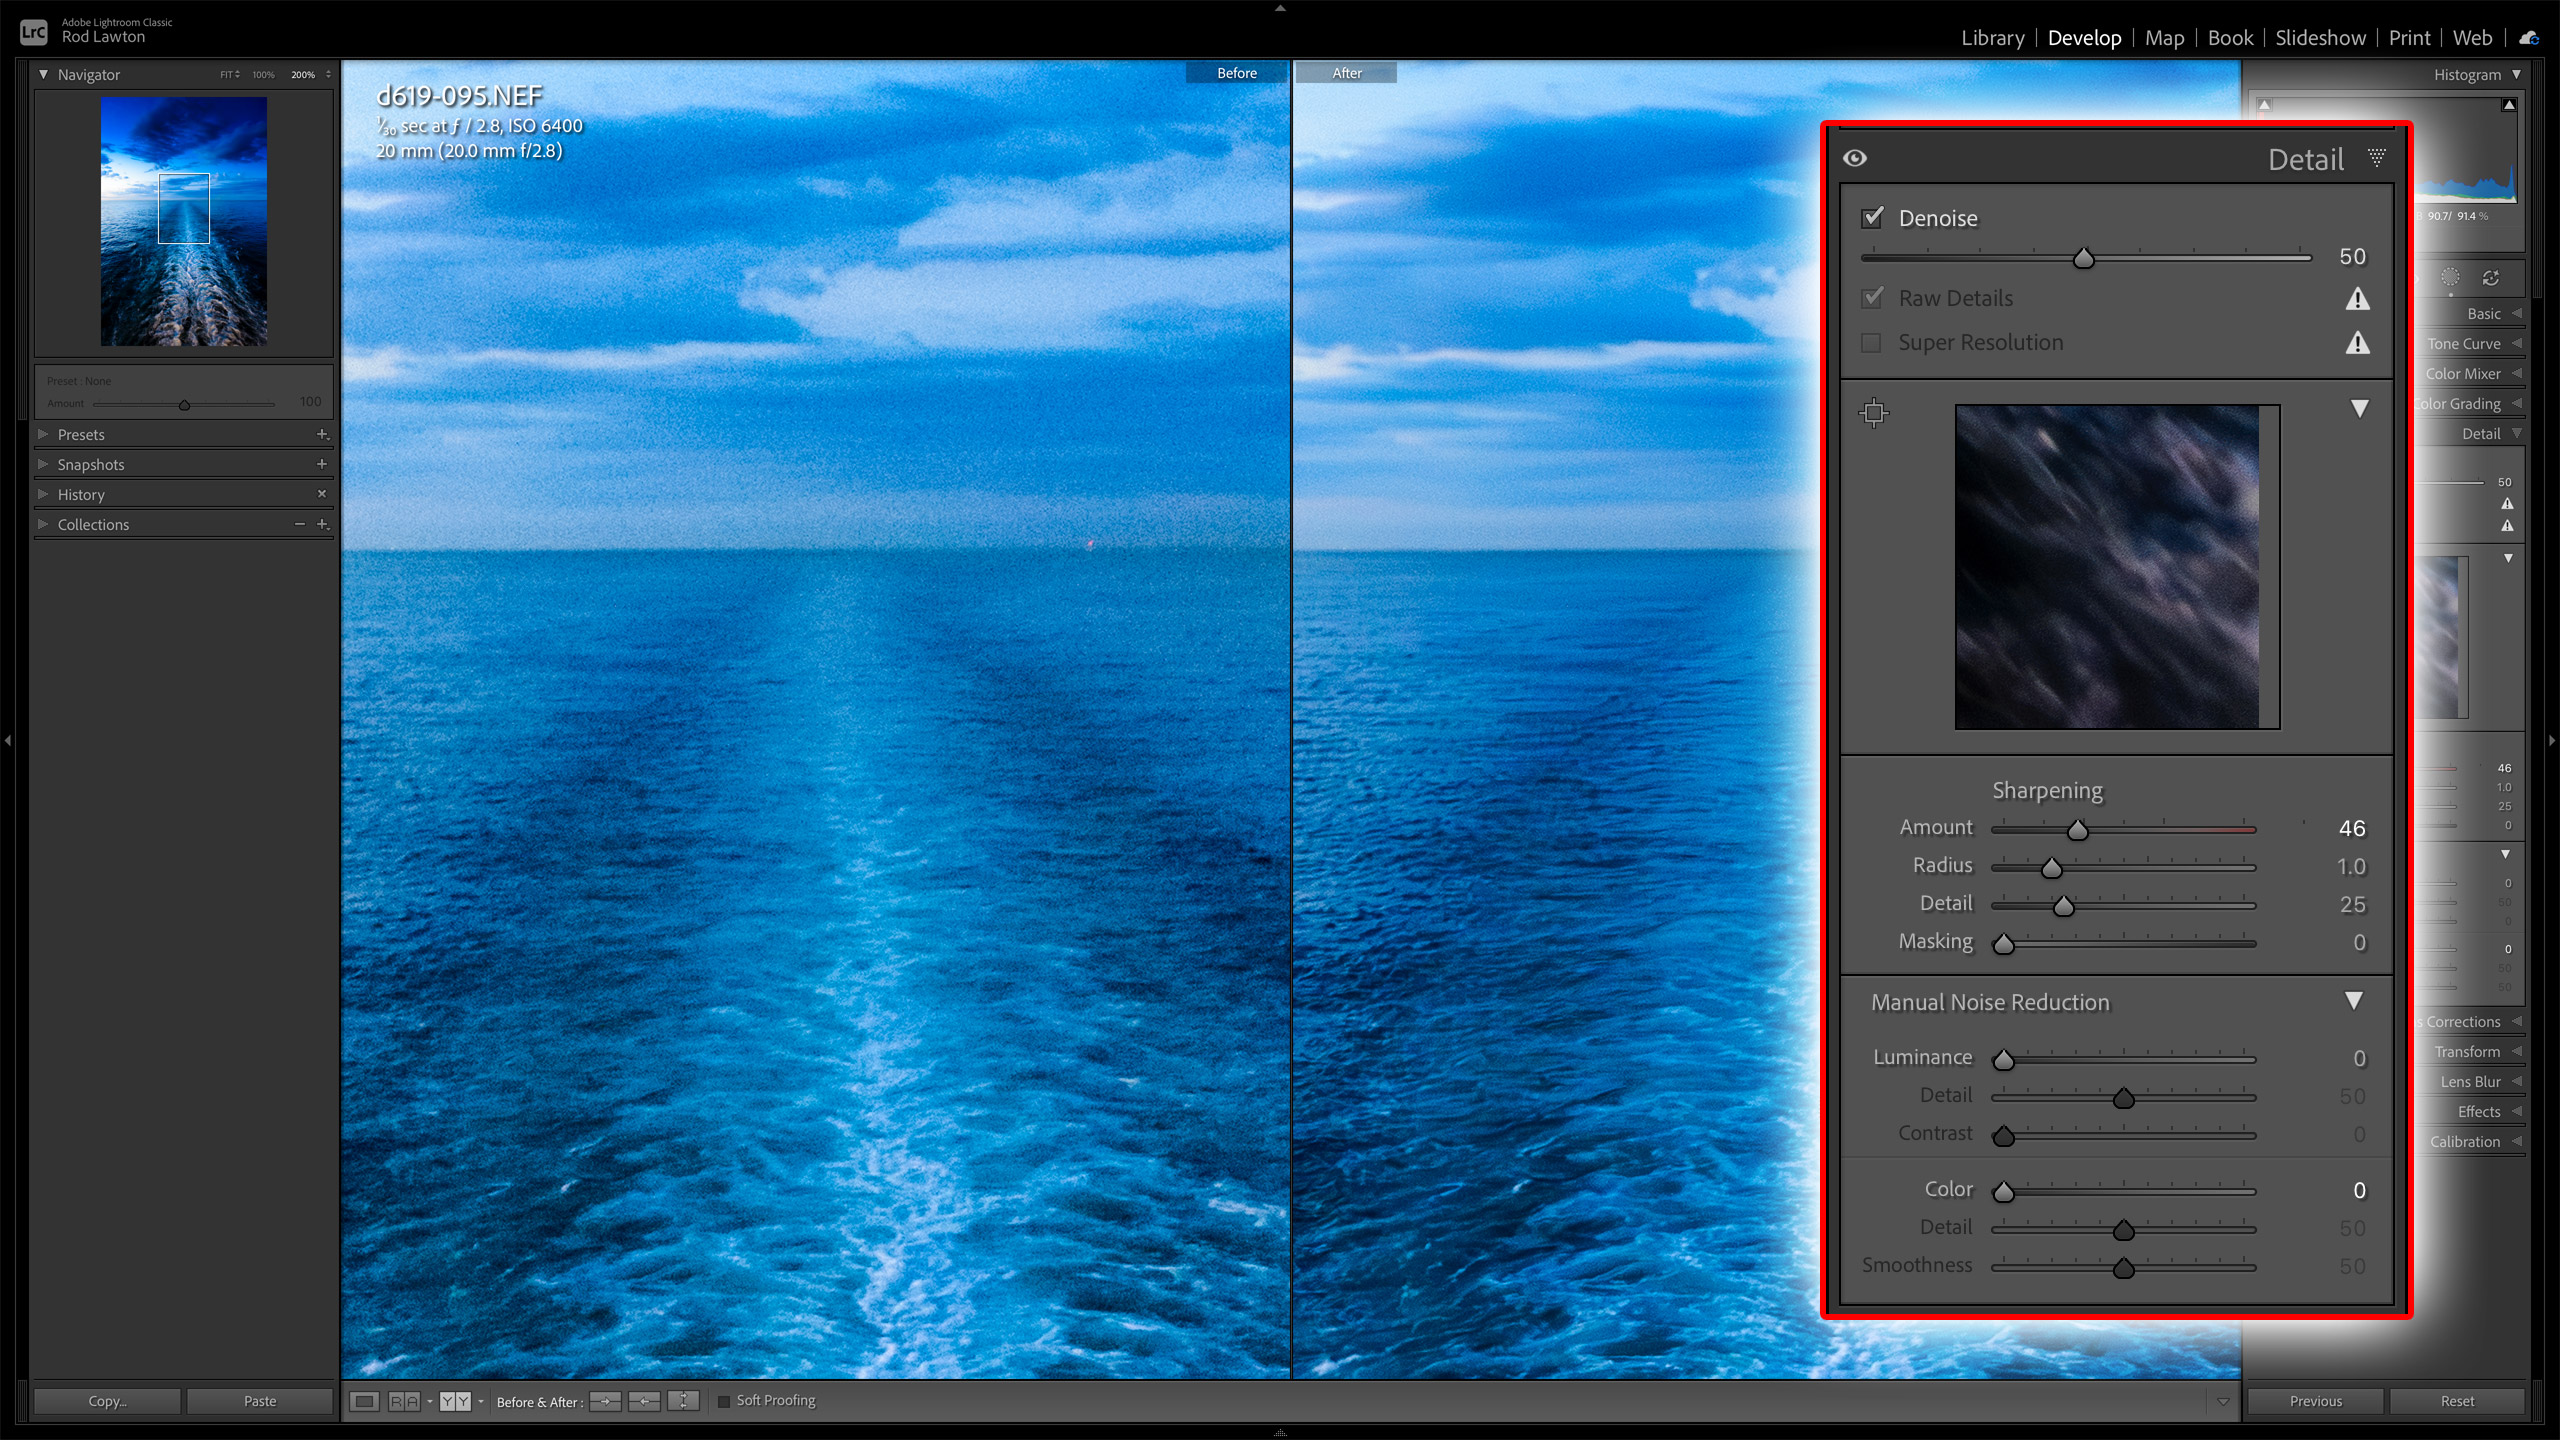
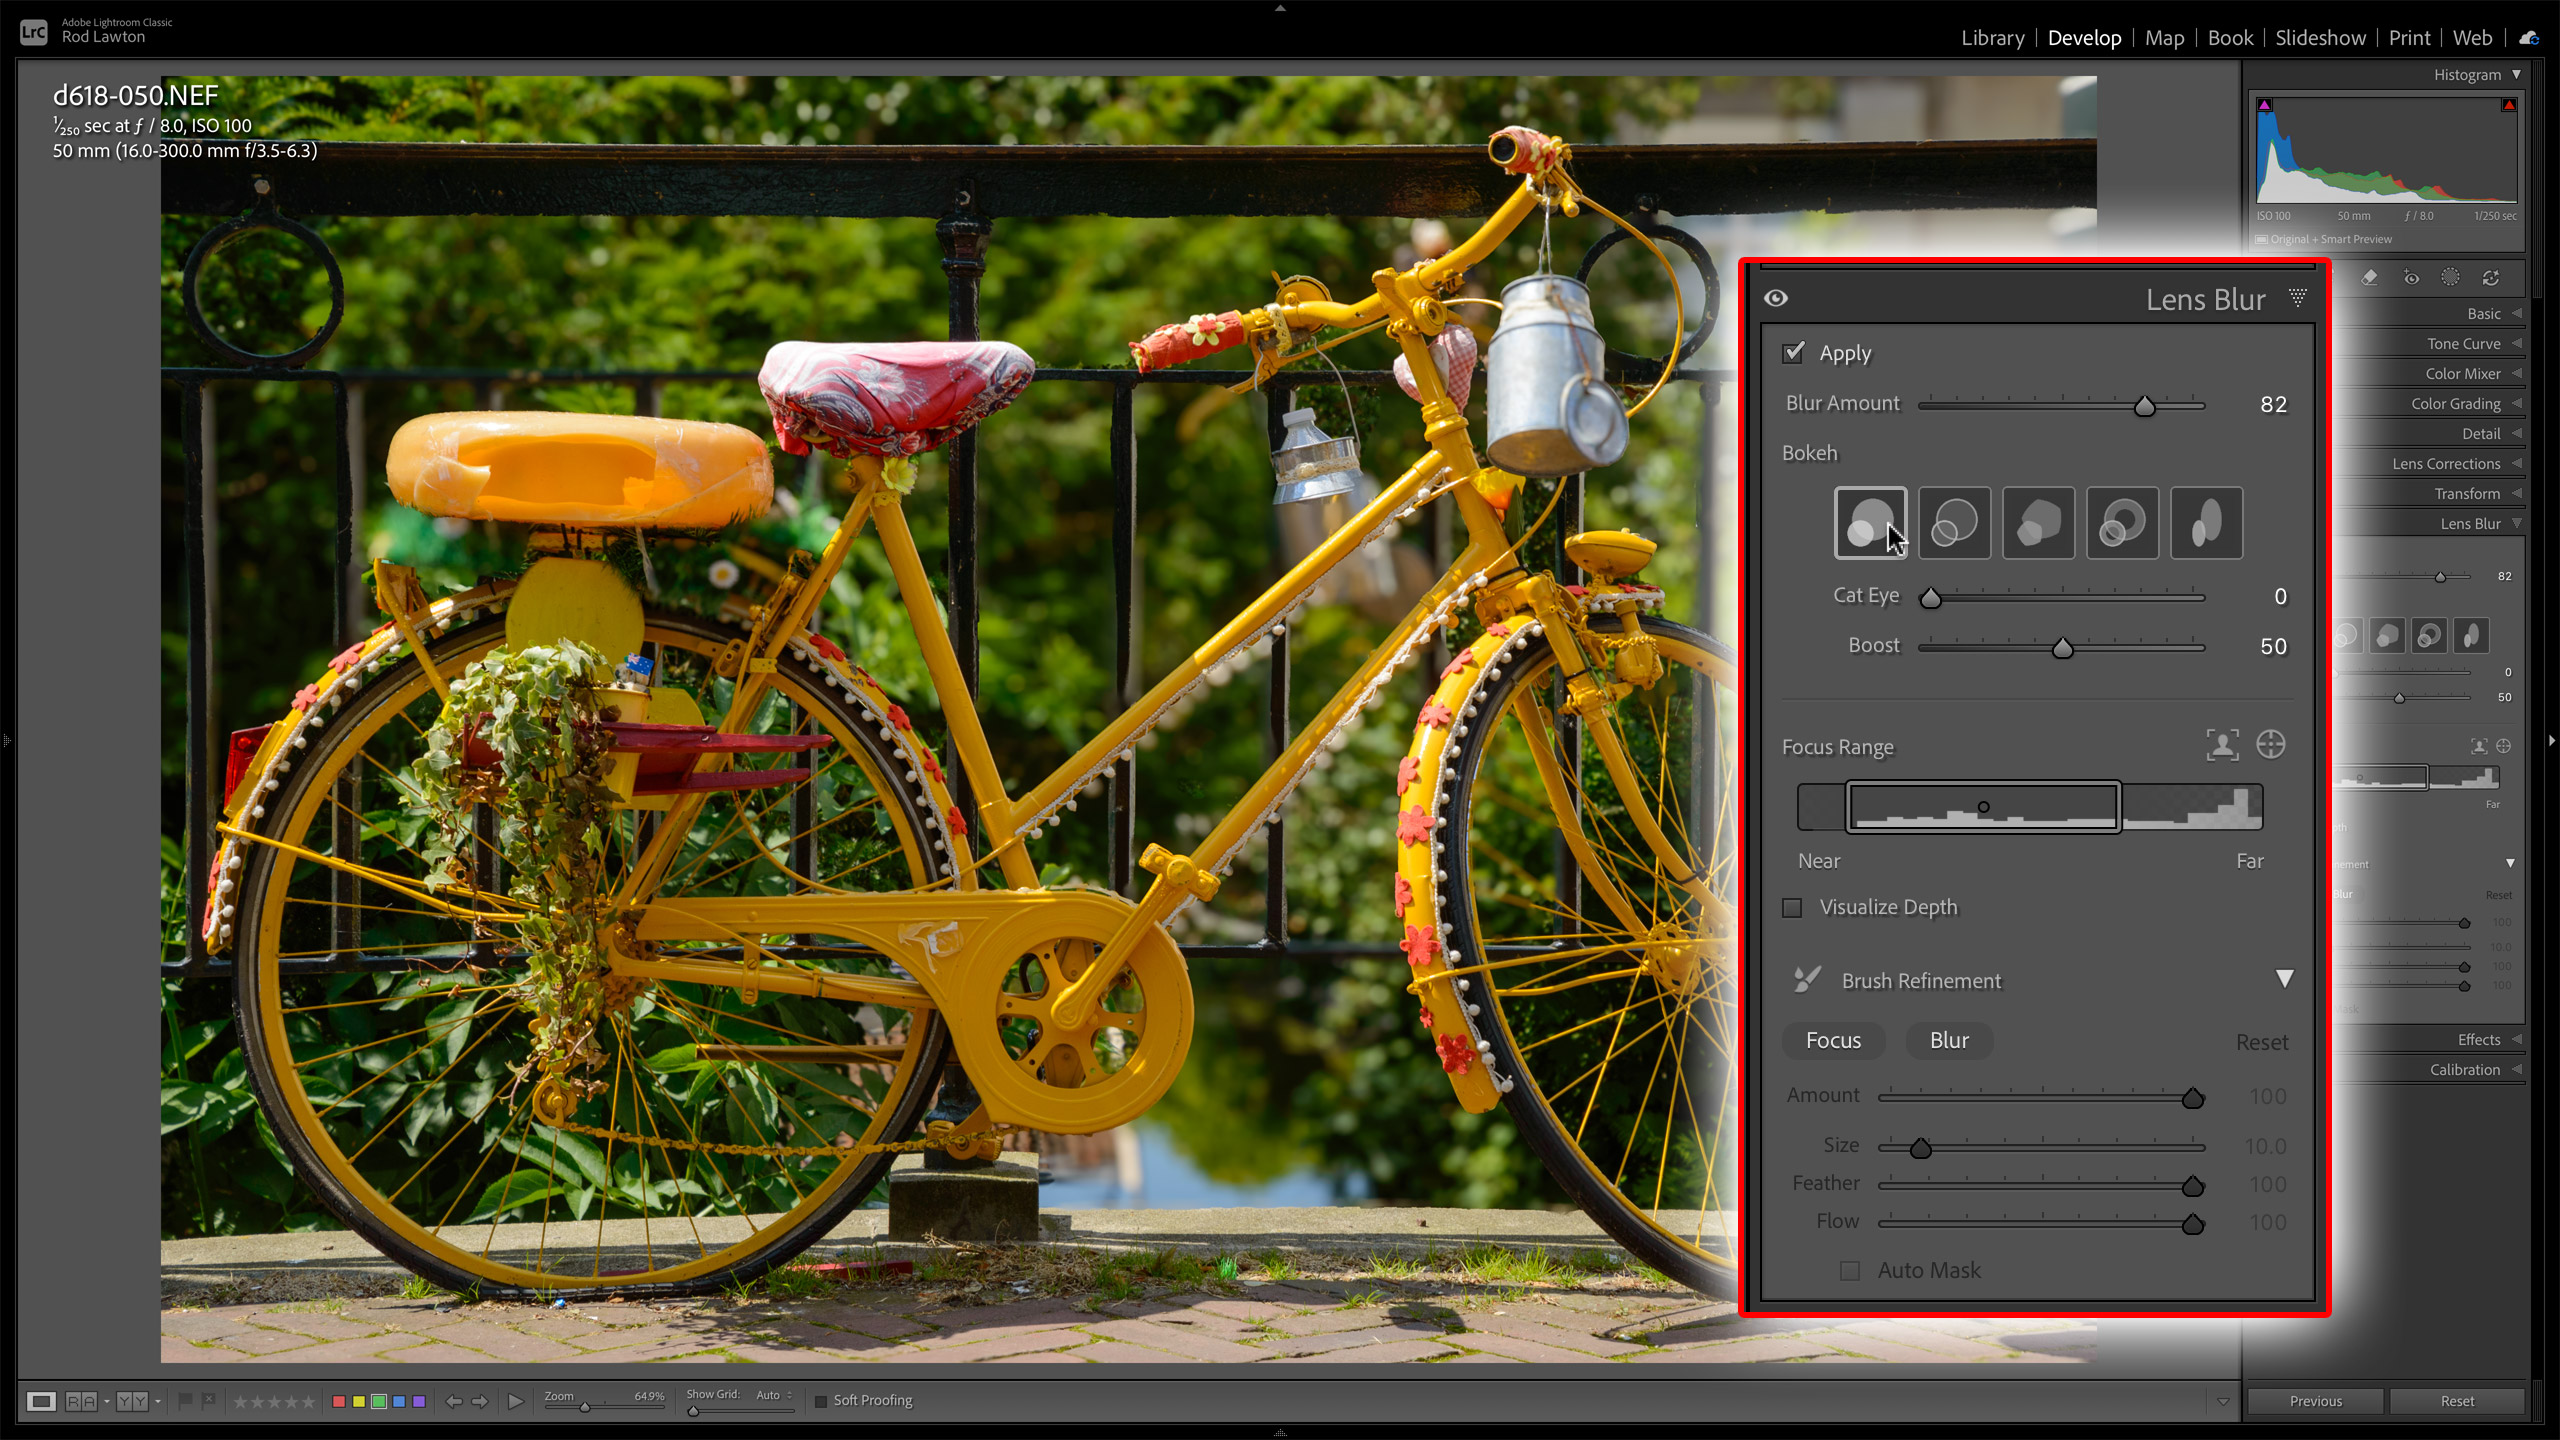
Most of the updates in recent years have been to Lightroom’s editing rather than organizational tools, and these now include state-of-the-art AI masking for local adjustments, AI-powered object removal, and AI denoising, which is now built onto Lightroom’s Details tab and no longer requires a separate enhanced DNG file. Lightroom Classic may be the ‘old’ Lightroom, but Adobe keeps it bang up to date. Anything that the web-based Lightroom gets, Lightroom Classic gets too.
Adobe Lightroom Classic: system requirements
| Header Cell - Column 0 | Windows | macOS |
|---|---|---|
Processor | Intel® or AMD processor (2 GHz or faster with SSE 4.2 or later and 64-bit support) or ARM processors (via emulation) | Multicore Intel processor (2 GHz or faster with SSE 4.2 or later, and 64-bit support) or Apple Silicon processor |
Operating system | Windows 10 (version 22H2) or Windows 11 (version 21H2 or later) | macOS Ventura (version 13.1) or later |
RAM | 8GB (16+GB recommended) | 8GB (16+GB recommended) |
Graphics | GPU with DirectX 12 support, 2 GB of GPU memory (GPU with DirectX 12 support, 4 GB of GPU memory for 4K displays and greater, 8 GB of dedicated GPU memory or 16 GB of shared memory for full GPU acceleration and AI features such as Denoise, Lens Blur, and Reflection Removal recommended) | GPU with Metal support, 2GB of GPU memory (Apple silicon GPU (M1 or later), 16 GB of unified memory for full GPU acceleration and AI features such as Denoise, Lens Blur, and Reflection Removal recommended) |
Storage | 8GB (SSD recommended) | 8 GB (Lightroom Classic will not install on case-sensitive file systems or removable flash storage devices) |
Display | 1024 x 768 display (1920 x 1080 recommended) | 1024 x 768 display (1920 x 1080 recommended) |
Adobe Lightroom Classic: price
Traditionally, the best way to get Lightroom Classic was with the Adobe Photography Plan, which comes with the ‘other’ Lightroom and Photoshop too. But now that the Photography Plan has been upscaled to include 1TB cloud storage, it’s practically doubled in price, so it might be tempting to look for a cheaper alternative.
The Adobe Lightroom Plan is just that. It ditches Photoshop but includes both versions of Lightroom. You can carry on using Lightroom Classic, but you do get the web-first Lightroom version too, and the 1TB storage you need to make the most of it.
So, if you can do without Photoshop, the Lightroom Plan is cheaper. Or, if you were lucky enough to start your subscription when the ‘old’ Photography Plan was still available, you can carry on using that. For many, that will be perfect. You’re not paying for all that cloud storage, and you get both Lightroom Classic and Photoshop at the old price.
Adobe Lightroom Classic: interface and usability
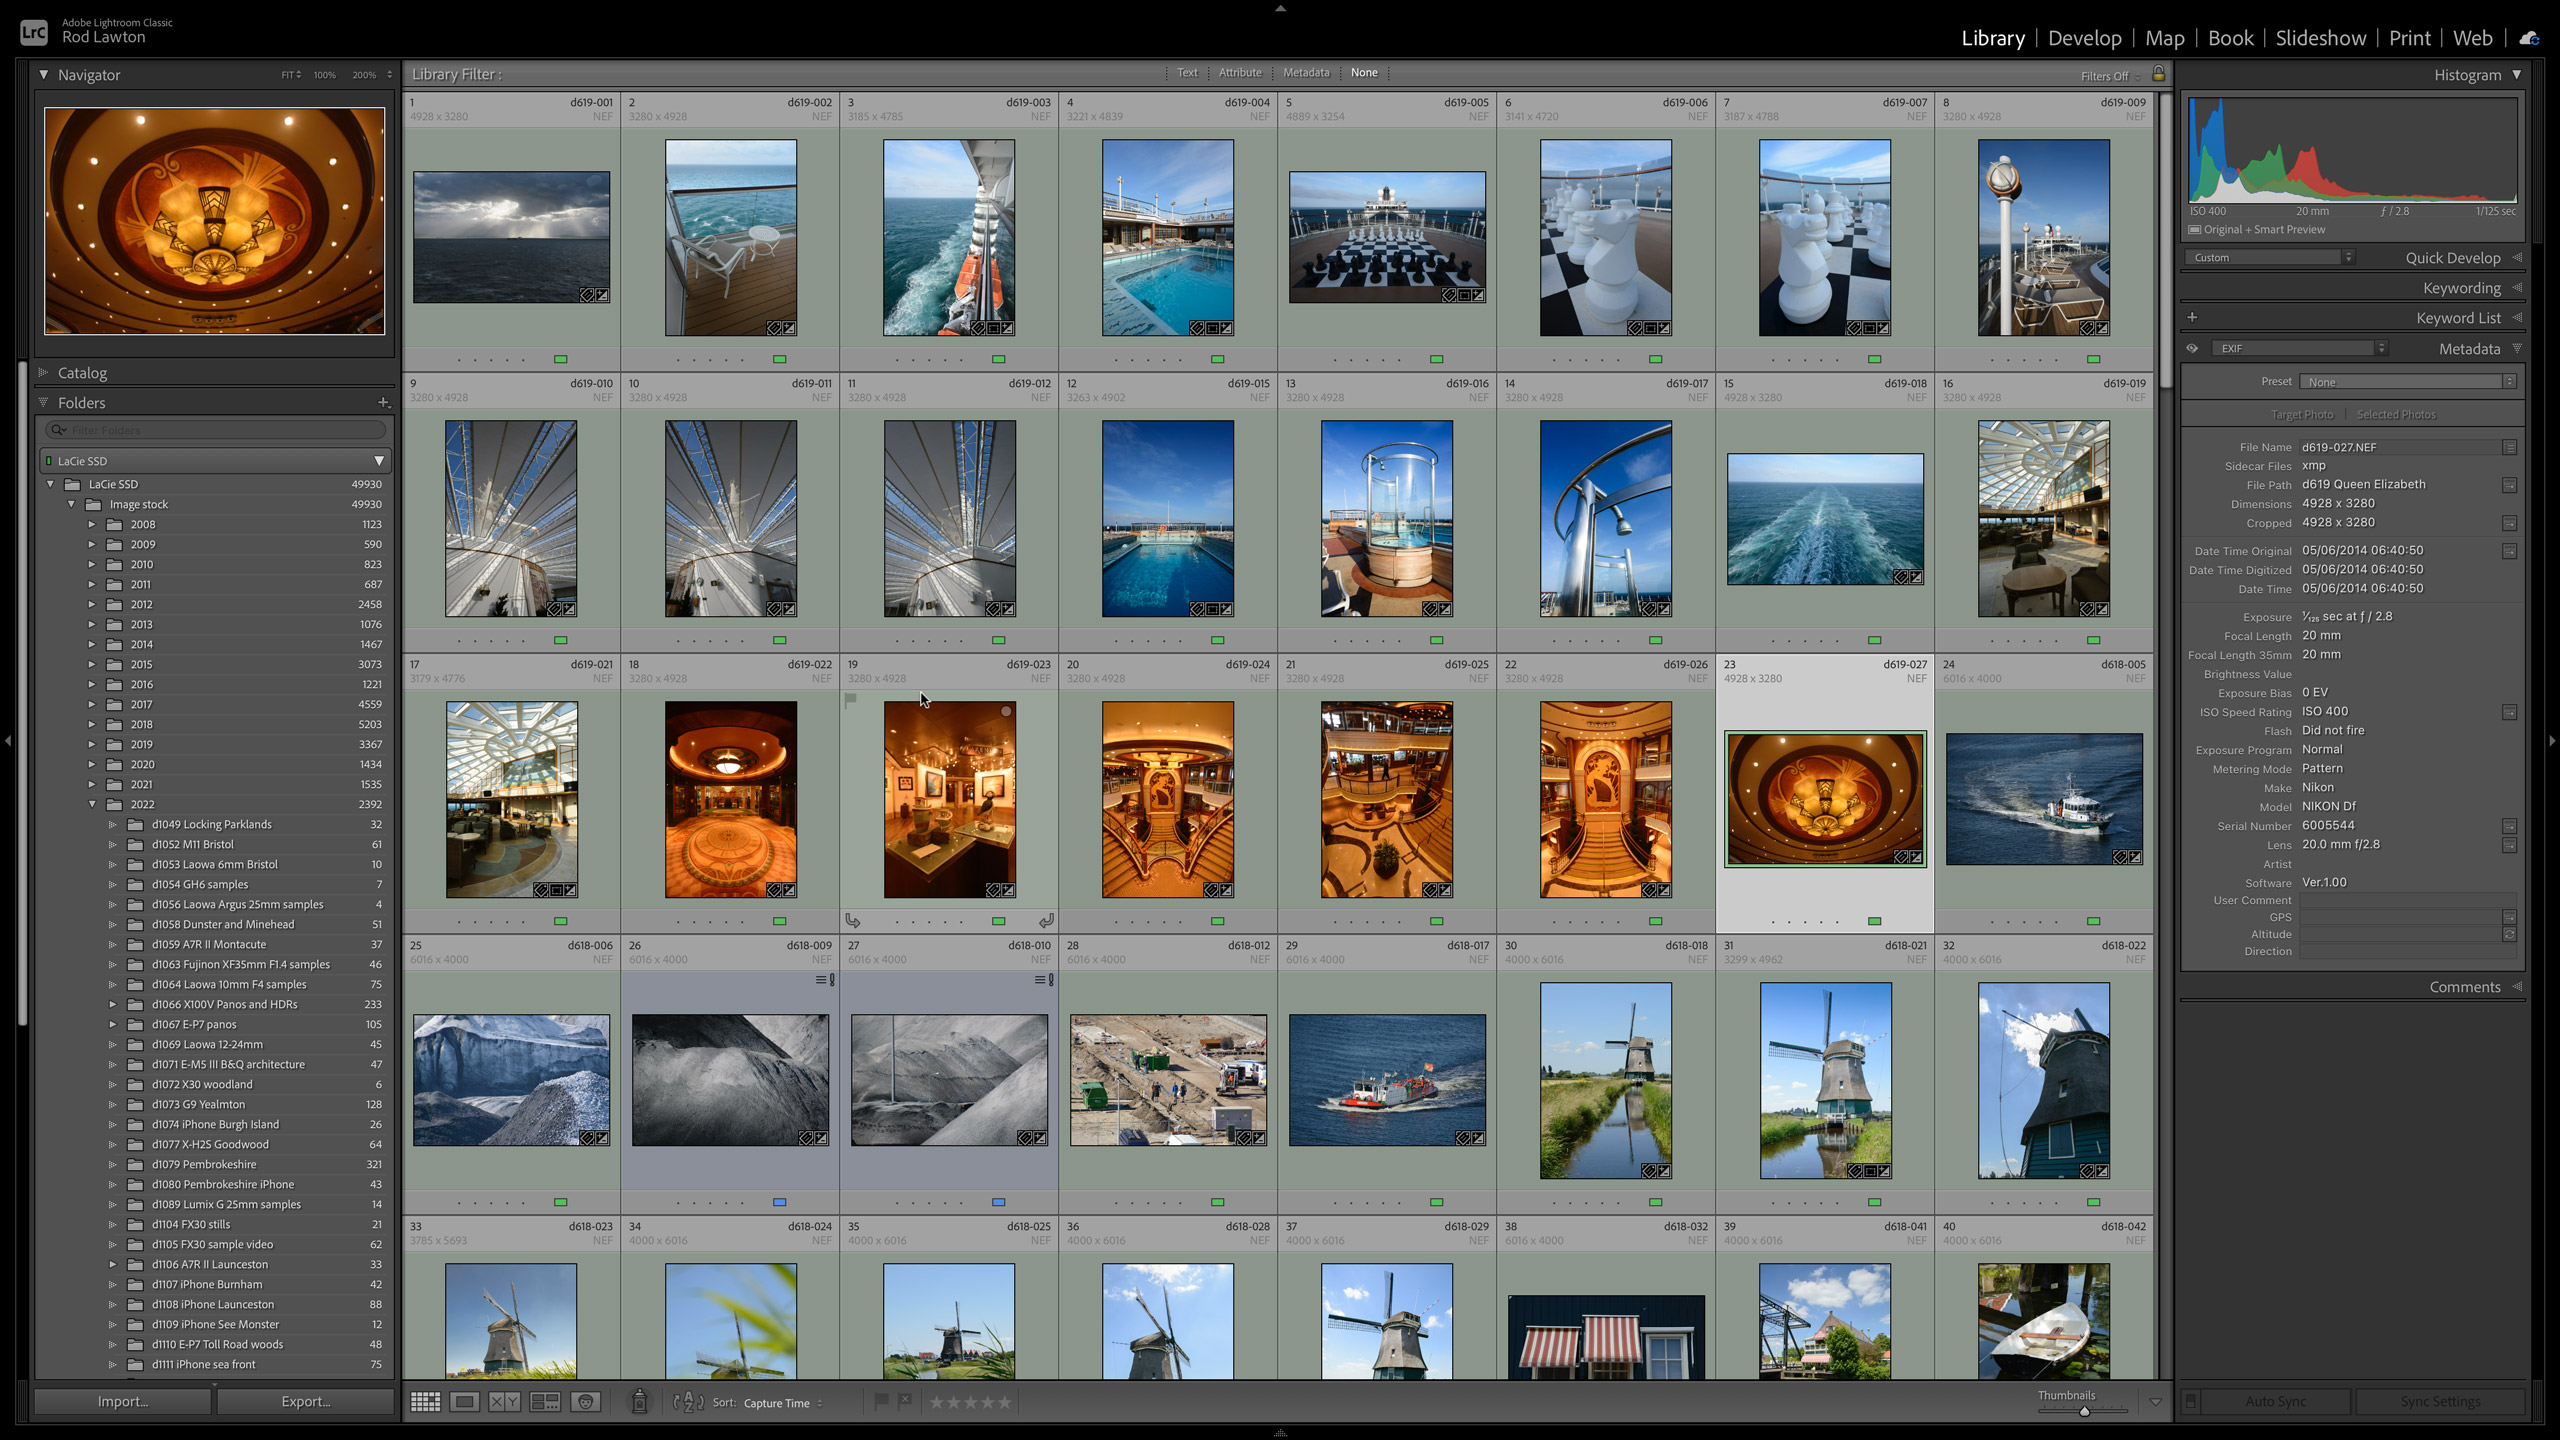
Lightroom Classic has a pretty simple workflow. First, you create a new Catalog – you can have multiple Catalogs, but it’s often best to stick to one – and then you import your images into it. This import process is one of the things that some people don’t like, since Lightroom doesn’t browse folders ‘live’ like Adobe Bridge. Still, once it’s done, it’s done. You can either keep your original photos in their original location or let Lightroom copy them to a new one and organize them into folders and sub-folders by date.
The best camera deals, reviews, product advice, and unmissable photography news, direct to your inbox!
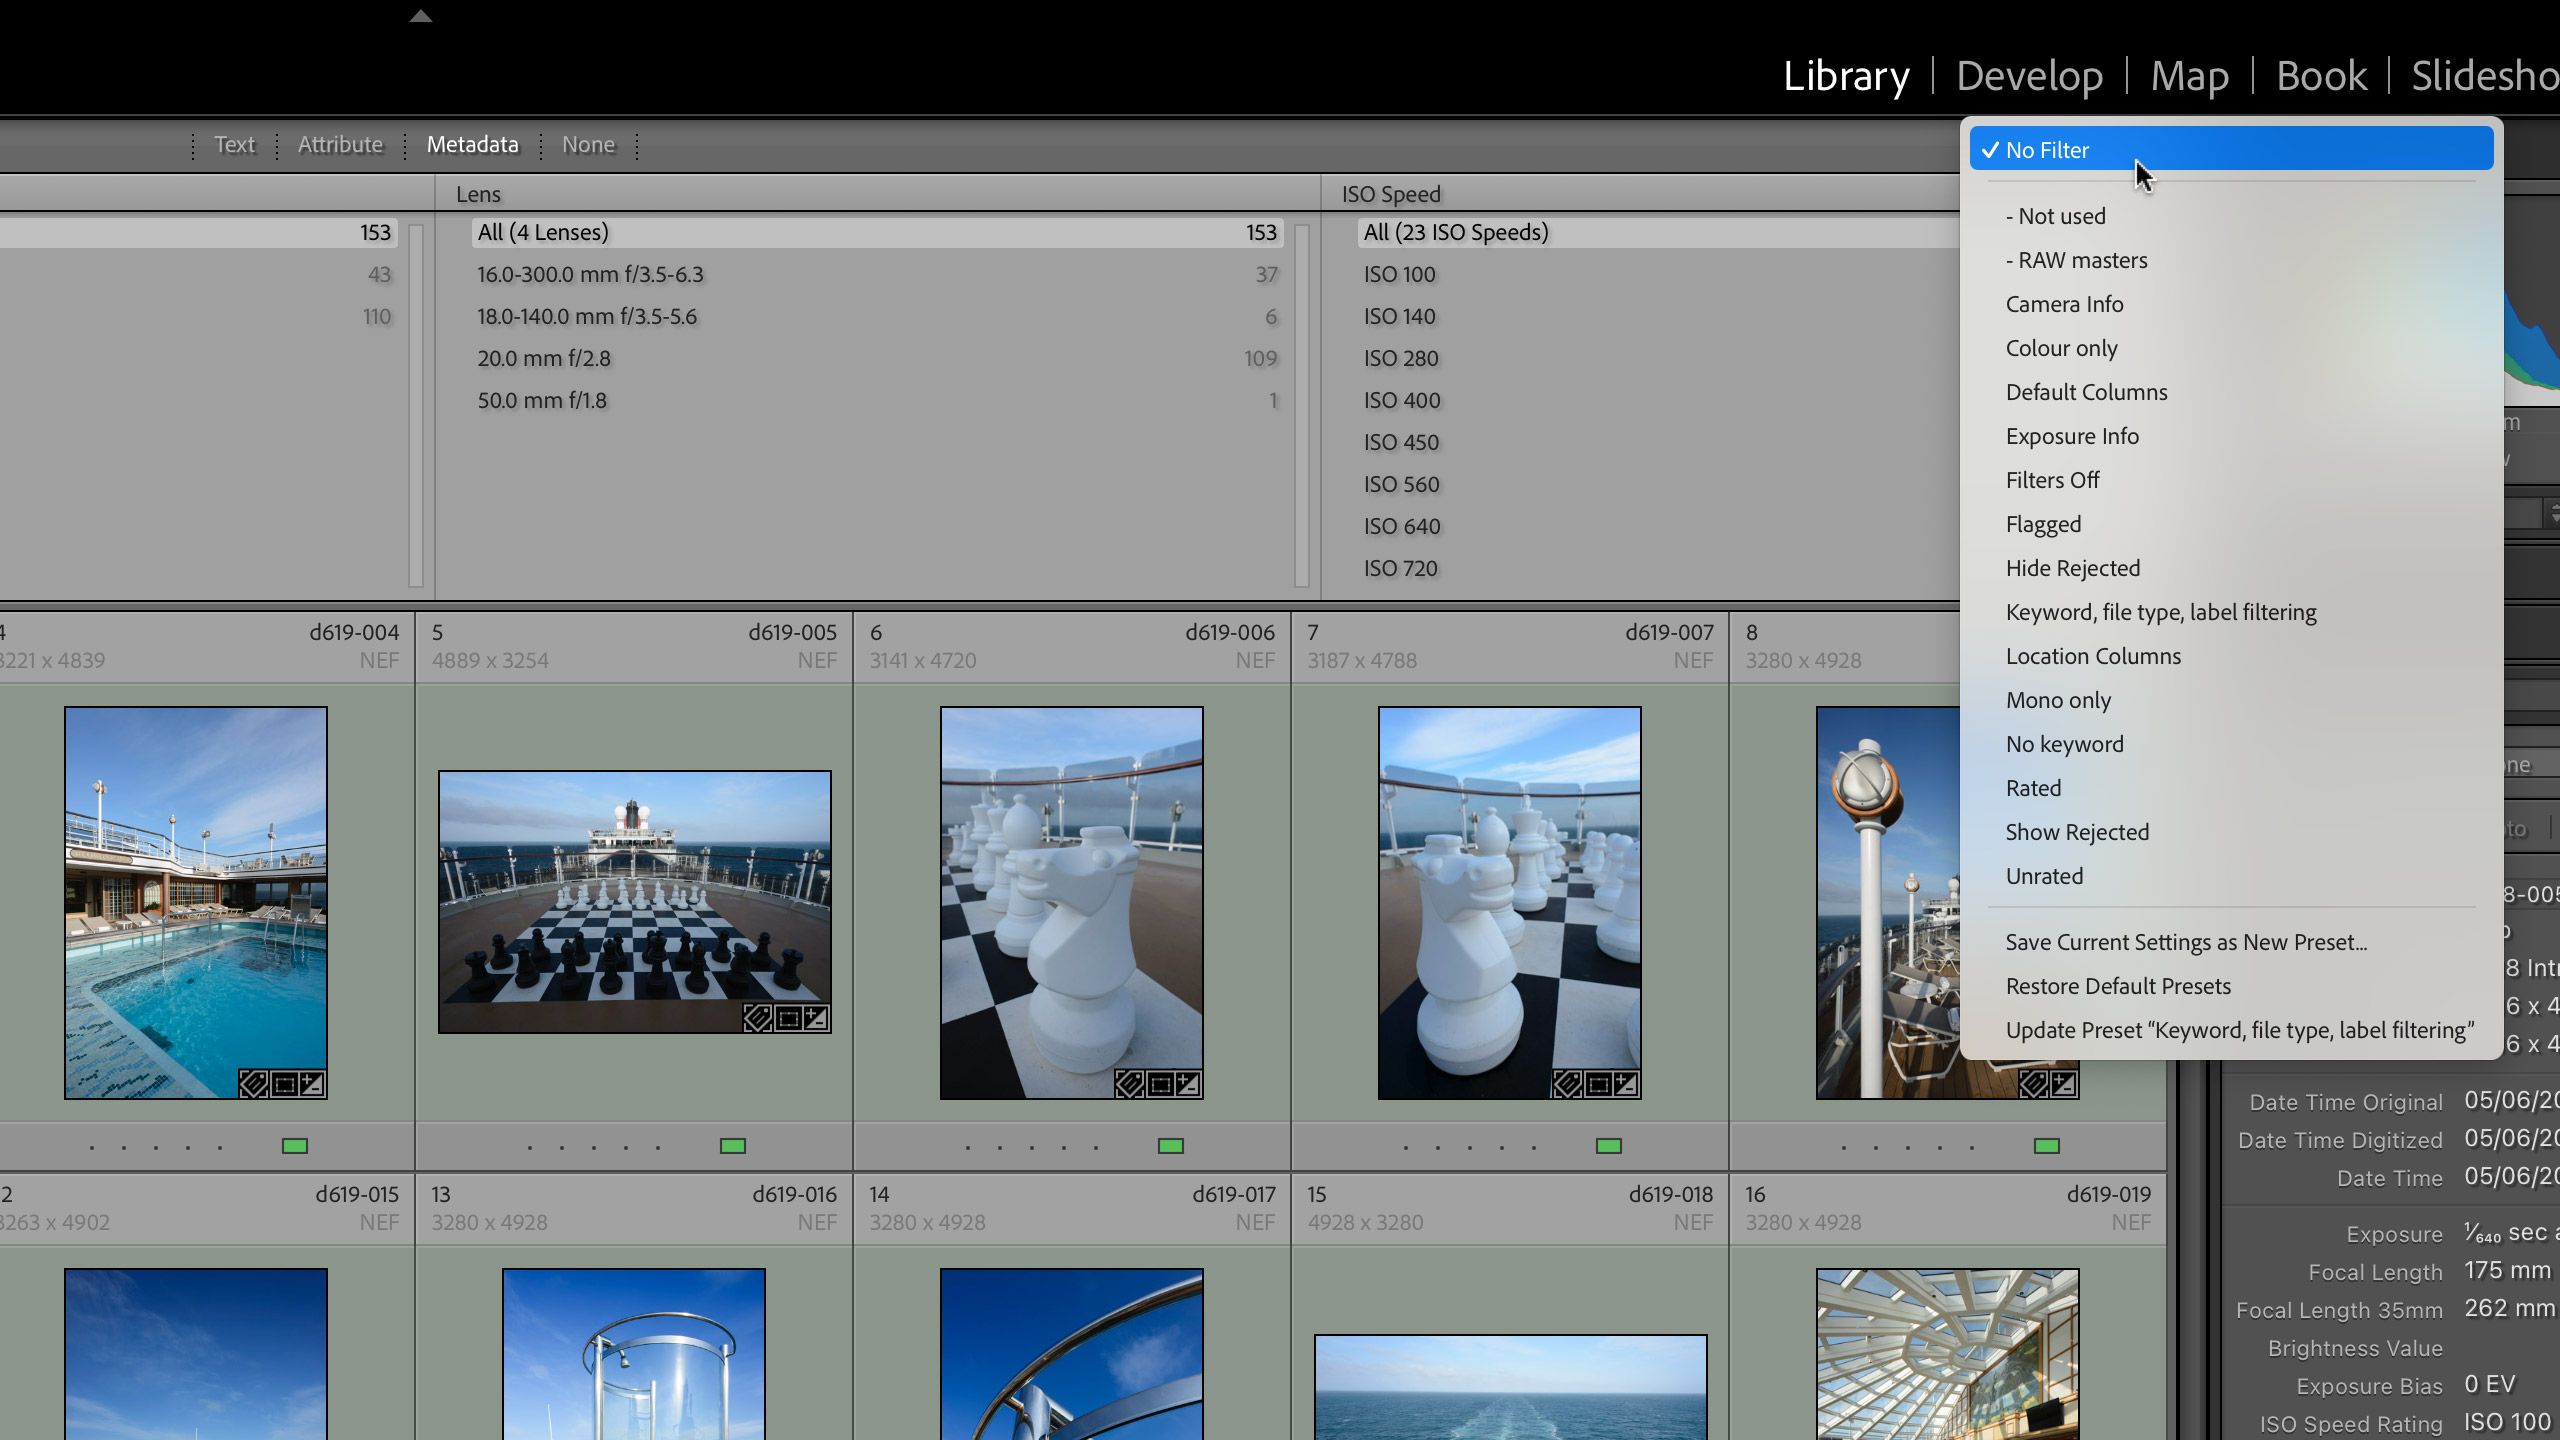
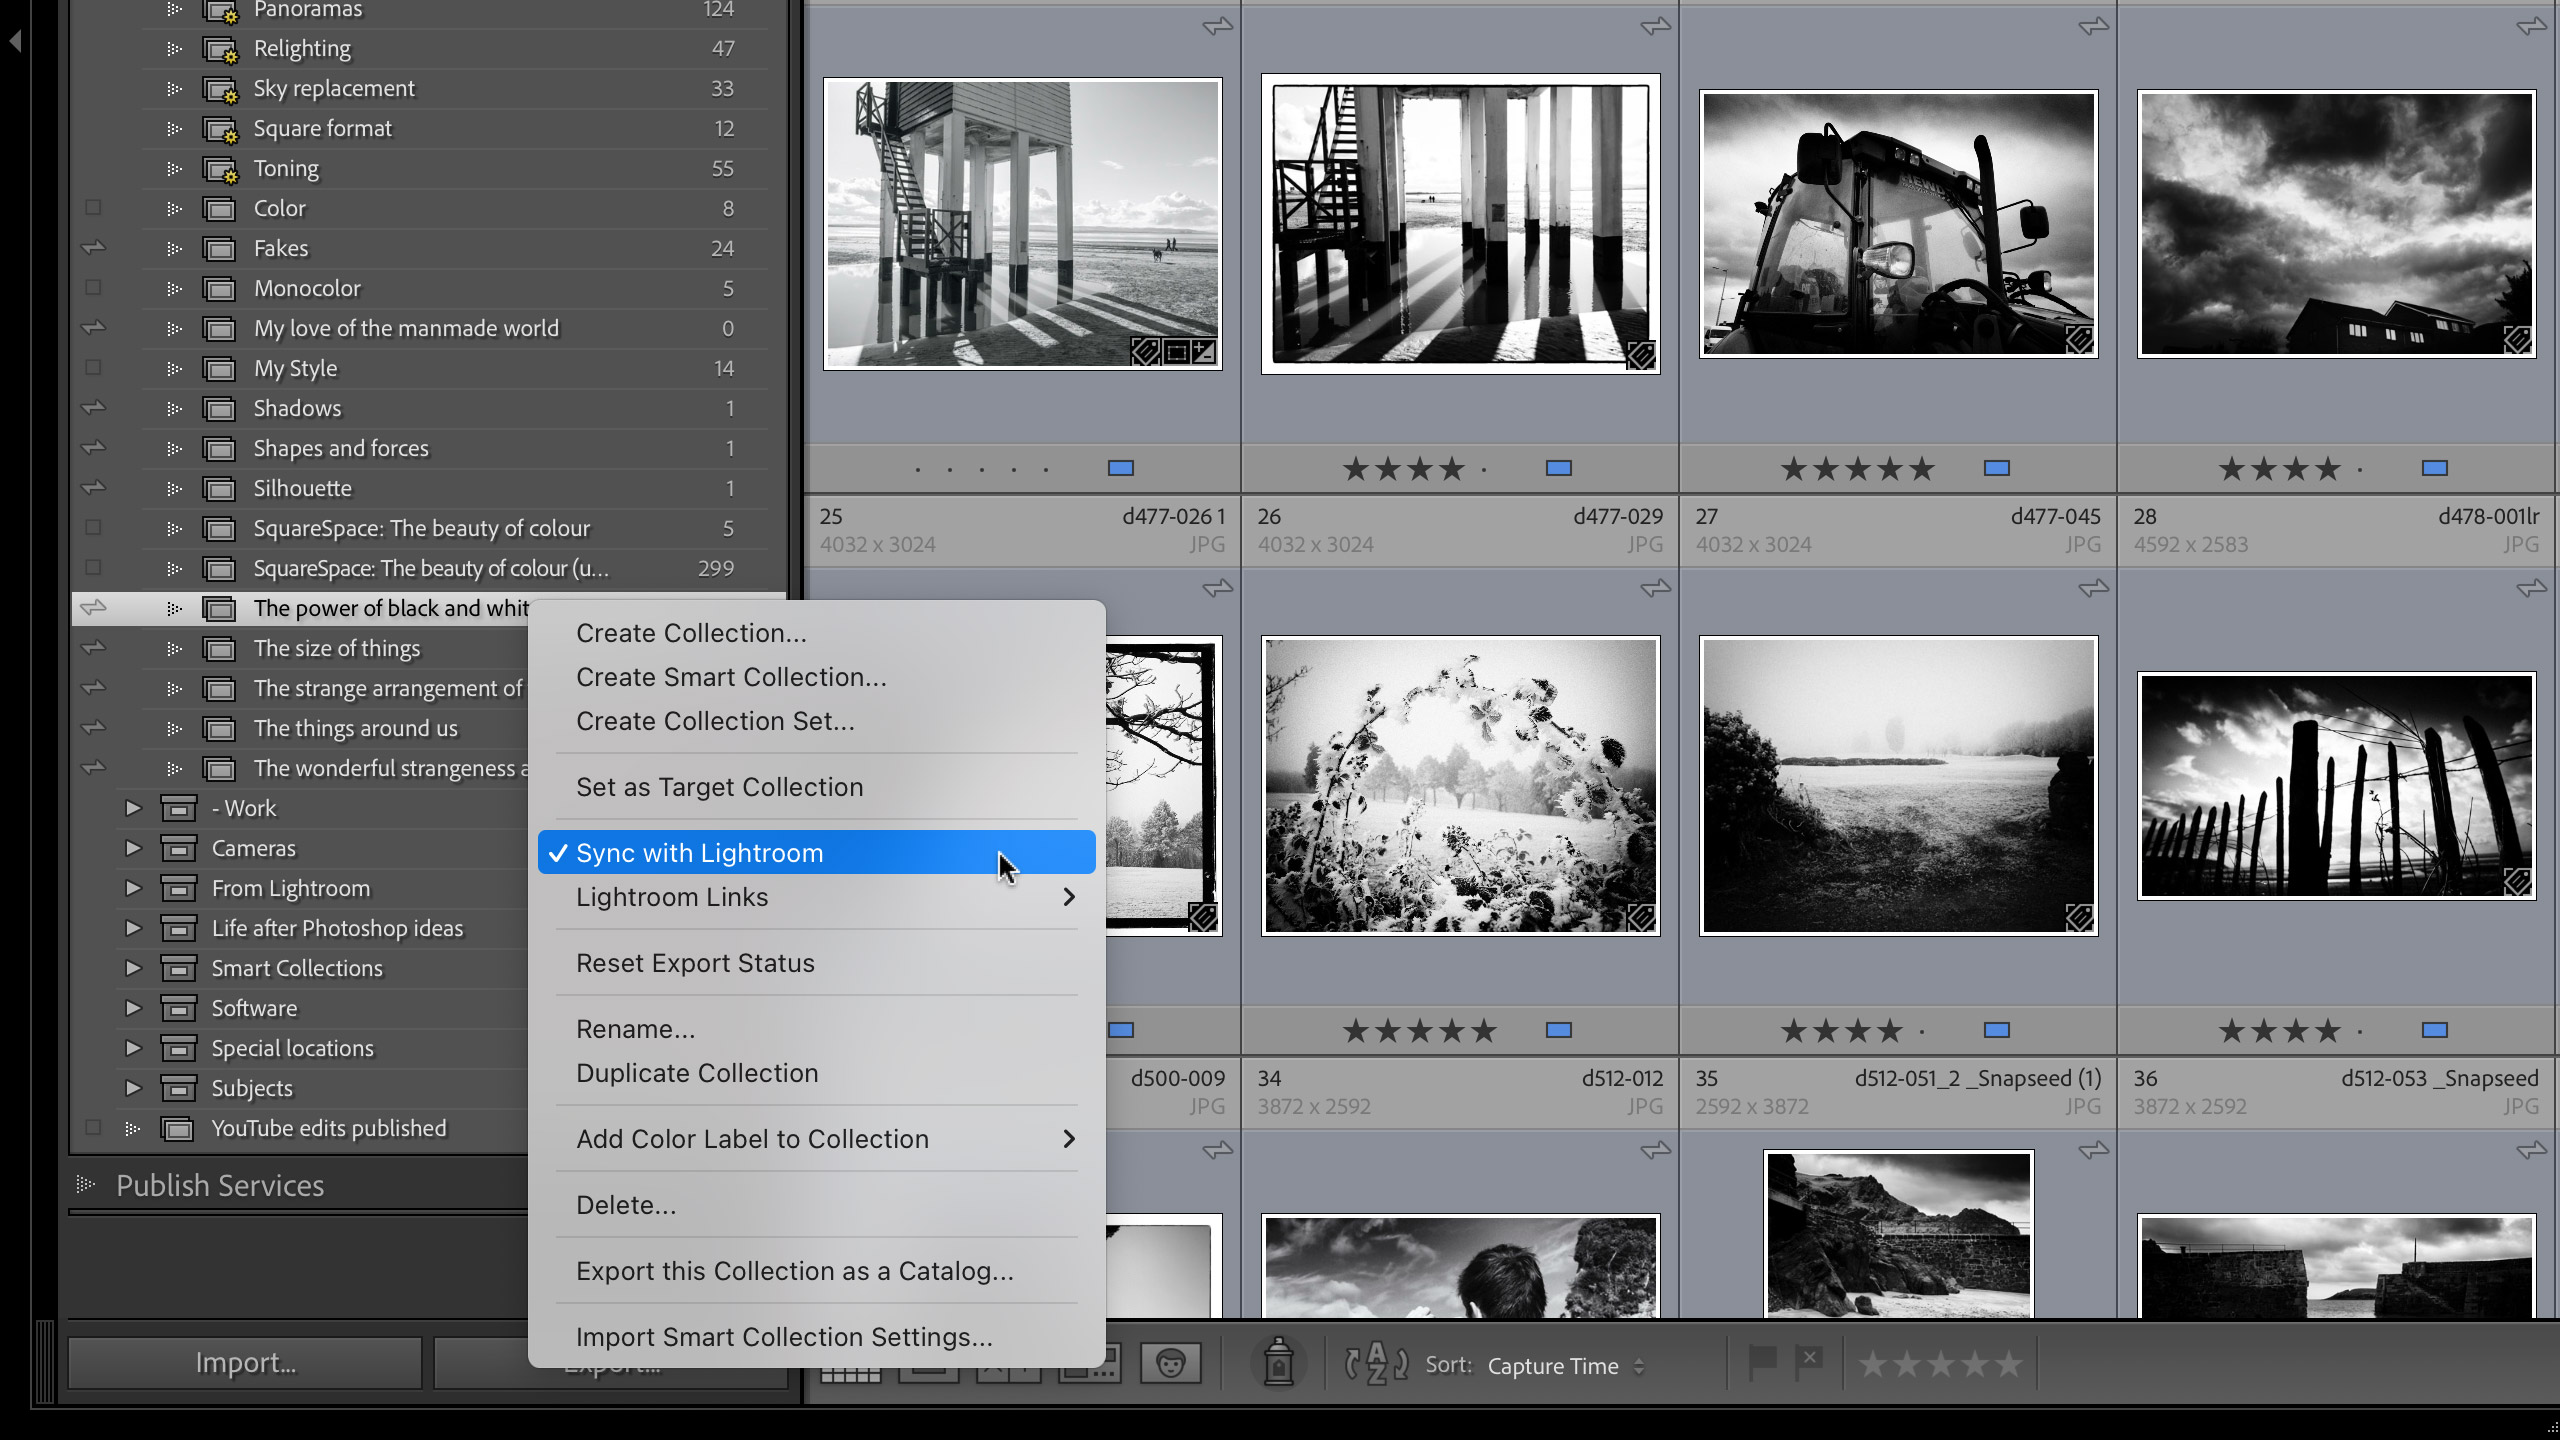
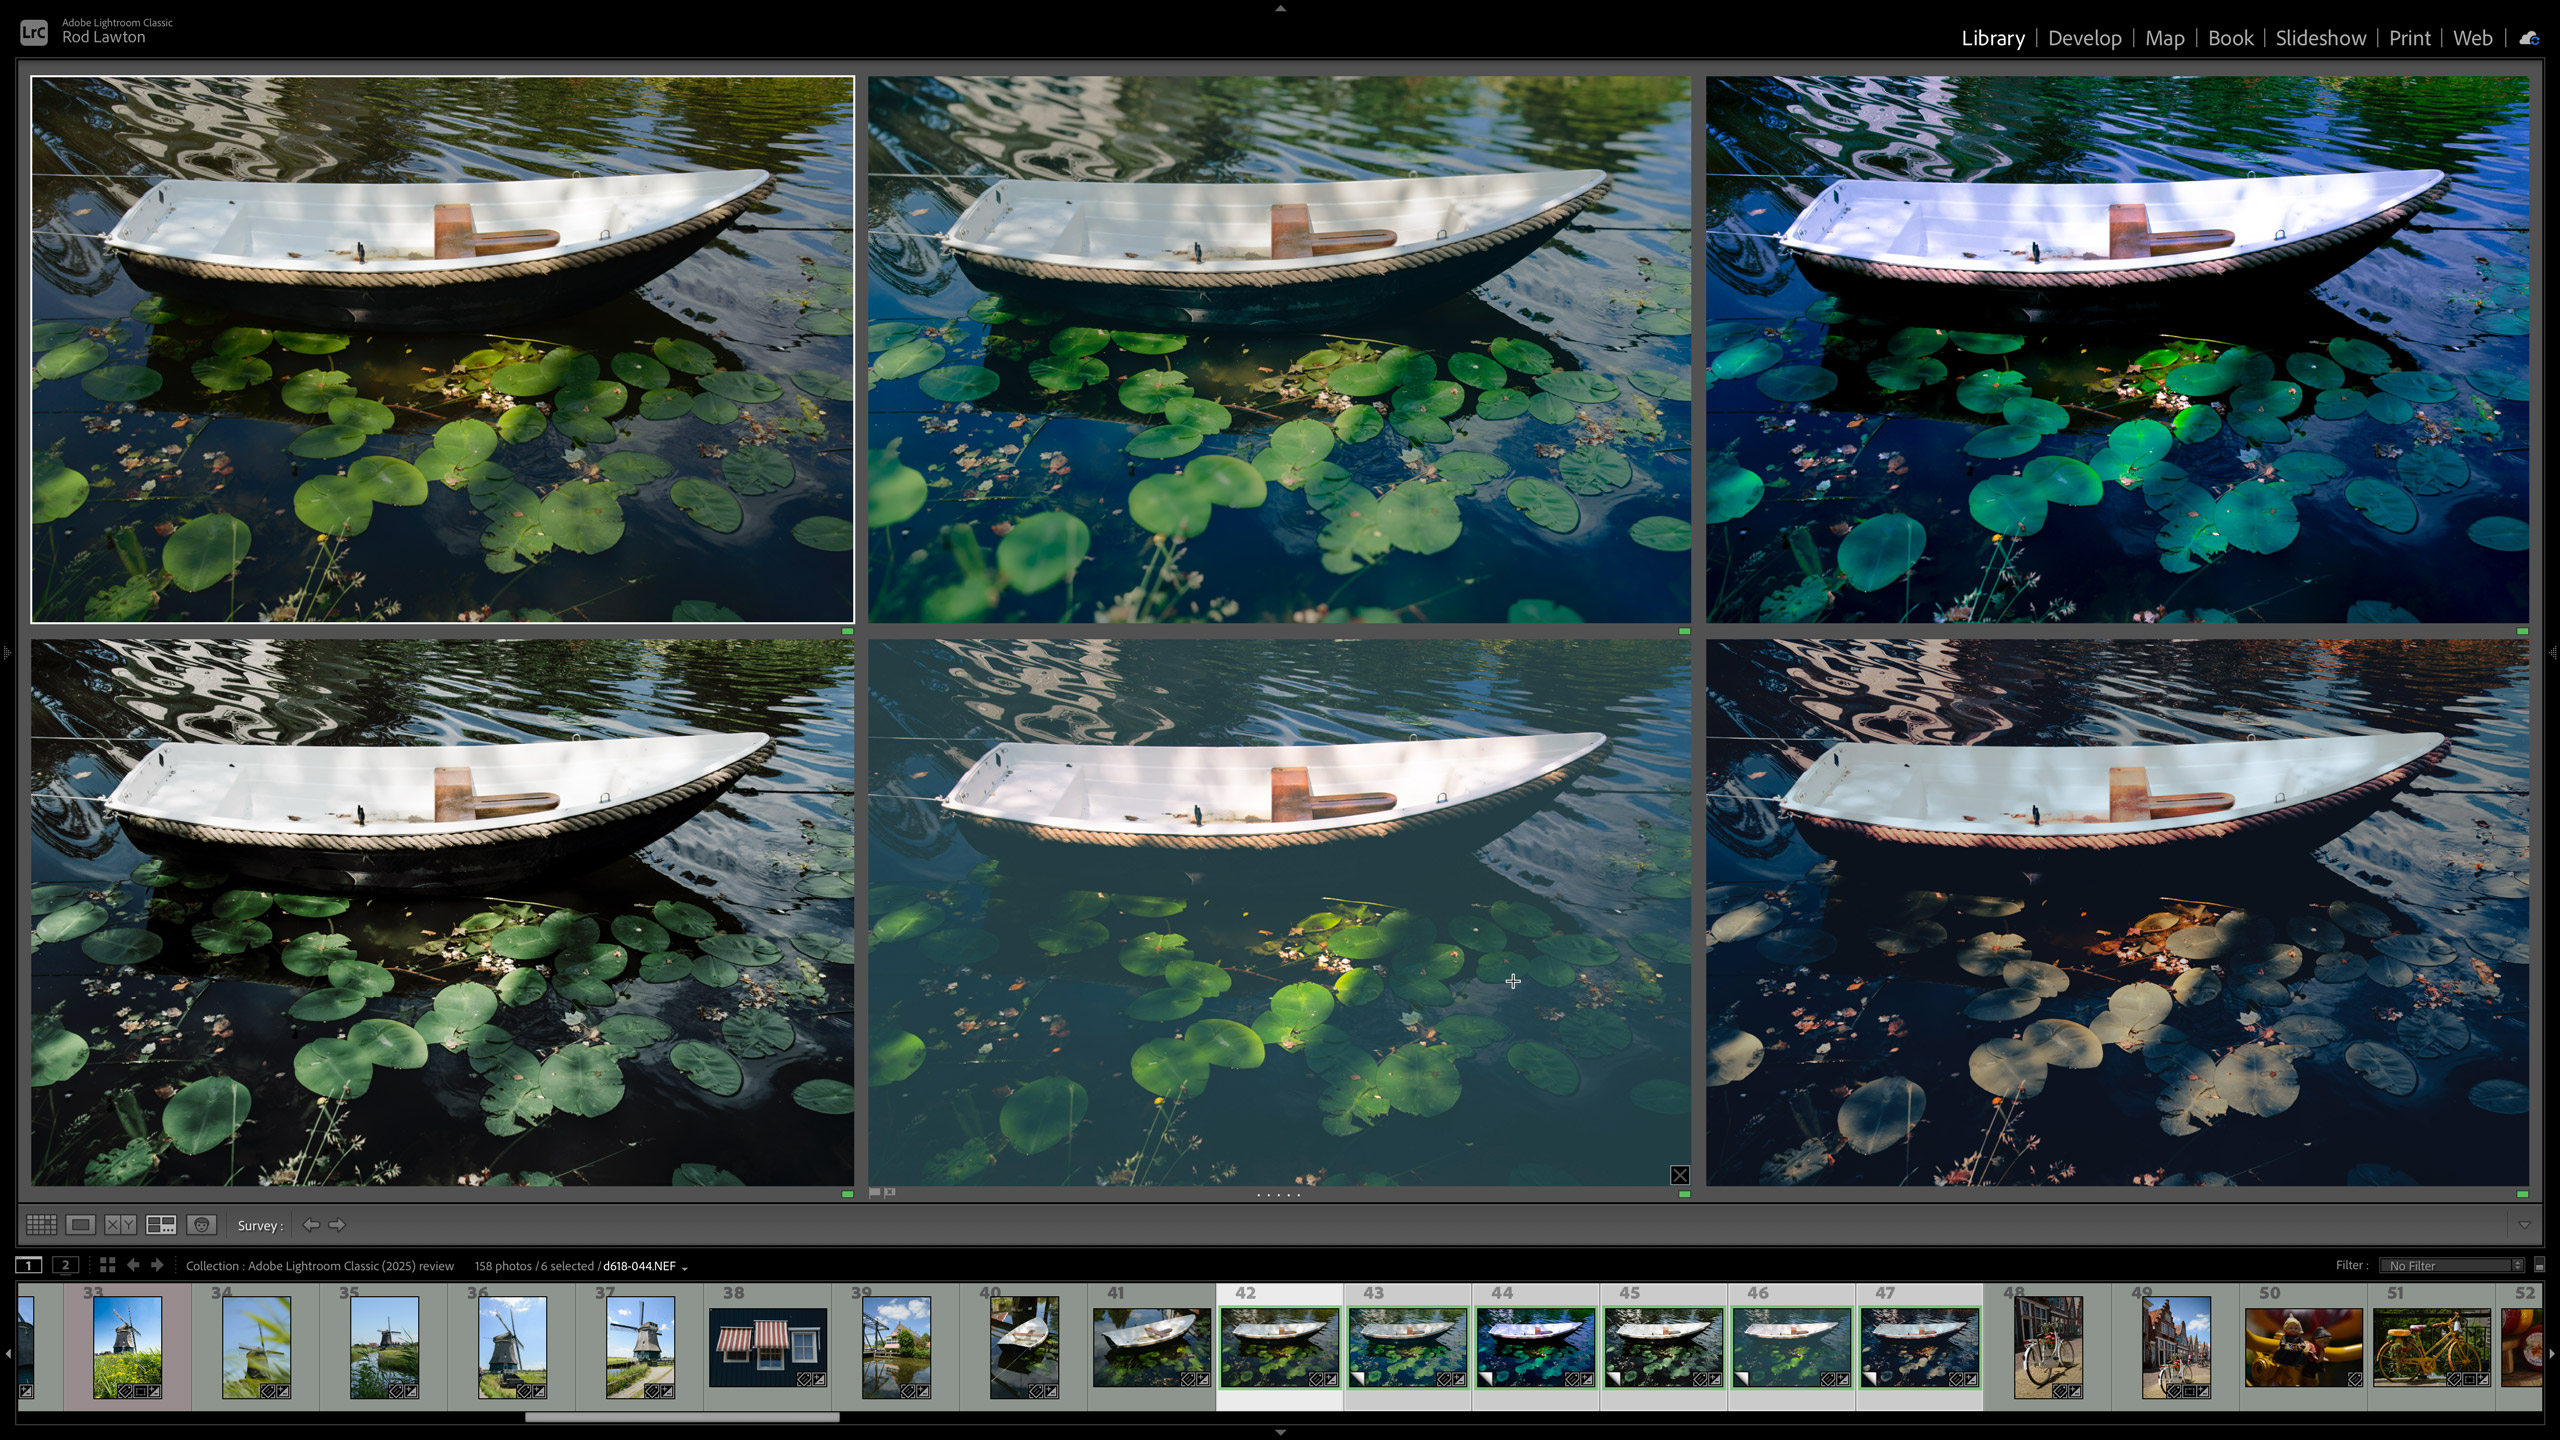
Once images are imported into the Catalog, you work in a series of modules via buttons at the top right of the program window. You use the Library module to browse your images, create Collections (albums) and Smart Collections, and view images as thumbnails in the main window (though you can double-click on them to see full-size previews). At the top is a Library Filter bar where you can filter your images by multiple criteria, such as file type, camera, keywords, lenses, focal lengths, and more. Lightroom Classic’s search and filtering tools are very powerful.
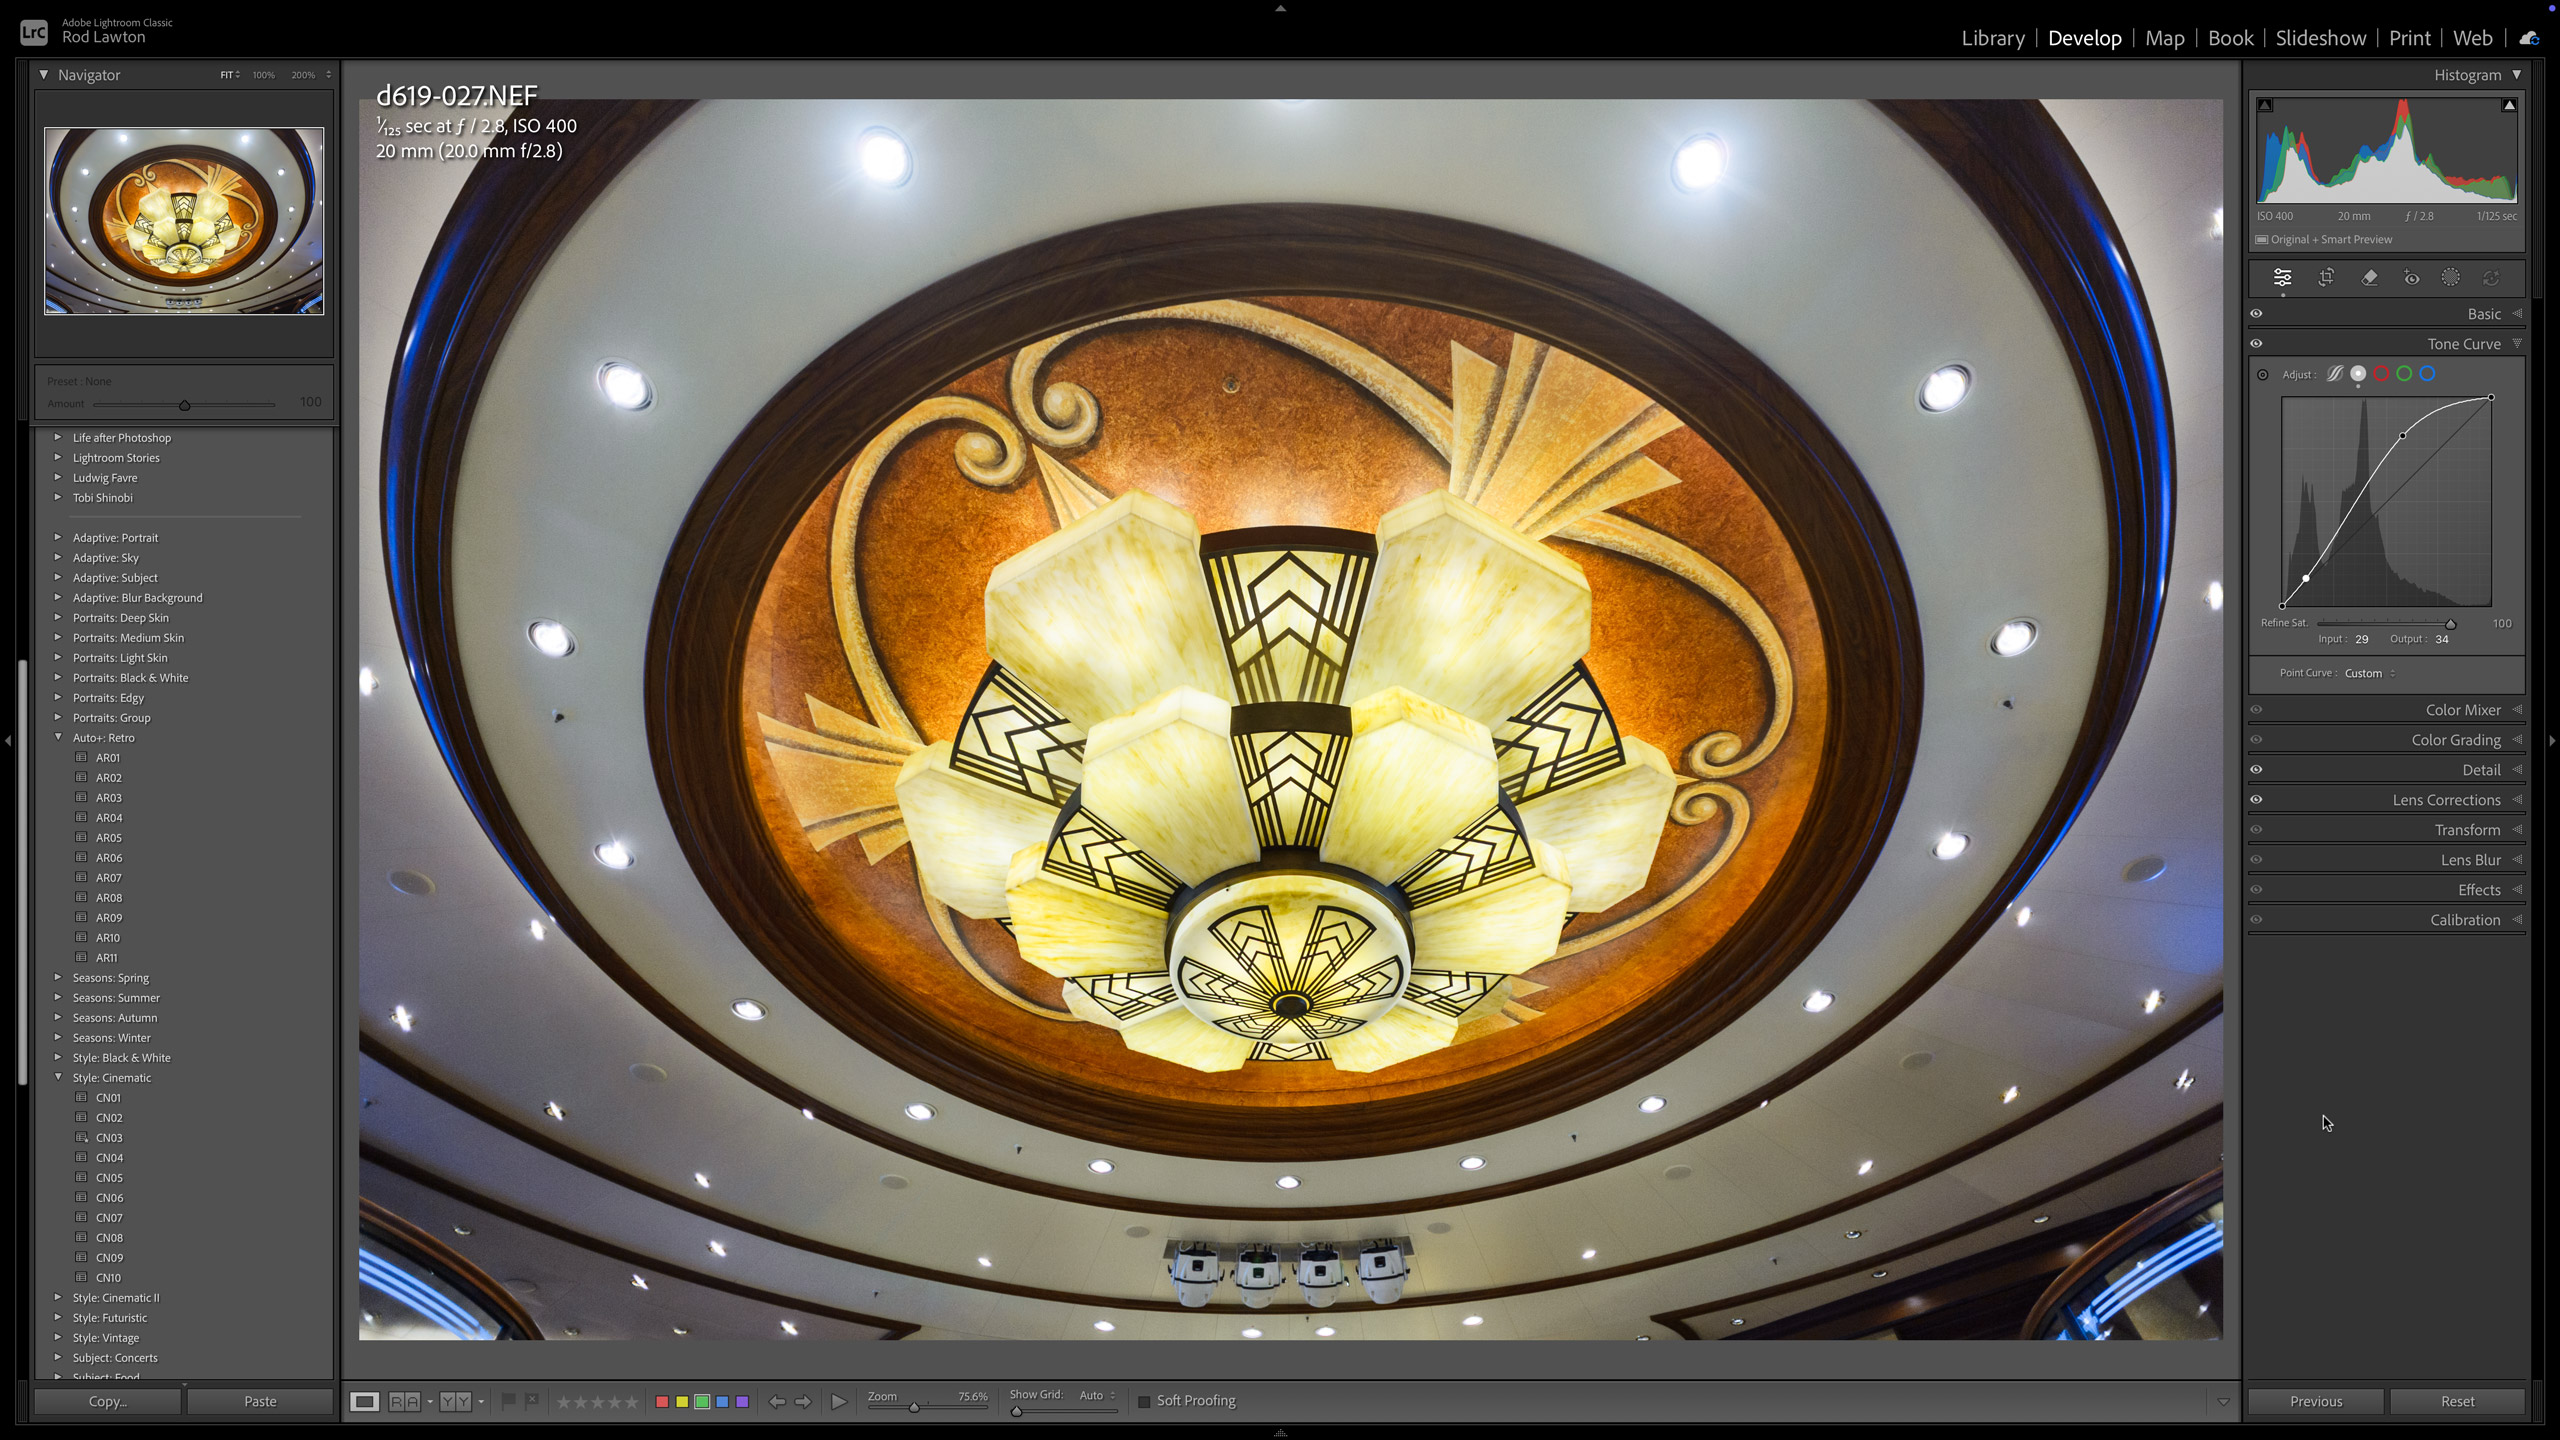
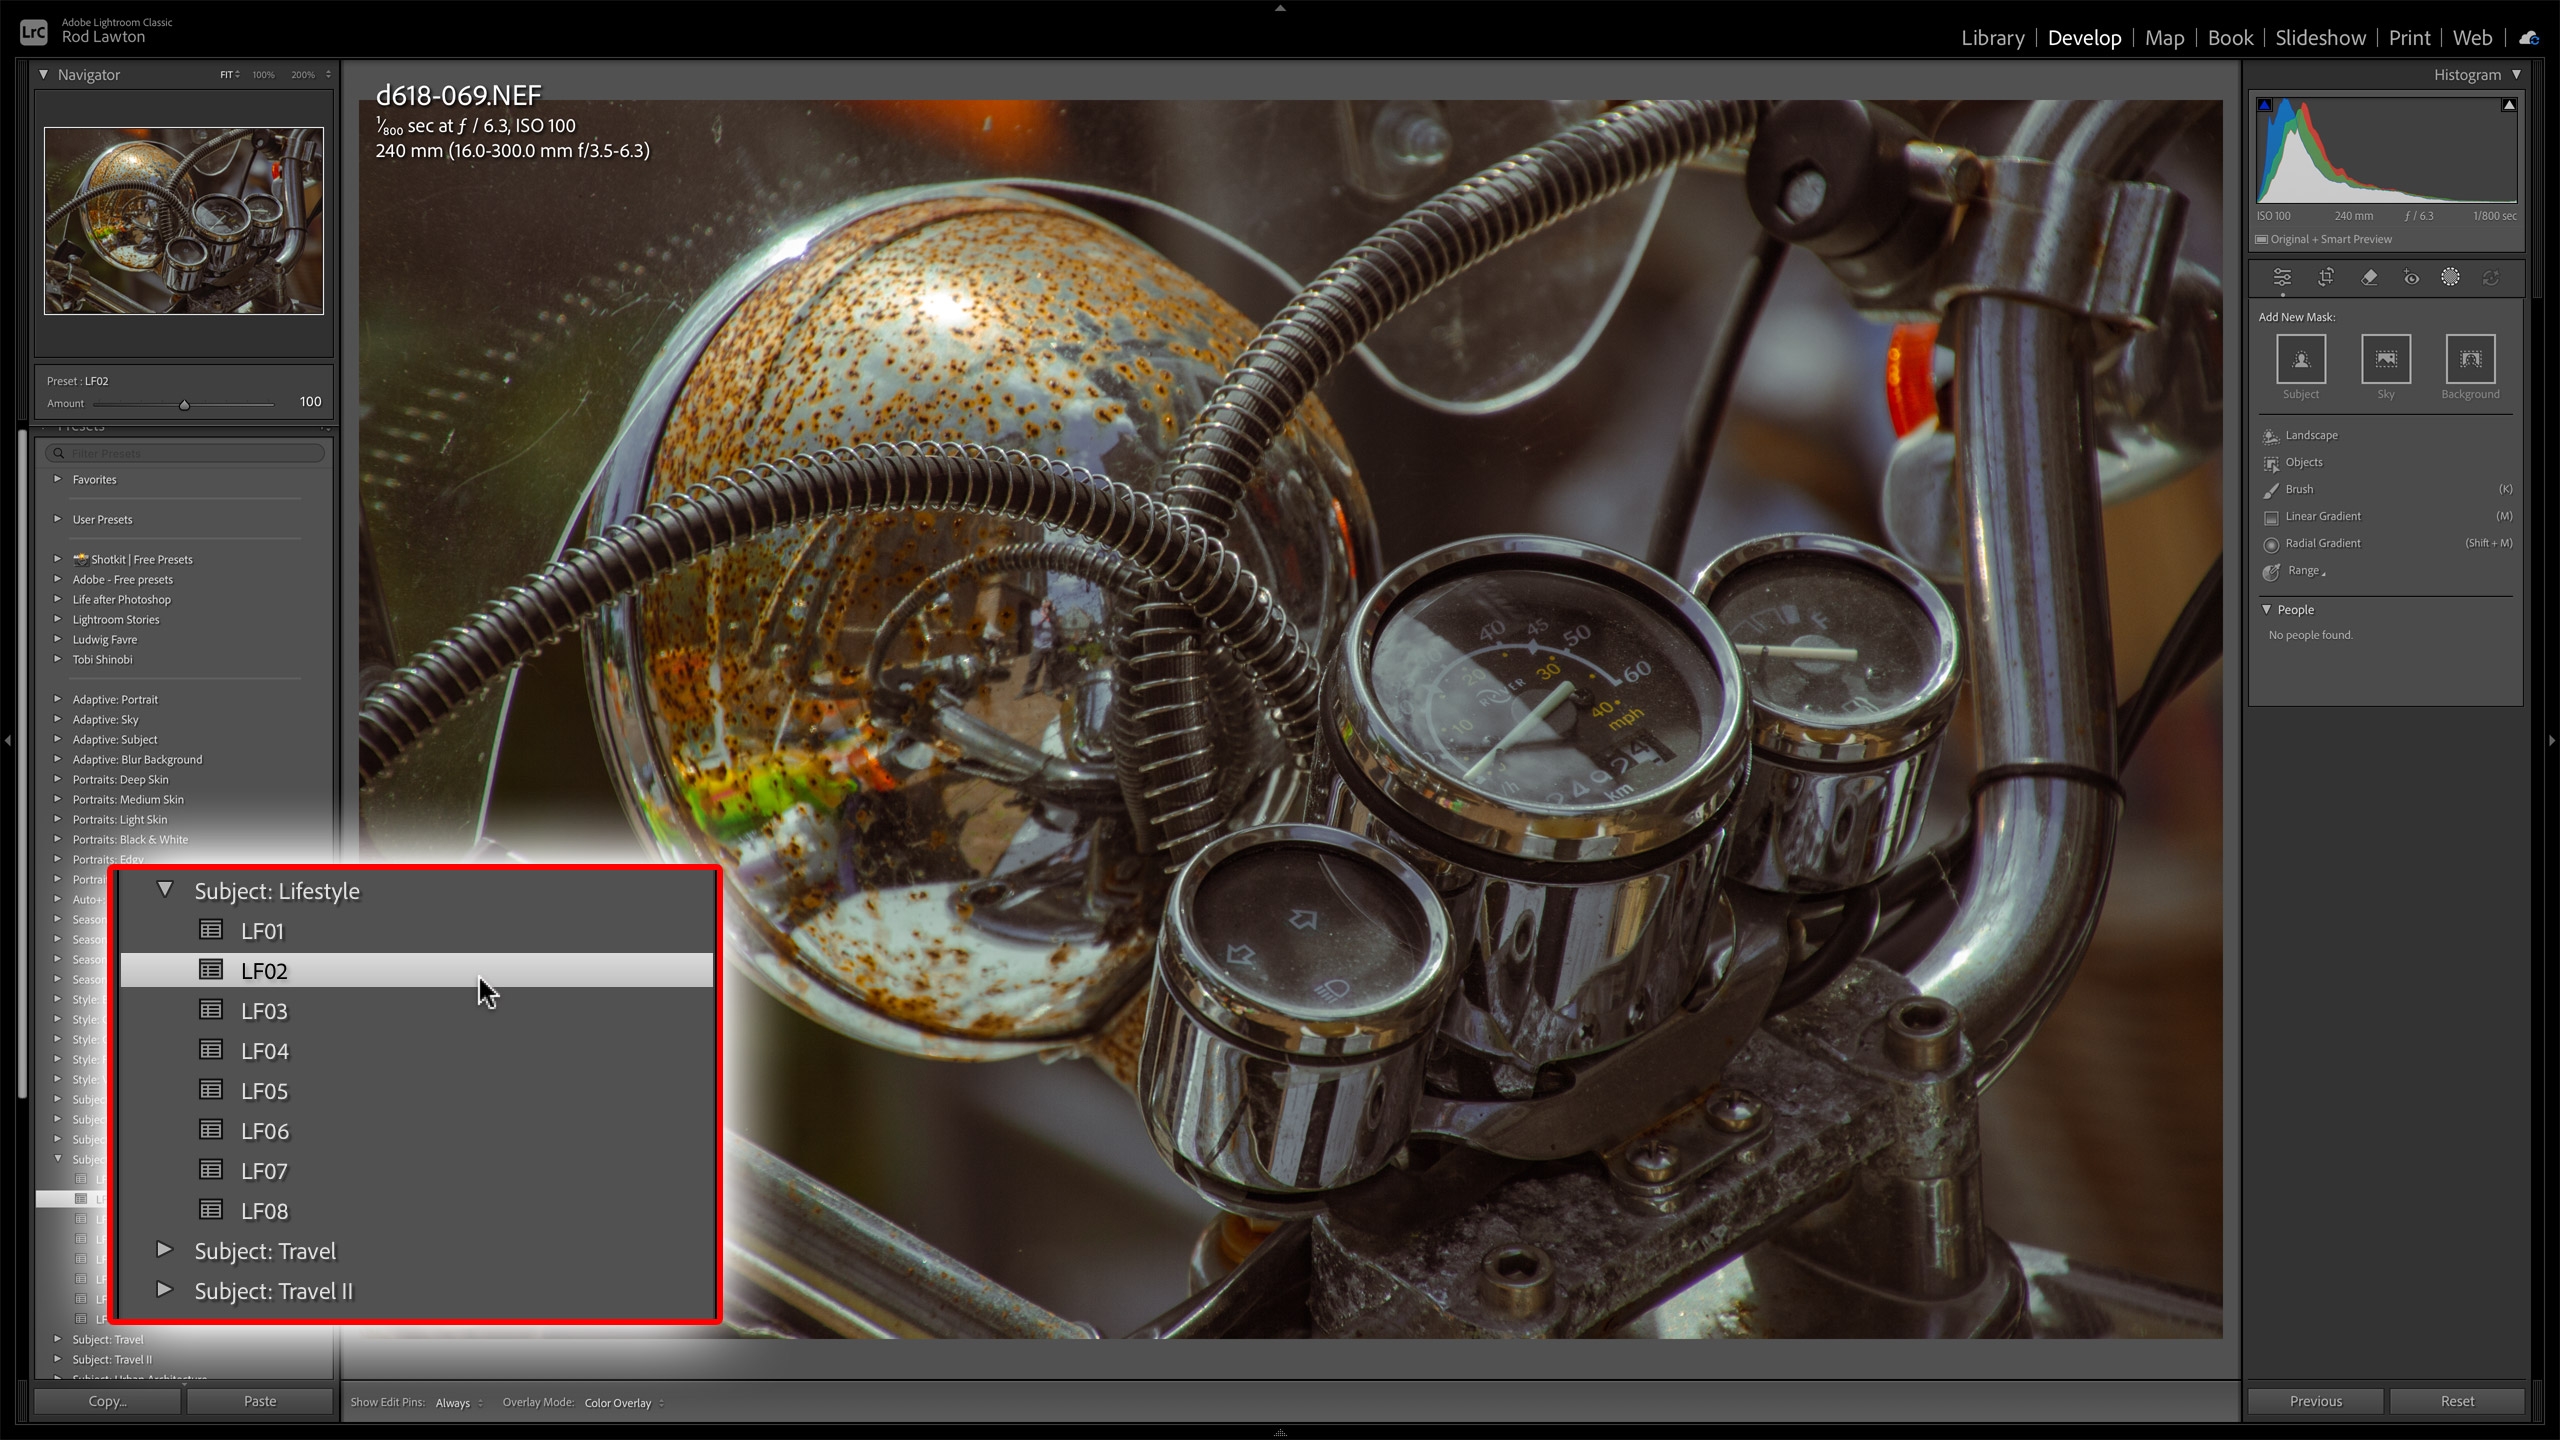
If you want to edit an image, you switch to the Develop module, where you’ll see Lightroom Classic’s extensive range of presets in the left sidebar and the editing tools on the right. Lightroom Classic is a non-destructive photo editor, so you don’t have open or save images; you simply make the adjustments you want to make and move on to the next image. Your changes are saved in real time and will still be there when you come back, so you can change or add to them at will.
Remember, though, that Lightroom Classic’s adjustments are ‘virtual’ and only visible within that Lightroom Catalog. If you want to share or publish an edited image, you will need to export it as a regular JPEG or TIFF file.
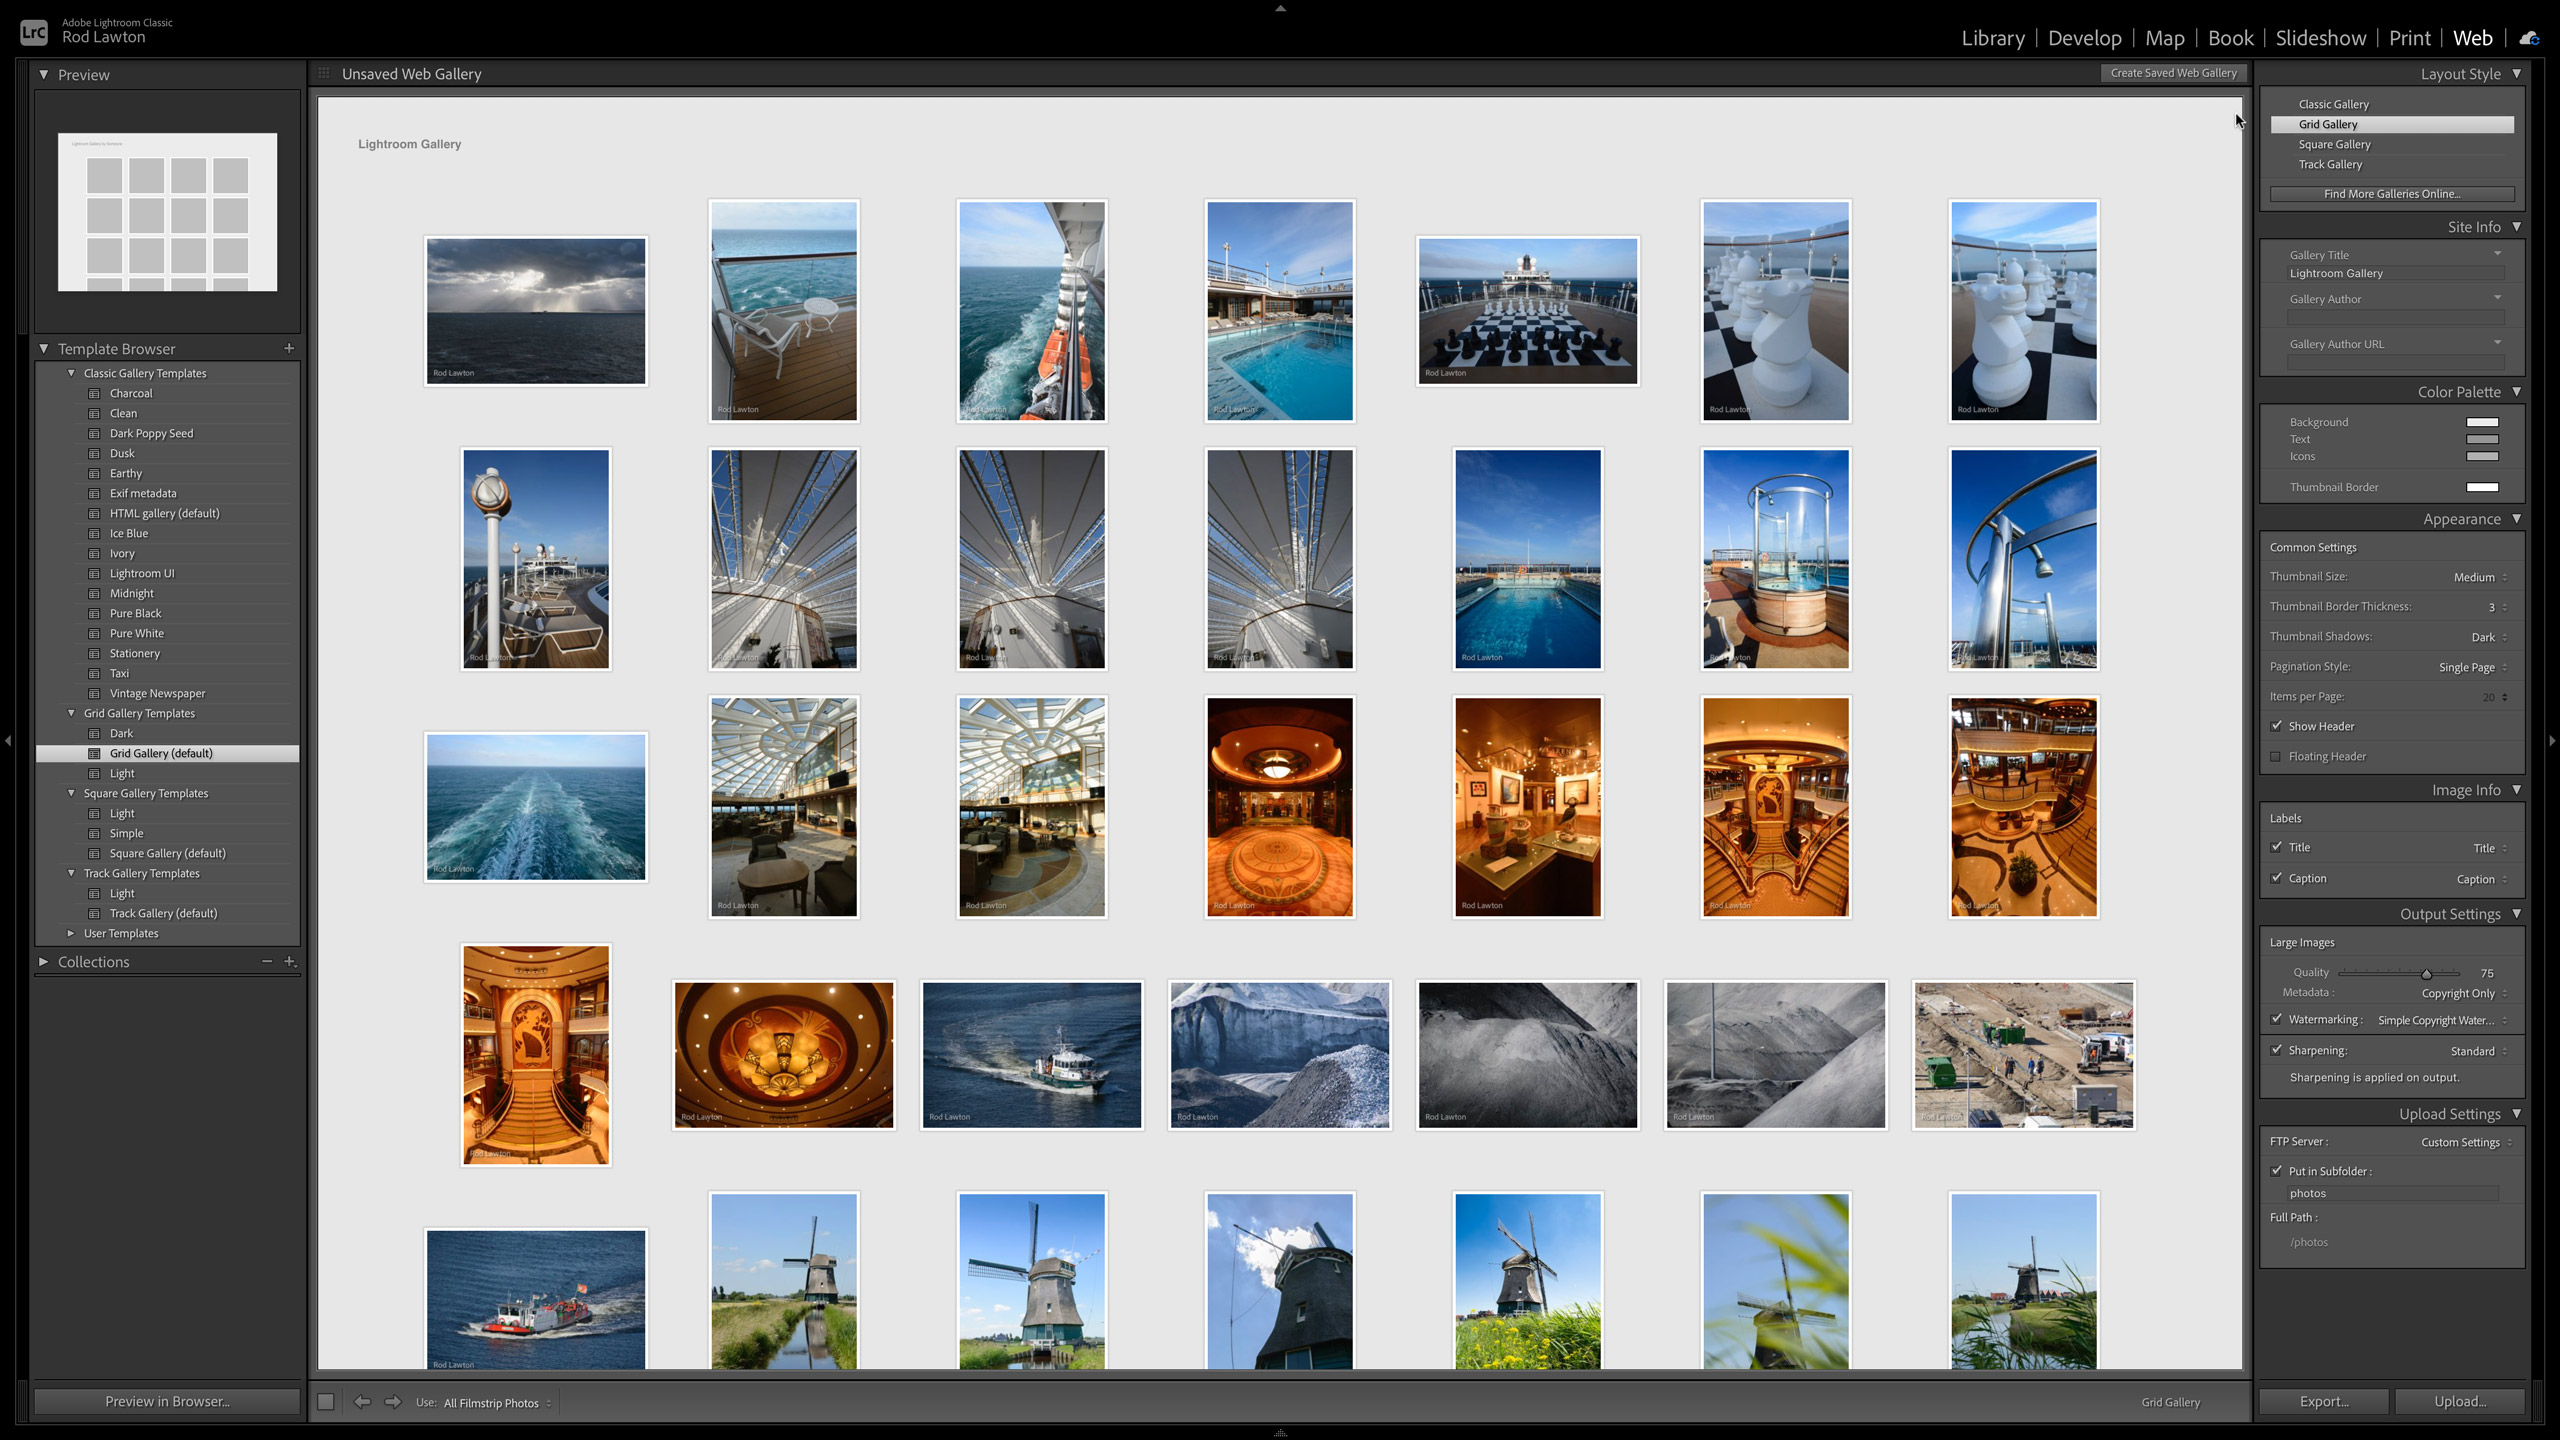
Lightroom also has a Map module for locating and browsing images on a map (though you will need to add location manually to photos taken by regular cameras without GPS), a Book module for designing photo books, a Slideshow module, a Print module with advanced print settings and previews, and a Web module for designing websites.
It’s significant that the web-based Lightroom version has dispensed with these, and they are perhaps a relic of past photographic workflows. This is what makes Lightroom Classic seem dated – surely no one uses its Slideshow and old-tech Web modules anymore, and if you’re designing a photo book, you’re more likely to use tools provided by your chosen photo book lab, whereas Lightroom Classic uses Blurb exclusively – though you can export your photo book as a PDF.
Interestingly, you can sync your photos and your edits to the cloud for viewing in Lightroom Mobile or in Lightroom on your computer. However, you can only sync selected folders, not your whole library, and the synced images are lower-res Smart Previews, not the full-size originals.
Adobe Lightroom Classic: performance
Lightroom Classic is quick and efficient to use on an up-to-date computer with good mid-range specs (I use a Mac Studio with 32GB RAM) using SSD storage. Adobe has updated its thumbnail display speed several times, and it’s now pretty quick and fluid. The Develop mode applies adjustments quickly, too. It takes a few seconds to process an image for AI noise reduction, which is now integrated with the Detail tools, but once it’s done, it’s done, and you can even change the strength of the denoising without reprocessing an image.
The image adjustment tools are straightforward to use and effective, though you only get a subset of the full controls when you’re working with local adjustment masks – it’s still enough, though.
The raw processing quality has always been a bit of a weak link for Adobe, since files from smaller MFT or APS-C cameras can look a little noisier than you’d expect. The difference becomes apparent if you compare Adobe’s raw processing with Capture One’s or DxO’s. Most people won’t even notice, though, and if you shoot with a larger-sensor full-frame camera, there’s very little difference. The incorporation of AI denoising into the regular workflow does make a big difference for ‘noisier’ cameras and images.
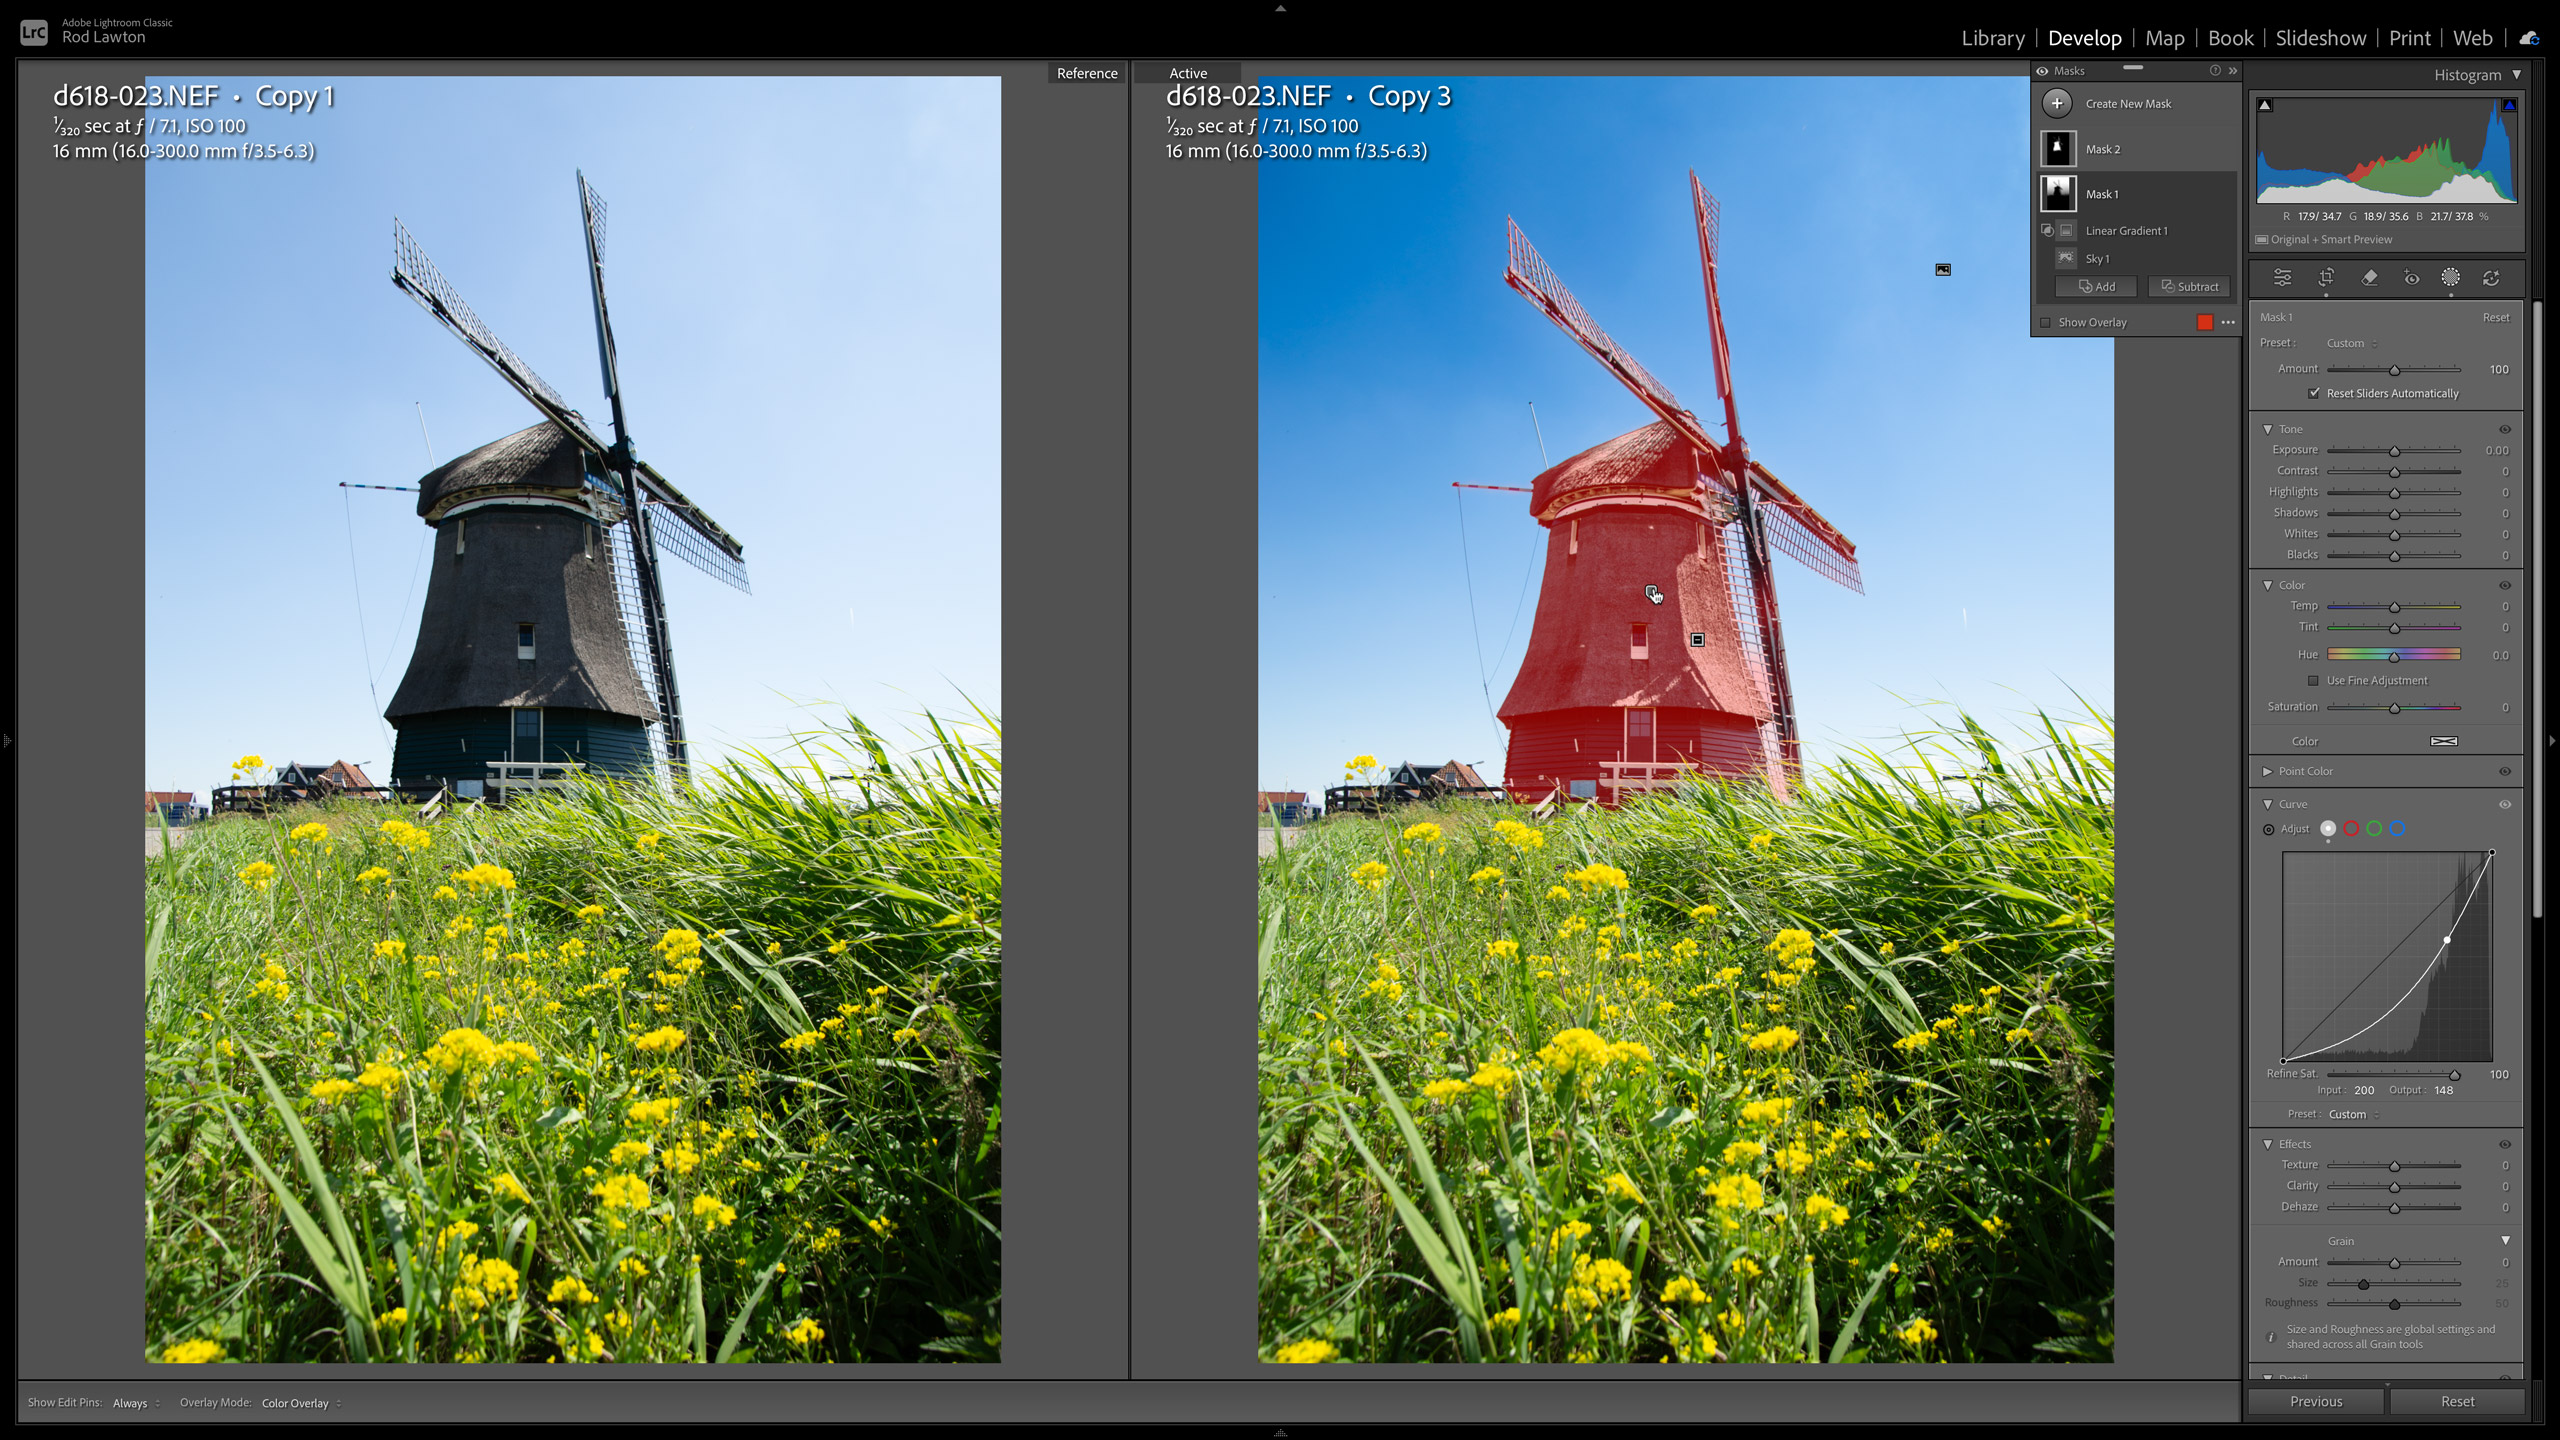
The AI masking is brilliant. Lightroom Classic can detect Subjects, Skies, and Backgrounds automatically, with uncanny success, and there are further options for selecting other objects, people, facial features, and even clothing. You can add to masks, subtract from them, and intersect them with other mask types. It would be nice if there were feathering or refine tools for the AI masks, which aren’t always perfect, but there are manual workarounds, so it’s not a major issue.
Adobe Lightroom Classic: verdict
Lightroom Classic is the go-to cataloguing and editing tool for countless photographers, offering local desktop storage without the cost and headaches of cloud services, and editing tools powerful enough to make external editors like Photoshop rendundant except for certain specific tasks – though plug-ins like the Nik Collection are valuable for borders, bokeh effects, light leaks and more, which are outside Lightroom Classic’s scope.
But why did Adobe change the name to Lightroom ‘Classic’? It’s almost as if Adobe believes it’s a legacy product and that the other web-first Lightroom is the future? Hmm. For now, I think a lot of folk, me included, would rather have local storage and direct file editing without needing an Internet connection, so, personally, I think this should be called ‘Lightroom’ and the other should be called ‘Lightroom Cloud’, but I guess Adobe’s made its mind up!
Lightroom Classic’s name and an interface that hasn’t evolved in 18 years (yes, it is that long) disguise the fact that this is a very powerful, very up-to-date photo organizing and editing solution that’s as relevant as it ever was to beginners, enthusiasts, and professionals alike.
Features | From professional-level image organizing to state-of-the-art editing tools, Lightroom Classic has the lot. | ★★★★★ |
Interface | Lightroom Classic works well enough if you don’t mind its module-based interface, but it’s long overdue for a refresh. | ★★★★☆ |
Performance | The raw processing is good but not great, but the AI masking is cutting-edge, as is the integrated AI denoising. | ★★★★★ |
Value | If you hate subscriptions on principle you will never accept that Lightroom Classic is good value – but honestly, it really is. | ★★★★☆ |
Alternatives
Adobe Lightroom is the obvious rival to Lightroom Classic, swapping desktop storage for all-your-photos-everwhere cloud storage and a slimmer, slicker interface. But cloud storage is not for everyone and brings headaches of its own, and if you work on a single desktop or laptop, Classic is a better solution.
Capture One Pro is more expensive than Lightroom Classic but offers superior raw processing, local adjustments based on adjustment layers and masks, and a powerful set of tools that are available both globally and to masked layers. It’s also better adapted to studio/client shoots where you need to capture, edit, and share images quickly.
ON1 Photo RAW is a subscription-free Lightroom Classic alternative that lacks the power and directness of Lightroom’s organizational tools but matches it for both local and global adjustments. It goes further, though, offering Photoshop-style image layering and composites, and a huge library of effects tools that do things Lightroom Classic can’t.

Rod is an independent photography journalist and editor, and a long-standing Digital Camera World contributor, having previously worked as Group Reviews Editor, Head of Testing for the photography division, Technique Editor on N-Photo, and Camera Channel editor on TechRadar, as well as contributing to many other publications.
He has been writing about digital cameras since they first appeared, and before that began his career writing about film photography. He has used and reviewed practically every interchangeable lens camera launched in the past 20 years, from entry-level DSLRs to medium format cameras.
Rod has his own camera gear blog at fotovolo.com but also writes about photo-editing applications and techniques at lifeafterphotoshop.com.
You must confirm your public display name before commenting
Please logout and then login again, you will then be prompted to enter your display name.
