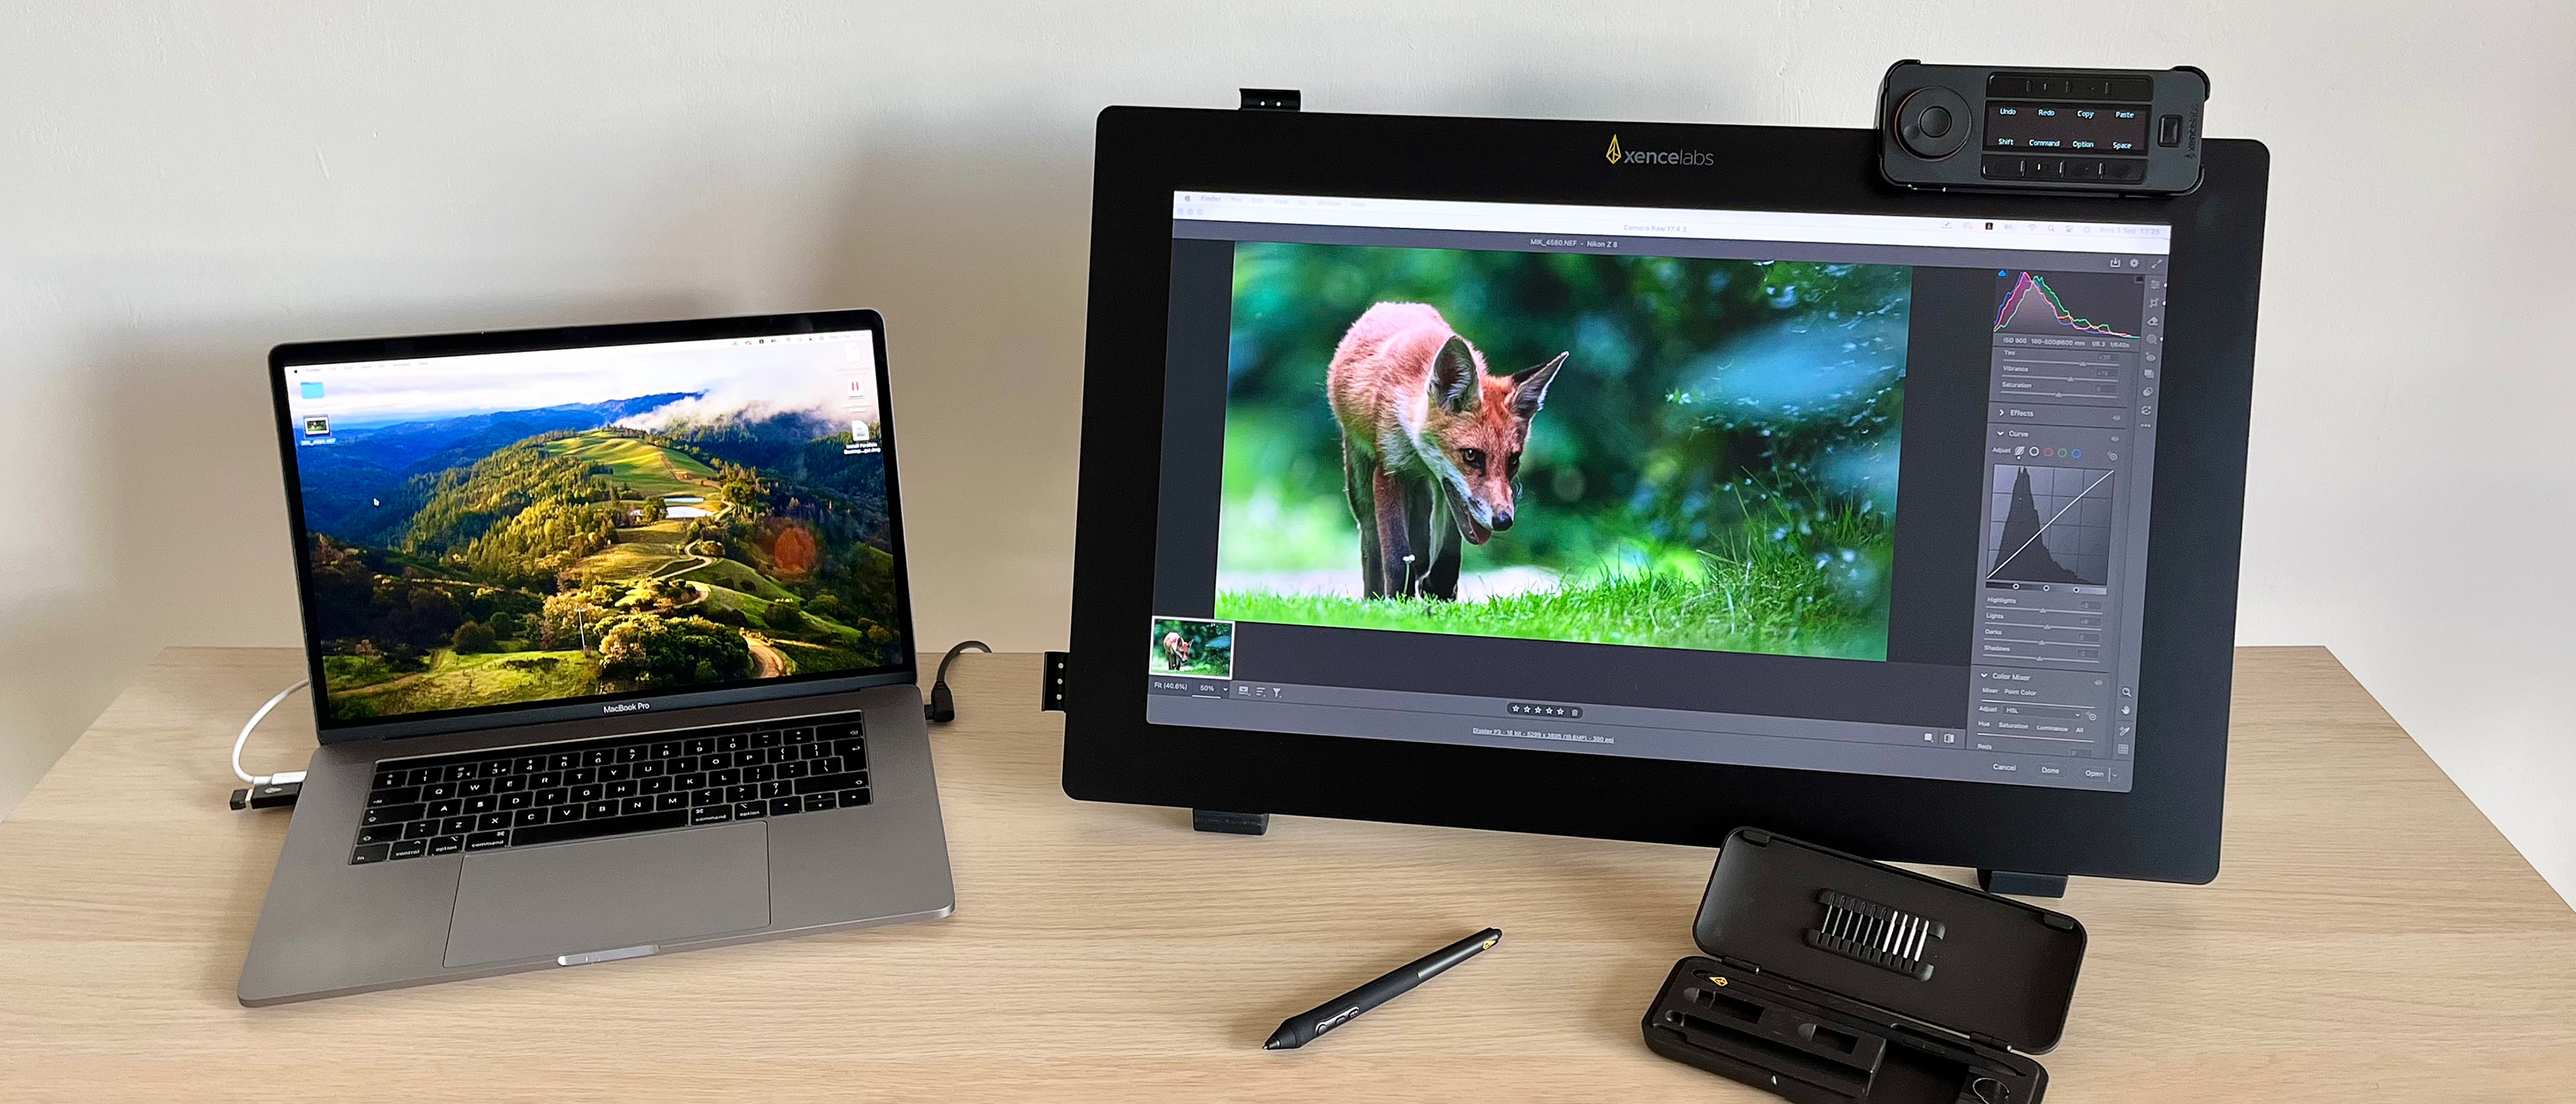
Digital Camera World Verdict
The Xencelabs Pen Display 24+ is a top-tier professional pen display that’s a joy to operate. From intuitive customization options, the inclusion of two styluses and Virtual Tablet Mode, it really does feel like Xencelabs has delved into the minutiae of the drawing tablet workflow and delivered a product for the working creative. Sure, some will bemoan the non-touch-sensitive screen, but others will love it. My only real disappointment is that the Calman Ready status that headlines the release requires software that isn’t compatible with Apple silicon Macs. Still, the color accuracy is good enough straight from the box that for 98% of users, that really won’t matter.
Pros
- +
Great color accuracy
- +
Huge 4K screen
- +
Everything's in the box
- +
Top-notch drawing experience
- +
Two styluses included
- +
Not touch sensitive
Cons
- -
HP Anyware and Calman are Windows-only features
- -
Calman Ready requires a license and colorimeter
- -
Not touch sensitive
Why you can trust Digital Camera World
The Xencelabs Pen Display 24+ Studio Series is a premium pen display that’s designed to compete with top-tier devices like the Wacom Cintiq Pro 24. Xencelabs only released its first pen display in 2023, before releasing the industry’s first 16-inch 4K OLED pen display the following year – the Pen Display 16, which I reviewed very favorably.
Well, this rising outfit in the premium drawing tablet sphere isn’t resting on its laurels, because the Xencelabs Pen Display 24+ Studio Series brings with it another industry first: it’s the only Calman Ready pen display on the market.
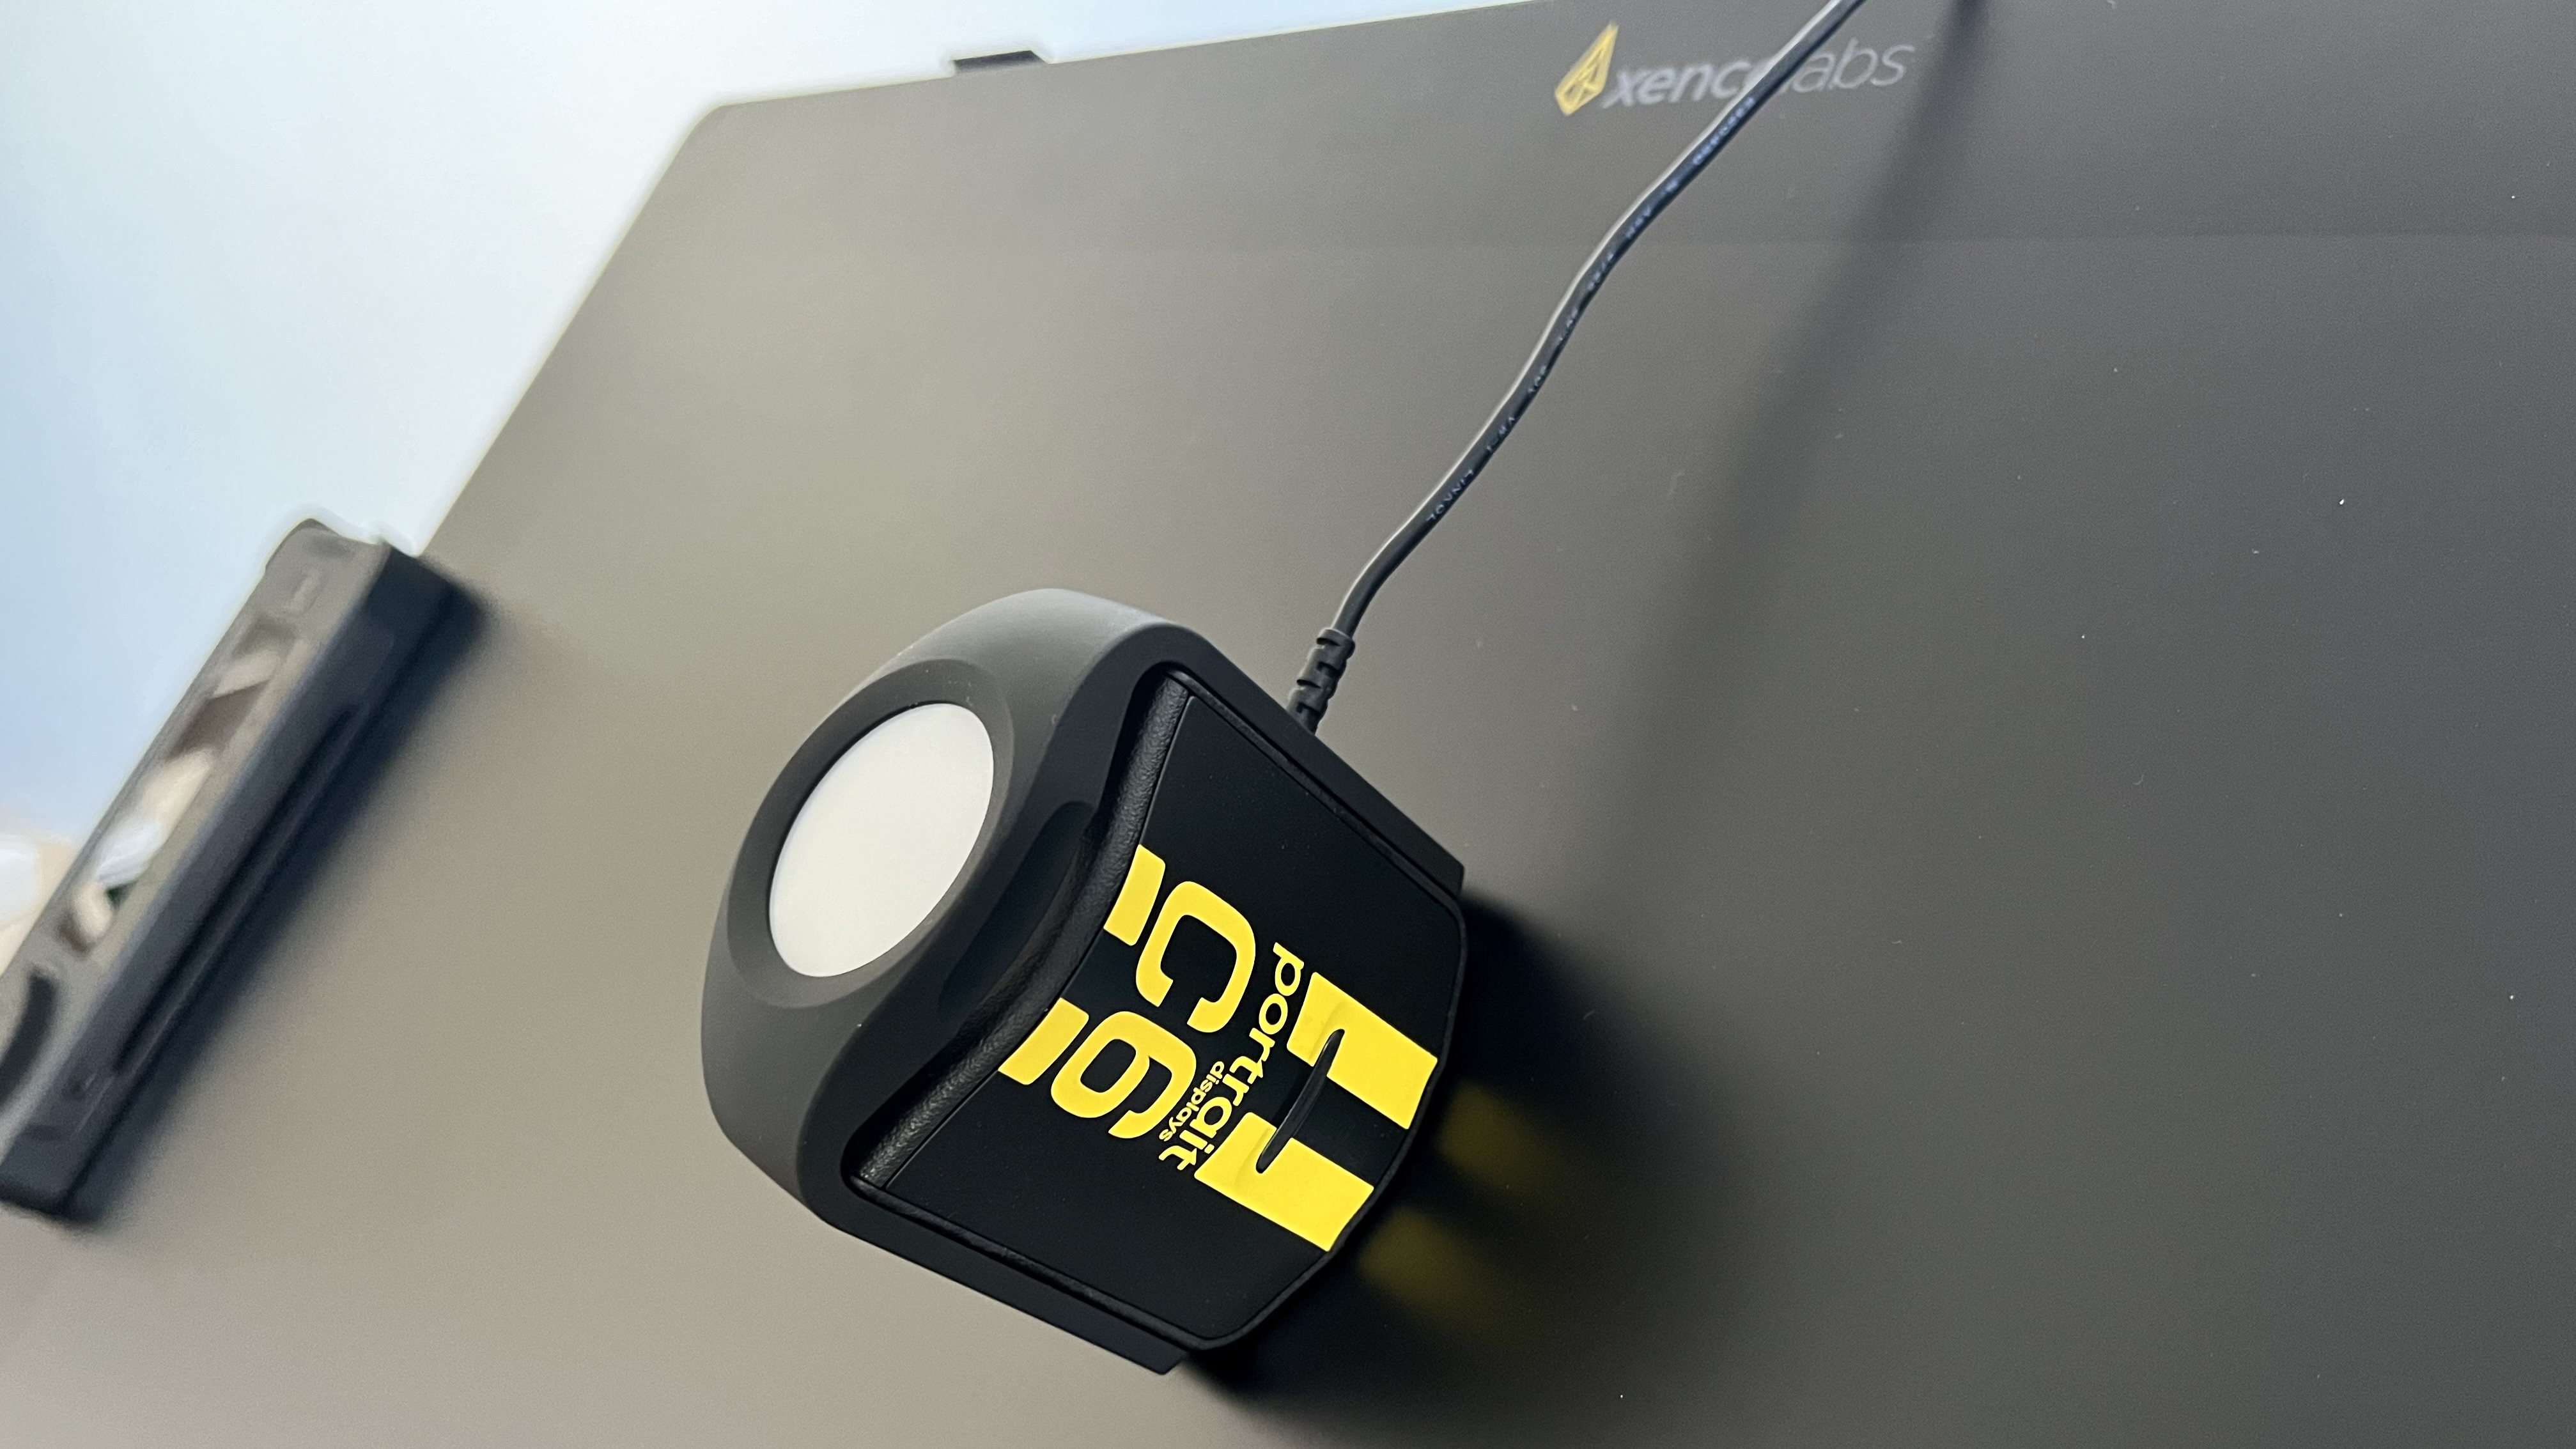
Calman is a color calibration software developed by Portrait Displays and, while many other pen displays support color calibration, Calman is industry-standard software that’s used throughout the creative industry from Hollywood to broadcast television.
This is good news for photographers looking to add a pen display to their workflow, because color accuracy is a big deal, especially if you’re working across multiple screens, intend to print your work or deliver commercial assignments.
Cheaper pen displays, while often offering a decent drawing experience, are rarely suitable for serious photo editing, because the color accuracy simply isn't good enough. The Xencelabs Pen Display 24+ Studio Series, then, is designed for digital creatives in general, so I’ve got high hopes that the display and drawing experience hold up. Let’s grab a stylus and get started.
Xencelabs Pen Display 24+: Specifications
Display | 23.8-in Super AG Etching, anti-glare display (60Hz) |
Display active area | 20.75 x 11.7in |
Display resolution | 4K (3840 x 2160) |
Display color | 1.07 billion colors, 99% Adobe RGB, 99% sRGB, 93% DCI-P3, 82% REC 2020, 99% REC 709 |
Display brightness | 330nits |
Pen pressure levels | 8,192 (60-degree tilt) |
Pen resolution | 5080 LPI |
Compatible OS | Windows 7 (or later), Windows 11 Arm64, macOS 10.13 (or later), Linux |
Storage | 256GB (expanded to 1TB with microSD) |
Power input | 100 to 240 VAC, 50/60HZ |
Power output | 12V / 5.0A |
Power consumption | 37 kWh/1000h |
Connections | 1x USB-C, 1x HDMI, 1x DisplayPort, 2x USB-A |
Size | W 24.4 x H 15.3 x D 1.4 in |
Weight | 6.9kg / 15.2lbs (with Tilt Stand and Rubber Feet) |
Xencelabs Pen Display 24+: Price
The Xencelabs Pen Display 24+ Studio Series is priced at US$1,899 / £1,850 (Australian price to be confirmed), which is less than the Wacom Cintiq Pro 24 and Wacom Cintiq Pro 24 Touch’s RRPs of US$2,199.95 / £2,009.99 / AU$3,679.01 and US$2,699.95 / £2,349.98 / AU$4,299.00, respectively. However, with frequent sales on the Wacom, prices can end up rather comparable.
Both Wacom and Xencelabs provide a wealth of accessories with their top-tier tablets, including the Xencelabs’ answer to Wacom’s ExpressKey Remote, the Quick Keys remote. But what I always appreciate about Xencelabs tablets is that you get two styluses: the 3 Button Pen and Thin Pen, so you can work with your preference of thickness.
The best camera deals, reviews, product advice, and unmissable photography news, direct to your inbox!
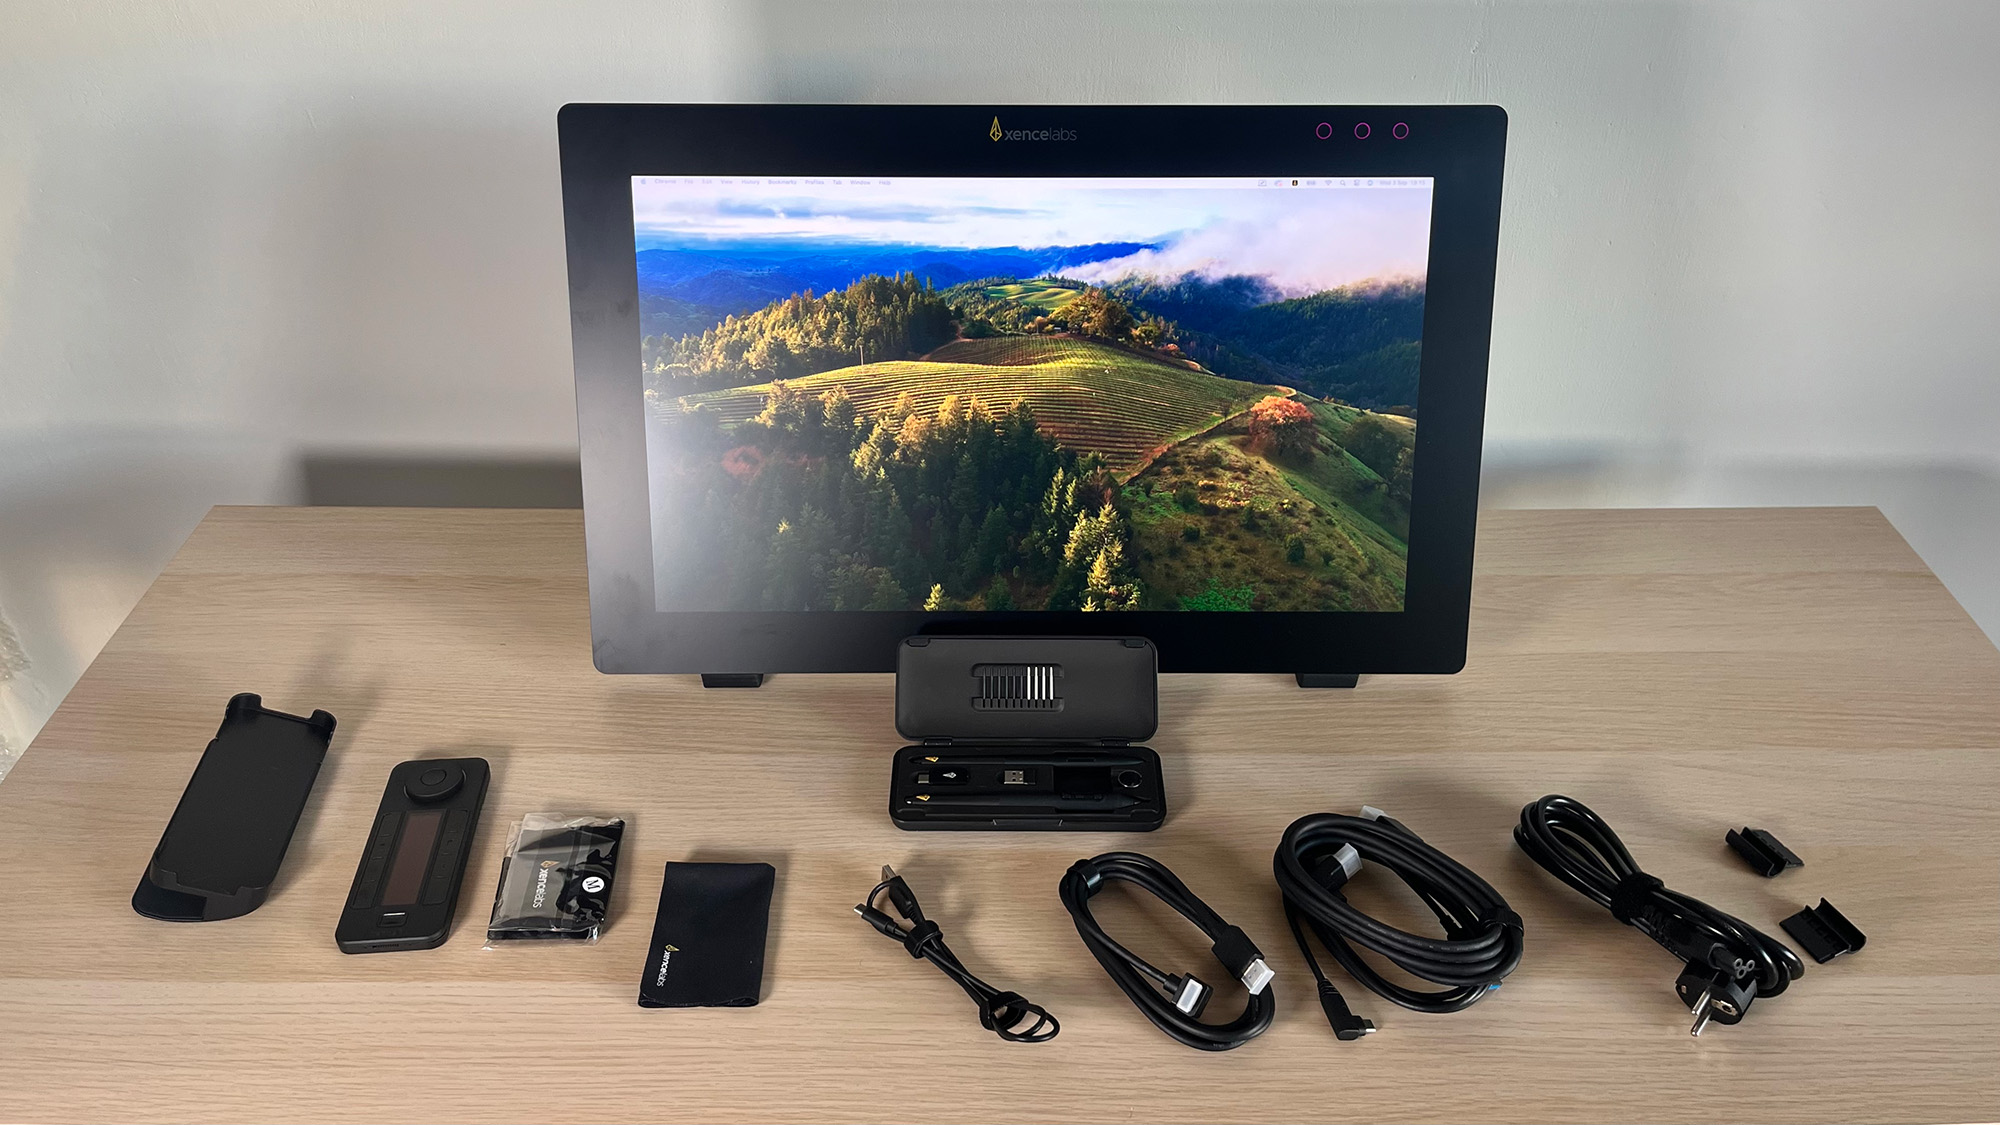
You also get a proper tilting stand, which is an aftermarket accessory for the Wacom. All in all, the Pen Display 24+ Studio Series includes: Tilt Stand, Rubber Feet, Quick Keys and Wireless Dongle, Quick Keys Clip, Pen Case, 3 Button Pen, Thin Pen, 6x Standard Nibs, 4x Felt Nibs, Nib Extractor, 2x Pen Clip, USB-A to USB-C Adapter, Drawing Glove, Cleaning Cloth, AC Power Adapter, and all the cords and leads you could possibly need to suit your setup.
The Xencelabs Pen Display 24+ Studio Series doesn’t come cheap, but it’s competitively priced for what it offers.
Xencelabs Pen Display 24+: Design & Handling
The Xencelabs Pen Display 24+ Studio Series is an absolute behemoth of a pen display. It’s thick and heavy, and for a professional desktop pen display that’s exactly what I’m looking for. Even set upright at around a 65° angle (I wouldn’t trust it beyond that), I could happily tap, draw and shade. The Pen Display 24+ wasn’t going anywhere.
This is partly due to the Rubber Feet, which grip the desktop surface you’re working on and partly due to this big hunk ‘o tablet’s chonky form factor. It certainly isn’t designed to accompany you on the sofa, as you doodle while watching reruns of Modern Family.
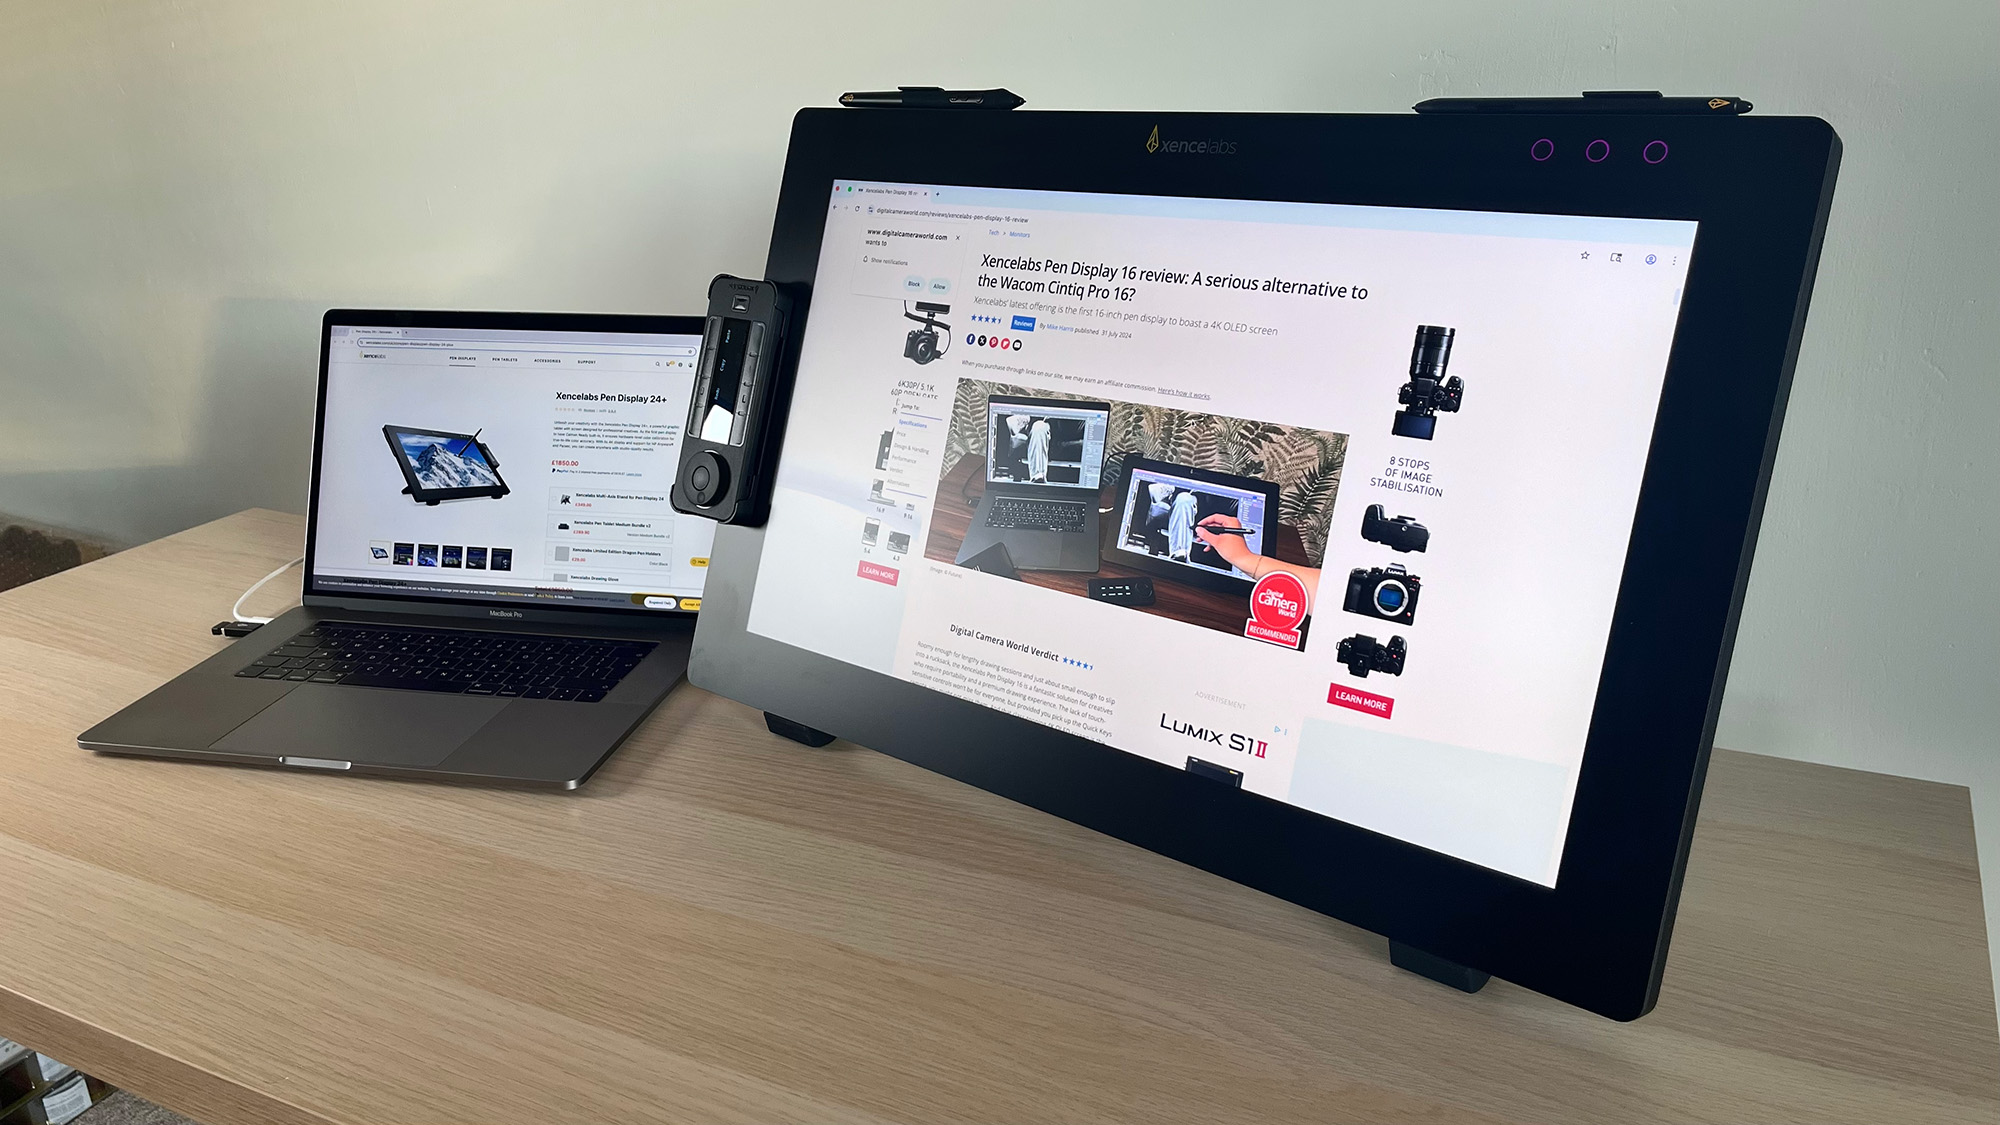
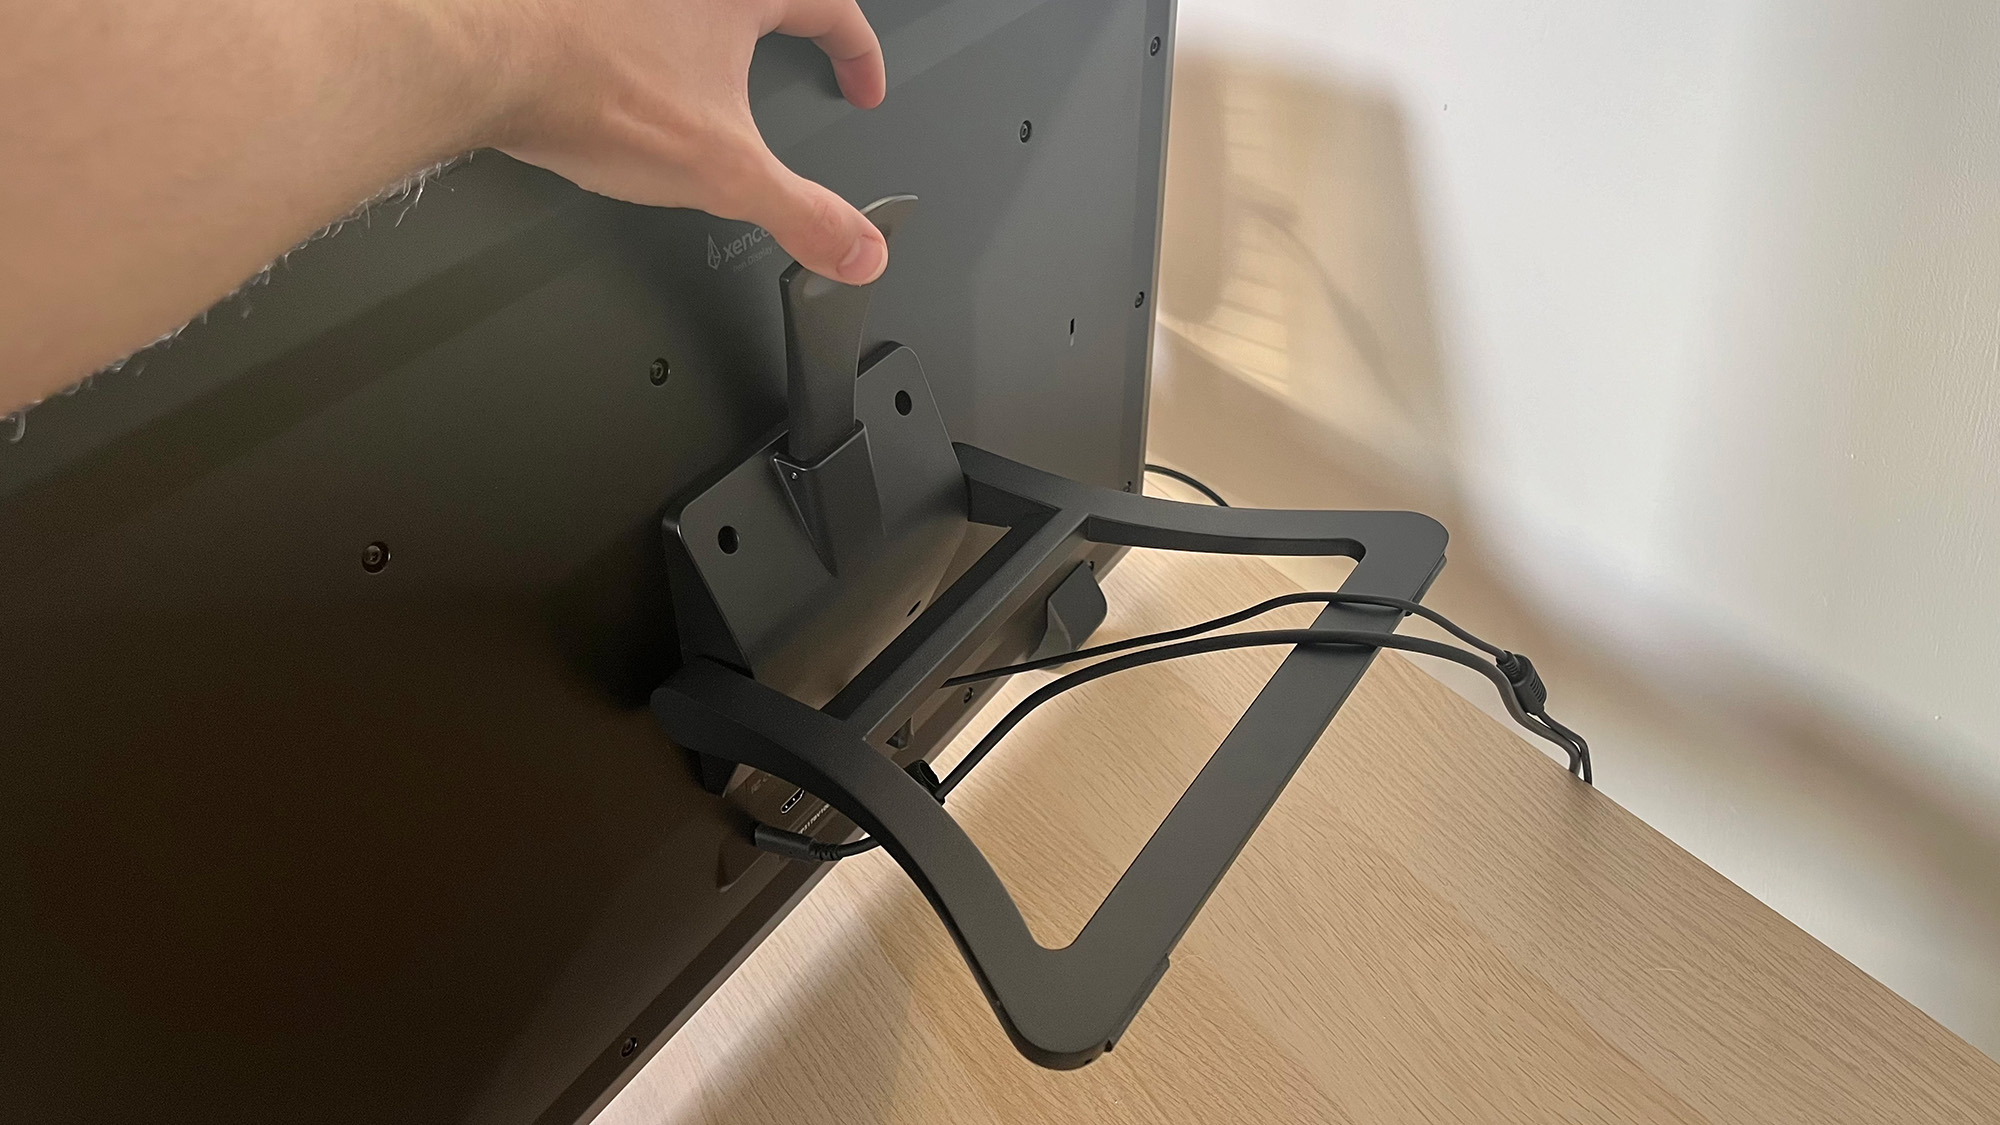
Kudos to Xencelabs for the tablet’s robust Tilt Stand. Not only is it sturdy, it’s easy to adjust, which is especially useful as I found myself using the Pen Display 24+ as a second monitor when I wasn’t using the stylus. When doing so, I could simply press the latch and adjust the stand as needed.
The Tilt Stand is good enough that I see little reason to pick up the Xencelabs Multi-Axis Stand for Pen Display 24 (US$299.99 / £349), unless you require the strongest stand possible or one that can rotate into a vertical position.
However, I did encounter a problem that I think every Pen Display 24+ user should be aware of. The stand can be adjusted from 16° to 72°; the problem is that the flattest angle can cause the entire weight of the tablet to rest on a protruding display cable. In my case, I now have a permanently bent USB-C connector. Easy to replace, but I could have easily damaged the port. In short, be very careful when setting the pen display flat.
The 23.8-inch display is really nice. I’ve come to enjoy working on Xencelabs’ paper-like screens; they don’t have as much bite as some – what you like best is personal preference – but I think the Pen Display 24+ provides a very pleasant drawing experience, nonetheless.
The display’s output matches the Wacom Cintiq Pro 24’s core specs with its 4K (3840 x 2160) resolution, 1.07-billion colors, and 99% Adobe RGB color accuracy. But color is where the Xencelabs really excels, with 99% sRGB, 99% REC 709, 93% DCI-P3, and 82% REC 2020.
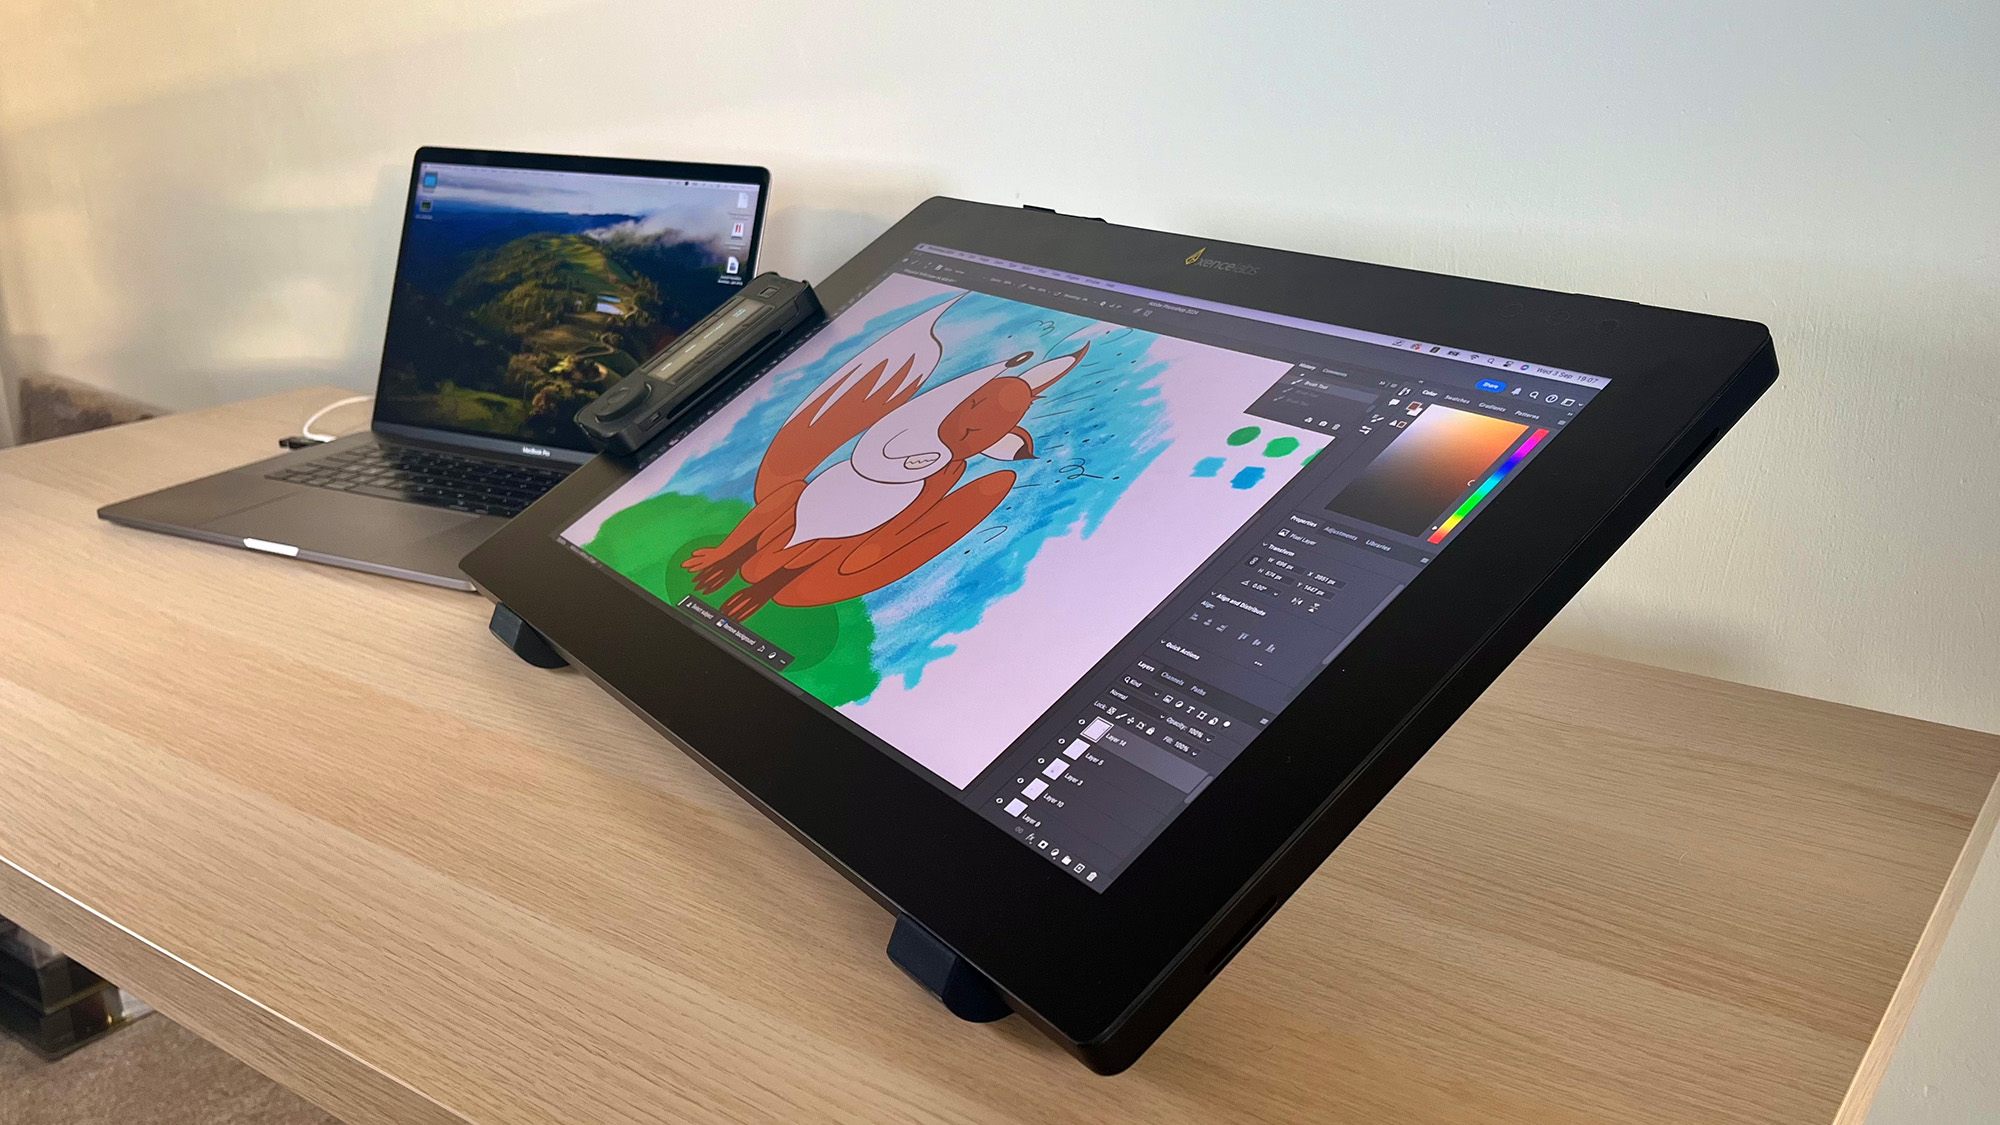
And of course, it’s the first Calman Ready pen display on the planet. This isn’t to be confused with some XP-Pen Artist Pro (Gen 2) tablets being the industry’s first Calman Verified pen displays. Essentially, Calman Verified devices have been pre-calibrated to Calman’s exacting standards.
Calman Ready devices are optimized for use with the Calman calibration software. This means the calibration process is both quicker and largely automated, while hardware that isn’t Calman Ready requires more time-consuming and potentially less accurate manual calibration.
There are pros and cons to both Calman Verified and Ready. Verified devices provide peace of mind, fresh from the box, so you’re ready to go. Ready devices provide a more accurate calibration that takes into account elements such as brightness and ambient lighting, but need to be set up.
Calman Ready devices also require users to purchase the Calman software and a compatible colorimeter (more on compatibility later). Chances are, a good deal of users won’t require Calman-level calibration, but it’s nice that it’s here, and it will be a huge boon for studio creatives working on big productions.
For most photographers, I think the Xencelabs Pen Display 24+ Studio Series display is good enough as-is. In my experience, it’s difficult to find a cheaper pen display with a screen that’s accurate enough for photo and video retouching. If you’re working on a budget, I think you’re better off opting for a traditional graphics tablet (aka drawing pad) so you can use a stylus while looking at your computer monitor.
If you’ve got your heart set on a pen display and you’ve got the budget, it’s easy to see where your money is going the moment you fire up the Pen Display 24+. Even against my MacBook’s Retina display, the colors held up very well.
The Xencelabs Pen Display 24+ is also compatible with HP Anyware. As it stands, the Xencelabs macOS driver does not support this function. That said, it is a specialist feature that the majority of creatives likely won’t use. HP Anyware is designed for remote creatives who need to access digital workspaces without a VPN, so you could, for example, connect to a client’s device via HP Anyware using your own setup and still make use of the Xencelabs Pen Display 24+.
The Xencelabs Pen Display 24+ Studio Series’ wealth of accessories means you should have everything you need to get started. Xencelabs has thought of every eventuality with a USB-A to USB-C Adapter and more cables than you’ll ever need. They’re decent quality cables, too. I couldn’t help noticing how the USB-C cable has the USB-C connector set at a right angle at one end, allowing it to connect neatly into my laptop.
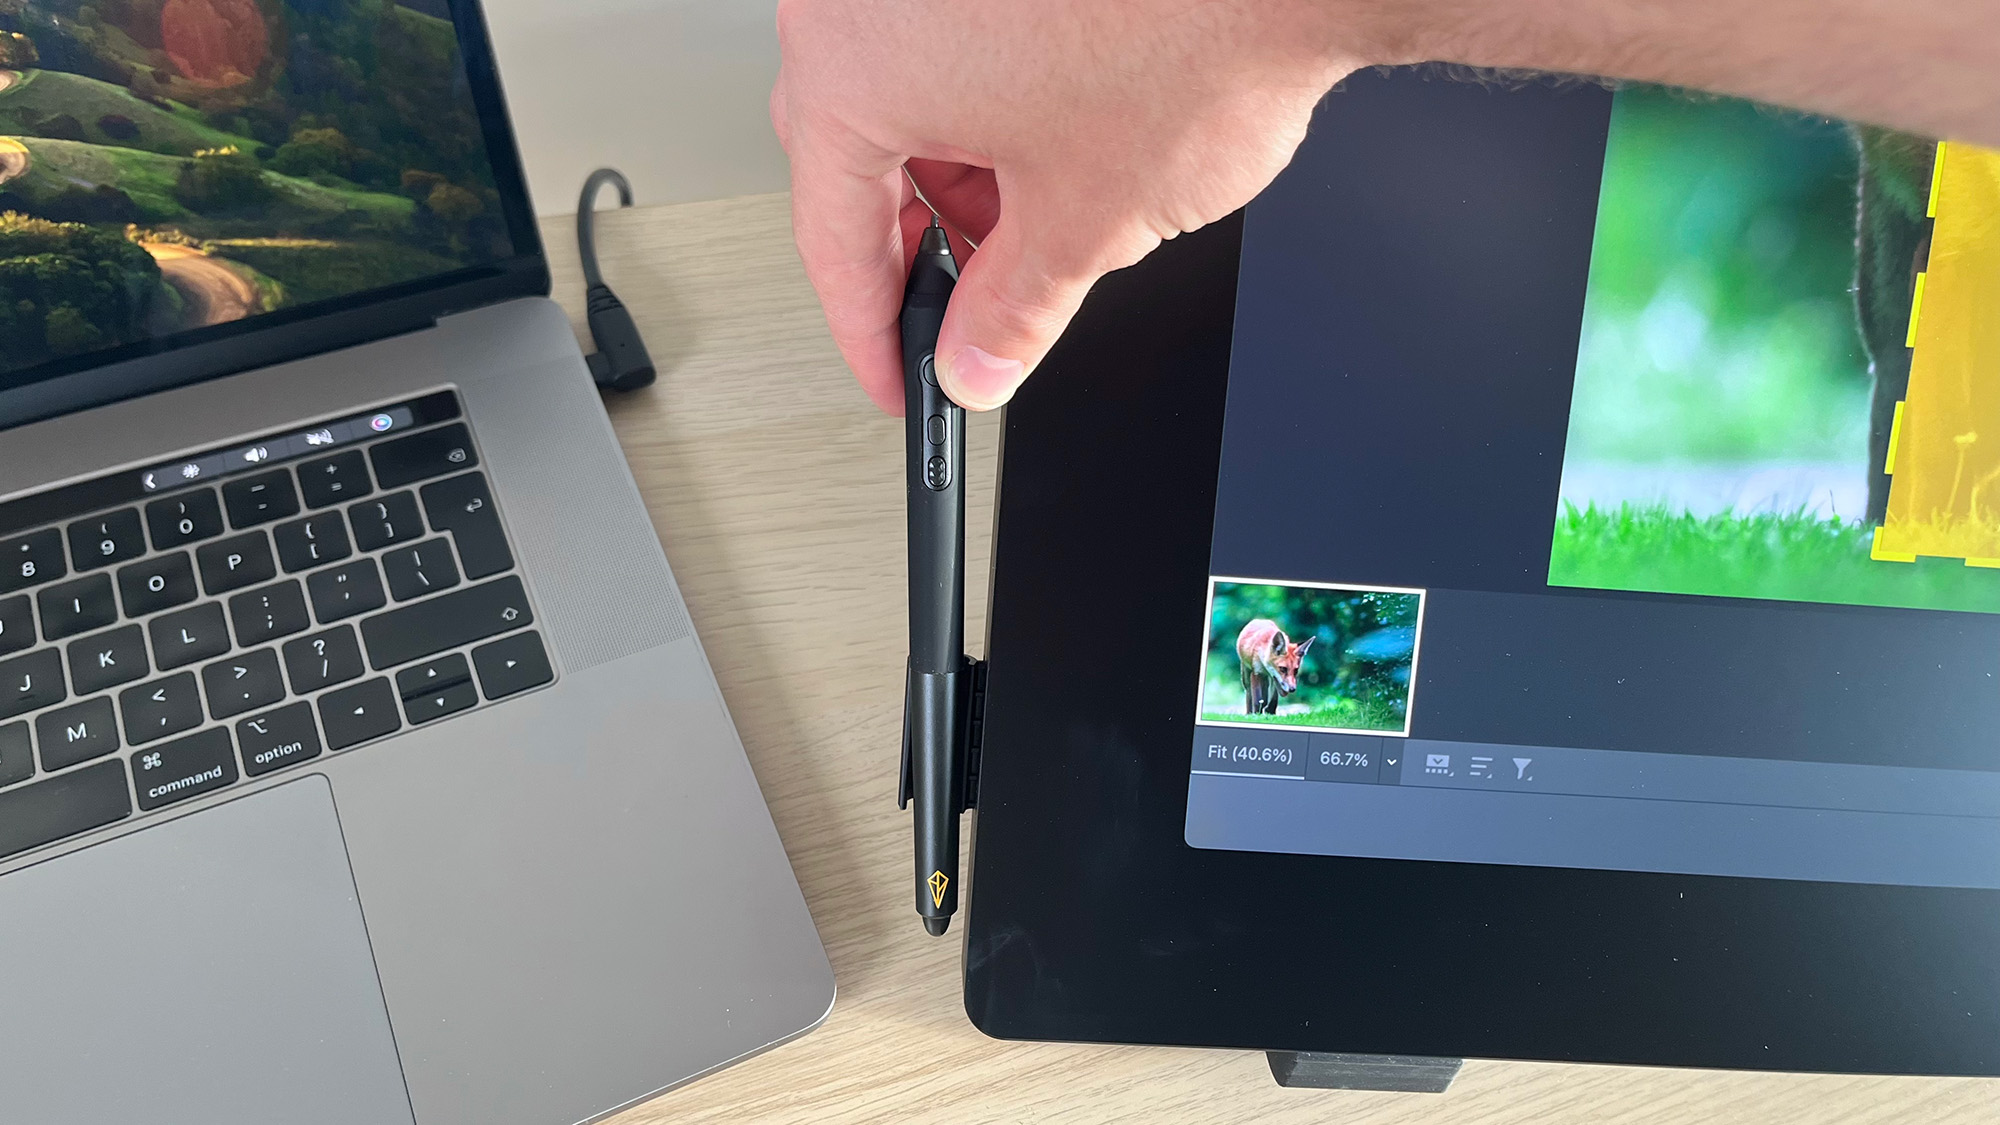
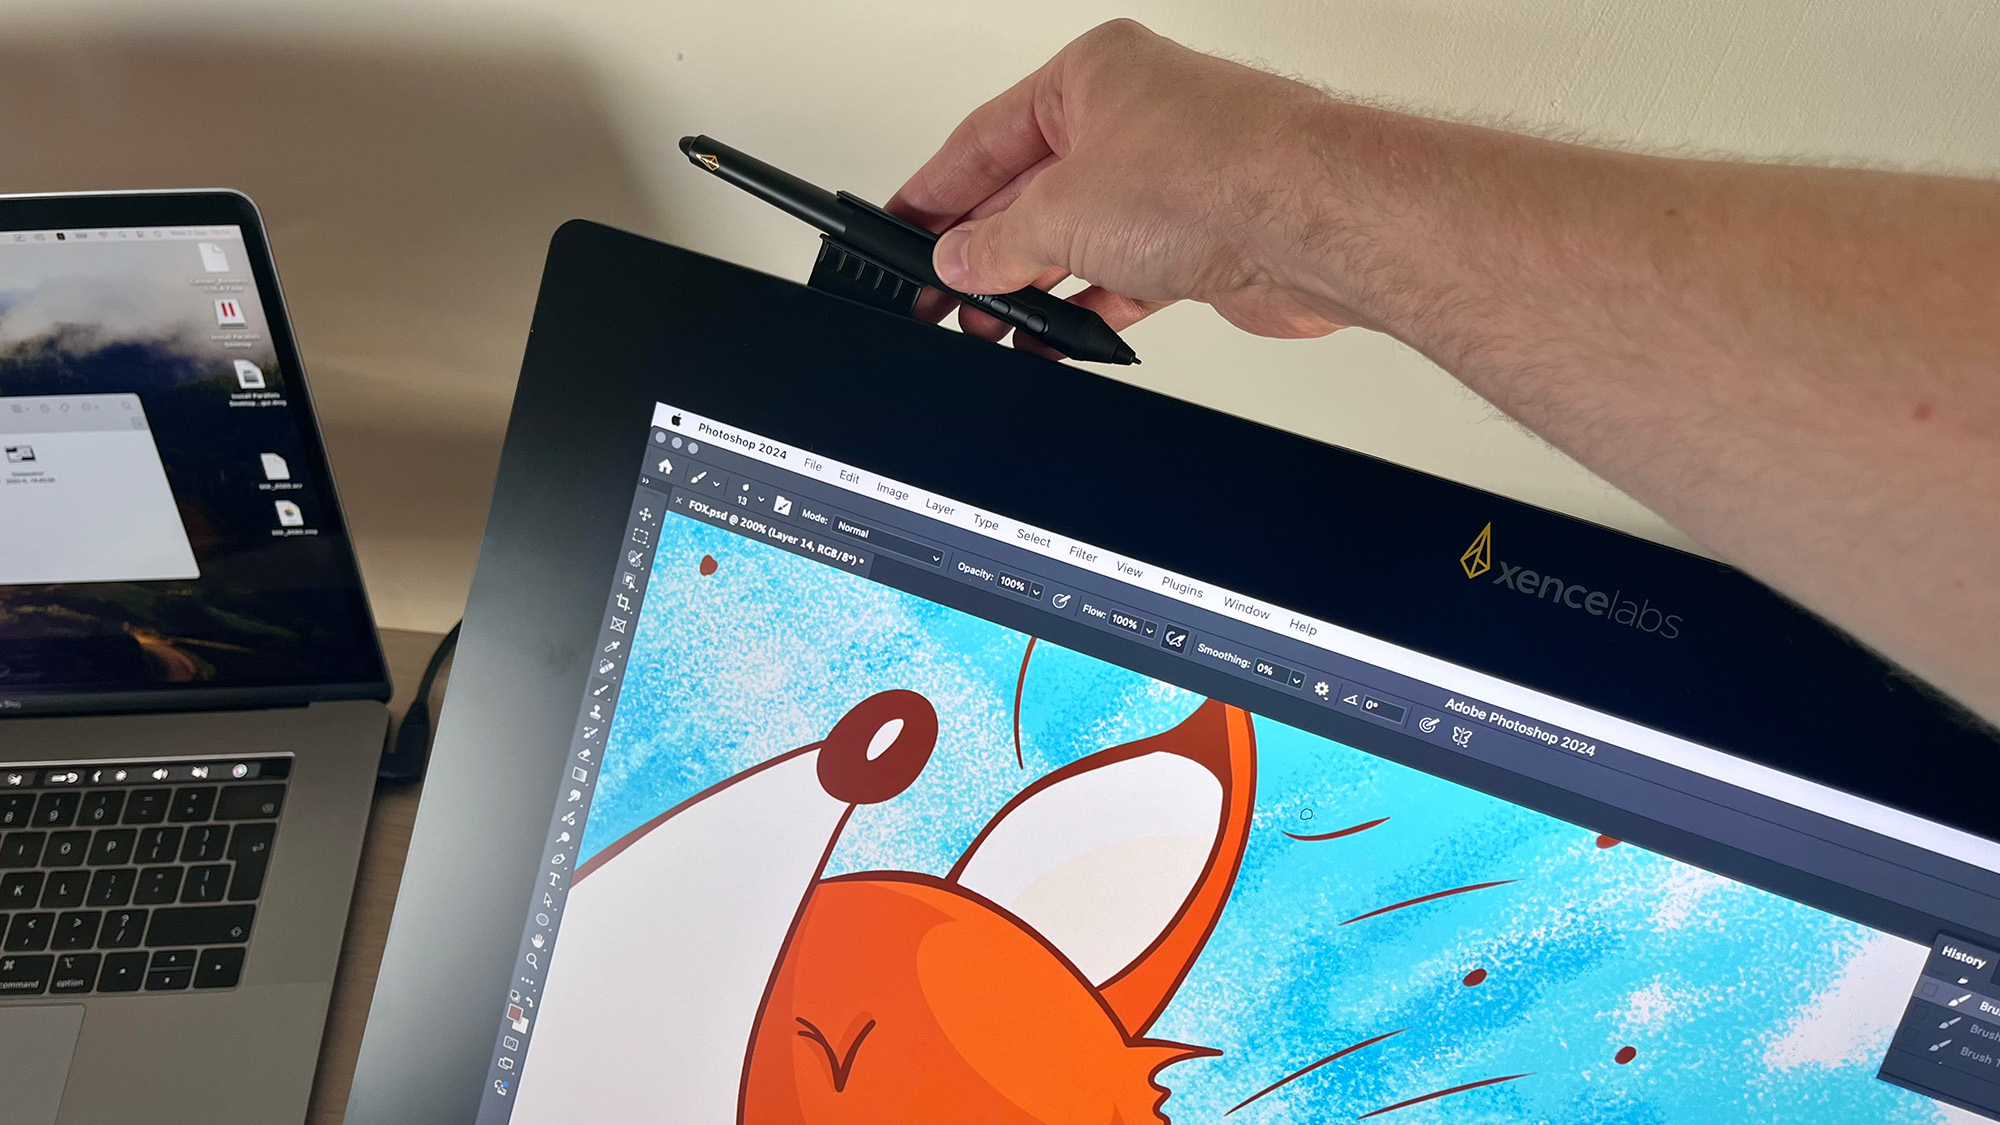
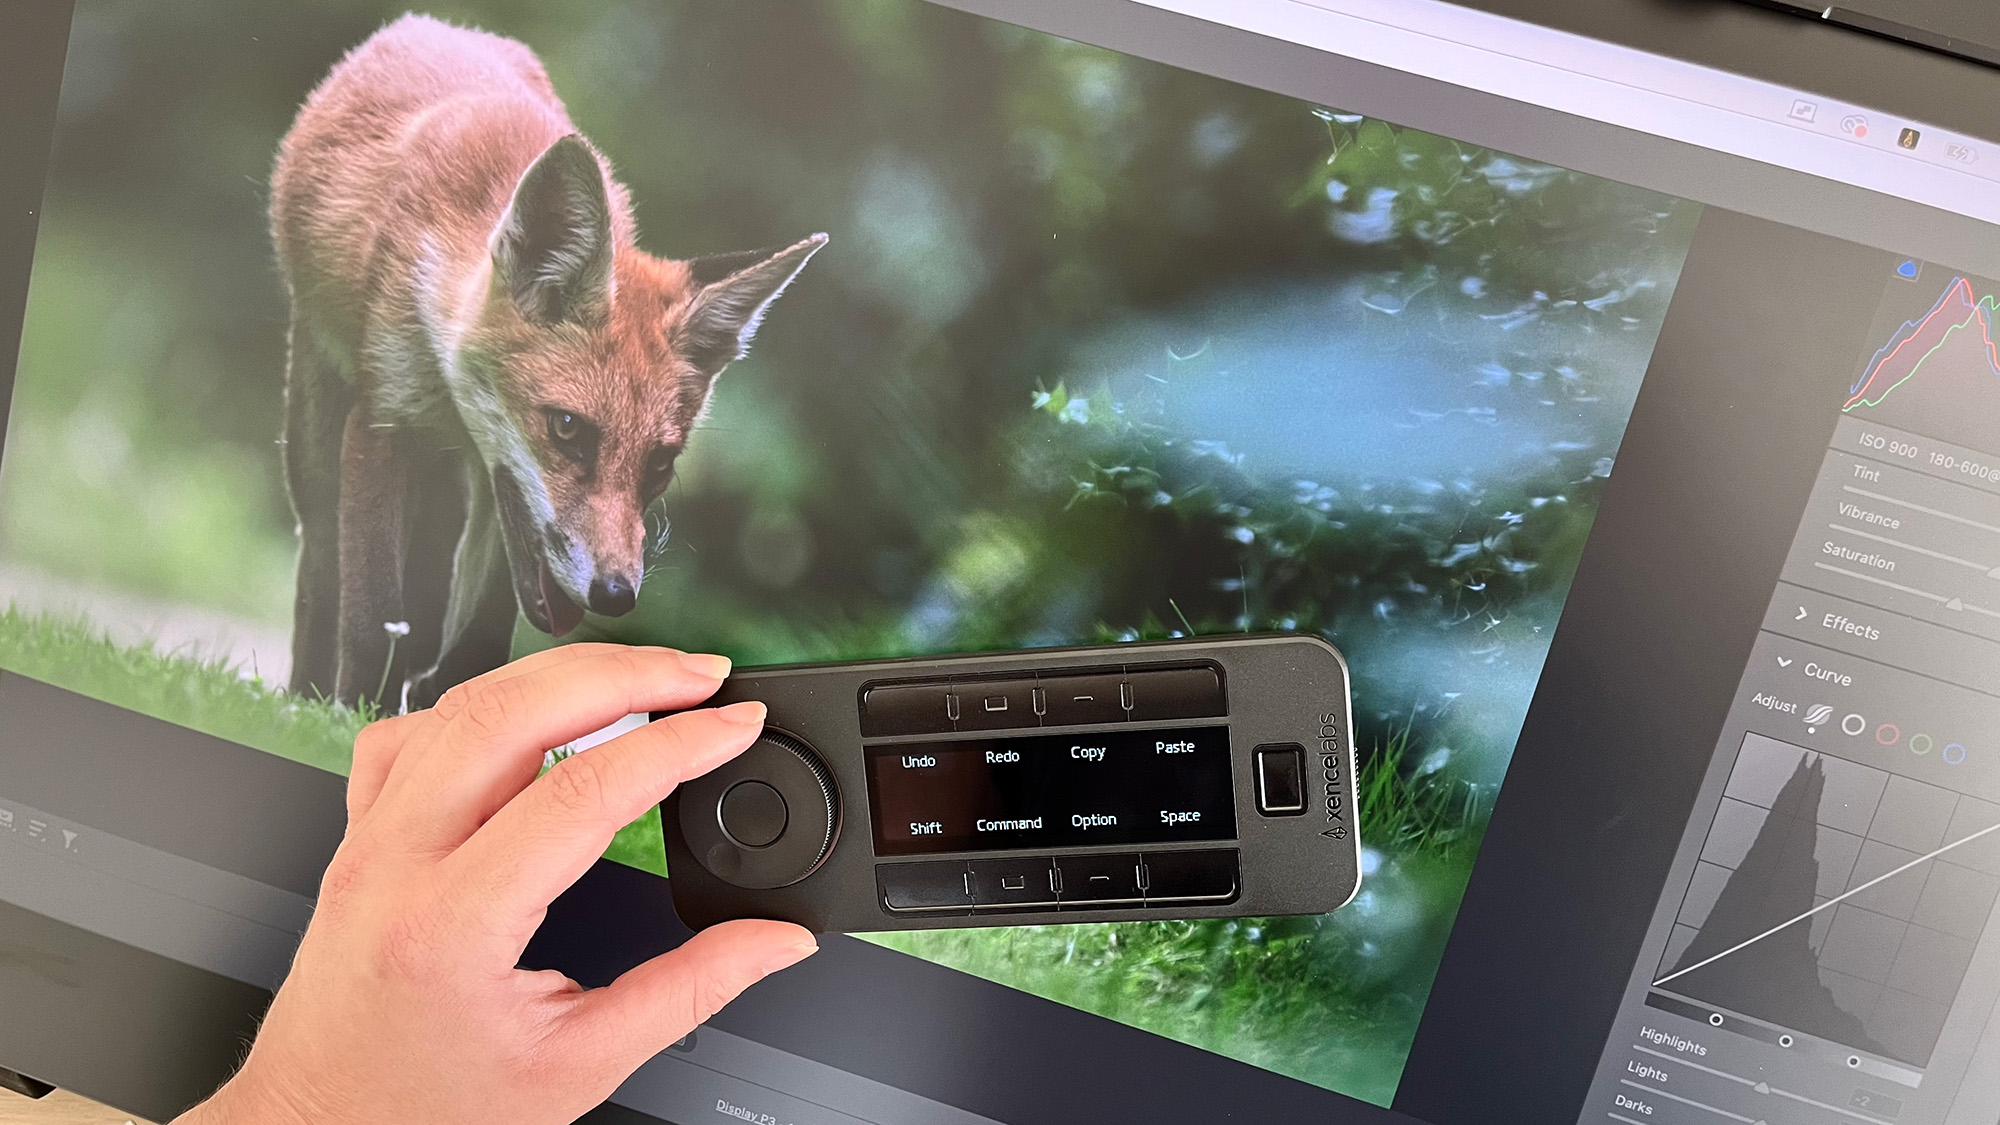
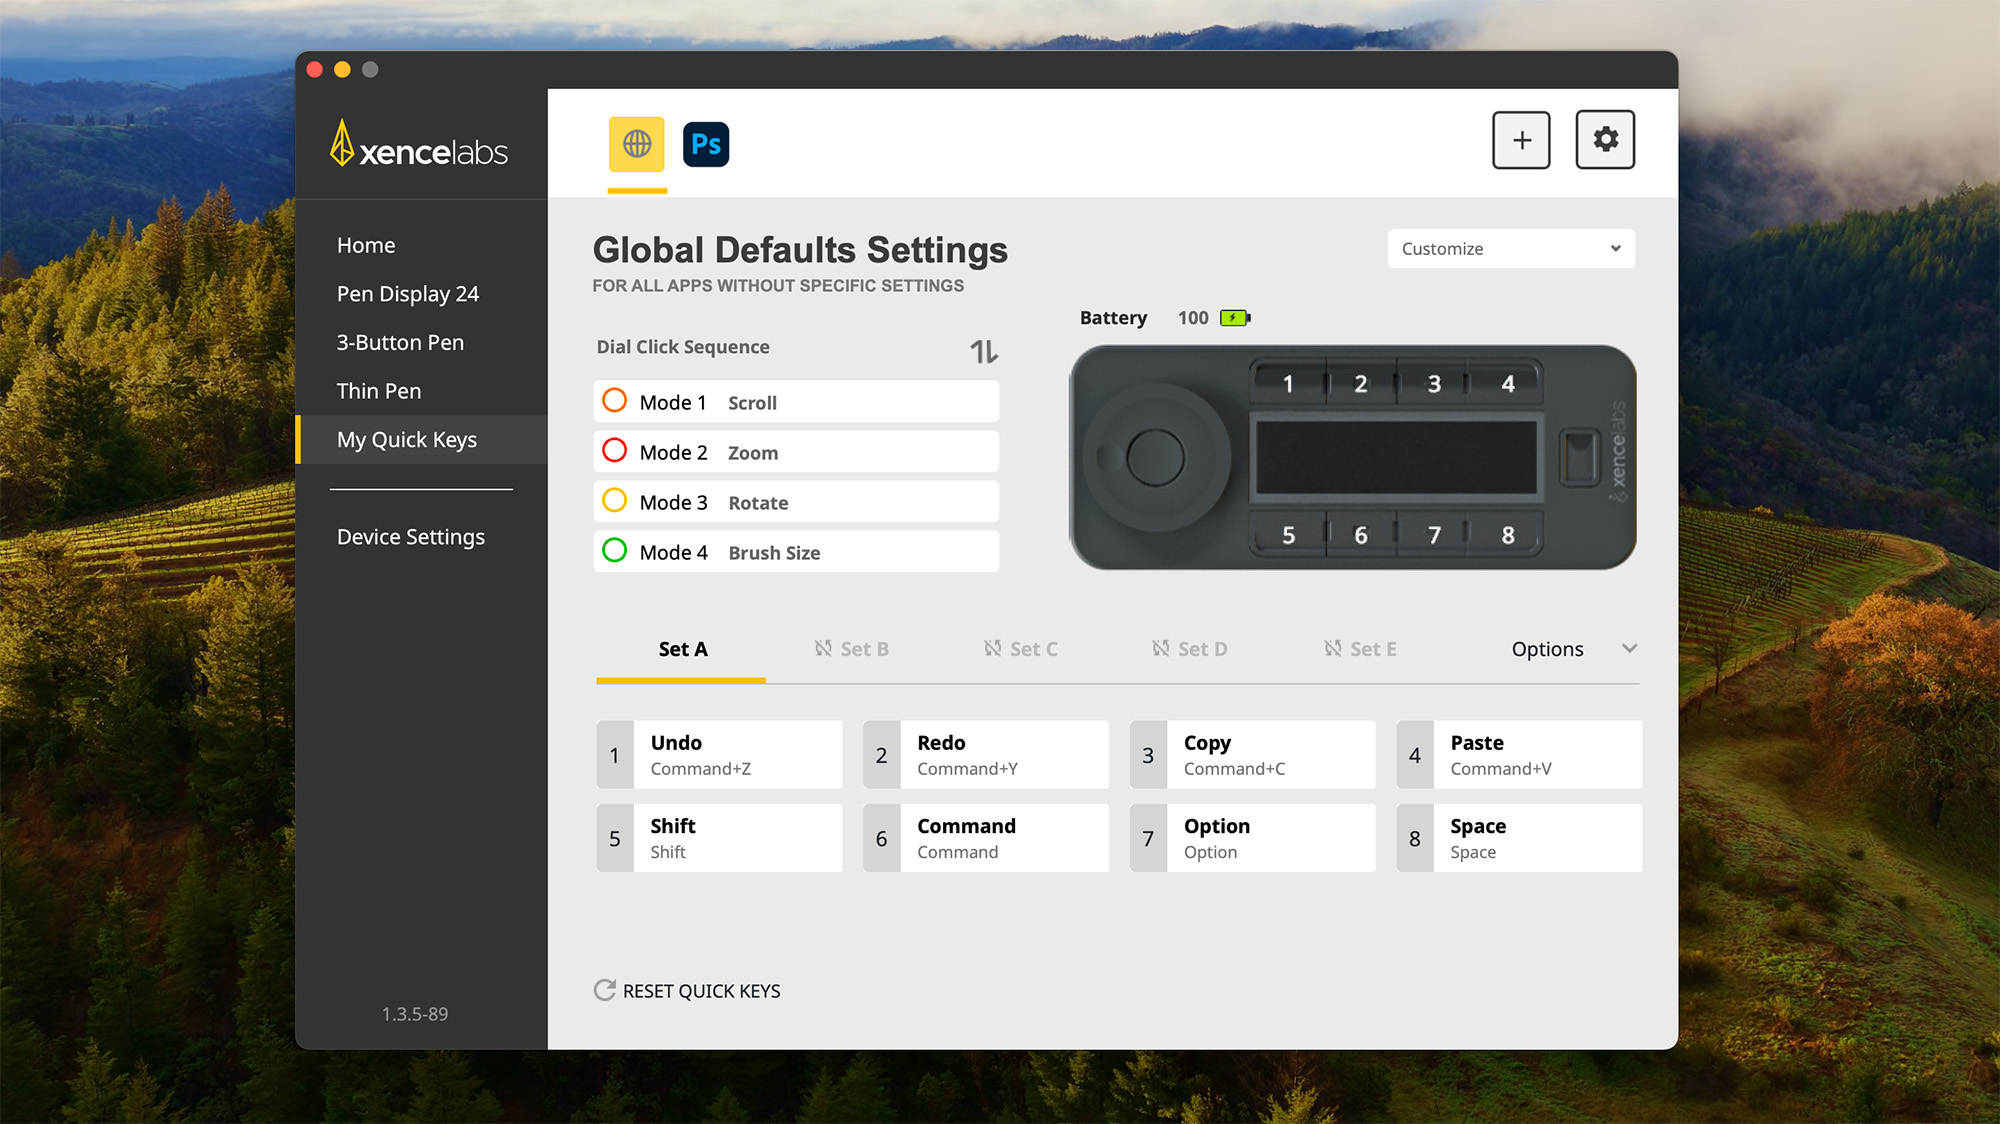
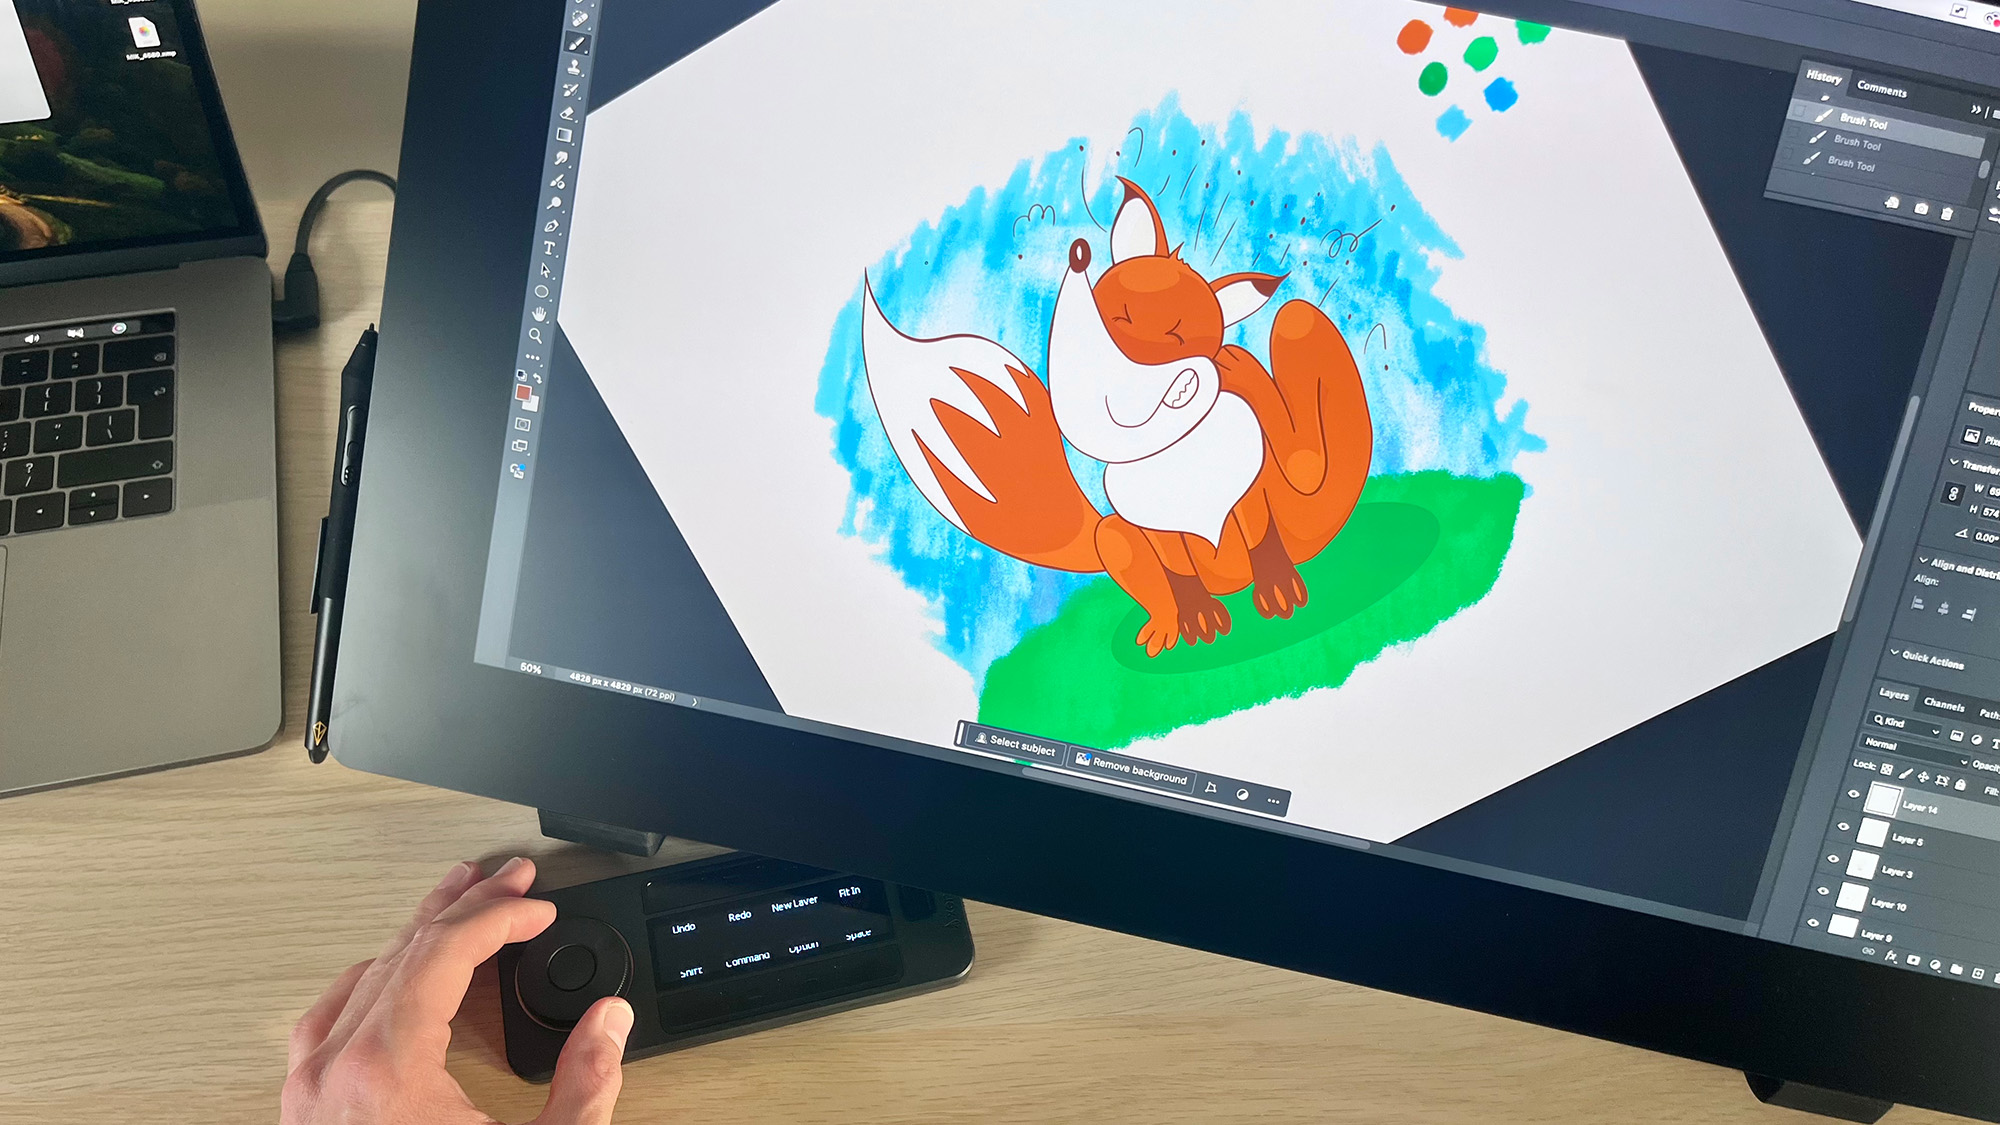
The pen and Quick Keys clips enable you to mount both styluses and the Quick Keys remote onto the pen display itself. The Quick Keys remote is a wireless controller with a command wheel and various buttons, which you can customize to perform a variety of shortcuts.
The remote can be easily customized using the display’s setup software; you can even customize the Quick Keys for particular pieces of software. So it will operate differently whether you’re using Adobe Illustrator or Photoshop, for example.
I’ve said it before: the Quick Keys and its buttons do feel plasticky, but they get the job done and the command wheel operates smoothly. The remote also has a simple OLED screen that displays the commands, should you get lost.
There are 11 controls on the Quick Keys in total: the command wheel and central button, the ‘Set’ button, and eight shortcut buttons. Think of the eight shortcut buttons as a single set. The ‘Set’ button is used to toggle through five different sets (all customizable), providing forty shortcuts in total.
I much prefer using a remote to having shortcut buttons built into a pen display, where it’s easy to inadvertently nudge them and they cannot be moved, comfortable or not. As such, I love the flexibility of placing the Quick Keys where I want it for quick access.
You can even tell the setup software what orientation you want to use the Quick Keys remote to maximize comfort (great news for lefties). The remote also has a rubber backing, so you can rest it on the screen without fear of scratches.
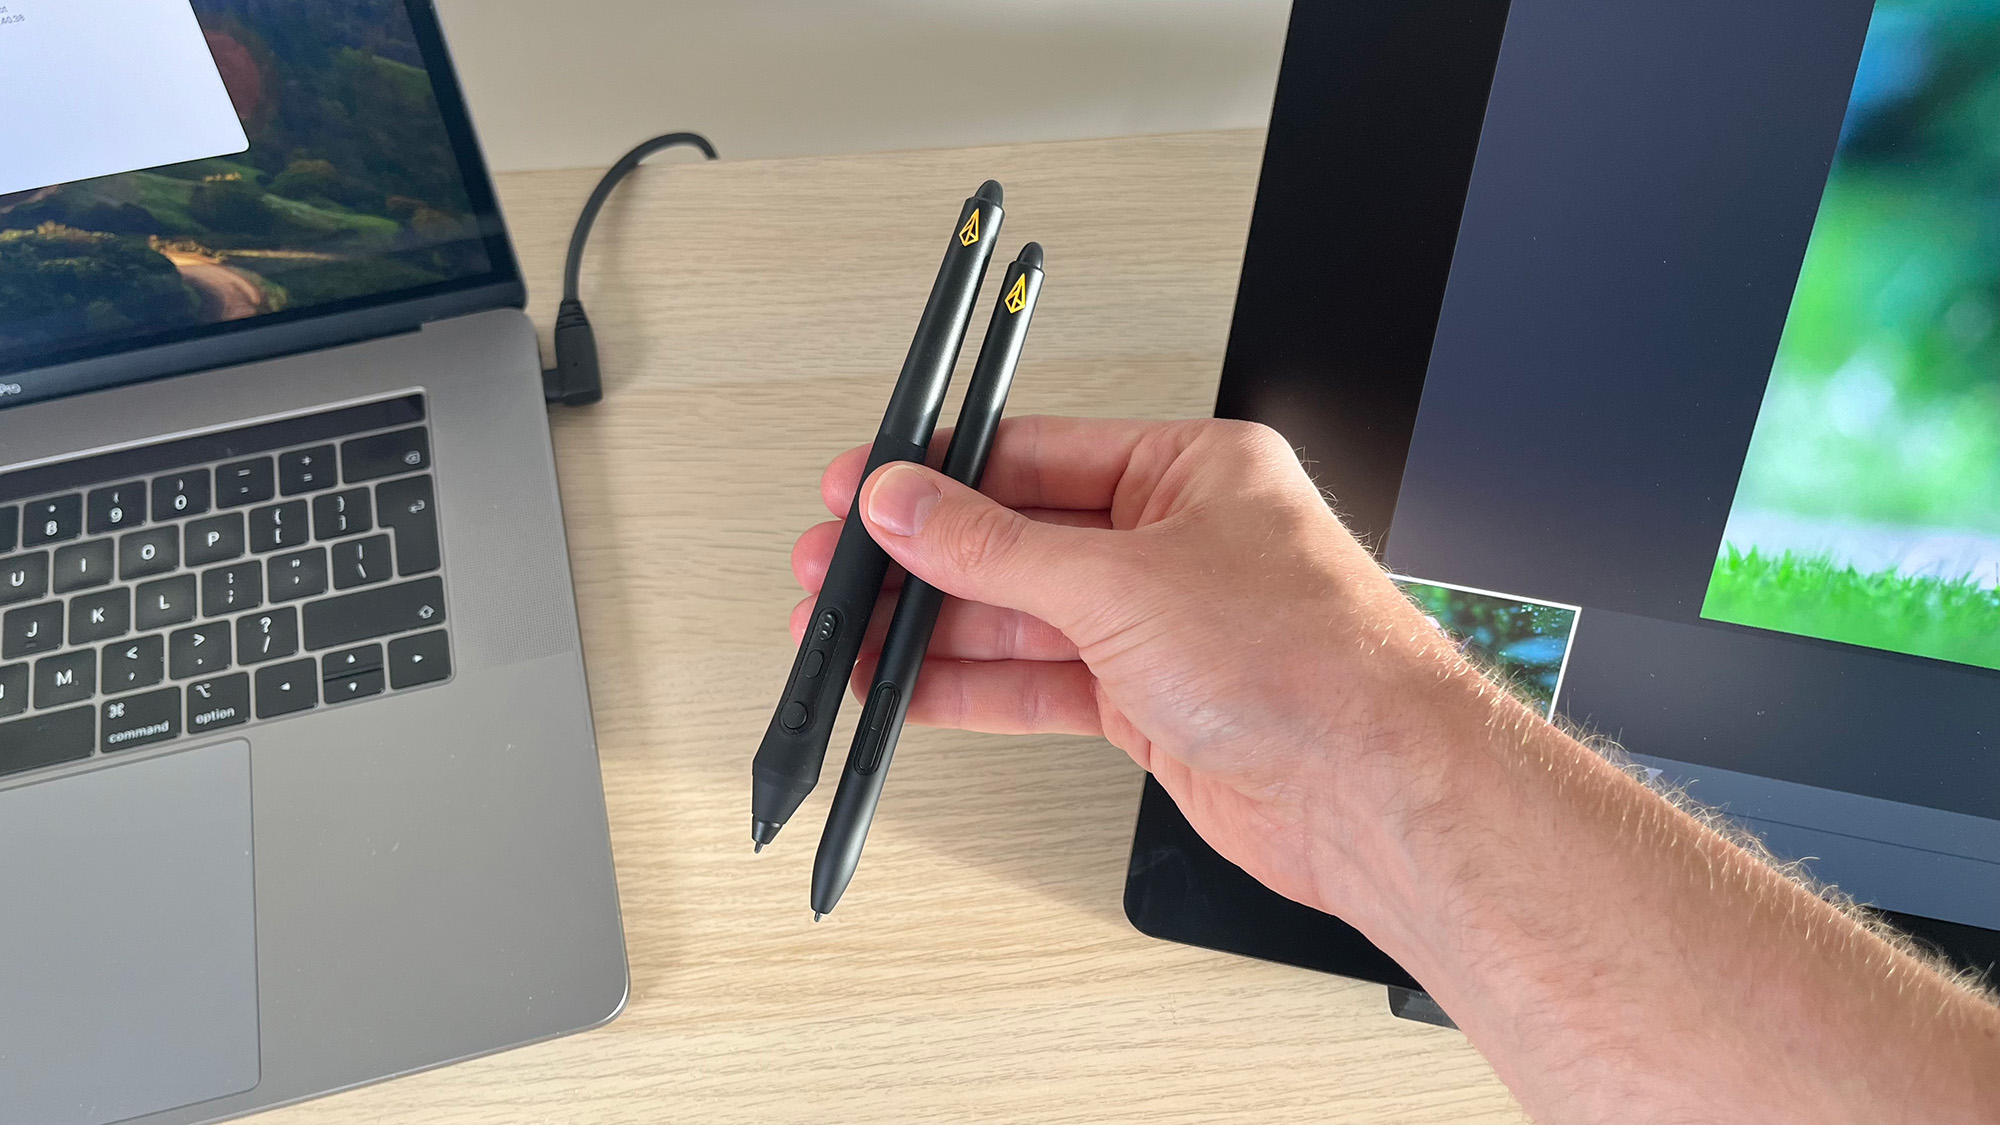
I realize that I appear to be in the minority when I say I prefer a thin stylus like the Apple Pencil 2 / Apple Pencil Pro, as opposed to the classic thick styluses many drawing tablet users are used to. No matter, though, because Xencelabs provides both and they come in a nice case.
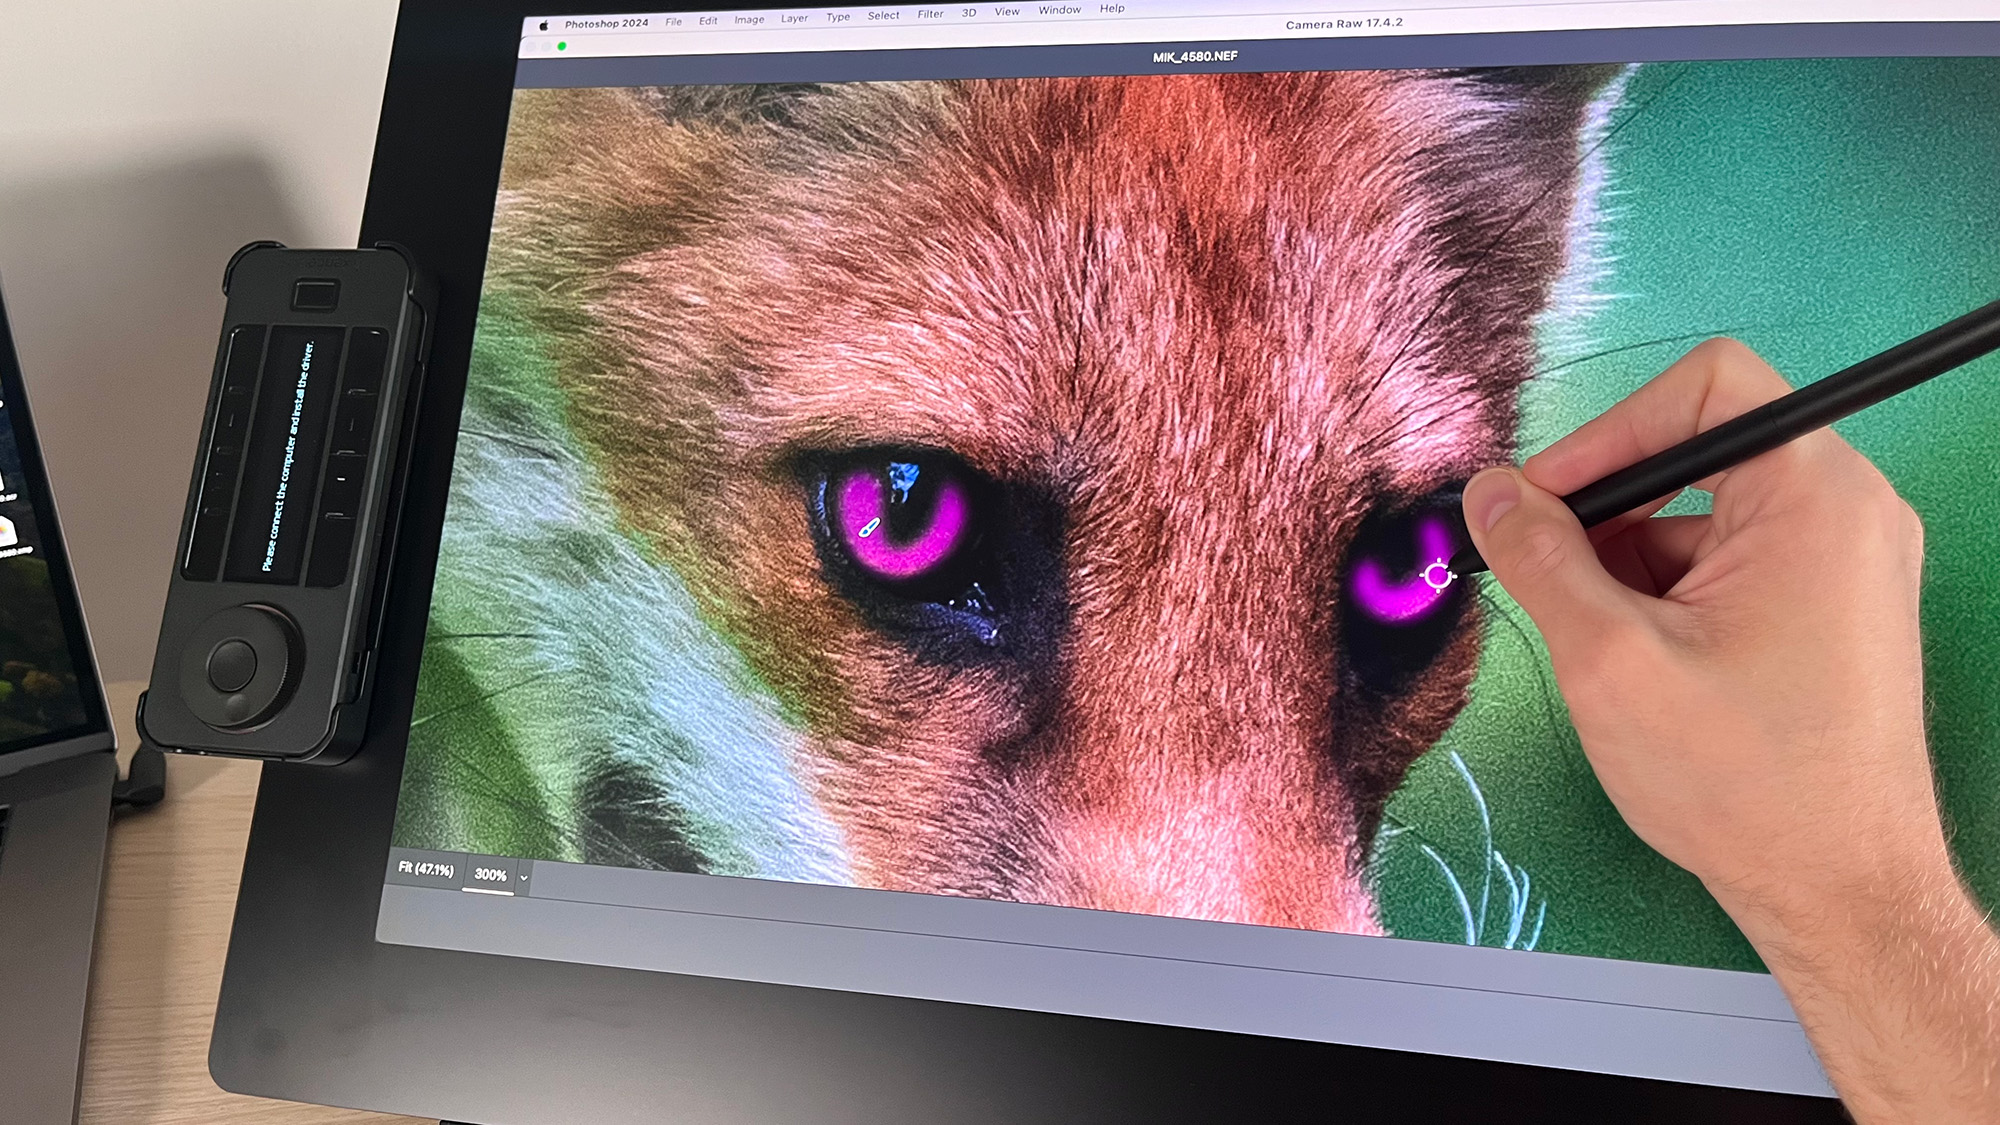
What I’ve actually found is that I like sketching with the thinner stylus and coloring with the thicker stylus. I also found myself switching pens during long sessions to help prevent my fingers from getting sore or cramping. Both pens are made from plastic, but they feel good in the hand and have a nice velvety grip.
Like the Quick Keys the buttons do feel on the cheaper side, but they’re functional. My preference is to disable stylus buttons anyway (no matter the brand), as I constantly find myself accidentally activating them.
Xencelabs Pen Display 24+: Performance
Setting up the Xencelabs Pen Display 24+ couldn’t be easier. You attach the power cable to a power outlet and your choice of cable between the pen display and your computer, and the tablet will fire up as a passive display, without a driver installed (it even connected to my iPad Pro).
This is very useful. A 24-inch pen display is a large presence on anyone’s desk, so instead of simply taking up space, when not in use, it can be used as a second monitor.
Xencelabs uses a single driver for all its tablets, so you only have to select the version for your operating system. I then connected the Quick Keys Wireless Dongle to my laptop and attached a USB-A to USB-C cable to the pen display and the Quick Keys remote to charge the peripheral. Once I had breezed through the setup wizard, I was ready to get started.
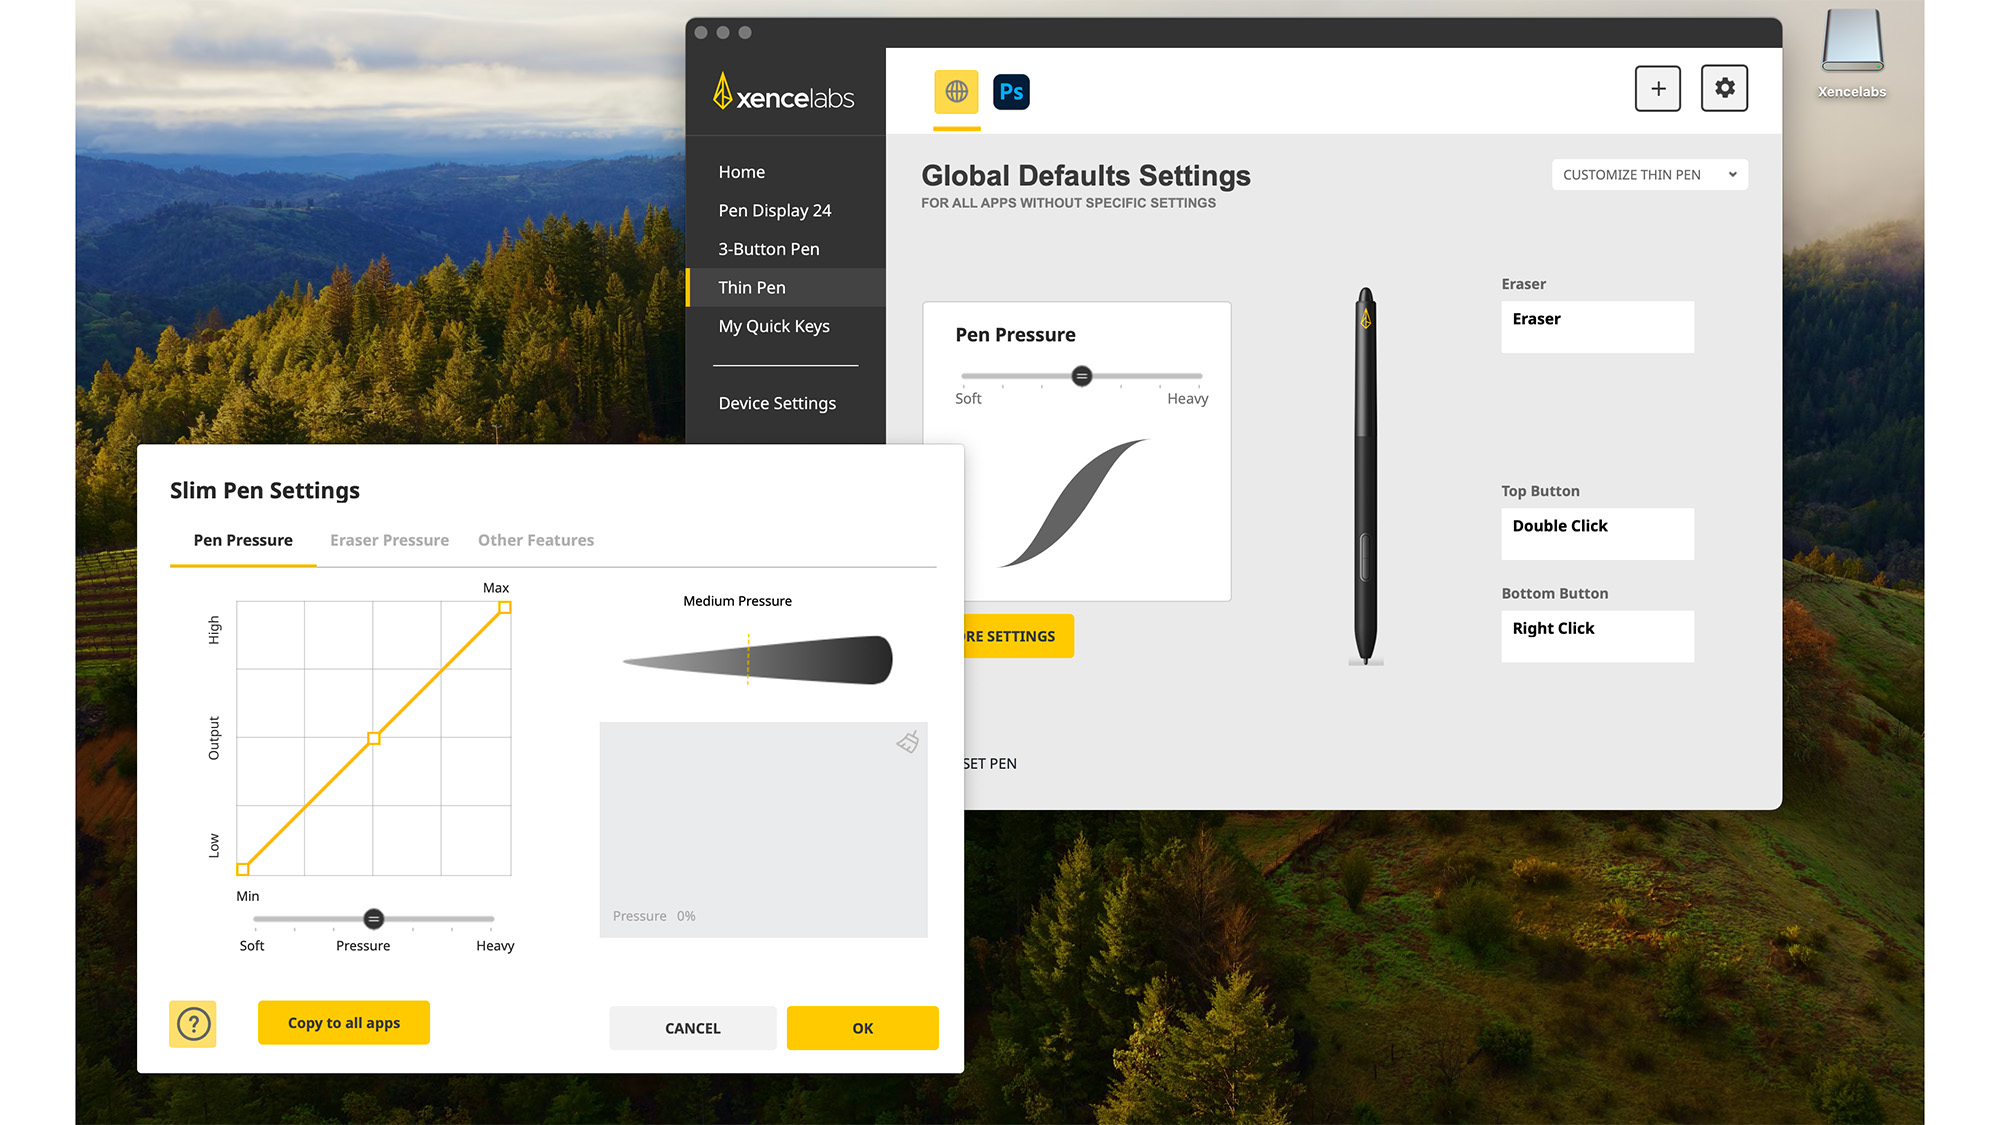
The Xencelabs setup software should be your first port of call. It acts as a command hub in which to customize the Quick Keys, styluses and pen display to your preferences. This includes selecting which color space you want if you’re not making use of the Calman Ready features.
And the colors are really good straight off the bat. By setting the Pen Display 24+ to sRGB and tweaking the brightness and contrast slightly, I was able to get it very close to my MacBook screen. I also performed an edit using the Pen Display 24+ entirely, and although the grading wasn’t exactly what I wanted, it was very close.
I think most photographers will get used to editing on this display very quickly, and thanks to the Virtual Tablet Mode (more on that later), it’s really no hassle moving your window across to your normal editing monitor to check that the grading is to your liking.
The biggest problem with the tablet’s Calman Ready status is that it’s technically Windows-only software with no dedicated macOS version. I say technically because you can get it to run via Apple BootCamp, or virtualization software such as Parallels, enabling you to run Windows on a Mac machine. But not only will you require a Windows license, this will only work if you’re using an Intel Mac.
At the time of writing, Calman is unable to run on machines powered by Apple’s silicon chips (M1 or later). This is unfortunate since a huge amount of creatives work on Mac and, indeed, the Pen Display 24+ works readily on Mac. The question is, does this really matter?
Well, for the vast majority of users, no. Calman is industry-standard calibration software and it doesn’t come cheap. Calman Studio is priced at $1,199 and Calman Ultimate, $2,995, and the Pen Display 24+ does boast very good color accuracy right off the bat.
In an ideal world, I would have preferred to have this tablet Calman Verified and not Ready, so it would boast Calman calibration fresh from the box. But Xencelabs is targeting high-end studio professionals here, and is currently the only pen display to do so, so I can certainly see the logic.
Although I haven’t tried it, you could opt for the older and cheaper Pen Display 24, which isn’t Calman Ready. However, at the time of writing, I can only find it around $100 cheaper, and although many of the core specs are the same, there are some differences here and there; it’s heavier for one, and covers fewer color spaces.
The drawing experience itself is everything that I’ve come to expect from a dedicated pen display, and the core experience is very similar to the Xencelabs Pen Display 16.
I’ve yet to try a pen display that provides a better drawing experience than an iPad Pro and Apple Pencil. The responsiveness, fluidity, and accuracy out of the box are still pretty much unrivalled. But that’s not to say that the Pen Display 24+ provides an inadequate drawing experience. Far from it.
Lines are smooth with minimal jitter, and the pressure sensitivity is great. I did experience a little lag, but nothing too disruptive, and I couldn’t say how much of this was down to my MacBook playing catch-up. I had to calibrate the styluses, fiddle around with a few settings, and bump the smoothness up on Photoshop a little bit to feel comfortable, but make no mistake, this is a top-tier, professional drawing experience – far beyond what most photographers will ever need.
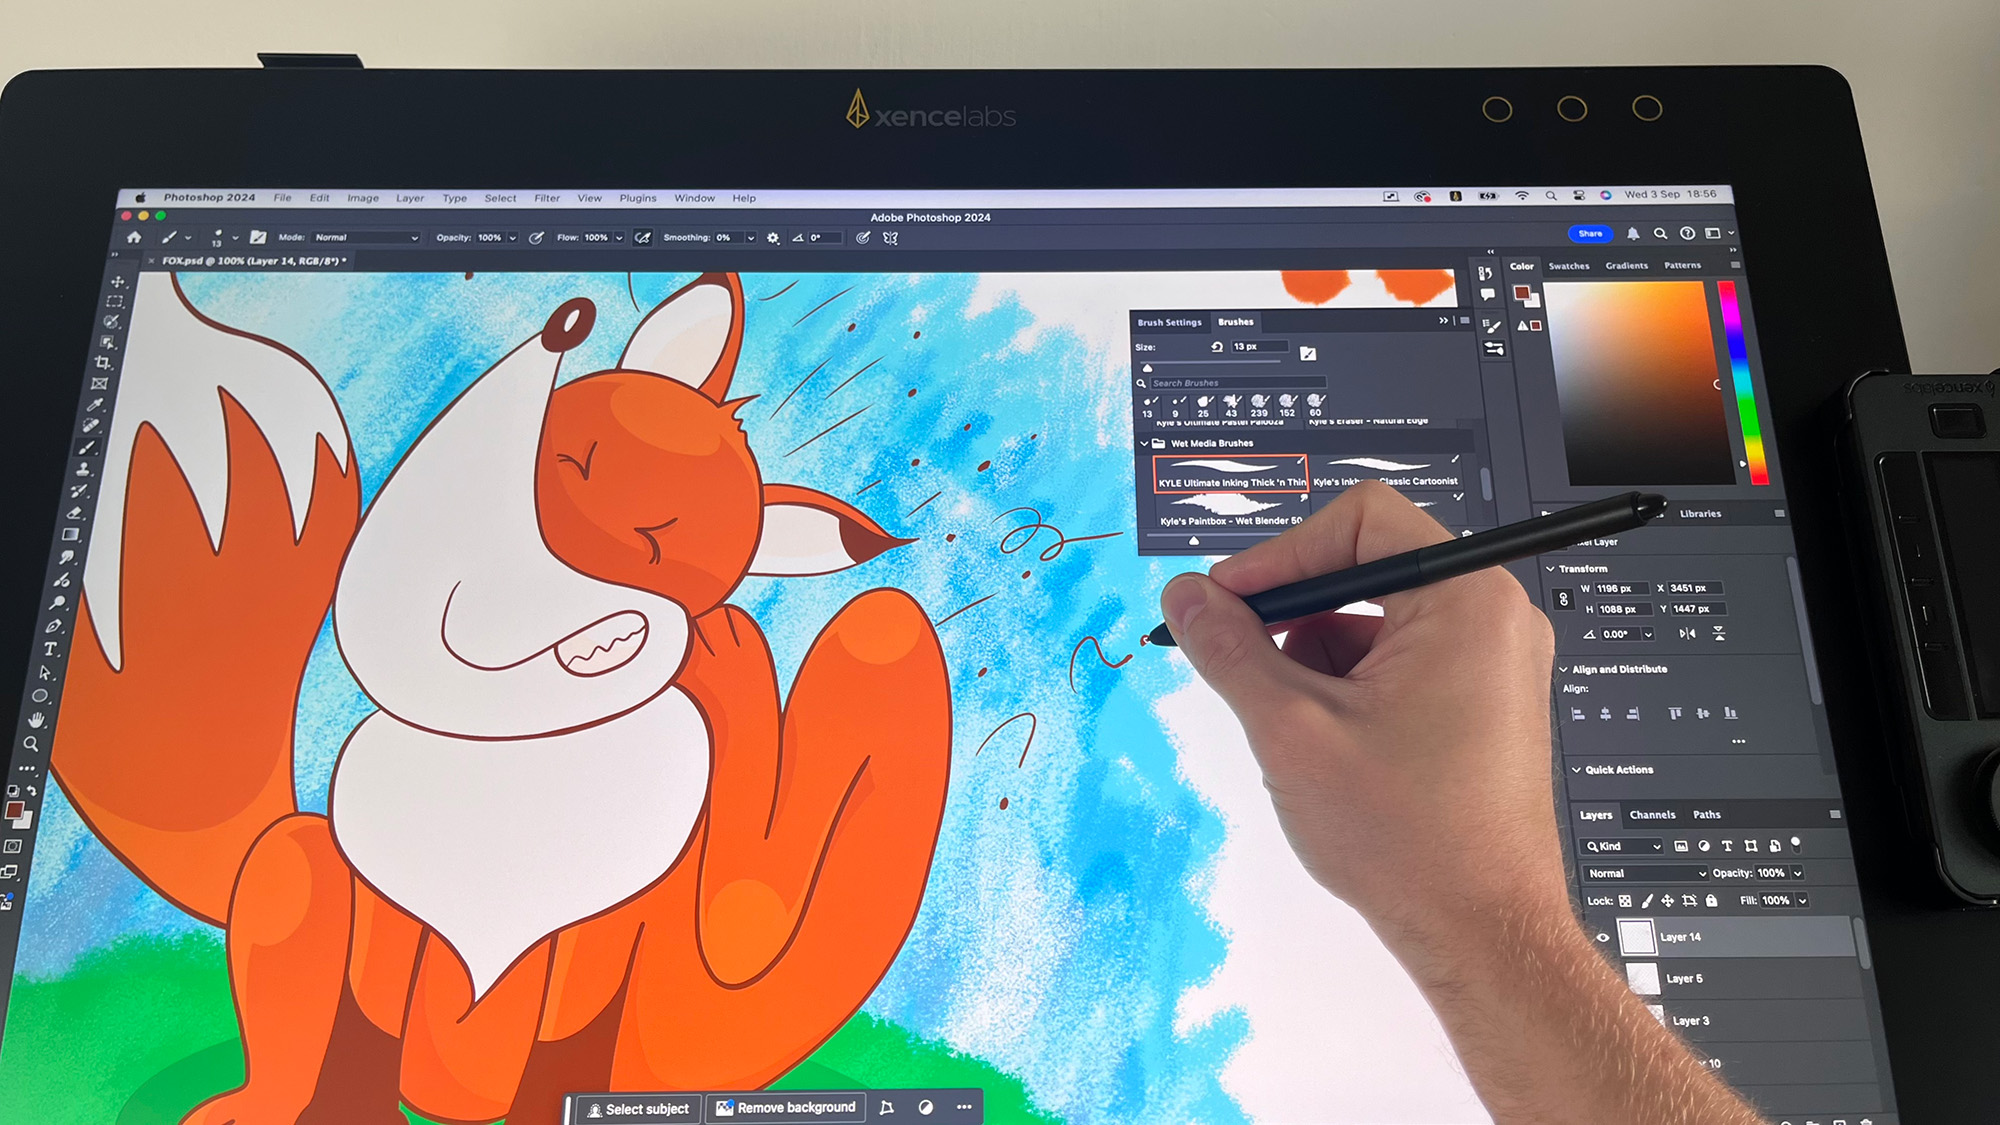
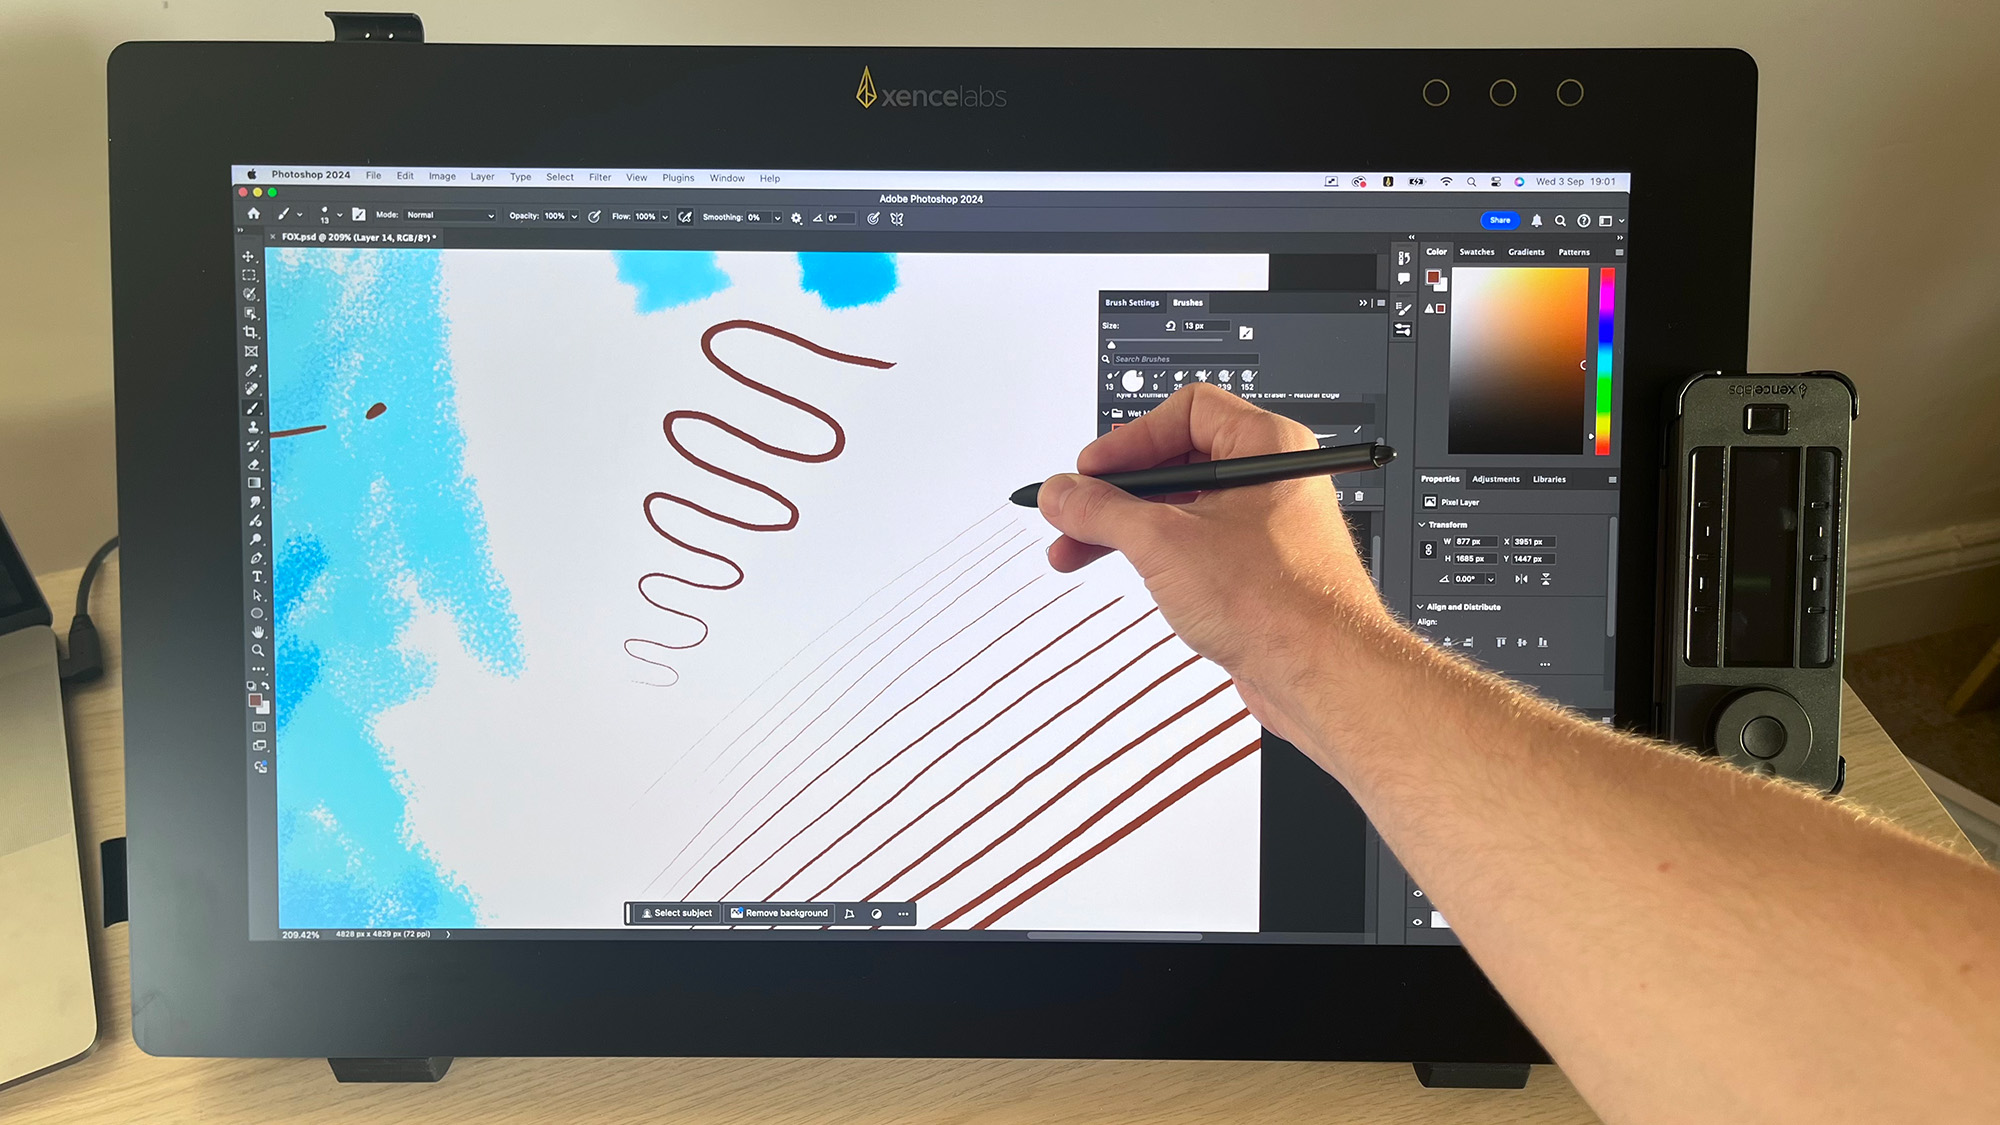
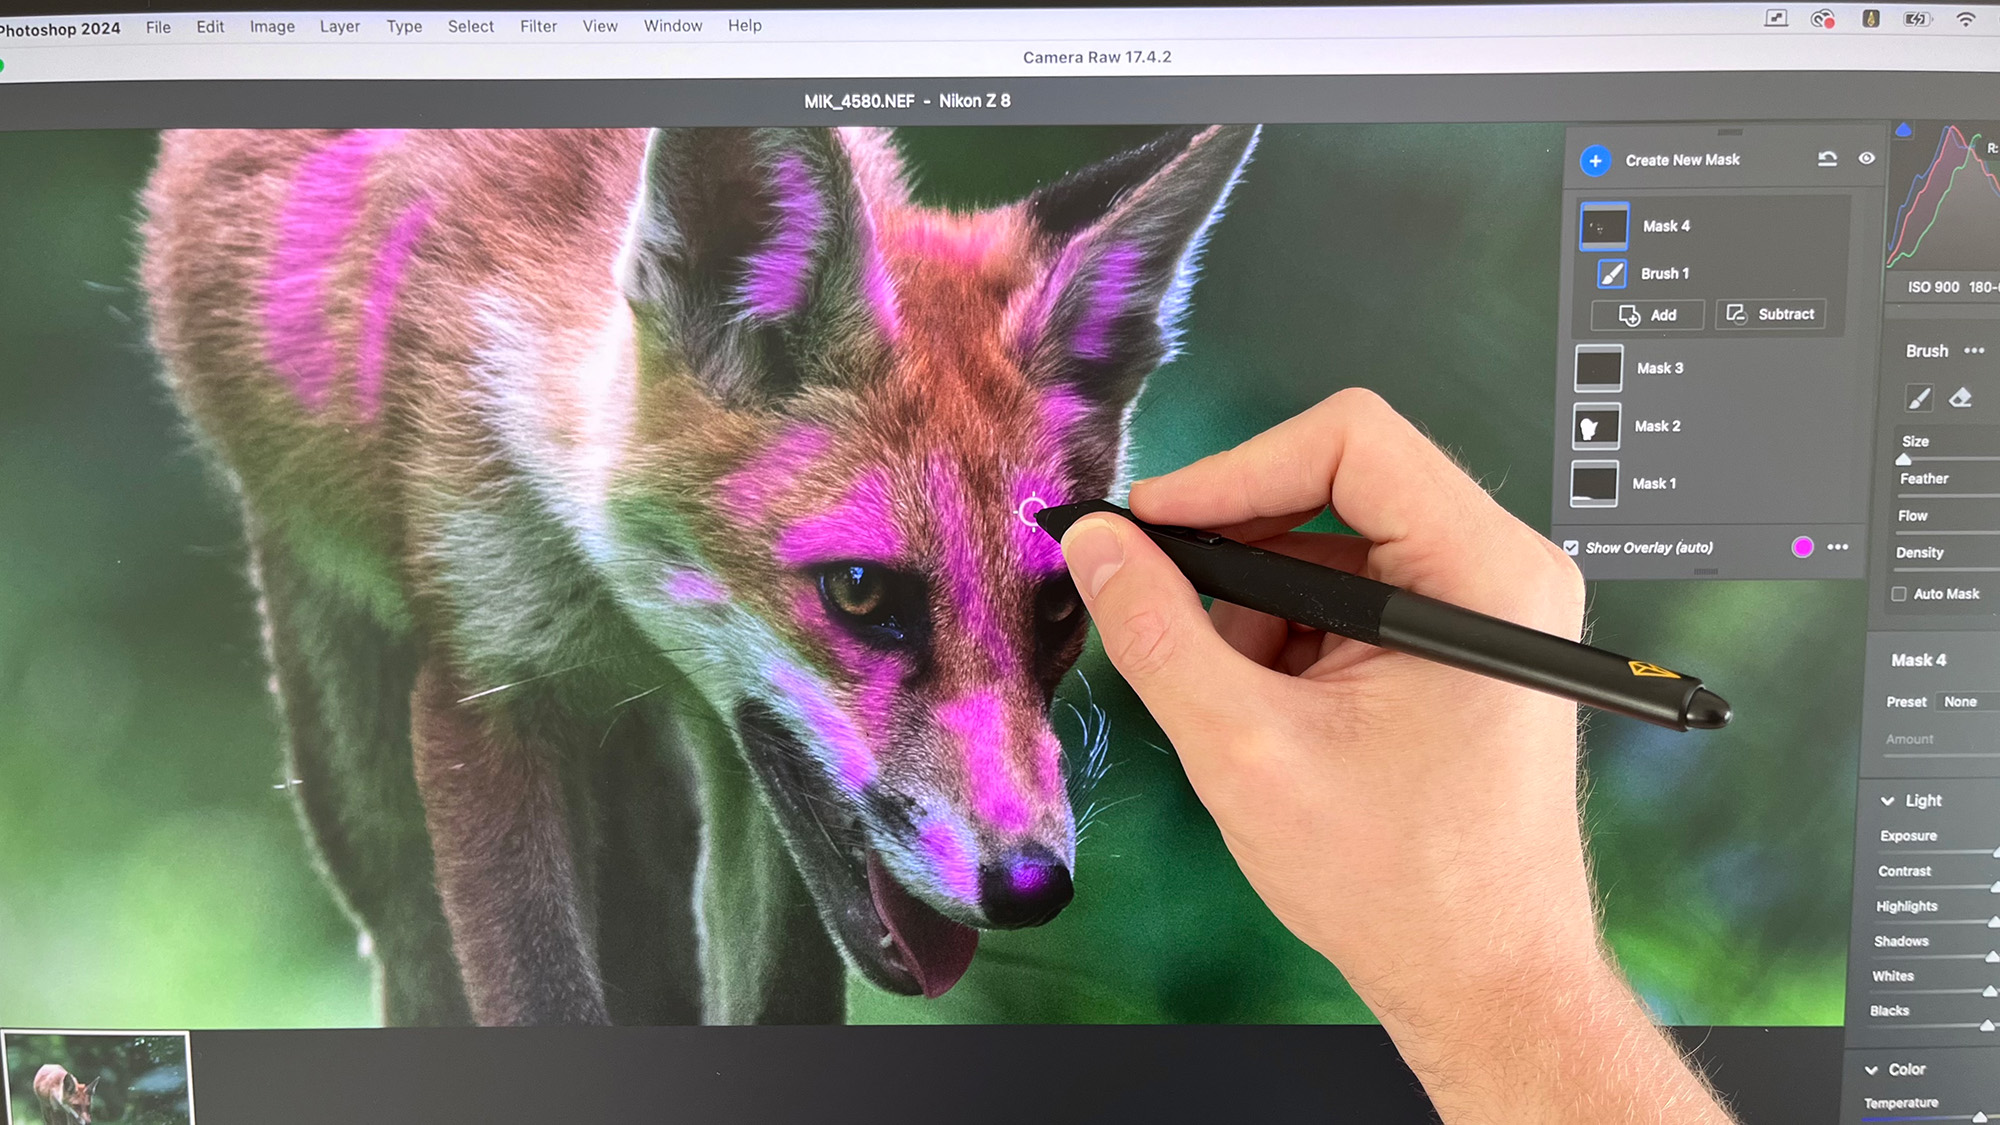

If your workflow includes a lot of dodging and burning, masking and skin retouching, nothing compares to a good pen display. And while the Apple Pencil might provide a more fluid experience, a dedicated device like the Xencelabs Pen Display 24+ comes with a plethora of advantages.
First and foremost, you’re not limited to iPadOS software and can benefit from using the best photo editing software that will run on your machine.
Secondly, working on a big 24-inch screen is far superior to working on a 12.9-inch tablet. And that’s before you include the quality-of-life additions that a premium tablet like the Pen Display 24+ brings with it. The ability to work with two styluses, which you can set up differently and effortlessly swap between. And the endless customization options via the Quick Keys remote, styluses, and pen display itself.
Like the Xencelabs Pen Display 16, the active area of the 24+ is not touch sensitive. This is a polarizing feature, and as somebody who’s used my fair share of pen displays, there are pros and cons with both touch-sensitive and non-touch-sensitive displays. The former is fantastic for moving around the canvas and zooming in and out instantly, but can prove problematic when your palm accidentally registers on the screen.
You can, of course, use a drawing glove, but these are typically very thin and can still end up inadvertently registering. The latter, on the other hand, is an absolute joy when you’re drawing, because you know you’re in full control, but zooming in and out and moving around the canvas, even with a device like Quick Keys, simply isn’t as intuitive as using a touch screen.
Given time, I think most artists can adapt to both, and with a big 24-inch screen that you’ll be resting your forearm on, I think Xencelabs has made the right choice here.
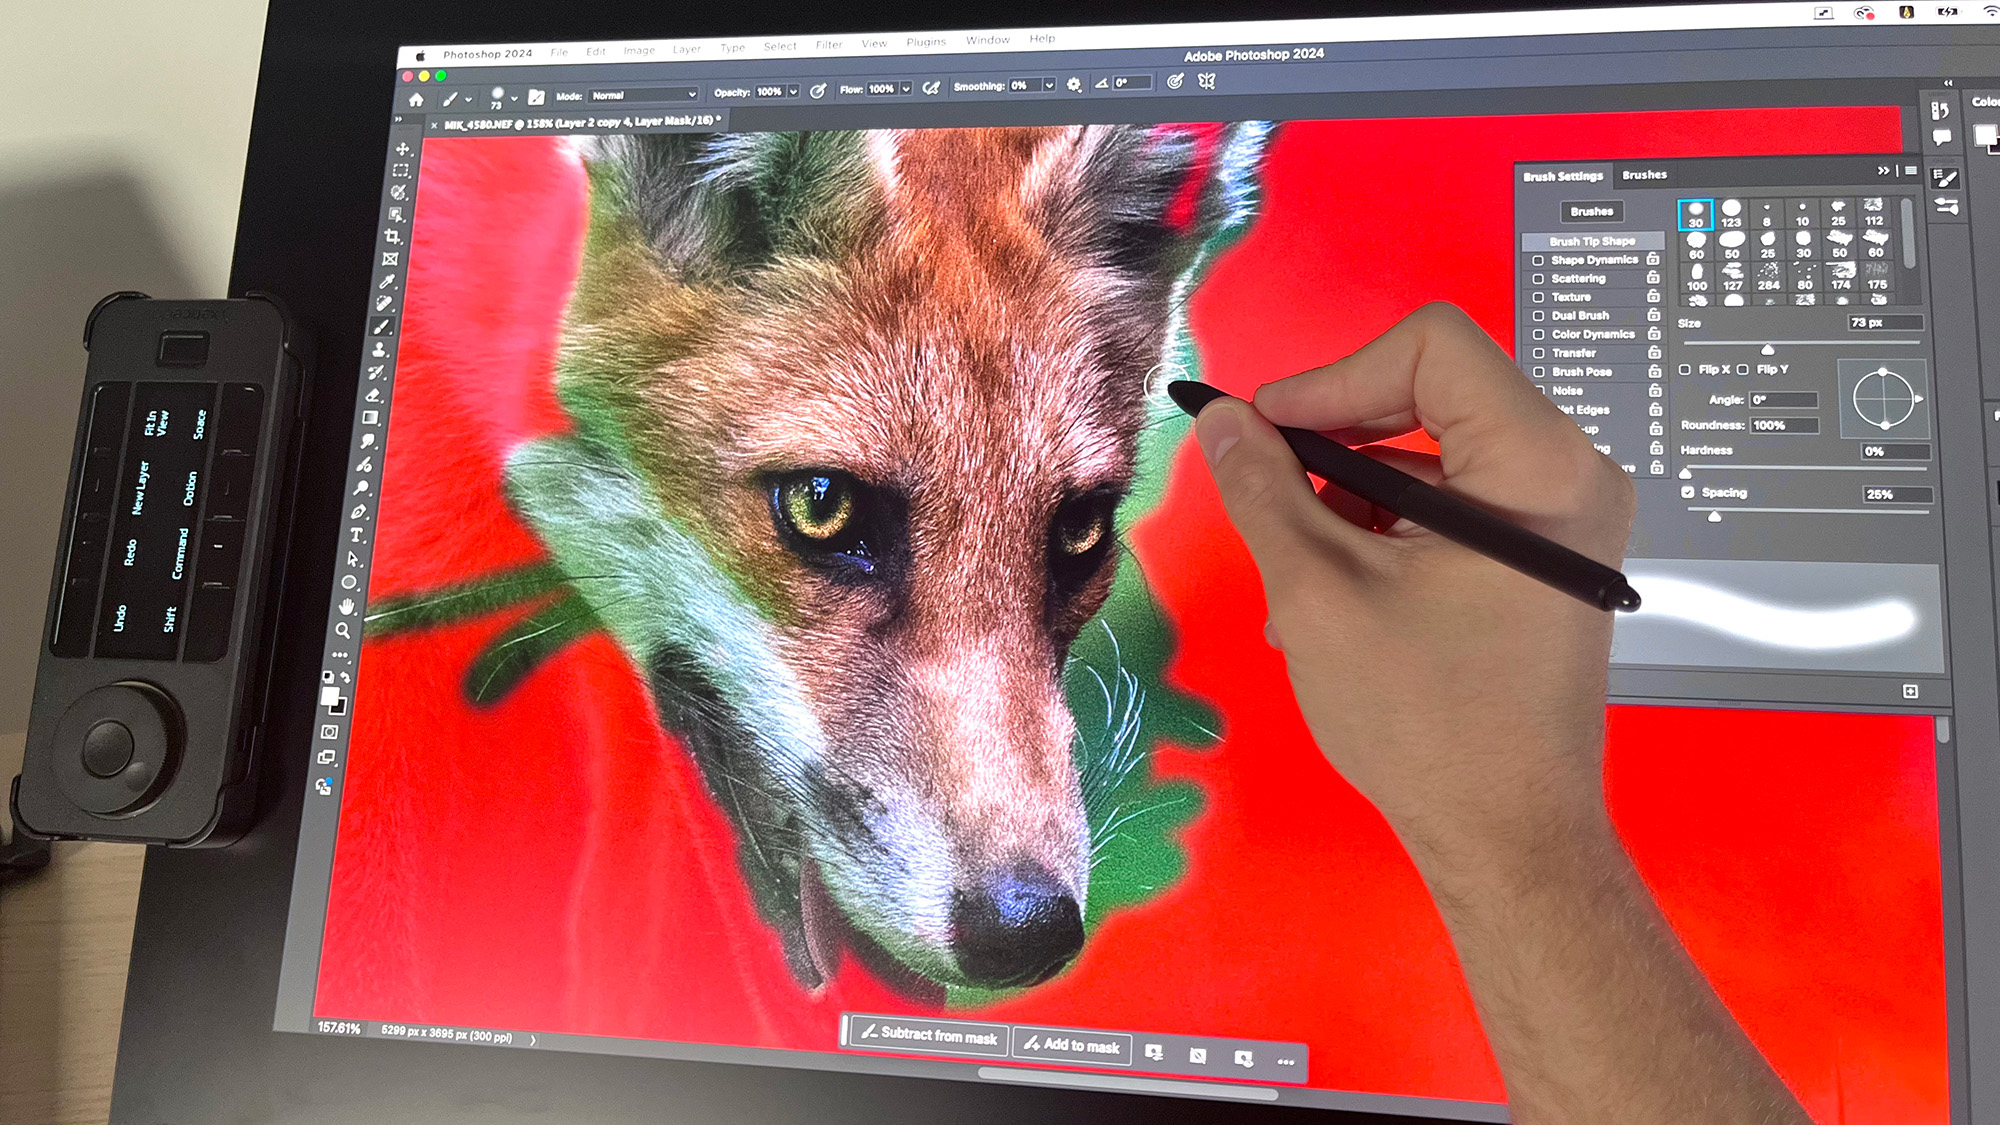
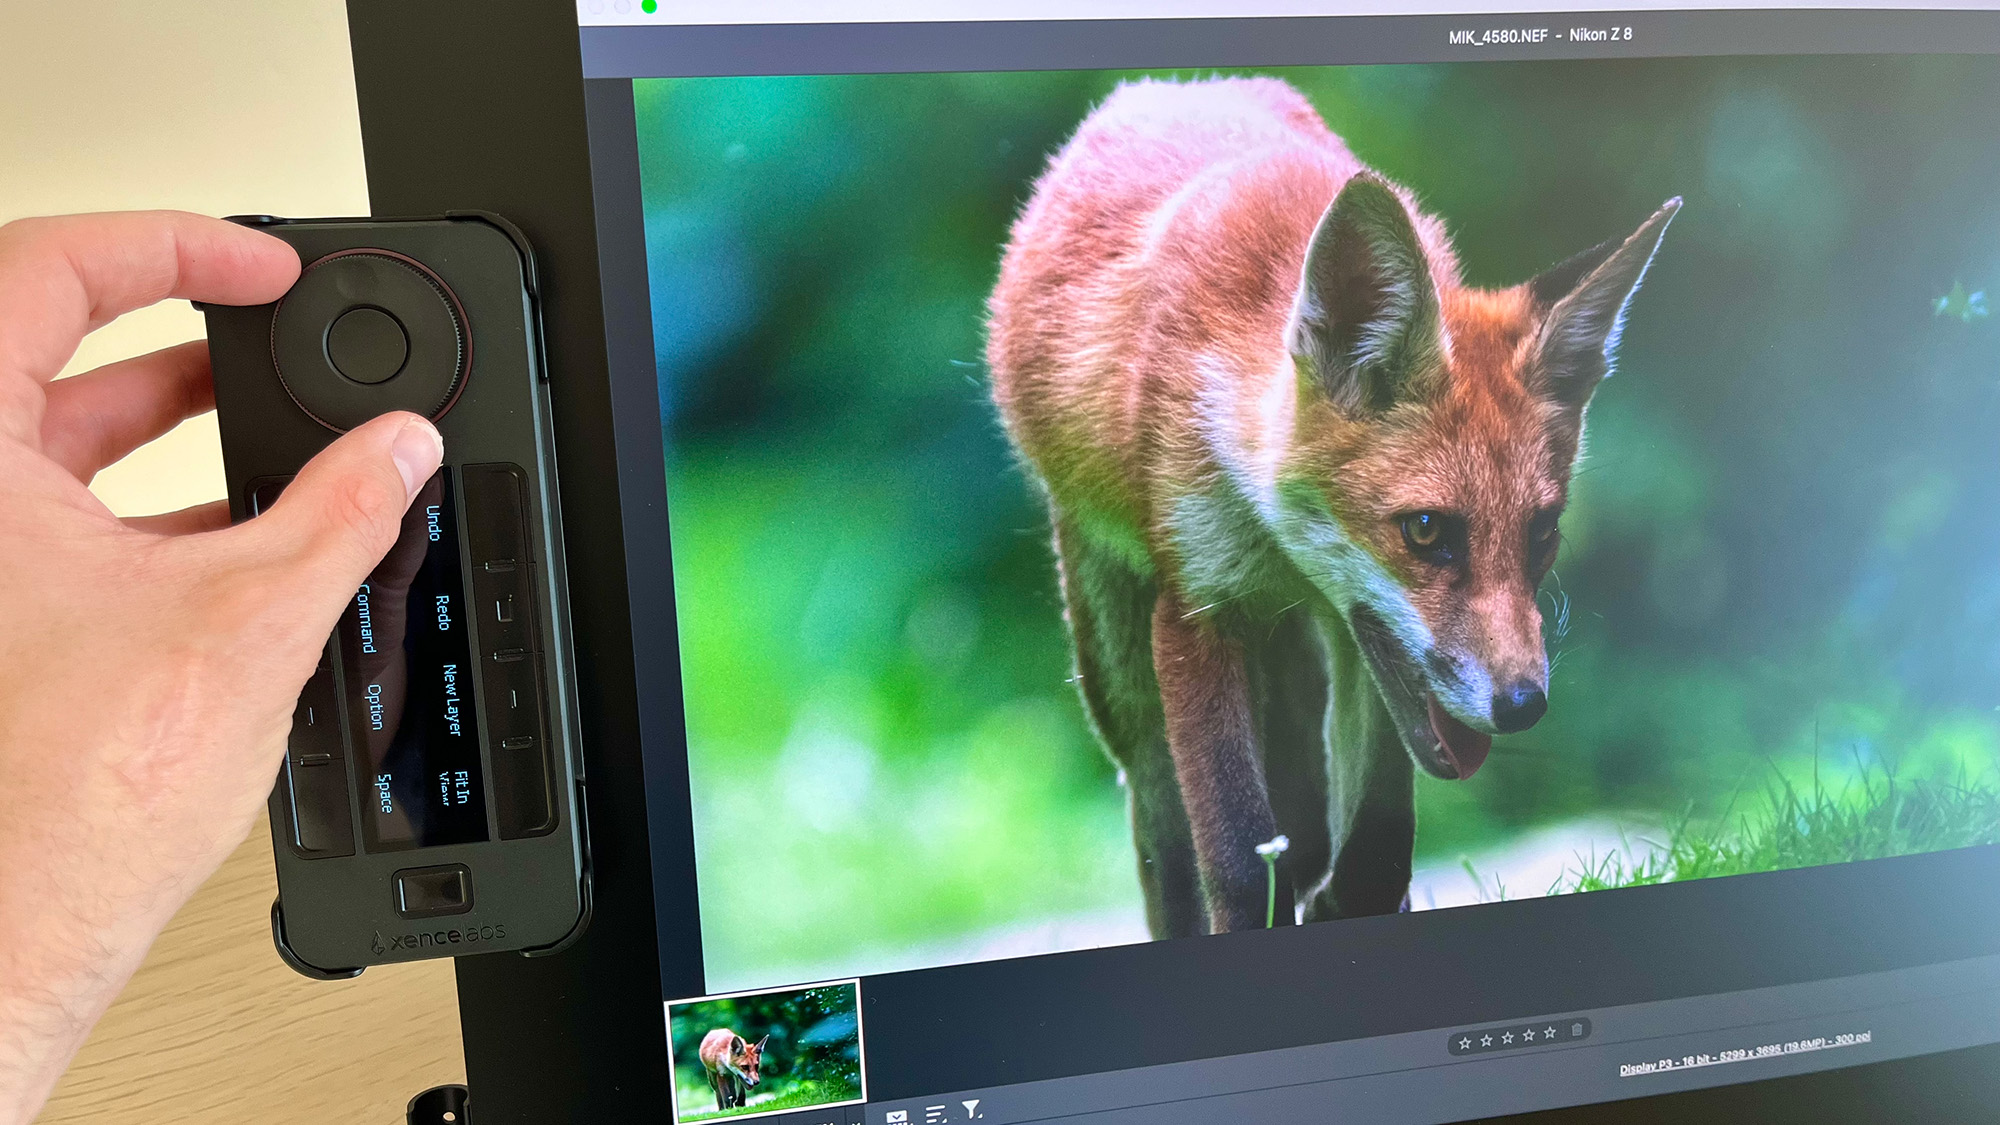
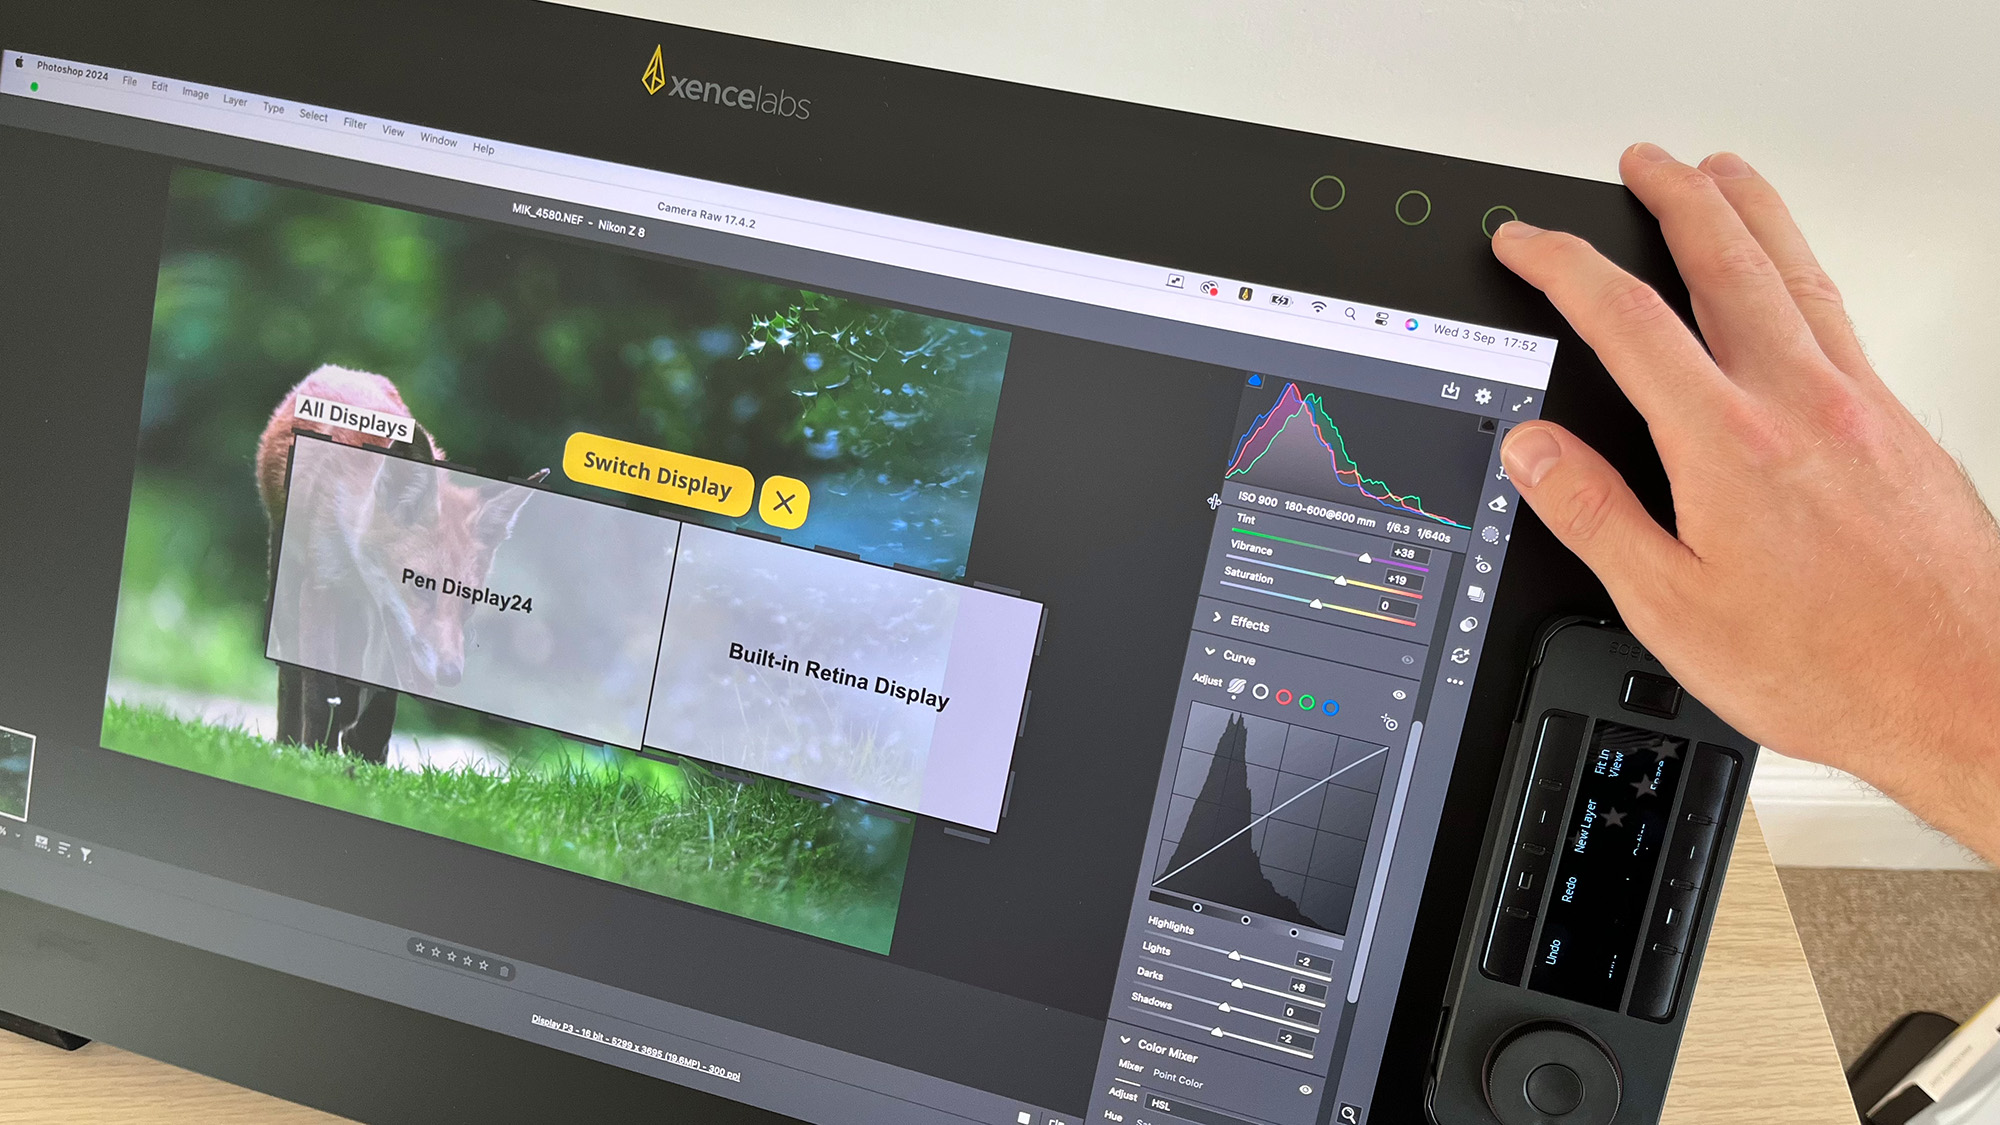
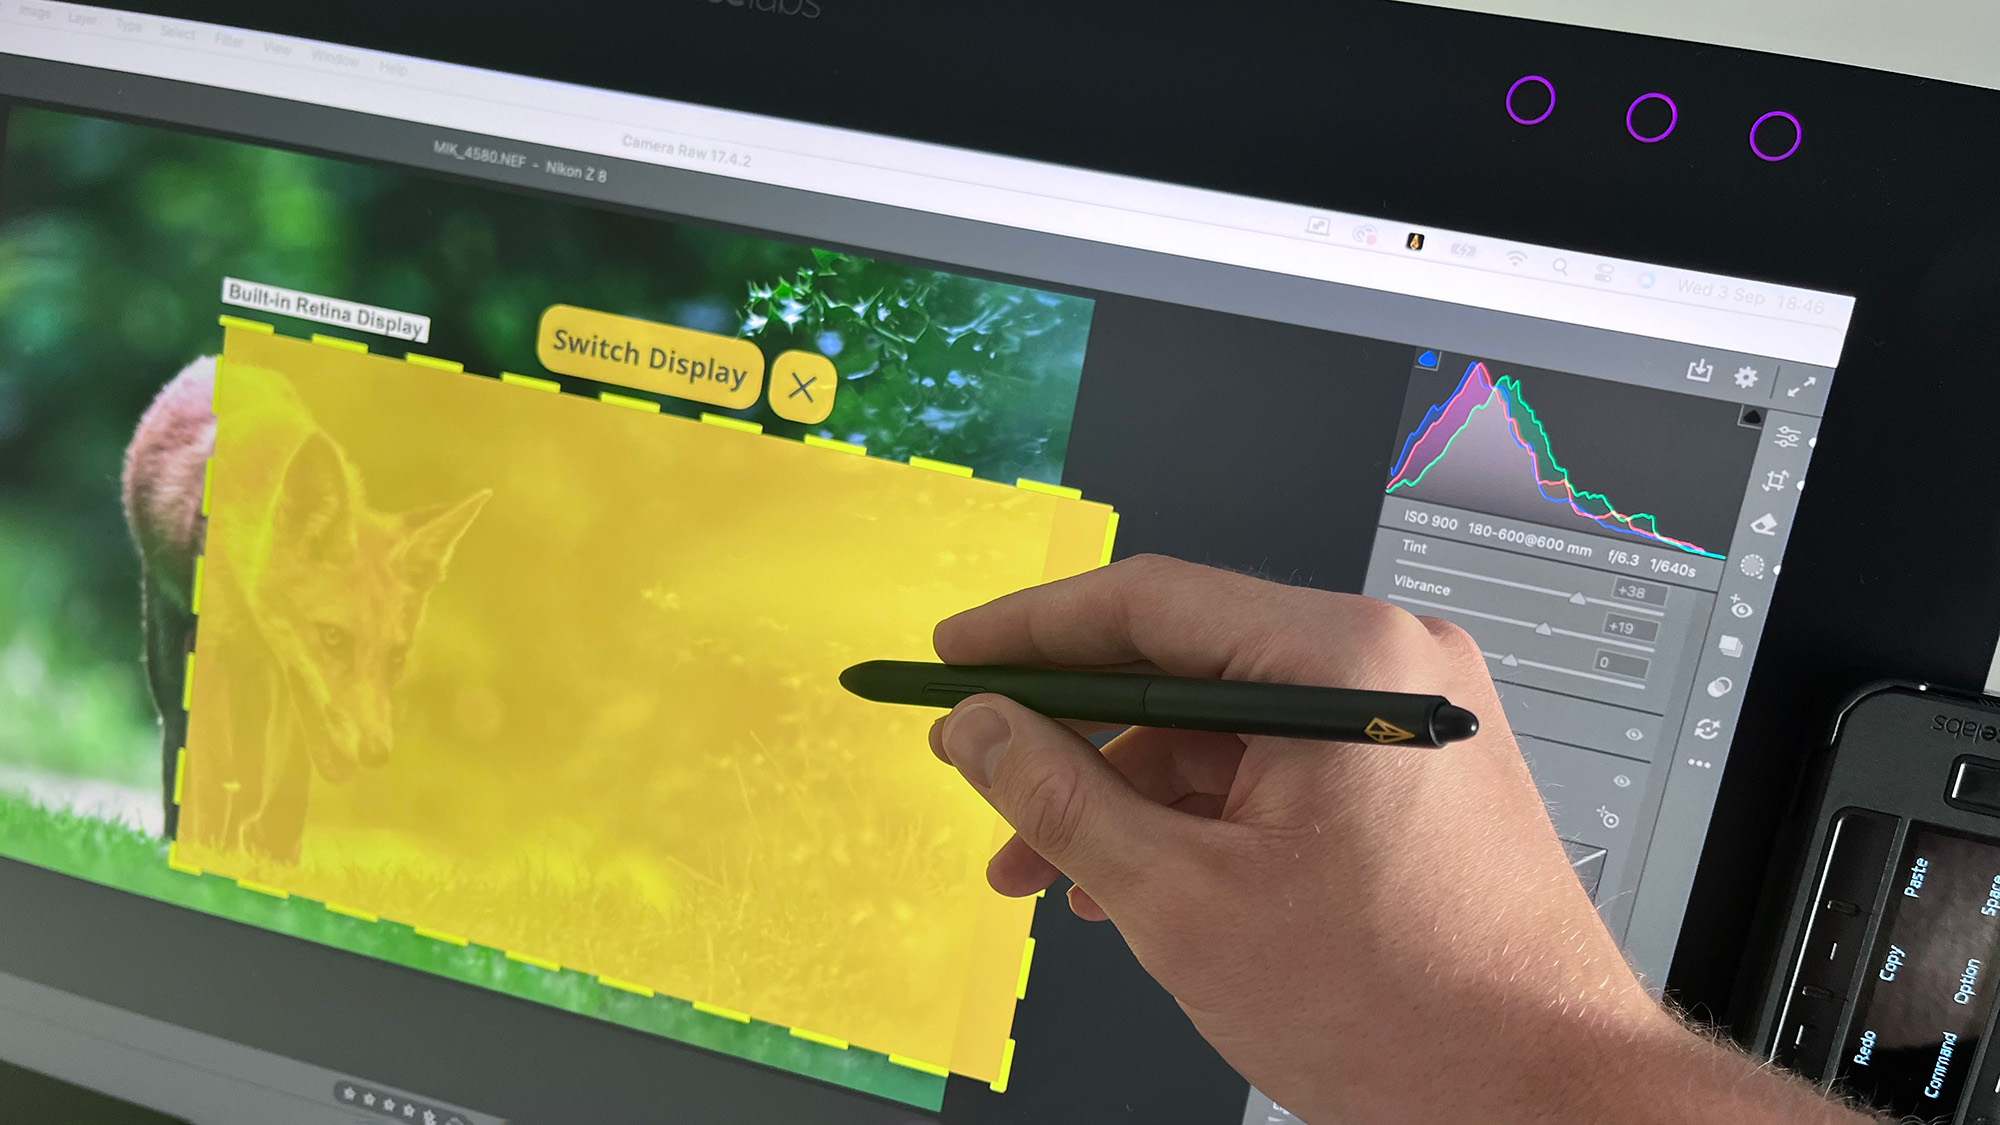
A neat feature on the Xencelabs Pen Display 24+ is the three LED circles in the top-right corner of the tablet. These are touch-activated buttons and can be programmed to perform various tasks.
By default, both the left and middle buttons bring up the Xencelabs Launch Settings window. The former goes straight to the ‘Home’ tab and the middle button brings up the 3-Button Pen settings. The far-right button enables Virtual Tablet Mode.
This clever feature enables you to work across multiple monitors without having to put down the stylus and move over to a trackpad or mouse. It does this by presenting your displays as a grid. I had a simple two-display setup with my MacBook Pro and the Pen Display 24+.
These were represented by two labelled rectangles in the center of the screen. If I hovered my stylus over the rectangle labelled ‘Built-in Retina Display’, it would take over the cursor on my MacBook, effectively operating like a traditional drawing tablet where you operate the stylus over a separate surface to the screen you’re working on.
The clever bit is that when I used my stylus to hold and drag a pop-up window on my MacBook display, as I dragged my stylus over into the Pen Display 24+ rectangle, the window passed over into it. And for more precise work, where you’re not dragging anything across, there’s a ‘Switch Display’ button that enlarges the rectangle so it’s easier to work on.
Personally, I think this is an ingenious solution to a frustrating problem.
Xencelabs Pen Display 24+: Verdict
Xencelabs has done it again. The Xencelabs Pen Display 24+ doesn’t feel like a product created by a company that only launched its first release in 2021 and certainly deserves a place alongside the very best premium pen displays the world has to offer. It’s not cheap, but it’s competitively priced.
From the raft of included accessories to the plethora of customization options, to the drawing experience itself, almost everything works exactly as you’d expect it to. Even if you’re a touch-sensitive stalwart, I think it’s possible to adapt to the Pen Display 24+ and if not, I would love to see a touch-sensitive Xencelabs tablet in the future, because this really is a great ecosystem.
My only real criticism is that macOS users aren’t getting this tablet’s full functionality. Xencelabs currently cannot support HP Anyware for Mac users and until Portrait Displays can release Apple silicon-compatible Calman software, the Calman Ready status isn’t accessible for a large chunk of creatives. Then again, your average working creative probably won’t lose any sleep over this.
The Calman Ready status puts the Pen Display 24+ in a higher echelon as far as color accuracy goes, but this will only be necessary for a select few studio professionals. For everyone else, the vast color accuracy options out of the box should suffice.
Features ★★★★★ | To call this pen display feature-rich would be an understatement, and yet nothing feels overengineered or unnecessary. |
Design ★★★★☆ | Windows-only features and input cables impeding the Tilt Stand aside, this is a supremely well-designed pen display |
Performance ★★★★★ | Easy to set up and responsive, providing your computer is up to scratch you’ll enjoy a smooth experience. |
Value ★★★★☆ | The Xencelabs Pen Display 24+ is competitively priced, but for a premium pen display it sits roughly where I’d expect |
✅ Buy this if...
- You want a premium pen display that’s optimized for professionals.
- You want a pen display with the color accuracy to edit photography or video.
🚫 Don't buy this if...
- You want something portable that you can take to and from the office or coffee shops.
- You want a standalone tablet that doesn’t require a computer to work.
Alternatives
Xencelabs Pen Display 16 Like the Xencelabs ecosystem but want a more portable professional pen display? Take a look at the Xencelabs Pen Display 16. It’s not Calman Ready, but it still boasts very good color accuracy, making it suitable for photographers and illustrators alike.
One by Wacom The One by Wacom is my top recommendation for anyone who’s interested in adding a drawing tablet to their workflow but has never tried one before. It’s tiny, so you can slip it in your rucksack, and it’s cheap enough that if you decide using a stylus just isn’t for you or you quickly find yourself hankering for an upgrade, your bank account won’t have lost out.

Mike studied photography at college, honing his Adobe Photoshop skills and learning to work in the studio and darkroom. After a few years writing for various publications, he headed to the ‘Big Smoke’ to work on Wex Photo Video’s award-winning content team, before transitioning back to print as Technique Editor (later Deputy Editor) on N-Photo: The Nikon Magazine.
With bylines in Digital Camera, PhotoPlus: The Canon Magazine, Practical Photography, Digital Photographer, iMore, and TechRadar, he’s a fountain of photography and consumer tech knowledge, making him a top tutor for techniques on cameras, lenses, tripods, filters, and more. His expertise extends to everything from portraits and landscapes to abstracts and architecture to wildlife and, yes, fast things going around race tracks...
You must confirm your public display name before commenting
Please logout and then login again, you will then be prompted to enter your display name.
