
These Lightroom tutorials and tips will help you learn Lightroom basics and show you how Lightroom tools and adjustments can be applied to real-world subjects. Lightroom expert Sean McCormack walks you through each process with step by step instructions and a video showing how these adjustments are made.
This series originally ran in Digital Camera magazine and we're republishing it here for everyone stuck in lockdown and looking for a new and useful photography project.
They're based around Lightroom Classic but most should also work with little modification in Lightroom CC or even Lightroom mobile. Lightroom has come a long way since this series was first started, but while you may see a few differences in the interface and tools, these techniques will work as well today as when they were first published.
• See also: Why I dumped Lightroom CC and went back to Lightroom Classic
Just scroll or swipe through the list of projects below and tap on any one of them to view the full tutorial. And if you don't yet have Lightroom, or you want to know how to get it, you can click on the links below to get the Adobe Photography Plan trial or choose the subscription plan you want.
• Read more: Best Adobe Photography Plans explained
Lightroom tutorials
Lightroom tutorial #1: How to recreate print toning effects in Lightroom

Find out why Lightroom is called a Digital Darkroom: how to make sepia prints, duotones and more. This tutorial uses Lightroom's Split Toning panel, recently upgraded into a more sophisticated color grading tool in the latest versions of Lightroom.

Lightroom tutorial #2: How to make shots look sharper with Lightroom
Use Lightroom to discover three straightforward ways to make your favourite photos look sharper and much more detailed. Lightroom's Detail panel is explained in depth, and did you know you can apply 'negative' sharpness, and sharpen specific areas of your image only?
Lightroom tutorial #3: Noise reduction sliders in Lightroom and what they do
Discover how Lightroom can help you reduce the artifacts that camera image sensors sometimes add to your shots. We explain the difference between color noise and luminance noise, and how to make your high-ISO shots look smooth as silk.
Lightroom tutorial #4: How to correct lens distortion with Lightroom

Even the very best lenses have some aberrations and distortions, but Lightroom can easily help you remove the effects with its built-in lens correction profiles. We explain how they work and what you need to know to make even an average lens look good.
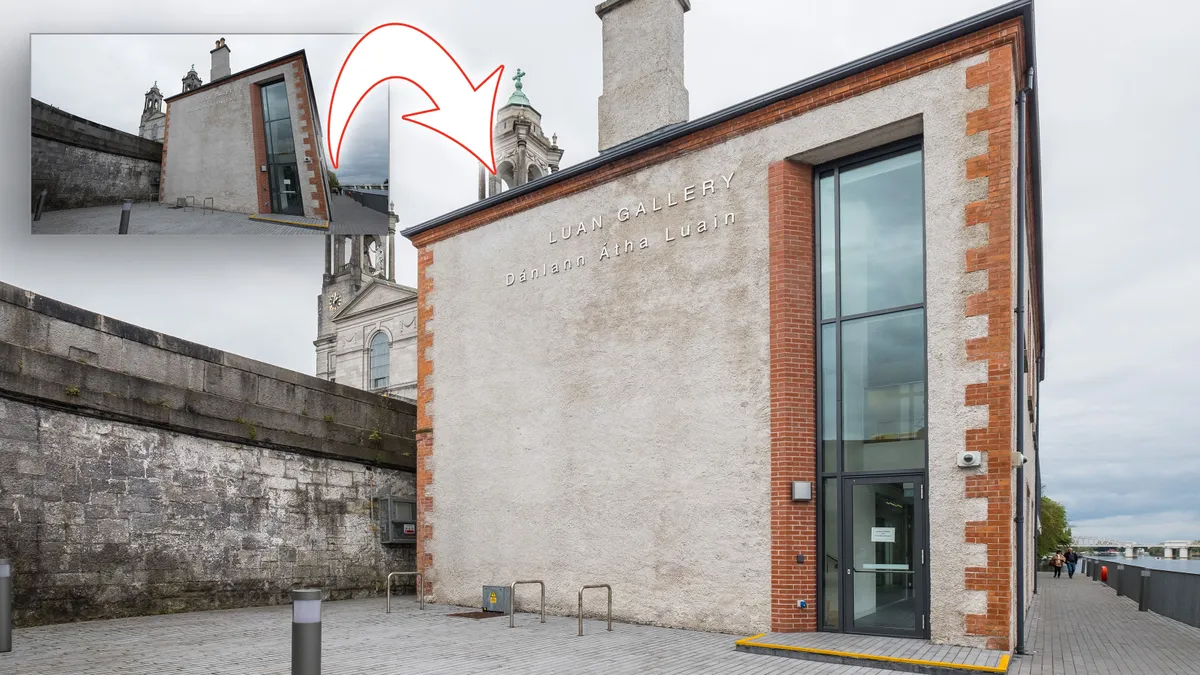
Lightroom tutorial #5: How to correct perspective distortion with Lightroom

Lens corrections and perspective correction are two different things. Even after you've applied a lens profile, your shots may still have converging verticals or other perspective distortion. Discover the smart way to fix those tricky perspective issues that can ruin your beautiful architectural shots.
Lightroom tutorial #6: Draw viewers' attention with a vignette effect

Focus attention where it’s most needed by taking charge of tonal values using a simple Post-Crop Vignetting adjustment. It's amazing how such a simple modification can make such a big difference to a picture's impact.
Lightroom tutorial #7: Fix skies with ease in Lightroom with a Graduated Filter

When there’s too much difference in brightness between the sky and the ground in your shot, Lightroom has the solution. The graduated filter tool can tone down bright skies and make your landscapes really pop, especially in conjunction with Lightrooom's Dehaze tool.
Lightroom tutorial #8: Enhance a landscape photo in Lightroom
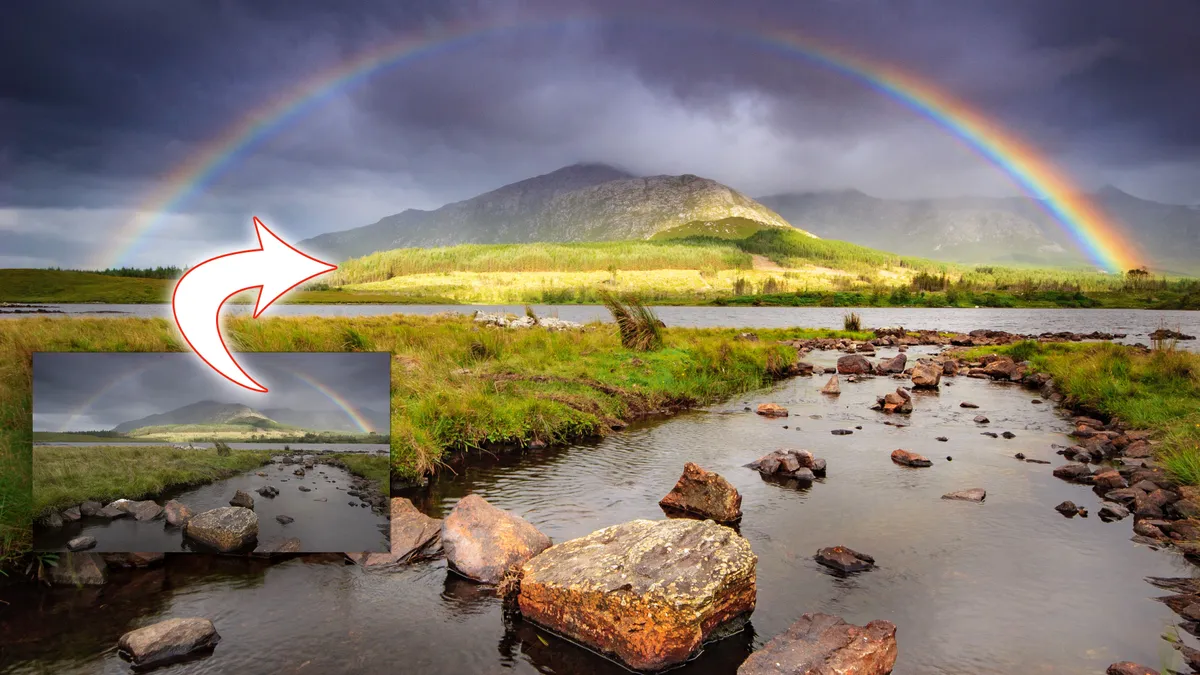
How to make the most of your landscape photos by using a series of different tools available in Lightroom. It often takes a series of subtle adjustments to make an image really stand out, and the beauty of a non-destructive image-editing program like Lightroom is that you can apply and juggle them in combination – you're not stuck with a linear editing process.
Lightroom tutorial #9: Add color and fill light to a photo

Find out how the Radial Filter enables you to make precise local changes, rather than affecting the whole image at once. It's a deceptively simple-looking tool with hidden depths that allow you to completely 're-light' a scene.
Lightroom tutorial #10: The smart way to retouch a portrait shot
You can enhance portraits to perfection with these straightforward Lightroom techniques. There are countless 'magic' portrait enhancement programs on the market now, but there's no substitute for careful and considered manual retouching.
Lightroom tutorial #11: Enhance your Milky Way photos the easy way
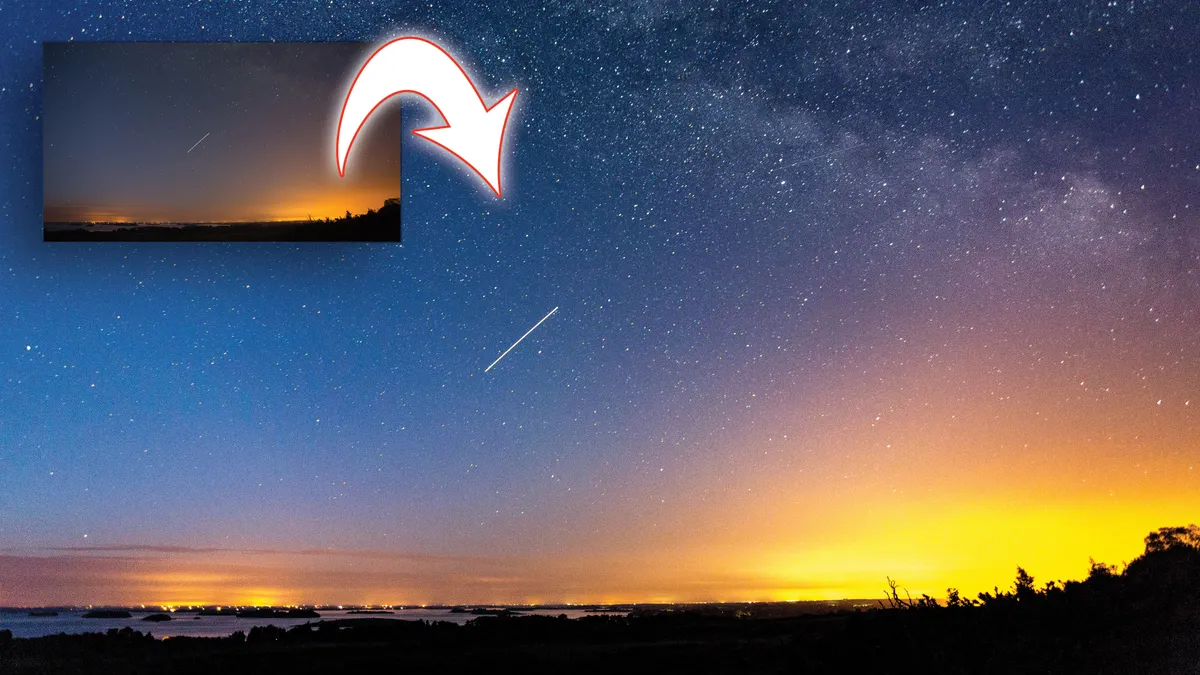
Astrophotography has become a hugely popular genre of photography. Here's how you can combine a few simple techniques in Lightroom to bring out the stellar detail in your Milky Way photos.
Lightroom tutorial #12: Remove unsightly spots from your photographs

Anyone who uses an interchangeable lens camera will run into sensor spots at some point. These are marks from sensor dust that appear as dark, diffuse dots in your images. But with Lightroom's Spot Removal tool, it’s simple to make it look like they were never there.
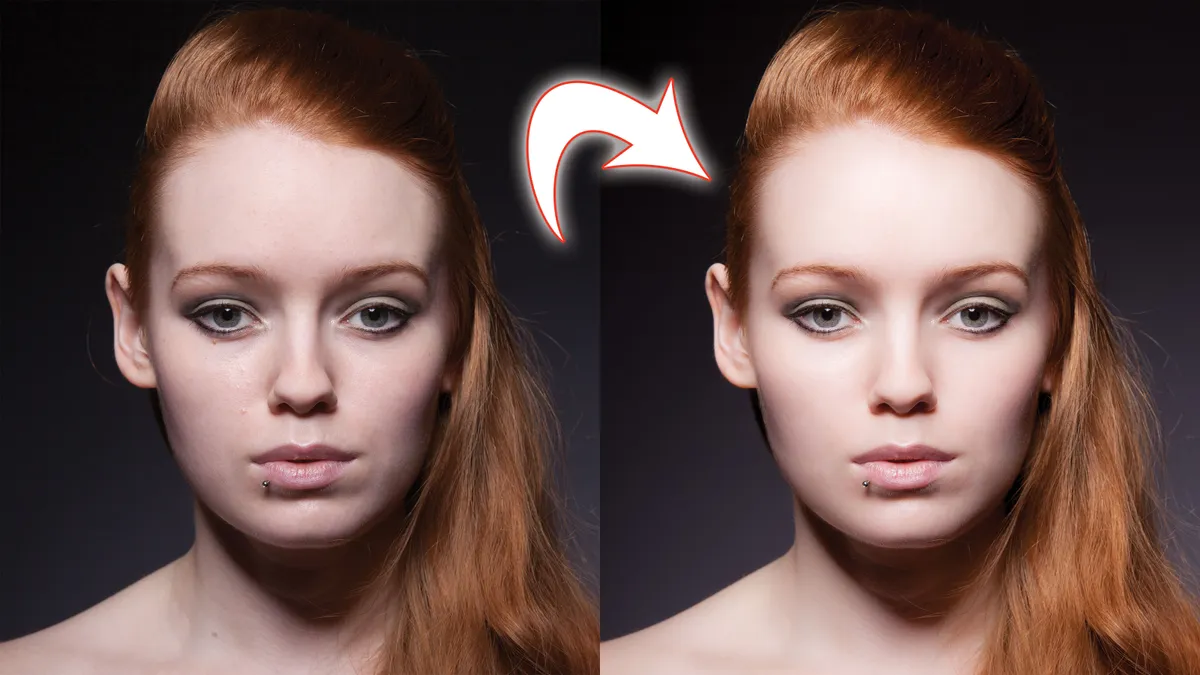
Lightroom tutorial #13: How to edit and retouch a low-key portrait
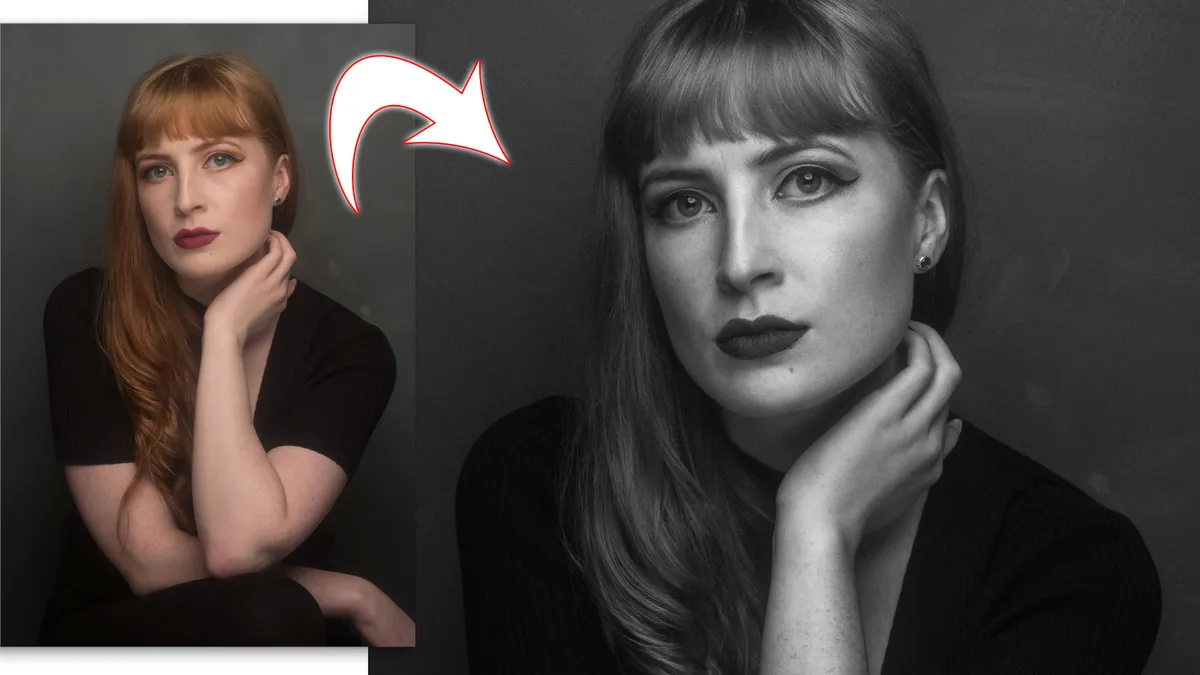
Become a dedicated follower of fashion, and learn how to retouch low-key images using the handy tools in Lightroom. Low key portraits emphasis the darker tones in the image for a more sombre, reflective look.
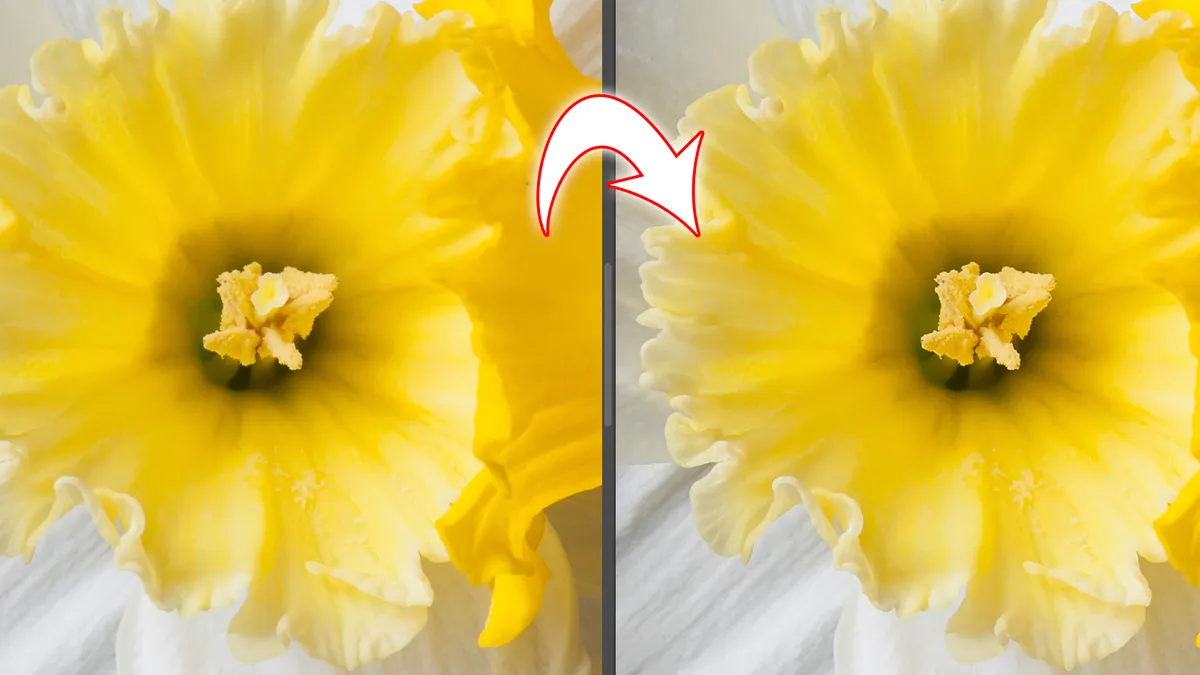
Lightroom tutorial #14: How to simulate a tilt-shift lens effect in Lightroom

Simulating tilt-shift effects for toy town landscapes is all the rage – but did you know you can use the effect in portraits too? So here's a really clever technique for a selective blur effect in Lightroom that uses its little known 'negative' sharpness feature.
Lightroom tutorial #15: How to create a vintage-looking portrait in Lightroom
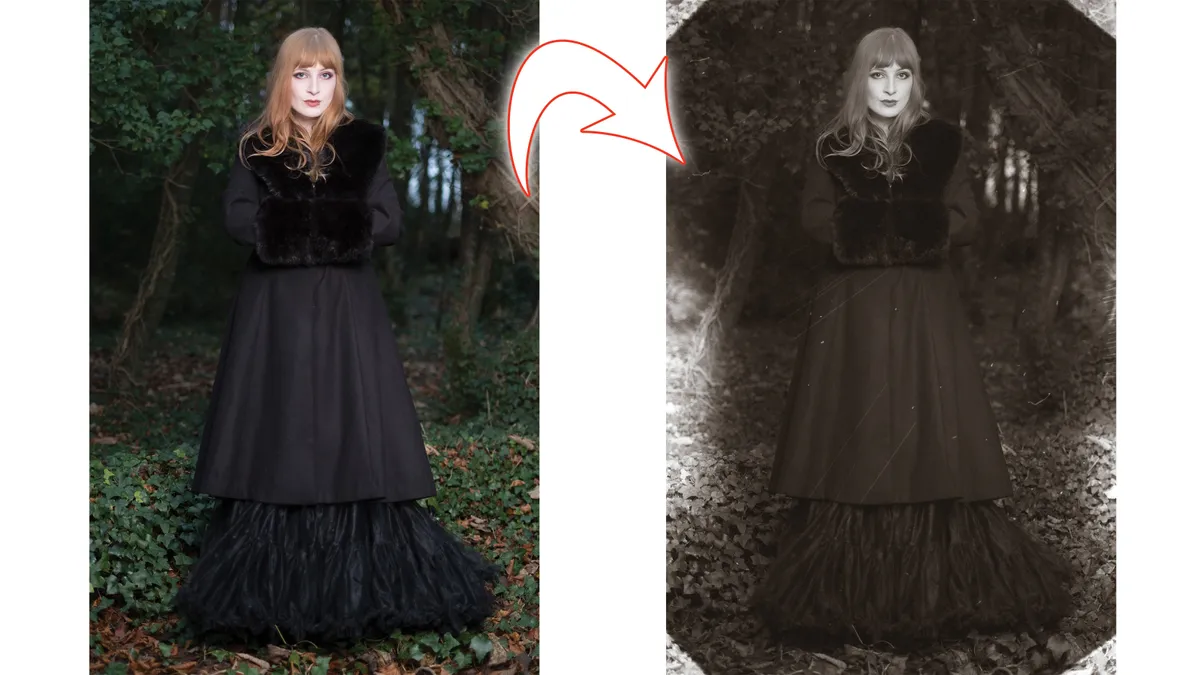
Discover how to successfully emulate an old-time portrait using a modern-day toolset. Lightroom has all the tools you need to create a vintage 'analog' look, using a black and white conversion, split toning, vignette and fade effects and even highly realistic film 'grain'.
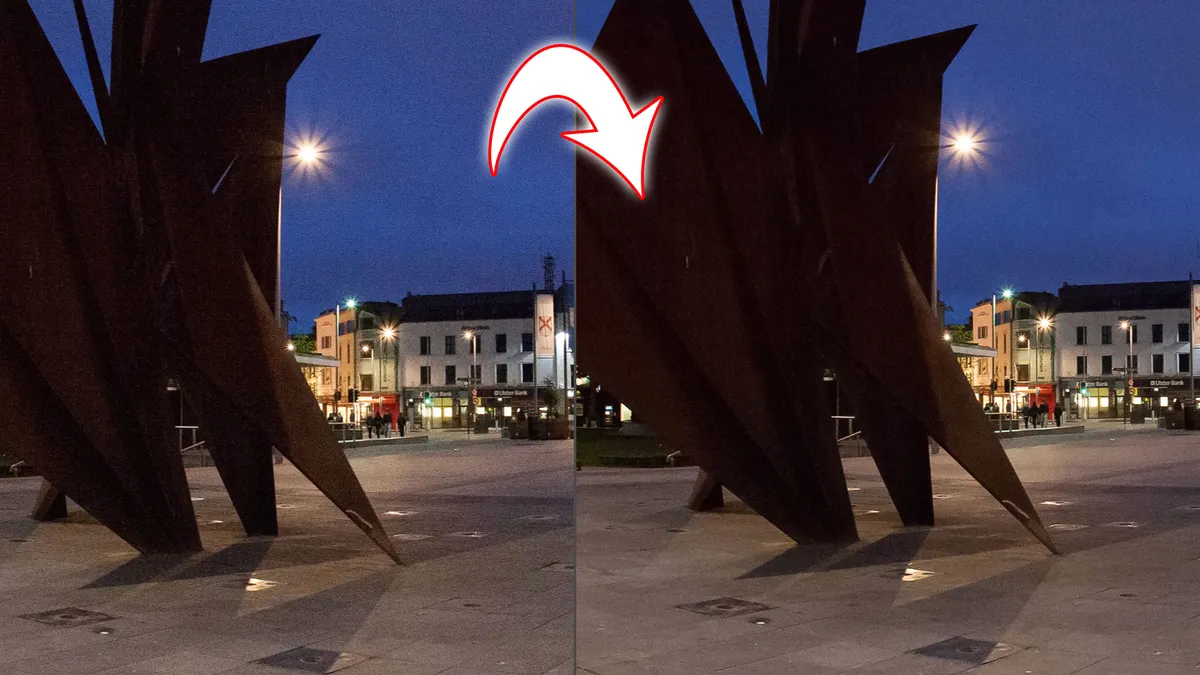
Lightroom tutorial #16: Enhance a night-time photograph with Lightroom
These handy Lightroom tips and tricks will really make your night-time landscape shots pop. Scenes taken at night can sometimes look a little flat on the computer, so here are some techniques to restore the brilliance of a night time scene as you originally perceived it.
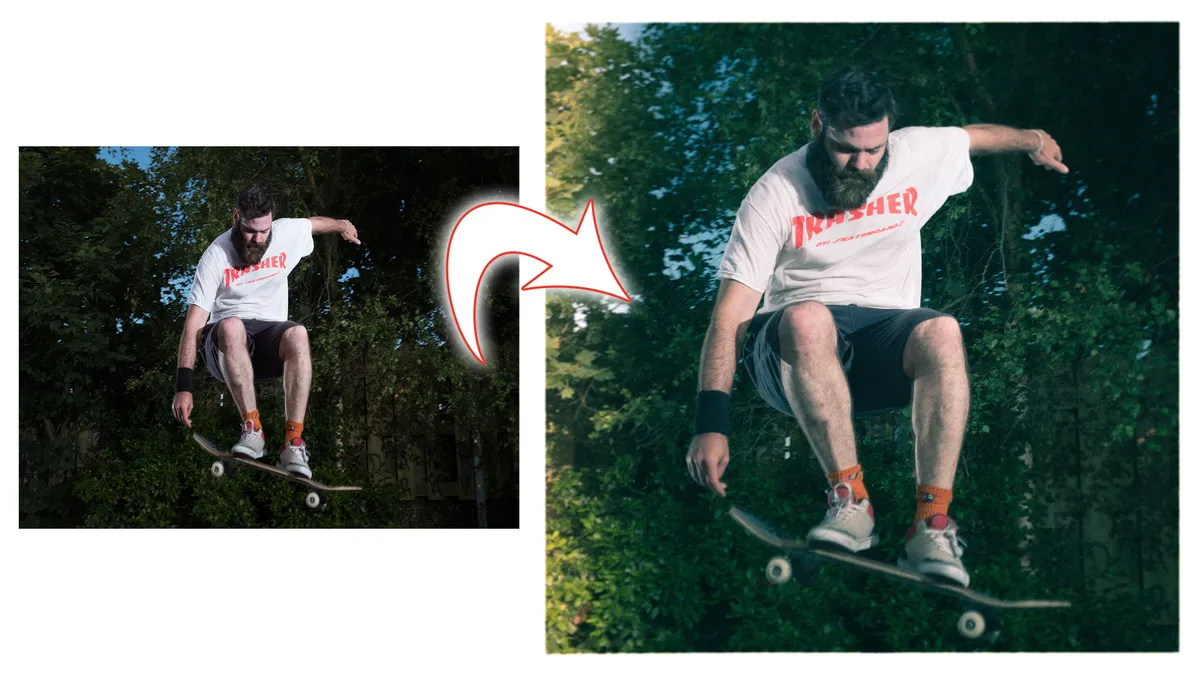
Lightroom tutorial #17: Create a dramatic male portrait in Lightroom
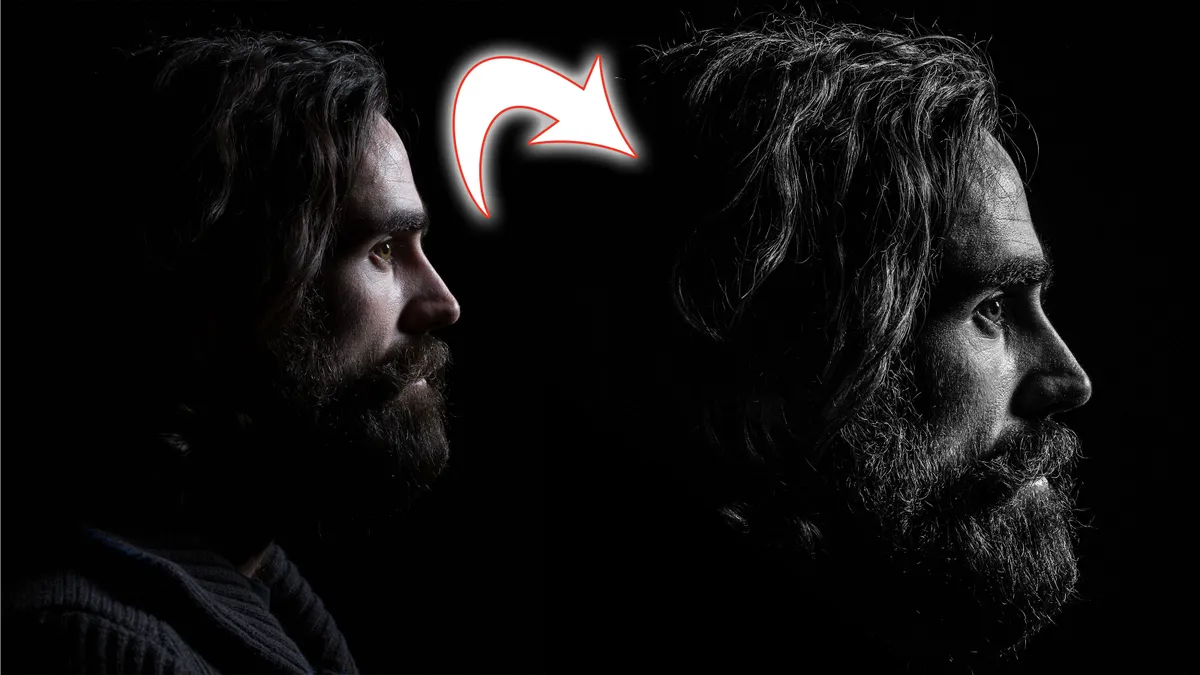
Sometimes less is more, and you can often make a portrait look more dramatic through what you take away, not what you add! Lightroom’s editing tools can help you add character and drama to your male portraits, and you can apply these techniques to your own shots.
Lightroom tutorial #18: Get the hand-colored look in Lightroom
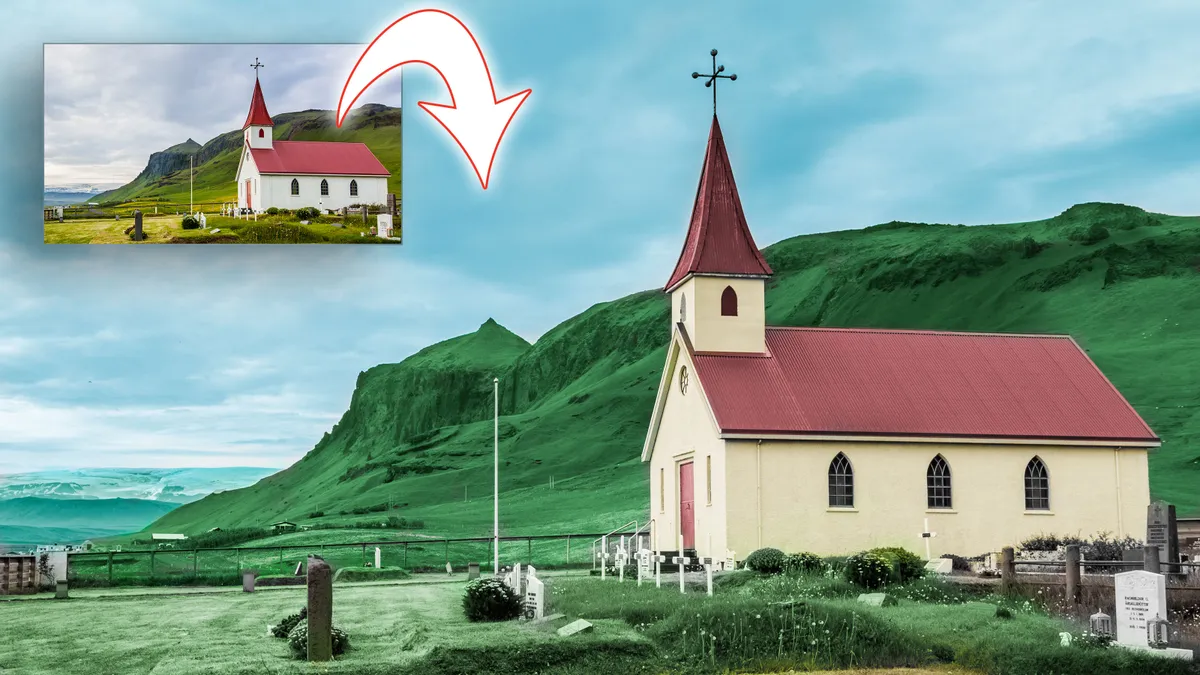
Who would have thought that you could hand-color photos in Lightroom? We show how you can give an ordinary landscape an otherworldly feel when you remove the colour and choose your own hues.
Lightroom tutorial #19: Create a dramatic landscape with Merge to HDR
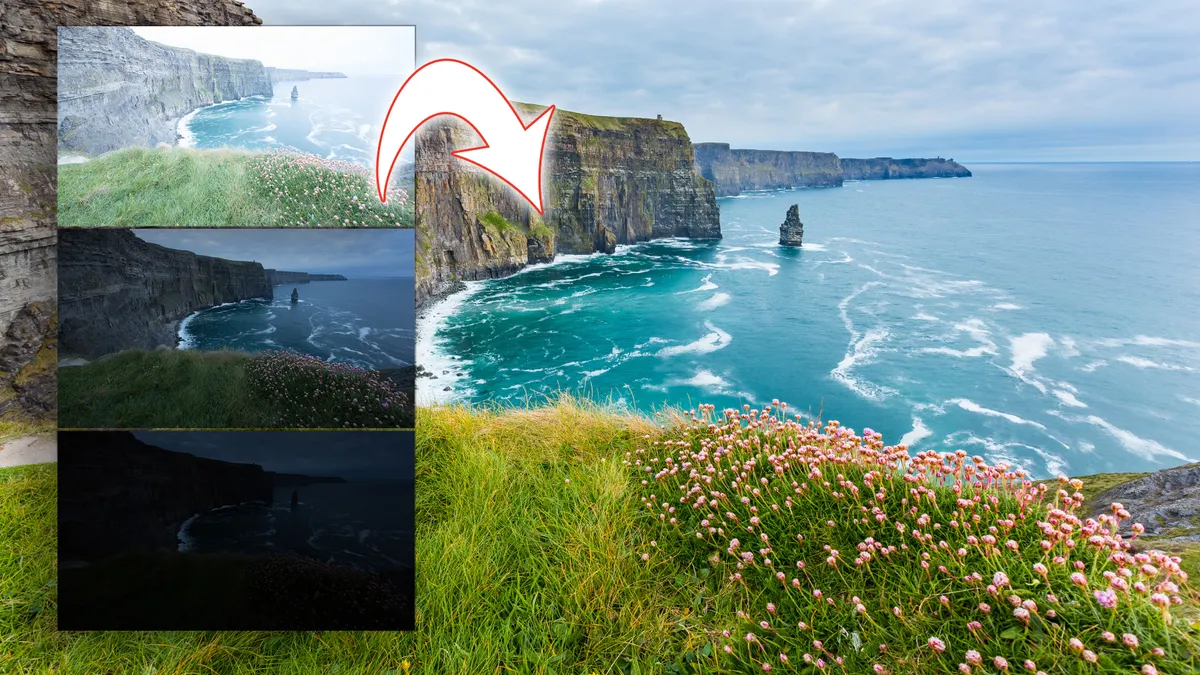
With Lightroom’s Merge to HDR option, you can combine a set of landscape photos at different exposures into a single merged DNG file and then carry out further edits to extend the dynamic range of your camera far beyond what it can achieve with a single exposure.
Lightroom tutorial #20: Create your own light leaks in Lightroom!
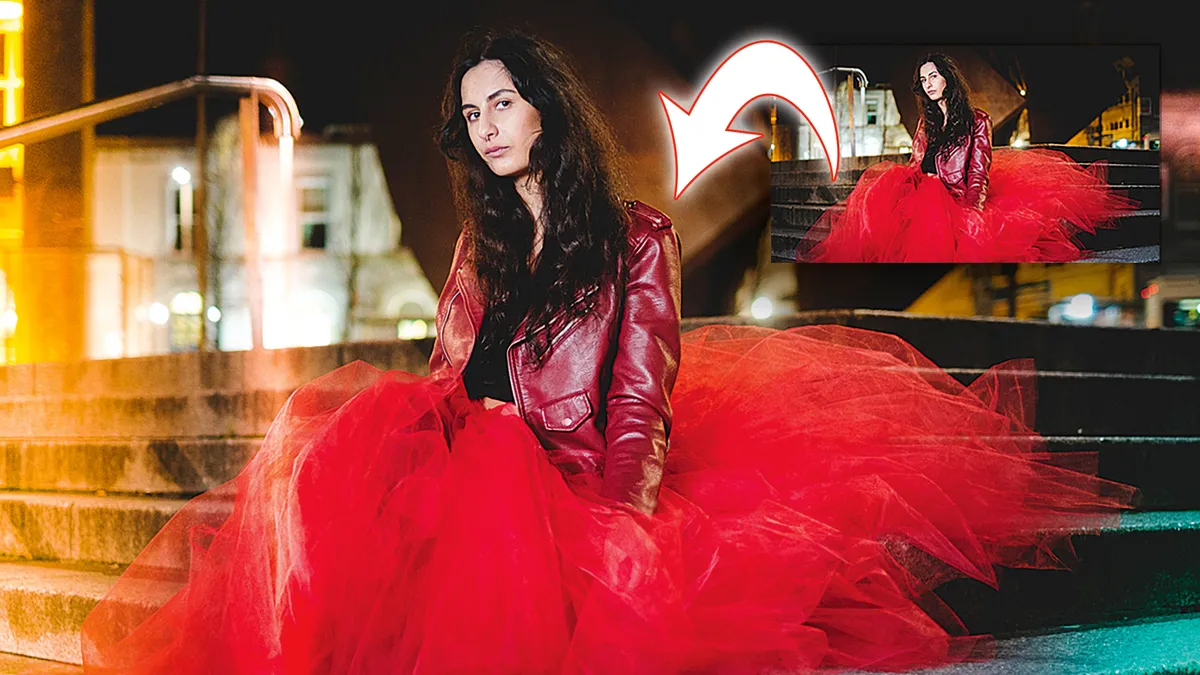
Normally, you would associate analog 'light leak' effects with pixel-based photo editors like Photoshop, but here's a way to add old-school imperfections to your photos in Lightroom, with an imaginative use of the Graduated and Radial Filters.
Lightroom tutorial #21: Correcting lens and perspective distortions in Lightroom
Converging verticals and other perspective issues are not the lens's fault – it's where you stand and how you tilt the camera that causes them. But never fear – if your building shots are looking squiffy, Lightroom can fix your images so that everything is nice and straight.
Lightroom tutorial #22: How to boost a model's freckles in Lightroom

You can add character to your subjects by bringing out their freckles, using techniques that work in both black and white and color. It's all achieved with careful and creative use of Lightroom's mono conversion tools, and how colors translate into different shades of grey.
Lightroom tutorial #23: How to bring back the film look in Lightroom
Here's how to apply a series of Lomography-inspired Lightroom adjustments to make your images look like you shot them with an old-school film camera. In this age of near-perfect digital imaging, sometimes we just want to bring back that old film look?
Lightroom tutorial #24: How to create a cool border and signature in Lightroom

You can do more with Lightroom's print options than might think. This tutorial shows how to create a matte border to show off your photos in the Print Module in Lightroom, and even add an identity plate to brand your pictures with your company name.
Lightroom tutorial #25: How to merge a raw panorama in Lightroom
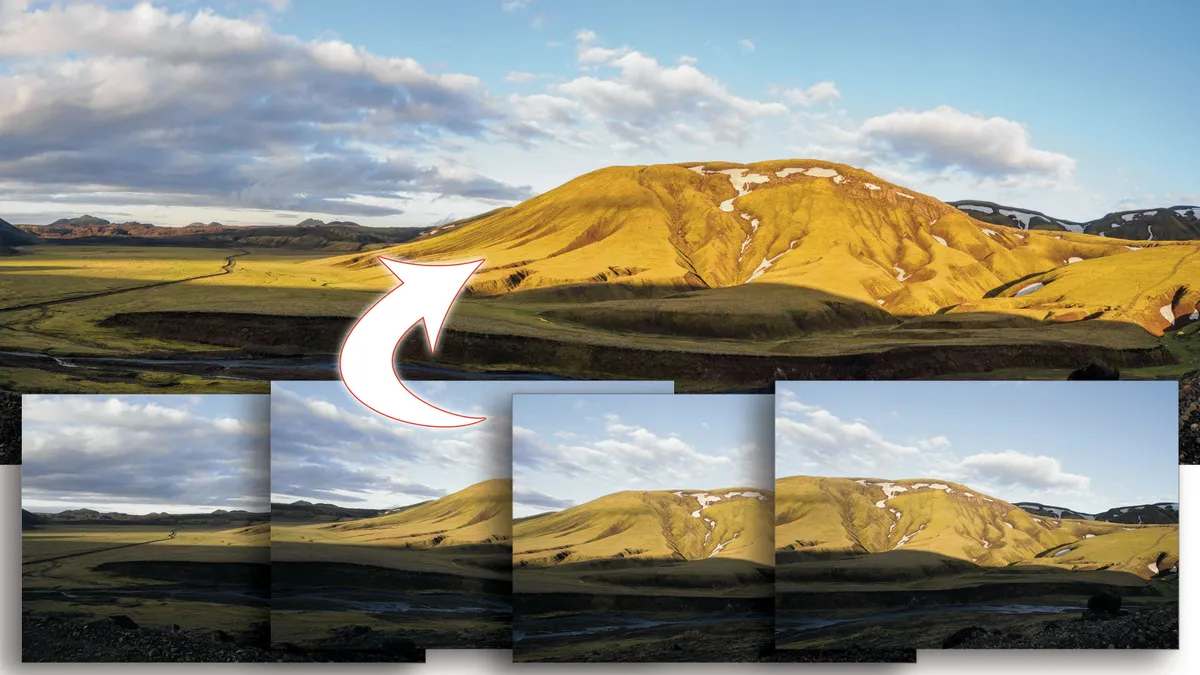
You can capture the widest landscapes by shooting overlapping images and then using the Panorama Merge tool in Lightroom – and this works with both JPEGs and RAW files. Lightroom will merge them into a single DNG file which you can then edit any way you like.
Lightroom tutorial #26: How to merge a series of exposures into a raw HDR shot
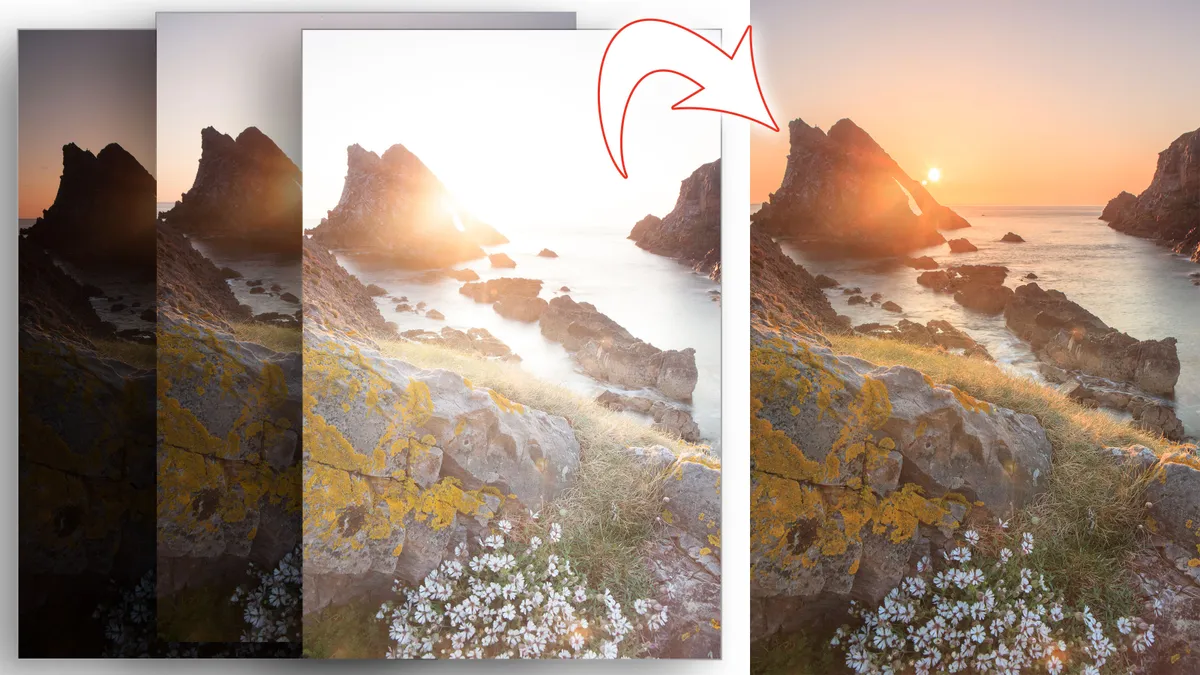
You can merge bracketed exposures into to a single HDR file in Lightroom with the HDR Merge option, and without losing access to Lightroom’s full raw editing toolset when you've done it. What's more, Lightroom's merged HDR images have a much more natural look than most HDR 'effect's tools.
Lightroom tutorial #27: How to create a black and white landscape in Lightroom
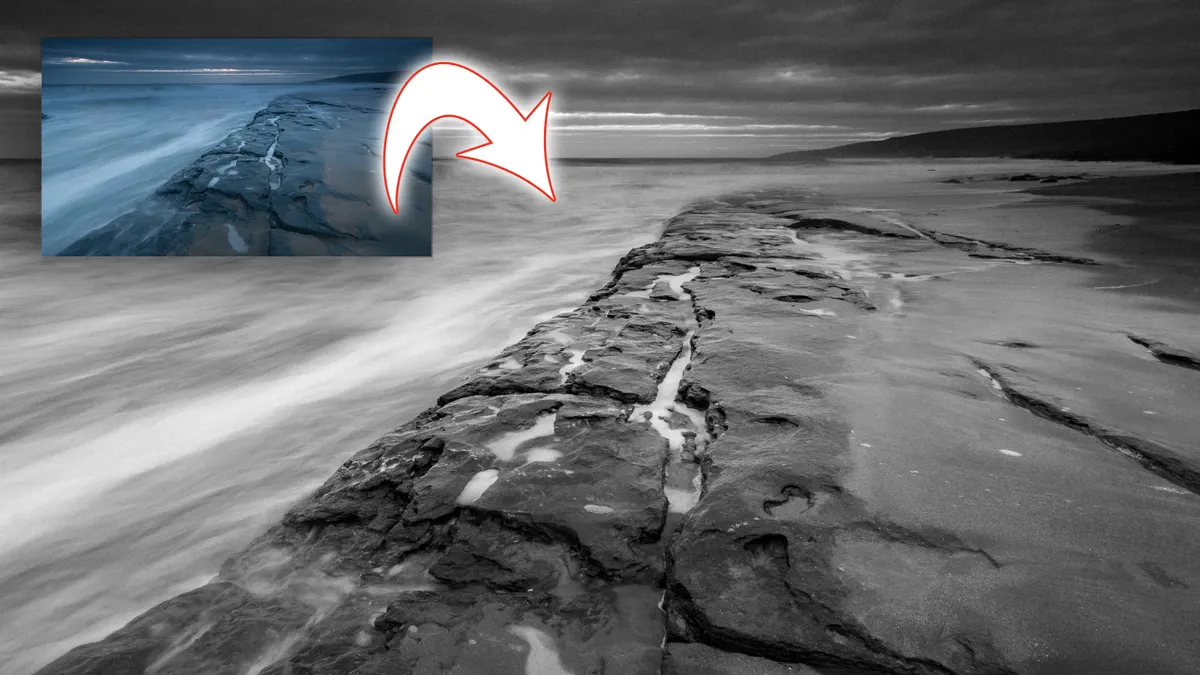
There's much more to successful black and white images than simply removing the color. We show how to convert a regular color image into a moody monochromatic landscape with rich tonal contrast and dynamic range that really shows off the power of black and white.
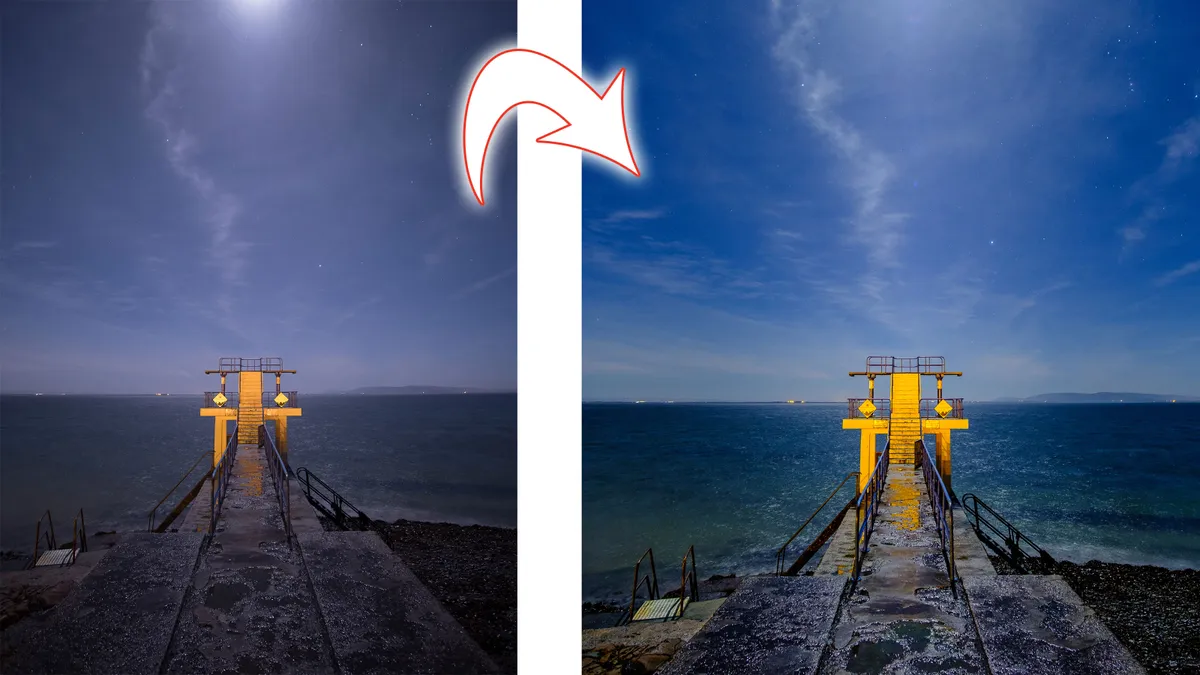
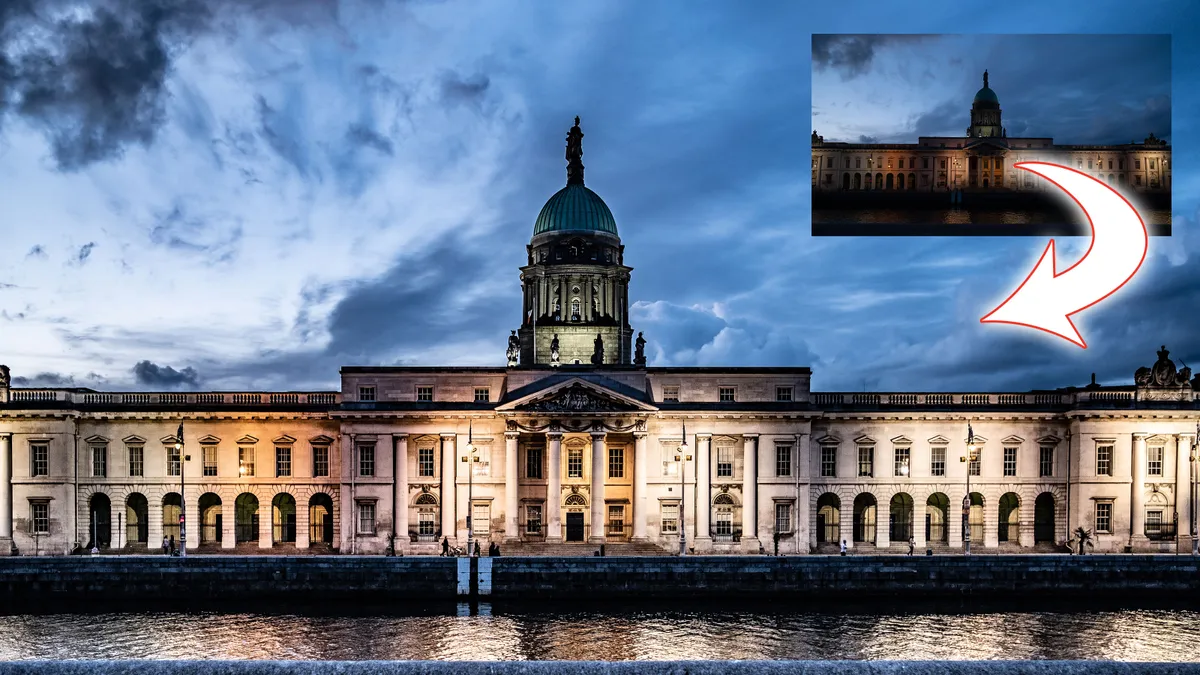
Lightroom tutorial #28: How to process a moonlit landscape in Lightroom

Discover the techniques that help you make a night-time image sparkle after a nocturnal shooting session. They say the camera never lies, but sometimes it needs a little help in Lightroom to reflect the vividness and contrast that we see with the naked eye.
Lightroom tutorial #29: How to 'insta-fy' a photograph in Lightroom

If you like the Instagram filter look and you want to get it with a regular camera, it's easy to do in Lightroom. You don't need manufactured social media filters to create your own Instagram-inspired look – one you can adapt over again.
Lightroom tutorial #30: How shoot and edit classic concert photos in Lightroom

Concert shots often have to be grabbed in very difficult conditions, with rapidly changing light, and not very much of it! Here are some ways to deal with the effects of low light and bring out the colour of the scene in Lightroom.
Lightroom tutorial #31: How to create a mono masterpiece in Lightroom

Take advantage of the Profiles now supplied in Lightroom Classic to choose the perfect black and white look. There's a whole selection of one-click 'looks to choose from, and because they don't use the regular adjustment tools, you still have the full adjustment range to work with if you need to make more changes.
Lightroom tutorial #32: How to develop your own style in Lightroom
Go beyond cleaning up and photo correction as you discover how to add a distinctive look to every shot you take. Building your own recognisable 'look' is part of any photographer's development, and can help you stand out in a crowded world.
About Digital Camera
This tutorial originally appeared in Digital Camera Magazine, the monthly newsstand magazine for all photographers. Why not subscribe to a print edition, and have the magazine delivered direct to your door every month?
Alternatively, we have a number of different digital options available, including:
• Apple app (for iPad or iPhone)
• Zinio app (multi-platform app for desktop or smartphone)
• PocketMags (multi-platform app ideal for Android devices)
• Readly (all-you-can-eat digital magazine subscription service)
If you wanted a printed version of any of our most recent issues we have a selection of back issues to choose from in our online store.
How to get Lightroom
Adobe Lightroom is available in two versions: the regular Adobe Lightroom Classic CC designed for desktop users, which is what we cover in this series, and a new cloud-based Adobe Lightroom CC, which stores your files online and offers a similar but reduced set of features. For regular desktop users we recommend Adobe Lightroom Classic CC.
Adobe offers three subscription based Photography Plans which you can click on below. We recommend either the regular Photography Plan, or the Photography Plan (1TB) which costs more but comes with 1TB online storage in case you decide to go with Lightroom CC.
For this set of tutorials and for anyone who likes to work on a single main computer, we recommend the regular Creative Cloud Photography Plan. This is the cheapest way to get started AND it comes with Photoshop CC too.
Read more:
• How to download Lightroom and try it for free
• Best Adobe Photography Plan deals for Photoshop CC & Lightroom
• 15 Photoshop fixes

