Lightroom series part 12: Remove unsightly spots from your photographs
Marks from sensor dust can easily appear in your images, but with Lightroom, it’s simple to make it look like they were never there

Dust is a pain for photographers, getting in the way of pristine skies. Even just swapping a lens risks getting some wandering pollen or skin cell onto our delicate sensors.
Welcome to the 12th instalment of our Lightroom series, first published in Digital Camera magazine (see below for subscription offers).
If you are already a Lightroom user, you could discover some new tricks and processes you haven't tried yet. If you don't use Lightroom, then scroll down to the bottom where you'll discover how to get it and which Adobe Photography Plan is best.
When I was in Iceland recently, I found out the hard way just how easy it is to get dust on your sensor. It’s worth learning how to clean your own camera, but if not, you can send it off for cleaning.
That’s great for future shots, but not for the ones already on the computer. Lightroom has had Spot Removal for a long time now, but it’s been super-charged over the last few versions, making it a great tool to remove those annoying dust bunnies from your photo. The tools also work for removing skin blemishes in portraits.
• See more Lightroom tutorials
1. Spot Removal tool

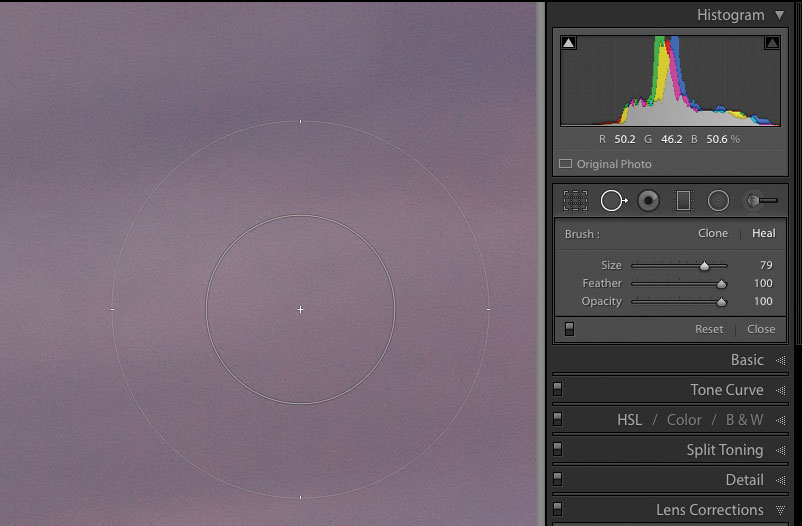
The handy Spot Removal tool is located in the Toolstrip, under the Histogram in Develop. You can also simply press Q to open it if you need to access it in a hurry. The Heal option will blend your source spot with the area you’re fixing, while Clone simply copies it.
The best camera deals, reviews, product advice, and unmissable photography news, direct to your inbox!
2. Choose the width
You can use Size to set the width of the brush that you’re using. This acts as the radius for a single click circular spot, or as the width for the Healing brush. Feather sets the softness of the edge, which is great when you’re using the Clone option.
3. Adjust the opacity
Opacity controls how much of the original image is visible under the spot. Generally, you should set Opacity to 100 unless you’re doing skin work and want to reveal the underlying texture.
4. Visualize spots
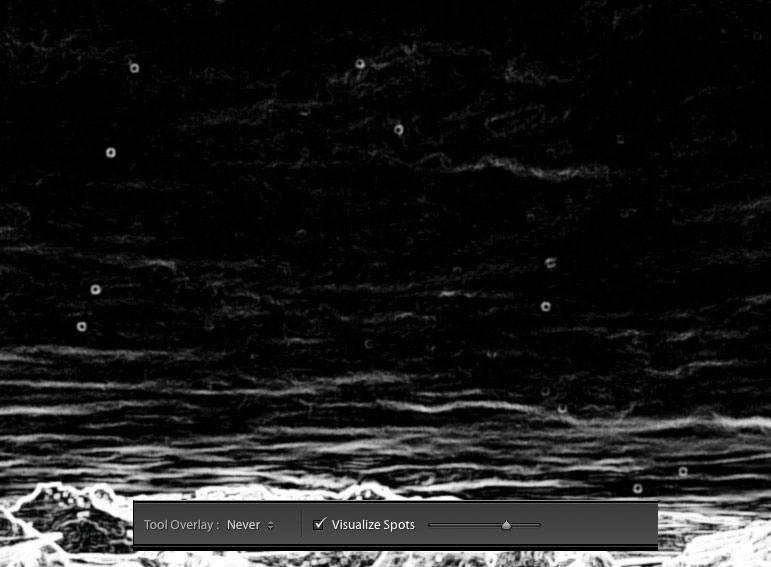
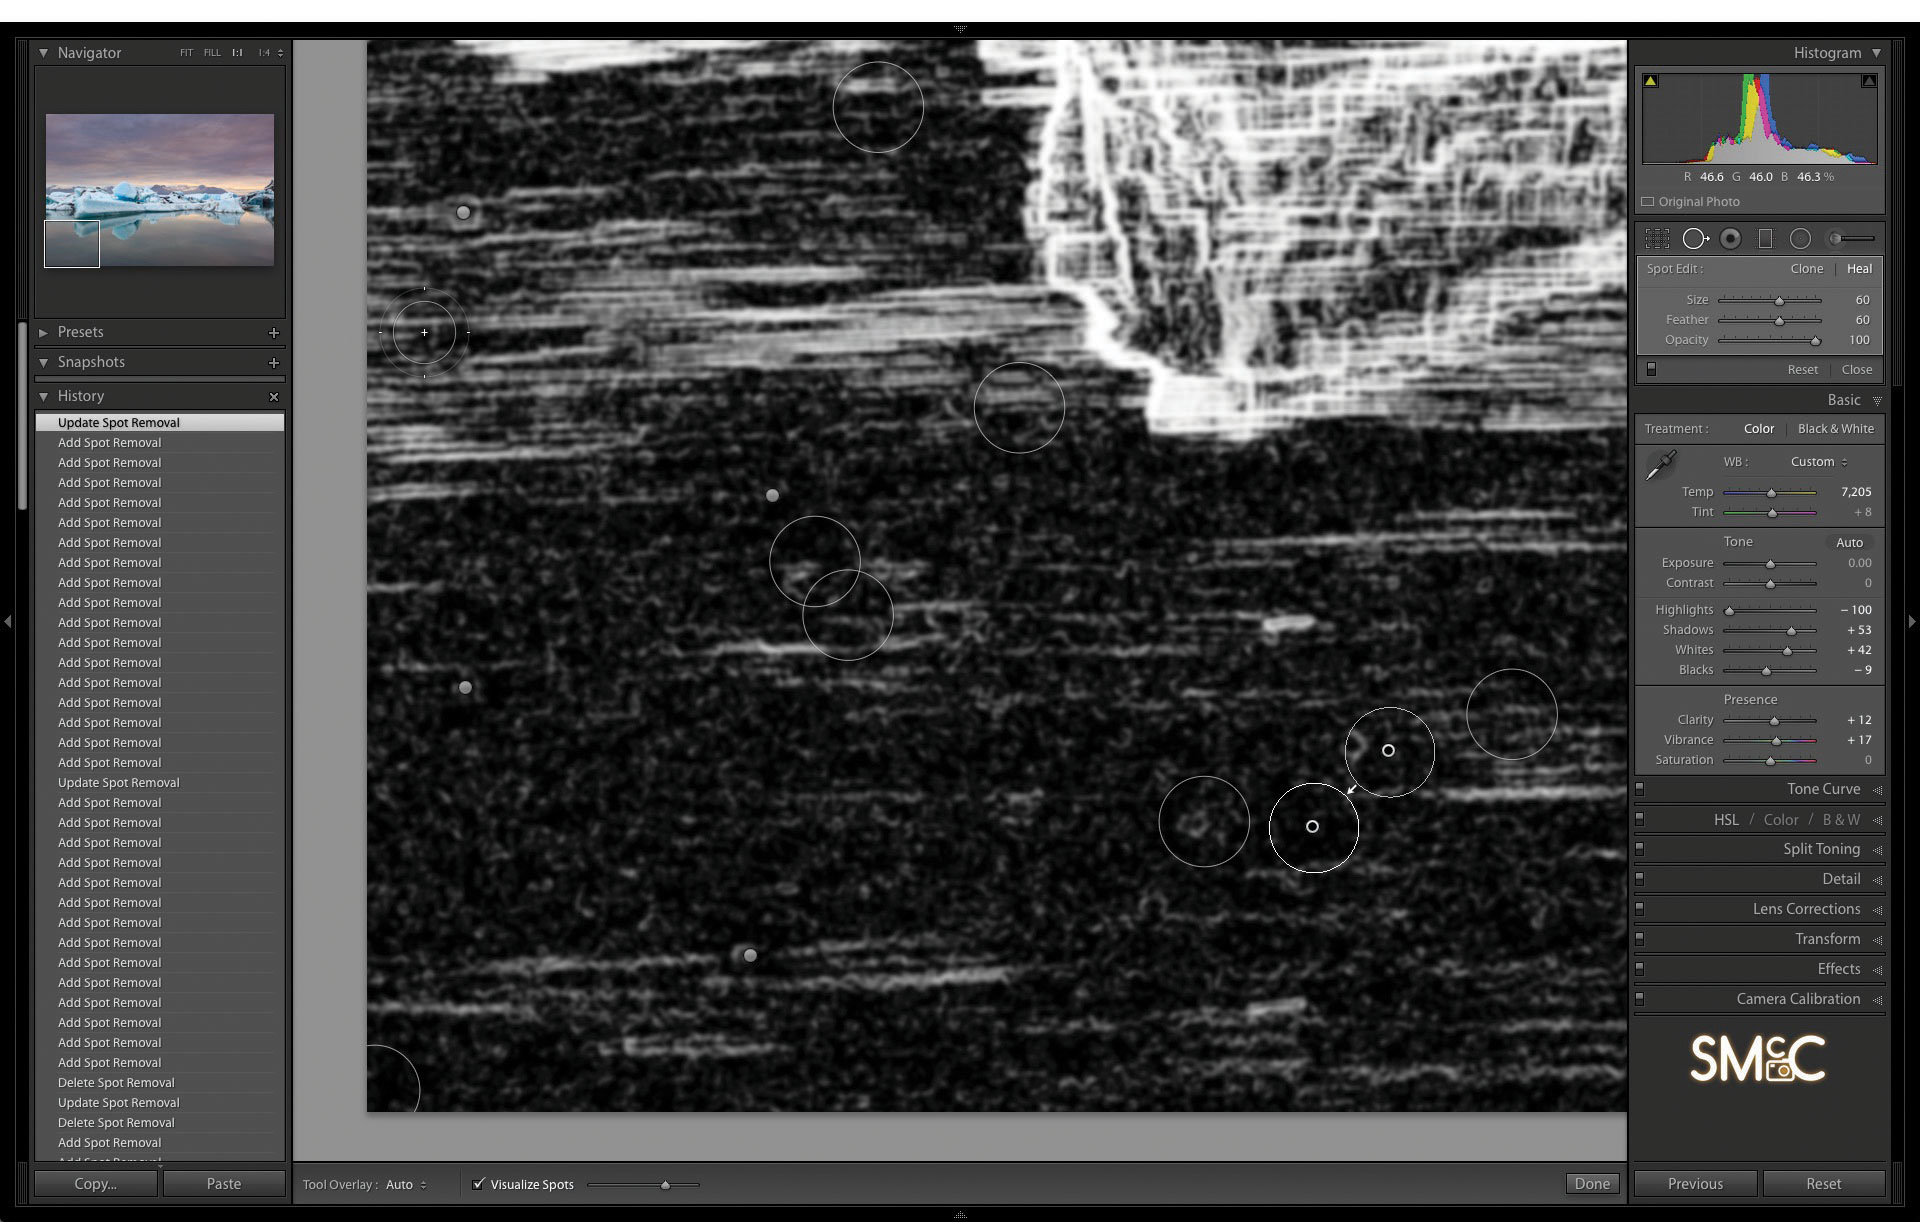
To help see the spots, apply the Visualize Spots checkbox to create an inverse edge mask. You can use the slider to change the intensity of the edges, which really makes the spots stand out.
5. Auto Hunt mode

Normally when you click on an unwanted spot in your image, it selects a similar nearby point as the source for removing the spot. This is called Auto Hunt mode. If you would prefer to choose your own source point, however, you need to hold down the Ctrl key (Windows) or the Cmd key (macOS), then simply drag across to your preferred source.
6. Move the pin
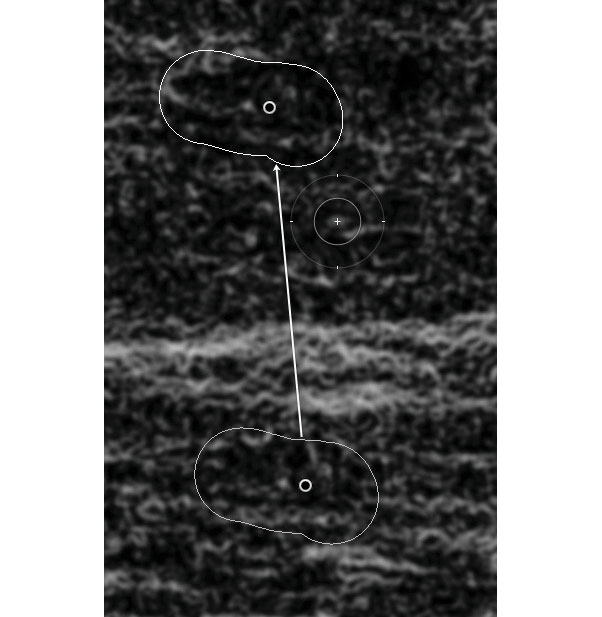
Drawing a line will create a shape that will auto-hunt for a source. This can’t be selected when you create the fix, but you can drag the pin on the source to move it. You can even move the spot position using the pin as well, if you like.
Expert tip: Become a Spot Removal pro
Zoom into 1:1 in the top left of your photo, fix the spots you see, then press the Page Down key. Work your way down the image, using Page Down each time. At the bottom, press Page Down again, and it jumps to the top of the next section in the photo. As well as the Ctrl/Cmd key modifier trick in step 5, there are another few shortcuts to get you to expert level. The square bracket keys [ and ] let you change the brush size. Adding the Shift key to these square bracket keys lets you change the Feather. Holding down Shift and Ctrl/Cmd lets you drag out a circular spot to any size you want – there’s no need to change the brush size as you work!
About Digital Camera magazine
This tutorial originally appeared in Digital Camera Magazine, the monthly newsstand magazine for all photographers. Why not subscribe to a print edition, and have the magazine delivered direct to your door every month?
Alternatively, we have a number of different digital options available, including:
• Apple app (for iPad or iPhone)
• Zinio app (multi-platform app for desktop or smartphone)
• PocketMags (multi-platform app ideal for Android devices)
• Readly (all-you-can-eat digital magazine subscription service)
If you wanted a printed version of any of our most recent issues we have a selection of back issues to choose from in our online store.
How to get Adobe Lightroom
Adobe Lightroom is available in two versions: the regular Adobe Lightroom Classic CC designed for desktop users, which is what we cover in this series, and a new cloud-based Adobe Lightroom CC, which stores your files online and offers a similar but reduced set of features. For regular desktop users we recommend Adobe Lightroom Classic CC.
Adobe offers three subscription based Photography Plans which you can click on below. We recommend either the regular Photography Plan, or the Photography Plan (1TB) which costs more but comes with 1TB online storage in case you decide to go with Lightroom CC.
For this set of tutorials and for anyone who likes to work on a single main computer, we recommend the regular Creative Cloud Photography Plan. This is the cheapest way to get started AND it comes with Photoshop CC too.
Read more:
• This is the best photo-editing software today
• These are the best laptops for photographers right now
• We help you choose the best desktop computers for photo editing
Sean McCormack is a commercial, and editorial photographer, book author, and regular contributor to Digital Camera magazine based in Galway, Ireland. He has extensive experience with Lightroom, dating back to its original beta version, and has tried out just about every plugin and preset available. His latest book is Essential Development 3: 25 Tips for Lightroom Classic’s Develop Module.
