Lightroom series part 19: Create a dramatic landscape with Merge to HDR
How to use Lightroom’s HDR Merge options to effectively combine a set of landscape photos at different exposures
The best camera deals, reviews, product advice, and unmissable photography news, direct to your inbox!
You are now subscribed
Your newsletter sign-up was successful
Landscape imagery is near and dear to most photographers, capturing the beauty we see as we travel through our lives. One thing you’ll notice pretty quickly is that unless the sun is at your back, the sky will be much brighter than the land, especially for sunrise and sunset. Traditionally photographers would use graduated filters for this, but there is a way to go without them. That way is high-dynamic-range or HDR processing.
Welcome to the 19th instalment of our Lightroom series, first published in Digital Camera magazine (see below for subscription offers).
If you are already a Lightroom user, you could discover some new tricks and processes you haven't tried yet. If you don't use Lightroom, then scroll down to the bottom where you'll discover how to get it and which Adobe Photography Plan is best.
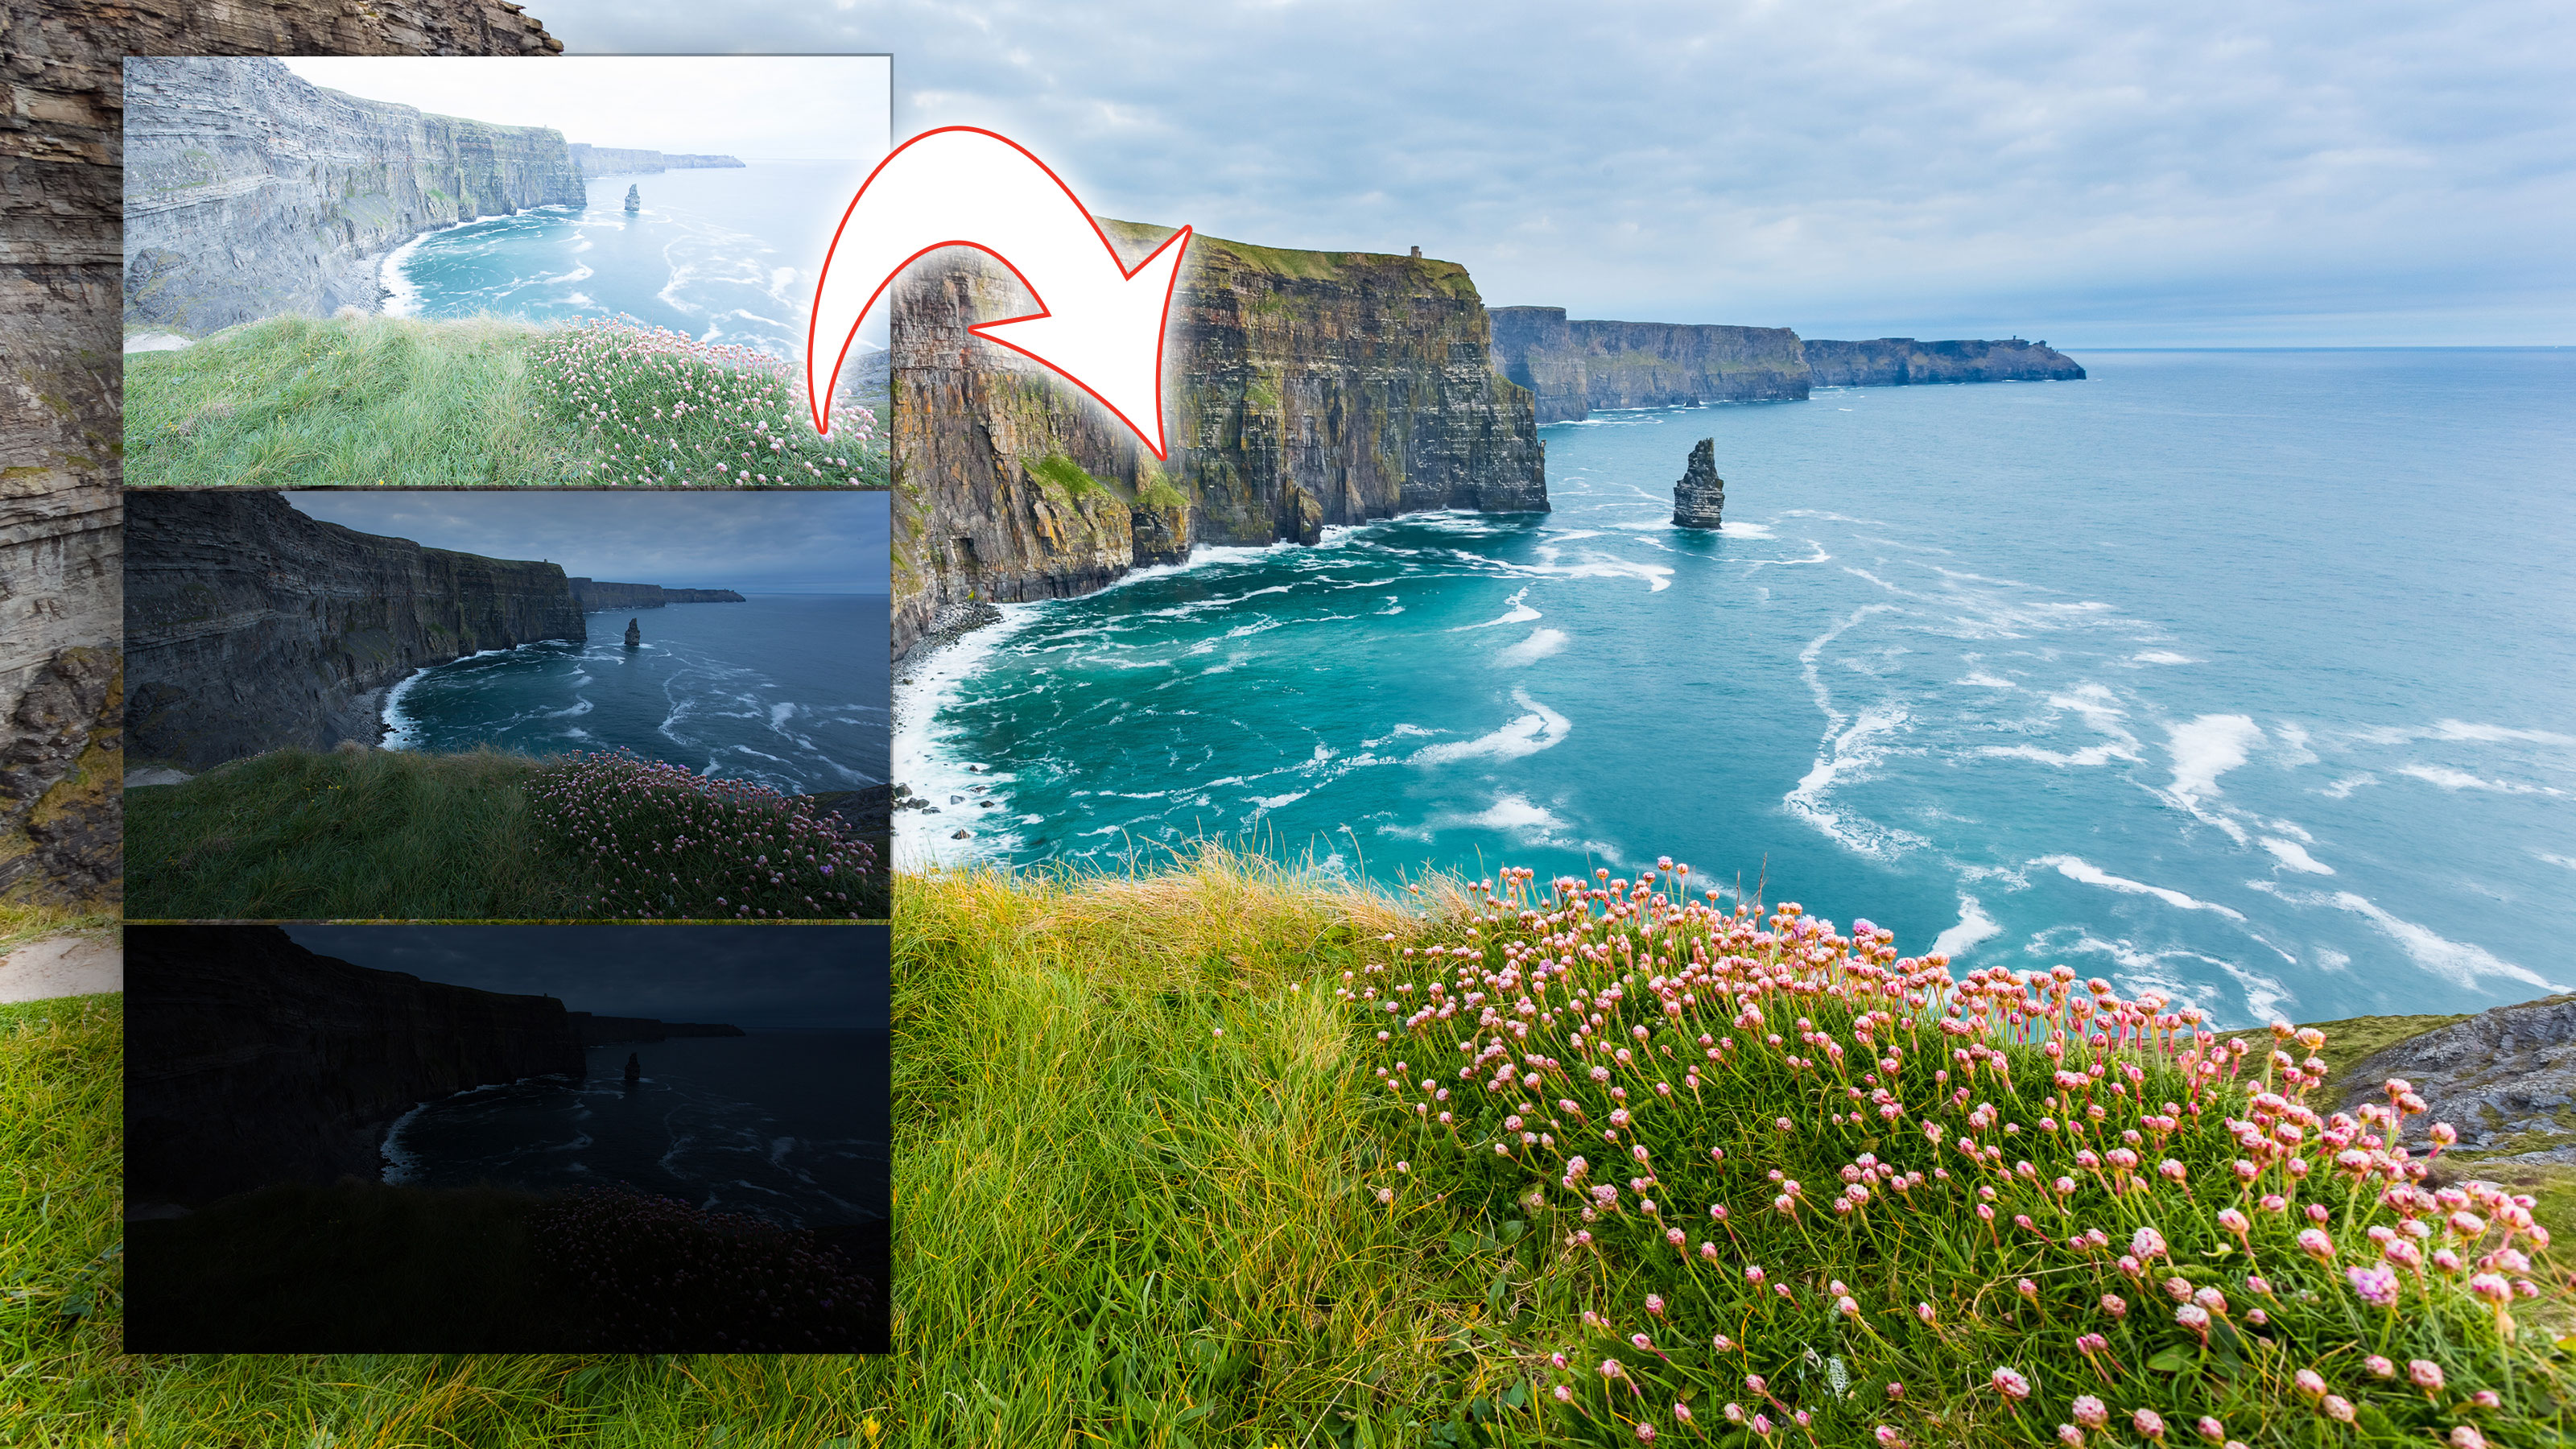
Here we will combine a series of photos at set exposure intervals apart, usually two or three stops with more than two photos. (This is called bracketing.) Most people use three photos, but five, seven or nine are common. Usually only the shutter speed is changed between each set.
• See more Lightroom tutorials
1. Select your images
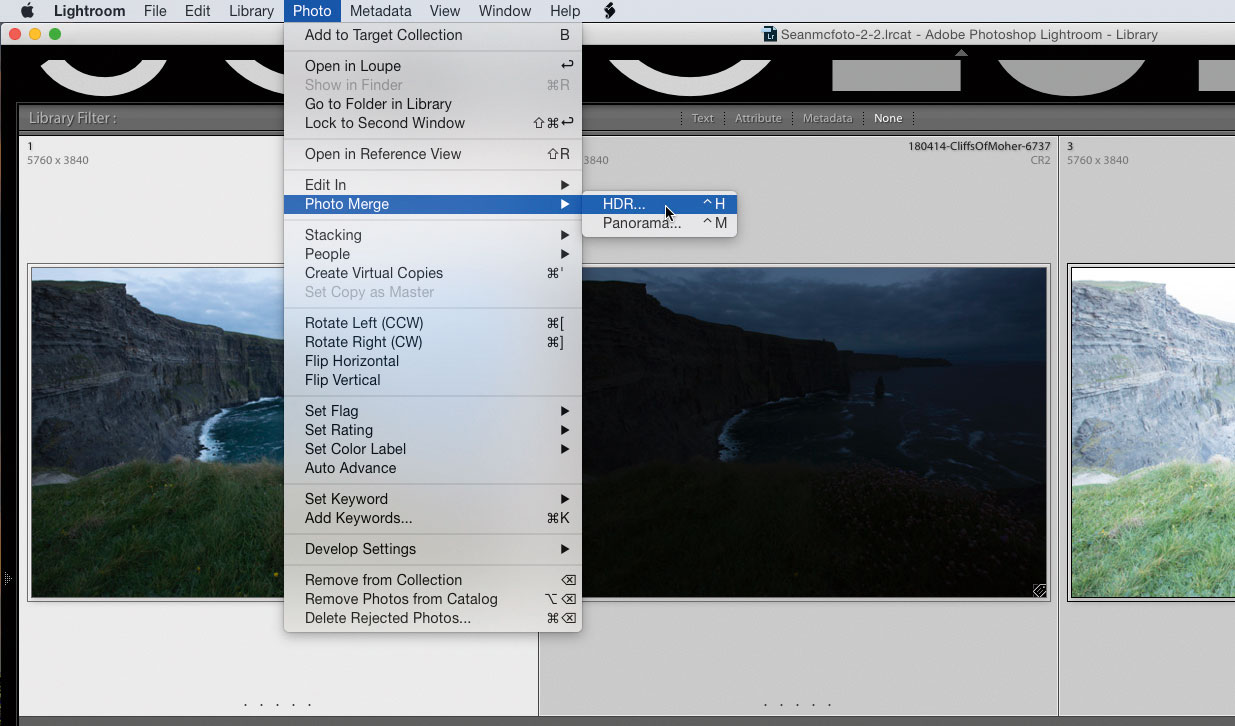
First, gather the photos to process together. From the Photo menu, go to Photo Merge and choose HDR. This set has three photos that are taken at 0EV, -3EV and +3EV. You can also use the shortcut Ctrl+H (on both Mac and PC).
2. Auto Align photos
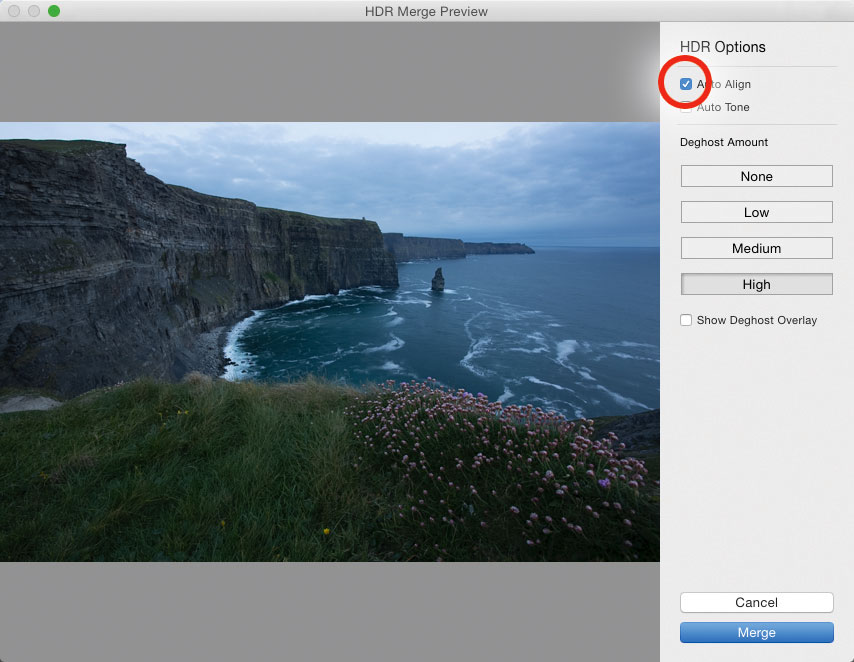
The HDR Merge Preview dialog appears. After a short while, a preview of the HDR will appear. The top option you can select is Auto Align. This is great if you shot your images hand-held. It’s even useful if you shot on a tripod, because it may have moved slightly between shots.
The best camera deals, reviews, product advice, and unmissable photography news, direct to your inbox!
3. Apply Auto Tone
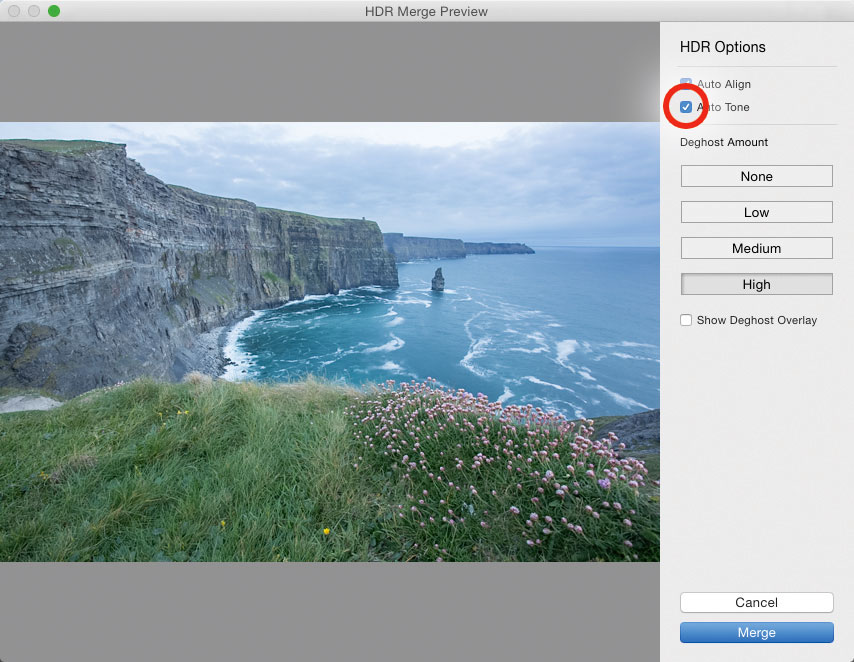
The next option is Auto Tone. This applies an auto-correction to the image, which sets the Highlights, Shadows, Whites, Exposure and Blacks of the photo. While it tends to be a little bright, I use this all the time and tweak from there rather than start from scratch.
4. Remove ghosting
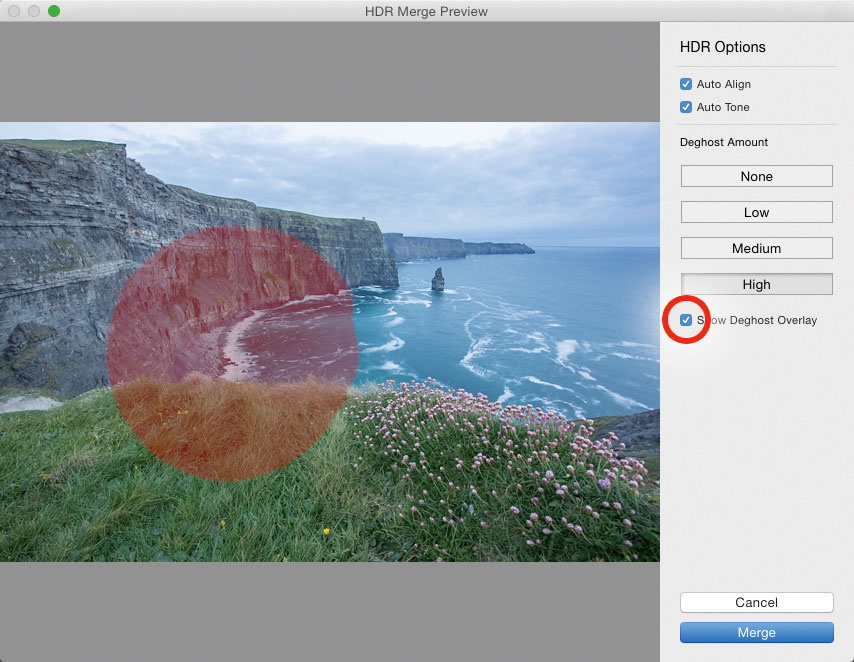
Things move between exposures: clouds, waves, trees, people and so on. Things that appear in different places can do odd things in the images and appear as ‘ghosts’. The Deghost Amount section removes these artefacts. Choose a strength. Go for High if there’s been a lot of changes, or None if it looks good with it. Check what’s been affected using the Show Deghost Overlay option.
5. Merge HDR
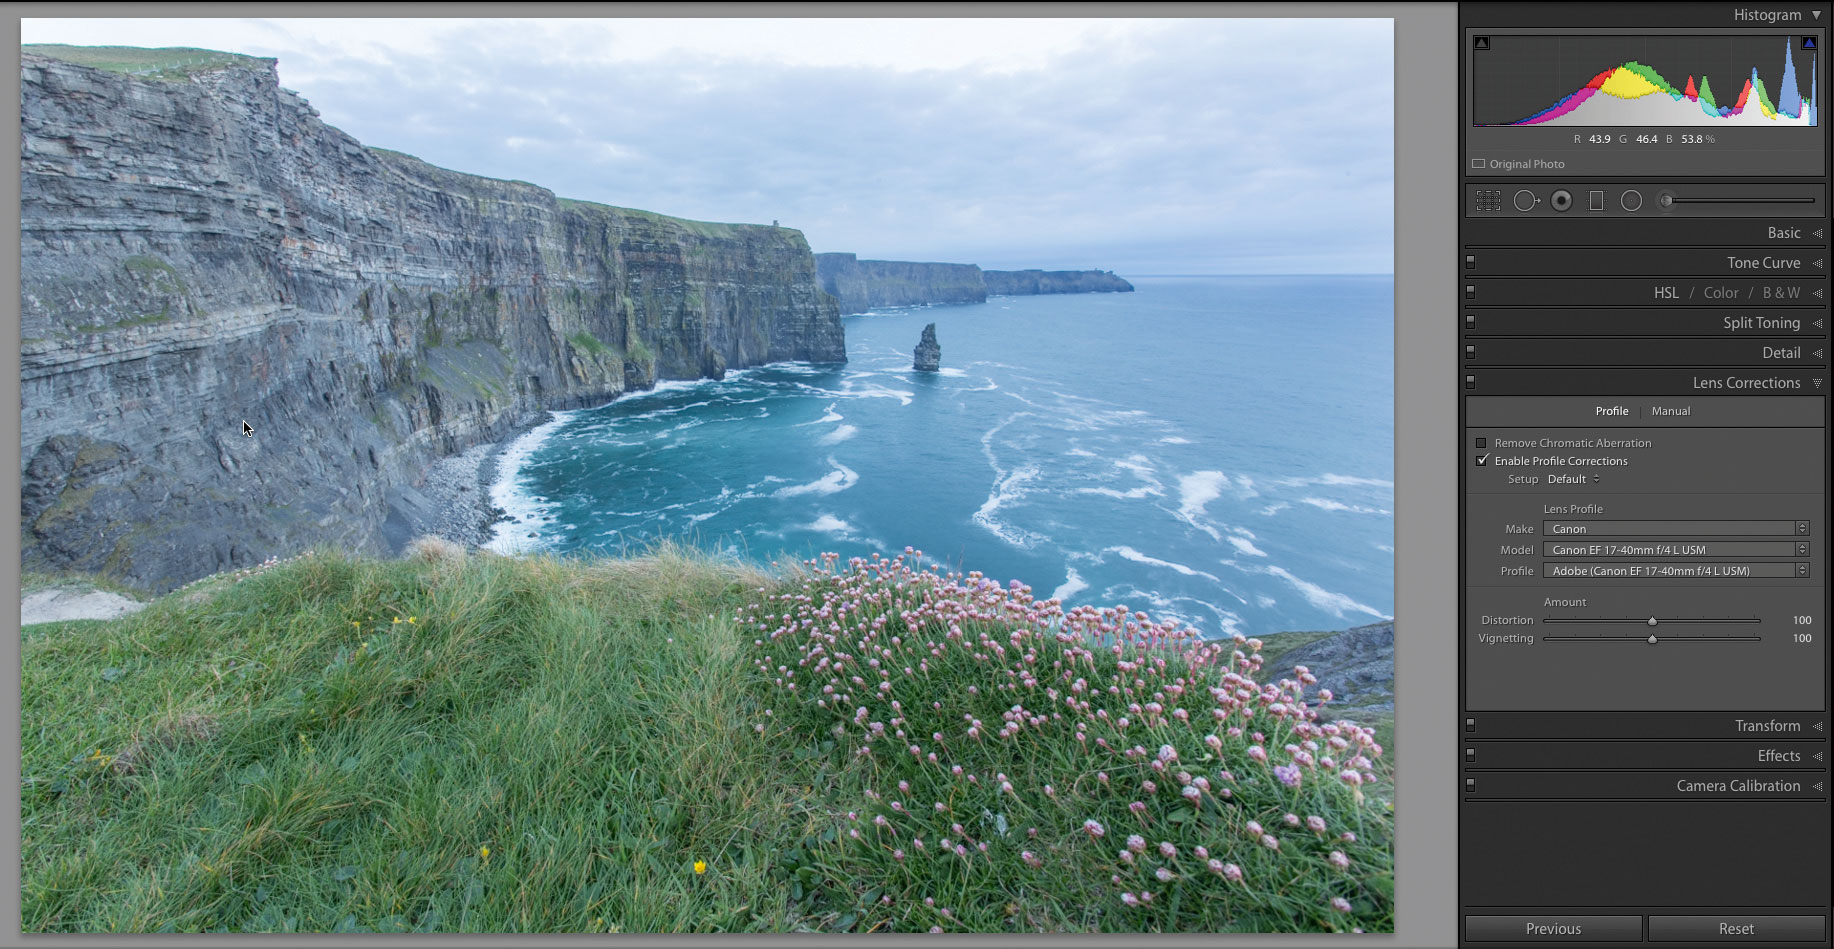
Press the Merge button to create the HDR in the background. This creates the auto-toned file, which is a 32-bit DNG file with full raw control. The next step is to apply a Lens Profile to correct distortions. Rotate the file as well if needed.
6. Final tweaks
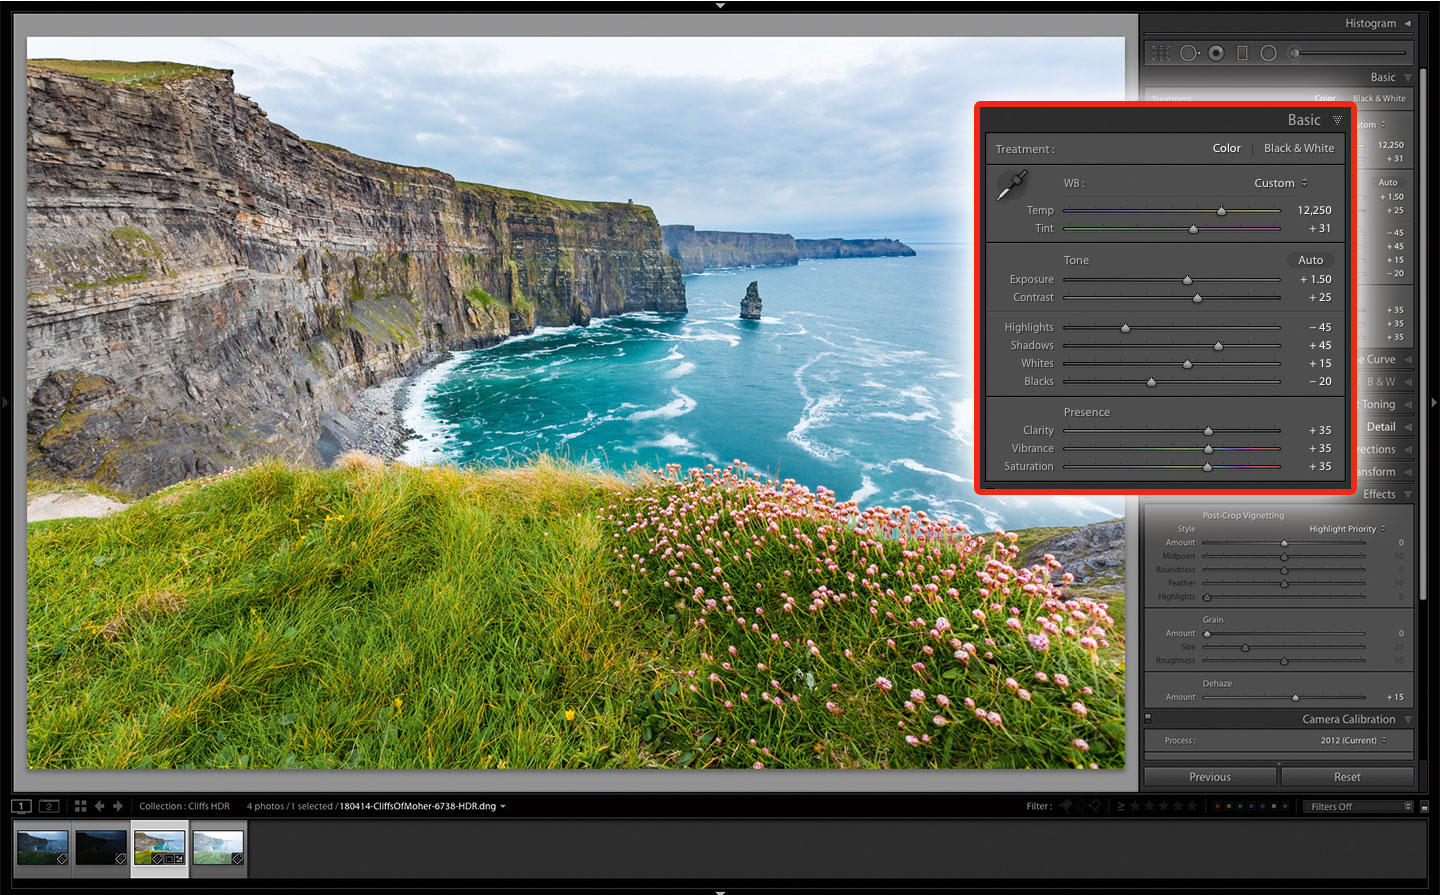
The final step is to get creative with the photo. Here, I’ve worked with the Basic panel and Dehaze in the Effects panel. I set Exposure 1.50, Contrast 25, Highlights -45, Shadows +45, Whites +15, Blacks -20, Clarity, Vibrance and Saturation 35. Finally Dehaze was set to +15.
Expert tip: Set up right for the best shot
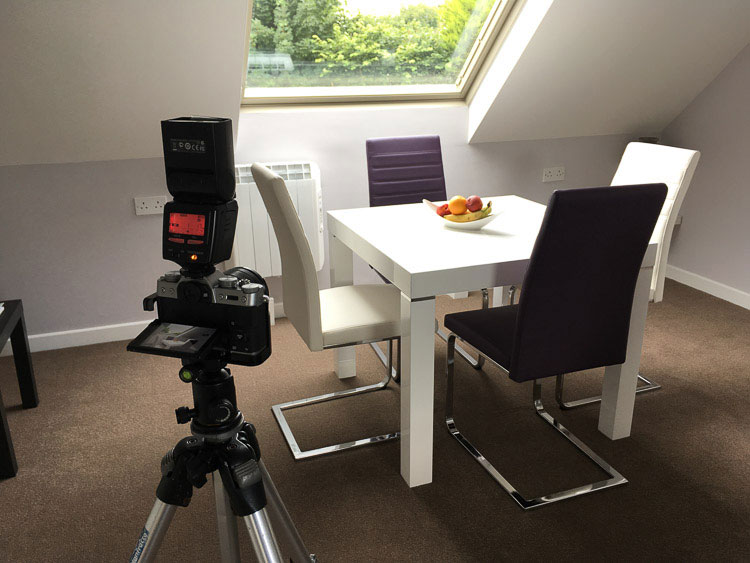
While Auto Align is great for hand-held HDR merging, it’ll only work where your longest exposure is above the reciprocal of your focal length on full-frame. In practice, this is about 1/15 to 1/30 with a wide-angle lens and a steady hand. In order to have your photo sharp from front to back, you’ll need an aperture of f/11 to f/16. f/22 can introduce too much diffraction, creating a blur that looks as bad as being out of focus. These narrow apertures require a slower shutter speed. The solution isn’t just to increase the ISO: it’s carrying a tripod with you and keeping your ISO low for the cleanest-looking shot.
About Digital Camera magazine
This tutorial originally appeared in Digital Camera Magazine, the monthly newsstand magazine for all photographers. Why not subscribe to a print edition, and have the magazine delivered direct to your door every month?
Alternatively, we have a number of different digital options available, including:
• Apple app (for iPad or iPhone)
• Zinio app (multi-platform app for desktop or smartphone)
• PocketMags (multi-platform app ideal for Android devices)
• Readly (all-you-can-eat digital magazine subscription service)
If you wanted a printed version of any of our most recent issues we have a selection of back issues to choose from in our online store.
How to get Adobe Lightroom
Adobe Lightroom is available in two versions: the regular Adobe Lightroom Classic CC designed for desktop users, which is what we cover in this series, and a new cloud-based Adobe Lightroom CC, which stores your files online and offers a similar but reduced set of features. For regular desktop users we recommend Adobe Lightroom Classic CC.
Adobe offers three subscription based Photography Plans which you can click on below. We recommend either the regular Photography Plan, or the Photography Plan (1TB) which costs more but comes with 1TB online storage in case you decide to go with Lightroom CC.
For this set of tutorials and for anyone who likes to work on a single main computer, we recommend the regular Creative Cloud Photography Plan. This is the cheapest way to get started AND it comes with Photoshop CC too.
Read more:
• This is the best photo-editing software today
• These are the best laptops for photographers right now
• We help you choose the best desktop computers for photo editing
Sean McCormack is a commercial, and editorial photographer, book author, and regular contributor to Digital Camera magazine based in Galway, Ireland. He has extensive experience with Lightroom, dating back to its original beta version, and has tried out just about every plugin and preset available. His latest book is Essential Development 3: 25 Tips for Lightroom Classic’s Develop Module.
