Lightroom series part 17: Create a dramatic male portrait in Lightroom
Lightroom’s editing tools can help you character and drama to your male portraits – apply these techniques to your own shots
The best camera deals, reviews, product advice, and unmissable photography news, direct to your inbox!
You are now subscribed
Your newsletter sign-up was successful
When photographers process a female portrait, they often go for a delicate retouch that tries to be as flattering as possible to the subject. This is less often the case with the male portrait, where character reigns supreme. Here we can swap soft, rosy cheeks for laugh lines, scars and wrinkles. Lighting plays a part in the drama – and I’ll look at that in my expert tip – but there are a few tricks in Lightroom processing to take a photo from a well-lit shot to a truly captivating image.
Welcome to the 17th instalment of our Lightroom series, first published in Digital Camera magazine (see below for subscription offers).
If you are already a Lightroom user, you could discover some new tricks and processes you haven't tried yet. If you don't use Lightroom, then scroll down to the bottom where you'll discover how to get it and which Adobe Photography Plan is best.
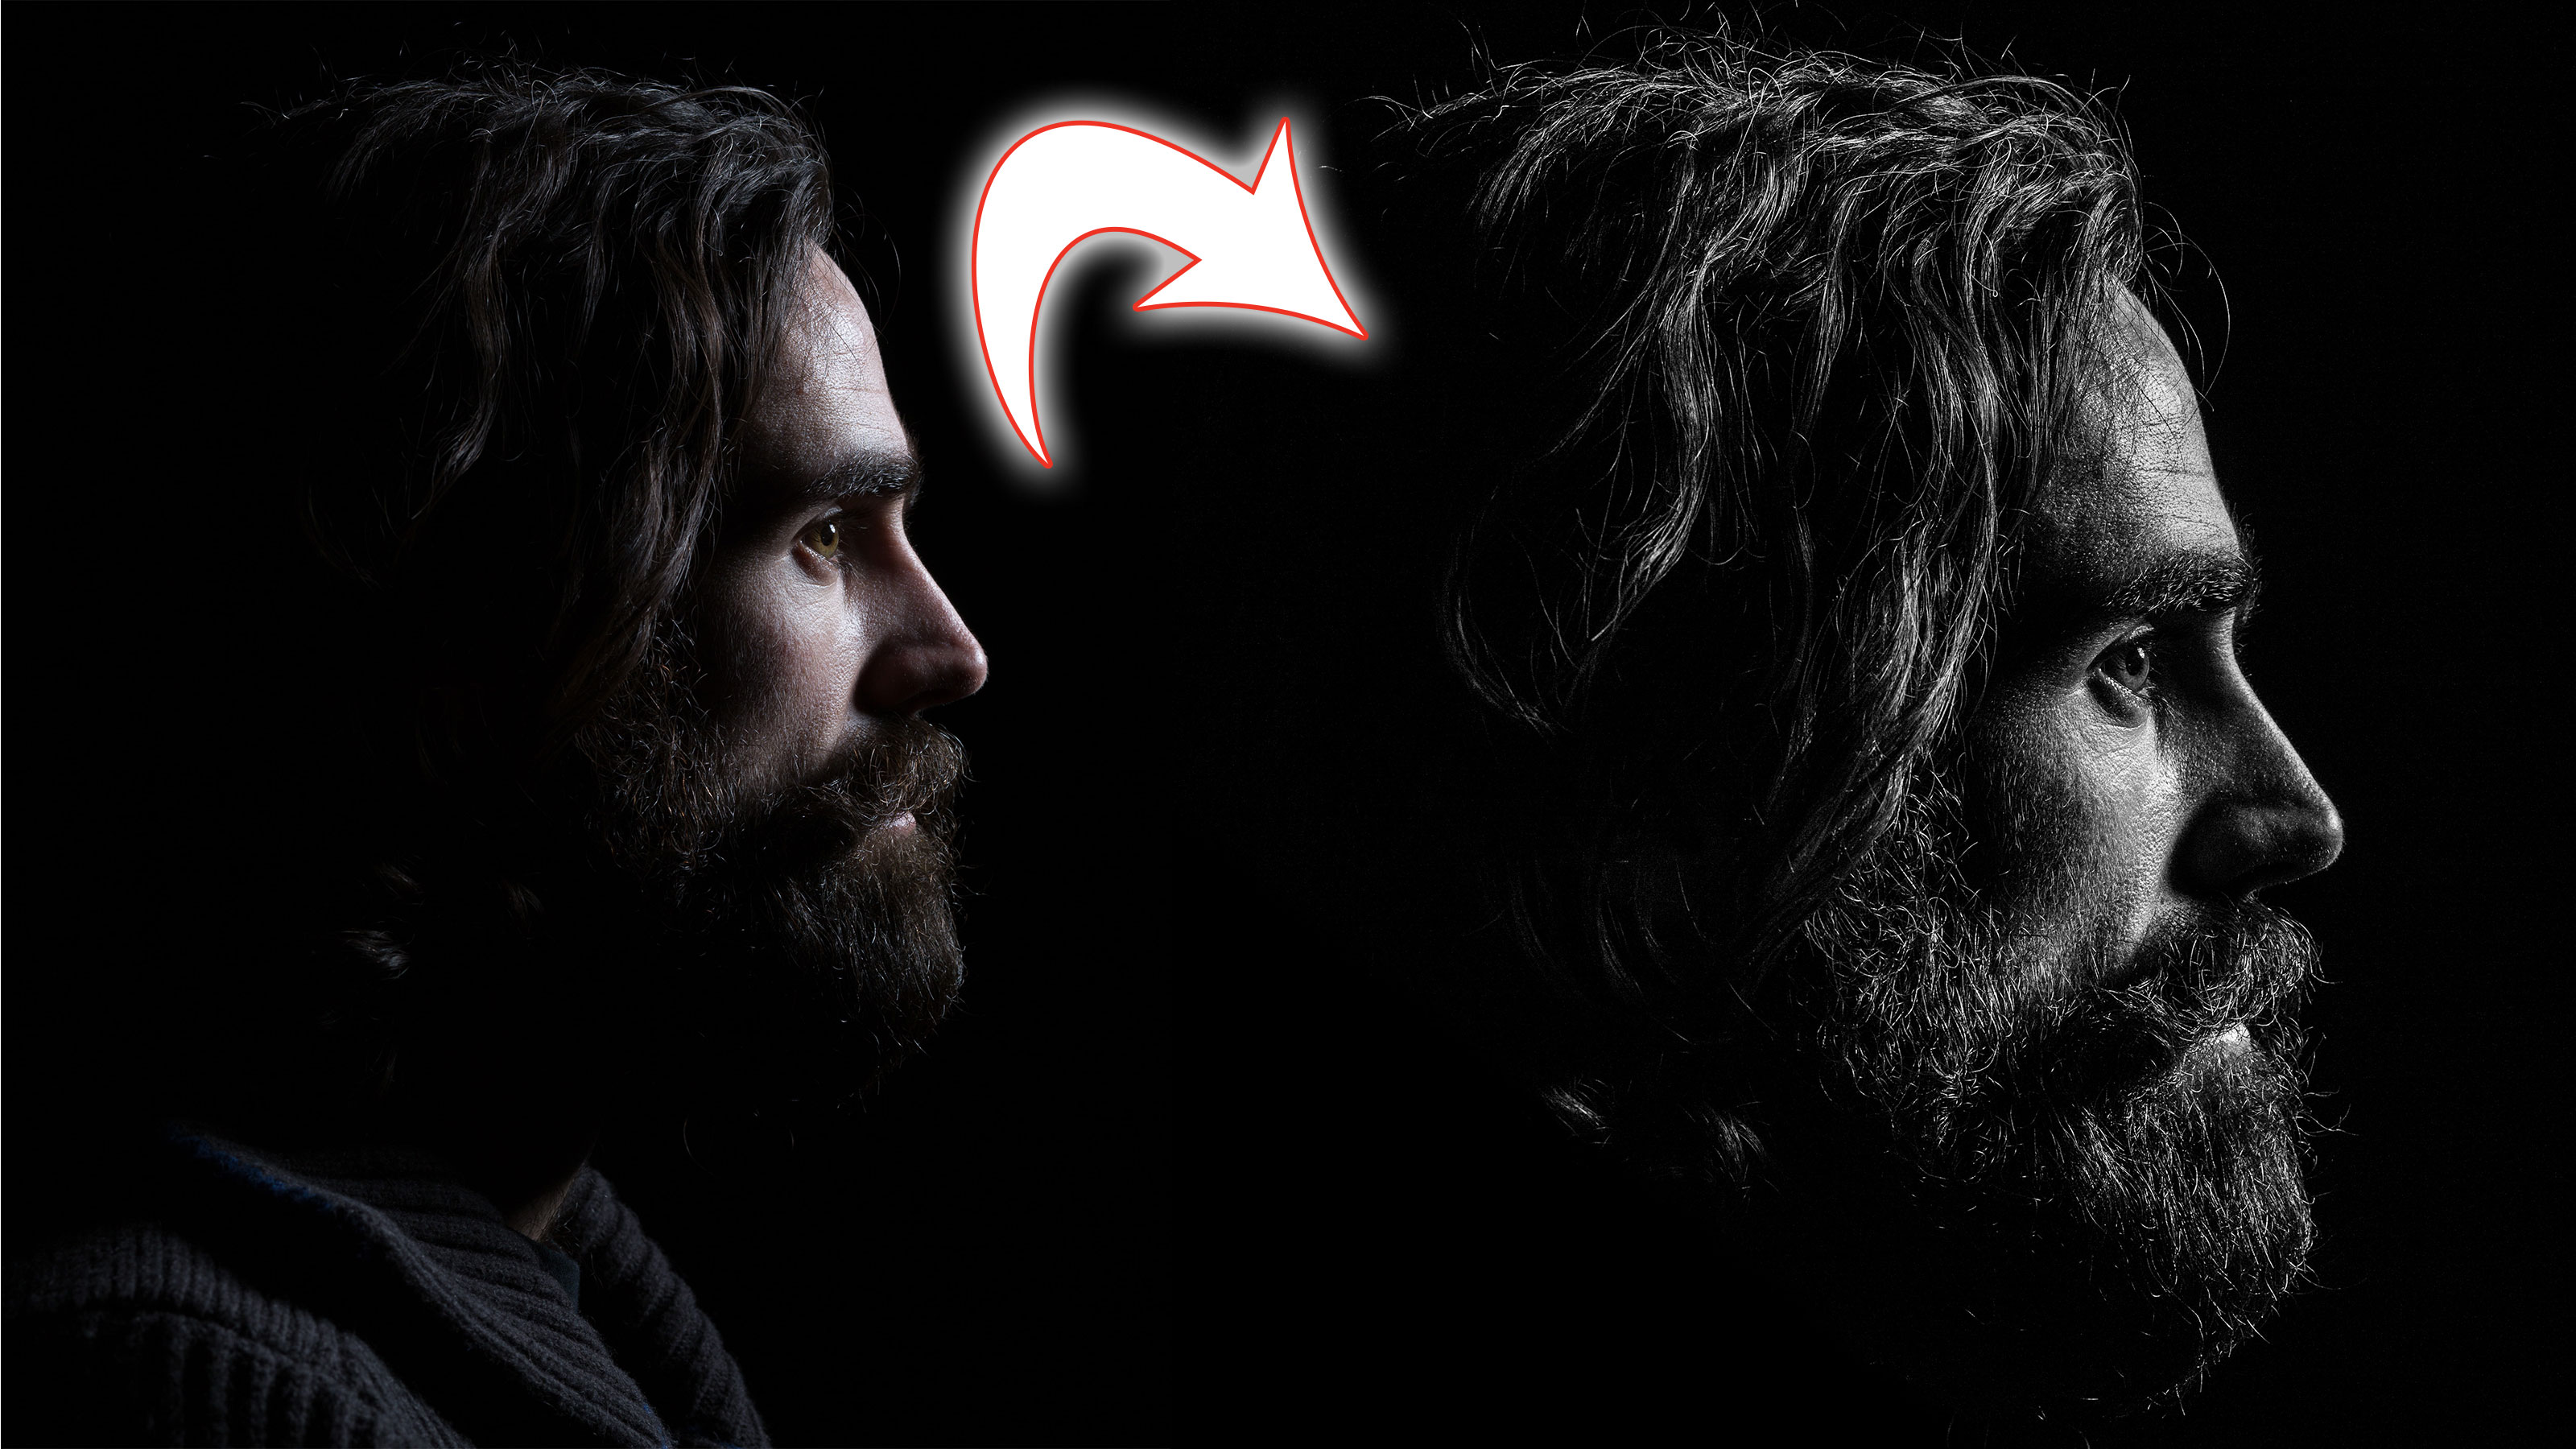
Over the last few years I’ve shot for a personal project, called Hirsute, all based around men’s facial hair. This is the processing I used to help bring the images together, featuring a shot of actor Sean T O’Meallaigh.
• See more Lightroom tutorials
1. Convert to mono
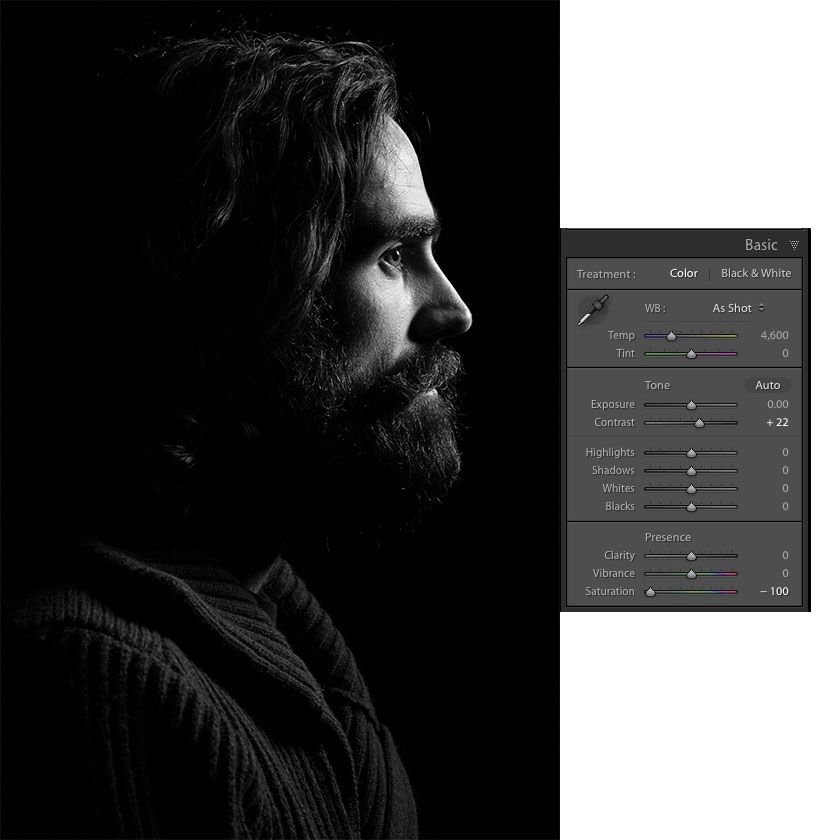
The intention for the photo is to be in black and white. You can use the B&W panel for this, or an alternative way is to decrease Saturation to -100, and increase Contrast to taste (+22 in this case).
2. Hide the clothes
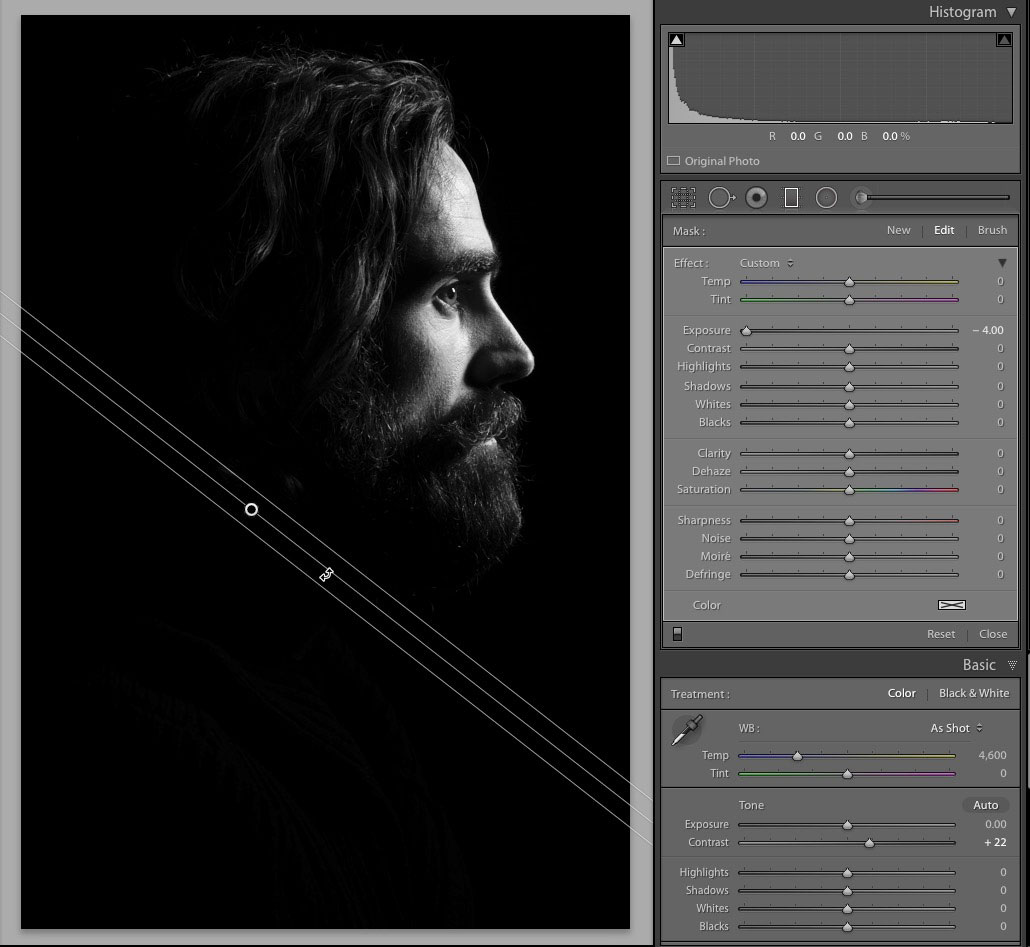
To create a digital bust, you need to hide the clothing. Here, I press M for the Graduated Filter (or you can click the fourth icon in the toolstrip below the Histogram). I set Exposure to -4 and draw out a filter parallel to the beard, then right-click on the pin and choose Duplicate for more effect.
The best camera deals, reviews, product advice, and unmissable photography news, direct to your inbox!
3. Improve the skin tone
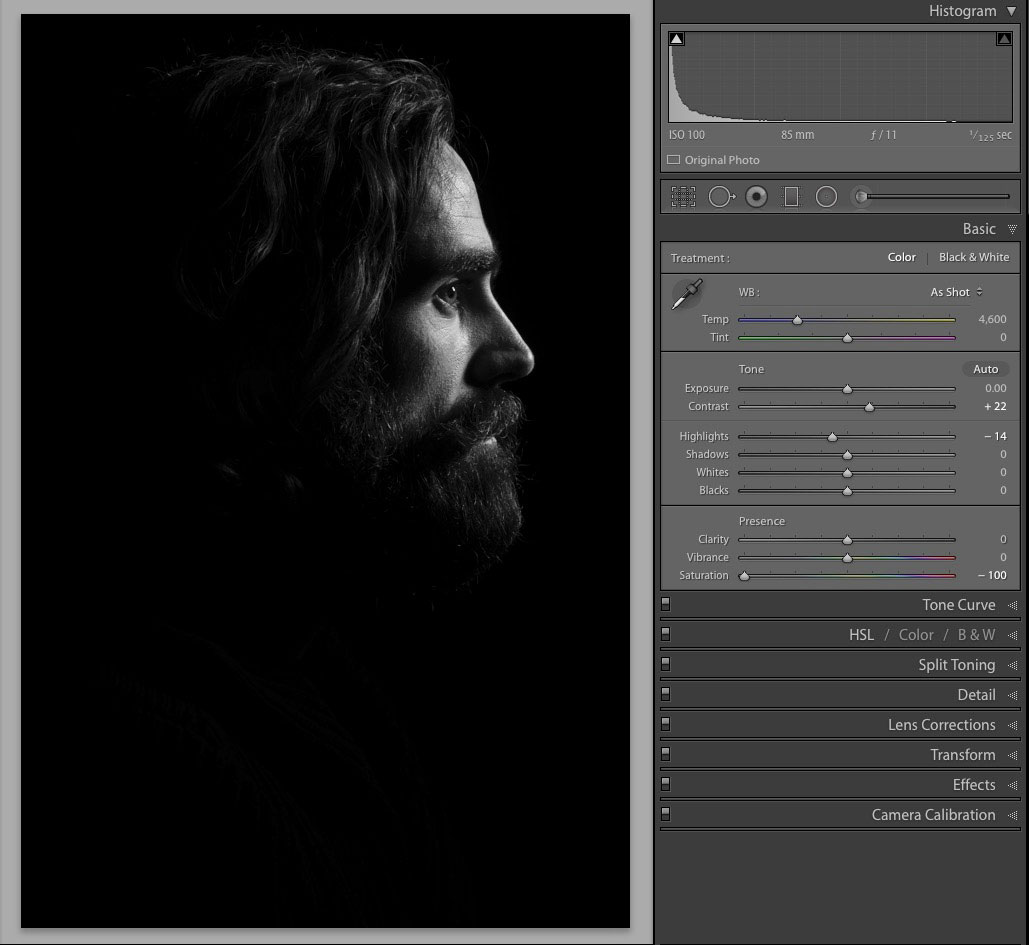
To bring some tone back into the skin, I bring the Highlights setting back to -14. This helps give a shade to the skin, and makes sure it can take the effects that follow.
4. Bring out the detail
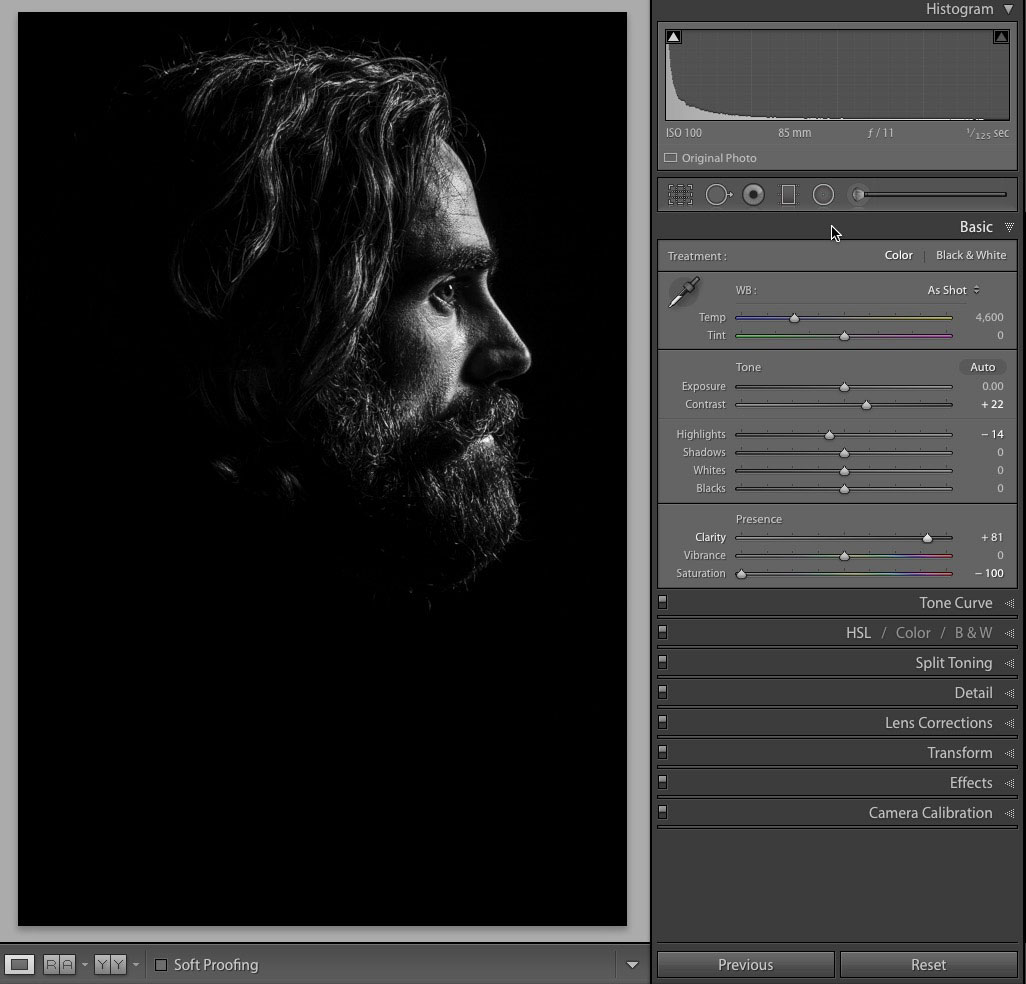
To bring out the character and detail, I bring the Clarity slider right up to 81. It’s a high setting, yes, but it really looks great on male portraits.
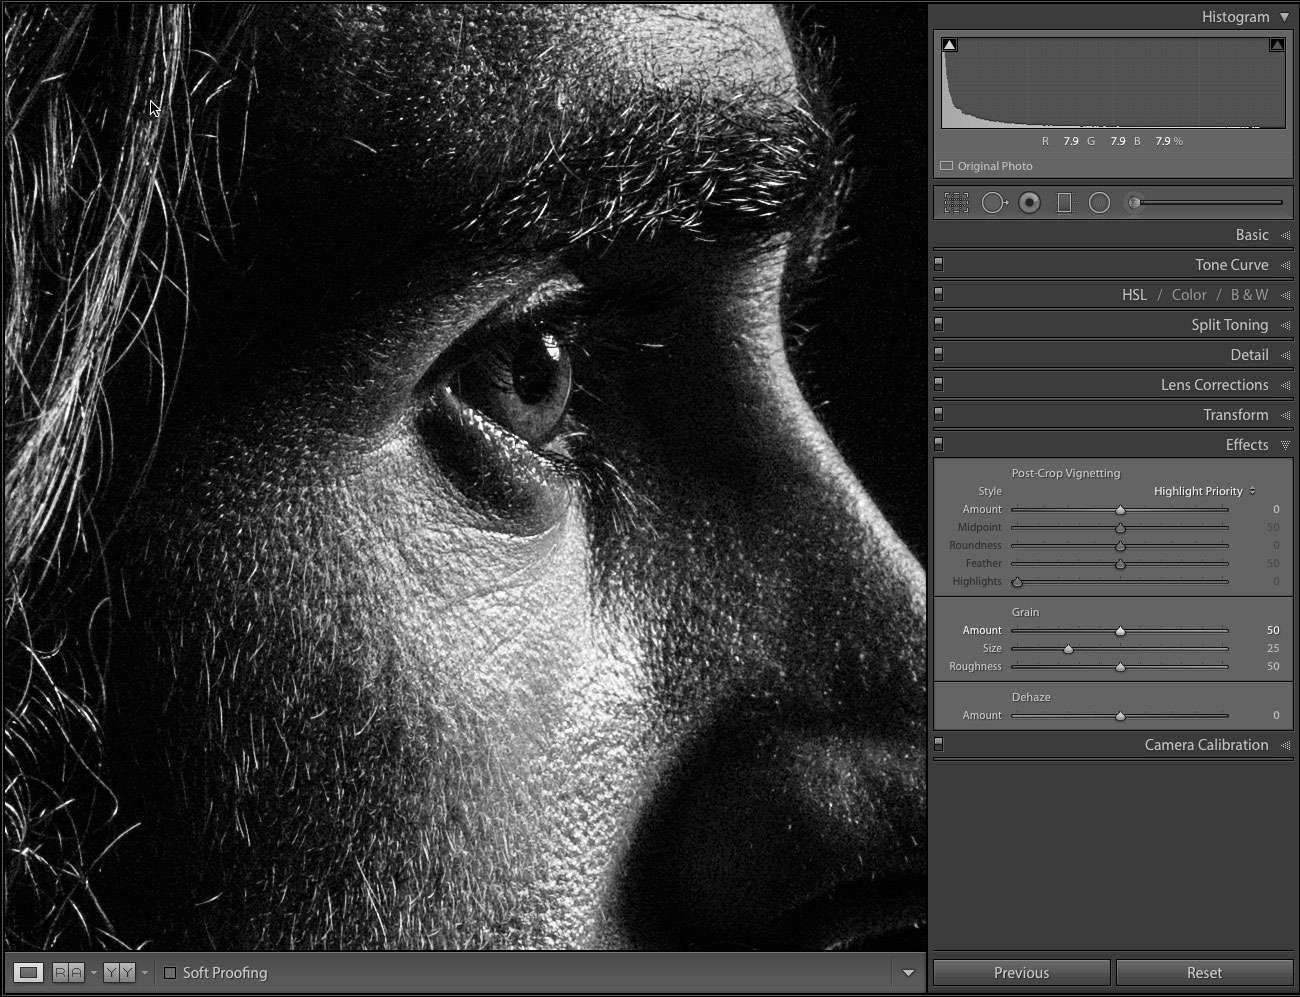
5. Add Grain
To roughen up the photo a little, I add Grain. The controls are in the Effects panel. I can get away with a lot on this image, so even +50 looks great. I can press Q and use the brush to remove any spots or areas that distract in the photo.
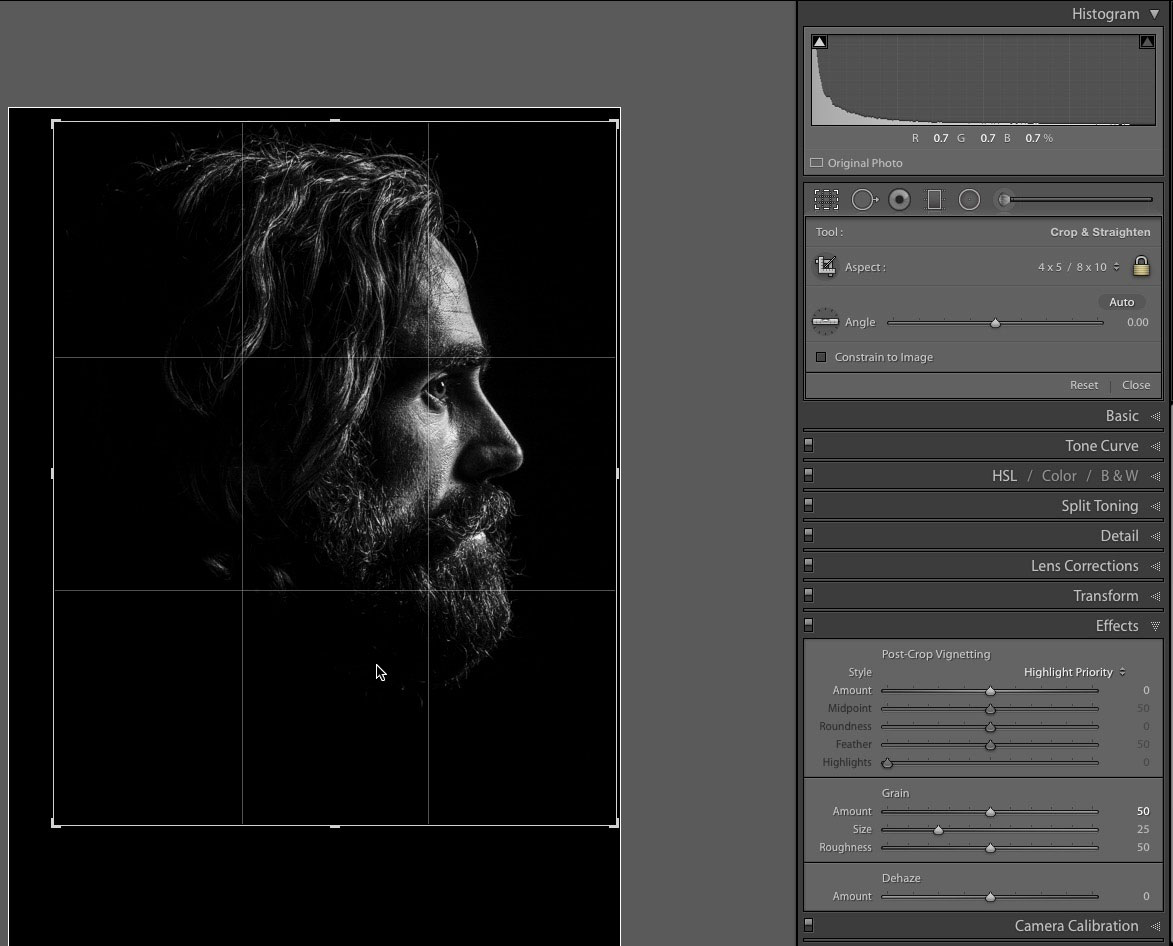
6. Make a crop
There’s a lot of blank space in the shot, so I press R to open the Crop tool. From the Aspect menu, I choose 4X5/8X10. This creates a crop with the top and bottom cut off this standard SLR image. The I can move the crop so the face is all included. Done!
Expert tip: Lighting the portrait
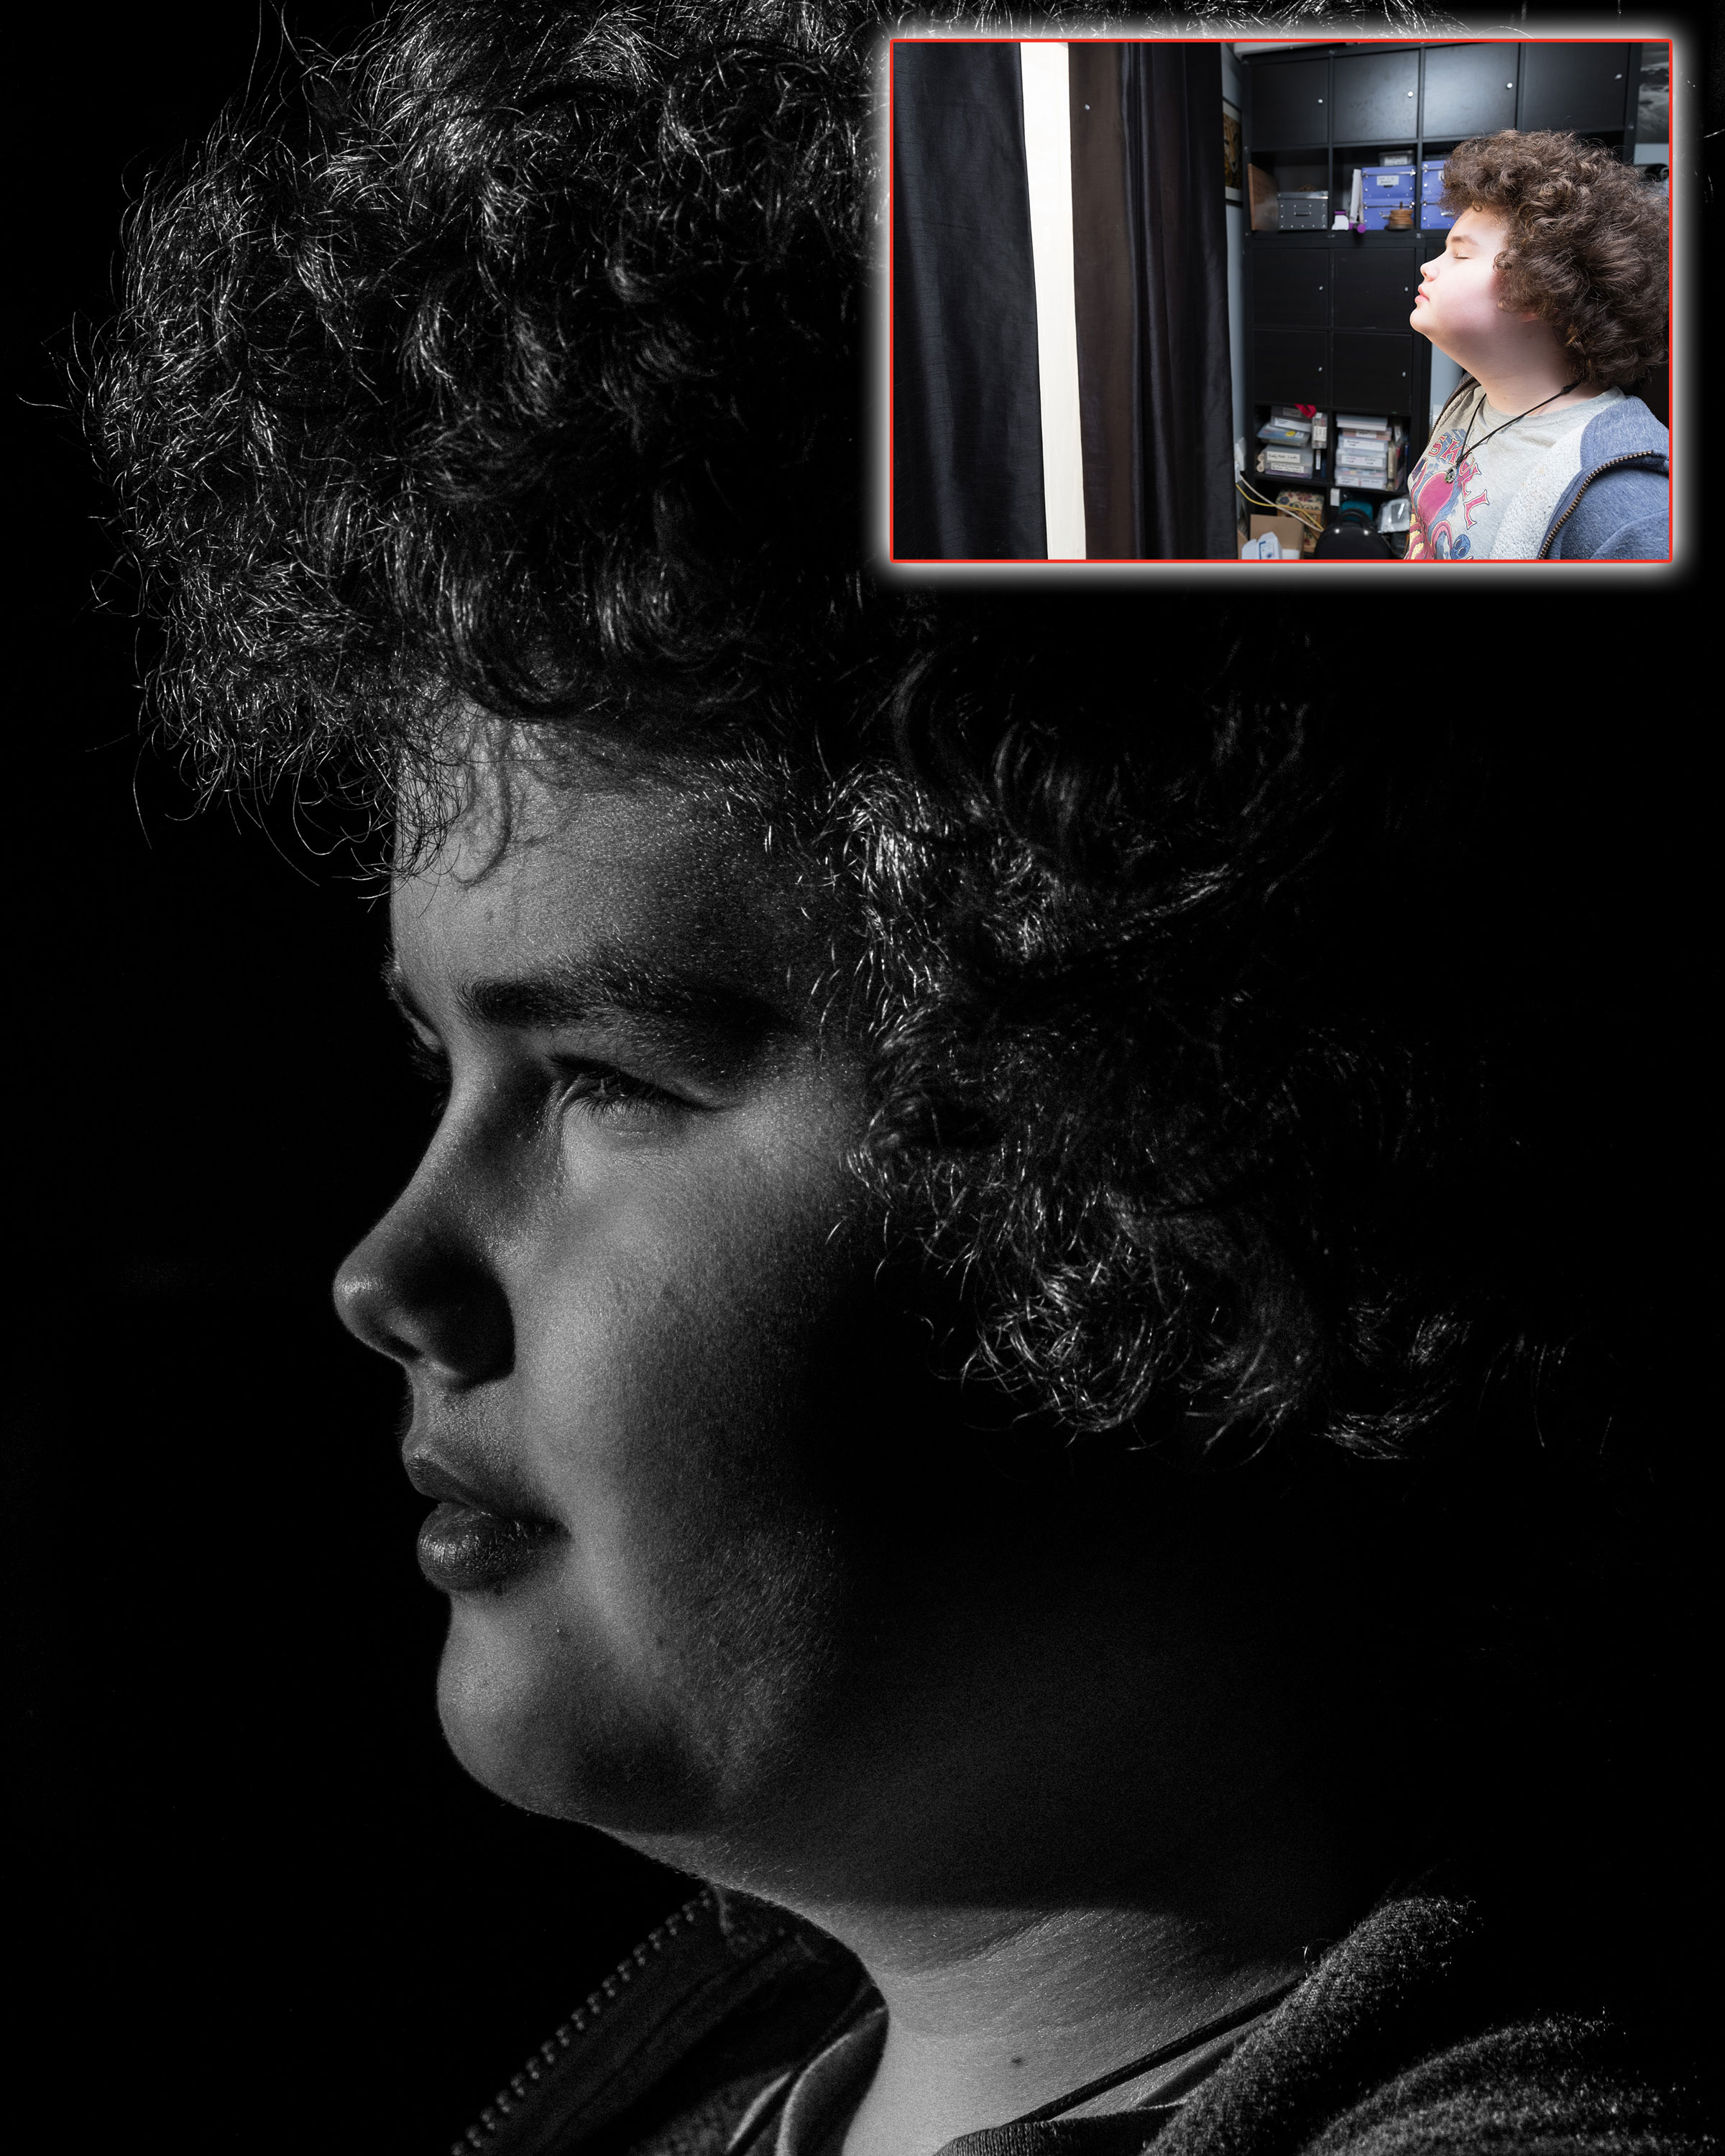
While my main image was shot in a studio using one light and a beauty dish with a grid, you can create this look at home using no more than a darkened room with a pair of curtains. Open the curtains just enough to let a sliver of light hit your subject’s face. Make sure all other light in the room is off or blocked. Have the subject face directly into the light first, then take a step towards you (sideways for them) – just enough to get a shadow on the cheek. See? Much easier than you’d expect. You can see here how I’ve done it with my son. The inset shows the shot with the flash turned off.
About Digital Camera magazine
This tutorial originally appeared in Digital Camera Magazine, the monthly newsstand magazine for all photographers. Why not subscribe to a print edition, and have the magazine delivered direct to your door every month?
Alternatively, we have a number of different digital options available, including:
• Apple app (for iPad or iPhone)
• Zinio app (multi-platform app for desktop or smartphone)
• PocketMags (multi-platform app ideal for Android devices)
• Readly (all-you-can-eat digital magazine subscription service)
If you wanted a printed version of any of our most recent issues we have a selection of back issues to choose from in our online store.
How to get Adobe Lightroom
Adobe Lightroom is available in two versions: the regular Adobe Lightroom Classic CC designed for desktop users, which is what we cover in this series, and a new cloud-based Adobe Lightroom CC, which stores your files online and offers a similar but reduced set of features. For regular desktop users we recommend Adobe Lightroom Classic CC.
Adobe offers three subscription based Photography Plans which you can click on below. We recommend either the regular Photography Plan, or the Photography Plan (1TB) which costs more but comes with 1TB online storage in case you decide to go with Lightroom CC.
For this set of tutorials and for anyone who likes to work on a single main computer, we recommend the regular Creative Cloud Photography Plan. This is the cheapest way to get started AND it comes with Photoshop CC too.
Read more:
• This is the best photo-editing software today
• These are the best laptops for photographers right now
• We help you choose the best desktop computers for photo editing
• Essential portrait photography tips
Sean McCormack is a commercial, and editorial photographer, book author, and regular contributor to Digital Camera magazine based in Galway, Ireland. He has extensive experience with Lightroom, dating back to its original beta version, and has tried out just about every plugin and preset available. His latest book is Essential Development 3: 25 Tips for Lightroom Classic’s Develop Module.
