Digital Camera World Verdict
Lightroom (or Lightroom CC) has come a long way. It’s the web-first version of Lightroom with a slicker interface but a 1TB storage requirement built into current subscription plans. Early objections have been fixed – now you CAN browse and edit local folders, you CAN create smart albums and you CAN use external editors! If you haven’t looked at Lightroom (CC) for a while, then maybe now’s the time to think again, because it has evolved and matured into a generally excellent photo-editing solution for modern camera/mobile shooting styles.
Pros
- +
All your images available everywhere!
- +
Community engagement features
- +
Slick and appealing interface design
- +
AI denoising now fully integrated
- +
AI-powered searches
- +
Intuitive interaction on mobile devices
- +
Pop-up tutorials help master the app
Cons
- -
1TB online storage is essential
- -
Mobile apps lack some desktop features
- -
Needs an Internet connection
- -
Offers Versions not Virtual Copies
Why you can trust Digital Camera World
Lightroom and Lightroom Classic share the same name, confusingly, and they do the same basic job of organizing your photo library and offering powerful non-destructive editing tools to correct and enhance images and apply all sorts of creative effects. The editing tools are the same, and they use the same presets and profiles. Both are among the best photo-editing software applications today. And yet they are two distinctly different programs aimed at different user types and ways of working.
I’ve reviewed Lightroom Classic separately: this is the ‘old’ Lightroom that works with files stored on your computer, not in the cloud, and is probably way more popular among serious photographers because the storage is free and under your control.
Lightroom offers a different way of working that’s not intrinsically ‘better’ or ‘newer’, just different. It’s aligned more closely with mobile creators, photographers who use more than one device to capture, edit, and view photos, and who want to be able to share images instantly and perhaps engage with the Lightroom community wherever they are and whether it’s on their desktop computer, laptop, tablet, or phone – or even in a web browser.
Lightroom stores your photo library in the cloud, and you do pay for this. It has been one of the key objections from many photographers all along. But 1TB cloud storage is included with Adobe’s Lightroom Plan and its new and alas more expensive Photography Plan, so if you’re a new subscriber, you will get the 1TB cloud storage Lightroom needs. It’s a done deal.
Originally, Lightroom had other limitations compared to Lightroom Classic, but as Adobe has developed and updated Lightroom over time, many of these have been chipped away.
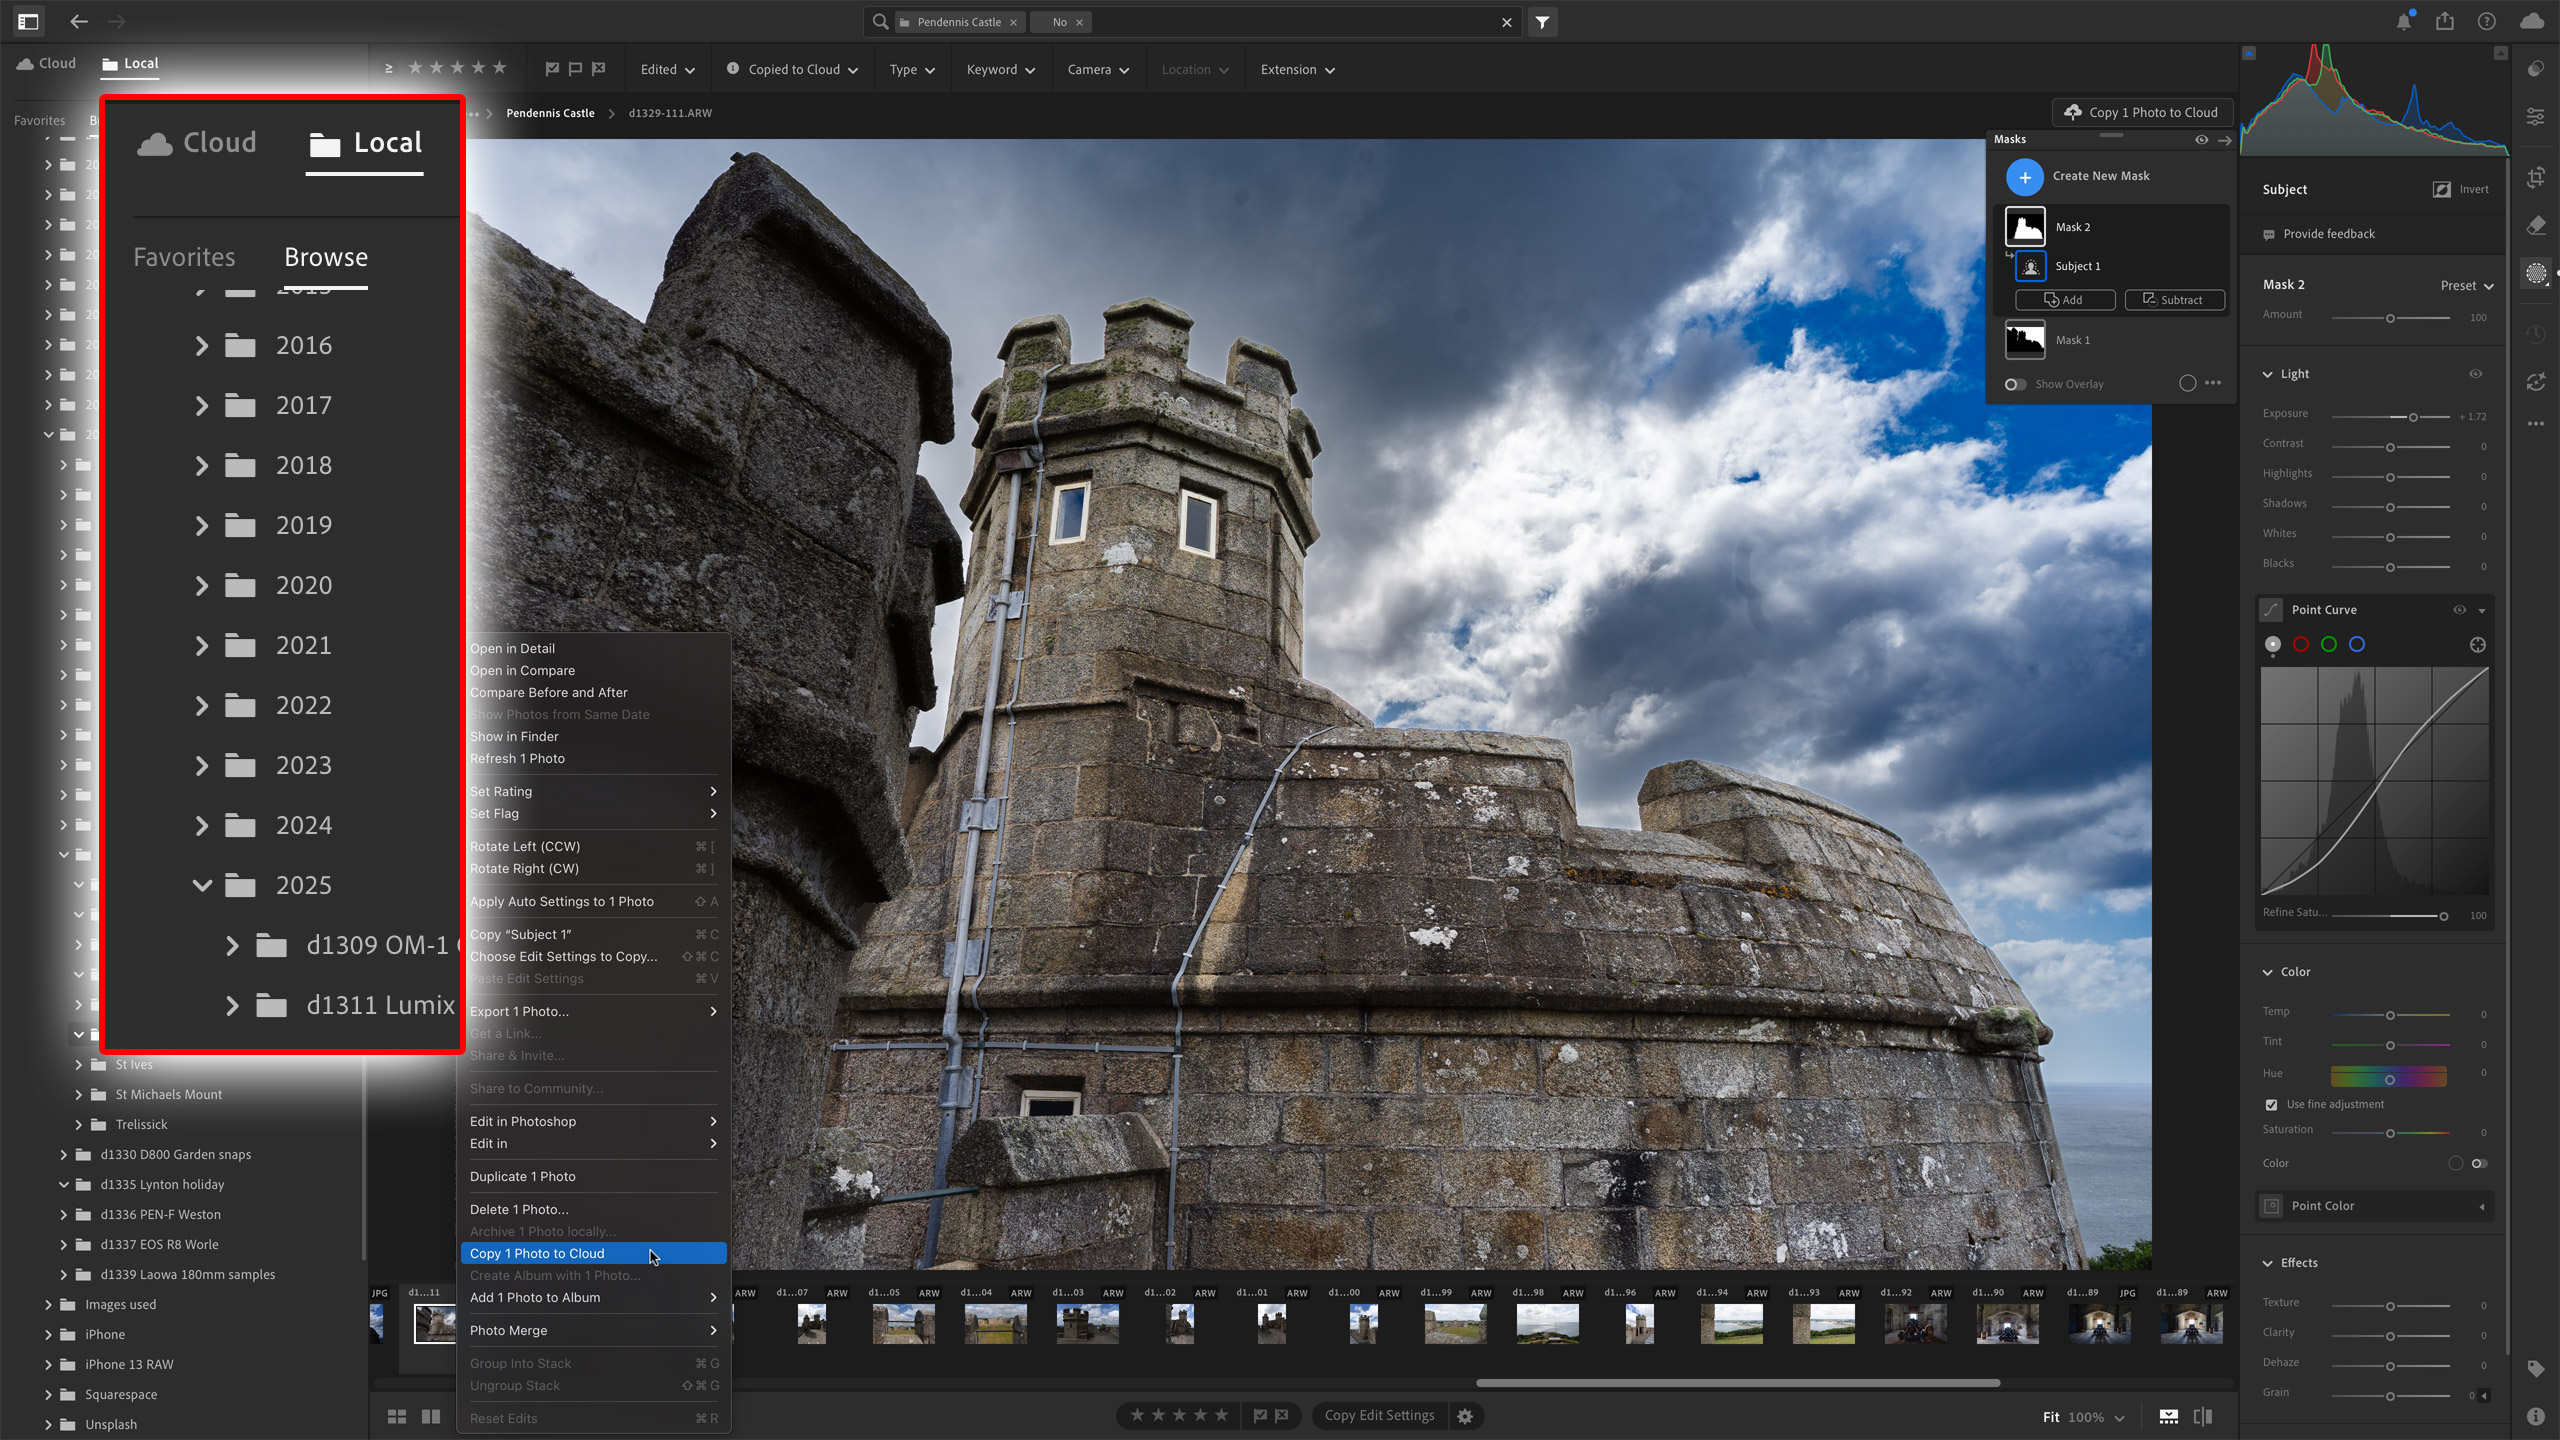
For example, Lightroom would initially only work with images stored in the cloud. Now, though, there’s a Folders panel where you can browse folders on your computer, edit them, and even choose which ones are uploaded to the cloud – you don’t get albums or proper search options with local folders, but this is a huge step forward for those who are still wary of cloud-based storage.
Another objection to Lightroom was that you could create albums but not smart albums. That’s changed too! You can now create both, which will solve a lot of organizational headaches with larger image libraries.
The best camera deals, reviews, product advice, and unmissable photography news, direct to your inbox!
And here’s another step forward – a big one. Back in the day, the only external editor you could use with Lightroom was Photoshop. This made it a closed ecosystem that also forced you into a subscription plan, which included Photoshop. Not anymore. Lightroom will now let you use any external editor of your choosing, and this has really opened up its potential as a central digital hub for your photos.
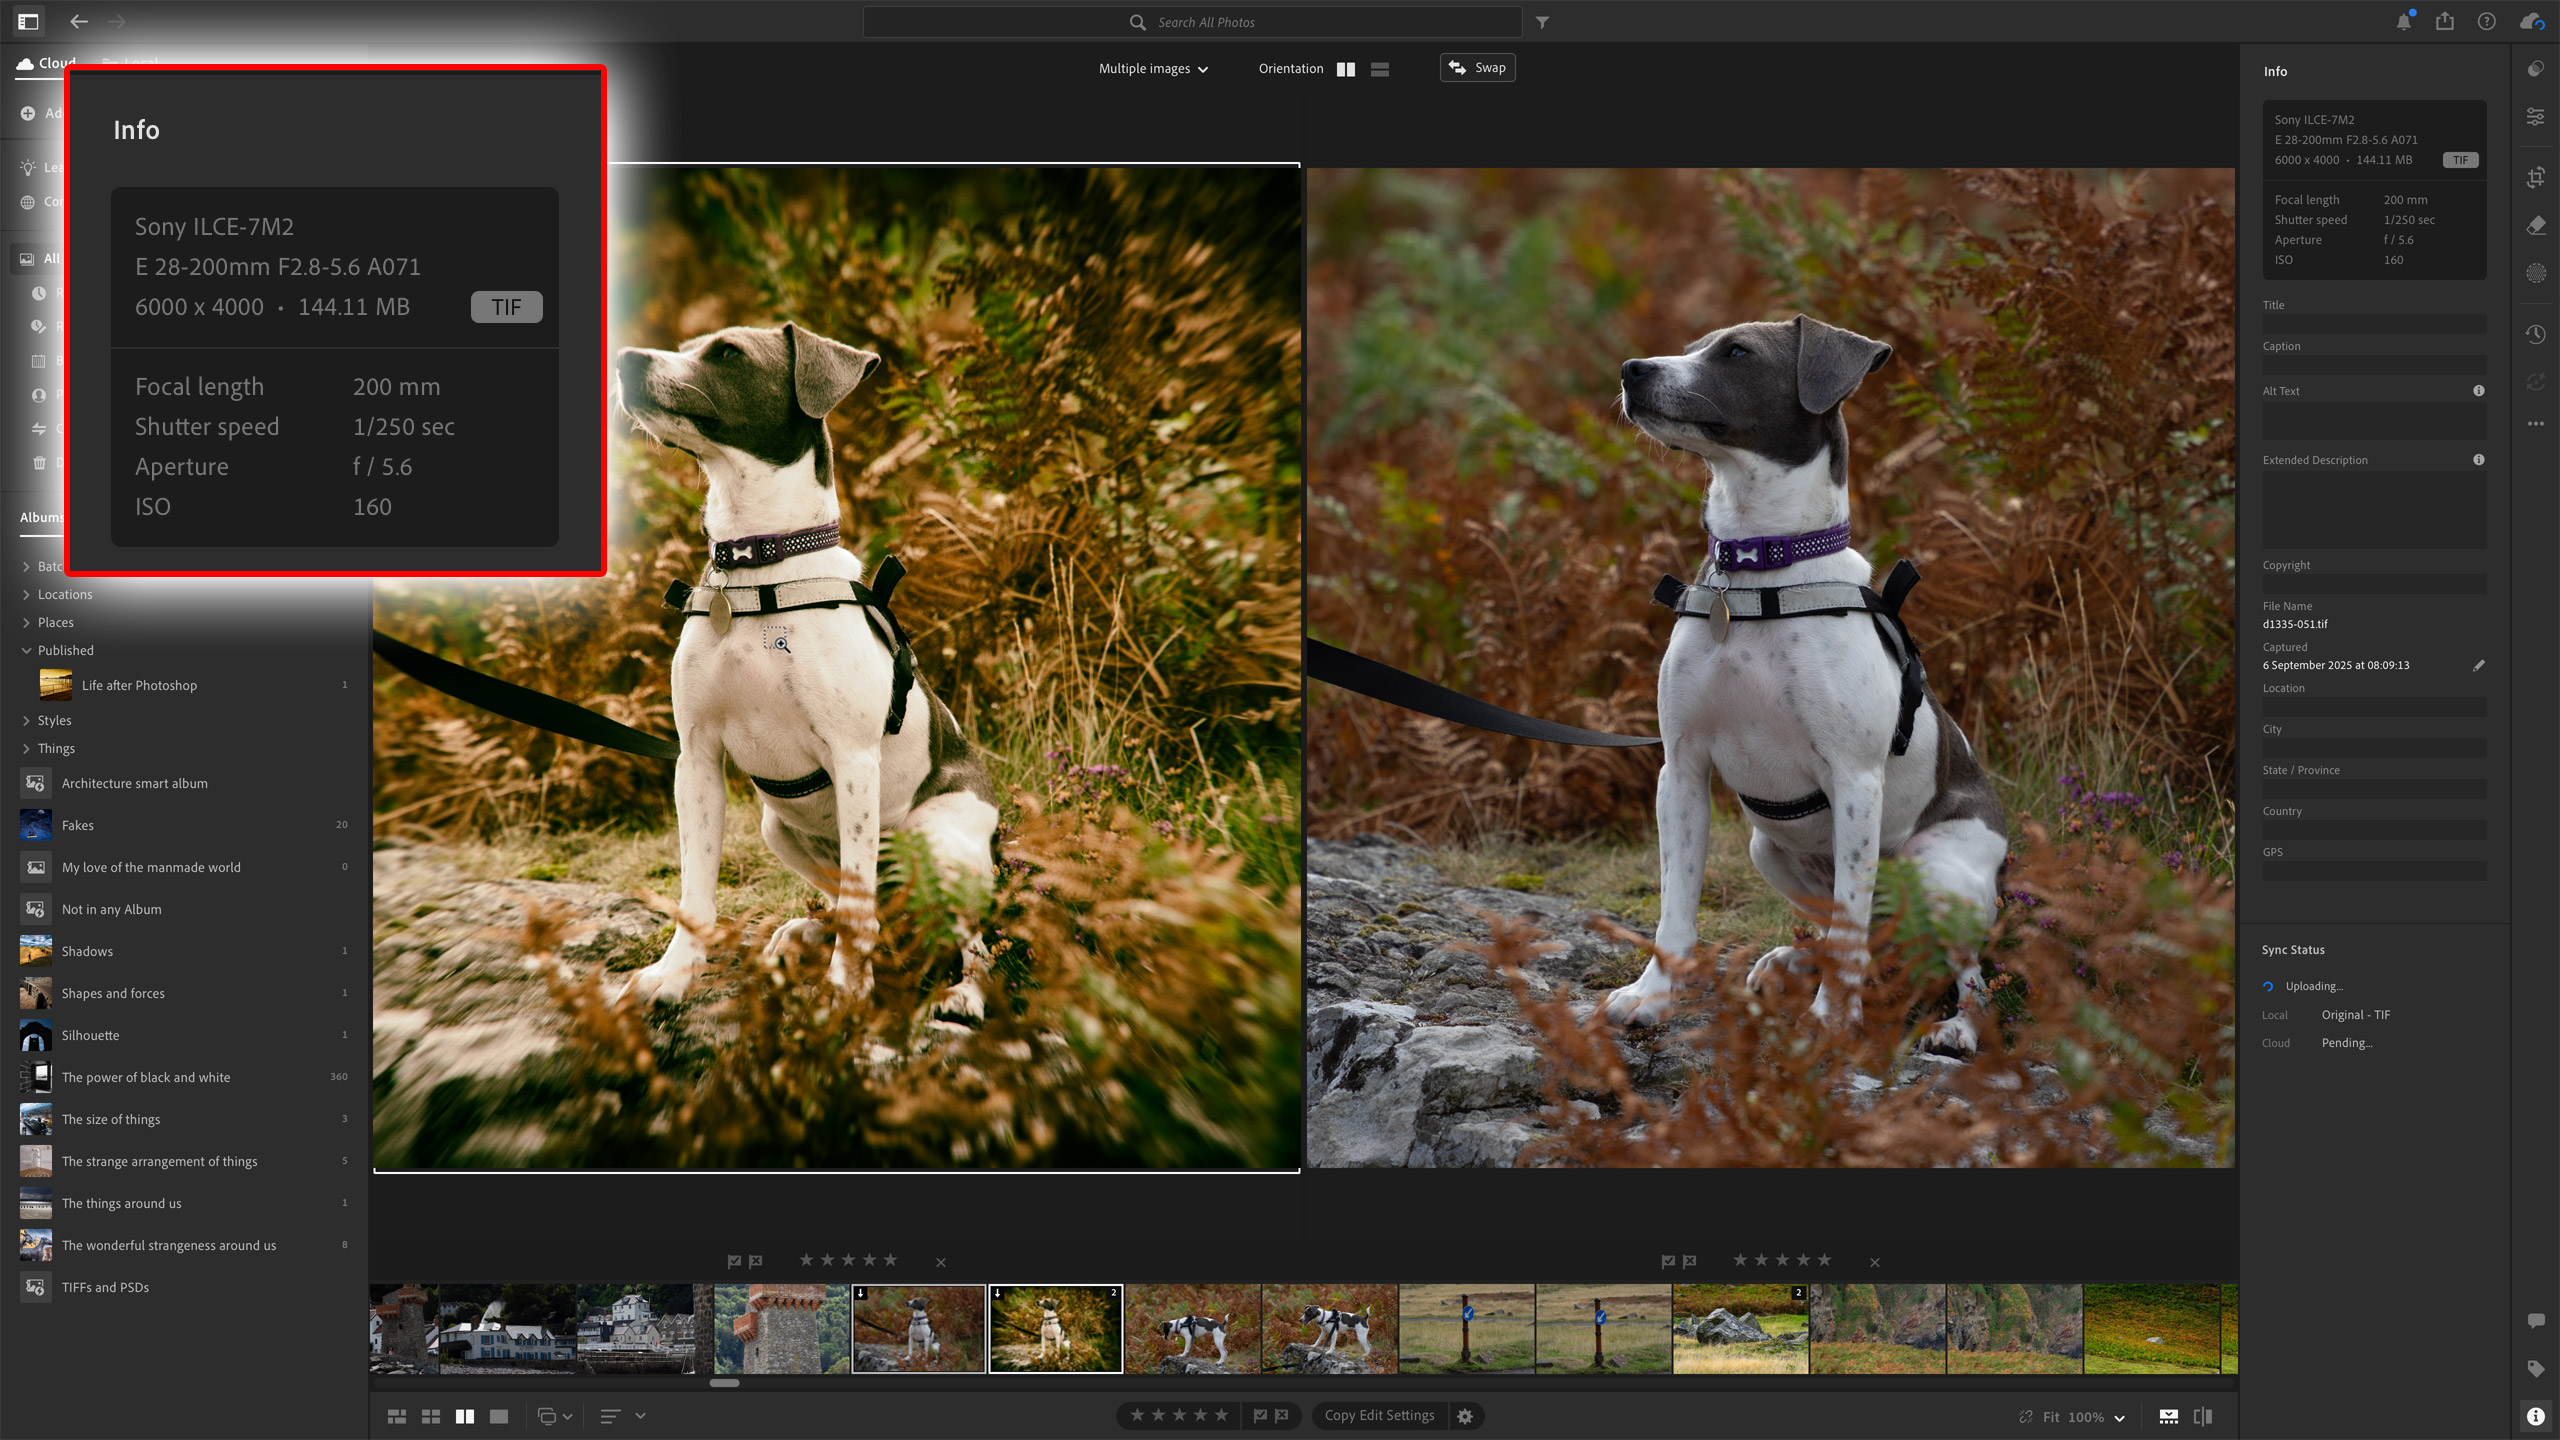
Except… Lightroom shares 16-bit TIFFs with external editors, and there appears to be no option to use 8-bit TIFFs or JPEGs instead. As a result, you end up with a file that might be 6-7 times larger than the raw file you started with, and your 1TB cloud storage could get eaten up faster than you think.
Adobe Lightroom: system requirements
| Row 0 - Cell 0 | Windows | macOS |
Processor | Intel® or AMD processor with 64-bit and SSE 4.2 support; 2 GHz or faster | Multicore Intel® processor with 64-bit support or Apple silicon processor |
Operating system | Windows 10 (64 bit) version 22H2 or later | macOS Ventura (version 13.1) or later |
RAM | 8GB (16+GB recommended) | 8GB (16+GB recommended) |
Graphics | GPU with DirectX 12 support, 2GB of VRAM (GPU with DirectX 12 support, 4 GB of GPU memory for 4k displays and greater, 8 GB of dedicated GPU memory or 16 GB of shared memory for full GPU acceleration and AI features such as Denoise, Lens Blur, and Reflection Removal recommended) | GPU with Metal support, 2GB of VRAM, Apple silicon GPU (M1 or later), 16GB of unified memory for full GPU acceleration and AI features such as Denoise, Lens Blur, and Reflection Removal recommended) |
Disk space | 10GB | 10GB (Lightroom will not install on case-sensitive file systems or removable flash storage devices) |
Display | 1280 x 768 (1920 x 1080 recommended) | 1280 x 768 (1920 x 1080 recommended) |
Adobe Lightroom: price
Adobe Lightroom is best bought in one of two ways: as a Lightroom-only plan, which includes Lightroom, Lightroom Classic, and 1TB storage, or as part of Adobe’s Photography Plan, which is more expensive but also includes Photoshop. The ‘old’ Photography Plan, which continues for existing subscribers only, comes with only 20GB of cloud storage, which is enough to try out Lightroom but not enough for long-term use.
Adobe Lightroom: interface and usability
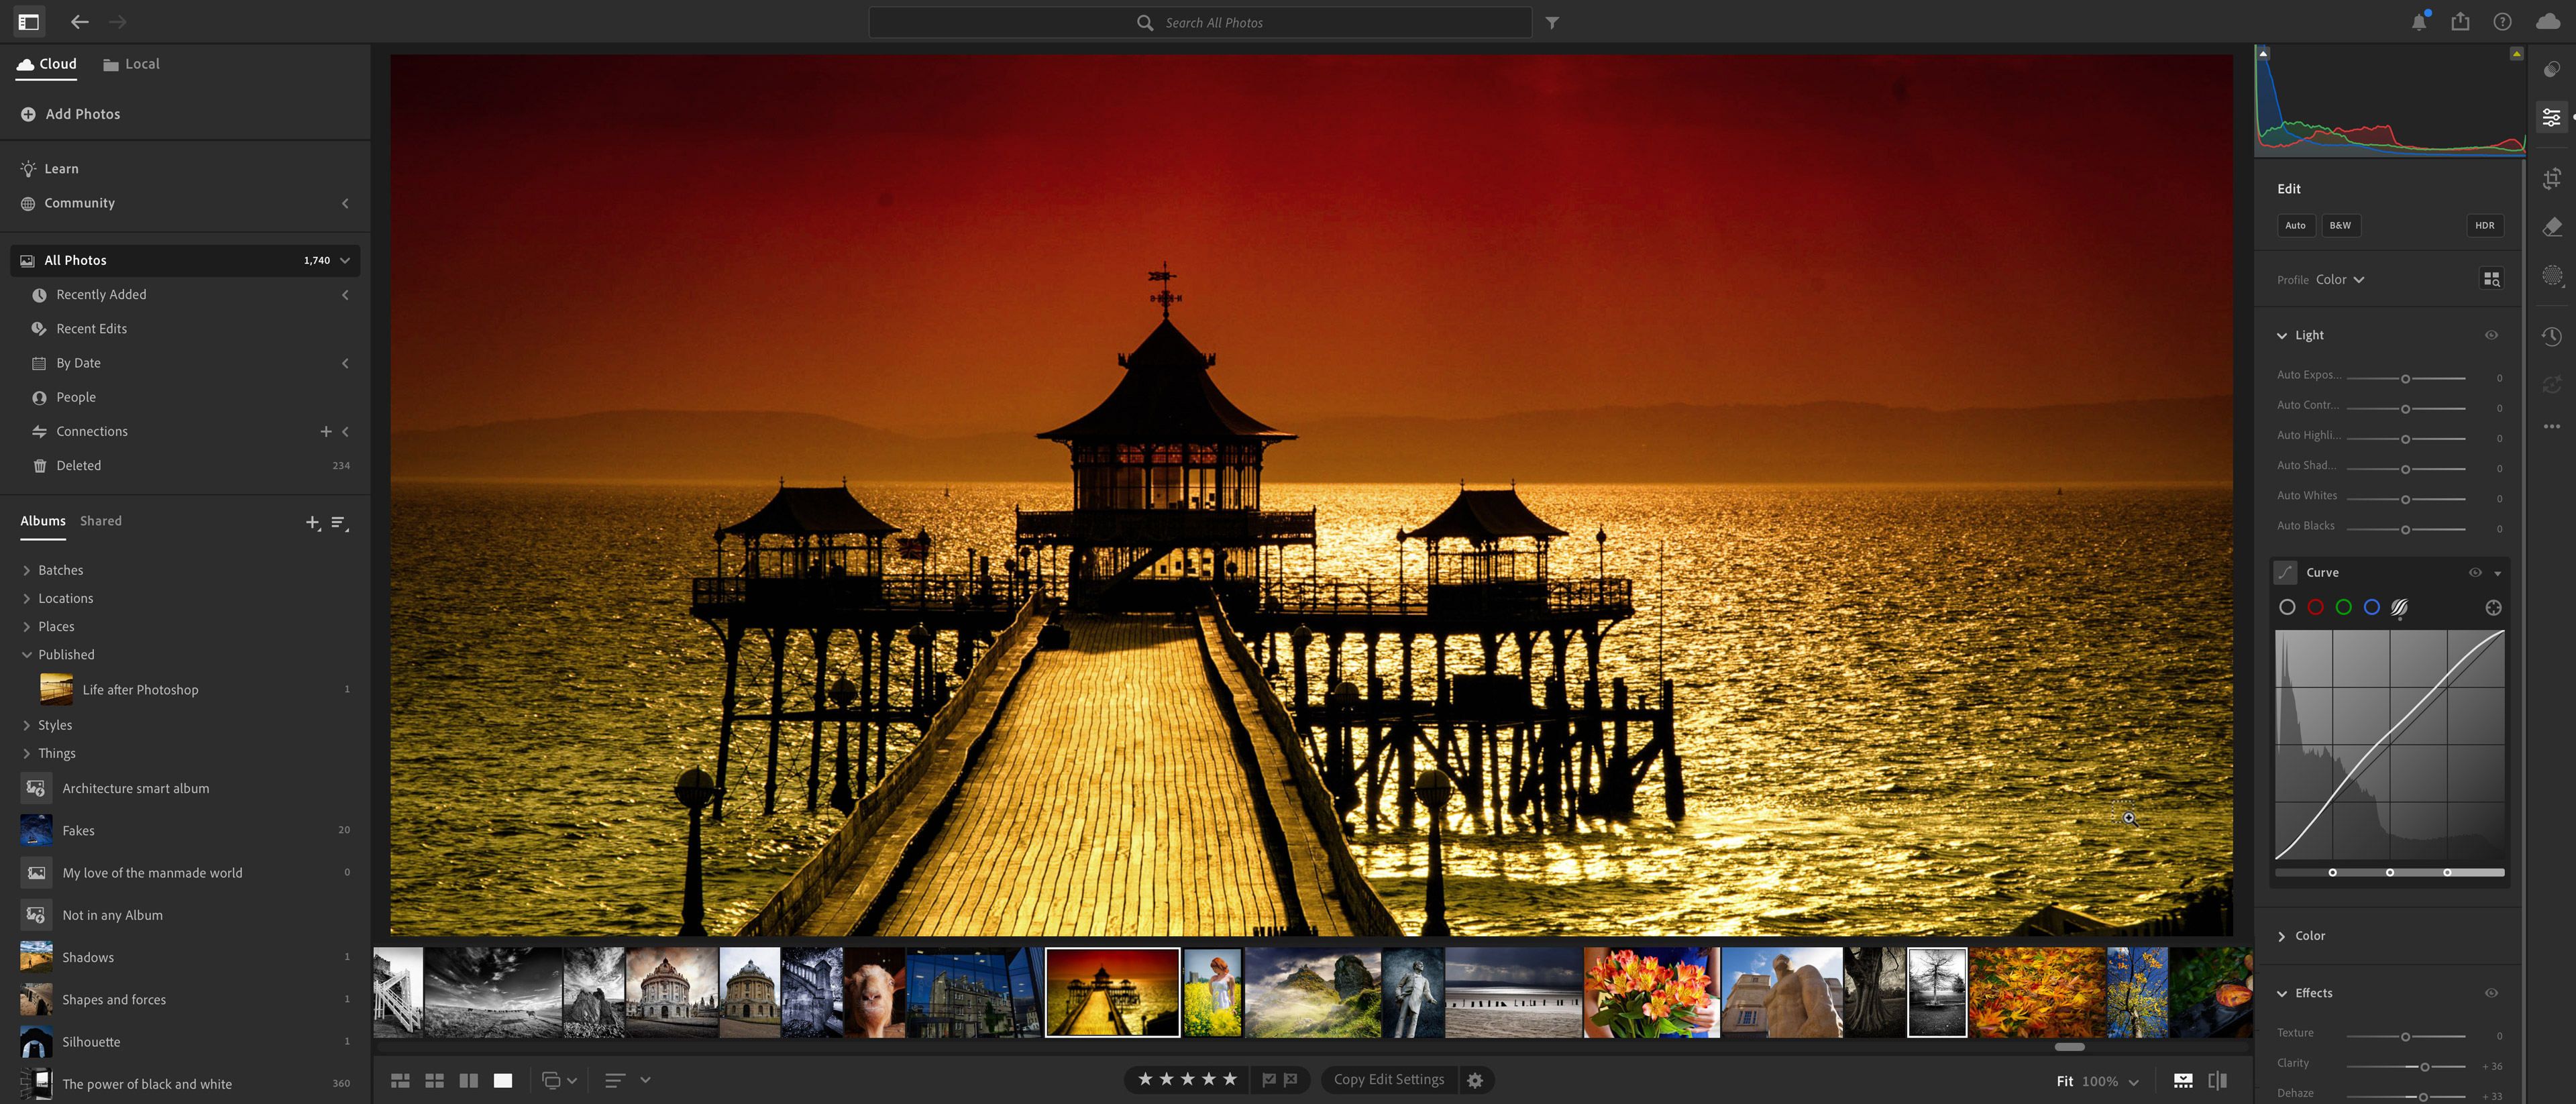
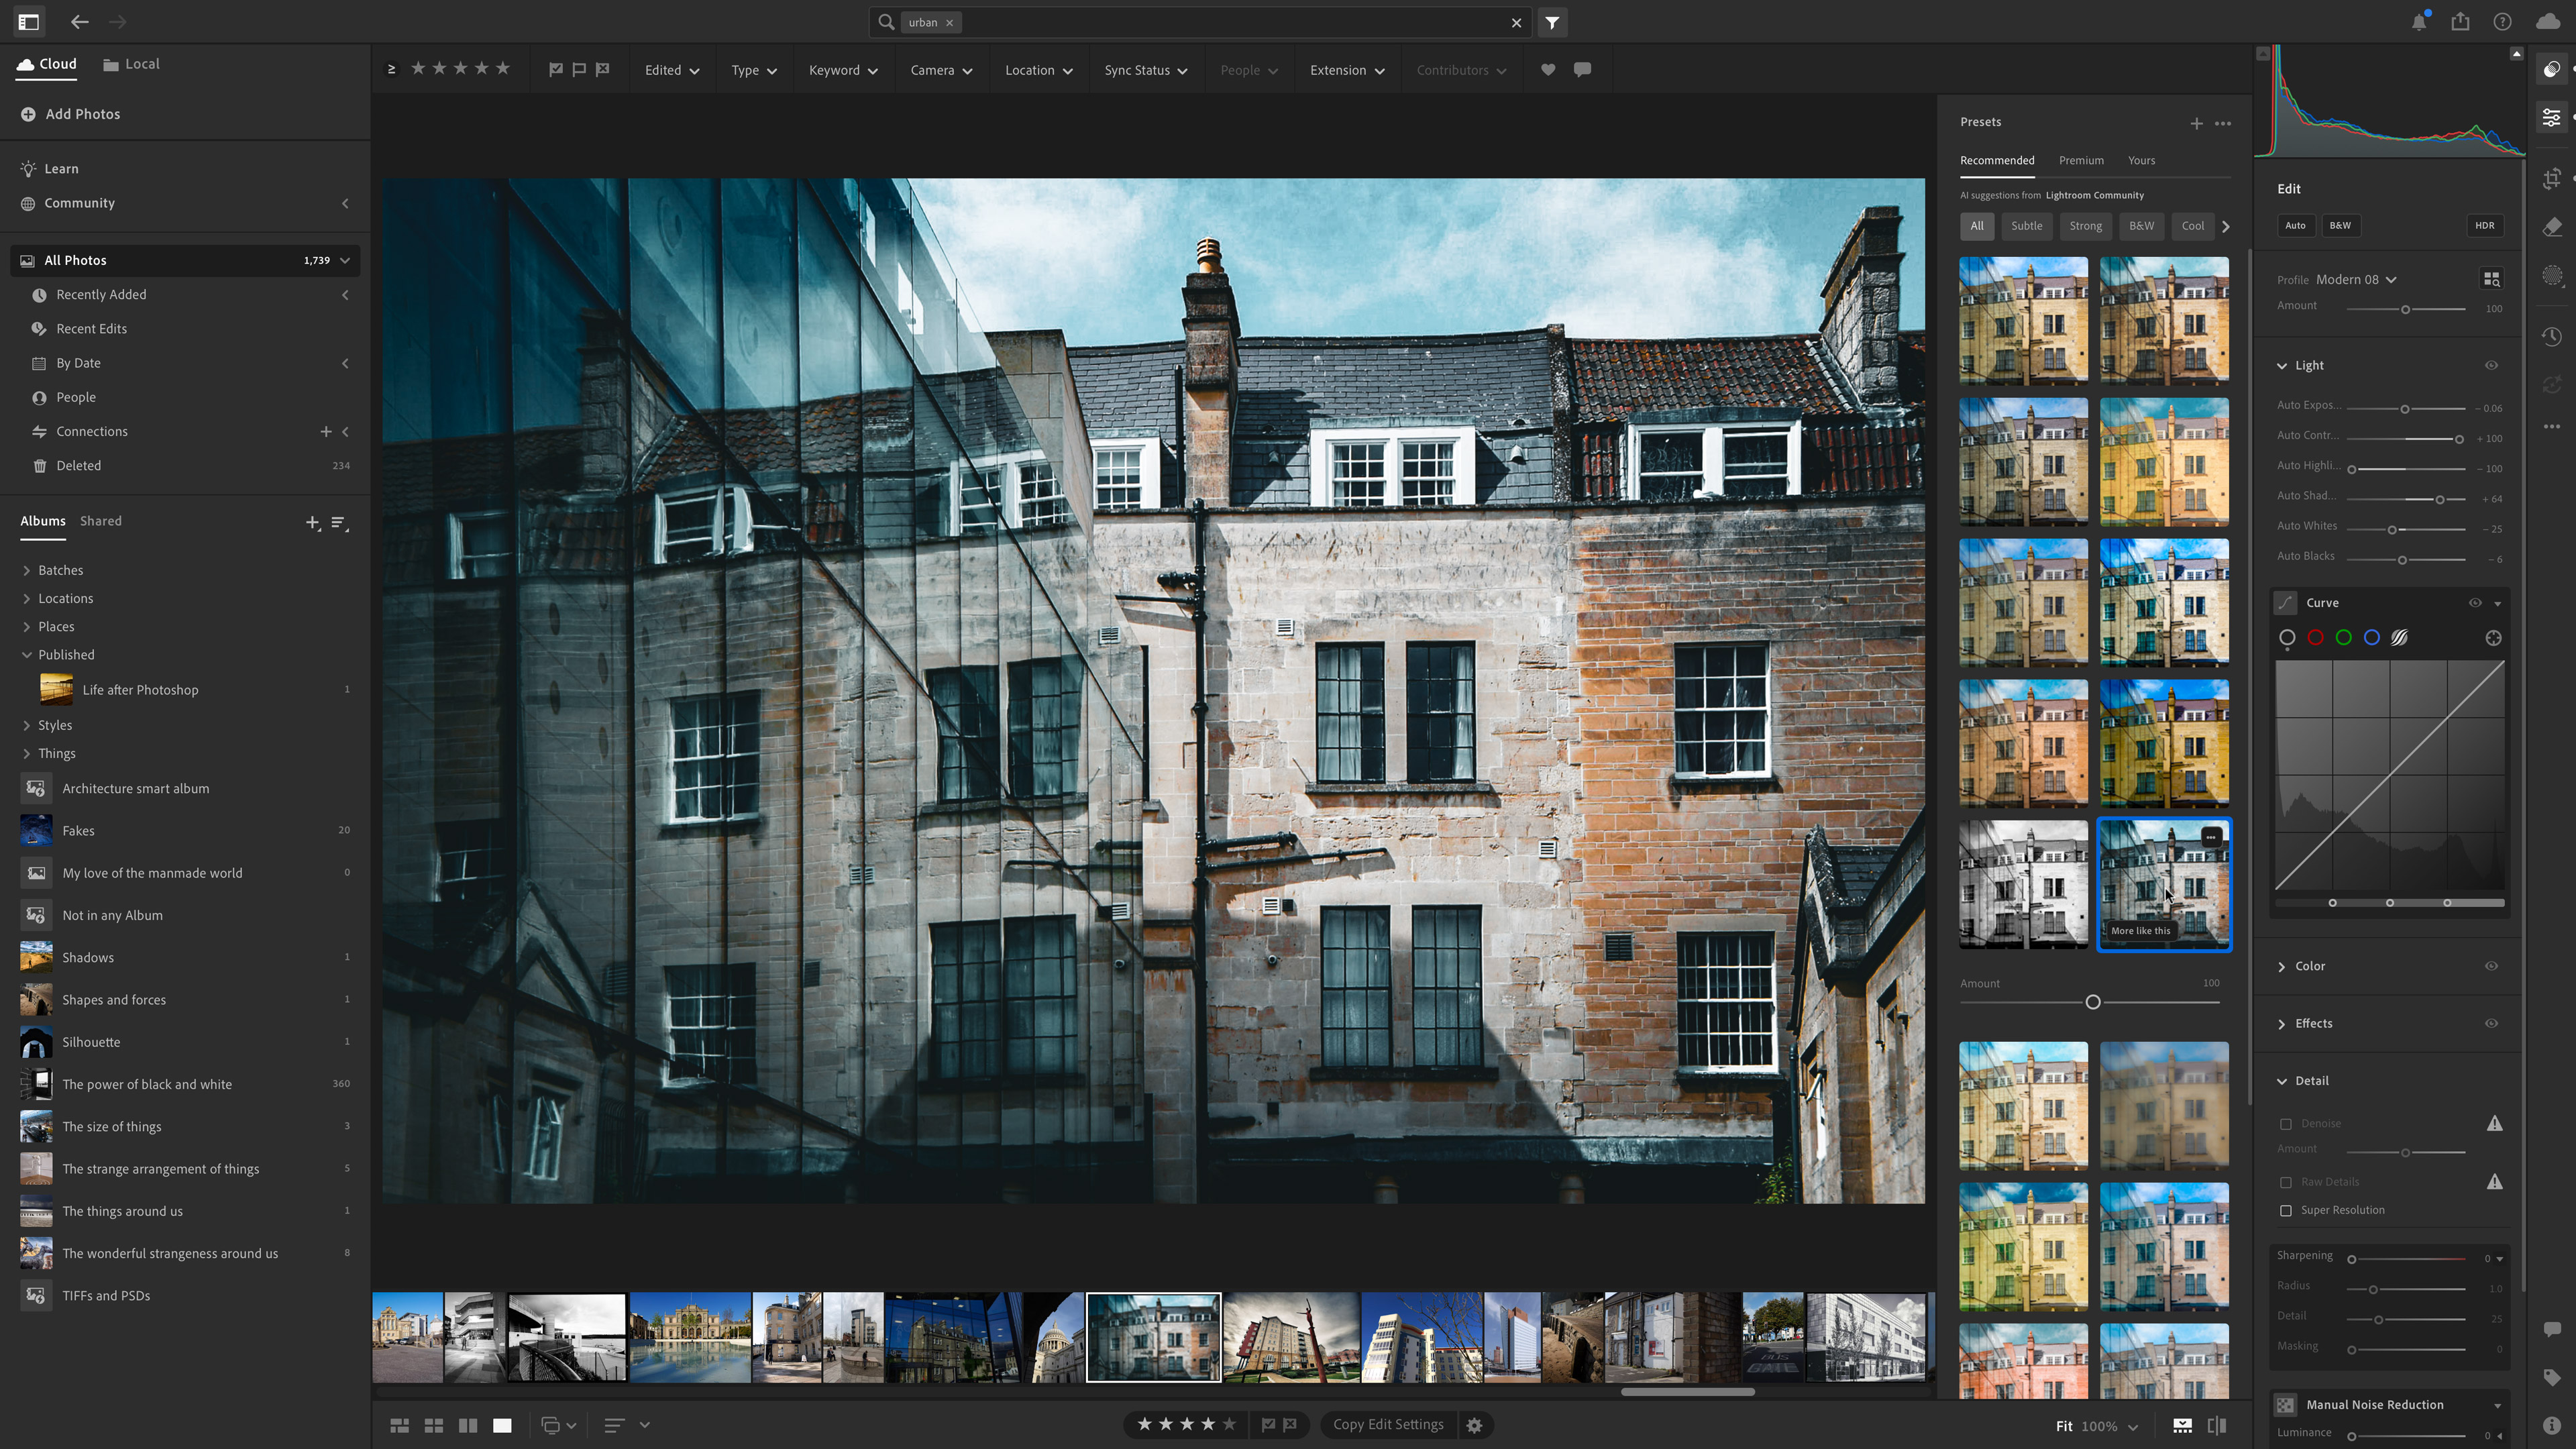
For a program that does so much, Lightroom has a remarkably clean and straightforward interface. The left sidebar displays your albums and smart albums, which can all be nested in a hierarchy of folders. With Adobe’s cloud storage, you only have one catalog, so this is it. There are no desktop-style folders, either, so you have to get used to your photos not being stored in a single, definite place.
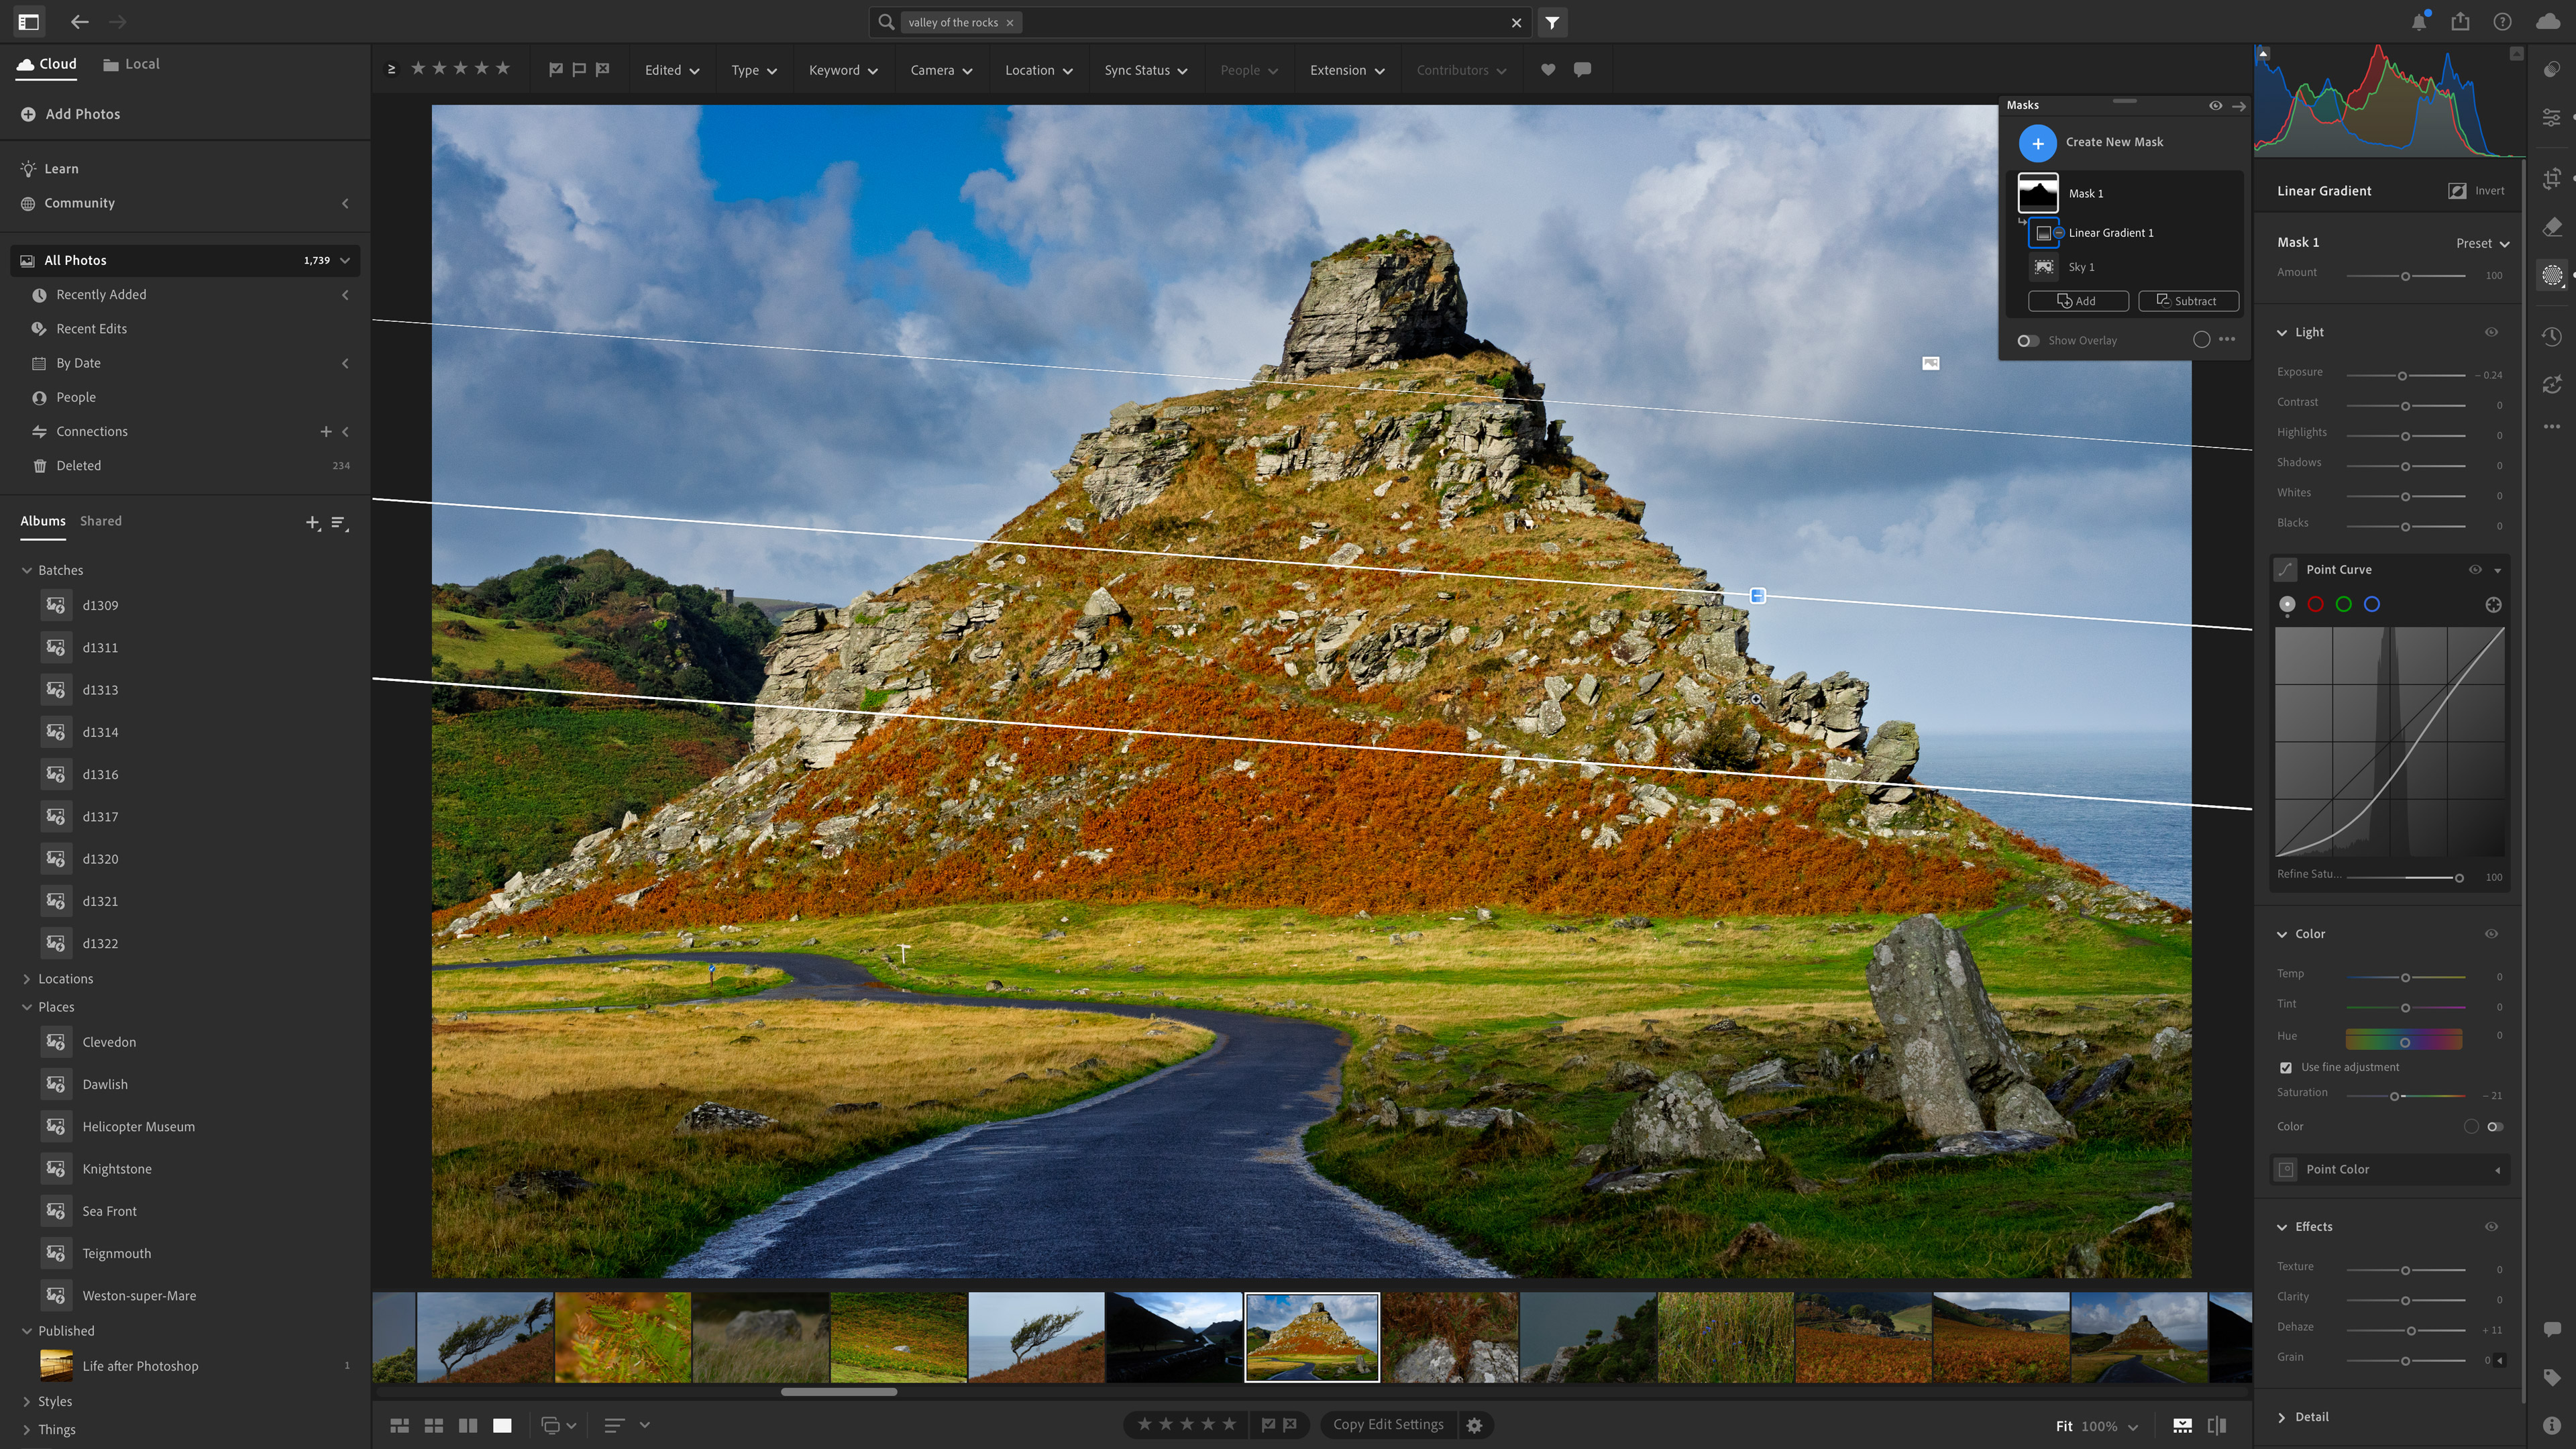
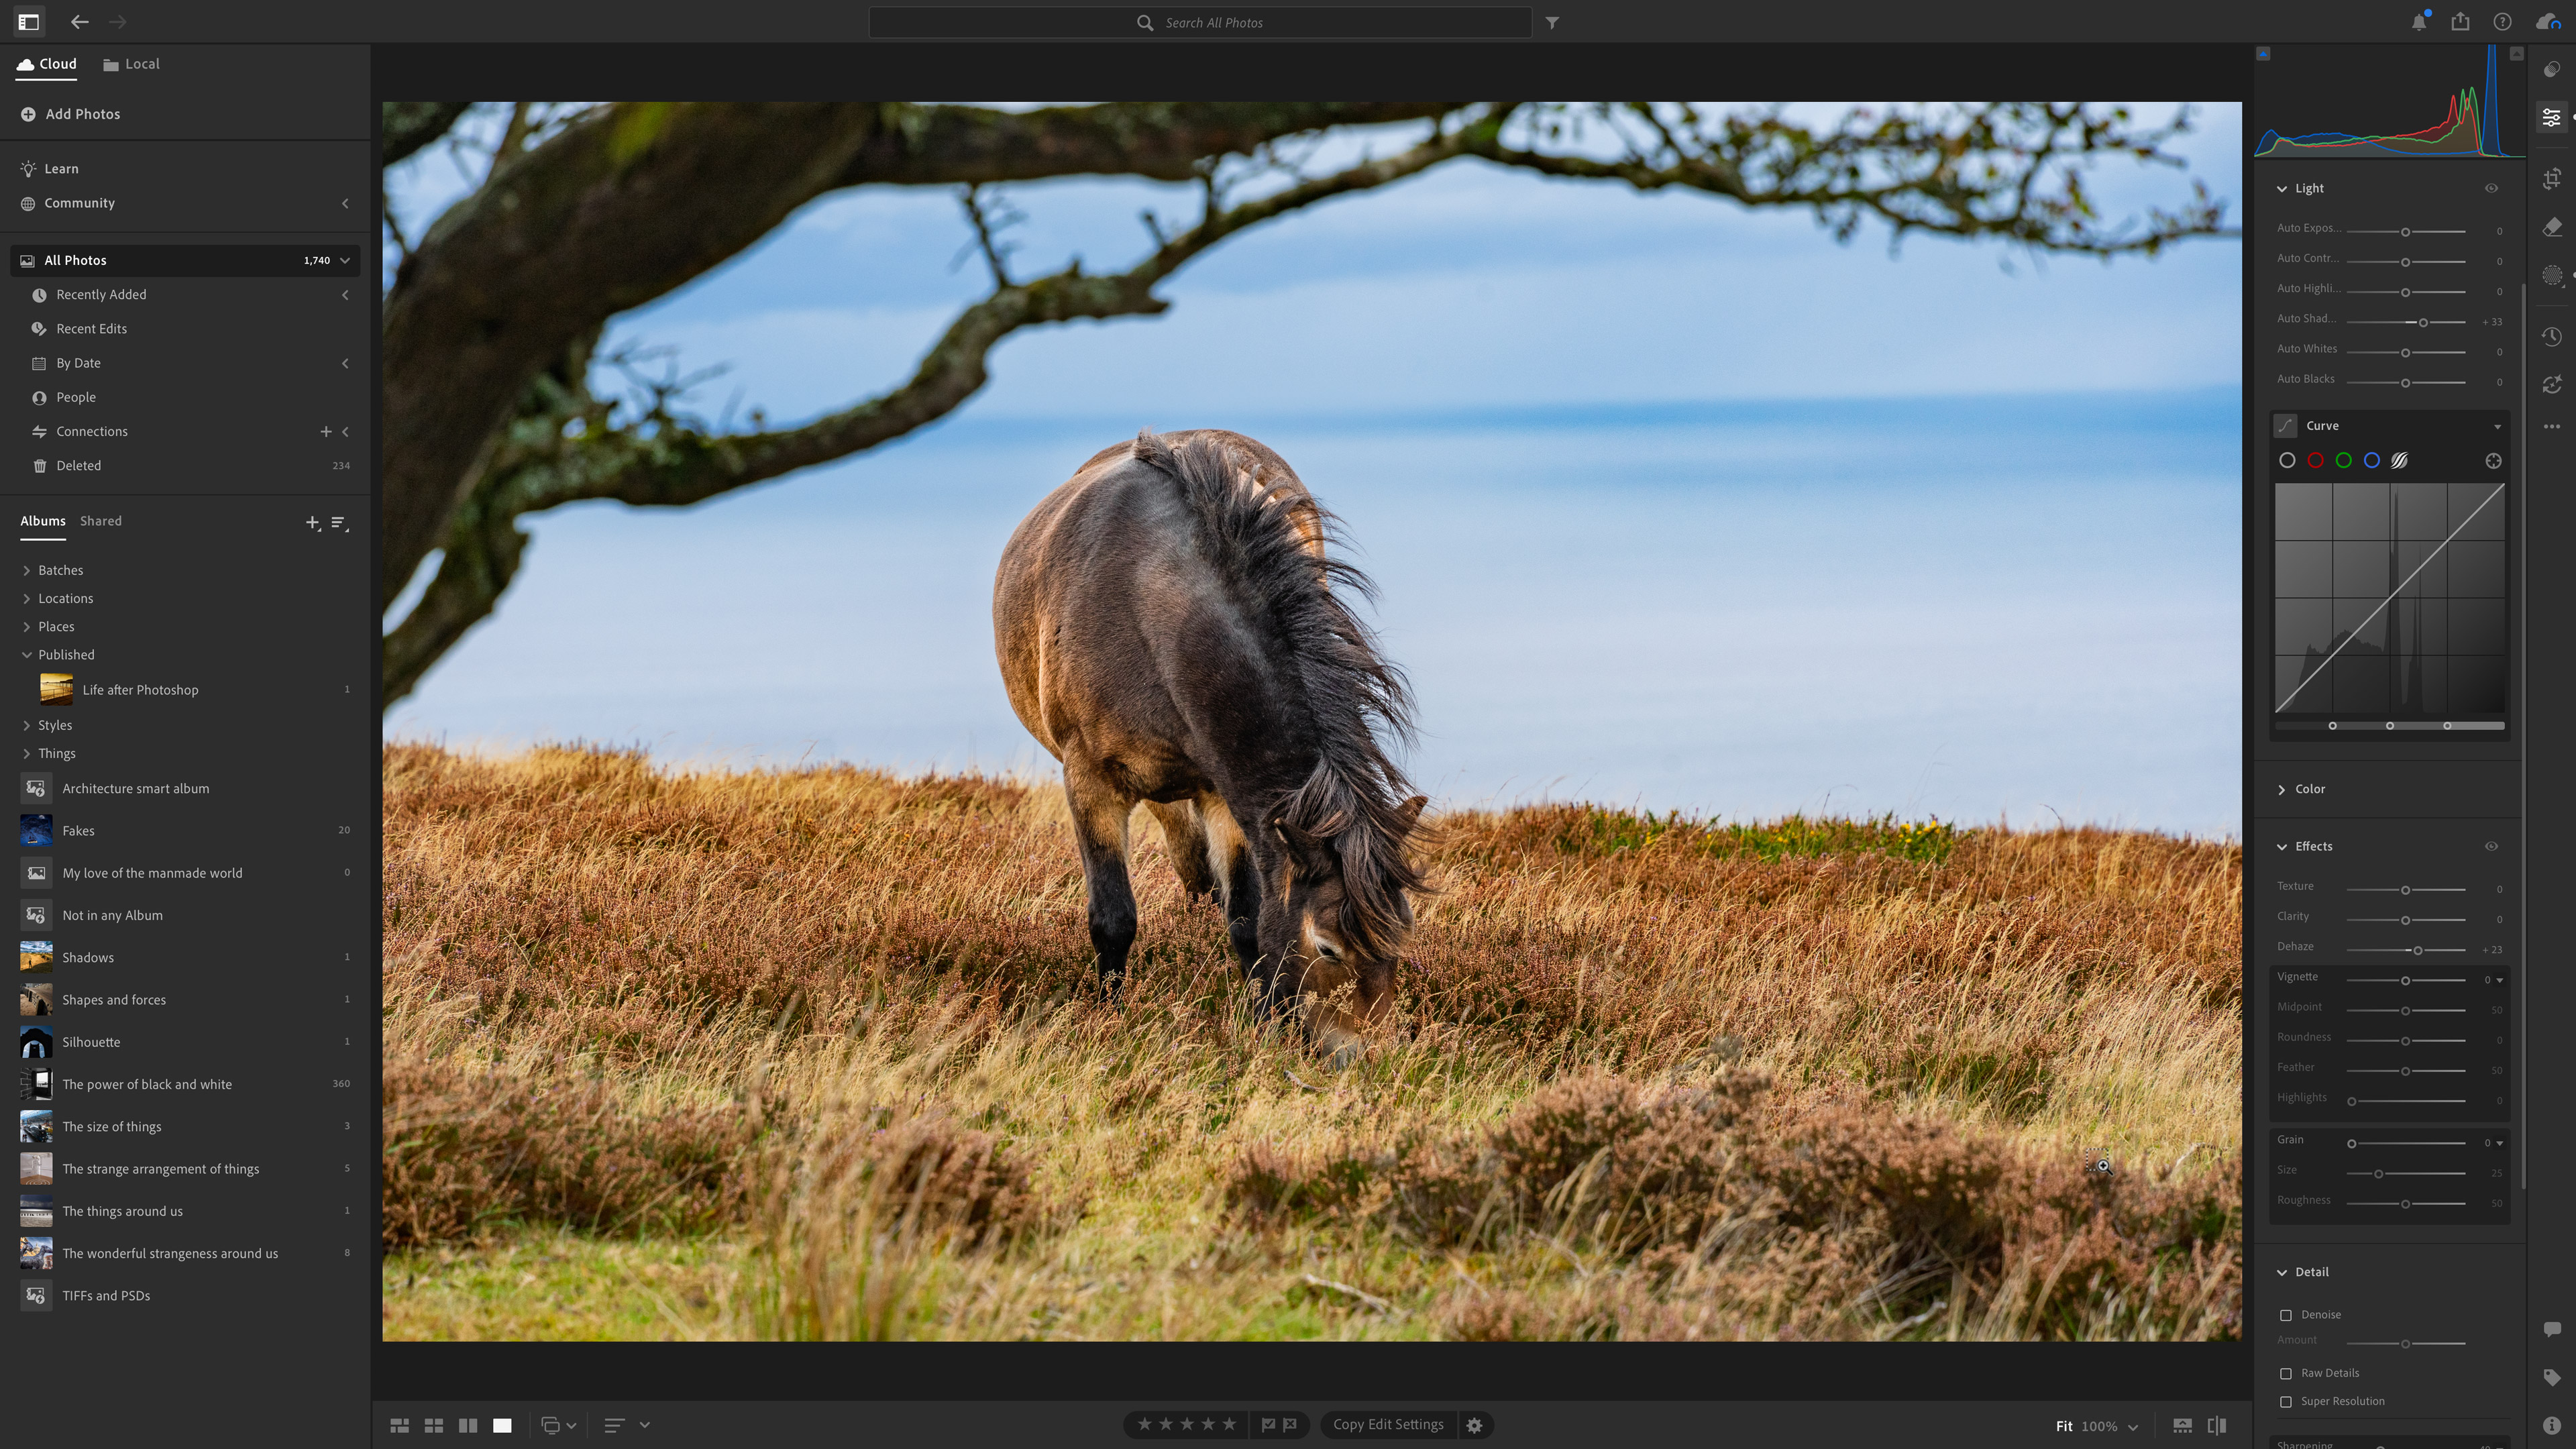
In the right sidebar, you’ll find all the editing tools for your images, arranged in a vertical stack. There are tabs for different activities, such as browsing presets, editing, cropping and transforming, repairs and cloning, masks, and Versions.
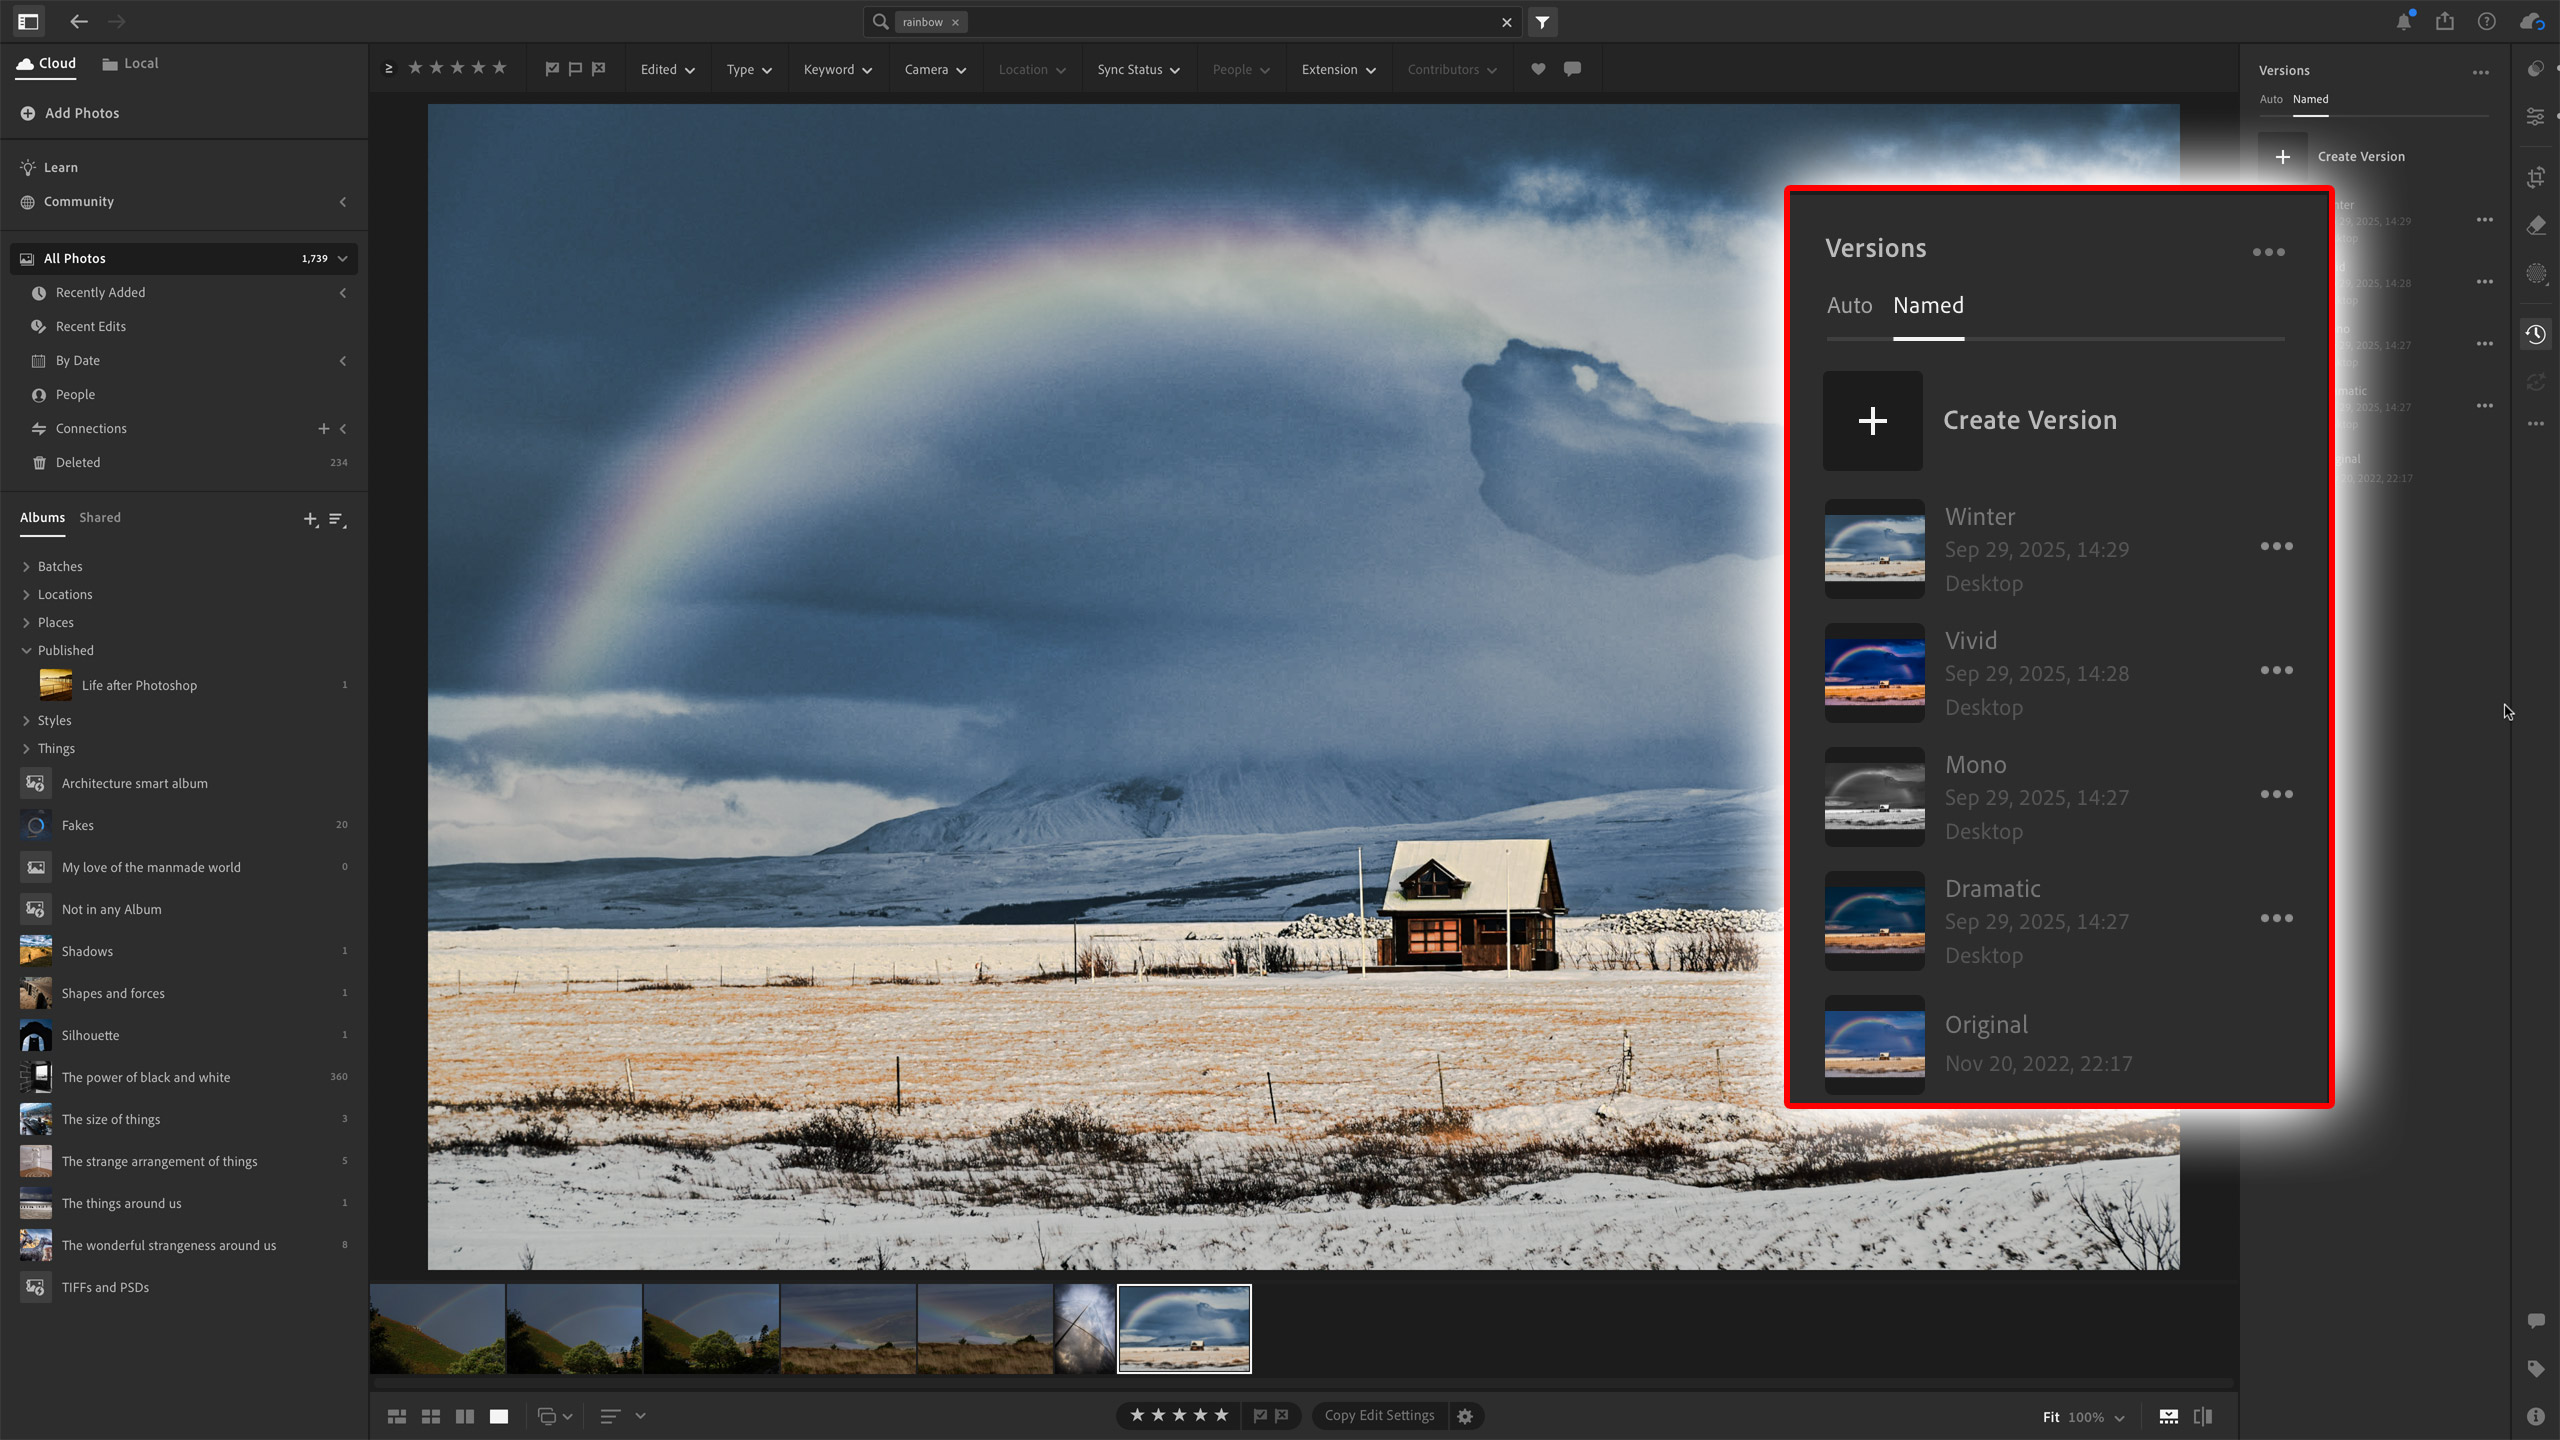
This is one key difference compared to Lightroom Classic. You can create alternative looks for your photos, but they are stored as Versions (a bit like Snapshots) within the image – you can’t create Virtual Copies, which can be seen alongside each other when you’re browsing, which is a shame.
All the editing tools in Lightroom Classic can be found here, too, though some have been moved around a little. Overall, the editing sidebar is clean, clear, and uncluttered. In fact, the whole interface feels lighter and less oppressive than Lightroom Classic’s, which has gone unchanged for years.
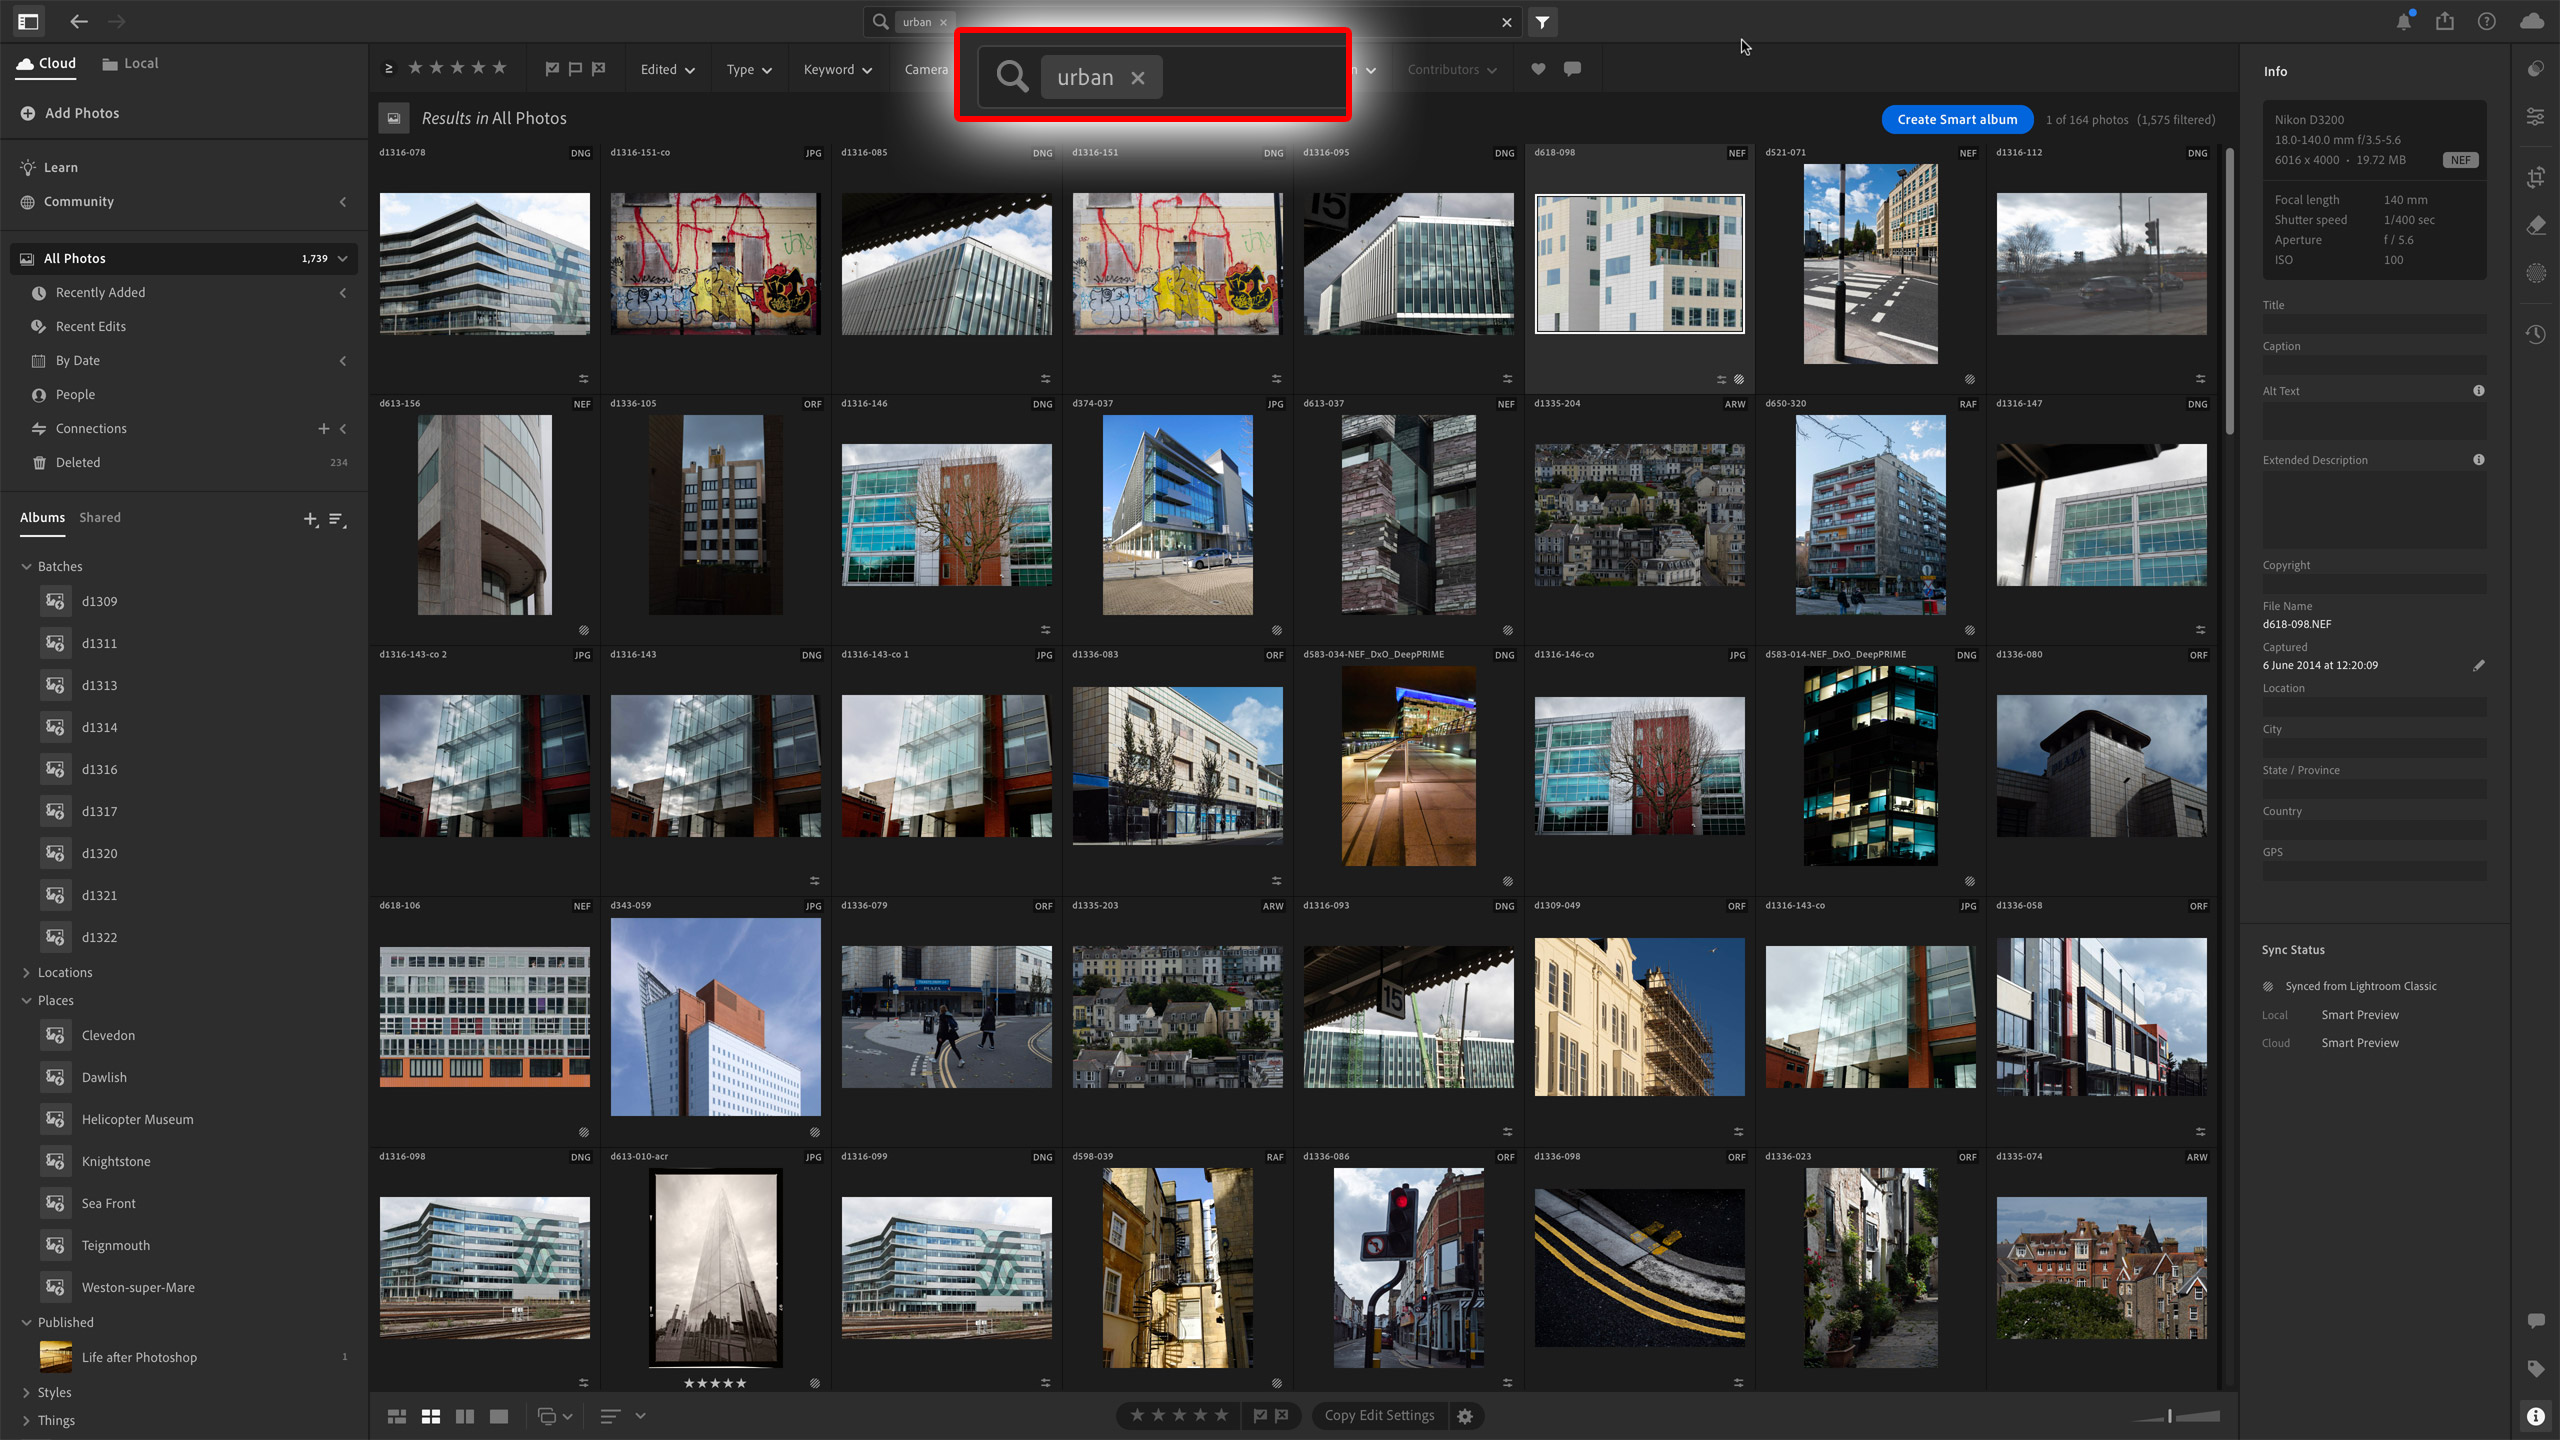
There’s also a bar along the top of the screen for filtering and searching. The filtering tools don’t go into quite the same depth as Lightroom Classic’s, but still filter by rating, flag, file type, keyword, and camera, though not lenses and other EXIF data. Above this filter bar is a search box, where Lightroom really shows its strength because it can use Adobe’s cloud-based Sensei AI to search for subjects based on image content. For example, if you want to find all your ‘architecture’ images, just type it in here and Lightroom will find them – no keywording necessary.
Adobe has come a long way in interface design since Lightroom was first launched, and it’s a shame it can’t (or won’t) give Lightroom Classic an update to reflect this clean and efficient look.
Perhaps the key workflow feature of Lightroom, though, is its all-your-images-everywhere cloud storage and the free mobile apps included. You can capture images on your phone while you’re out, edit them on your computer when you get home, and share them from your tablet while you’re watching TV. It all requires an Internet connection, but otherwise it’s seamless and just works.
Adobe Lightroom: performance
Lightroom and Adobe Camera Raw, its shared processing engine, is the raw processing tool of choice for many photographers. It does not always produce the best results, with a tendency to increase noise with small sensors, and is not as good at processing Fujifilm’s latest X-Trans 5-sensor images as, say, Capture One. But it’s quick, convenient, and for most photographers it’s quite good enough.
What Adobe has now done, though, is to incorporate its AI denoising process with Lightroom’s regular Details panel, so that you no longer have to generate a new and larger DNG file with the processing applied. Now, you can achieve high-quality, high-definition images even at high ISOs, with just a click of a checkbox and a few seconds’ wait for the processing to complete.
This makes a big difference, and Lightroom now feels a much more polished and capable raw processing tool as a result. It already offers excellent raw support covering just about every camera with automatic correction profiles for just about every lens. When you combine this with its inbuilt profiles, countless presets (both official and third-party), and its excellent AI masking tools, you have a program that can do just about everything, and with considerable finesse.
I particularly like its new Adaptive Color Profile, another recent, quiet addition, which is much better at optimizing tonal values in raw files than Lightroom’s Auto adjustments, and its insistence on hiking Vibrance and Saturation levels in images that don’t need it.
The reality doesn’t always quite measure up to the dream, though. While you can create smart albums in the desktop version, these aren’t supported by the mobile app and won’t be displayed. Also, for newer features like the Adaptive Color profile to be available on mobile, it needs to be a relatively recent device that can support the latest LR version. The use of 16-bit TIFFs for external editing is a bit of a nightmare, too, because even ordinary 24-megapixel images will swell to 120MB or more.
Adobe Lightroom: Lightroom mobile
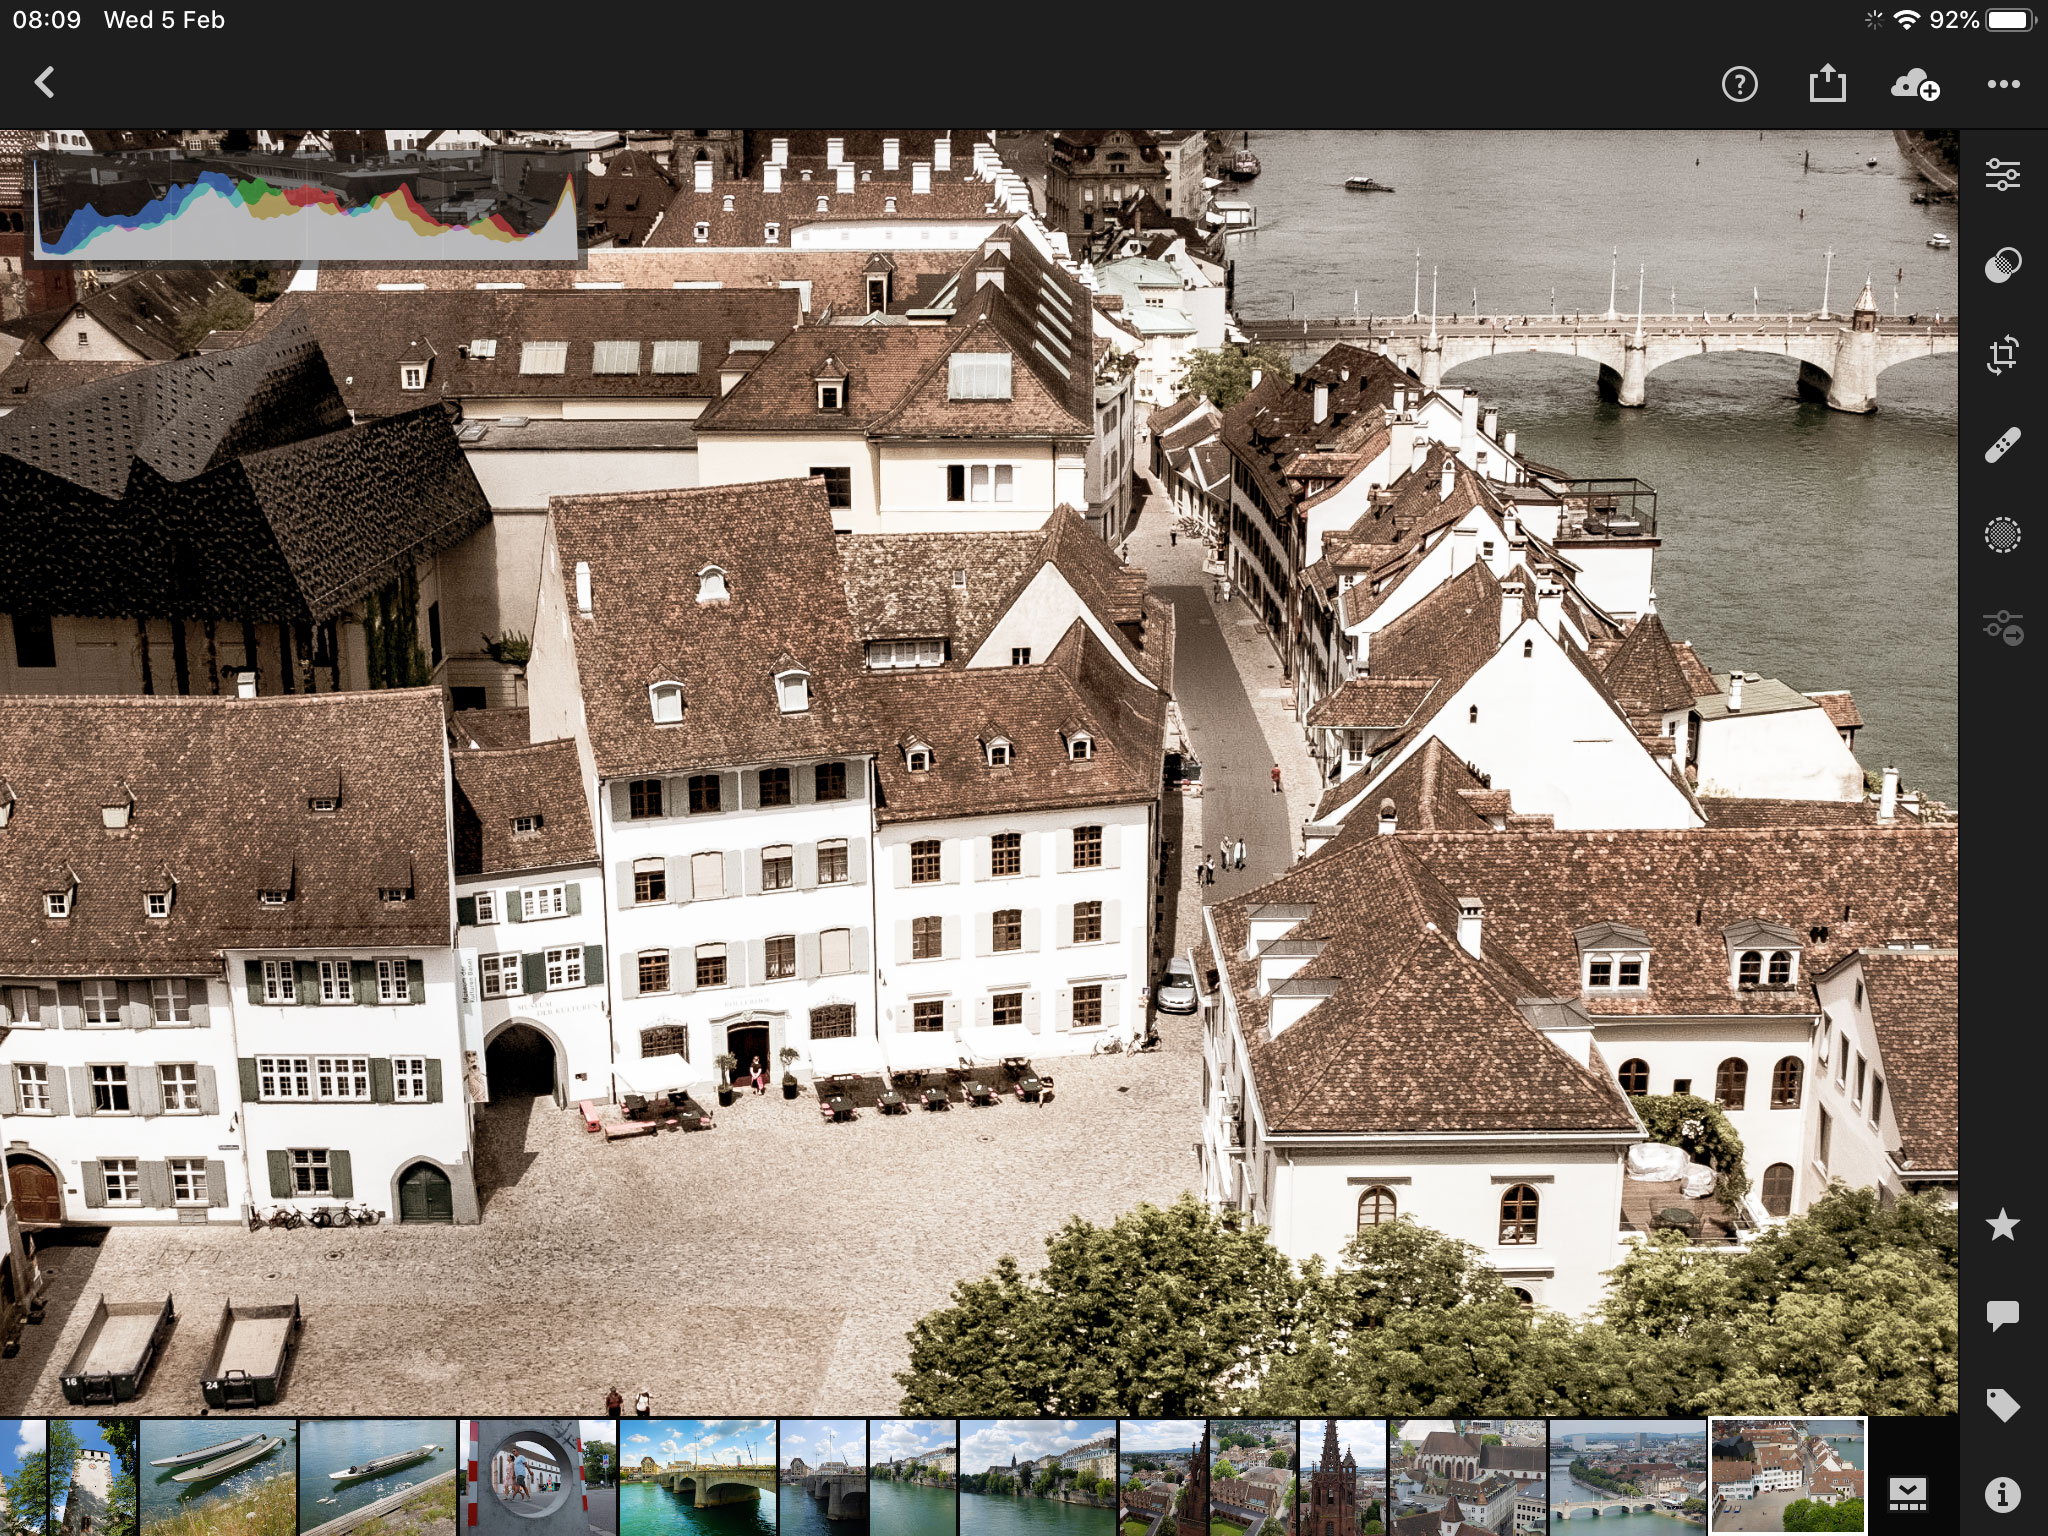
A key element in Lightroom's appeal is the mobile apps, which can access your Lightroom catalog in the cloud, offer most of the same editing tools, and sync any changes back to your catalog, so that they will appear on your desktop computer and other devices. Adobe has done a great job making these apps accessible and usable on smaller touch-screen displays. Keep in mind, though, that some features don't carry across from desktop to mobile, notably smart albums, and that you will always need an Internet connection, either via Wi-Fi or a cellular network.
These mobile apps have another trick – an in-built Camera app. This offers lots of manual control, some instant presets, and direct integration with your cloud-based catalog. This makes Adobe Lightroom especially interesting for mobile creators who use their devices both to capture and share images.
Photographers who use regular cameras and perhaps carry around a laptop may not gain much advantage from Lightroom compared to Lightroom Classic, but for mobile creators, it's a much better fit than the 'old' Lightroom.
Adobe Lightroom: verdict
Lightroom hasn’t exactly made any single huge leaps forward since its launch, but has taken a whole series of significant steps over the years to the point where, today, it’s a much more complete, usable, and useful program than it was before. You will still need a program like Photoshop to create layered composite images or plug-ins for more advanced retro/lo-fi/analog effects, but many photographers will find Lightroom does everything they need and more.
Whether it’s better than Lightroom Classic will depend on you and how you work. For conventional desktop-based photo editing and for those who like to manage their files directly on their own computer, Lightroom Classic is still the best. But for anyone who wants to work with their photos on multiple devices at multiple locations, Lightroom is what you need. Even if you’re a relative novice and you just shoot on a phone, Lightroom is accessible, streamlined, and easy to grasp, and, really, there’s nothing exactly like it.
Features | It won’t replace Photoshop for complex, layered editing tasks, but it’s easily powerful enough for most photography. | ★★★★☆ |
Interface | The interface is slick, streamlined and efficient. If only Lightroom Classic looked like this! | ★★★★★ |
Performance | Powerful AI masking, integrated raw enhancement a huge range of presets and profiles, but not all features appear in the mobile app | ★★★★☆ |
Value | I’ve given it four stars because many still object to subscriptions on principle, but honestly, the Lightroom-only plan is great value. | ★★★★☆ |
Alternatives
Capture One Pro is like a professional version of Lightroom Classic rather than Lightroom. It doesn’t offer cloud storage for your own library, but it is a much more effective studio/client workflow solution for professional photographers on busy shoots. It also offers superb image quality and very fast and powerful editing tools.
Lightroom Classic will still be the preferred choice for many photographers, simply because you store your images on your own computer, and don’t have to pay for cloud storage. The editing tools are the same as Lightroom’s and just as effective. The interface, though, feels quite clunky and oppressive by comparison.
ON1 Photo RAW is often overlooked as a Lightroom alternative, but although it’s marketed on price as a cheaper and subscription-free alternative, it’s actually extremely good. Its organizing tools aren’t as slick as Lightroom's, nor its raw processing option, but it supports Photoshop-style image layering and has an excellent collection of preset effects.
Read more: If you are looking to develop your photo editing, this is the best photo editing software right now. Also interested in editing video? Check out the best video-editing software. And if you need a powerful device to edit images on, these are the best laptops for photo editing.

Rod is an independent photography journalist and editor, and a long-standing Digital Camera World contributor, having previously worked as DCW's Group Reviews editor. Before that he has been technique editor on N-Photo, Head of Testing for the photography division and Camera Channel editor on TechRadar, as well as contributing to many other publications. He has been writing about photography technique, photo editing and digital cameras since they first appeared, and before that began his career writing about film photography. He has used and reviewed practically every interchangeable lens camera launched in the past 20 years, from entry-level DSLRs to medium format cameras, together with lenses, tripods, gimbals, light meters, camera bags and more. Rod has his own camera gear blog at fotovolo.com but also writes about photo-editing applications and techniques at lifeafterphotoshop.com
You must confirm your public display name before commenting
Please logout and then login again, you will then be prompted to enter your display name.
