Learn Canon Digital Photo Professional, the free software you didn't know you had!
Canon Digital Photo Professional is a free raw processing and photo editing application that's available to any Canon owner
Canon Digital Photo Professional is a raw processing tool tuned perfectly for your Canon camera, and it's free!
If you shoot raw files with your Canon EOS or PowerShot camera, you're probably using Adobe Photoshop or Lightroom to open and process your raw files, or perhaps some other program like Capture One or DxO PhotoLab. But many Canon owners may not be aware that Canon makes its own free raw processing software. In the old days, you would have got this software on a disk that came with the camera; now you simply download it from the Canon website.
How to get Canon Digital Photo Professional
At the time of writing Digital Photo Professional 4.13.10 is the latest version (released 29 October 2020) and is available for most current Canon EOS DSLR cameras, as well as Canon EOS M and EOS R mirrorless cameras. .
Article continues belowYou can get Canon Digital Photo Professional from Canon's website. You will need to select your camera from the list and choose your computer's operating system and, as a final step, enter your camera's serial number to confirm that you qualify for this free Canon software.
How to use Canon Digital Photo Professional
Digital Photo Professional is a powerful raw processing tool that's designed specifically for Canon cameras, so the processing is just about as good as you can get for these cameras, and the Picture Style and white balance options closely match the cameras' own color rendition.
Now that we've shown you how to get Canon Digital Photo Professional, we can show you how it works, how to use the controls and how to get the best results from your images. We're republishing a series of tutorials which first appeared in our Canon-dedicated PhotoPlus magazine, and you'll see a list of instalments below. Just click on the ones that interest you most, or work your way through the list from the start to get the full benefit.
Part 1: How to import and sort your raw images
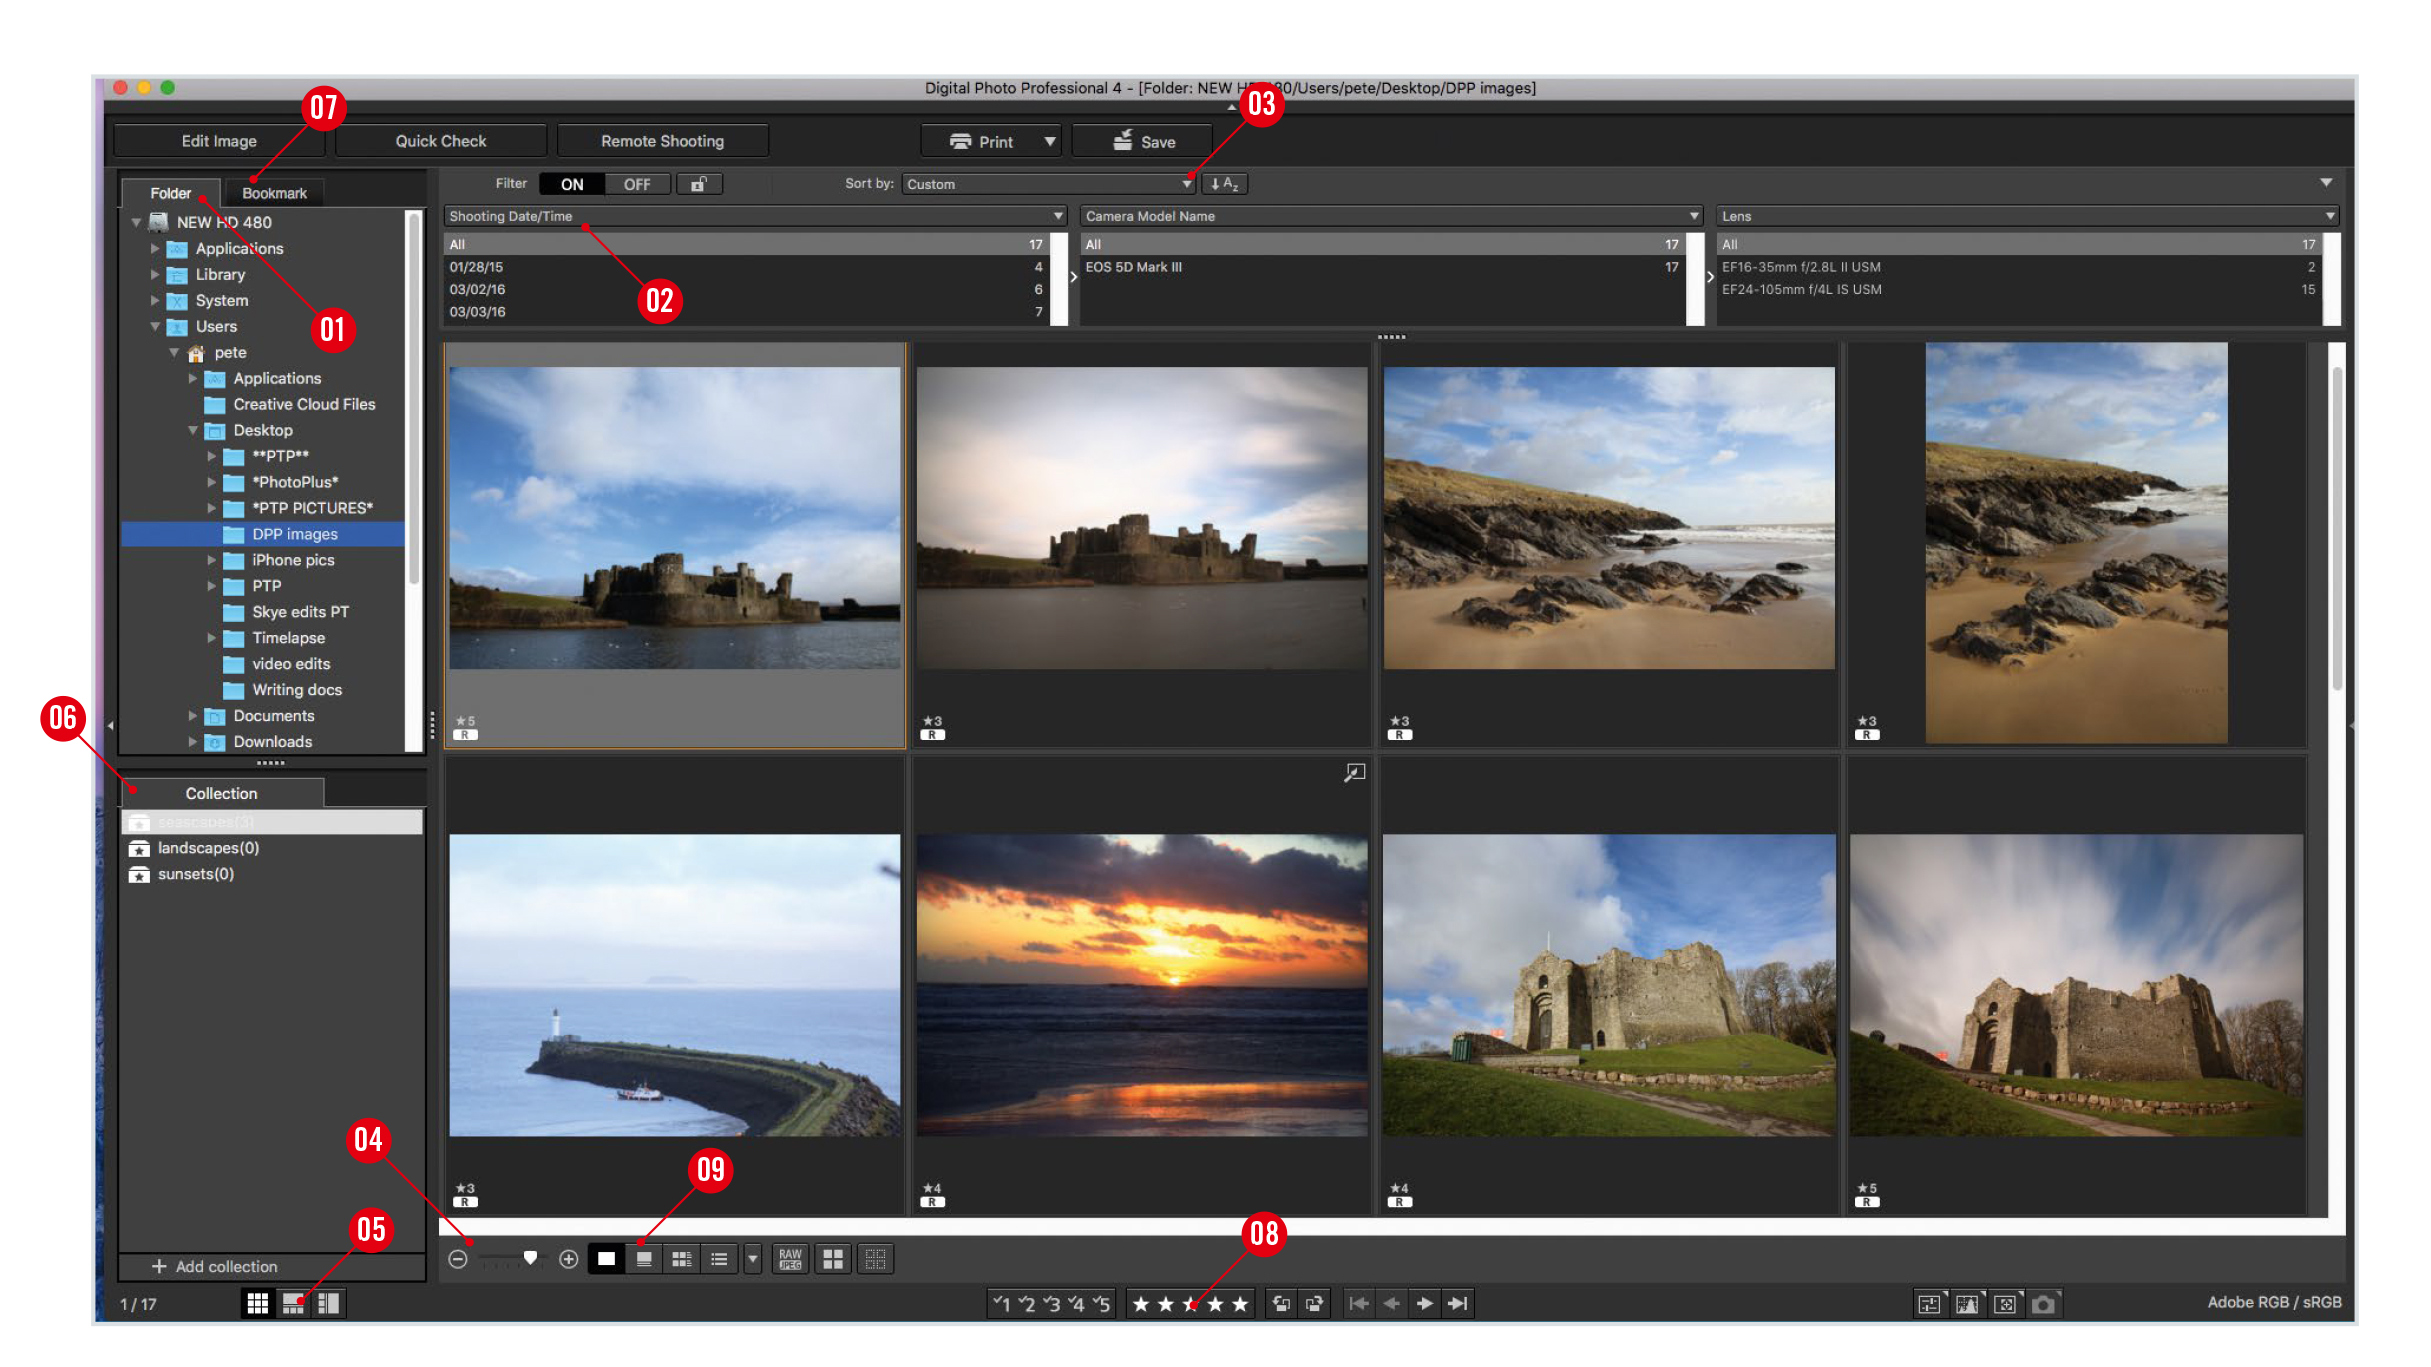
Here we’ll show you how to use the software to access and import RAW images that are already stored on your computer. Your photographs may be stored chronologically in various folders on your computer. This can make it a time-consuming task to locate a specific image. DPP 4 enables you to separate the wheat from the chaff by using labelling tools, such as check marks and ratings. Read the tutorial
The best camera deals, reviews, product advice, and unmissable photography news, direct to your inbox!
Part 2: How to use the Tone Adjustment palette
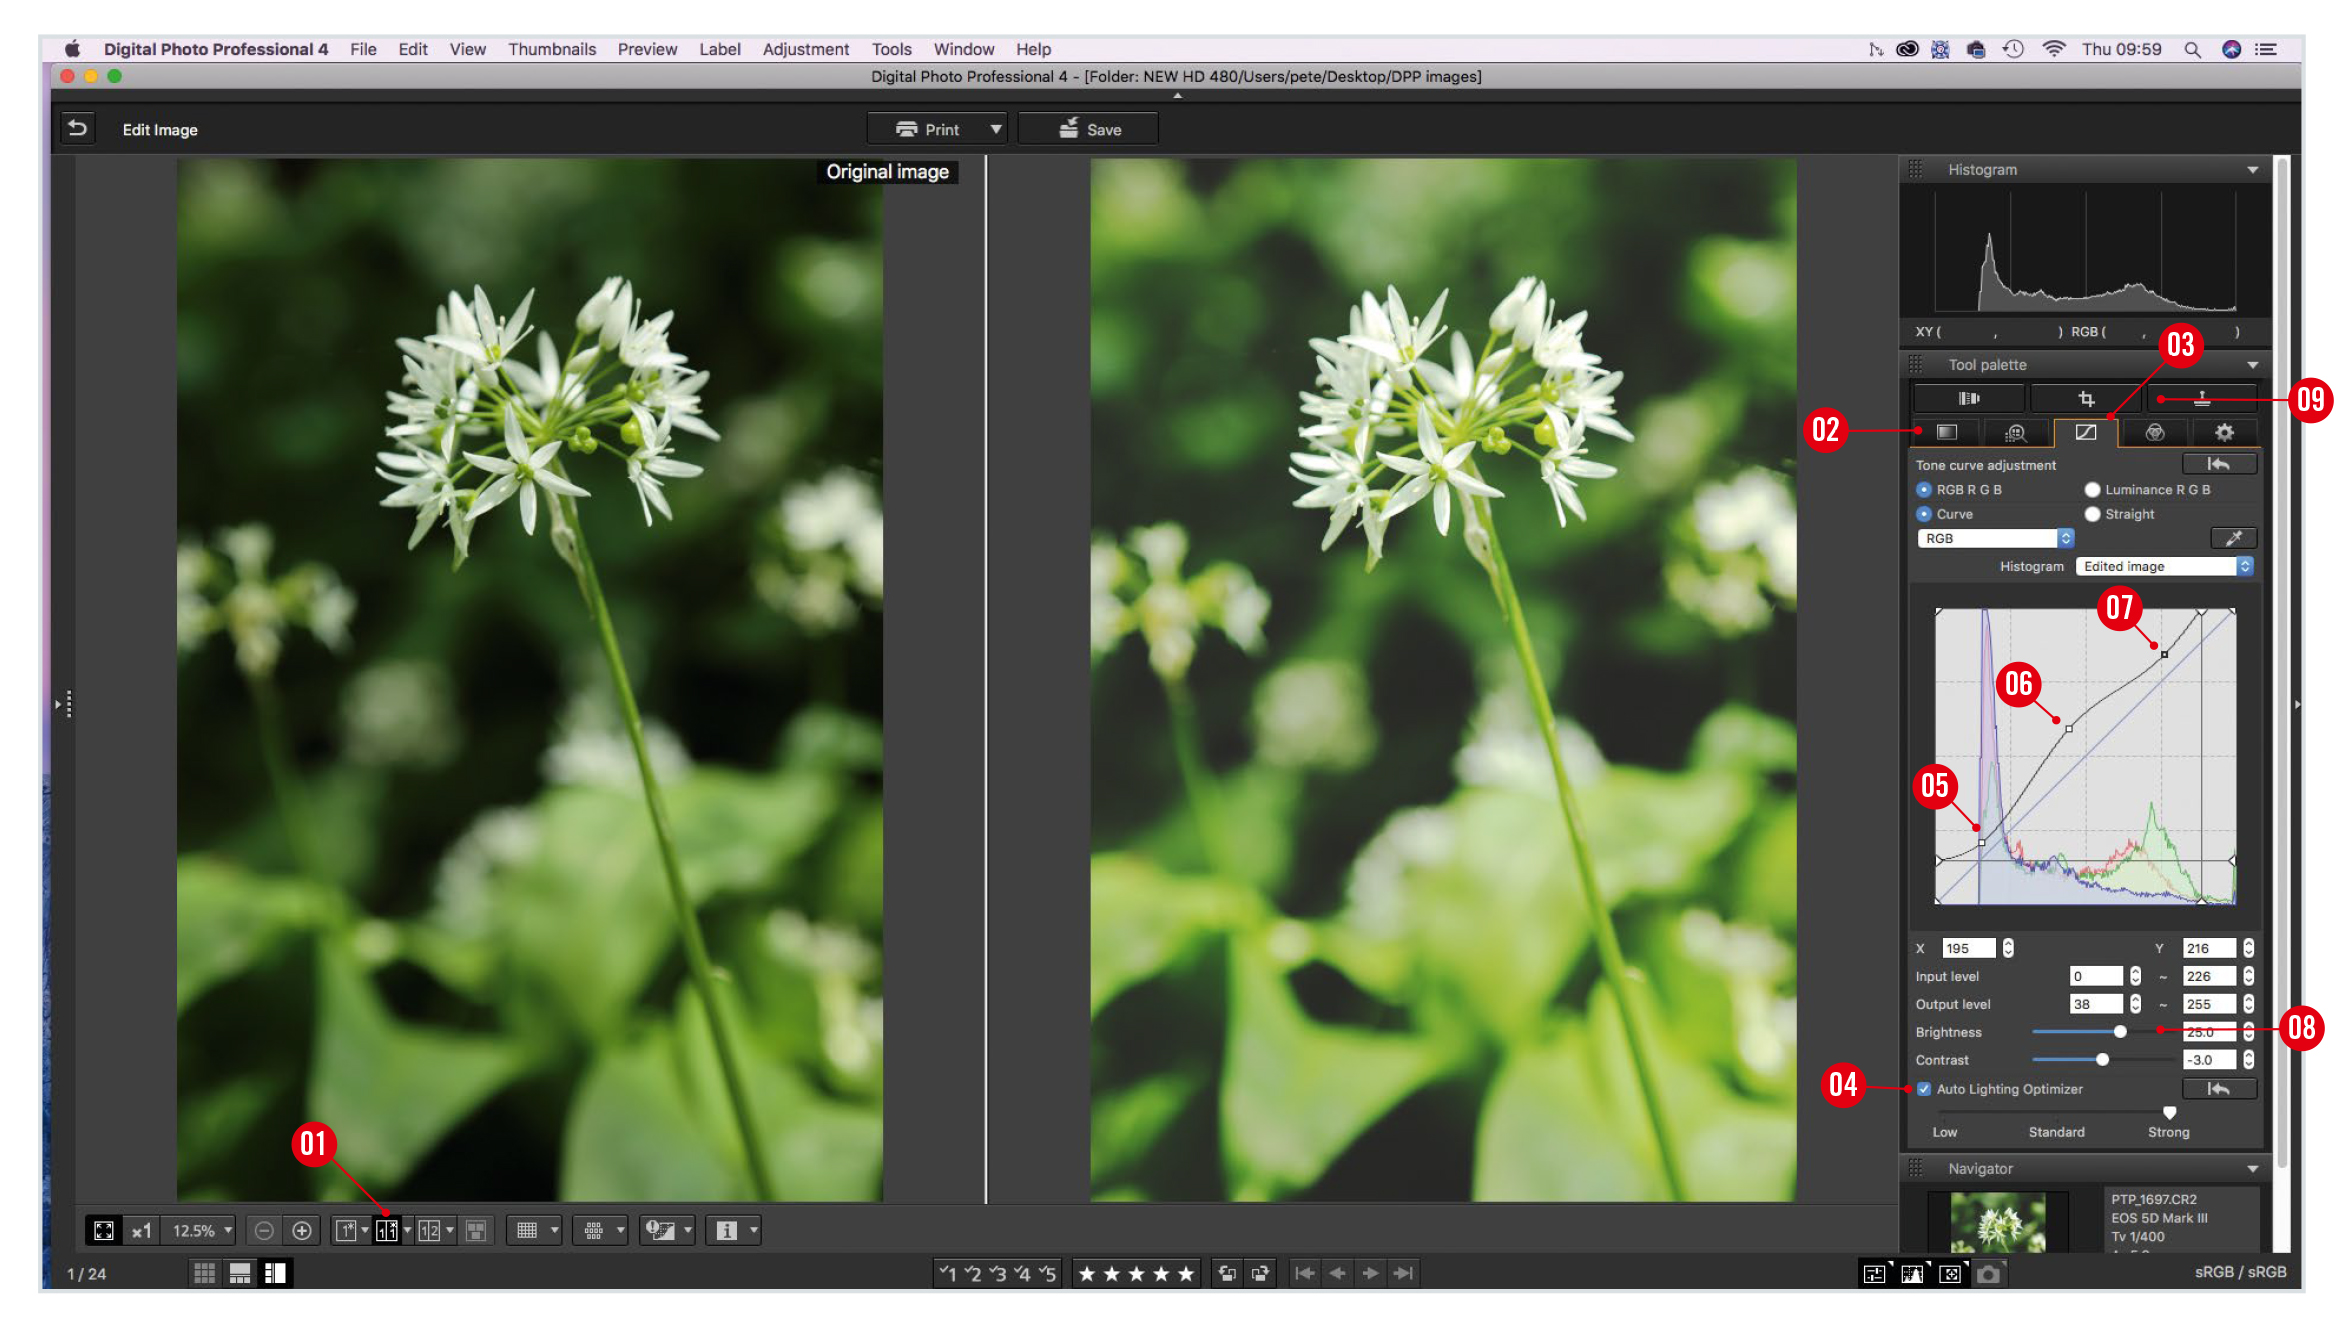
DPP4’s Basic palette can brighten up an underexposed image and selectively lighten shadows and darken highlights, but these sliders only work up to a point. If the contrast is too strong, you need to delve into the Tone Adjustment tool palette and selectively target and tweak specific shadow, midtone and highlight details with more power and accuracy. Tone curves enable you to create a more evenly balanced exposure when other tone-tweaking tools fail. Read the tutorial
Part 3: How to recover highlights and shadows
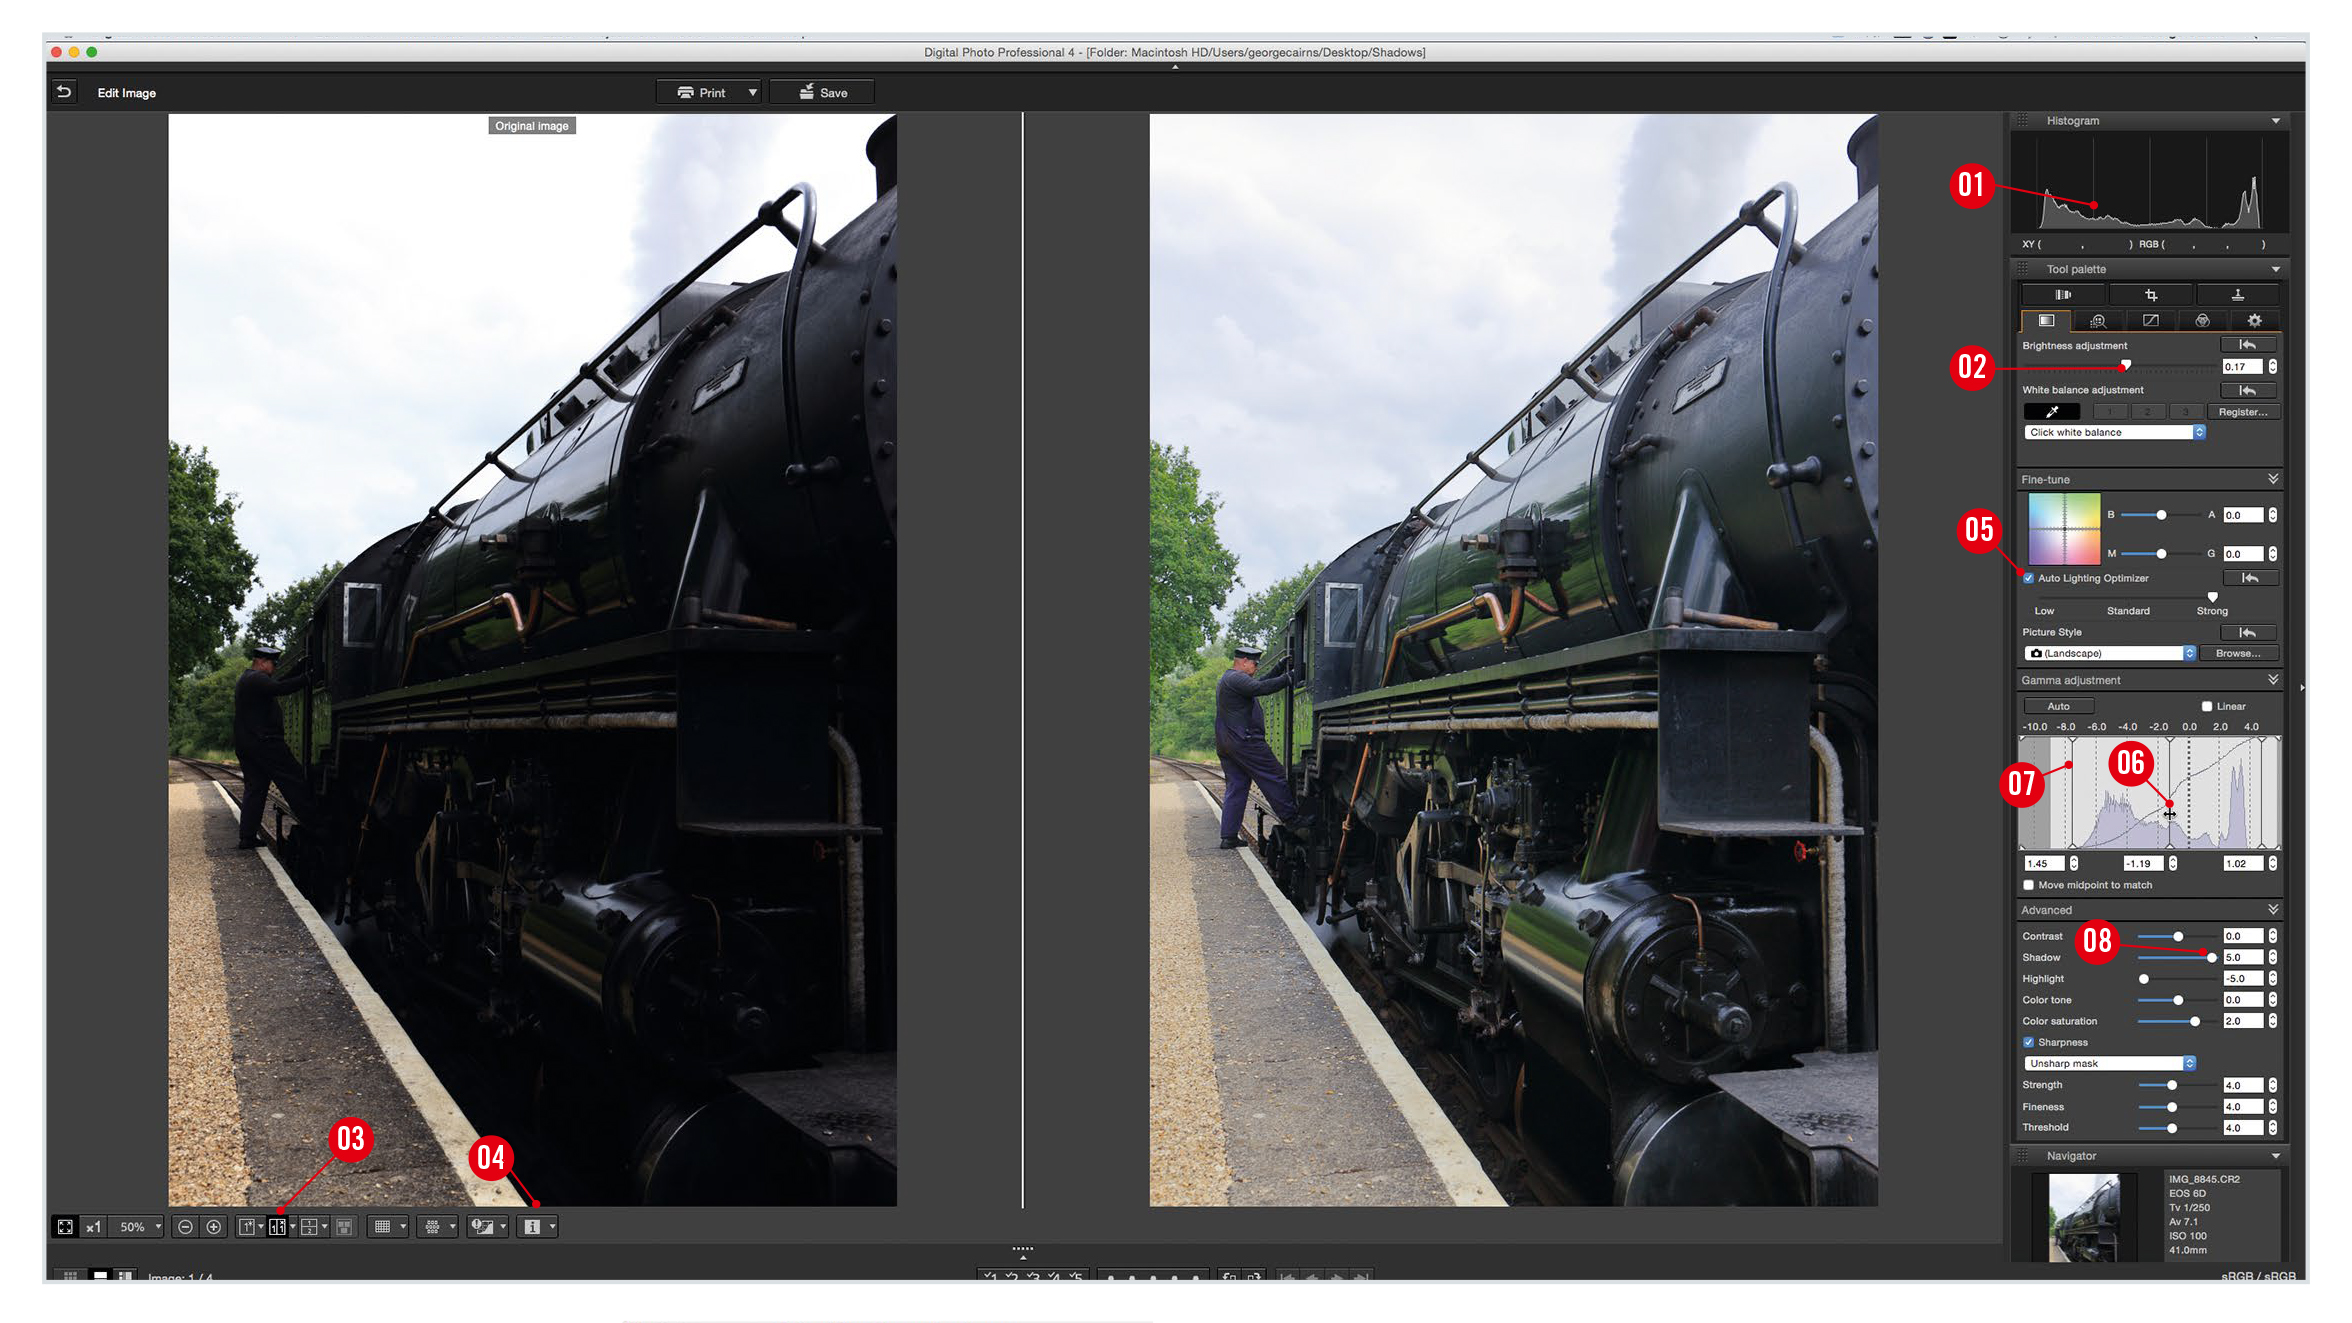
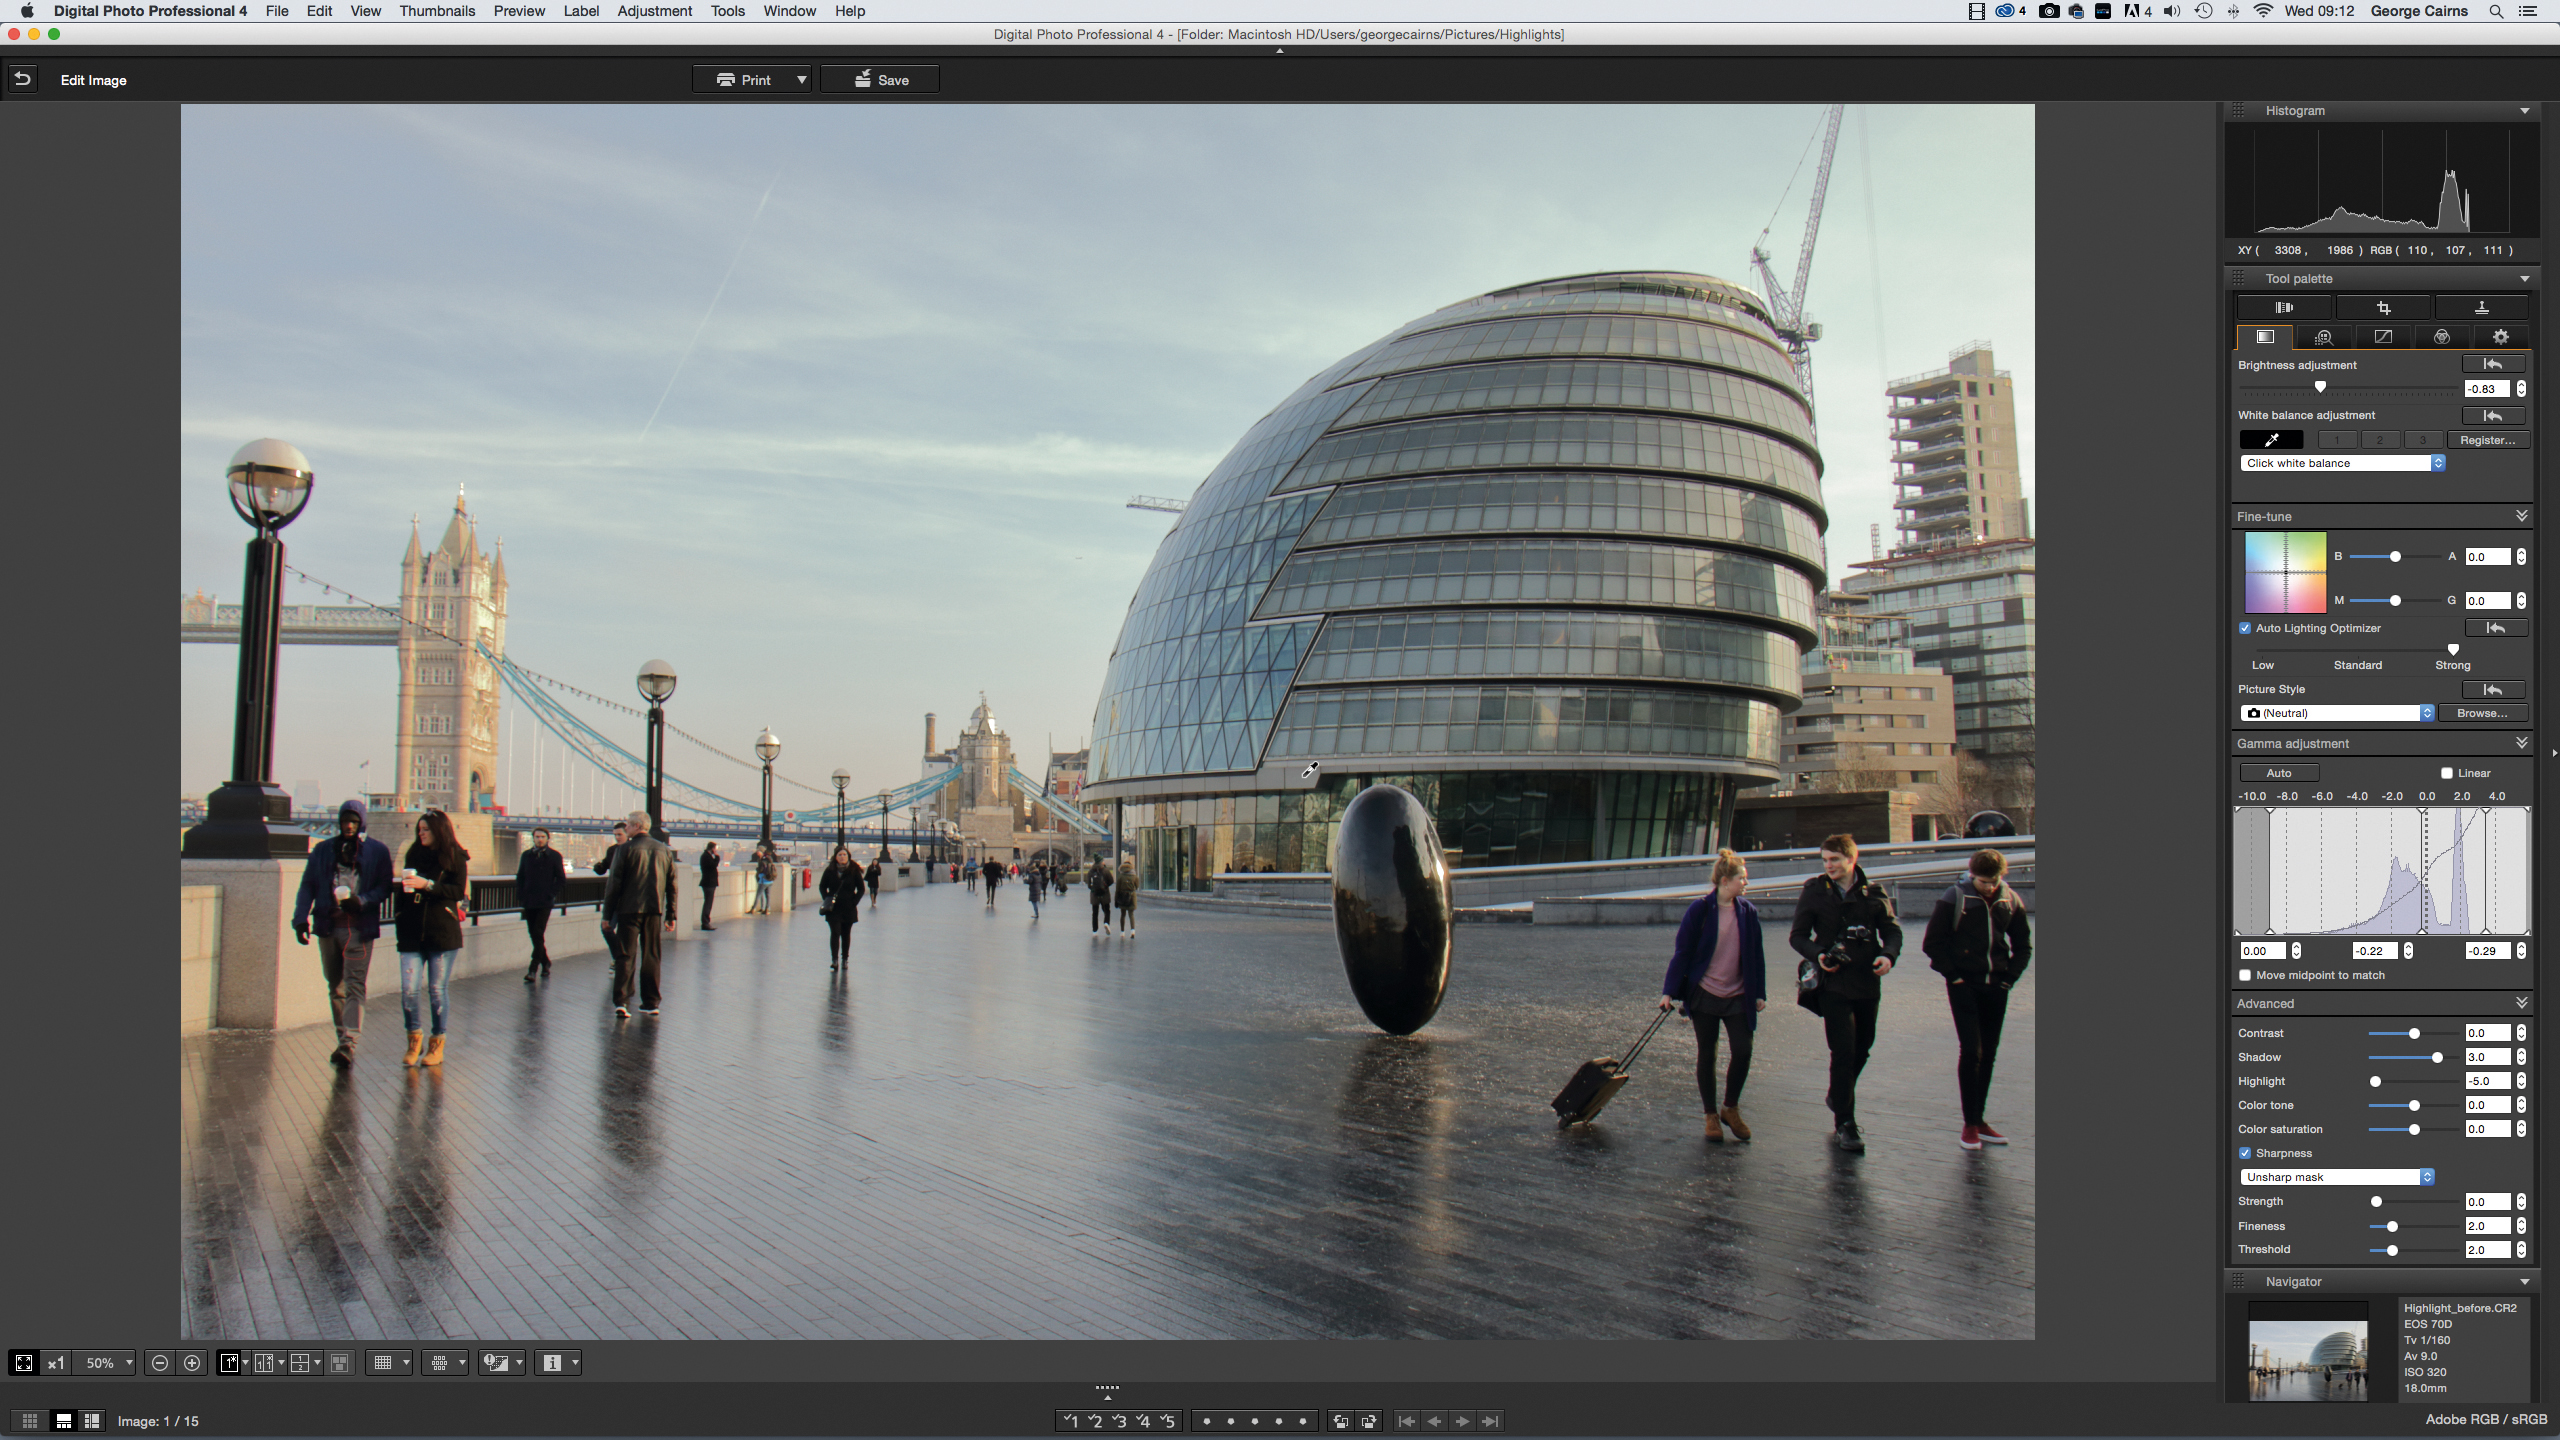
By shooting in the Raw image format you can give yourself the edge, as there will be more tonal information hidden in the unprocessed Raw file than you’ll be able to see with the naked eye. You can then tease out missing shadow detail in Digital Photo Professional 4’s virtual darkroom. Read the tutorial
Part 4: How to adjust color casts and tints
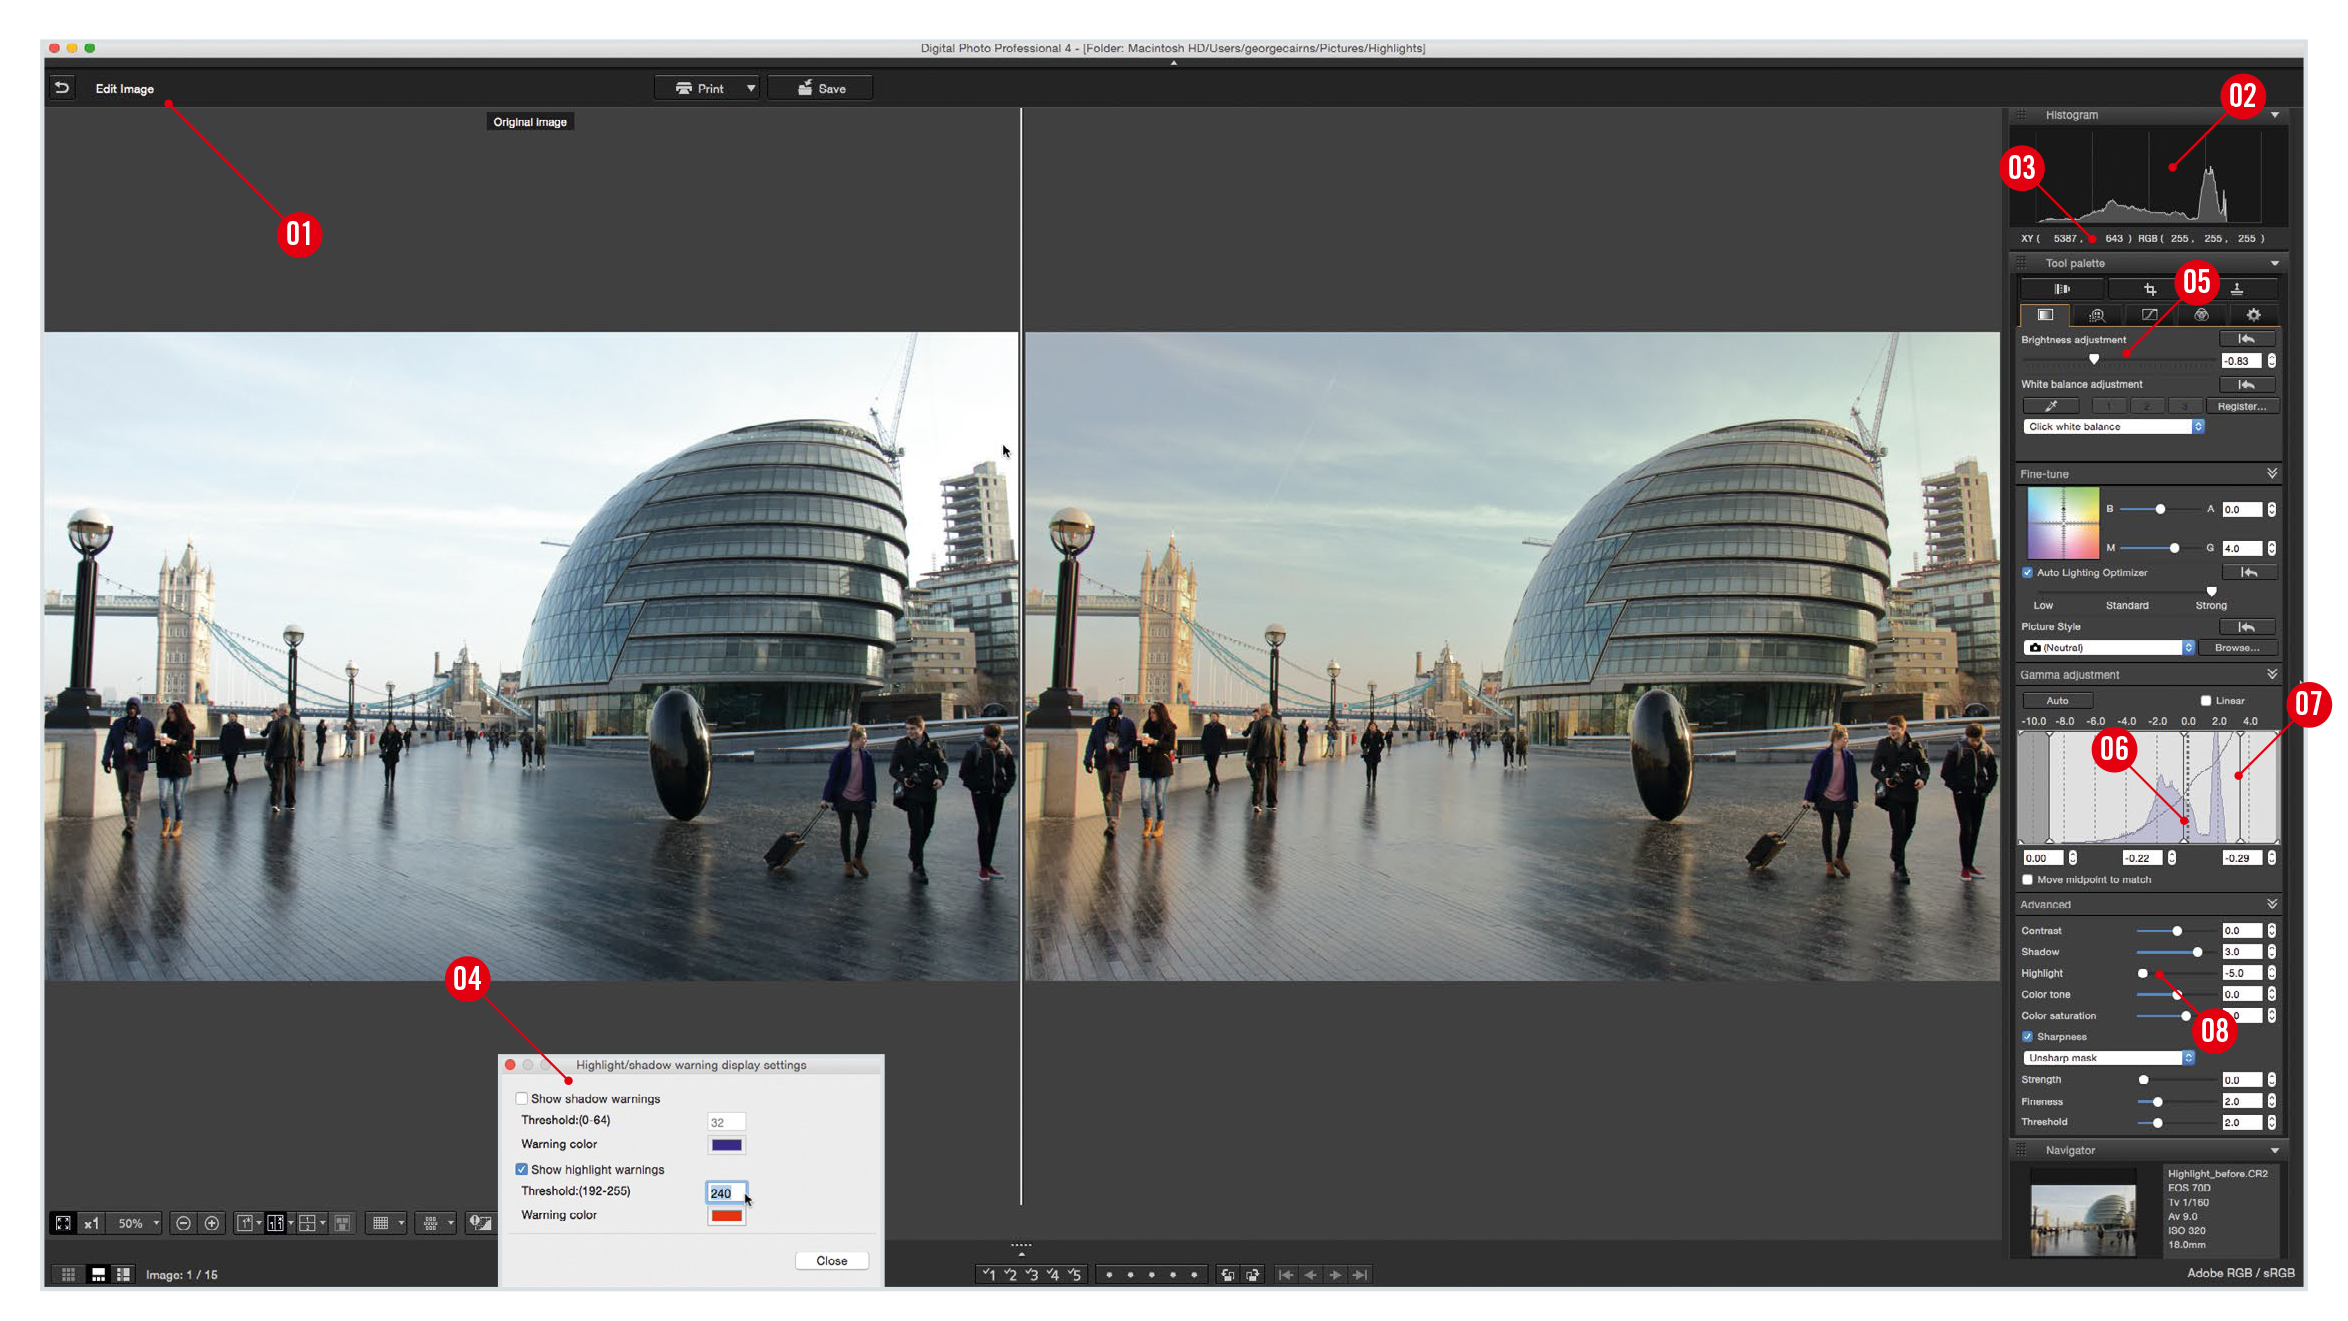
Here's another look at shadow and highlight recovery, one of the main reasons for shooting raw files in the first place, what to do about color casts and how to change color tints in Digital Photo Professional. Read the tutorial
Part 5: How to adjust white balance
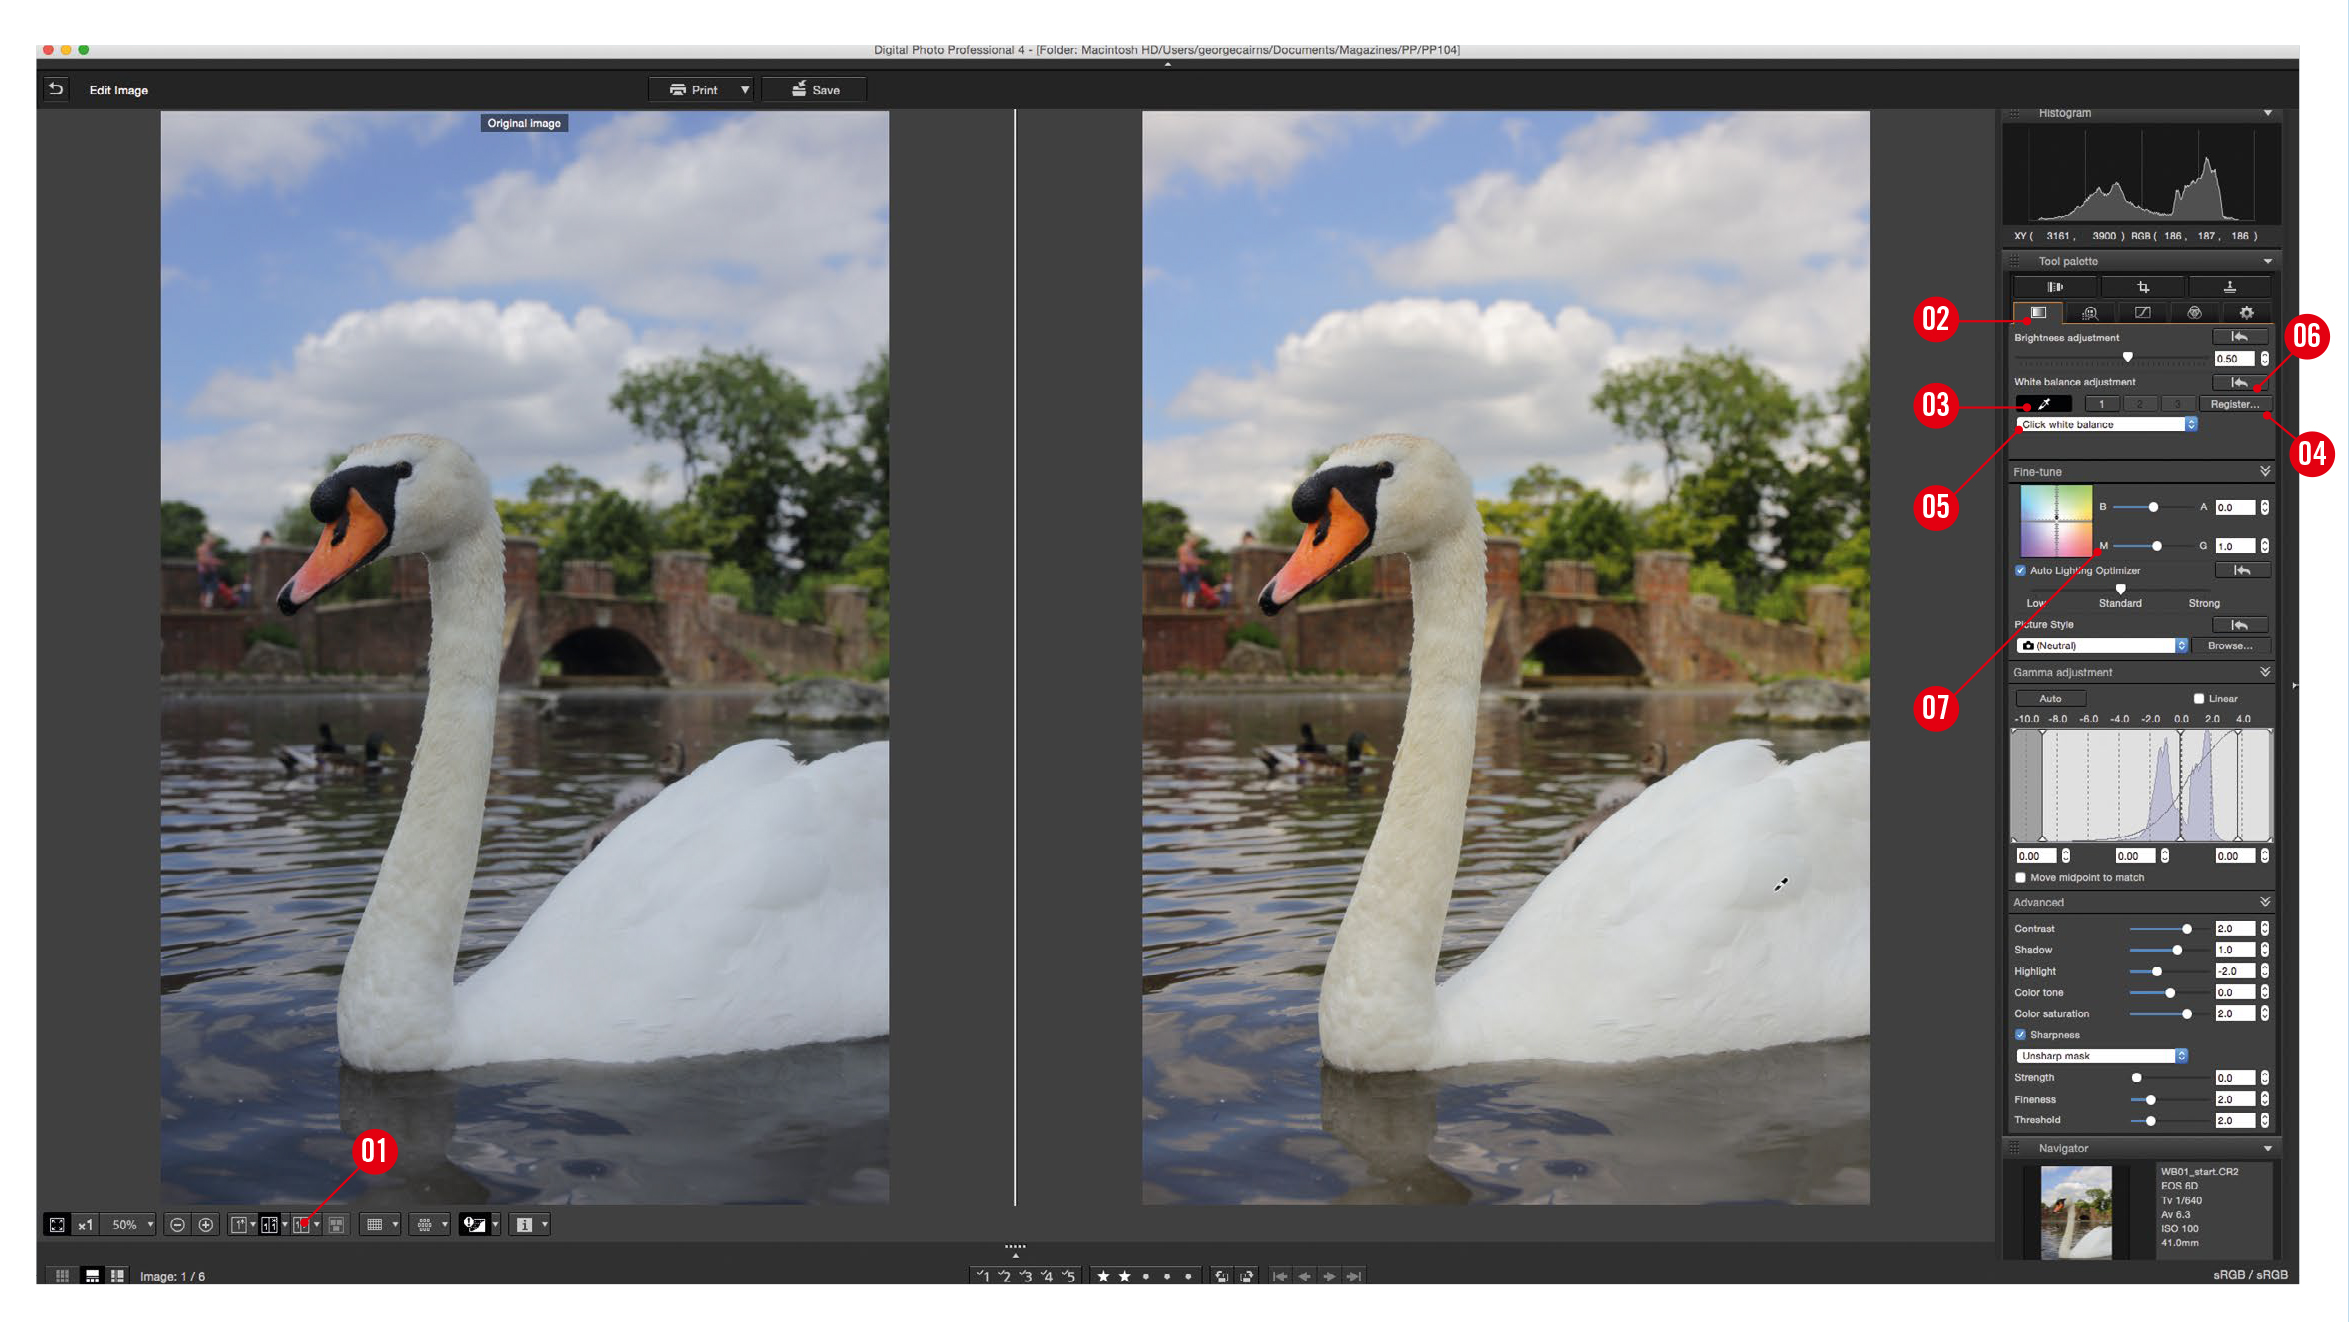
If you shoot in Raw quality mode then you can easily correct colour casts in Digital Photo Professional 4. It boasts the same manual and automatic white balance presets as your camera, so you can experiment with different settings in a few clicks to get the correct white balance. You can also perform custom white balance operations to ensure that your images show their true colors every time, whatever the weather or light source. Read the tutorial
Part 6: How to apply selective color adjustments
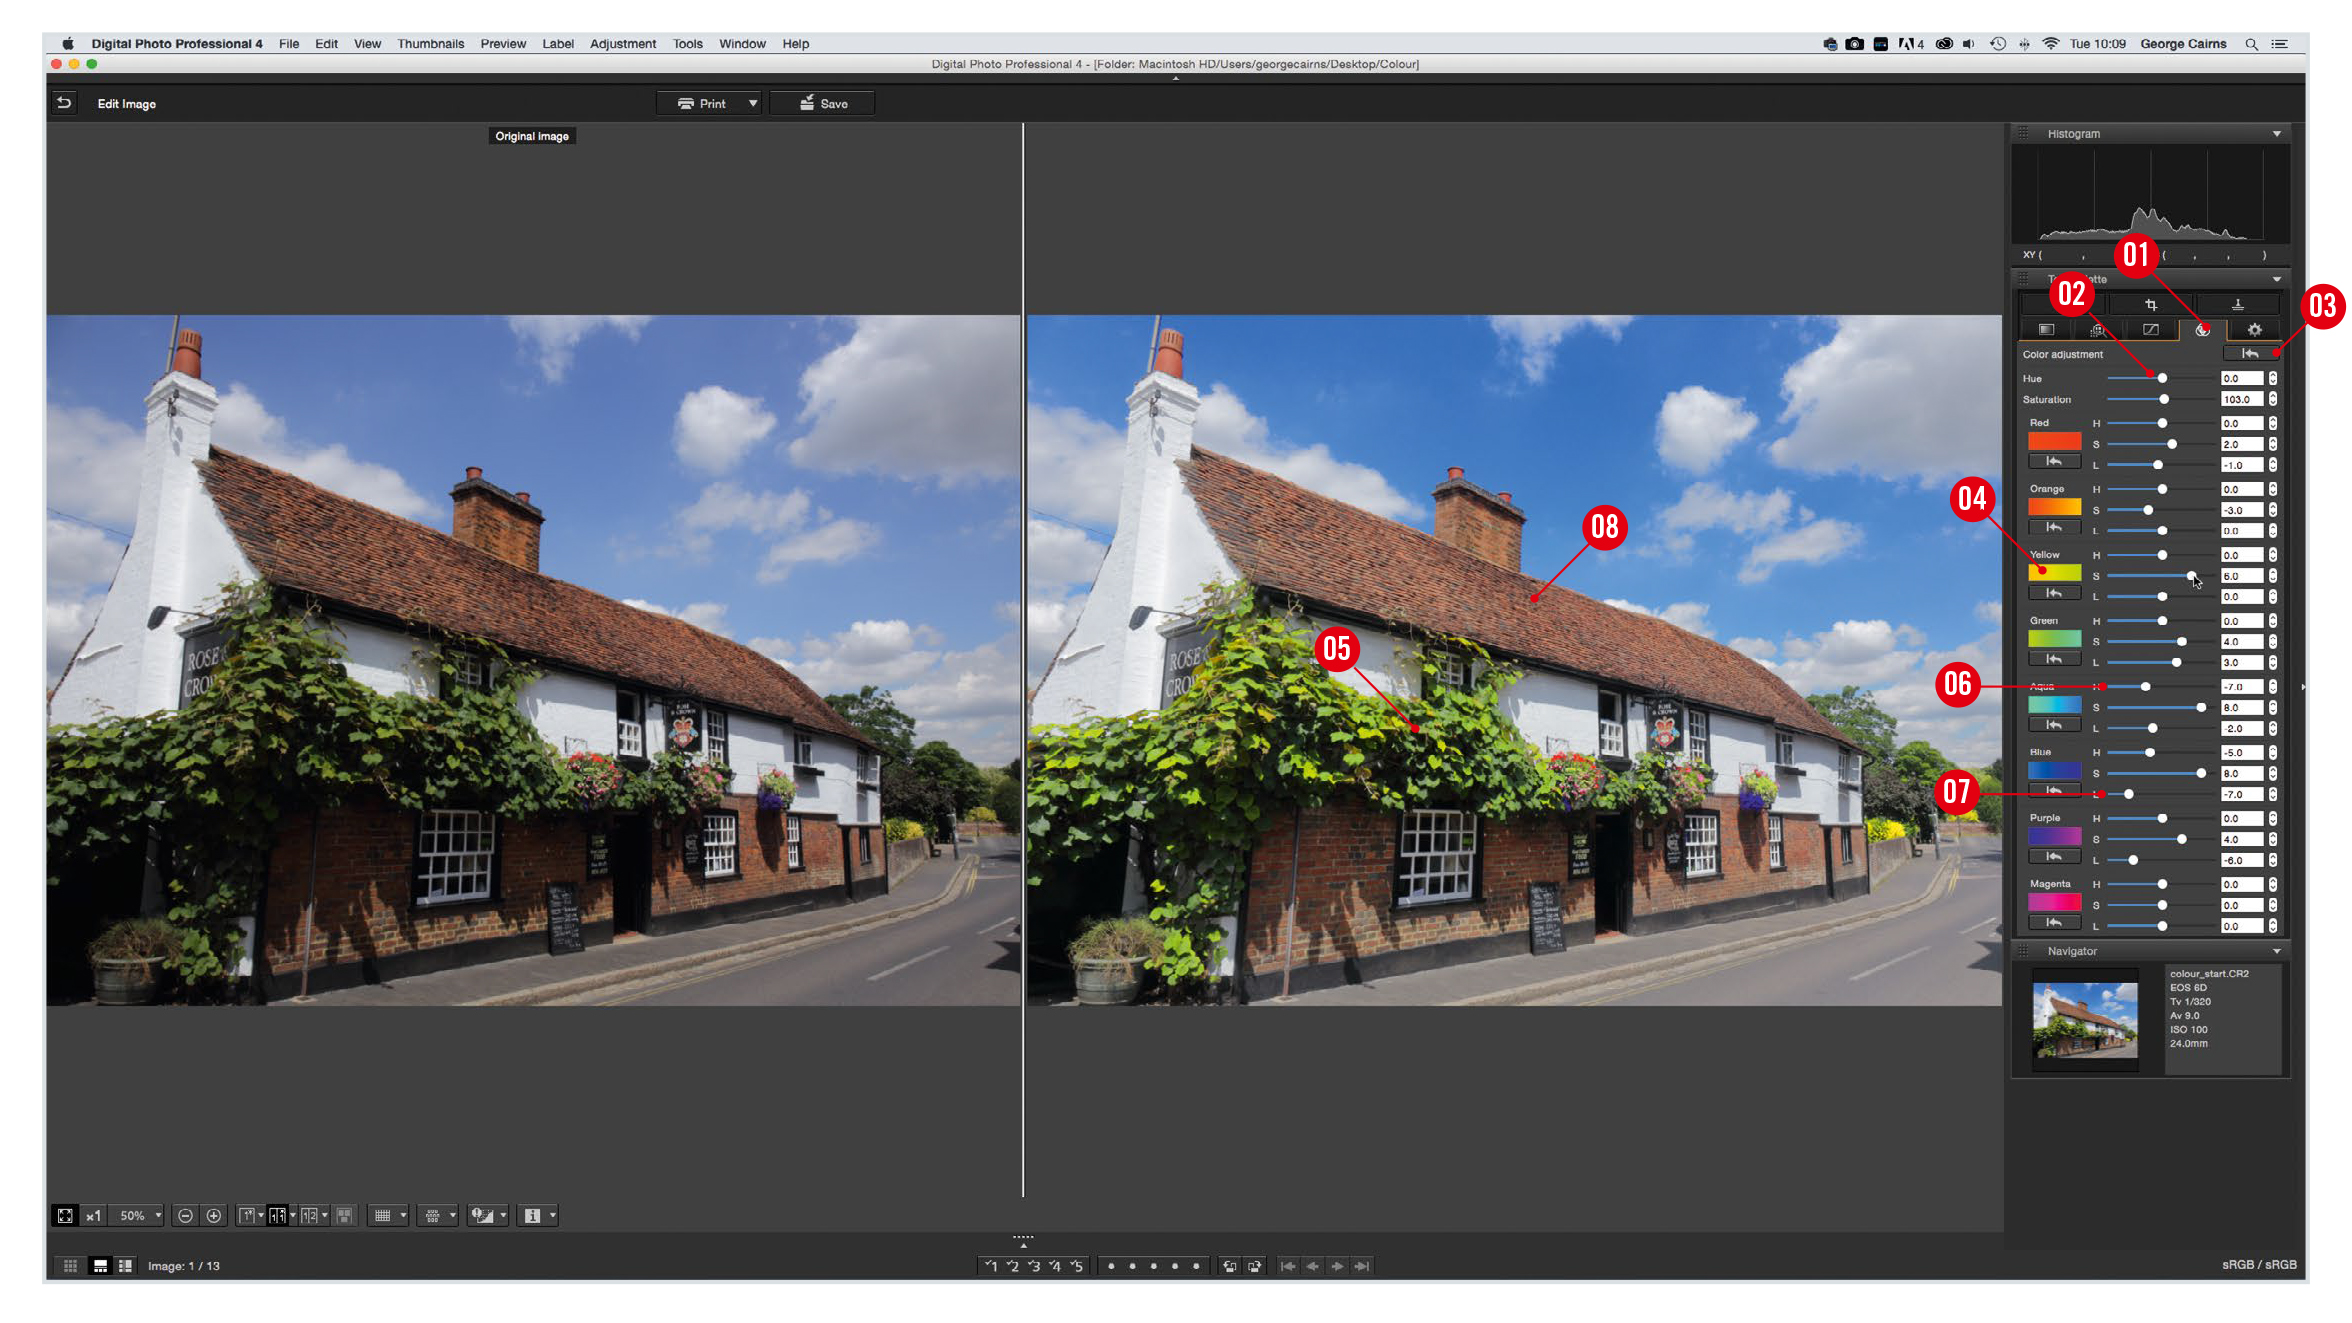
In this tutorial, we demonstrate how to make selective colour adjustments to create more colourful and visually stimulating images. While this global adjustment might give a drab blue sky more impact, it could simultaneously make over-saturated skin tones look too orange. Read the tutorial
PhotoPlus: The Canon Magazine is the world's only monthly newsstand title that's 100% devoted to Canon, so you can be sure the magazine is completely relevant to your system.
Read more:
Best photo editing software: image editors for novices through to pros
Best photo-editing laptops in 2020: top laptops for photographers
Best online photography courses – from beginner guides to masterclasses
Best recovery software for photos
Best password manager

Rod is an independent photography journalist and editor, and a long-standing Digital Camera World contributor, having previously worked as Group Reviews Editor, Head of Testing for the photography division, Technique Editor on N-Photo, and Camera Channel editor on TechRadar, as well as contributing to many other publications.
He has been writing about digital cameras since they first appeared, and before that began his career writing about film photography. He has used and reviewed practically every interchangeable lens camera launched in the past 20 years, from entry-level DSLRs to medium format cameras.
Rod has his own camera gear blog at fotovolo.com but also writes about photo-editing applications and techniques at lifeafterphotoshop.com.
