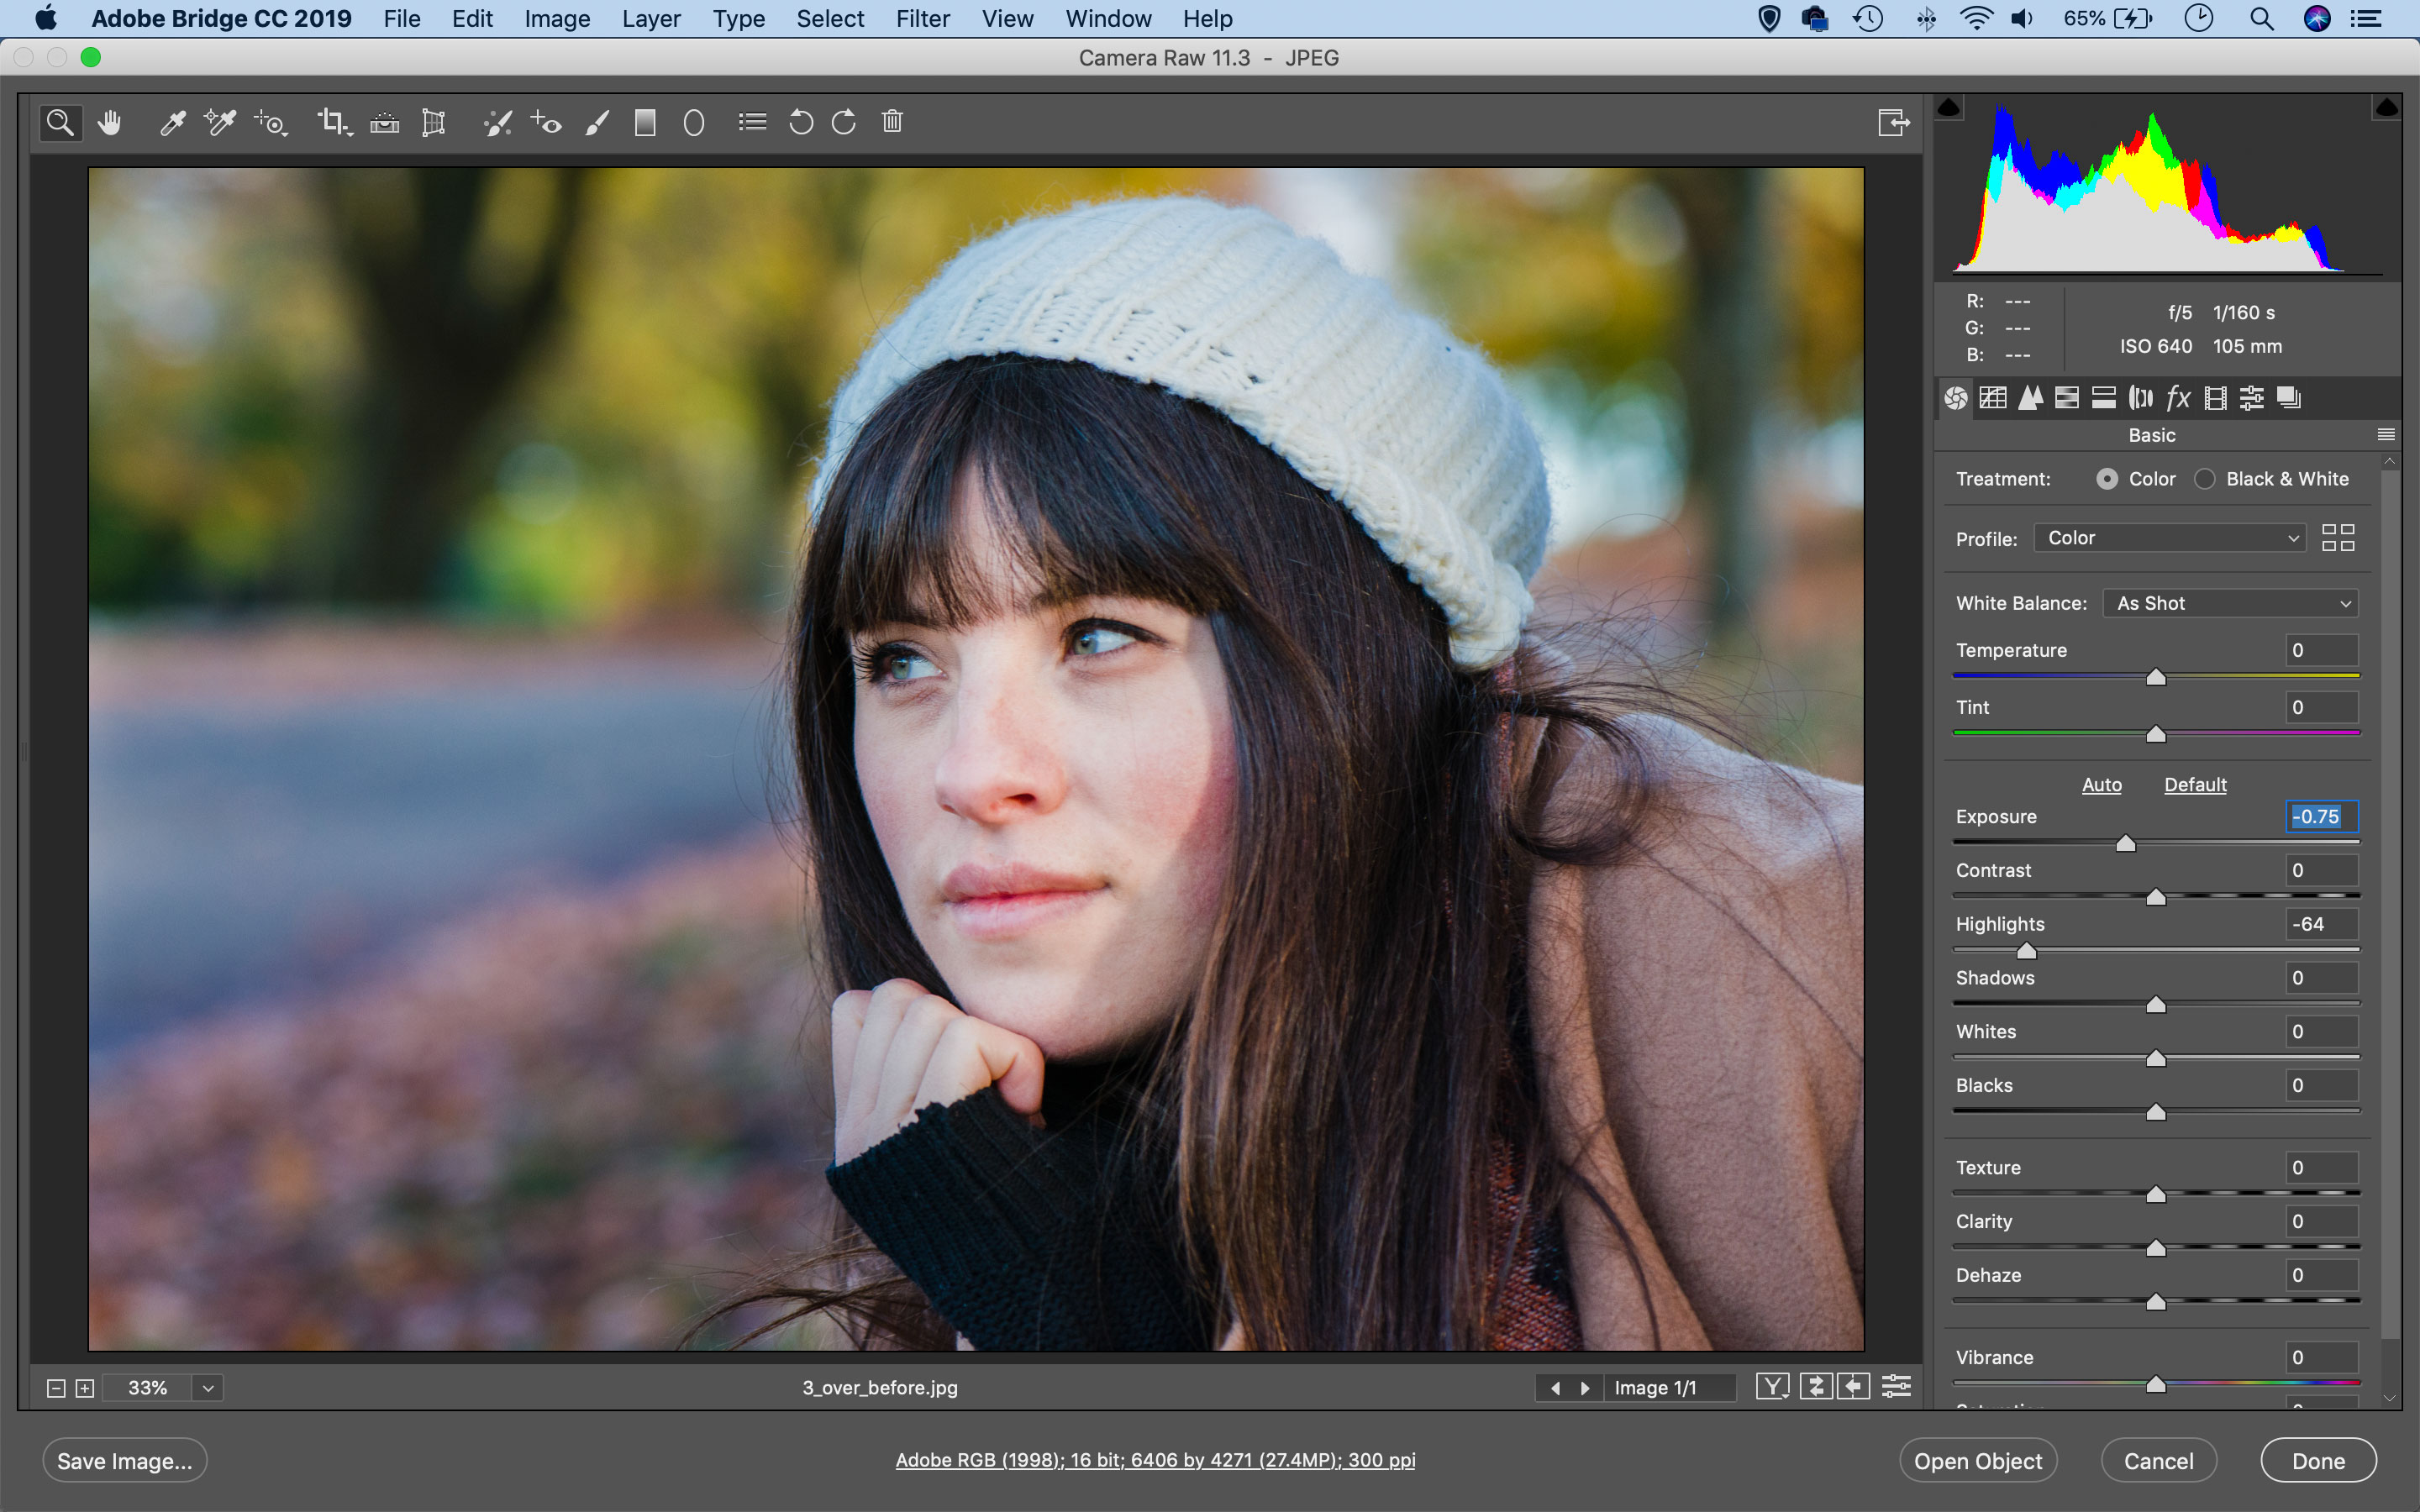
Common photo problems and how to fix them in Photoshop: #3 My photo is overexposed!
It's the opposite problem to yesterday's issue – this time we explain what to do with pictures that have come out too bright

The best camera deals, reviews, product advice, and unmissable photography news, direct to your inbox!
You are now subscribed
Your newsletter sign-up was successful
It's easy enough to fix underexposure in Photoshop, so surely it should be just as easy to fix overexposure? Not quite! For digital cameras, overexposure is a much more serious problem because highlight detail is very fragile – and once it's gone, you can't get it back. This is why we always recommend photographers shoot raw files – raw files have just a little extra exposure leeway that can allow a small amount of highlight recovery.
See all 15 instalments
• 15 common photo fixes
Adobe trial downloads
• Download Photoshop
• Download Lightroom
• Download Premiere Pro
Computers and photo editing
• Best photo-editing software
• Best laptops for photographers
• Best desktop computers for photo editing
Photo tips and ideas
• 11 home photo projects
• 44 tips cards to cut out and keep
• Photography tips for beginners
Welcome to the third instalment in our a 15-part series on how to fix photo problems in Photoshop, Lightroom and Adobe Camera Raw.
It's aimed at all photographers learning how to use Photoshop, Adobe Camera Raw and Lightroom to enhance their photos, but we hope it's going to be especially useful to photographers who find themselves stuck at home during the current coronavirus crisis. Let's look on the bright side – now's a chance to do some of the image-editing tasks and experiments we never had time for before!
Article continues belowIn this instalment we'll show you how to correct a photo that's been overexposed. It's a simple enough job if you took the precaution of shooting raw files.
Exposure and Highlights
If an image is too bright for your liking, you can use the tonal tools in Camera Raw/Lightroom to darken it down. The Exposure and Highlights sliders in the Basic Panel are a good place to start.
As long as the highlights aren’t clipped to pure white, there will be detail in the brightest areas that you can recover (especially if it’s a raw). Some photographers like to overexpose on purpose, or ‘expose to the right’—while being careful not to blow out or clip the highlights—then recover the image afterwards. This ensures the minimum of visual noise.
Jargon buster
Highlight recovery: This is a technique used when processing raw files. You can adjust the processing to recover very bright highlight areas that would otherwise have been 'clipped' or blown out.
The best camera deals, reviews, product advice, and unmissable photography news, direct to your inbox!
Expose to the right: This is a technical trick used by some photographers to get the maximum theoretical quality. It means choosing an exposure that pushes the image histogram as far to the right (the highlight end of the scale) as you dare. The more light the sensor gets the better, though the more likely it is that you will end up clipping the highlights. For the small theoretical gain in quality, we think it's just too risky.
Next instalment: #4 My photo is out of focus
If you don't use Photoshop or Lightroom, why not sign up for the trial version? You can use this free for a period of 7 days and then decide which of three Photography Plan subscriptions would suit you best.
The lead technique writer on Digital Camera Magazine, PhotoPlus: The Canon Magazine and N-Photo: The Nikon Magazine, James is a fantastic general practice photographer with an enviable array of skills across every genre of photography.
Whether it's flash photography techniques like stroboscopic portraits, astrophotography projects like photographing the Northern Lights, or turning sound into art by making paint dance on a set of speakers, James' tutorials and projects are as creative as they are enjoyable.
He's also a wizard at the dark arts of Photoshop, Lightroom and Affinity Photo, and is capable of some genuine black magic in the digital darkroom, making him one of the leading authorities on photo editing software and techniques.


