Create X-ray photographs with this cool Photoshop trick
GIve yourself X-ray vision using this Photoshop technique
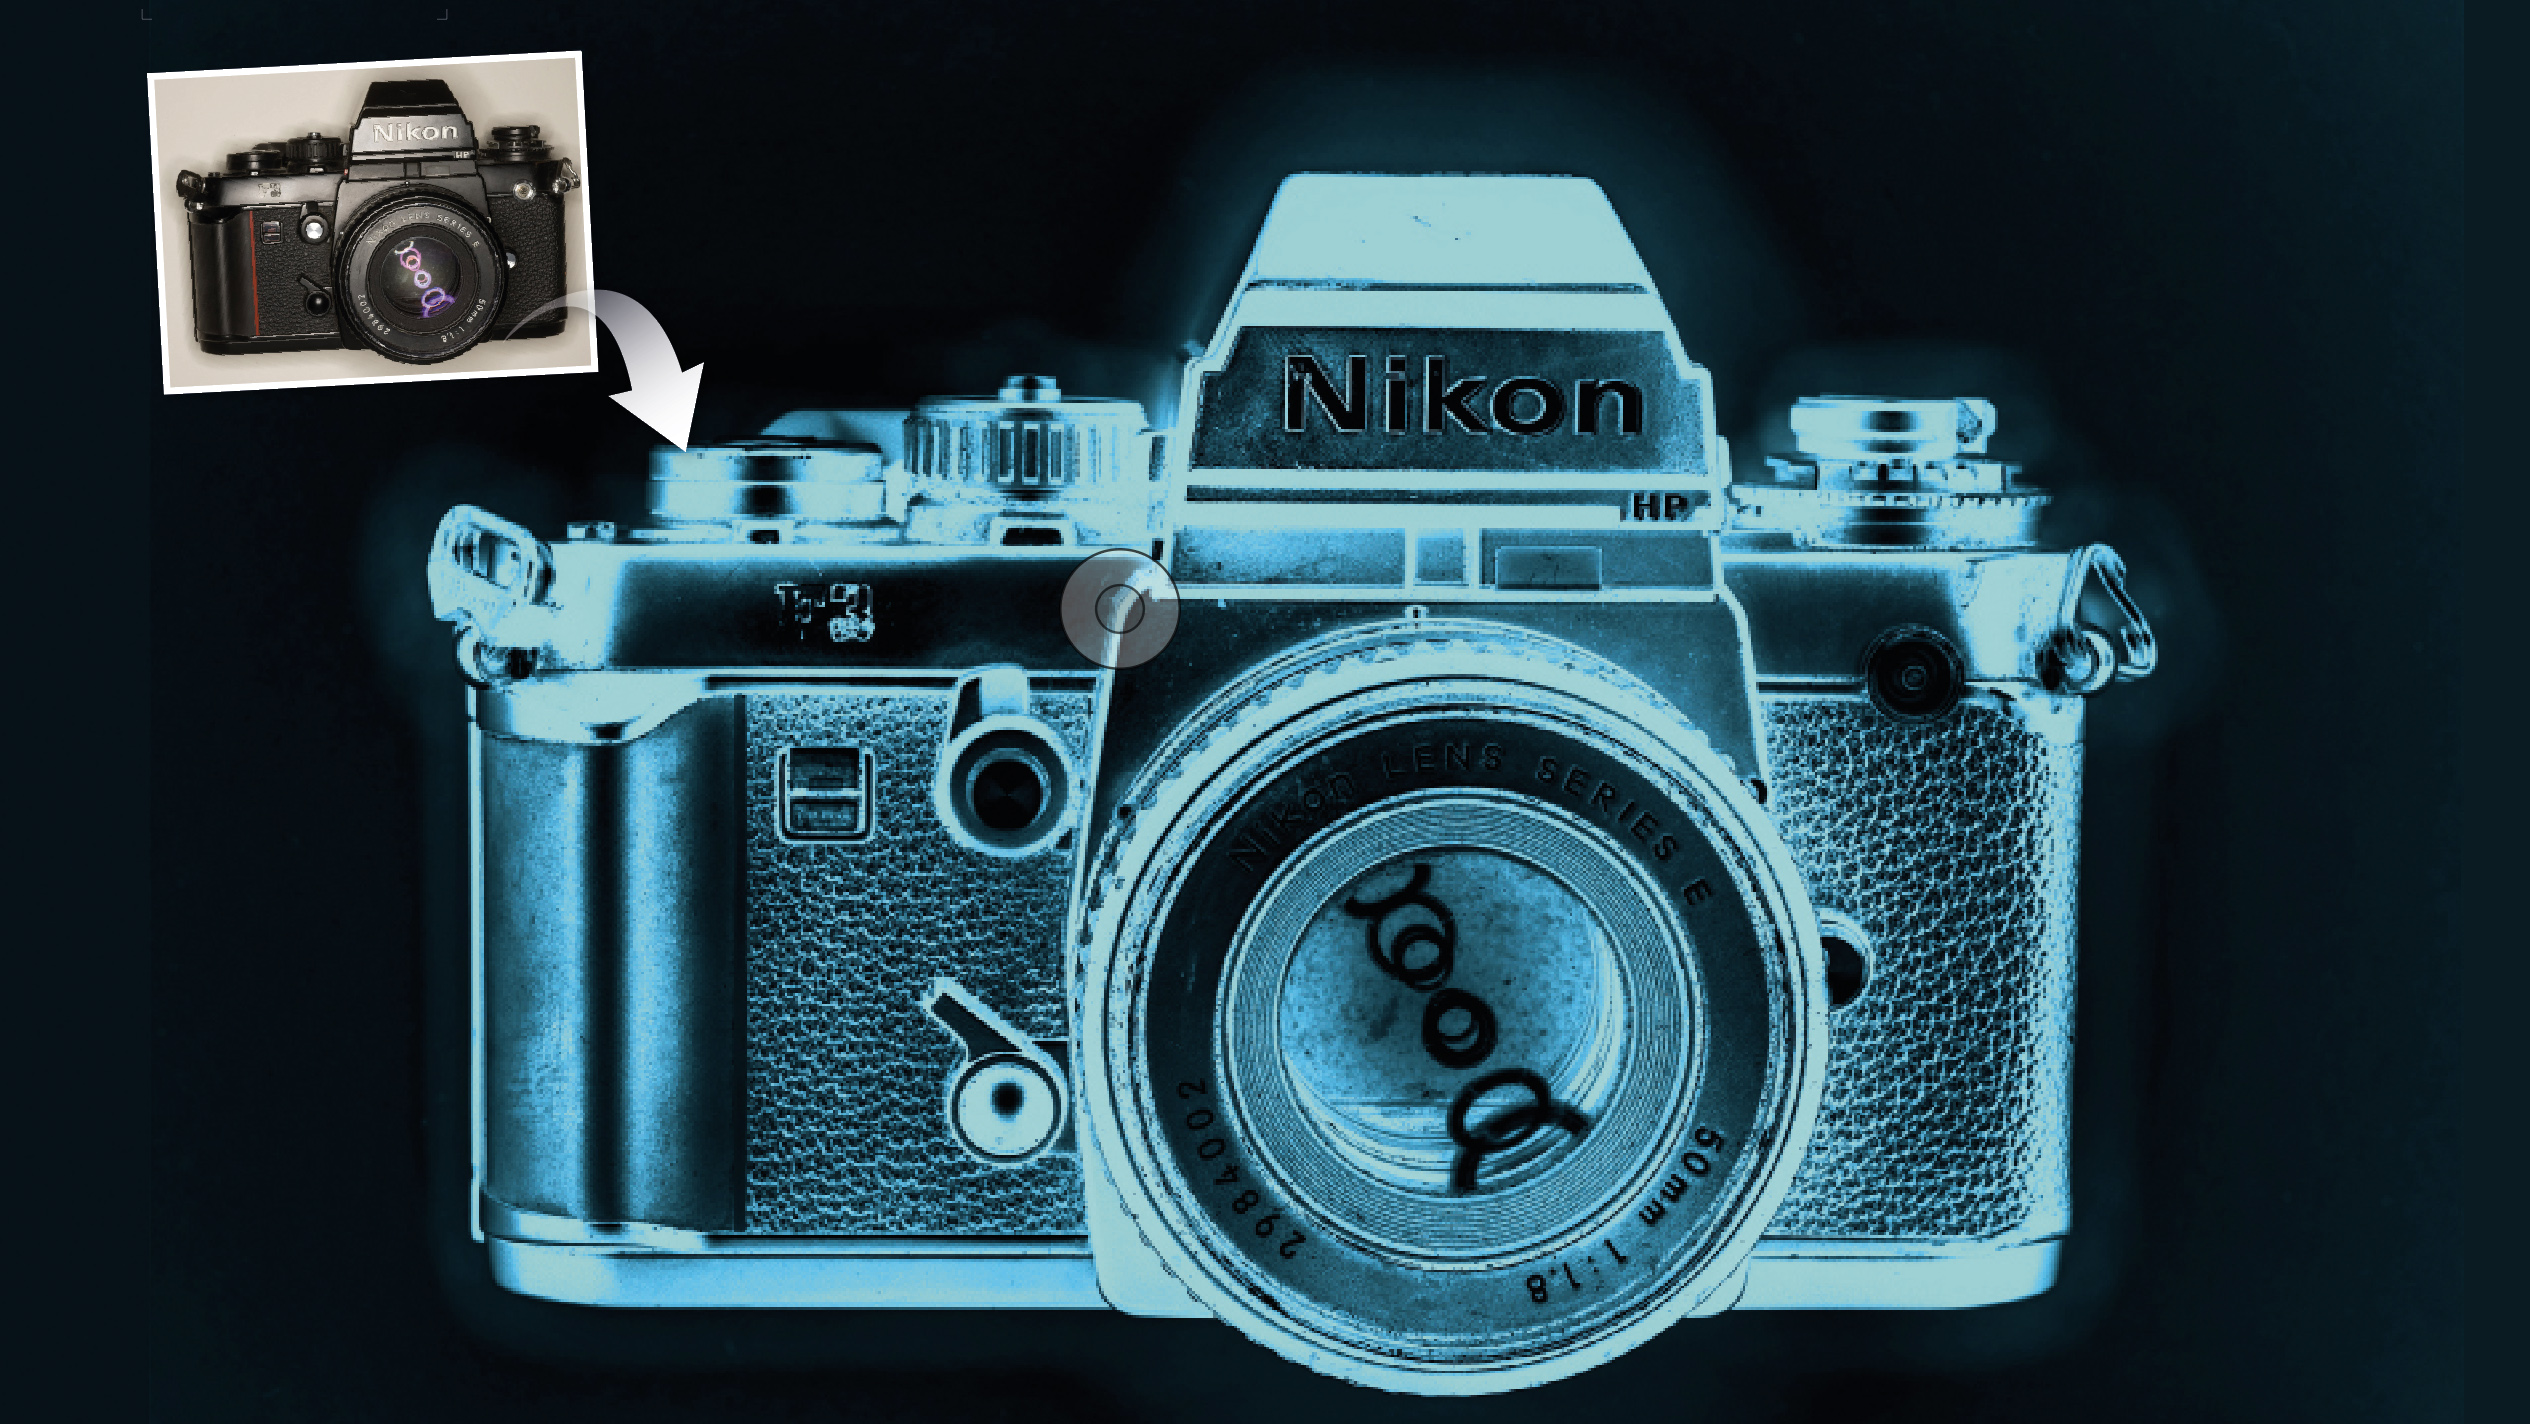
X-ray photography can be much more than a security measure or a way for doctors and dentists to see inside us. Some photographers and radiographers have used the equipment and film to make X-rays to create striking and vibrant studies of flowers and other similar subjects.
Tips and tutorials
• How to download Photoshop
• 100 Photoshop tips!
• 15 top Photoshop fixes
• More Photoshop tutorials
• Photoshop Elements tutorials
Free Photoshop stuff
• 55 free Photoshop brushes
• 63 free Photoshop templates
• 52 free Photoshop plug ins
• 63 free Photoshop actions
• Free textures for Photoshop
• Free frames and borders
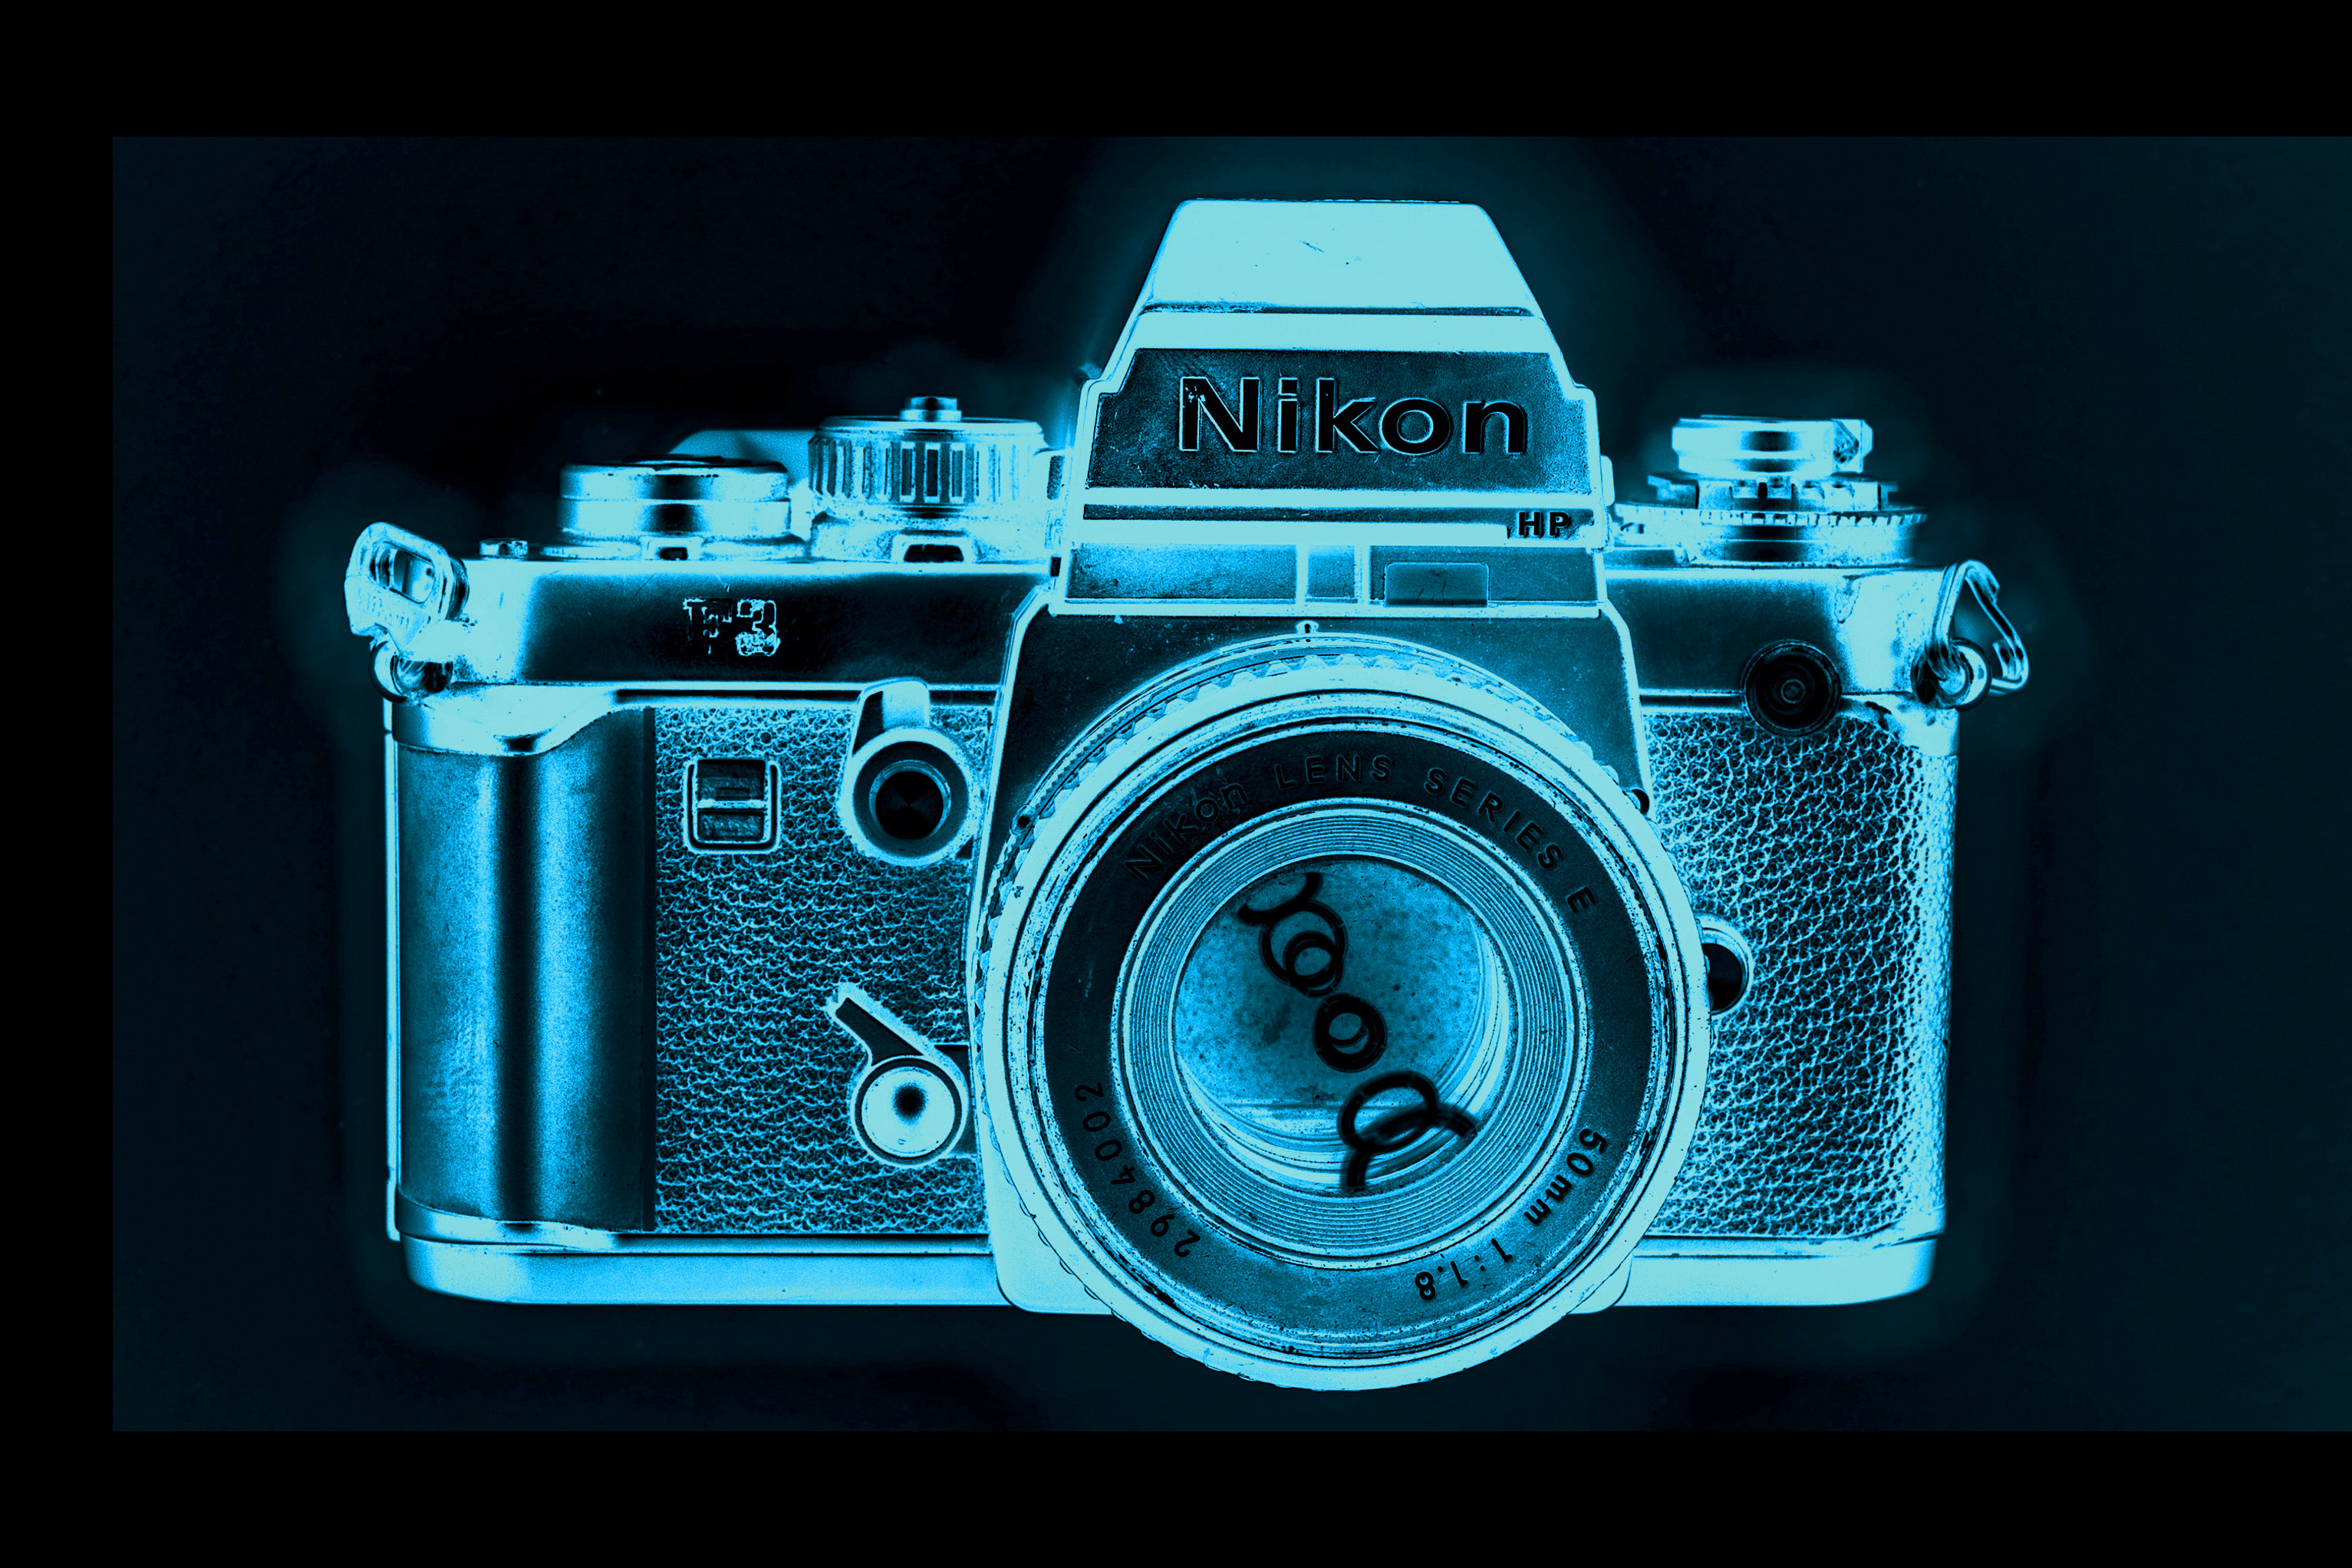
While the results can be spectacular, most of us don’t have an X-ray machine tucked away in the back of the cupboard, so in this walkthrough we’re going to take a look at replicating the X-ray effect. The characteristic negative tones and cyan hues that are typical of many X-rays are a wonderful way to give your images a creative twist.
We've used Photoshop to convert our image to black and white, invert the tones, and then add a colored tint and a subtle glow. Using a non-destructive and re-editable workflow with Adjustment Layers and Smart Objects, you’ll also master some essential Photoshop skills that’ll come in useful for other projects.
Let’s see how it’s done!
01: Shoot a suitable subject
Shoot it Lots of objects work well with this technique, from kitchen utensils and plastic toys – to the old Nikon F3 film camera we’ve used here. Photograph your object on a white background – it will end up being black once the image is inverted.
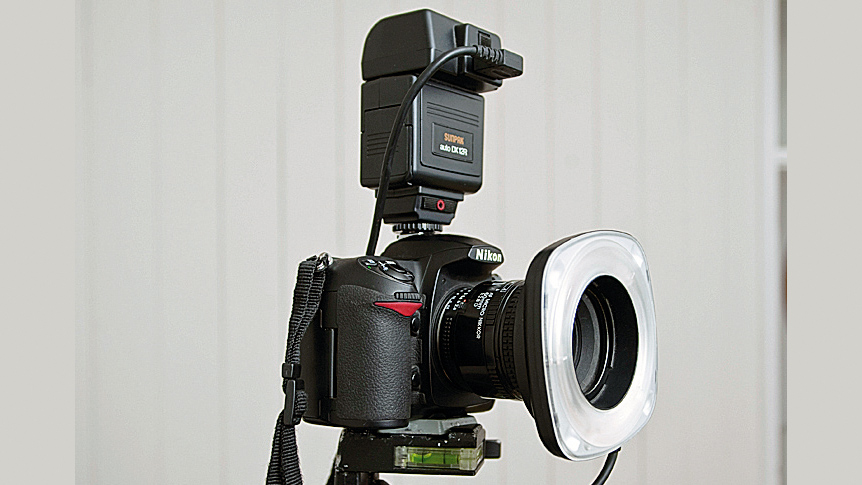
For an X-ray-style glow, the lighting from a ringflash is perfect, so if you’ve got one, attach it to your lens and use it. If you’d prefer a white background in your finished images, shoot your subject on a piece of black card or cloth.
02: Process in Raw
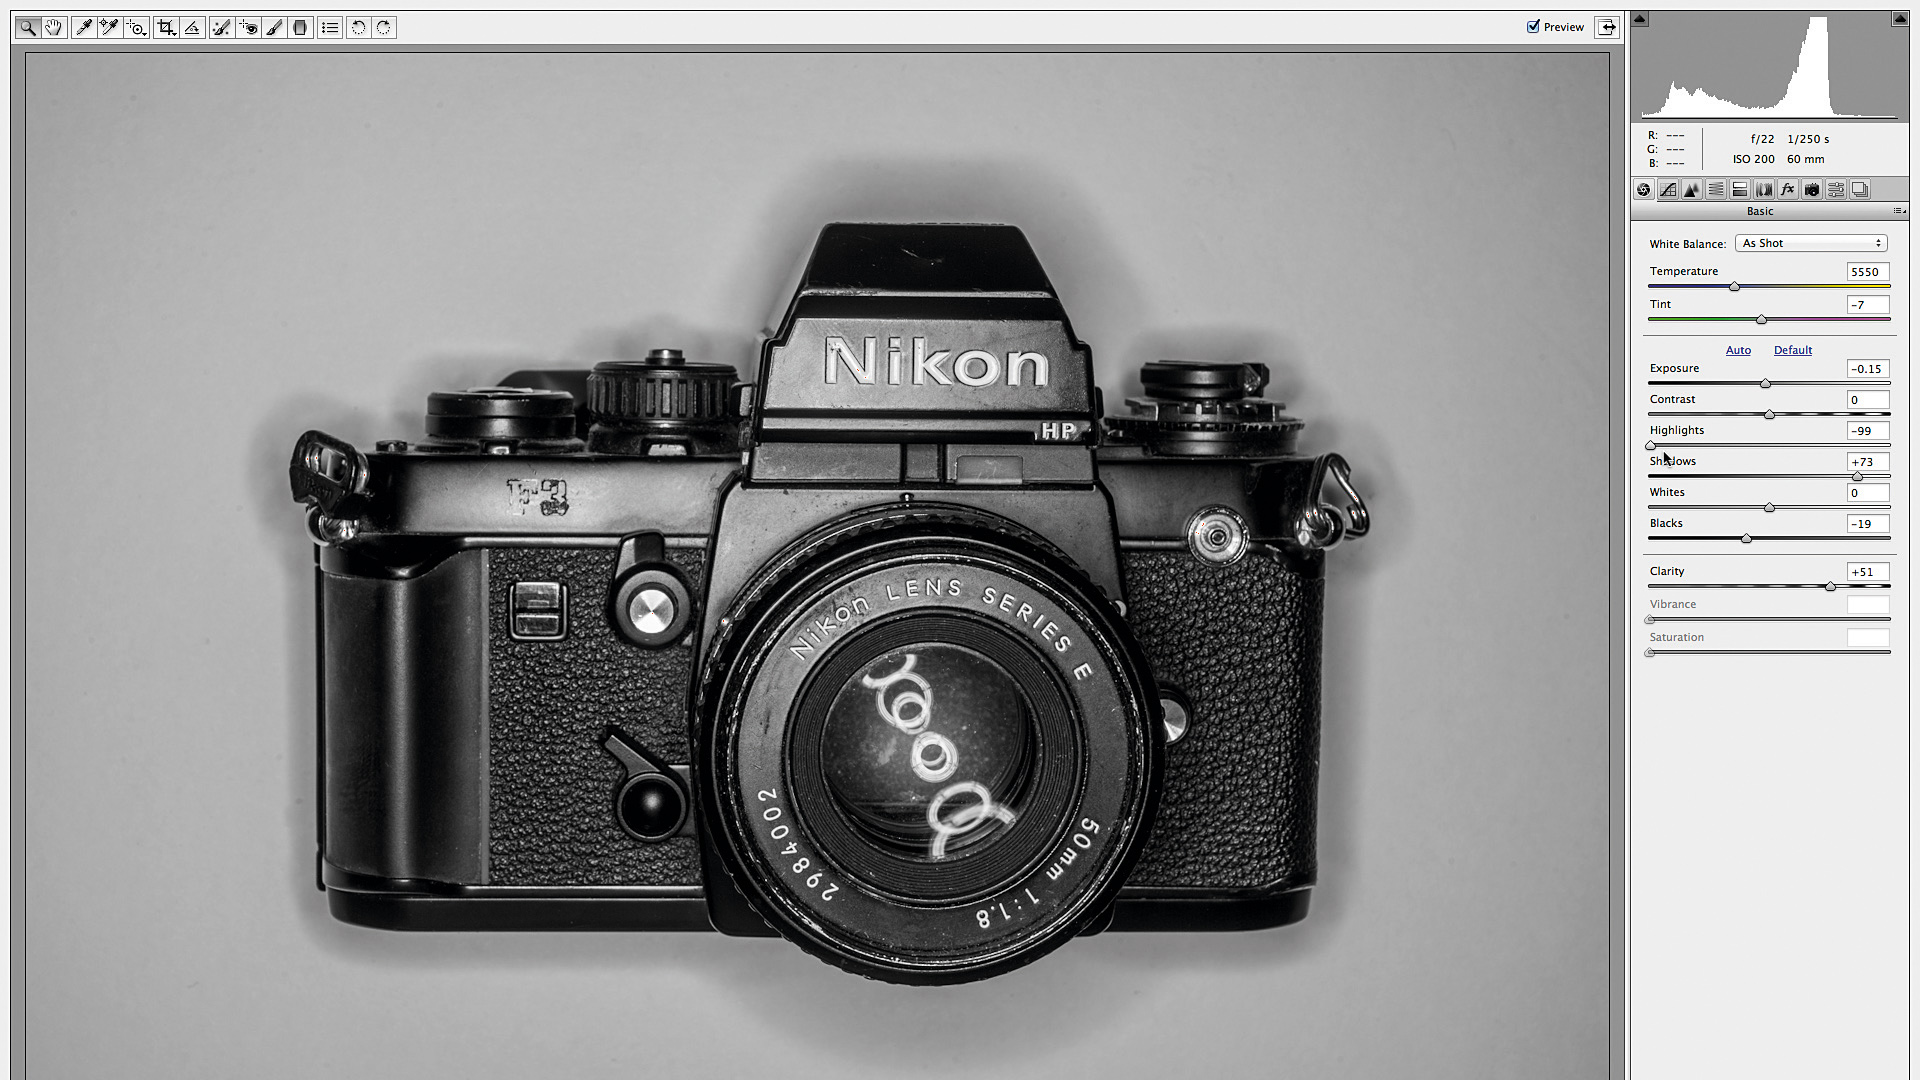
Download the image and open it in Adobe Camera Raw, or use the file ‘xray_before.NEF’. Go to the HSL/Grayscale tab and check the Convert to Grayscale box. Return to the Basic panel and set the Highlights slider to -99, the Shadows slider to 75 and Clarity to about 50 to eke out as much detail as possible.
The best camera deals, reviews, product advice, and unmissable photography news, direct to your inbox!
03: Invert the tones
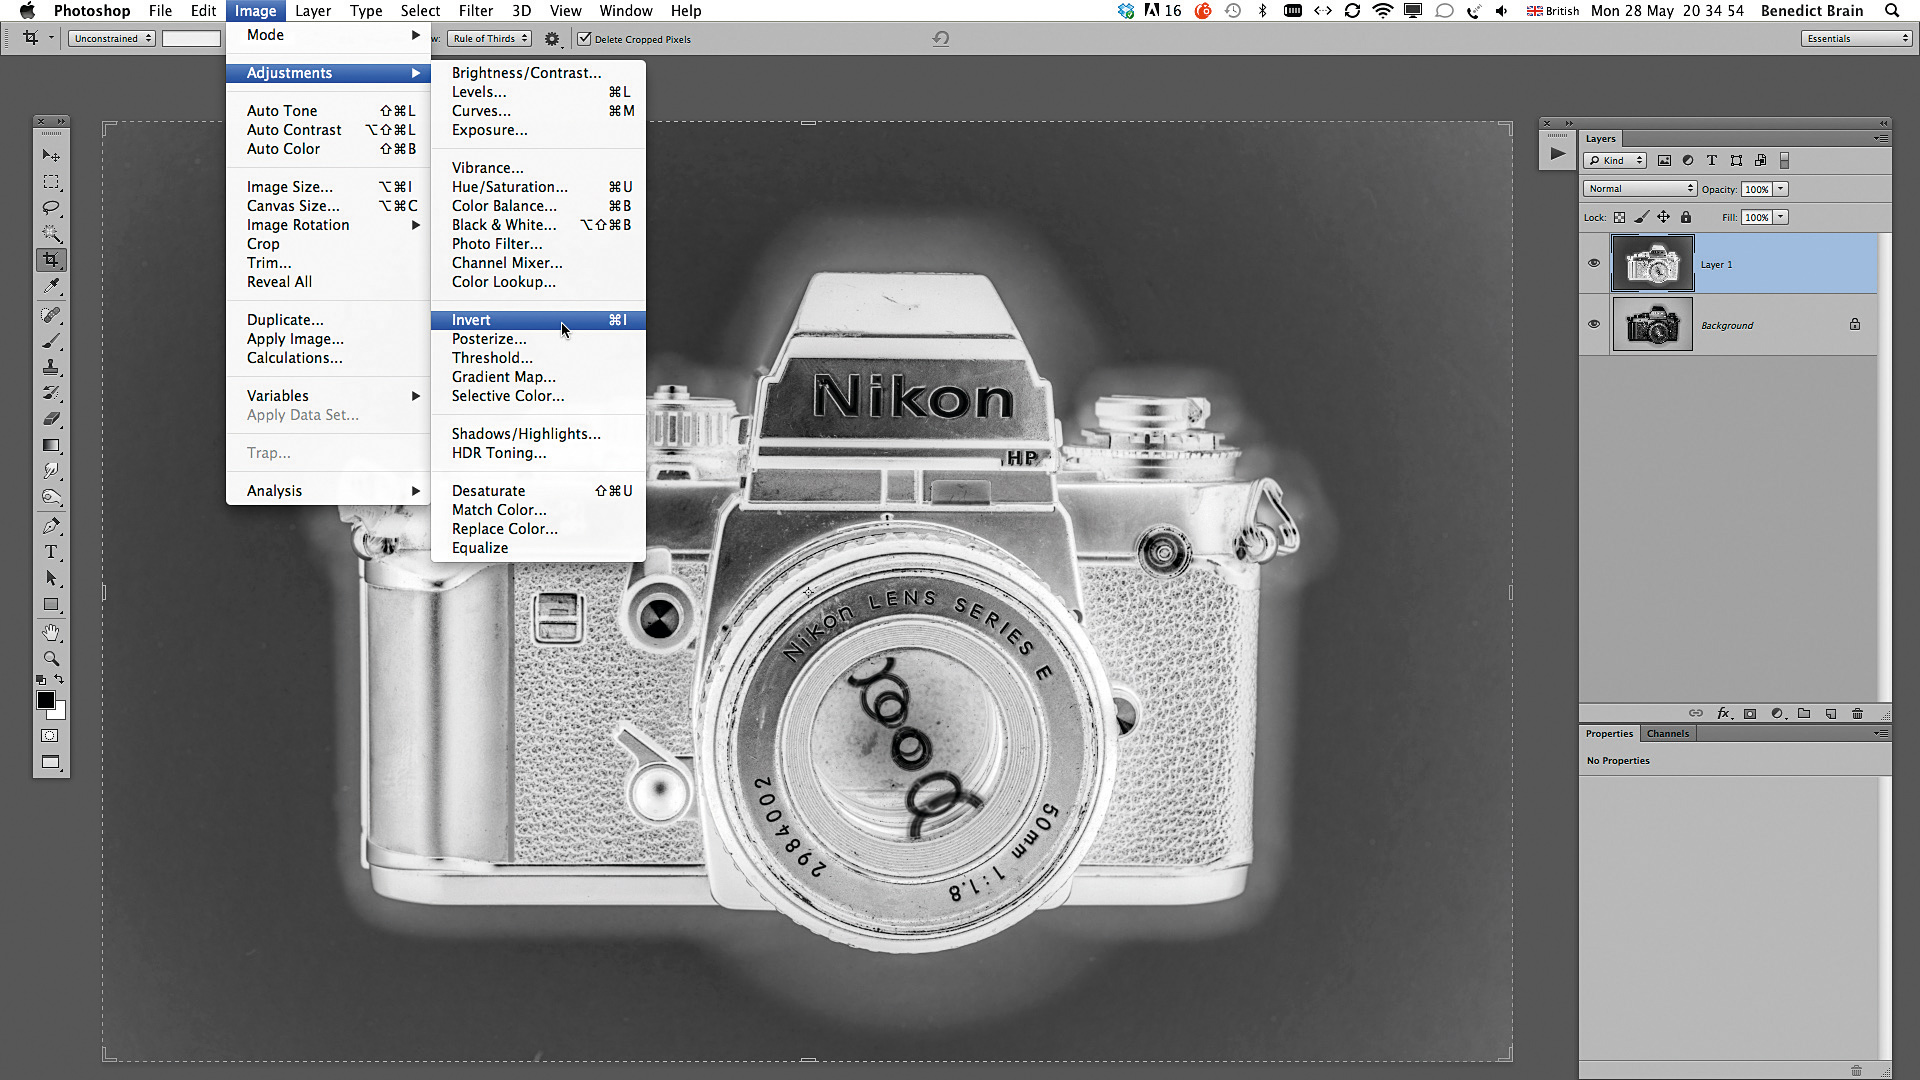
Duplicate the background layer and go to Image > Adjustments > Invert, or hit Ctrl/Cmd+I to do this. At this point, it’s a good idea to select the Dodge and Burn tools from the Tools palette to selectively darken and lighten parts of the image, making sure there are no deep shadow or glowing highlight areas.
04: Add a color tint
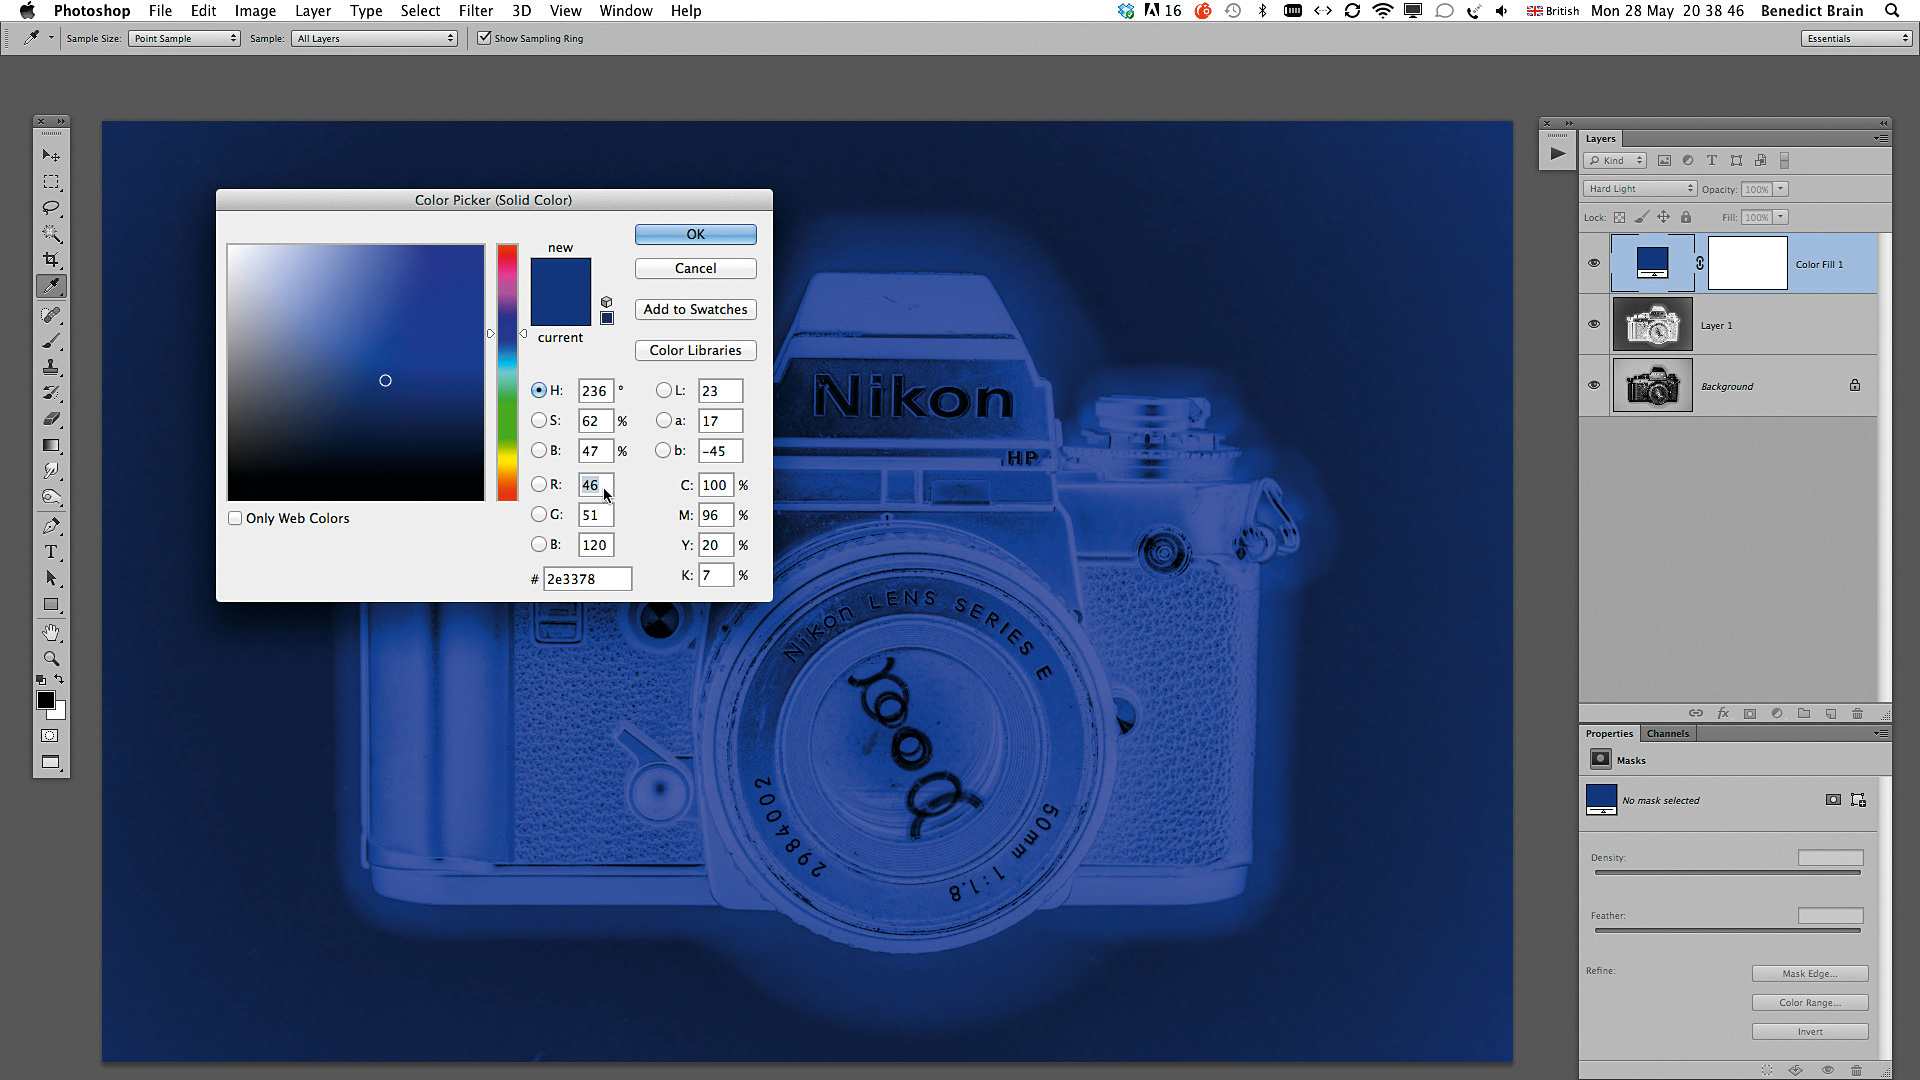
Add a color tint Go to Layer > New Fill Layer > Solid Color, and from the color picker, choose a bluish X-ray tint – R41 G51 B120 is a good starting point. At the top of the Layers panel, select Hard Light from the Blend Mode drop-down menu. It’s worth experimenting with some of the other Blend Modes to see which effect you like best.’
05: Tweak the tones
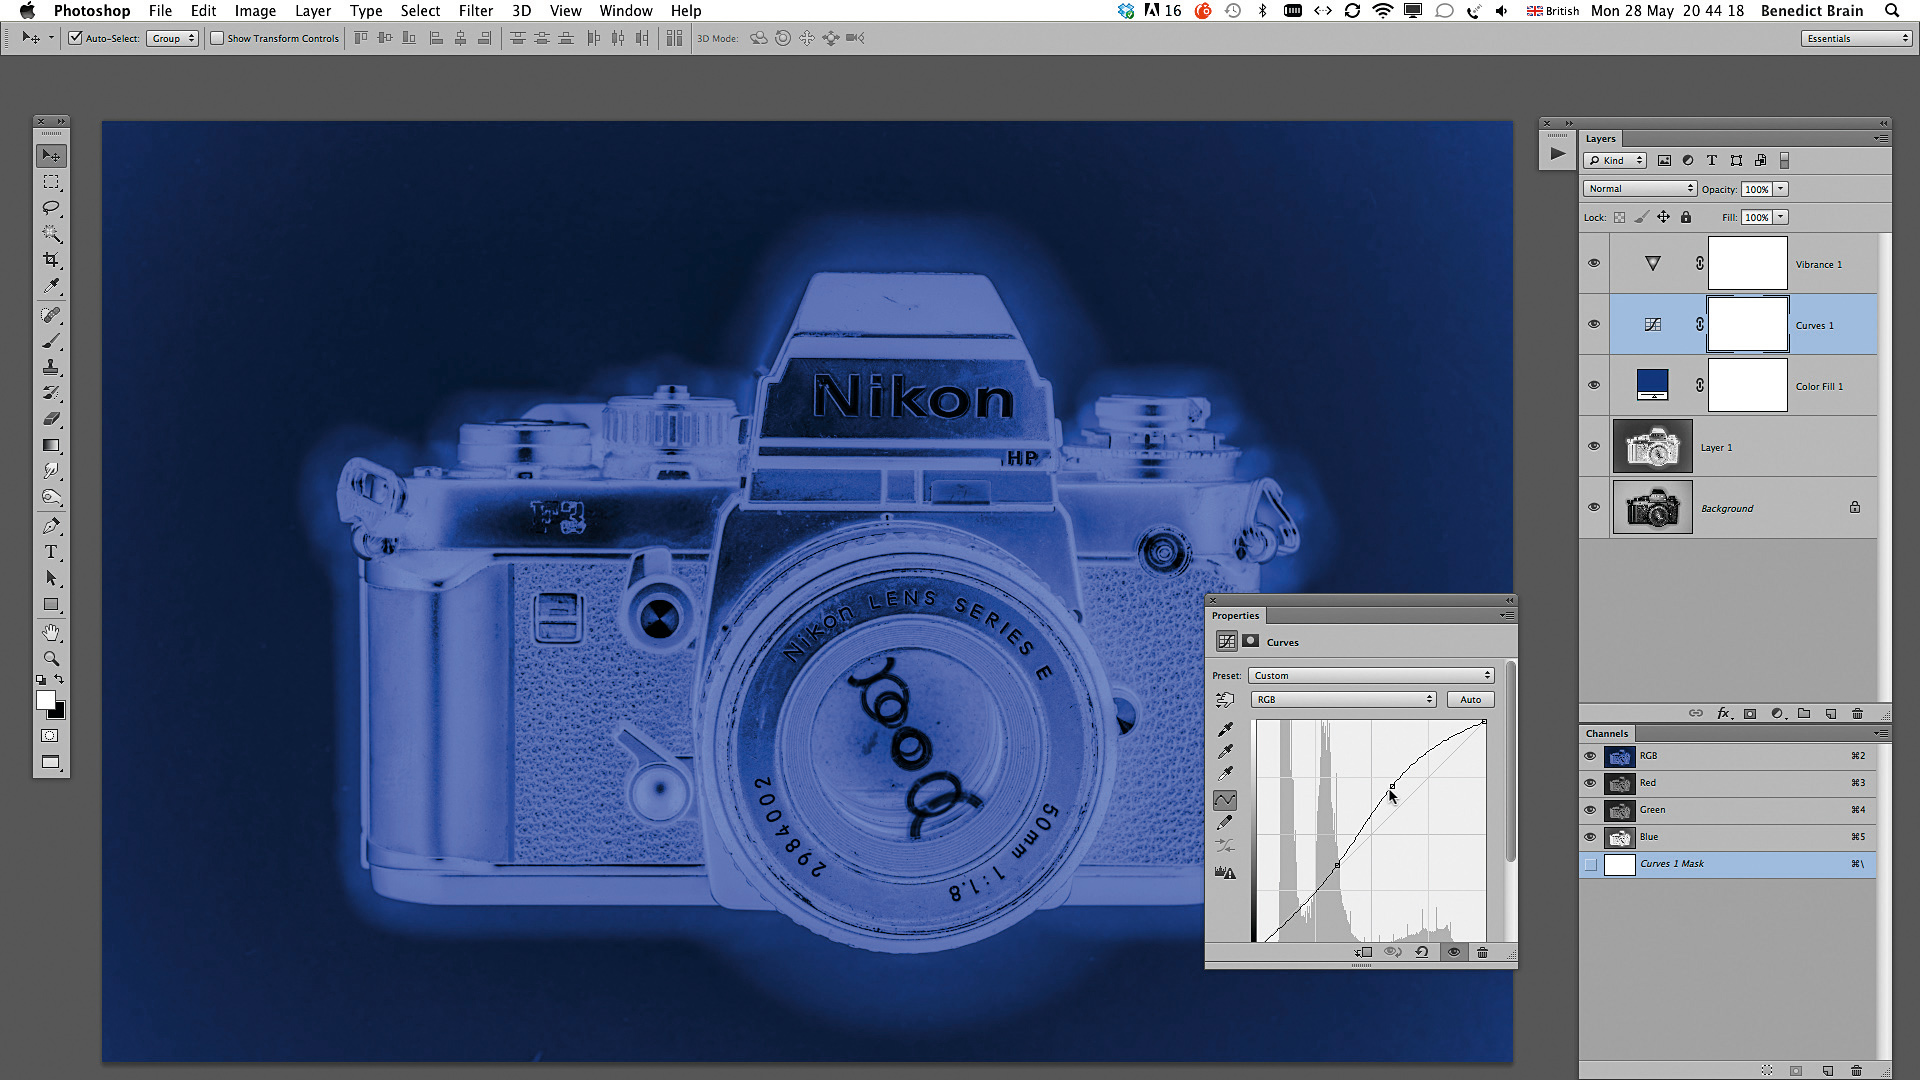
To alter the tones, create a Curves Adjustment Layer and bend the upper half of the curve upwards to make the light tones a little lighter. Place an anchor half way down so the dark tones remain unaffected. Now use a Vibrance Adjustment Layer to tweak the intensity of the colors. Here we’ve reduced it a little.
06: Add final glow
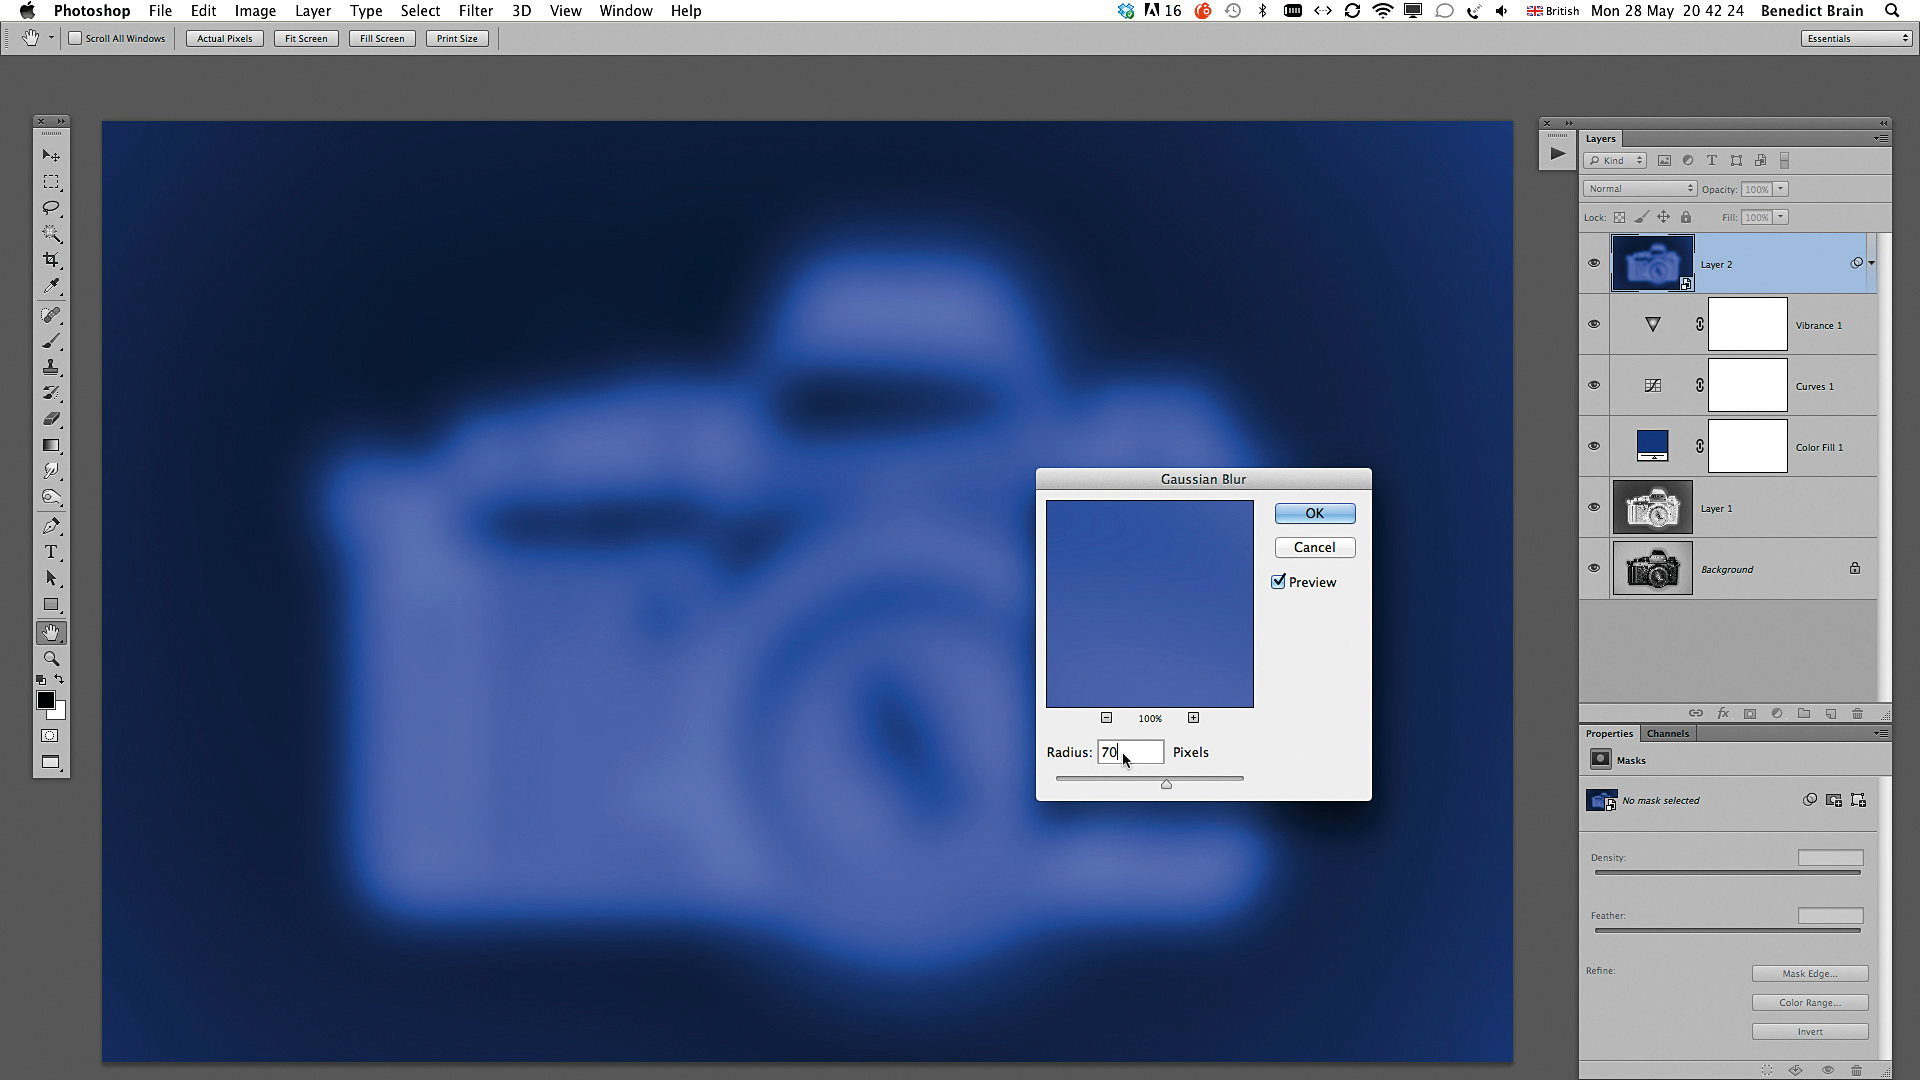
A final glow Hit Shift+Alt+Ctrl/Cmd+E to merge all of the separate layers into a new layer at the top of the layer stack. Convert the layer into a Smart Object and go to Filter > Blur > Gaussian Blur and enter a blur of 70 pixels. To finish off, change the Layer Blend Mode to Soft Light and set the Layer Opacity to 25%, or to a value that suits your subject.
Read more:
• This is the best photo-editing software today
• These are the best laptops for photographers right now
• We help you choose the best desktop computers for photo editing
Benedict Brain is a UK based photographer, journalist and artist. He graduated with a degree in photography from the Derby School of Art in 1991 (now University of Derby), where he was tutored and inspired by photographers John Blakemore and Olivier Richon, amongst others. He is an Associate of the Royal Photographic Society and also sits on the society’s Distinctions Advisory Panel.
Until July 2018 Benedict was editor of Britain’s best-selling consumer photography magazine, Digital Camera Magazine. As a journalist he met and interviewed some of the world’s greatest photographers and produced articles on a wide range of photography related topics, presented technique videos, wrote in-depth features, curated and edited best-in-class content for a range of titles including; Amateur Photographer, PhotoPlus, N-Photo, Professional Photography and Practical Photoshop. He currently writes a regular column, The Art of Seeing, for Digital Camera magazine.

