Common photo problems and how to fix them in Photoshop: #7 There are color fringes in my highlights
Color fringing, or chromatic aberration, is a nasty little problem that affects many lenses and needs sorting out...

Chromatic aberration is not a new problem, but it's certainly not getting any better. Lens makers always have to make optical compromises to design affordable zoom lenses, and chromatic aberration, or chromatic aberration, is an extremely common side-effect. Some cameras have in-built corrections for JPEG images, but if you shoot raw files you'll have to apply those yourself.
See all 15 instalments
• 15 common photo fixes
Adobe trial downloads
• Download Photoshop
• Download Lightroom
• Download Premiere Pro
Computers and photo editing
• Best photo-editing software
• Best laptops for photographers
• Best desktop computers for photo editing
Photo tips and ideas
• 11 home photo projects
• 44 tips cards to cut out and keep
• Photography tips for beginners
Welcome to the seventh instalment in our 15-part series on how to fix common photo problems in Photoshop, Lightroom and Adobe Camera Raw.
The current COVID-19 crisis has impacted all of us, and if like us you are stuck working at home, then now might be a chance to catch up on all those photo-editing jobs you've been putting off – and one of those is fixing up all those nearly-great photos with irritating flaws that need fixing.
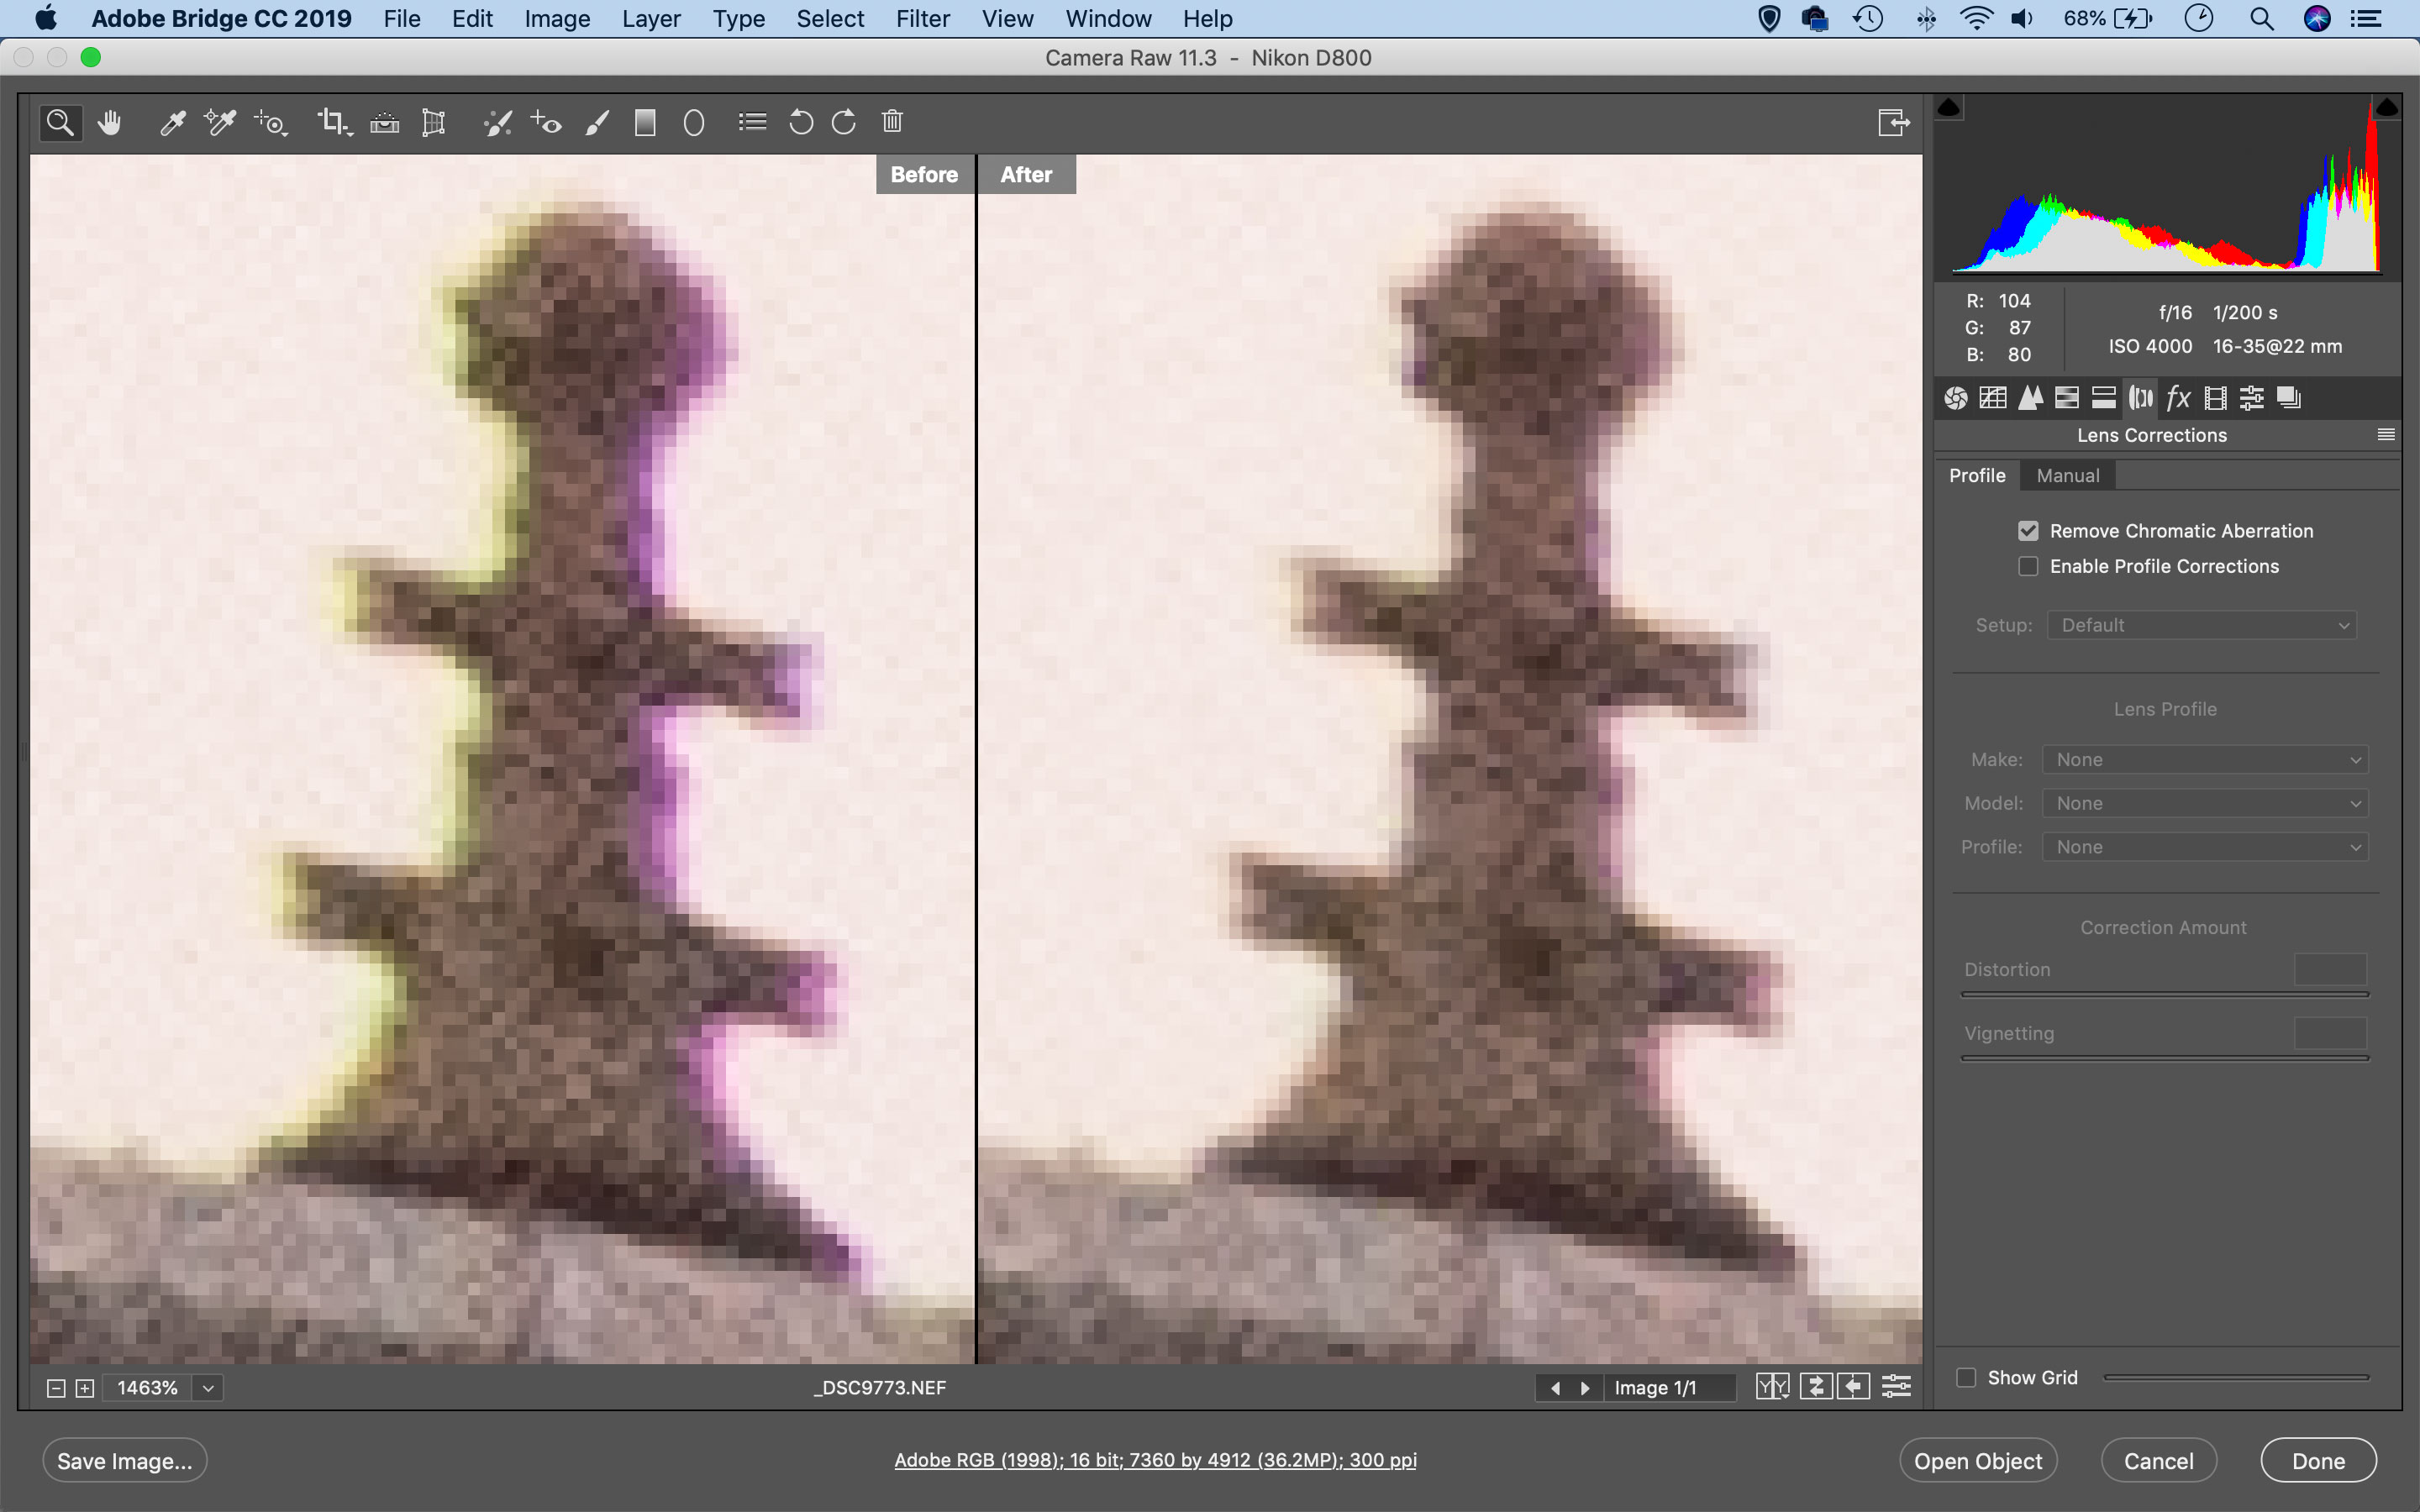
In this instalment we'll show you what you can do about color fringing, or chromatic aberration. These color fringes aren't very wide but you can spot them a mile off and they really devalue your pictures.
Straighten Tool and Upright options
Color fringes are often seen in areas of edge contrast, where light edges meet dark. Displaying either a green/magenta or a red/cyan cast. In earlier versions of Photoshop and Adobe Camera Raw the fix was really quite complicated because you had to identify which of these two color fringing pairs you had and then manually drag a slider to correct them. Very often, you'd have to juggle both sliders to fix color fringing that didn't neatly fit either category.
Now, though, the solution is MUCH simpler. In Adobe Camera Raw and Lightroom, all you have to do is check the Remove Chromatic Aberration box within the Lens Correction panel. This will even work on JPEG images – the software doesn't need the original raw image data to do this, nor even a correction profile for the lens used.
Jargon buster
Chromatic aberration: This happens when a lens doesn't bring different colors to precisely the same focus, so you get colored fringes appearing around object edges that get worse the closer you are to the edge of the frame. It's so common in modern lenses that it's virtually unavoidable and needs to be corrected digitally.
The best camera deals, reviews, product advice, and unmissable photography news, direct to your inbox!
Lens corrections: No lens is optically perfect, so the solution used today is to apply digital lens corrections in software, using specially-developed lens profiles for each lens. These lens corrections will fix distortion and corner shading (vignetting) automatically. The other main lens fault, chromatic aberration, is corrected separately.
Next instalment: #8 The colors just look wrong
If you don't use Photoshop or Lightroom, why not sign up for the trial version? You can use this free for a period of 7 days and then decide which of three Photography Plan subscriptions would suit you best.
The lead technique writer on Digital Camera Magazine, PhotoPlus: The Canon Magazine and N-Photo: The Nikon Magazine, James is a fantastic general practice photographer with an enviable array of skills across every genre of photography.
Whether it's flash photography techniques like stroboscopic portraits, astrophotography projects like photographing the Northern Lights, or turning sound into art by making paint dance on a set of speakers, James' tutorials and projects are as creative as they are enjoyable.
He's also a wizard at the dark arts of Photoshop, Lightroom and Affinity Photo, and is capable of some genuine black magic in the digital darkroom, making him one of the leading authorities on photo editing software and techniques.

