
When I was a new photographer, I remember thinking that buying a new camera or a new lens would be the turning point that took my photos from average to good. But, looking back over the dozen or so years that I’ve spent behind the camera, the moment that boosted my photographs the most wasn’t buying new gear, it was learning photography lighting basics.
Light plays multiple roles. Lighting in photography isn’t just about having enough light to use a low ISO. Light commands attention on the subject and loses the distractions in the shadows. Light increases contrast. Light can either create flattering colors or wreak havoc on a photograph’s hues. Light can even make a photograph appear sharper.
I’m not saying that buying a better camera or upgrading beyond a kit lens doesn’t impact your photos. It does. Upgrading your camera can mean a higher resolution and better autofocus, while a new lens opens up possibilities for better bokeh and a greater variety of focal lengths. What I’m saying is that, if you are a beginner, learning photography lighting basics makes a bigger impact than new gear.
Learning photography lighting basics doesn’t even require buying anything, at least not at first, although picking up a book on photography lighting or an online class isn’t a bad idea. Beginners can start learning about photography lighting with free light sources, like the sun or a window, before moving on to more advanced lighting and purchasing flashes, strobes, and modifiers.
There are three key aspects to understand when learning light: direction, intensity, and quality.
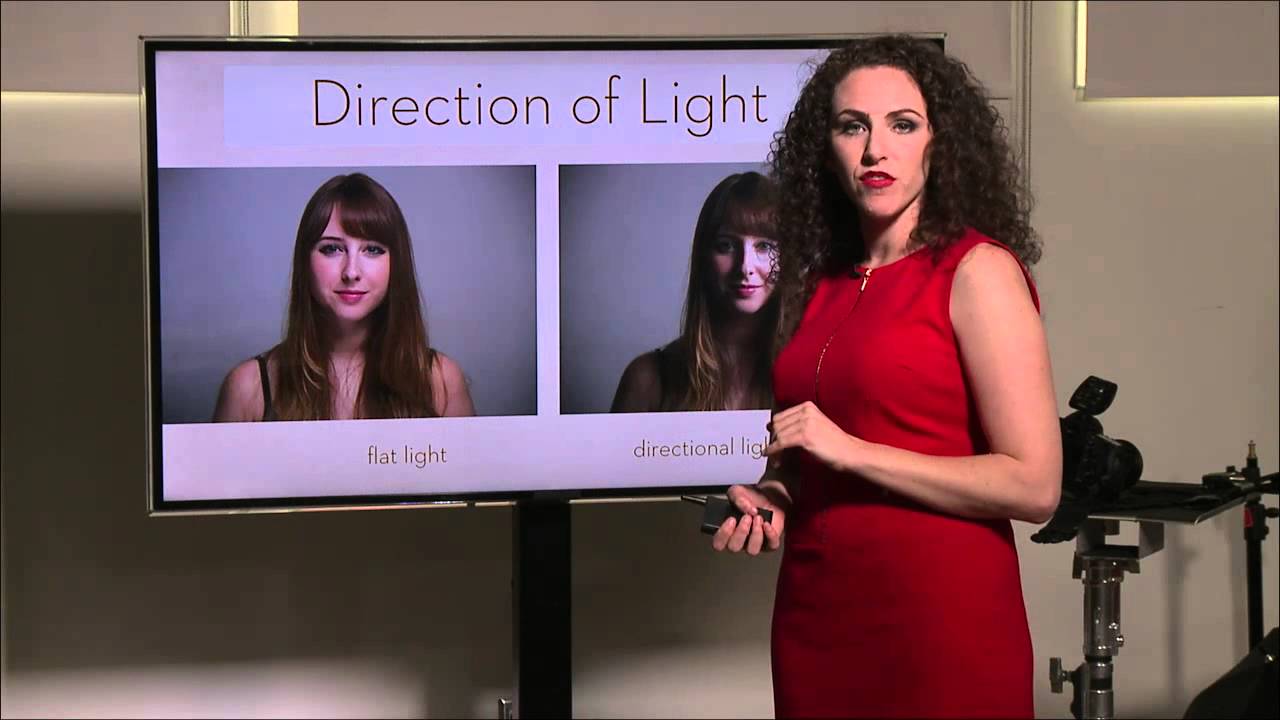
Photography Lighting Basics: Direction


Start with direction. Grab your camera, a random household object, and find an empty patch of floor near a large window (during the daytime). Place the object near the window, then start photographing that item from all sides. What happens when the light is coming from the side of the subject? What happens when the subject is facing directly towards the light? Try photographing that object with the light directly behind it (spoiler alert, you’re going to get either a very dark subject or a very bright background, depending on your camera settings).
By changing the direction of the light hitting the subject, you change where the highlights, or the brightest parts of the image, and the shadows, or the darkest parts of the image, lie across the subject. This can be used to add drama, create depth, or even hide unflattering elements in the shadows.
Think of a portrait. Shadows under the eyes makes someone look tired, right? By understanding how direction changes the location of those shadows, you can avoid unflattering under-eye shadows.
Photography Lighting Basics: Intensity


Then, move on to intensity. Light intensity refers to how much light there is, or quantity. You can’t grab a remote and turn down the intensity of the sun (like you can once you move to flashes). But, you can get further away from a window, or take photos at noon and then take photos at sunset.
Place that object close to the window and take a photo. Next, move the object as far away from the window as you can get. The farther away you get from the window, the less light there is, and you’ll notice a difference in your photos.
Another thing to try is taking photos at noon, then taking photos just before sunset. The light is less intense at sunset; the quantity of light is lower. Beyond the quantity of light, shooting at sunset also changes the quality of light, which is our next lighting essential.
Photography Lighting Basics: Quality of light


Finally, build an understanding of the quality of light, which refers to how hard or soft a light source is. Hard light creates well-defined shadows that have a hard edge. Soft light creates shadows that gradually transition from light to dark.
On a sunny day, take that random object and go to a window on the opposite side of your house or apartment from where the sun is. You want a window that doesn’t create a patch of light on the floor. Take a photo near this window, with the light coming in on one side of the subject. Then, move to a window where the sun is directly streaming through, creating a square of light on the floor. Place the object in that square of light and take a photo, again from the side.
Now, compare the two photos. The photo from the window with direct sun streaming in should have well-defined shadows with a solid edge. The photo near the window with indirect sunlight should have shadows that fall off gradually and not have a hard edge.
You can experiment with hard and soft light outdoors, too. The sunlight on a sunny day at noon creates hard light. The sun on a cloudy day or closer to sunset creates softer light.
Learning lighting basics solves a number of photography problems, creating more flattering portraits and interesting shadows. Light will also enhance contrast and help reduce the need for a high ISO or a slow shutter speed, which can help your photos to appear sharper. Start with learning the basics using natural light, then ease into flash photography so you can create good light no matter what the sun is doing.
Yes, there are a number of benefits that come from upgrading your gear. But understanding light will help you get the most out of the gear that you already have – and when you do decide it's time to upgrade your gear, you’ll still have that lighting knowledge to hit the ground running.
When I look back on my early photographs as a beginner to the photographs that I take today, the biggest difference that I see is from learning light. Understanding how to best use natural light, then learning flash, then off-camera flash as my confidence with light increased, made the largest impact on my photography.
New to photography lighting?
Here are some more resources and tutorials on photography lighting:

