Want a wall-length panorama? Here's how to create jaw-dropping giant photos
James Paterson shows you how to shoot and edit photos for wonderful, whopping, wall-length displays
The best camera deals, reviews, product advice, and unmissable photography news, direct to your inbox!
You are now subscribed
Your newsletter sign-up was successful
Watch video: Wall-length panoramas
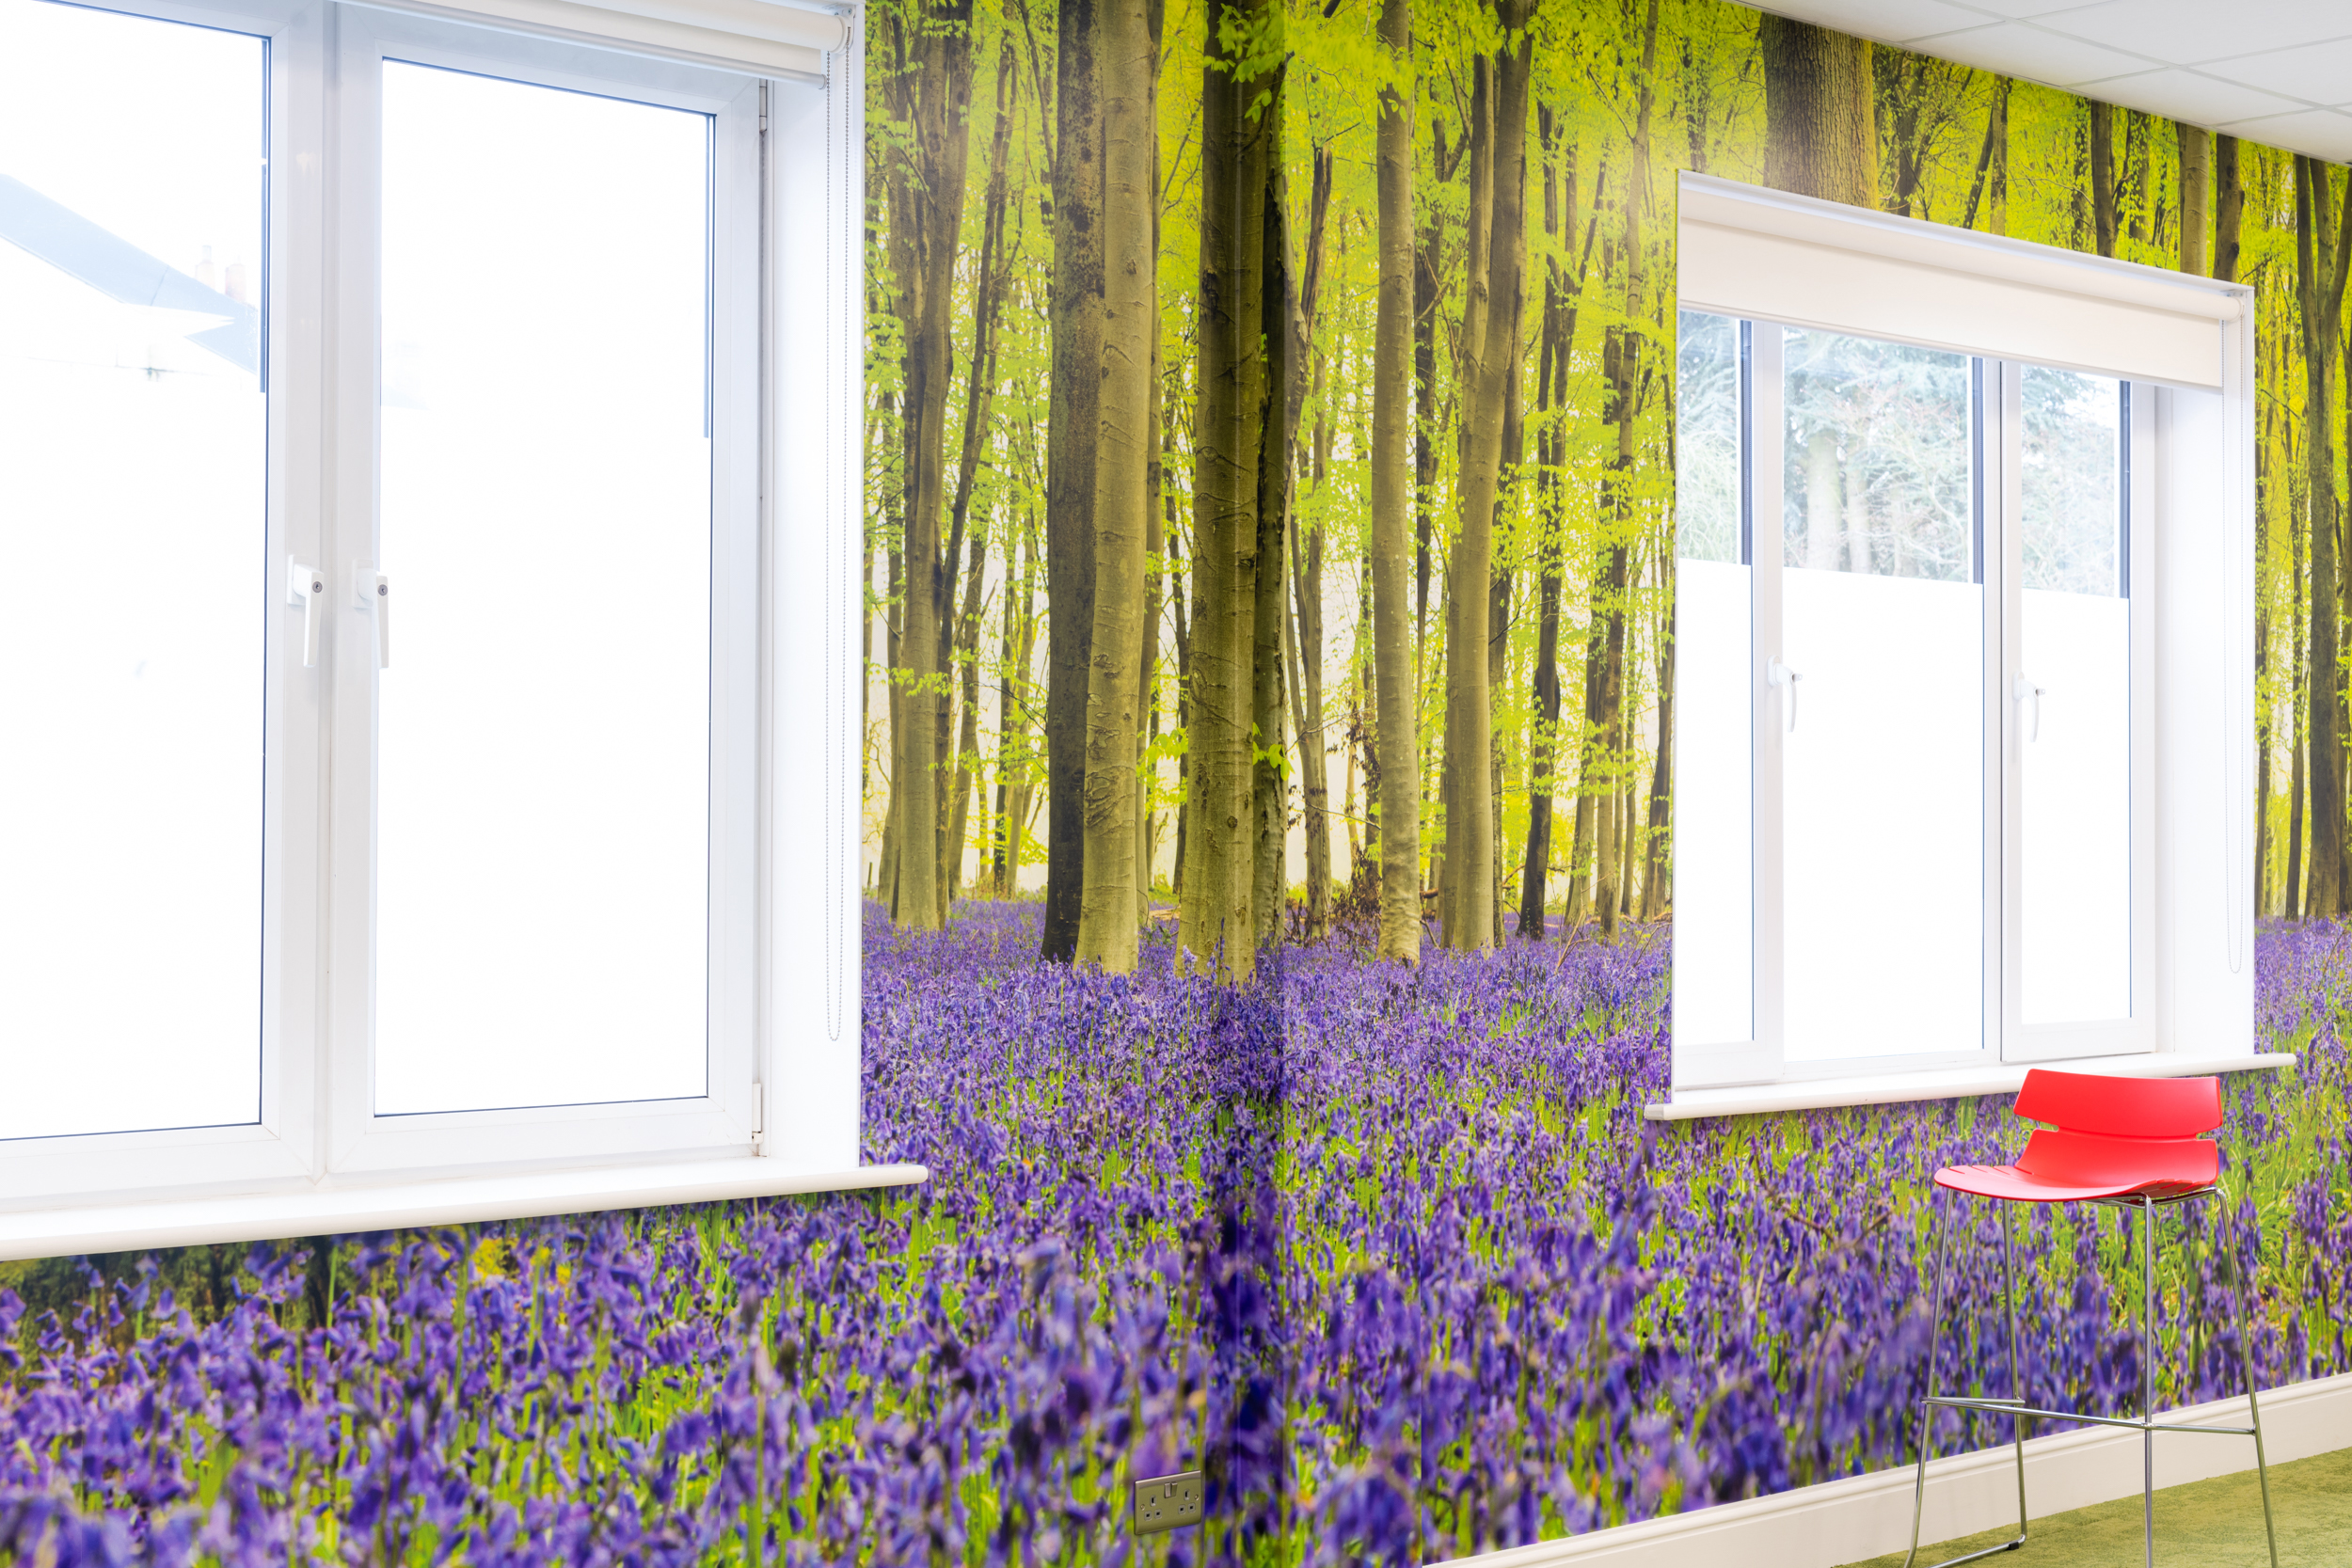
As anyone with a printer will know, it’s nice to see your images on paper. But gazing upon an entire wall print of your own creation takes things to a whole new level. Wall murals are becoming increasingly popular in offices, restaurants and homes and – thanks to healthy competition between printers, they’re more affordable than ever.
So why not create your own whopping wall display? In this project we’ll look at how it’s done, from shooting the image to making the mural. And even if you don’t fancy making a floor-to-ceiling photo, you’ll find plenty of useful advice on creating ultra-detailed images.
• Check out these large format photo printers
Of course, deciding to turn an entire wall into a photo display is a big commitment, and something you might have to live with for years to come. There are lots of choices to be made: Which wall? Which printer? And most importantly, what kind of image? You can’t just use any photo to create a wall-length print; pixel count is the name of the game here. We need a vast amount of detail for a yards-long print, so we need to wring as much quality as possible out of our cameras.
There are several ways we can do this. First, our choice of lens, aperture and camera gear will all have a bearing on sharpness and detail. Then there are techniques like panorama stitching and HDR imaging that can help us to maximize the resolution and quality of the image. To squeeze every last detail out of the sensor can be a rewarding task, and even more so when you get to see the results on a room-size scale!
01 Shoot for an HDR
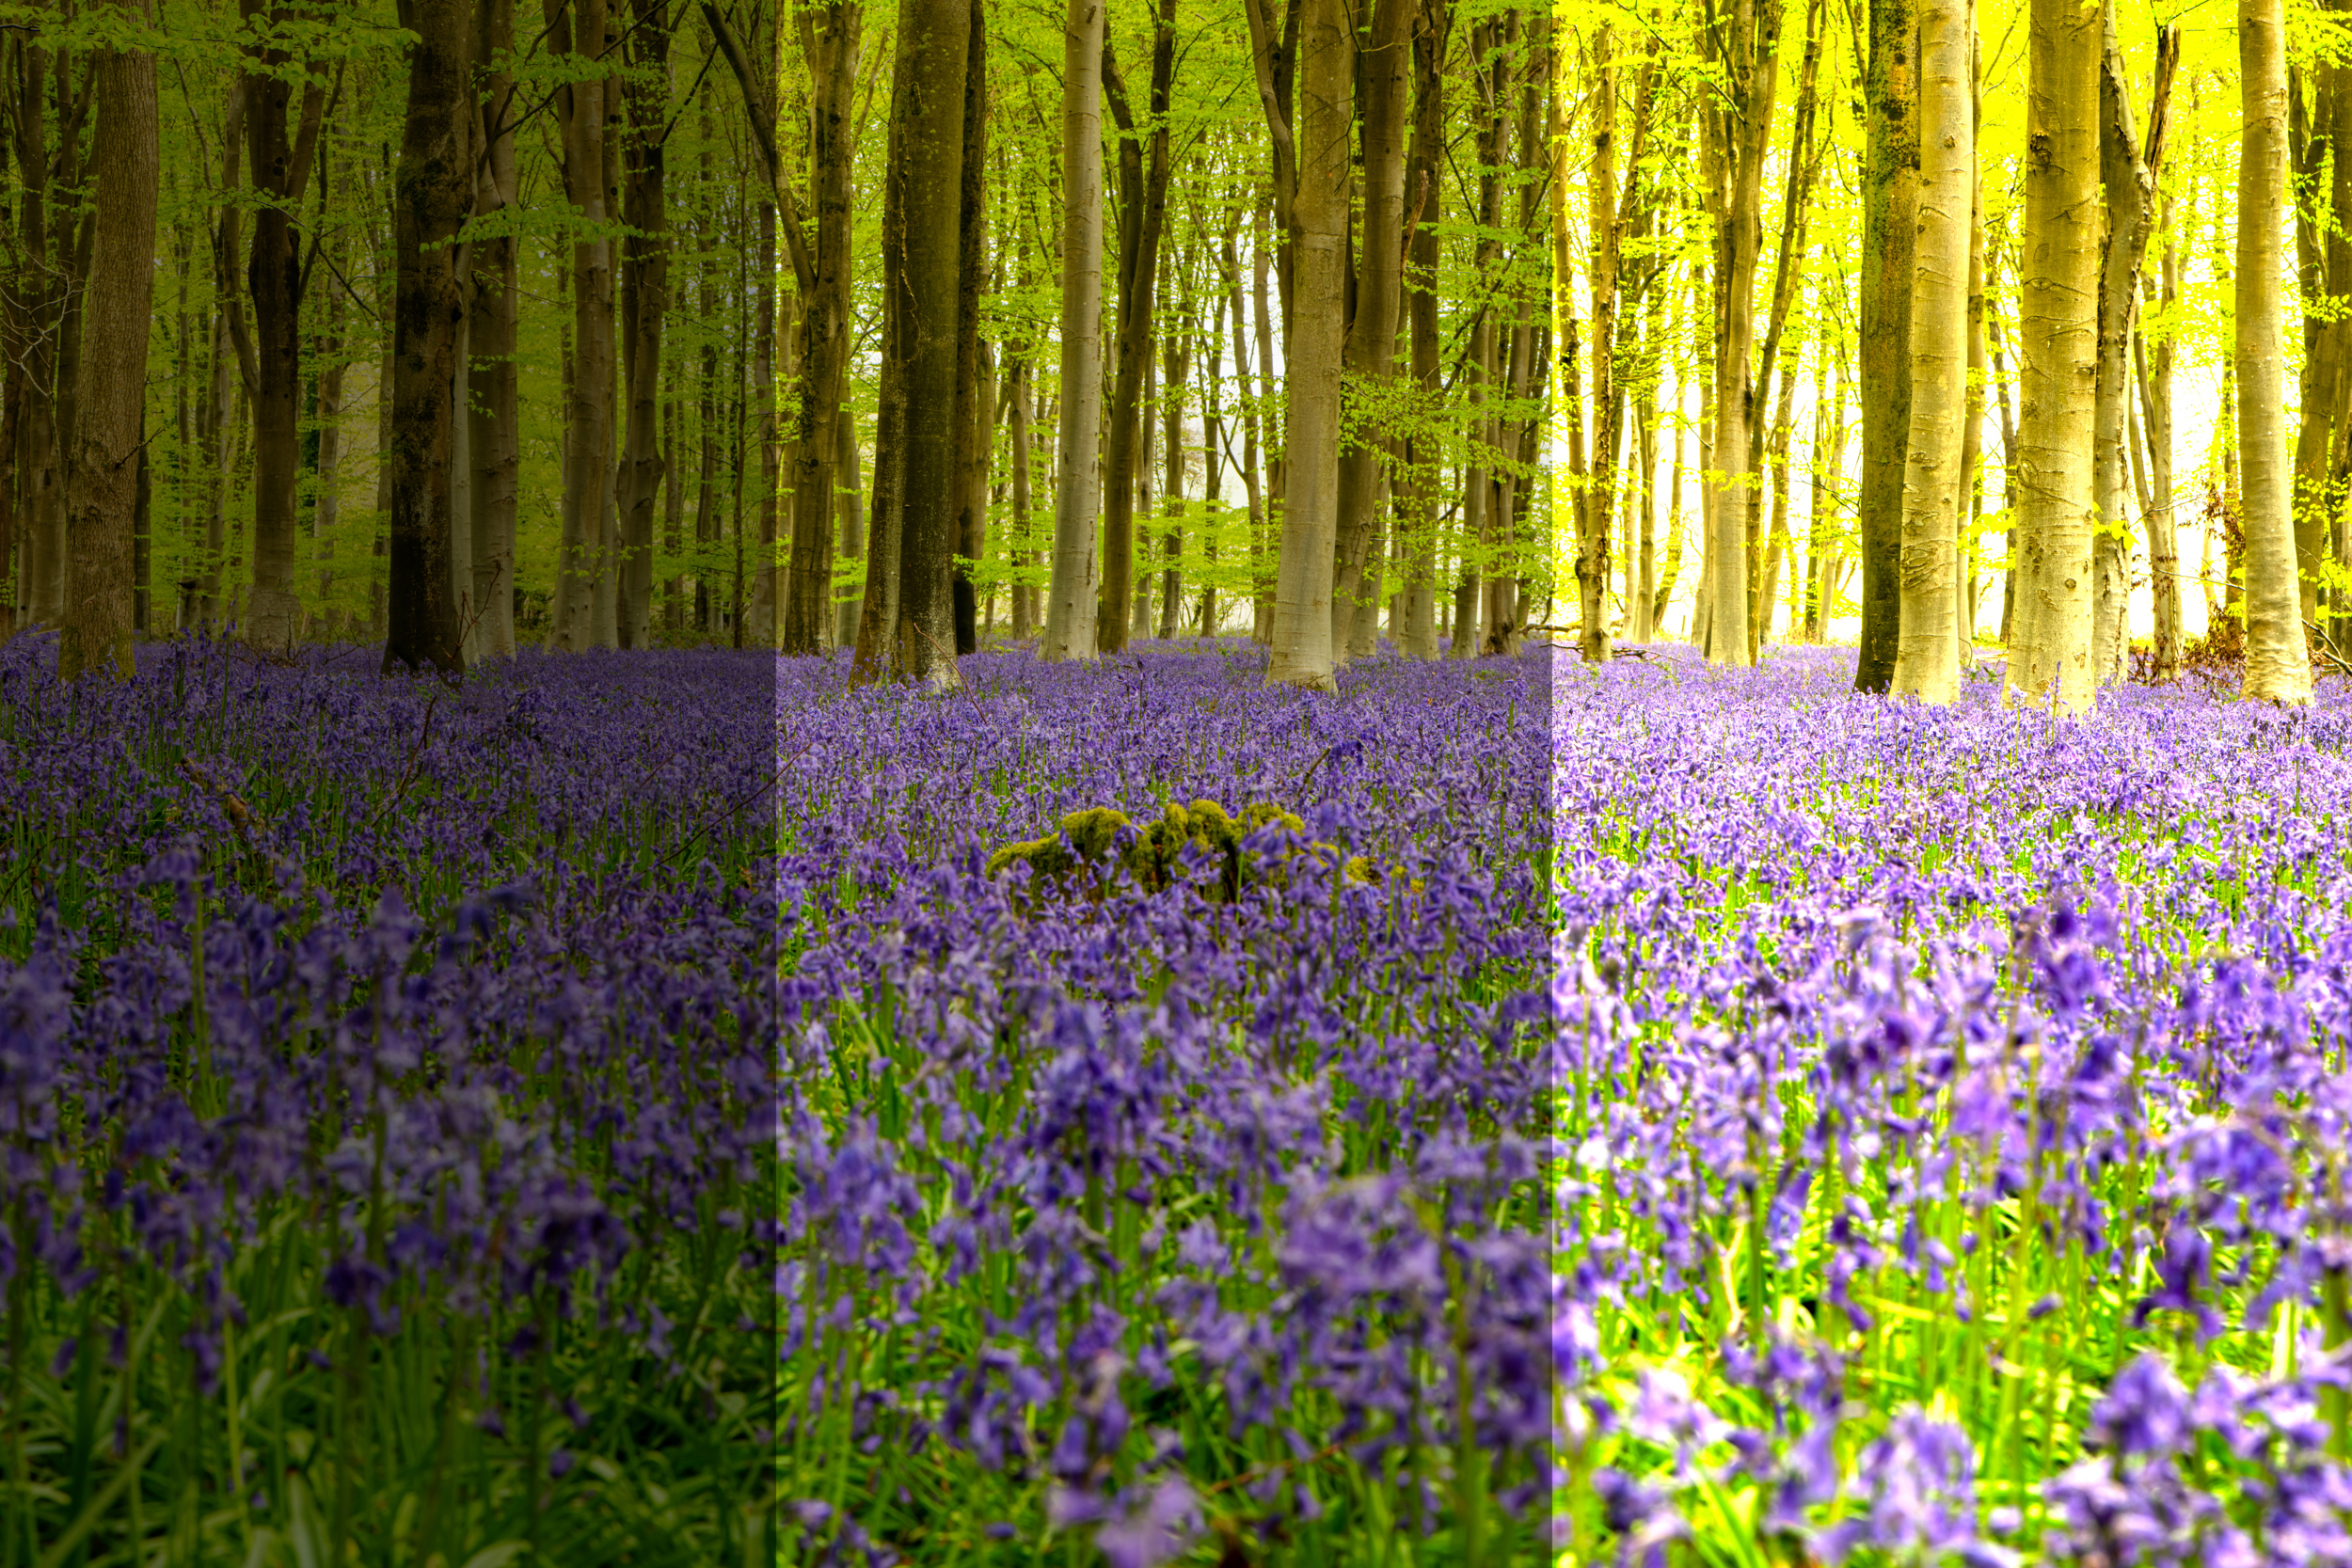
Bracket your shots for each ‘segment’ of the panorama, as this gives you the option to merge your photos for an HDR image later. By creating an HDR image we can ensure the maximum detail without under- or over-exposure, which is especially useful in scenes with bright highlights or deep shadows.
The best camera deals, reviews, product advice, and unmissable photography news, direct to your inbox!
02 Panorama tips
Check that the horizon is level at the start and end point of your pano. Focus on a point a third of the way into the scene, then switch to manual focus to lock it. Overlap each segment by a third, using natural markers in the scene as a guide. Consider shooting the pano in two or more rows for greater detail.
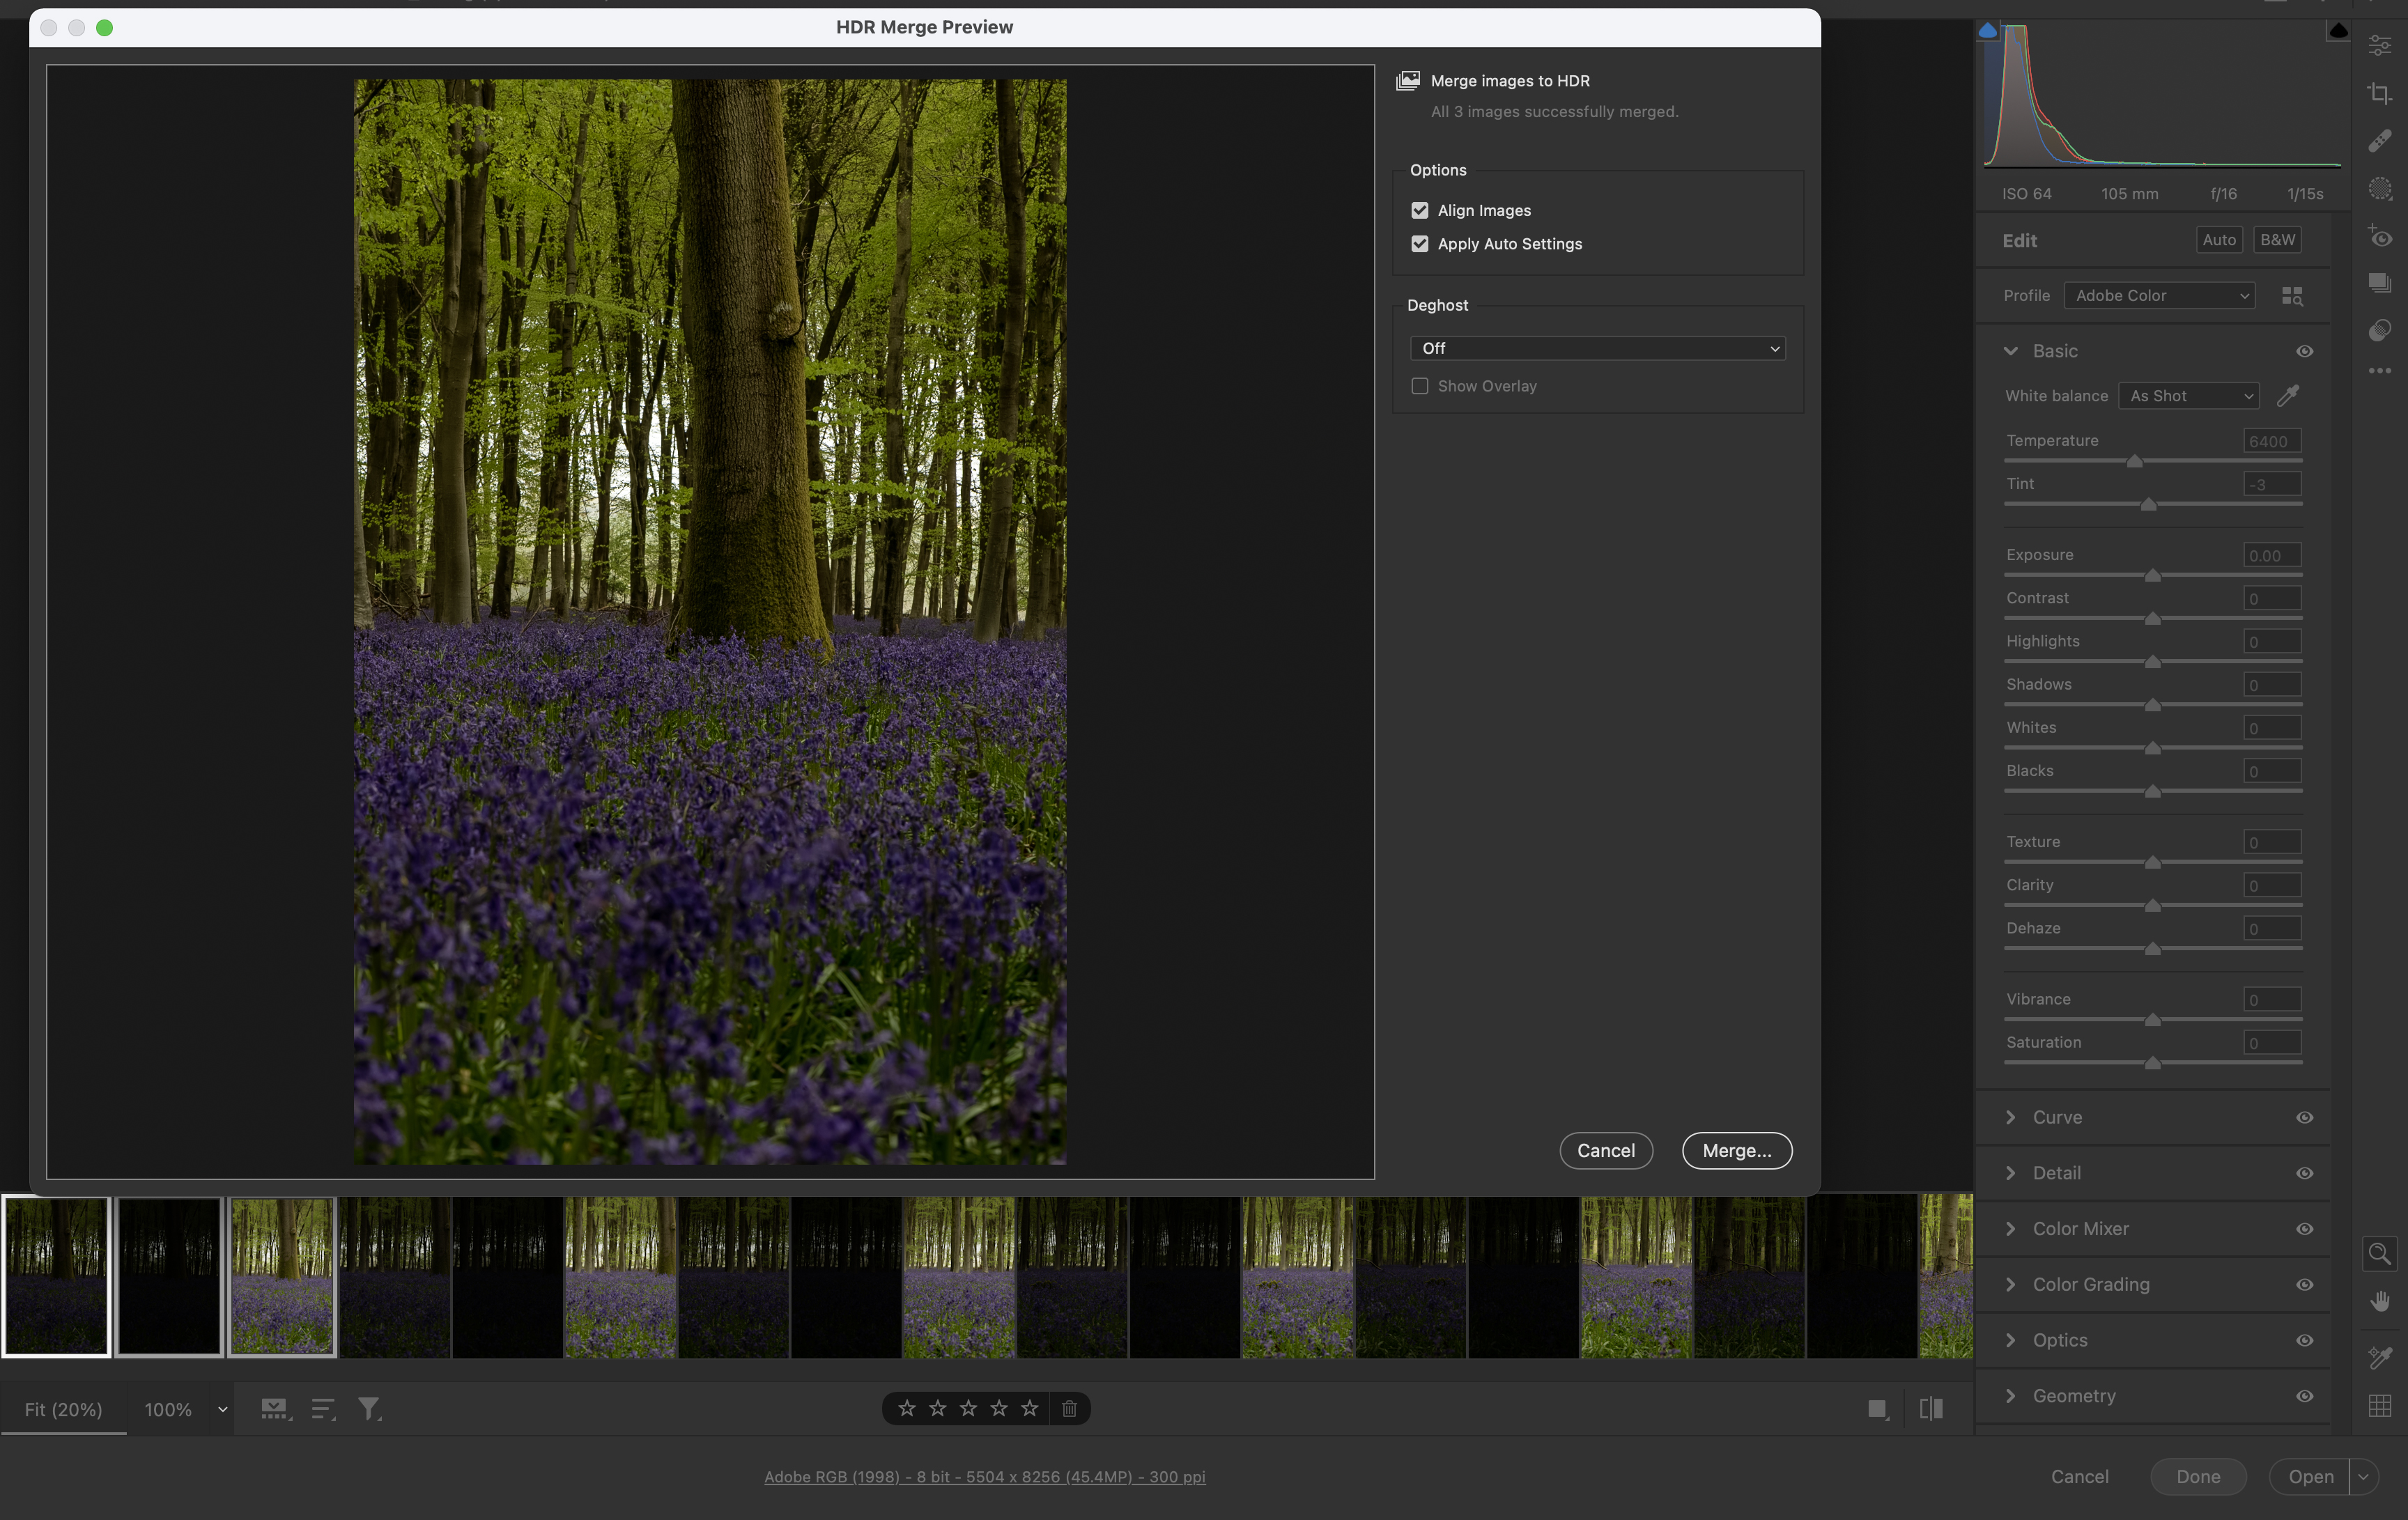
03 Merge the HDRs
Open your images into Adobe Bridge, then highlight them all, right-click and ‘Open in Camera Raw.’ Highlight the images in the first bracketed segment, then right-click and choose Merge to HDR. Hit OK. Now highlight the next bracketed set and hit Shift + Alt + M to repeat the HDR command. Repeat for the rest.
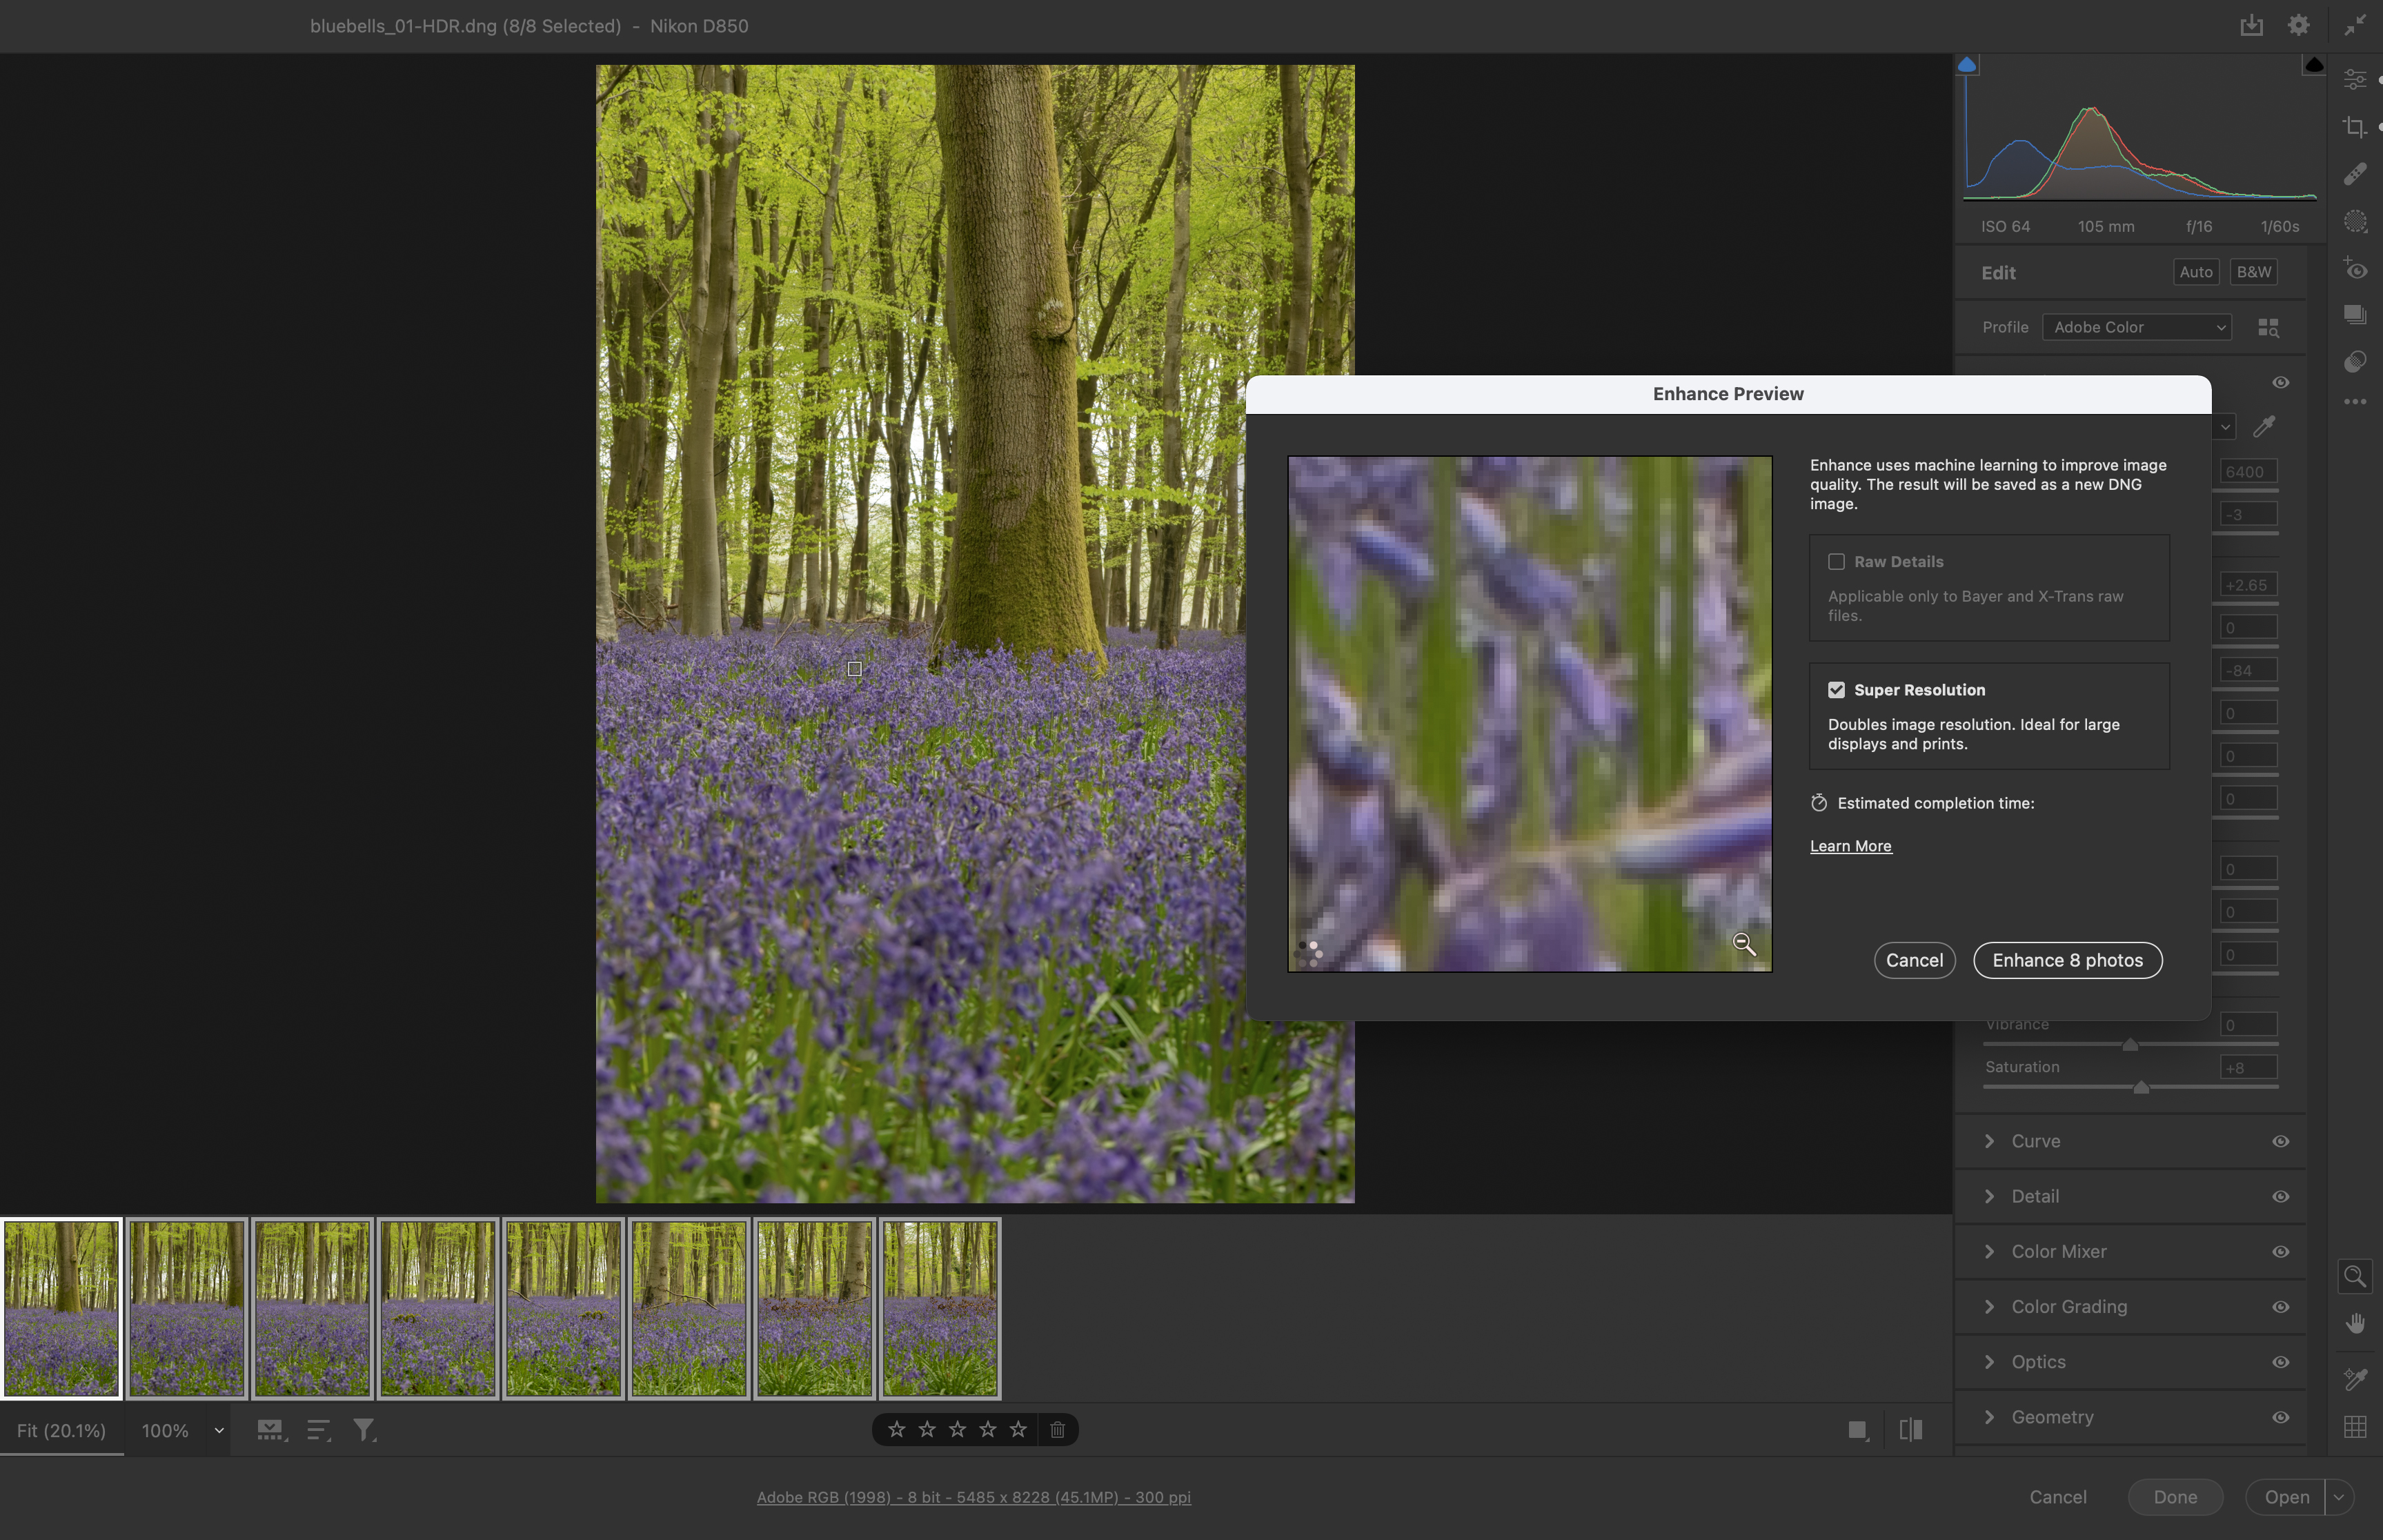
04 Use Super Resolution
This feature doubles the size of your photo. Right-click the image in Camera Raw (Raws work best) and pick Enhance. A new enhanced DNG version of the image will be generated once you close Camera Raw. If you do this, you’ll need to enhance each panorama segment individually before stitching them together.
05 Stitch the panorama
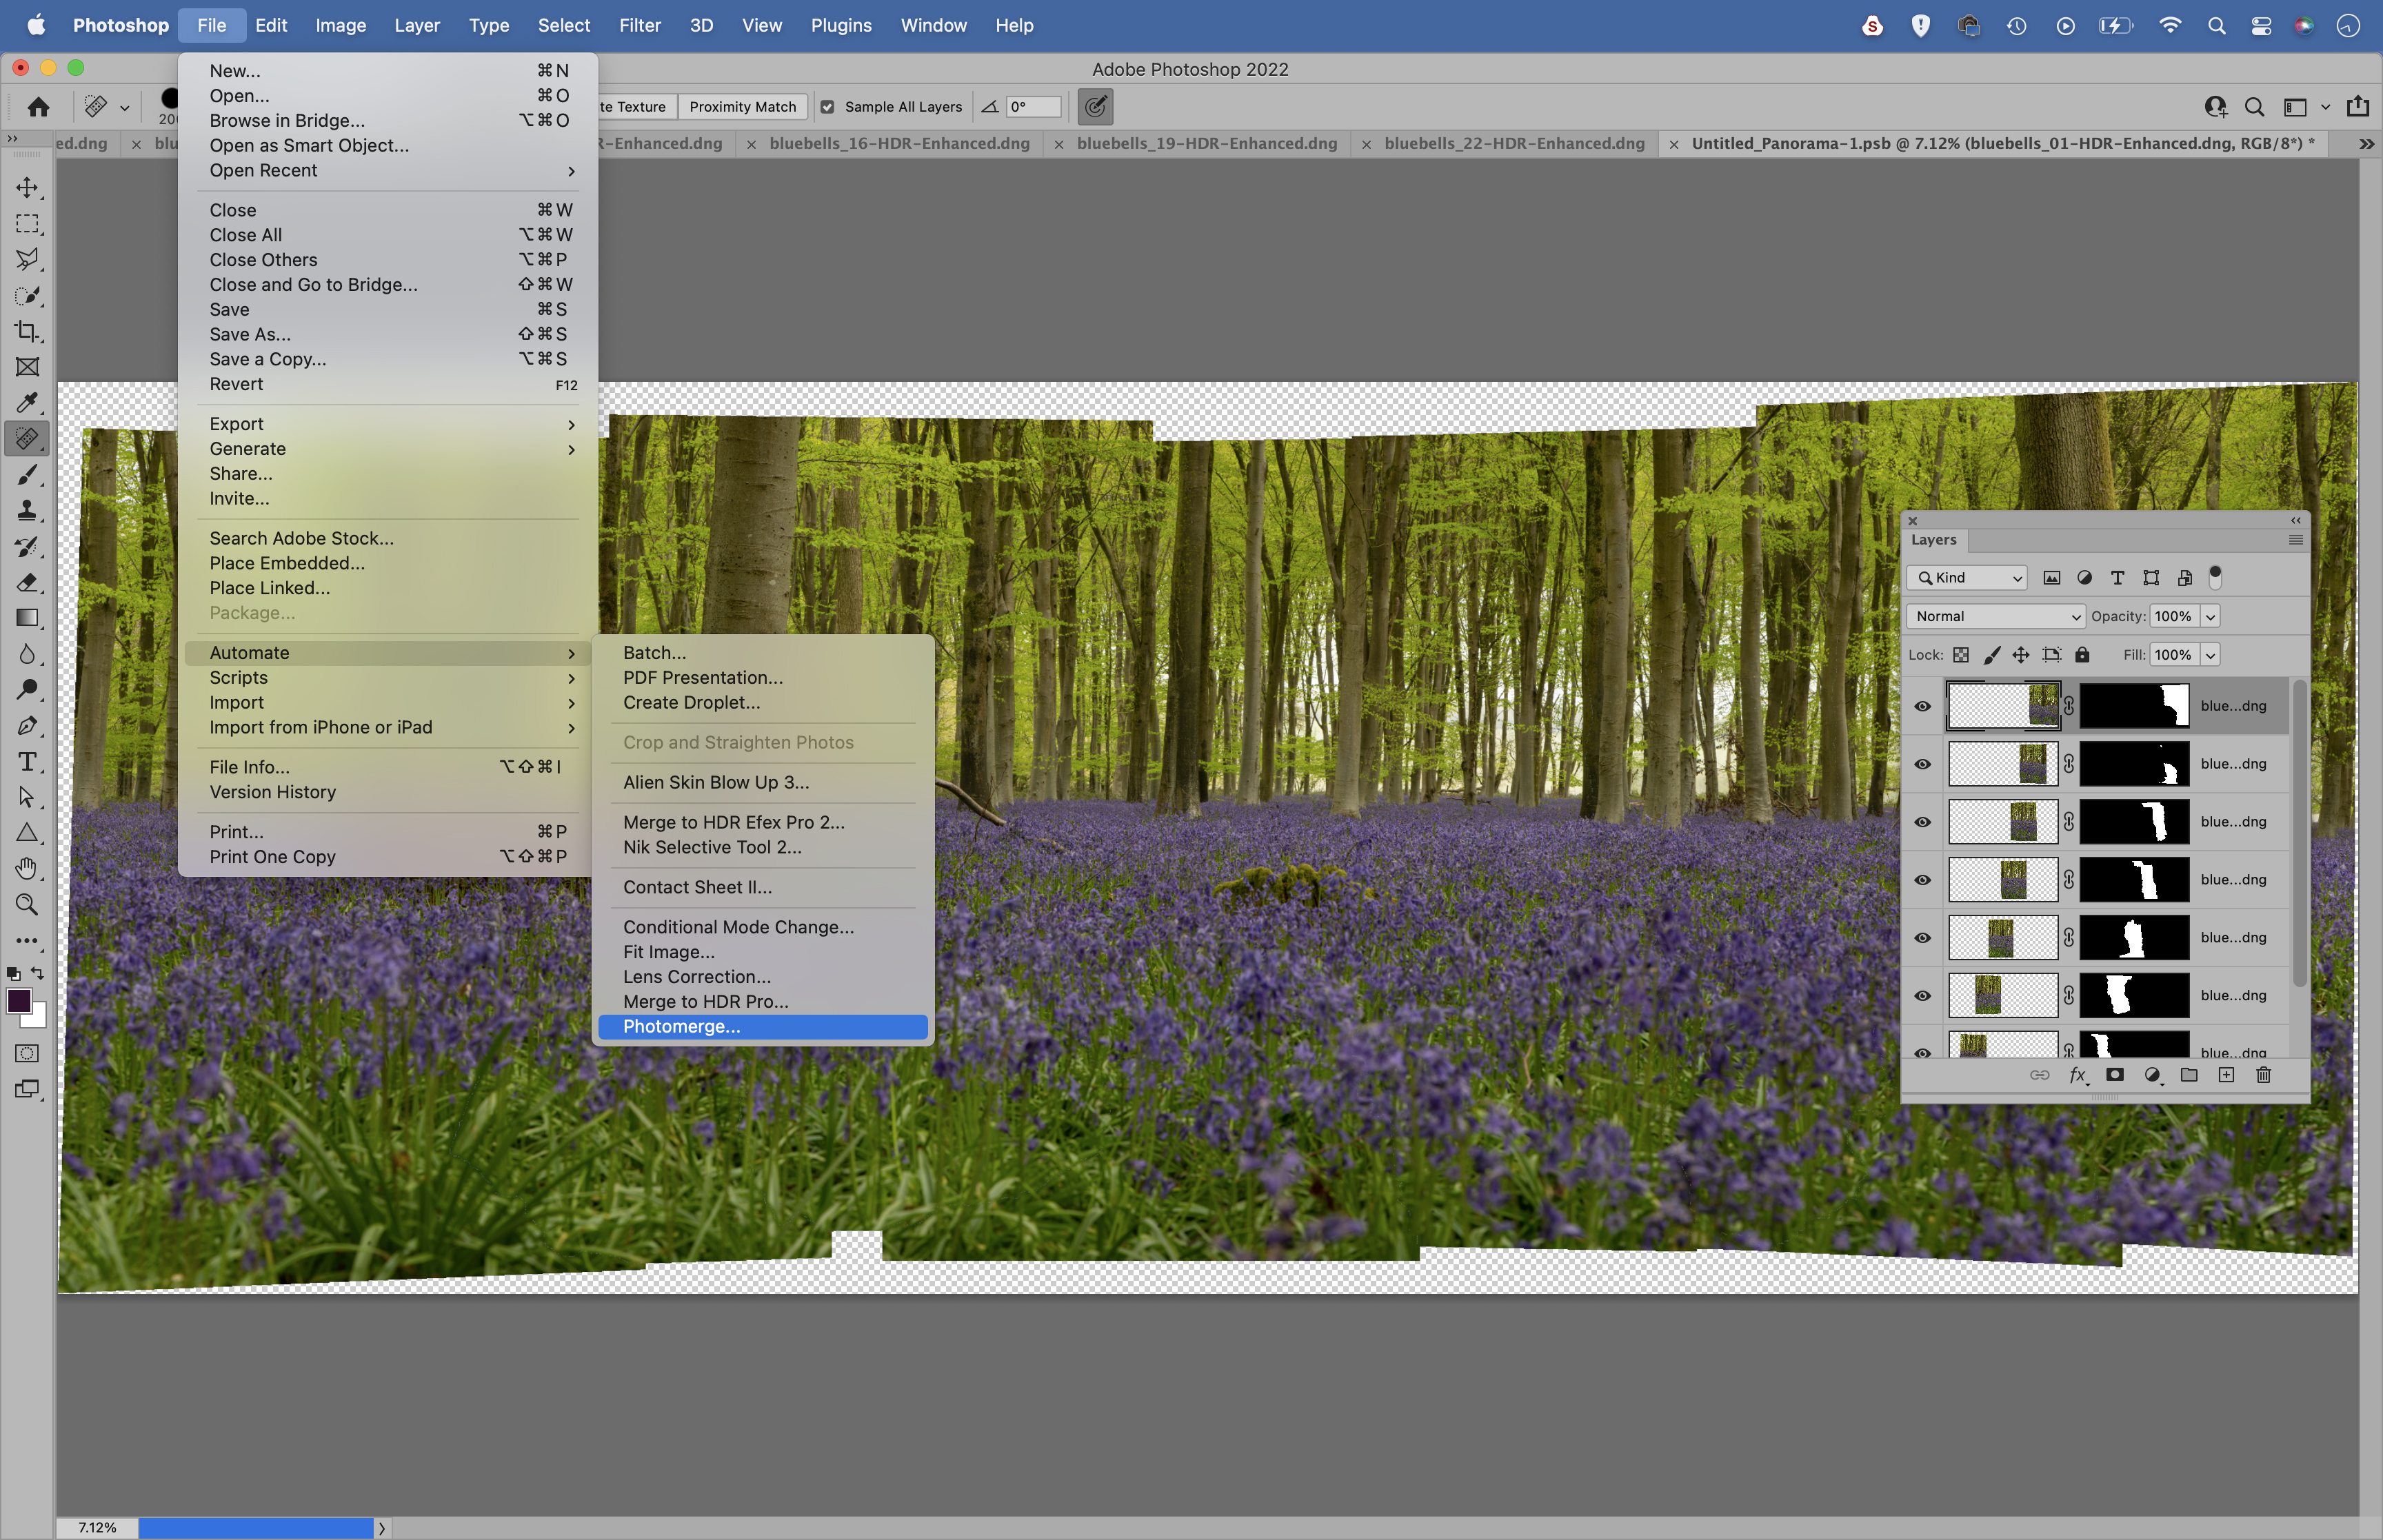
Open your new segments into Camera Raw, hit Cmd/Ctrl + A to select them all and use the sliders to enhance the colors. Next, open Photoshop and go to File > Automate > Photomerge, load in the images and hit OK to merge them.
06 Remove distractions
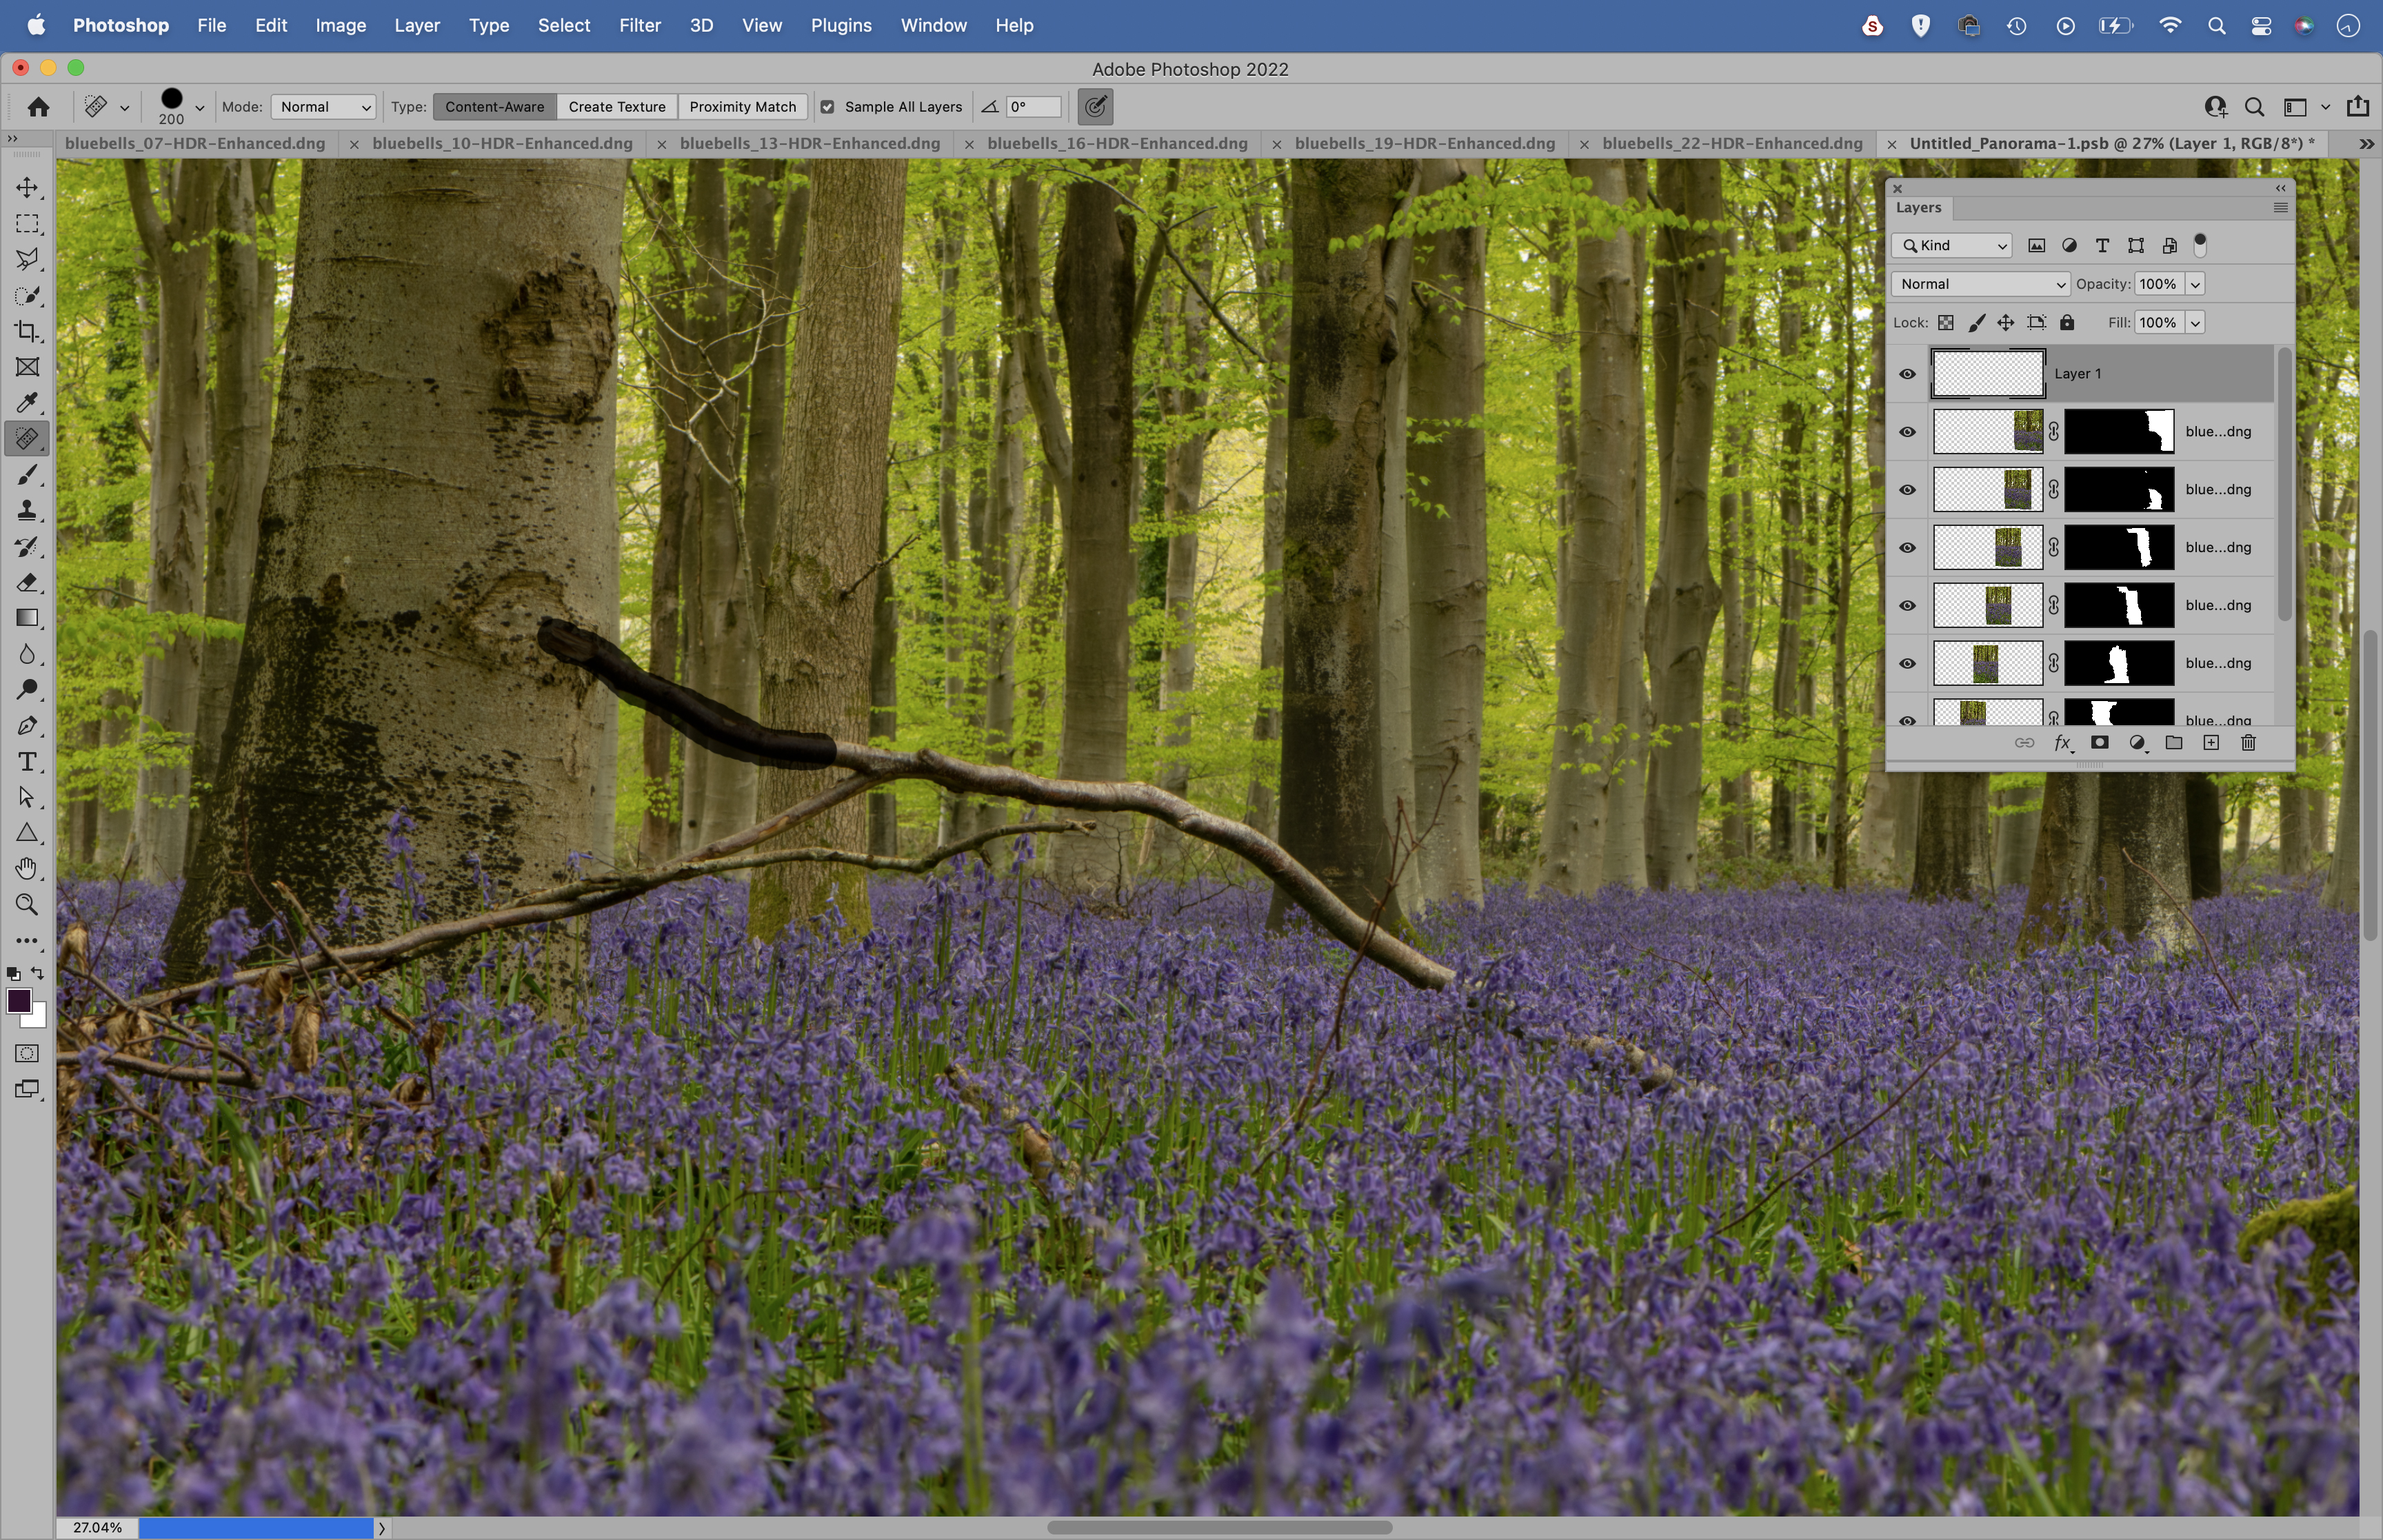
Check the panorama is stitched together perfectly, then zoom in, make a new layer and grab the Spot Healing Brush tool. Set it to ‘Sample All Layers’, then paint to remove any distractions or unwanted details. Finally, crop the image to the dimensions of the wall.
07 Make a selection
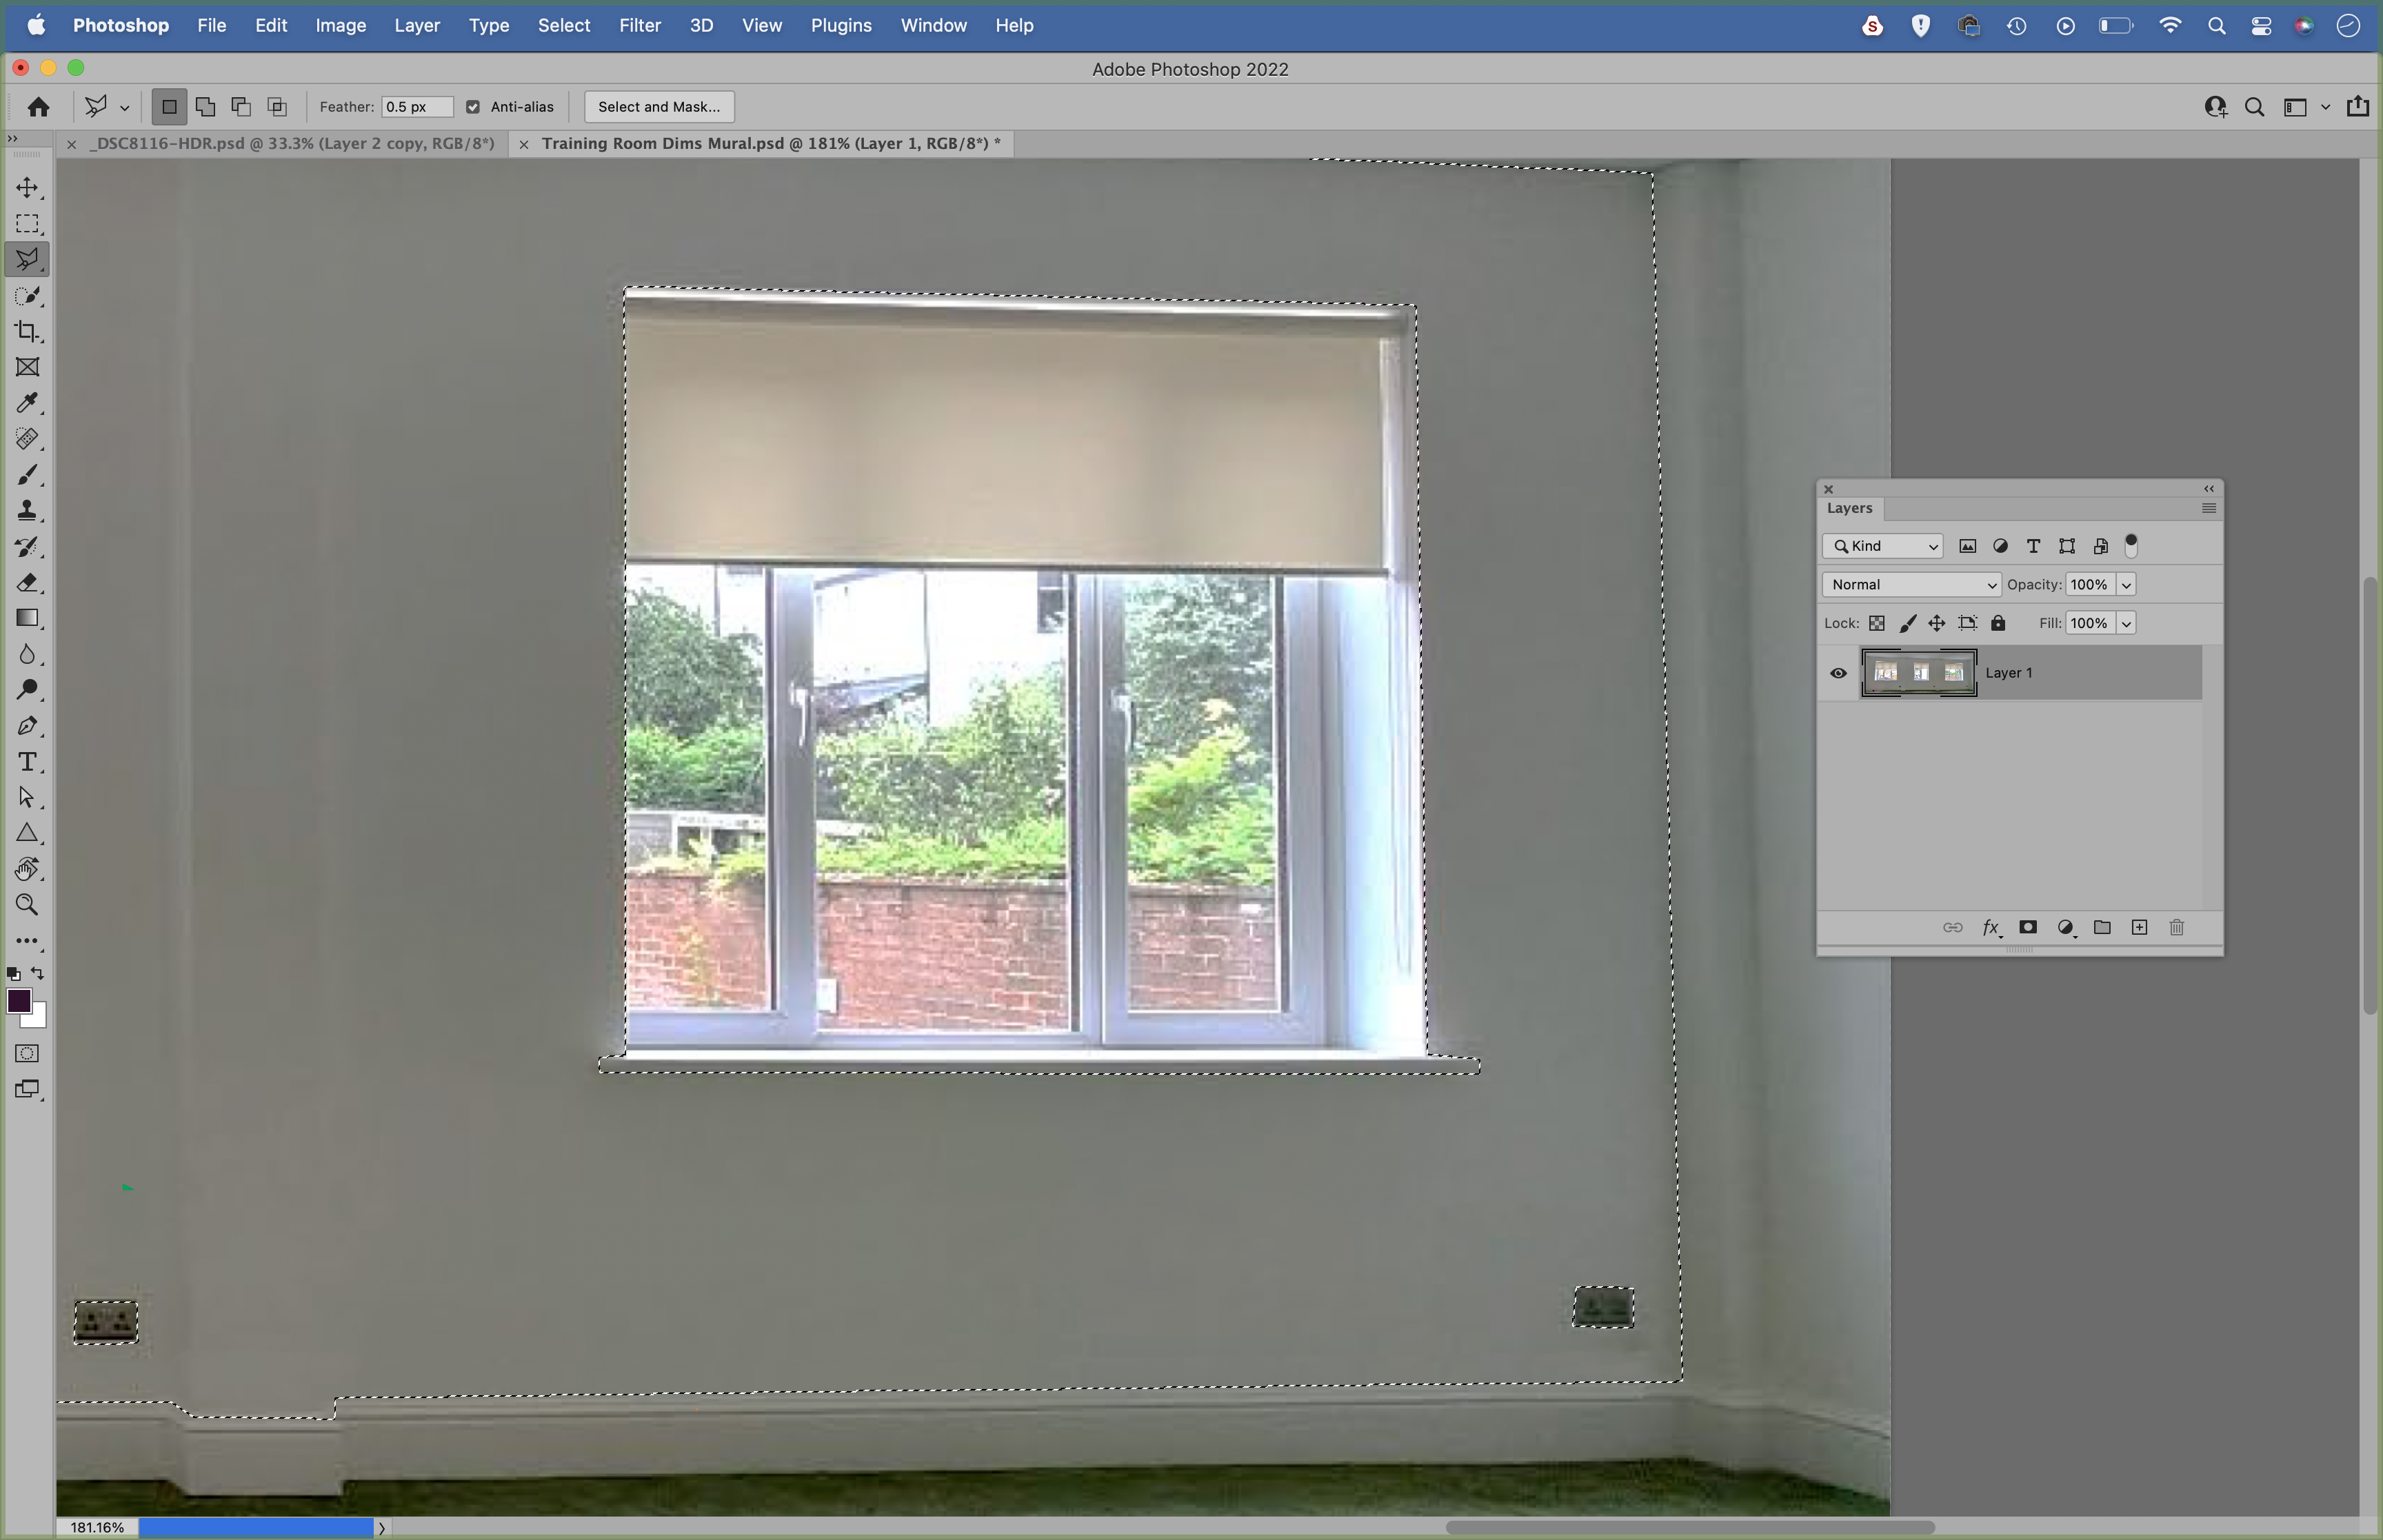
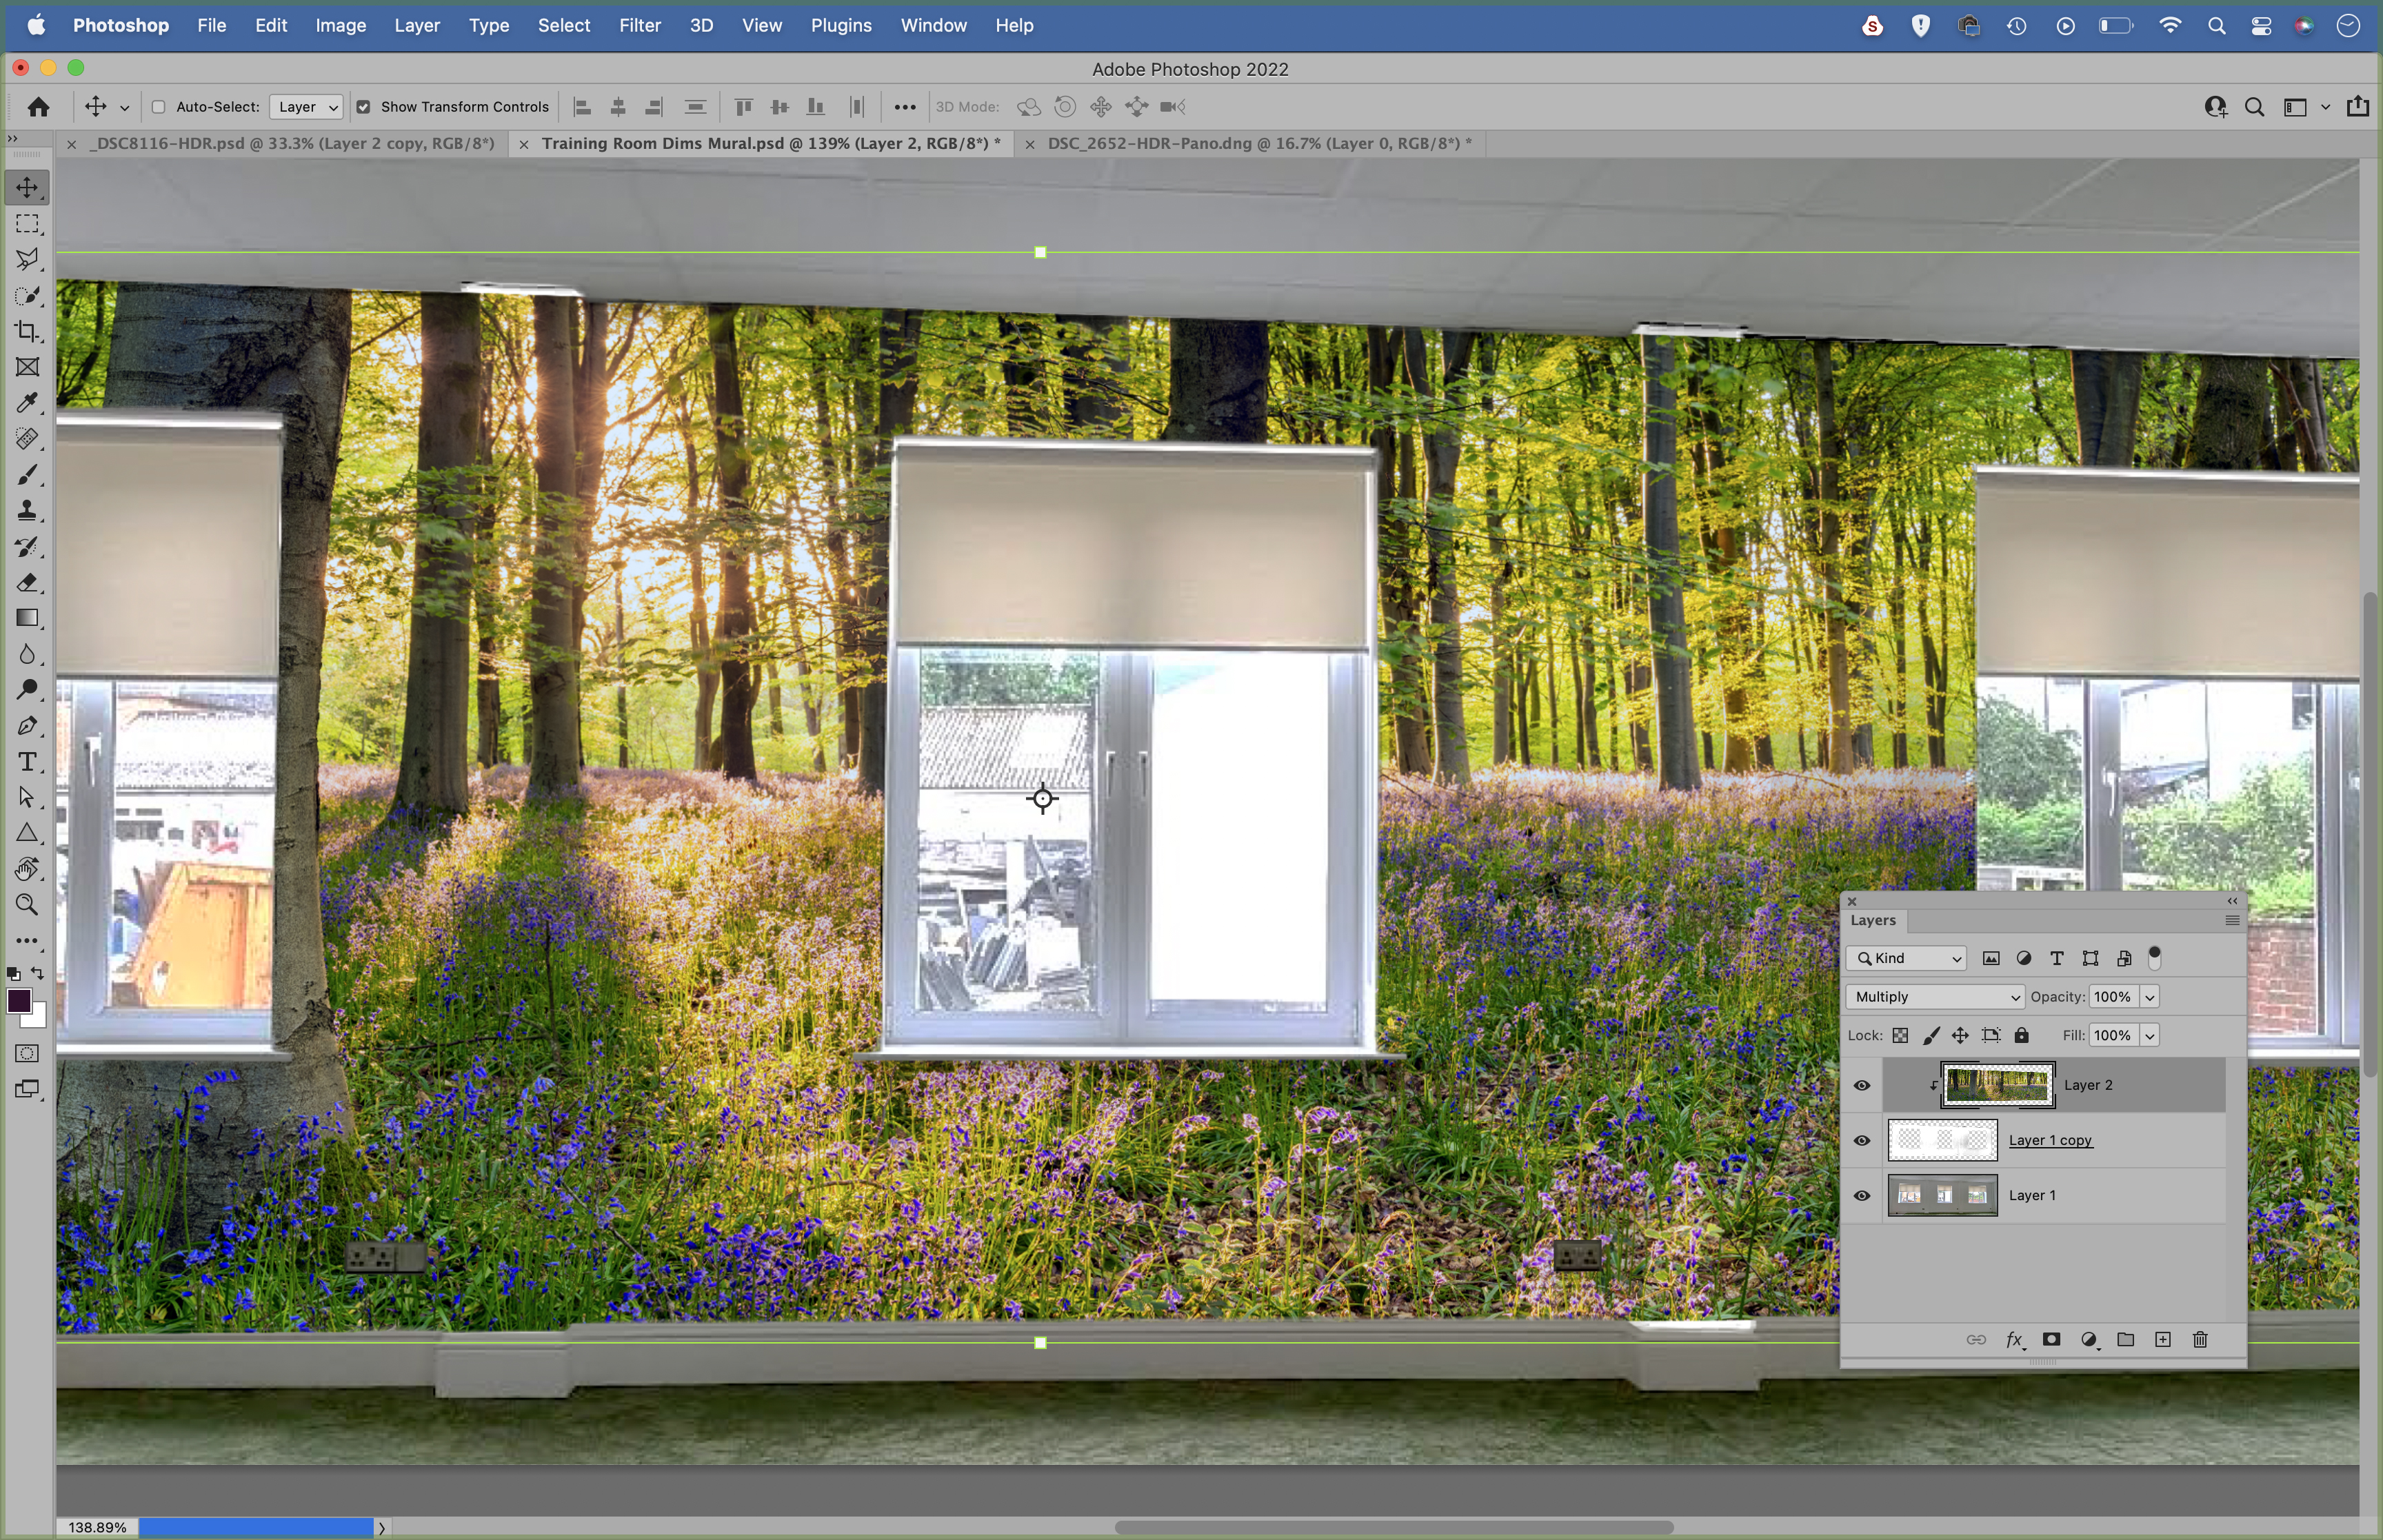
Take a photo of the wall you intend to use for the mural. Open it in Photoshop and then grab the Polygonal Lasso tool. Click to plot a selection around the edges of thee wall, then hold alt and click around the windows to exclude them. Continue until the whole wall is selected.
08 Copy the wall
Go to Select > Select and Mask and use the sliders to improve the selection. Increase the radius to expand the area of refinement along the edge. Set Output: New Layer and hit OK. Next press Cmd/Ctrl + Shift + U to desaturate the layer, and Cmd/Ctrl + L for Levels. Increase the contrast with Levels.
09 Clip the image
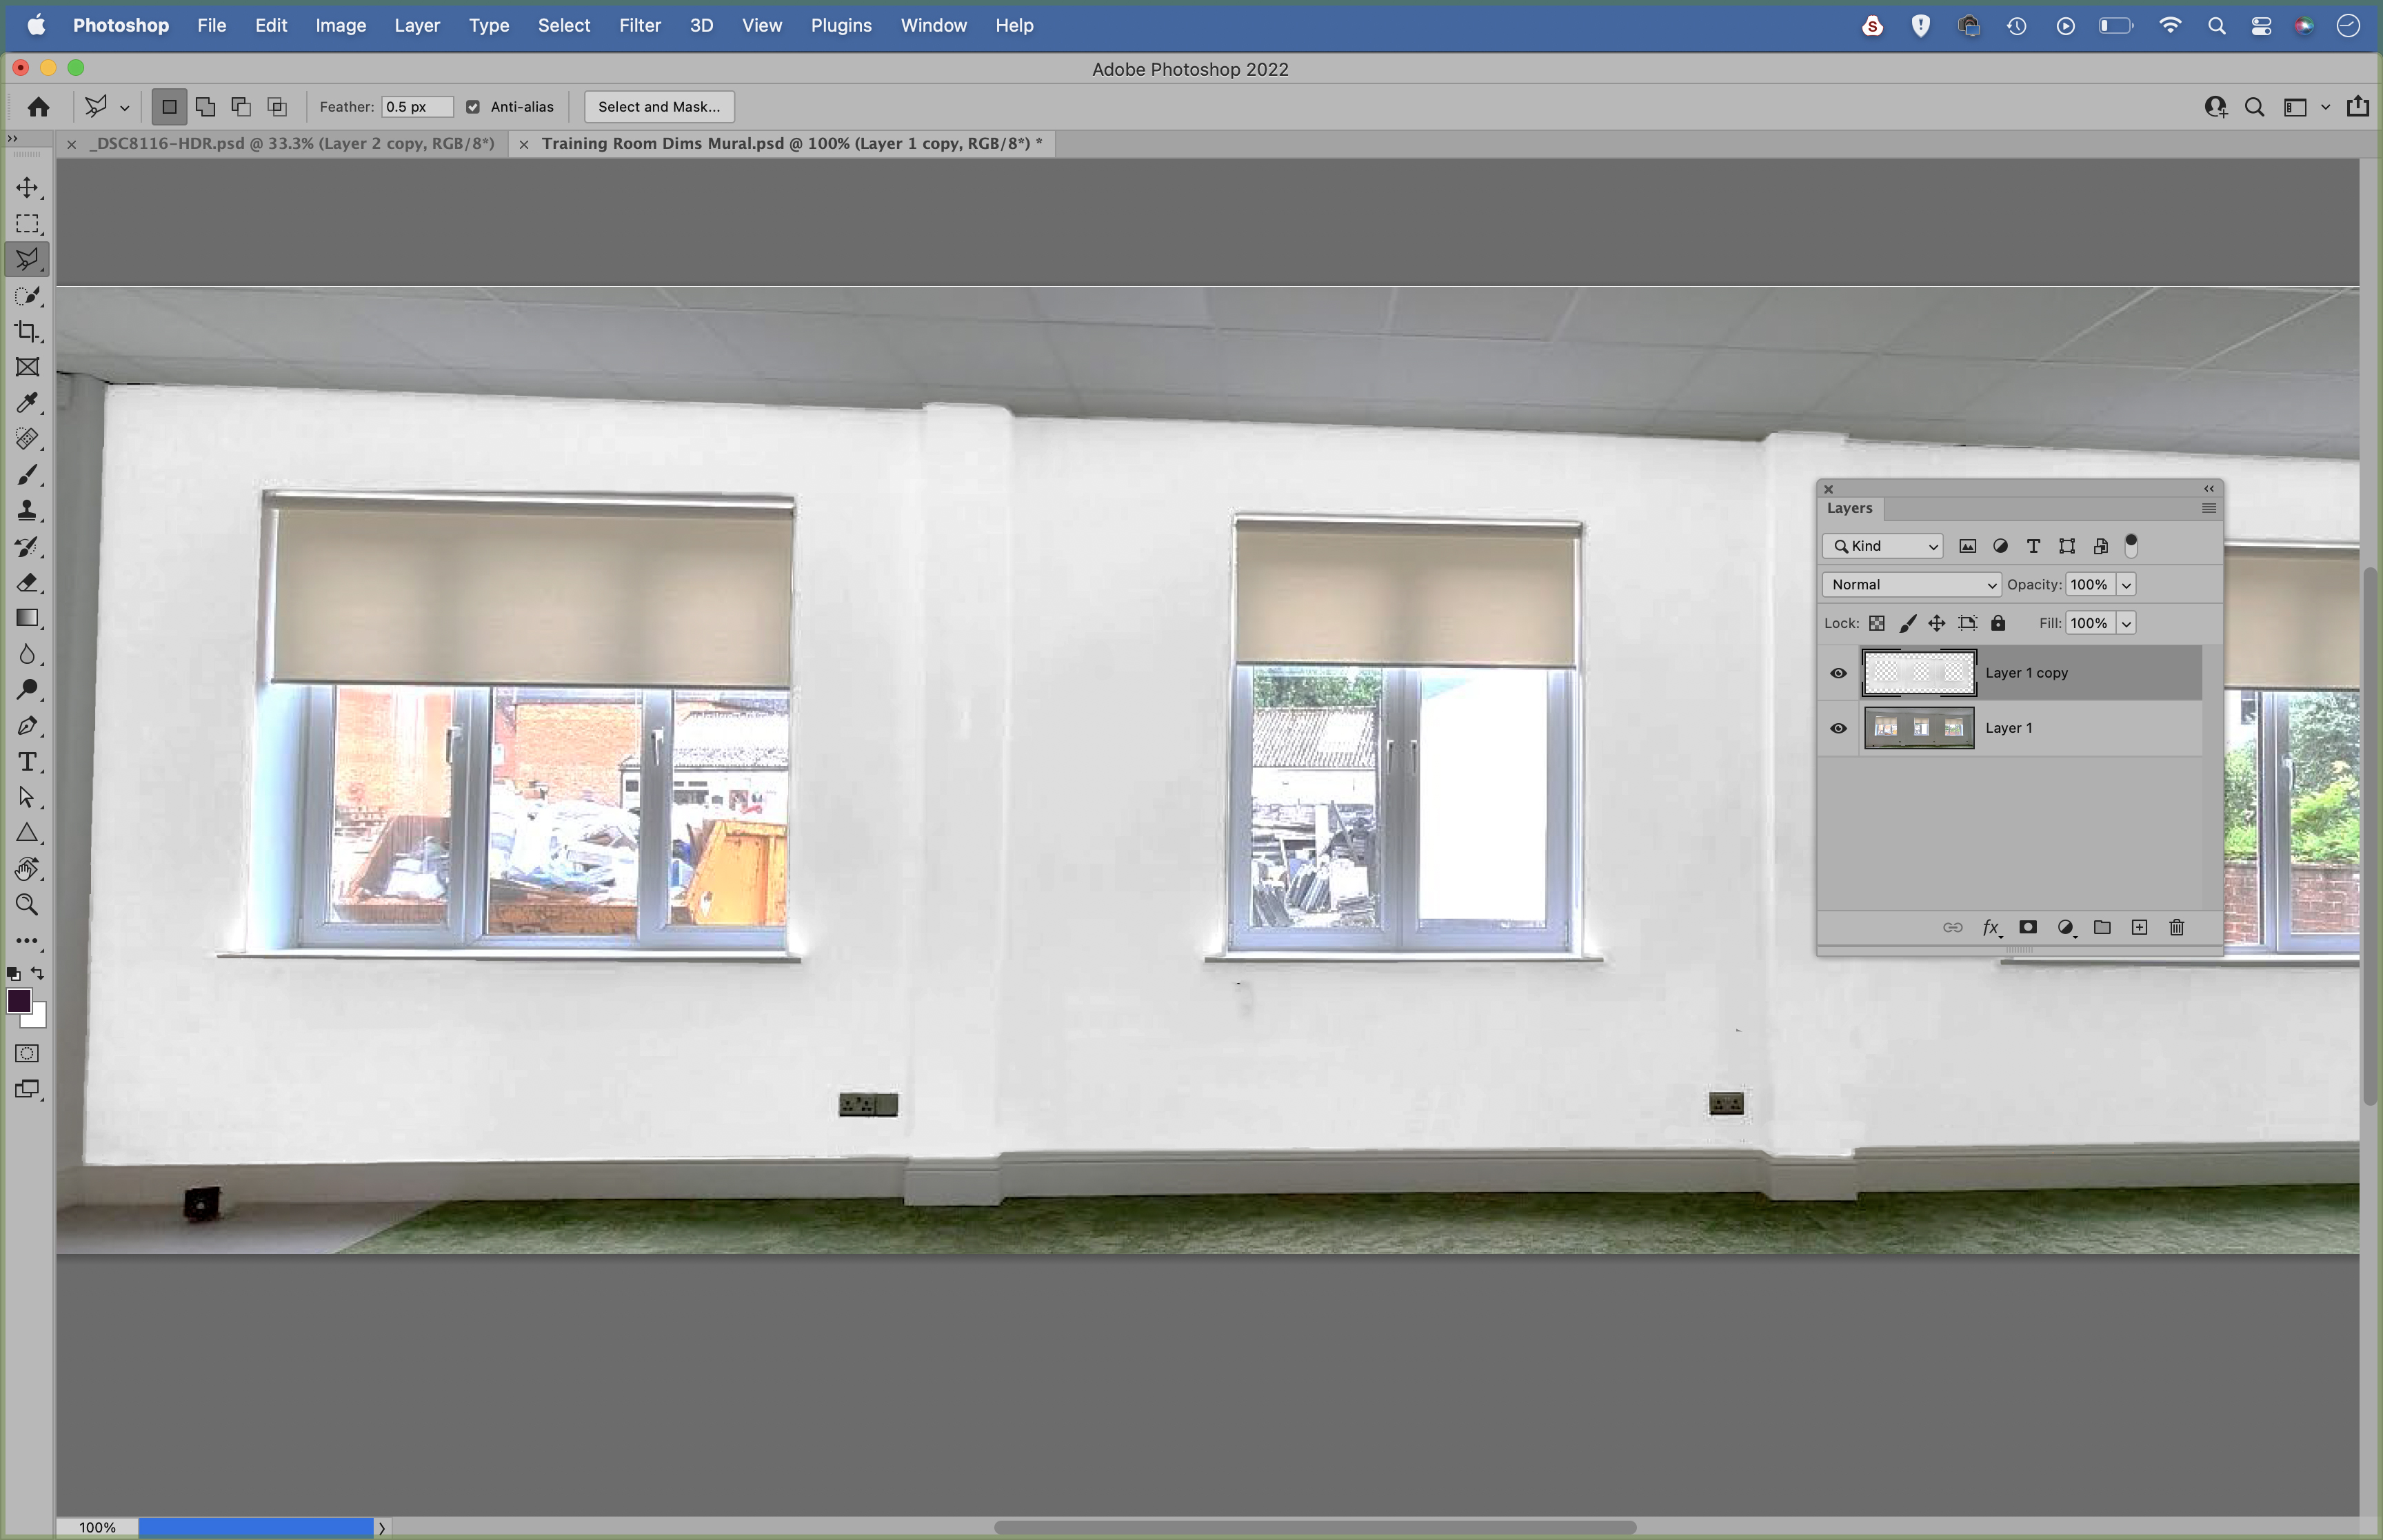
Open the wall mural image. Grab the Move tool and drag it to the other image, then right-click the layer and ‘Create Clipping Mask’ to clip it to the cut out wall layer, Set the blend mode to Multiply, hit Cmd/Ctrl + T, then hold Cmd/Ctrl and drag the corner points to skew the image to fit.
10 Print your wall mural
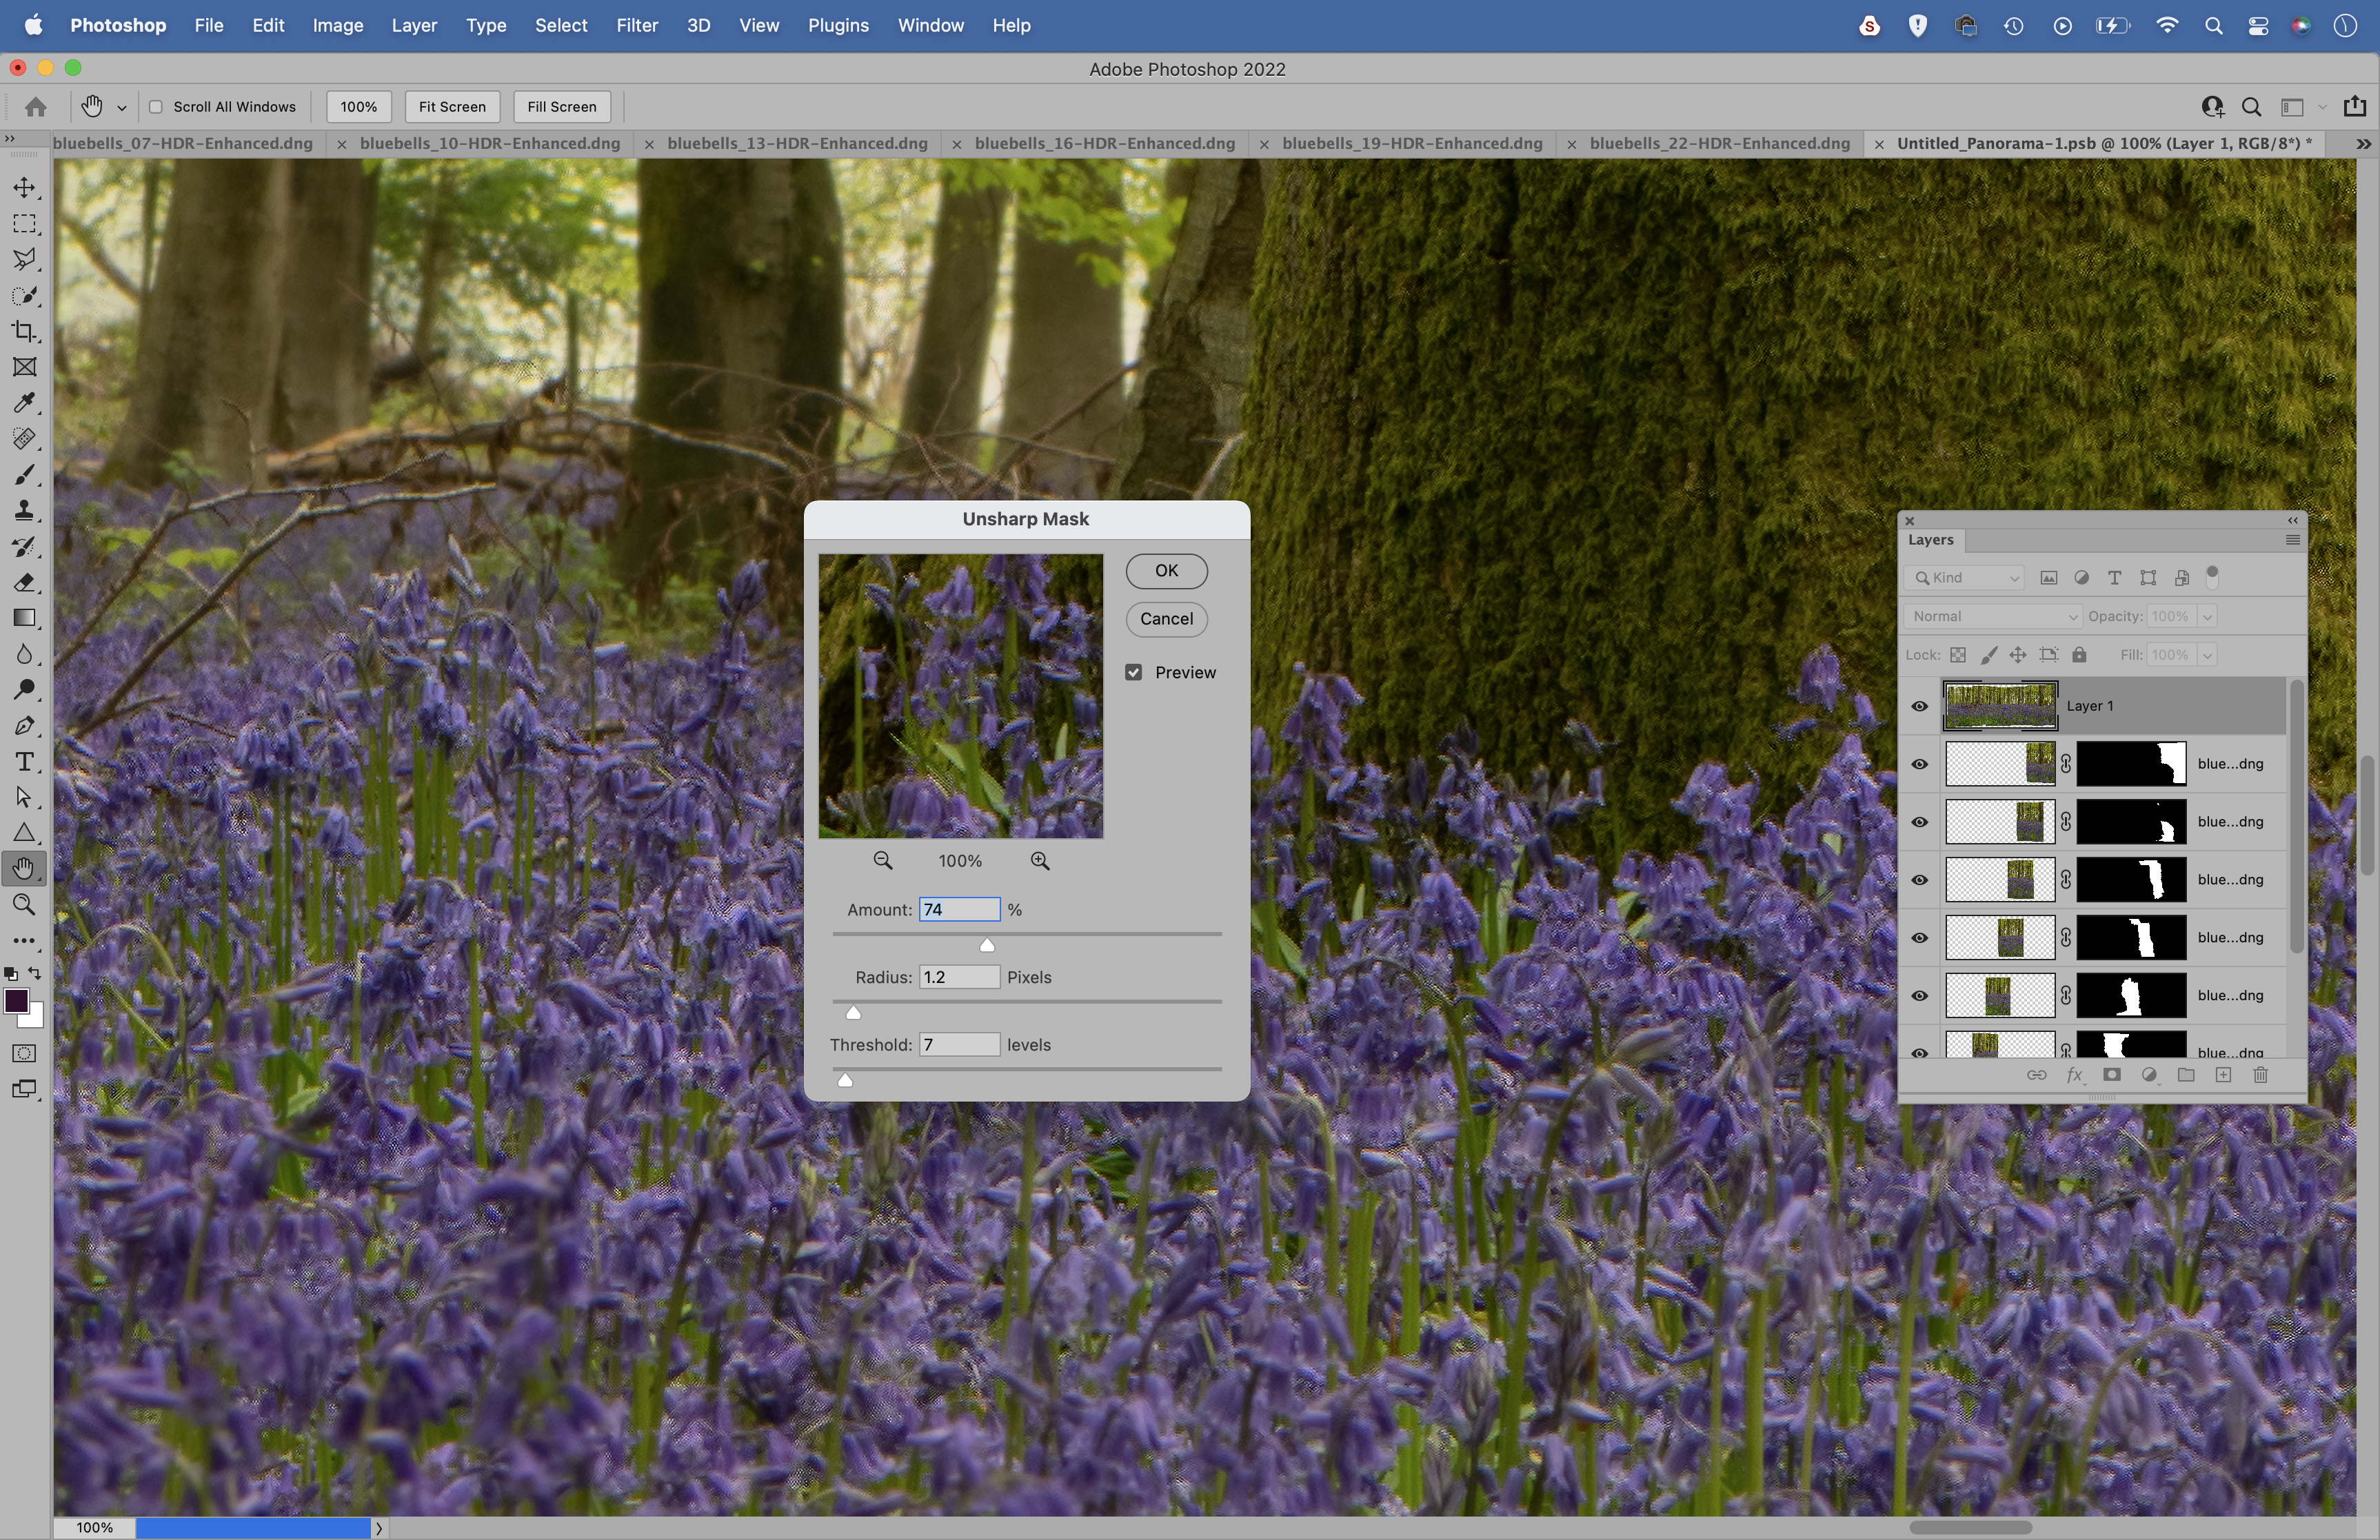
Just like any print, the last stage in preparation is to sharpen the image. Double-click the Zoom tool to zoom to 100% view, and use Filter > Sharpen > Unsharp Mask to enhance the details, being careful to keep it subtle. When it comes to choosing a printer, a quick Google search for ‘wall mural printing’ will throw up lots of results.
Enquire how long the print is expected to last before fading, and whether you need to prepare the wall beforehand. Many retailers will also offer a returns policy if you’re not satisfied, so check this. When it comes to wallpapering the area, self-adhesive paper might be easier to apply, as it can be removed and re-stuck if necessary. Good luck!
PhotoPlus: The Canon Magazine is the world's only monthly newsstand title that's 100% devoted to Canon, so you can be sure the magazine is completely relevant to your system.
Read more:
Best cameras for portraits
Best portrait photography tips
The best photo editing software: image editors for novices through to pros
The best photo-editing laptops: top laptops for photographers
10 best online photography courses – from beginner guides to masterclasses
The lead technique writer on Digital Camera Magazine, PhotoPlus: The Canon Magazine and N-Photo: The Nikon Magazine, James is a fantastic general practice photographer with an enviable array of skills across every genre of photography.
Whether it's flash photography techniques like stroboscopic portraits, astrophotography projects like photographing the Northern Lights, or turning sound into art by making paint dance on a set of speakers, James' tutorials and projects are as creative as they are enjoyable.
He's also a wizard at the dark arts of Photoshop, Lightroom and Affinity Photo, and is capable of some genuine black magic in the digital darkroom, making him one of the leading authorities on photo editing software and techniques.
