How to use Lightroom Classic: learn basic adjustments and use the Develop Module
Start mastering Lightroom Classic CC with this tutorial on how to navigate the interface and make basic adjustments
Watch video: Learn the basics of Lightroom Classic CC
Crafting the perfect balance of exposure and tones is easier than you might think – especially when you’re using Lightroom Classic CC’s Develop module. It has a whole host of handy tools and adjustments you can use to speedily work up each of your images with ease.
The Develop module features a large range of adjustments and tools, including Lens Correction, Tone Curve and many, many, more. However, one of the most powerful features we can utilize here is the Basic panel on the right of the interface.
• Read more: Free Lightroom presets
These deceptively easy-to-use adjustable sliders enable users to enhance various aspects of their images, including color temperature, exposure, vibrance and more. Thankfully, this panel is brilliantly simple, though it is one of the most important assets in Lightroom Classic CC to master when learning how to edit your pictures effectively.
If you understand how to make the most of sliders such as Exposure, Shadows, Highlights and Temperature, then you’ll have a solid editing foundation that you can then build on with fun flourishes further down the line.
In fact, while many users love experimenting with extensive edits, you’ll often find that most of your photos will only need a few tweaks. In this tutorial, we’ll be diving into how you can use the Basic panel to do the minimum amount of adjustments for maximum effect.
The best camera deals, reviews, product advice, and unmissable photography news, direct to your inbox!
• See also: Why I dumped Lightroom CC and went back to Lightroom Classic
01 Import your photos
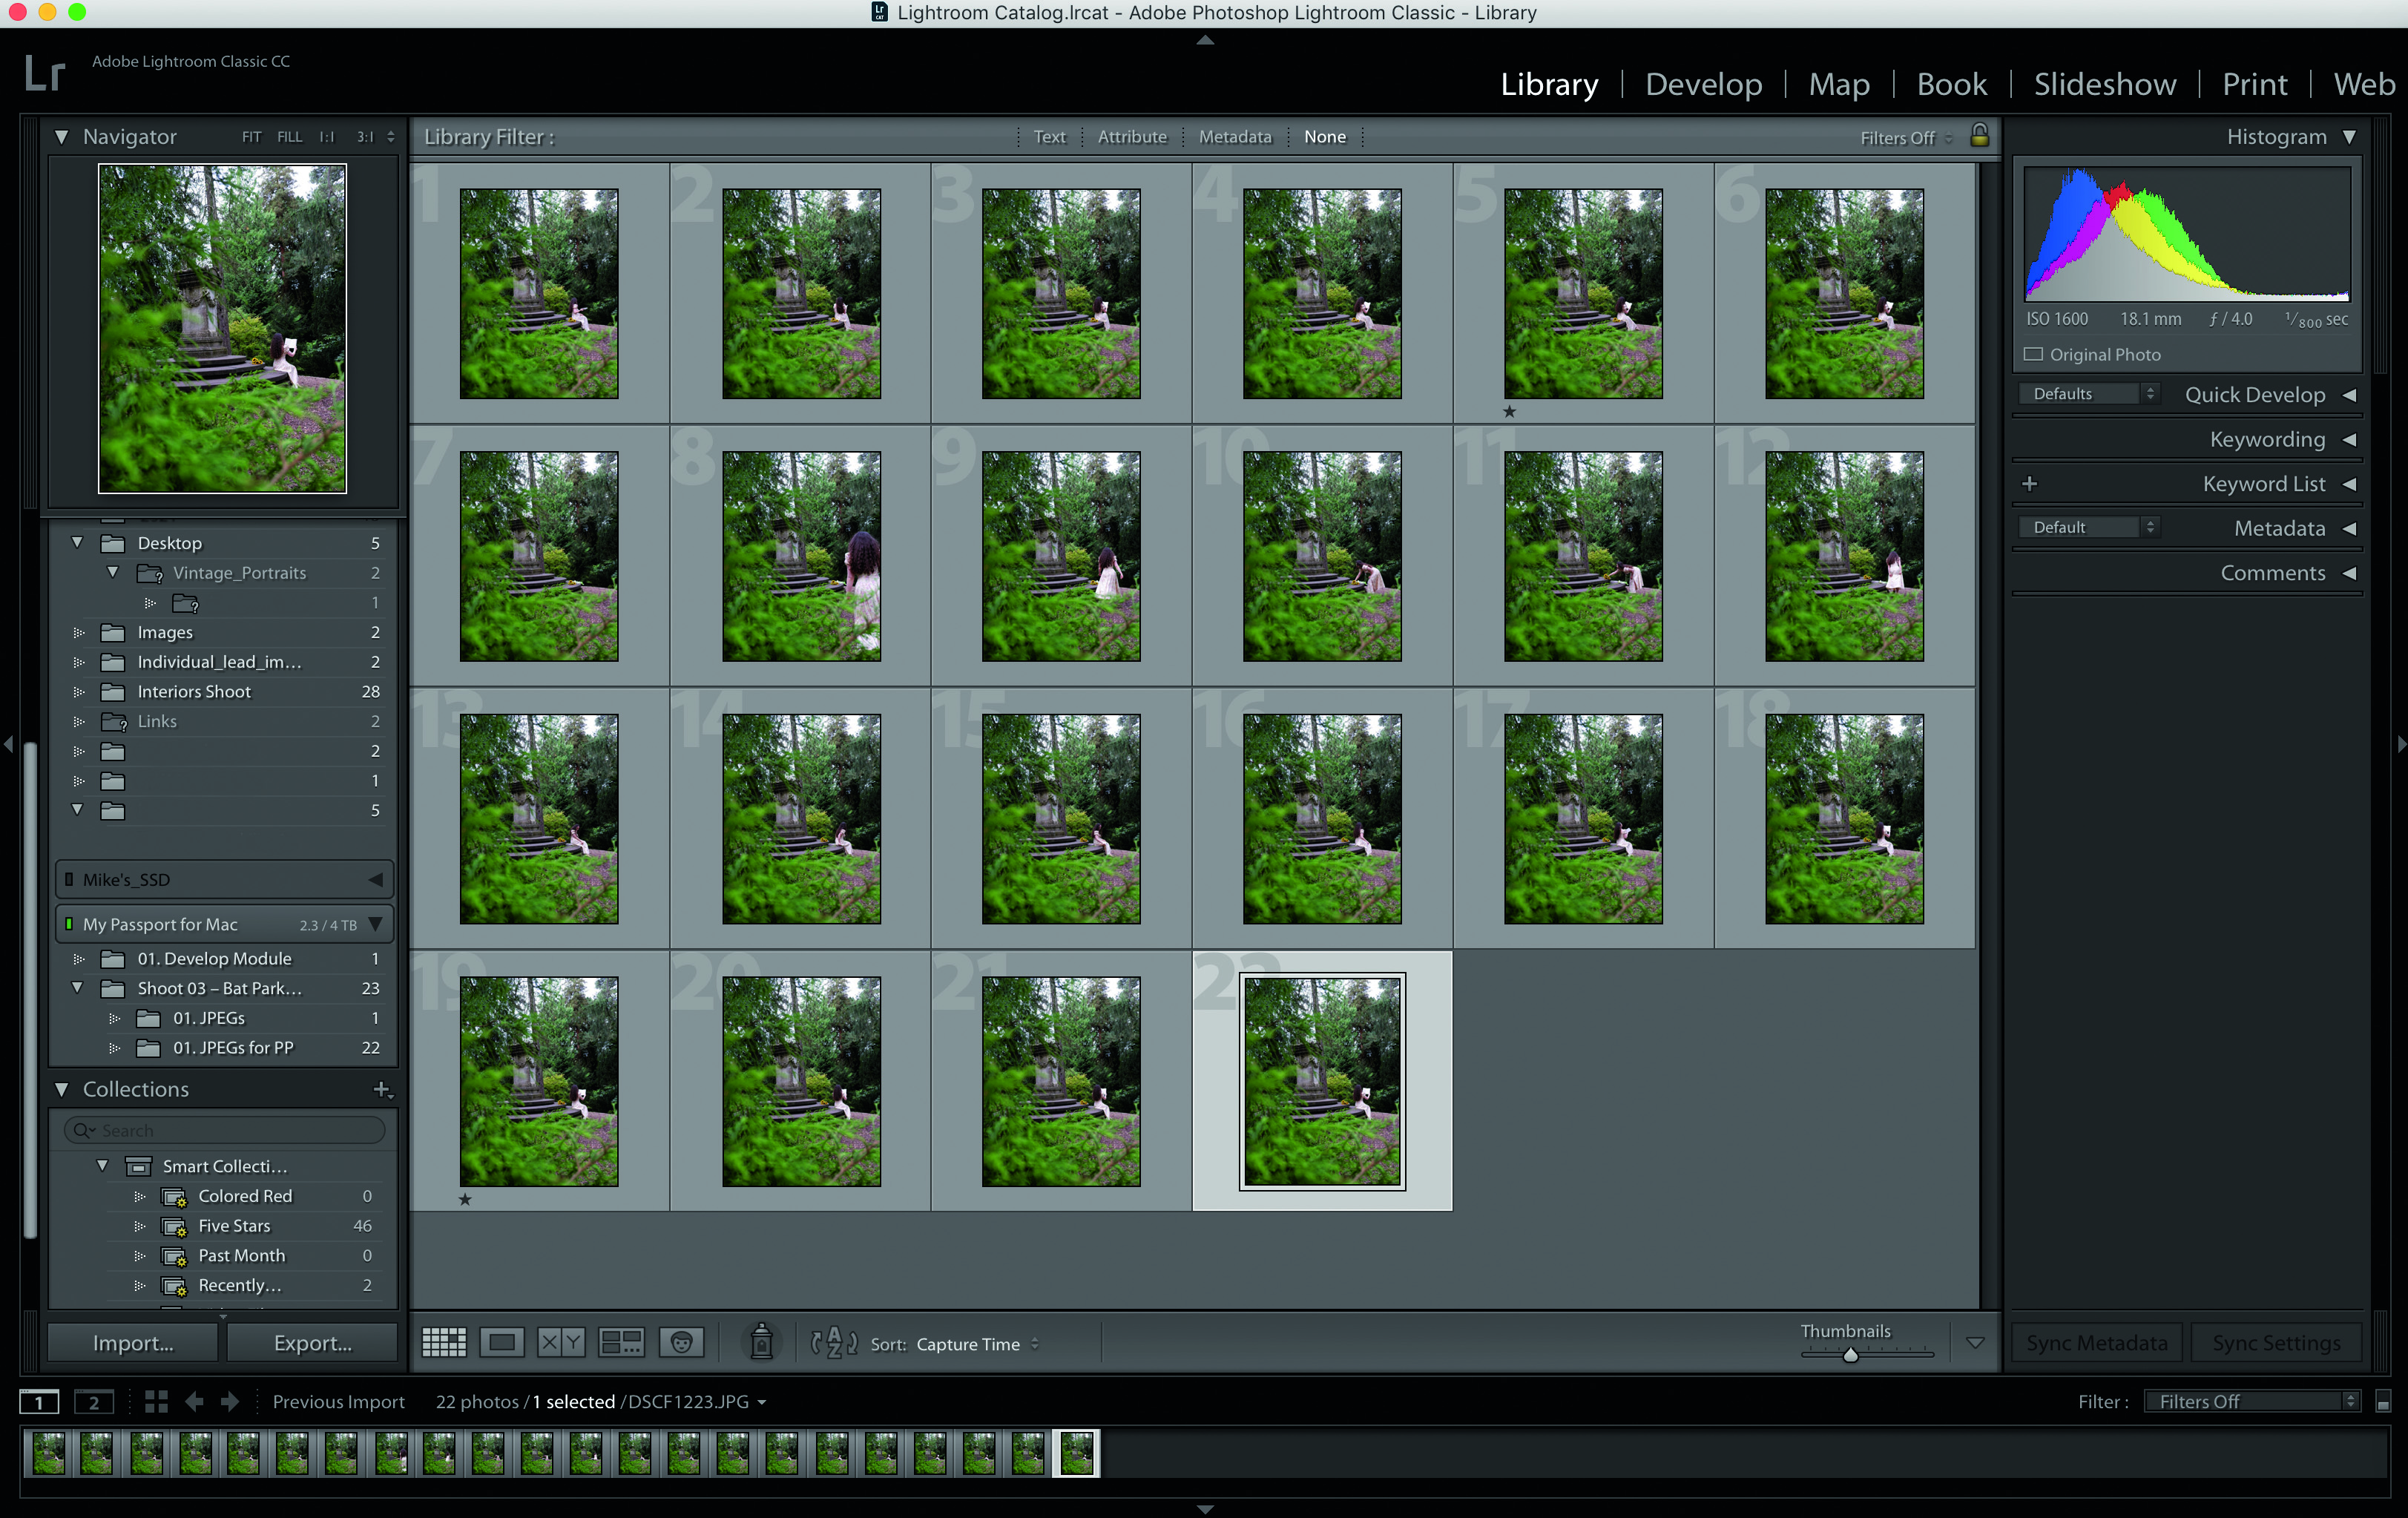
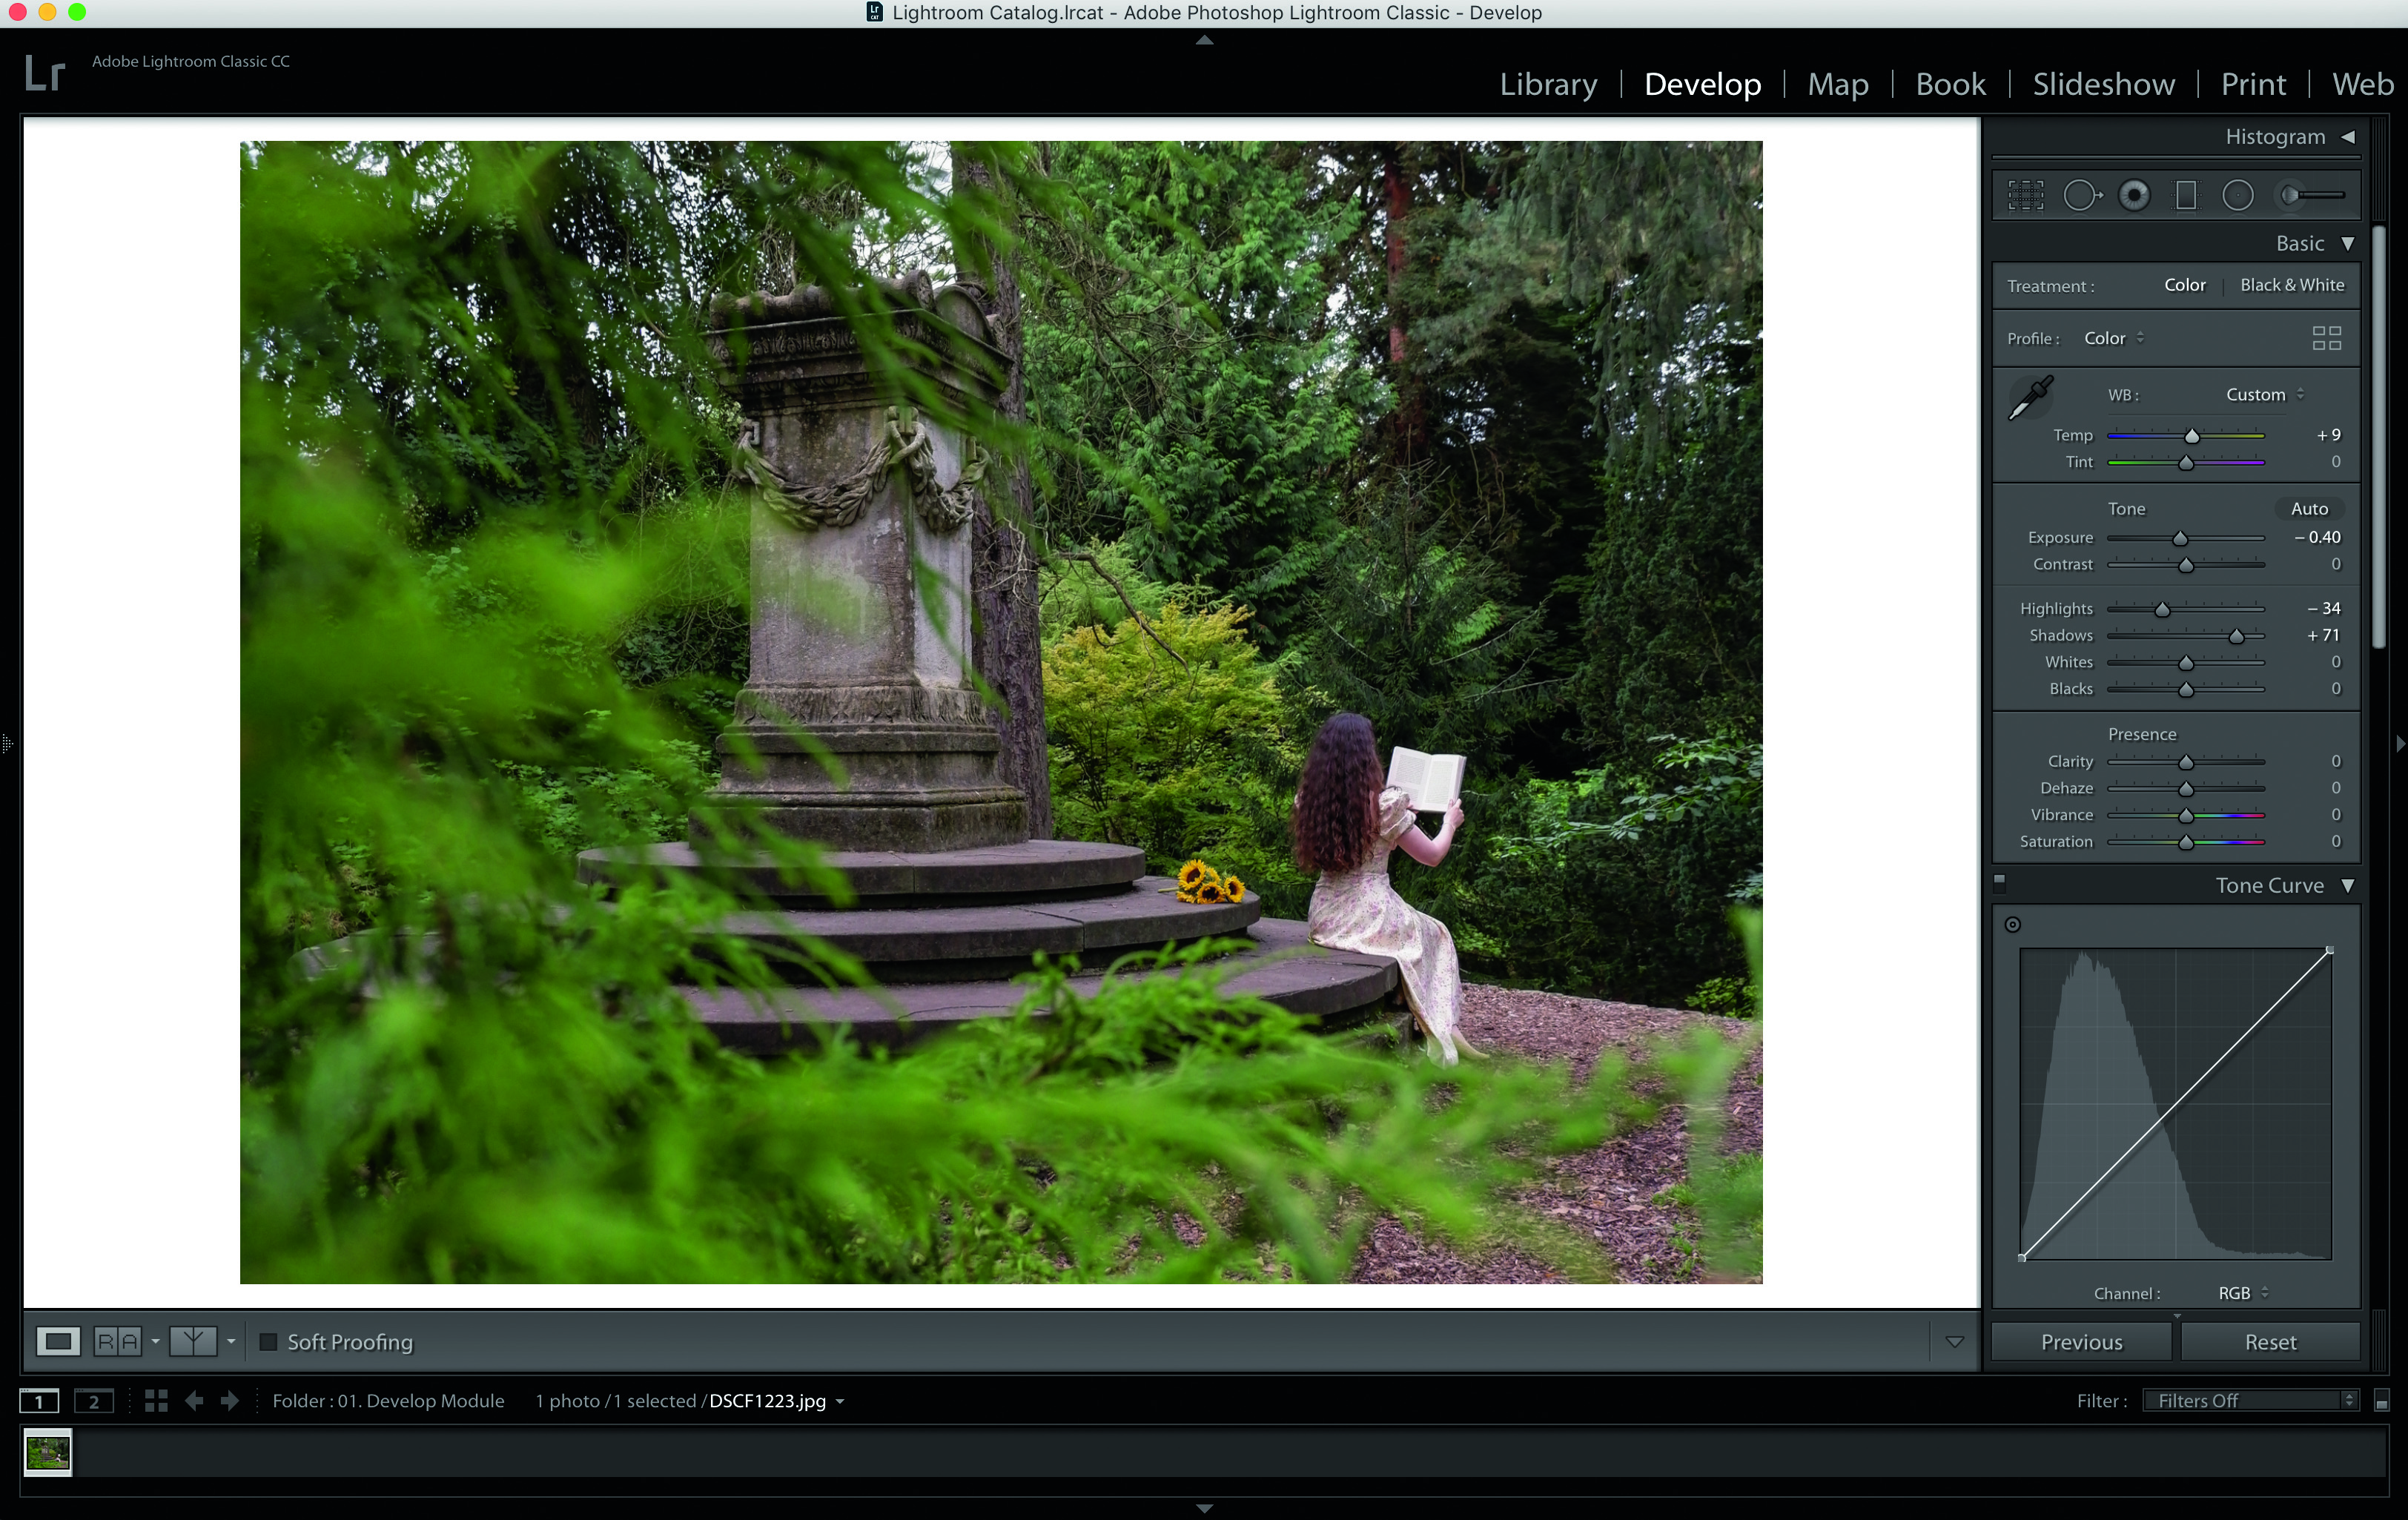
When you open Lightroom Classic CC, you’ll be brought into the Library to select which imported image you’d like to edit or download our Victoria_Park.jpg start image and import that instead. Once you’ve chosen your picture, go to the Develop Module in the top right corner and will then be using the Basic panel on the right to begin editing.
02 Adjust the exposure
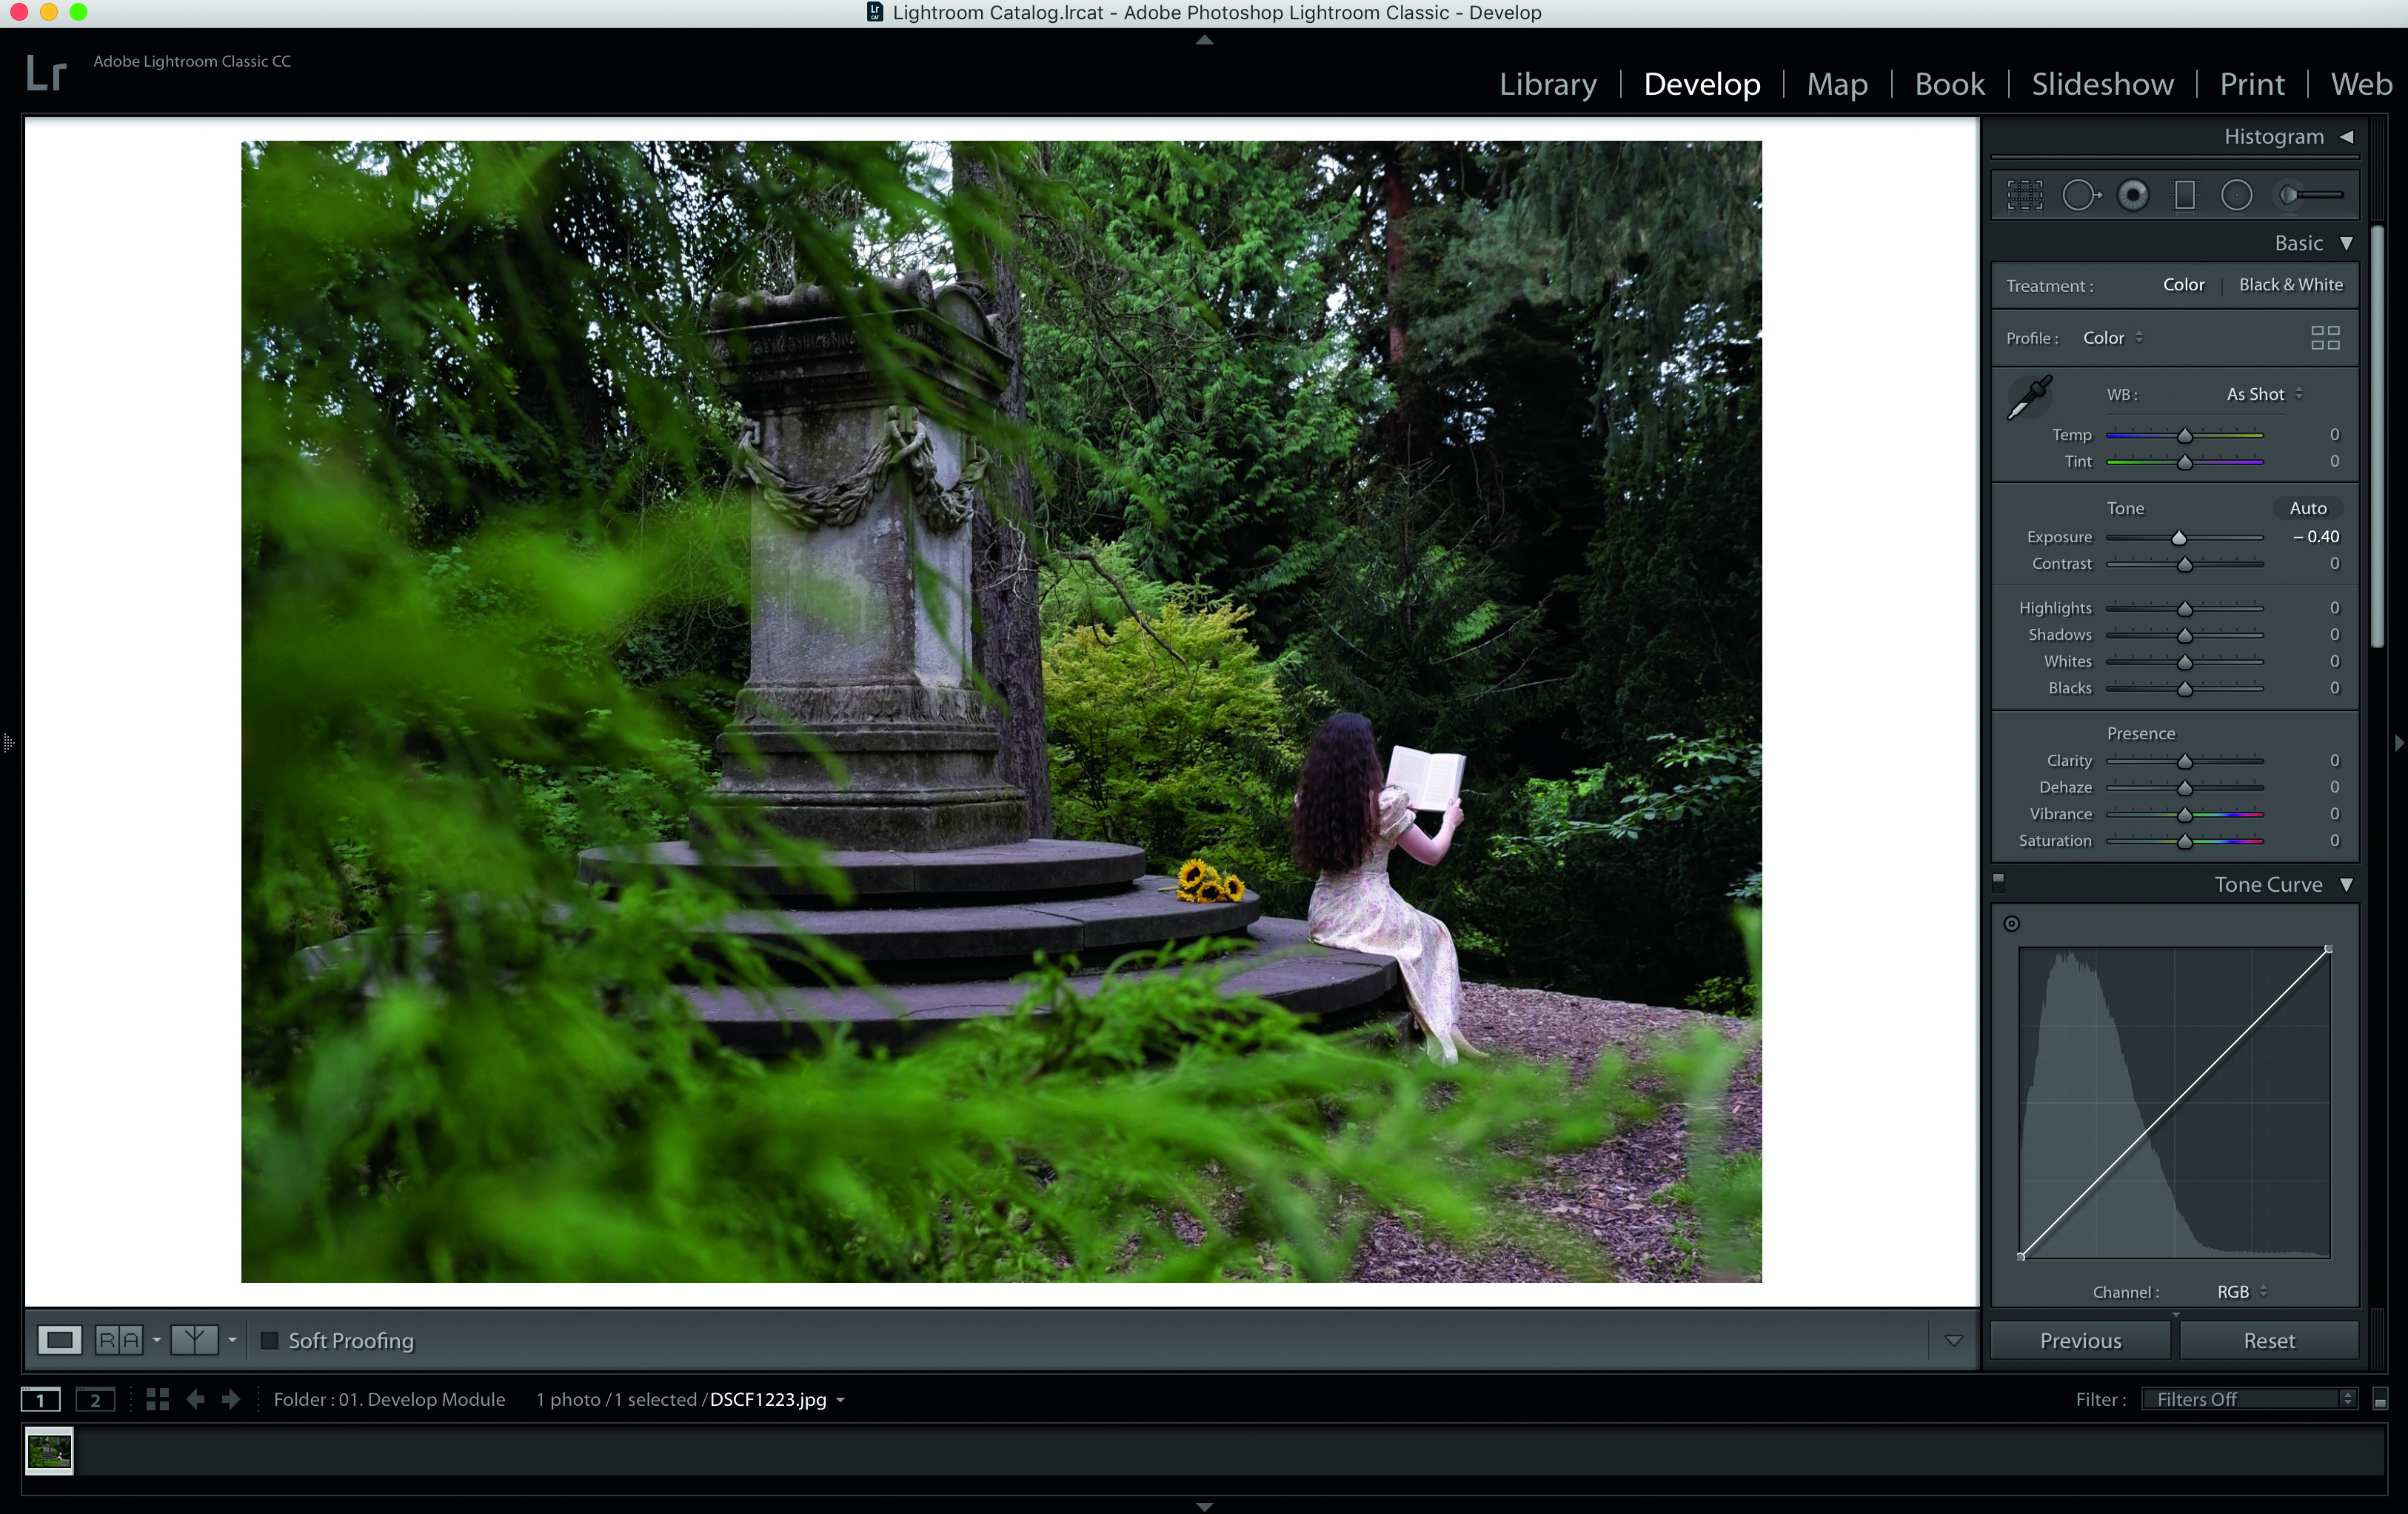
The Exposure slider is a global adjustment that controls how light or dark your image will be. Move the slider to the right to make the image brighter, or move it to the left to make it darker. We underexposed this image a little to preserve our highlight details.
03 Bring down the highlights
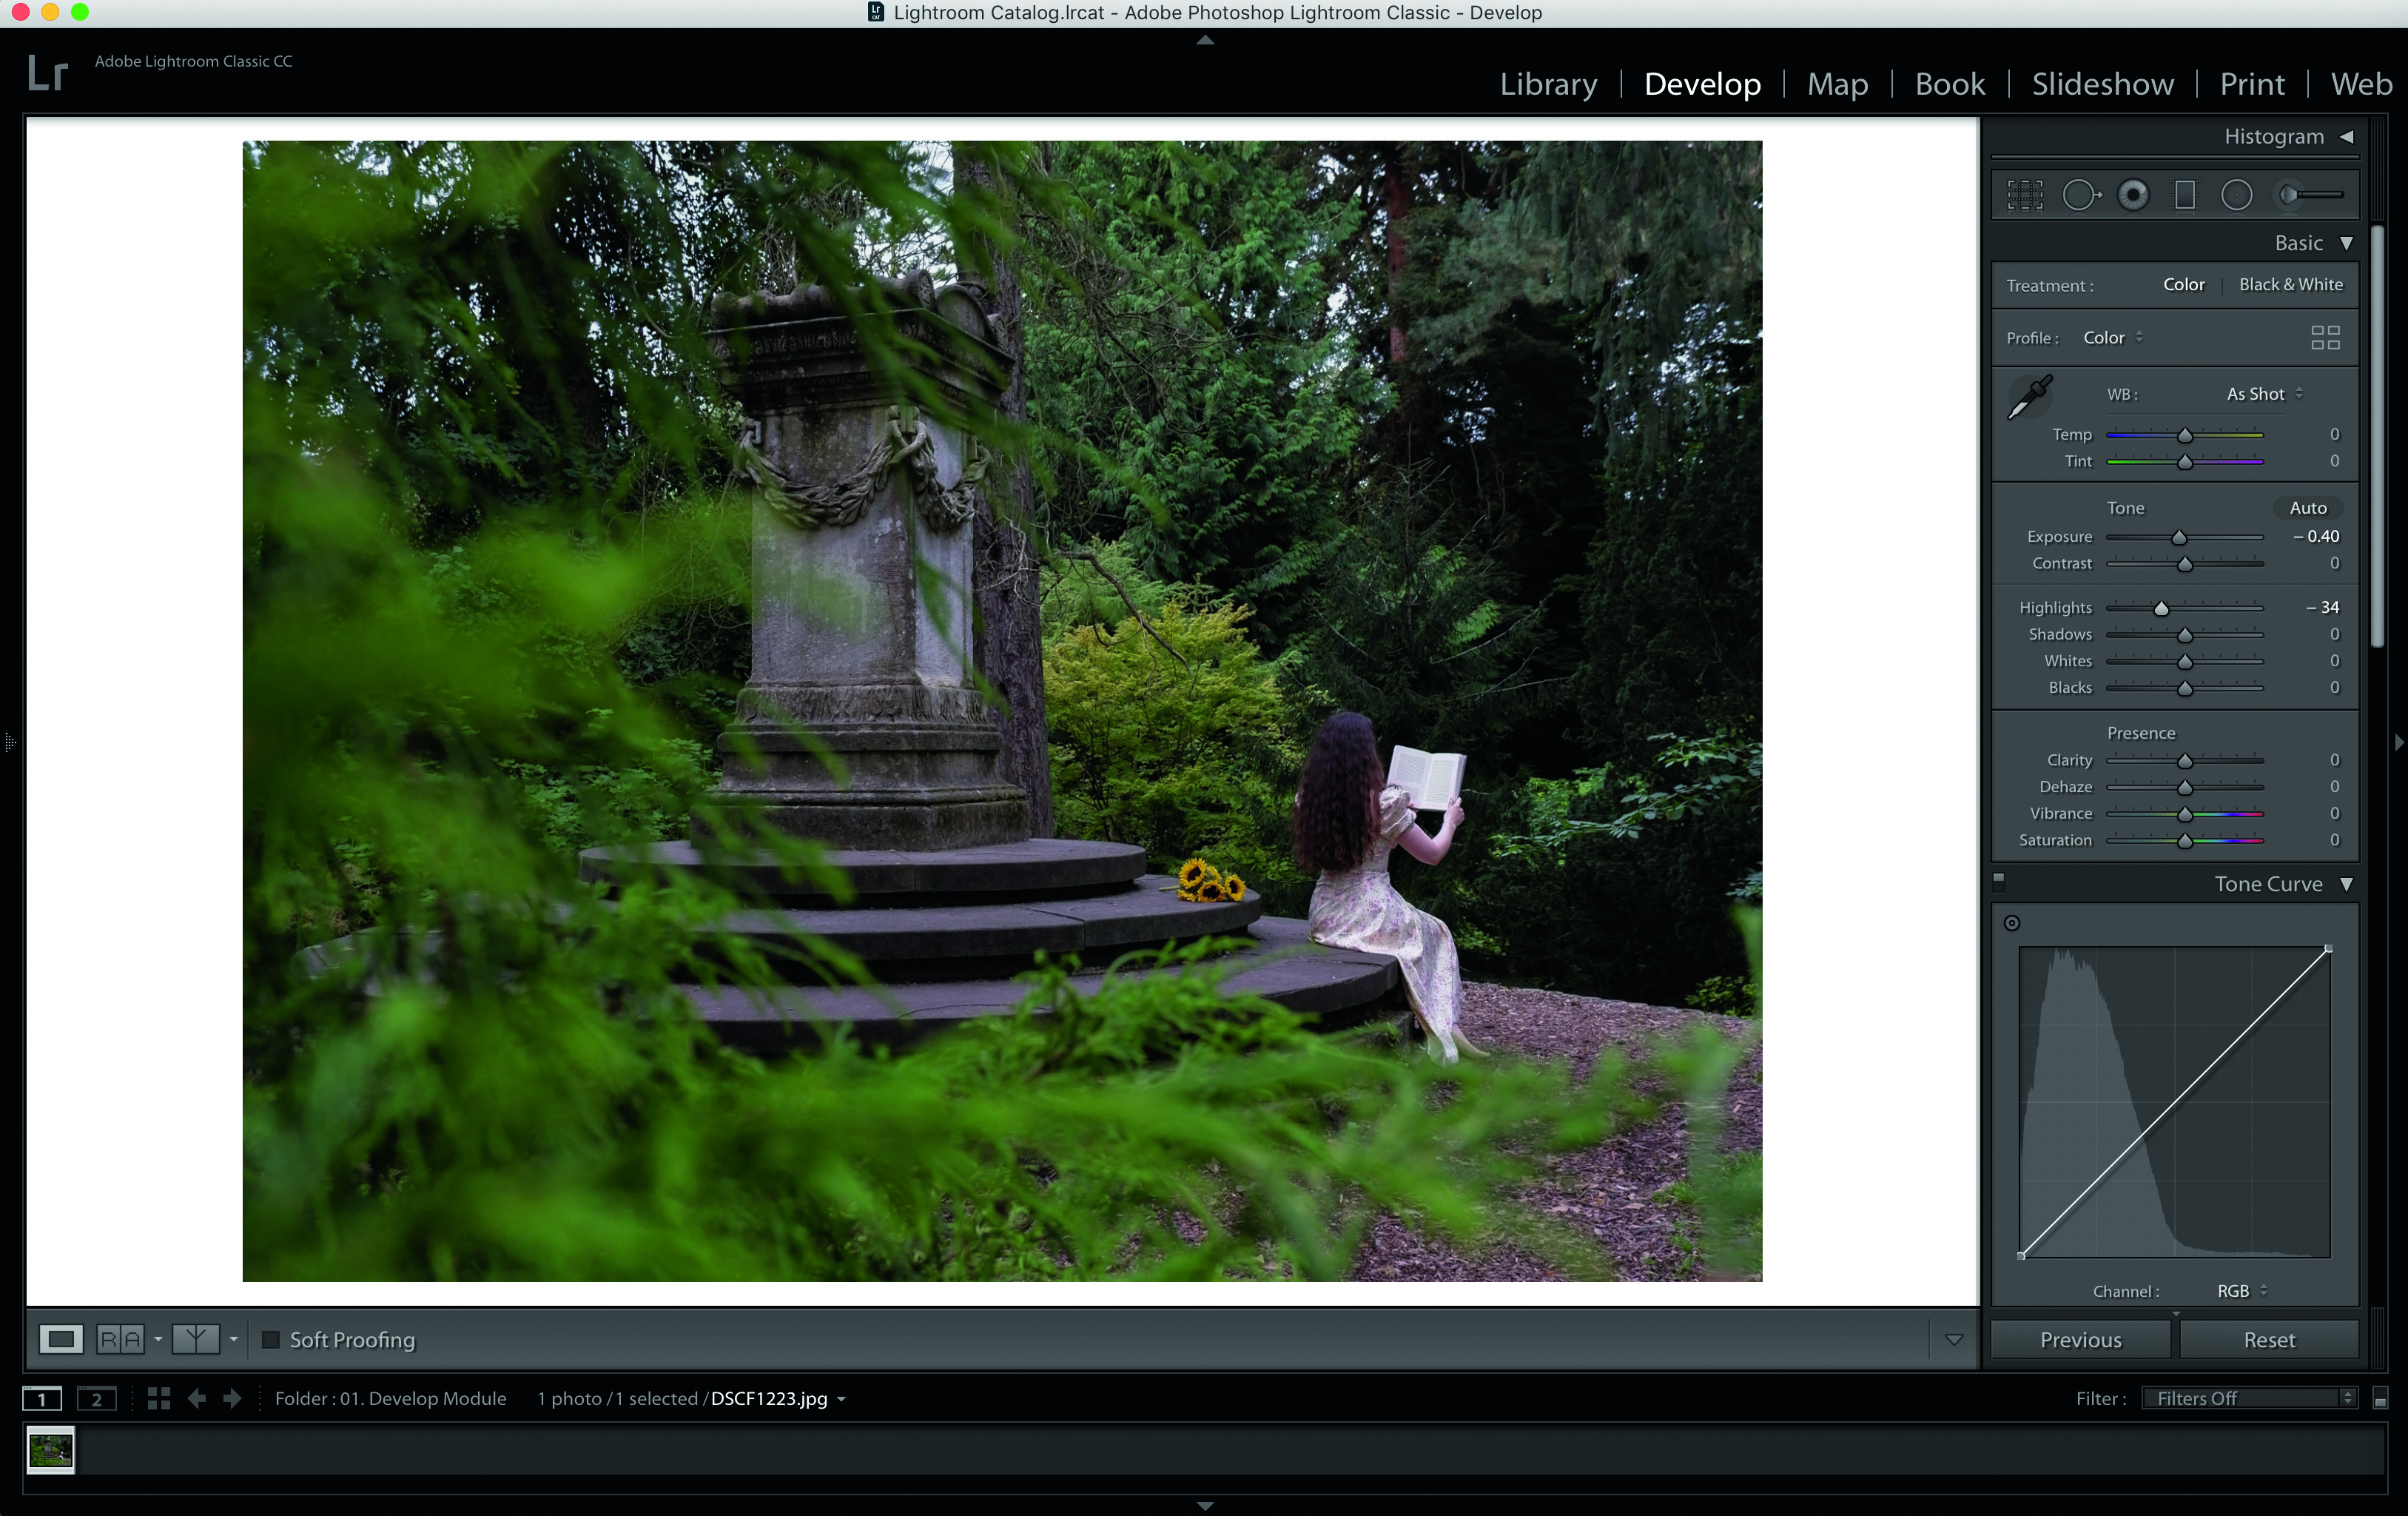
While the Exposure slider affects the entire image, the Highlights slider will only adjust the brighter parts of the photo. If you have overexposed areas in your image, drag the Highlights slider to the left to retain them. Alternatively, move it to the right to brighten them up. This works even better on Raw photos that have extra exposure information.
04 Boost the shadows
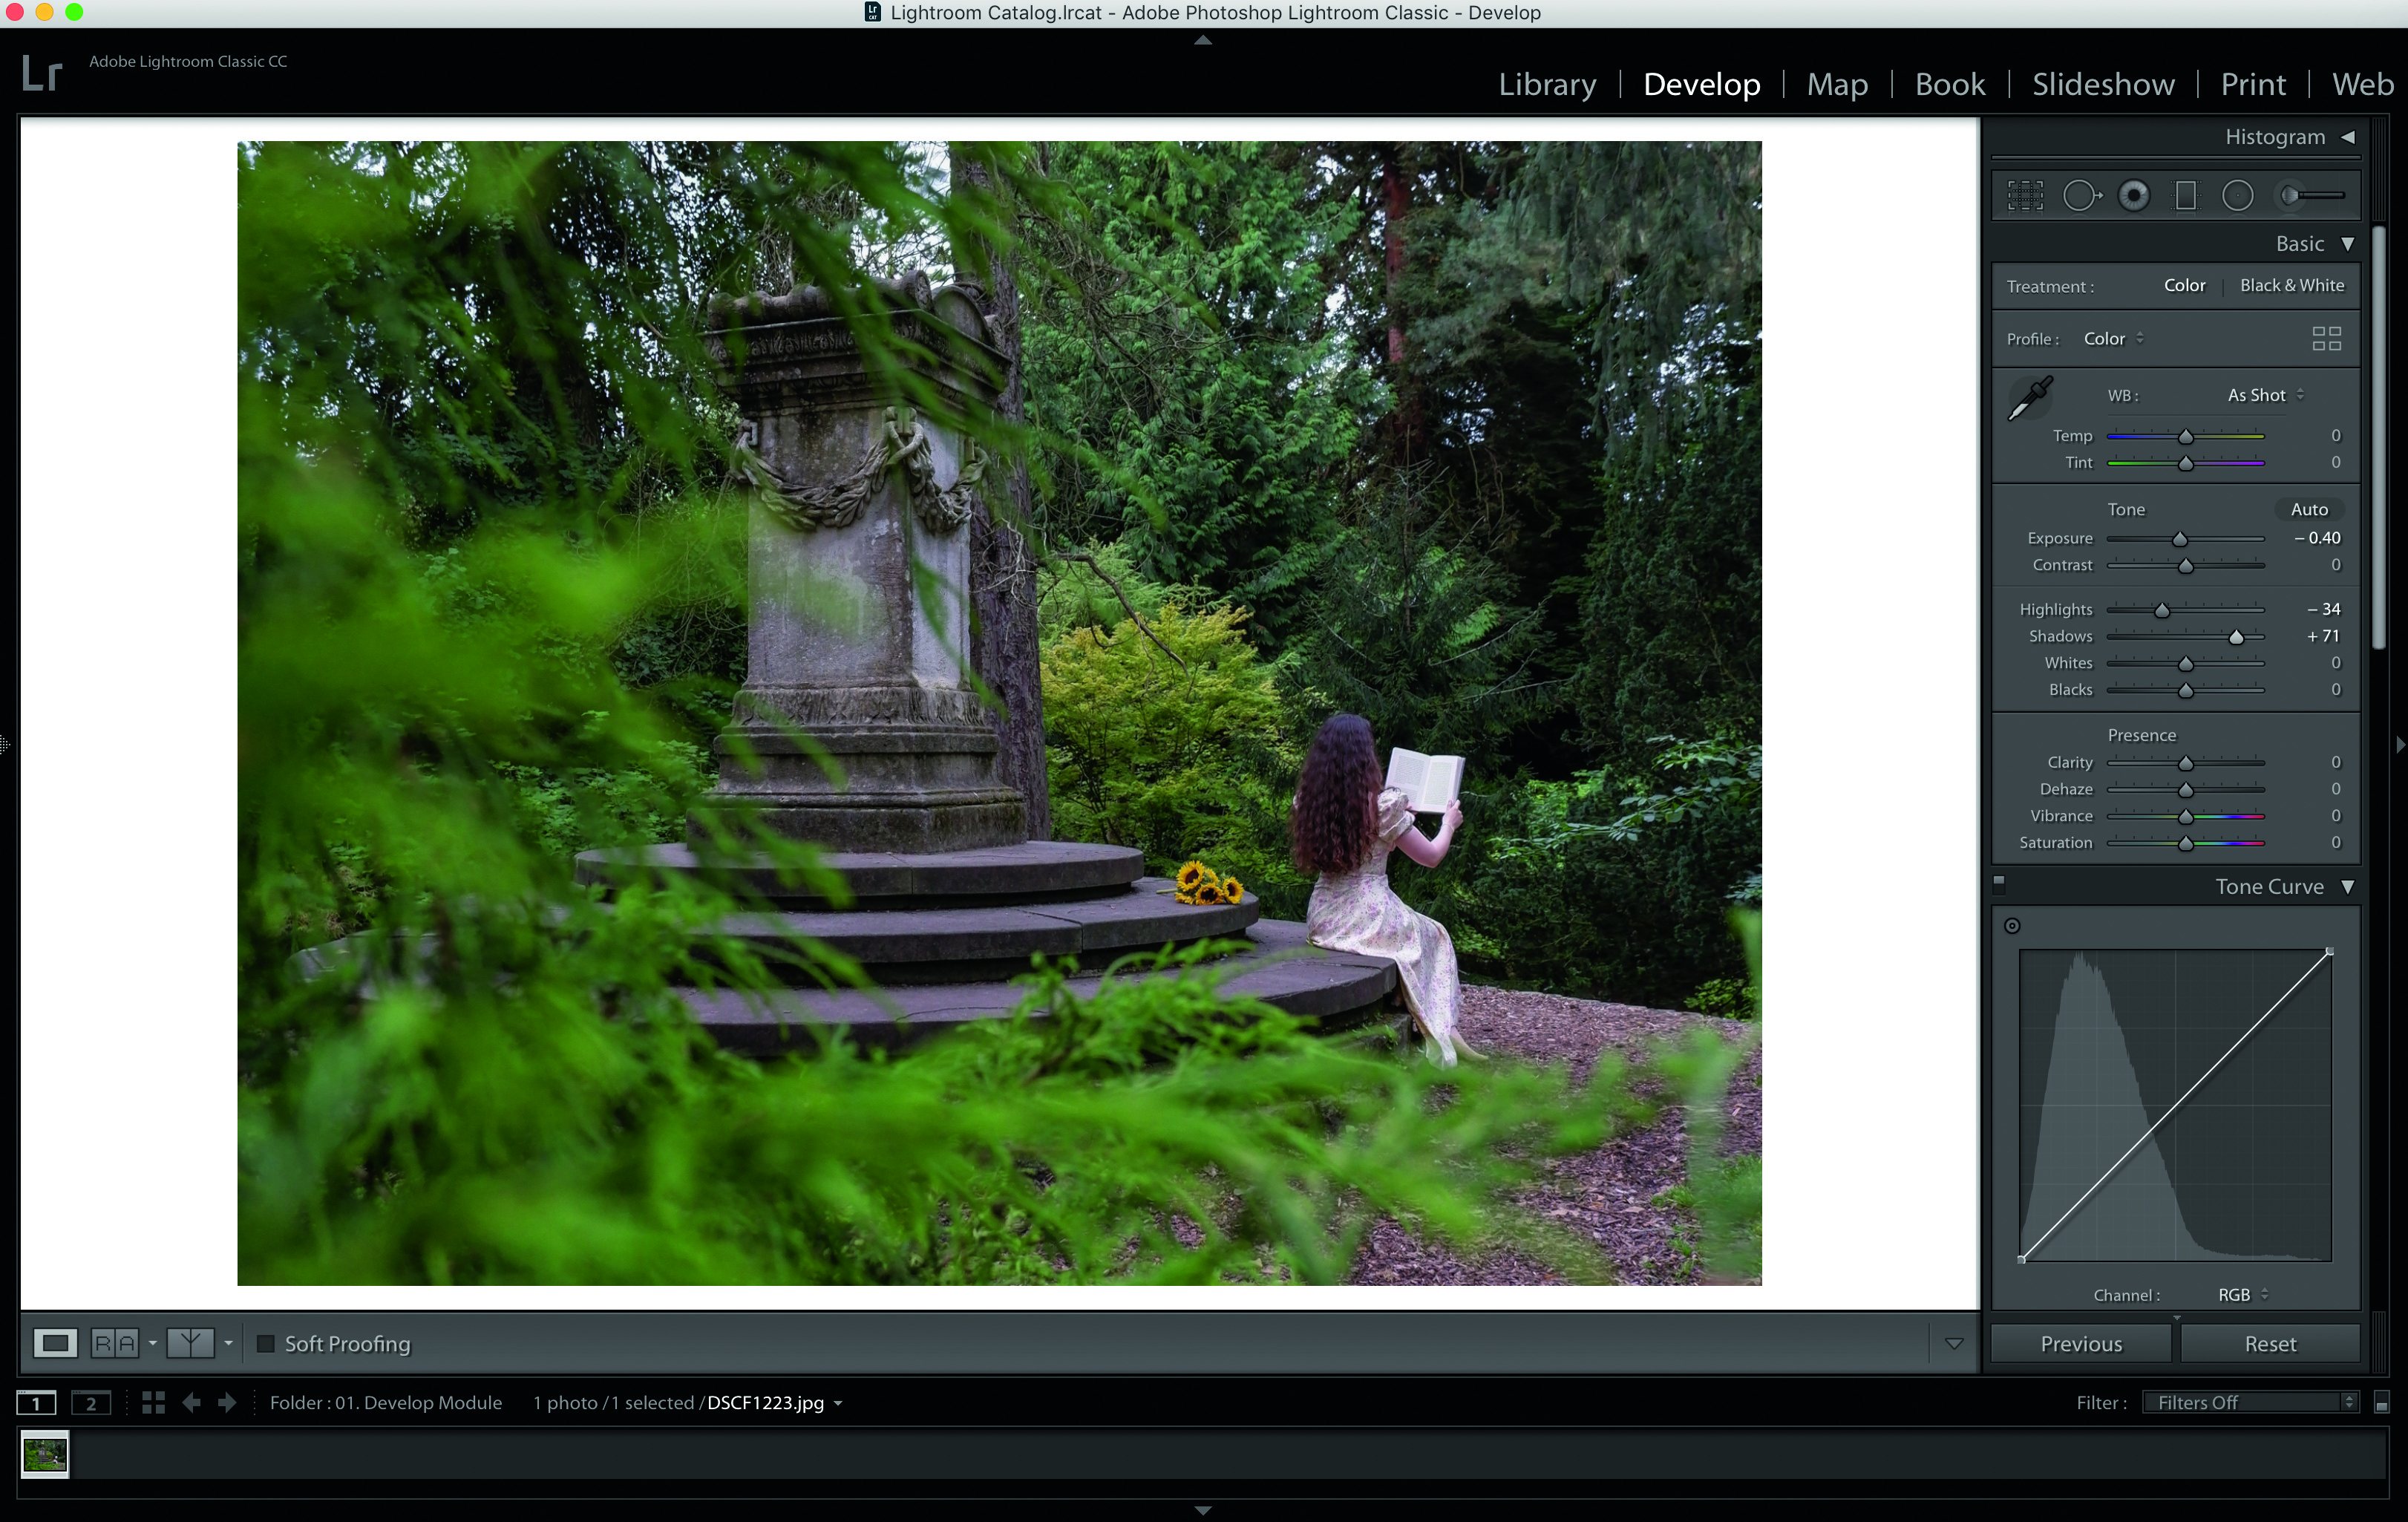
The Shadows slider works similarly to Highlights, but only affects darker tones. Dragging the Shadows slider to the right will do a good job of boosting the dynamic range and reveal hidden detail in dark patches without blowing out the highlight detail.
05 Play with color temperature
If you often shoot on Auto White Balance, you may find that the colors aren’t always 100% accurate. Use the Temperature slider to introduce warm or cool tones to your photo. If the colors still don’t look right, try using the Tint slider to correct for green or magenta casts, often caused by filters being attached.
06 Boost your colours
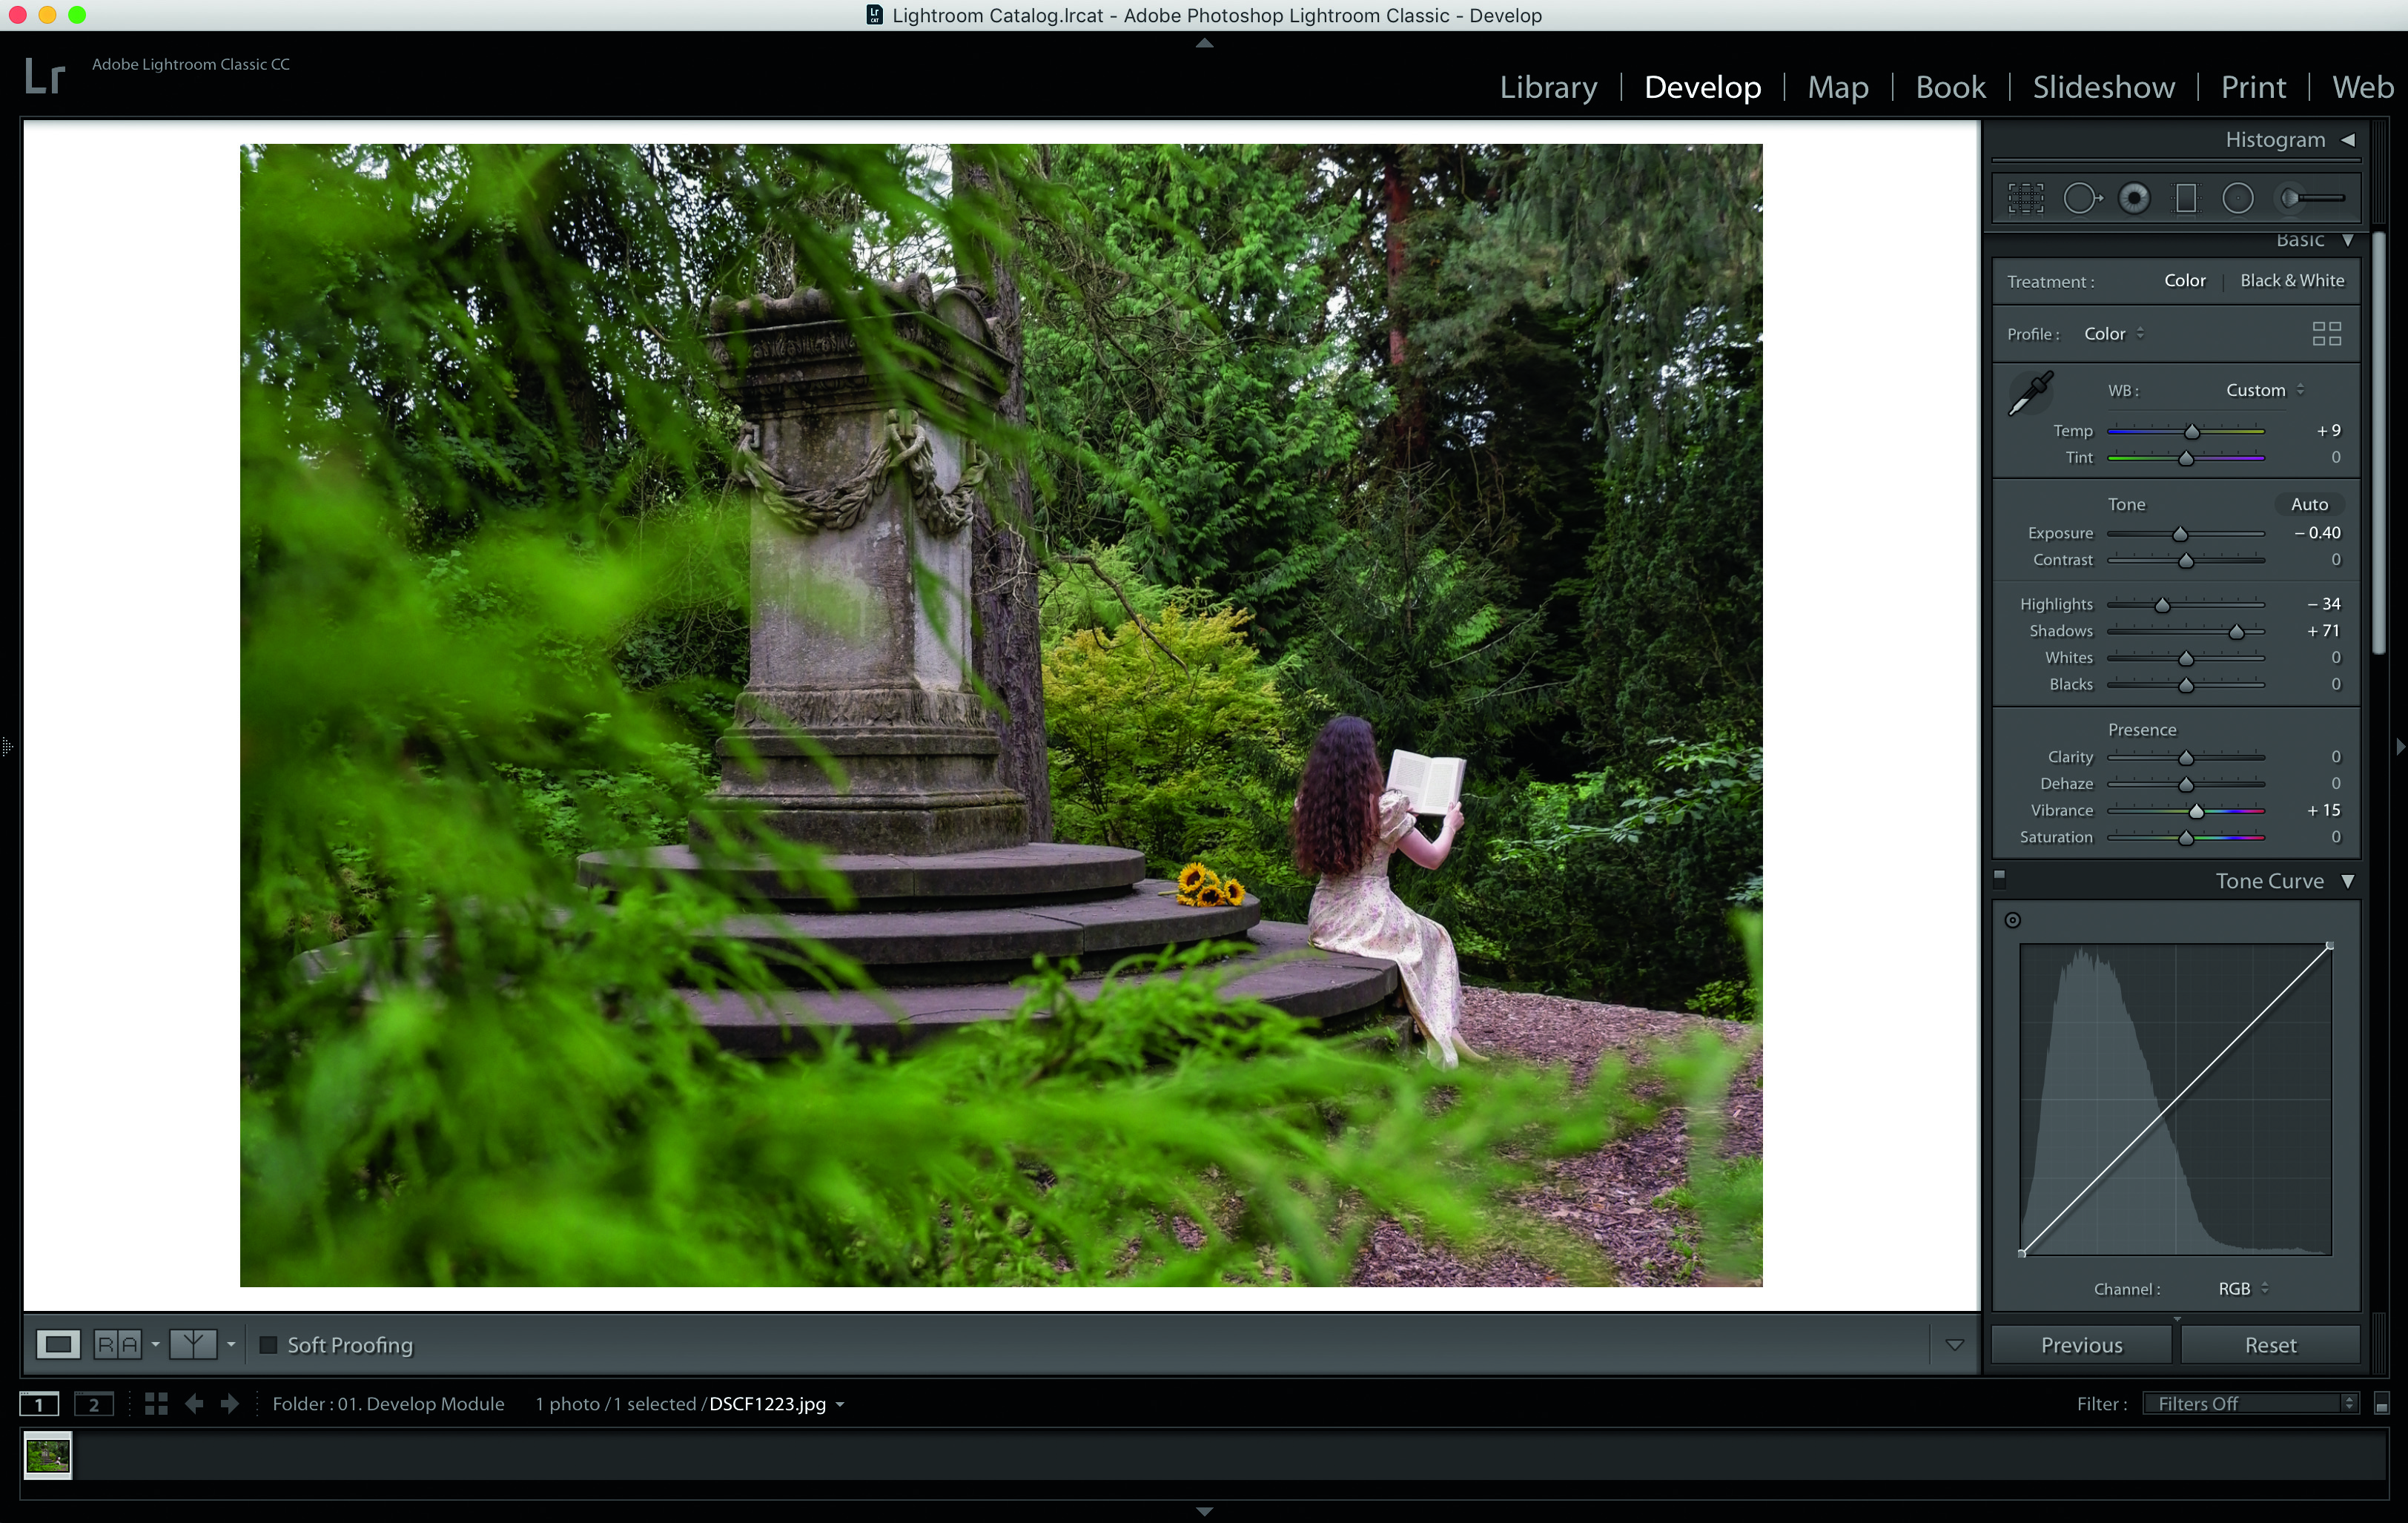
Want to make your colors more vivid without them becoming garish? Try using the Vibrance slider, rather than Saturation. While Saturation boosts all of the colors equally, Vibrance boosts the least saturated colors first so can be more effective and subtle.
PhotoPlus: The Canon Magazine is the world's only monthly newsstand title that's 100% devoted to Canon, so you can be sure the magazine is completely relevant to your system.
Read more:
The best photo editing software: image editors for novices through to pros
The best photo-editing laptops: top laptops for photographers
10 best online photography courses – from beginner guides to masterclasses
With over a decade of photographic experience, Louise arms Digital Camera World with a wealth of knowledge on photographic technique and know-how – something at which she is so adept that she's delivered workshops for the likes of ITV and Sue Ryder. Louise also brings years of experience as both a web and print journalist, having served as features editor for Practical Photography magazine and contributing photography tutorials and camera analysis to titles including Digital Camera Magazine and Digital Photographer. Louise currently shoots with the Fujifilm X-T200 and the Nikon D800, capturing self-portraits and still life images, and is DCW's ecommerce editor, meaning that she knows good camera, lens and laptop deals when she sees them.
