Getting sharper, better-exposed photos starts with your LCD screen
Here are simple LCD tweaks that can make the difference in fine-tuning exposure, focus, and composition, and give you more control
Although it may seem fairly basic, customizing your LCD screen is a crucial step in enhancing your images. By tweaking LCD settings, you will unlock supporting features that are especially useful when you are just starting your photography journey. Getting an instant preview of the scene before pressing the shutter allows easy fine-tuning in exposure, sharpness, and composition. Plus, the 100 percent field of view offered by the LCD screen is often greater than that provided by viewfinders.
Different features can be assigned to specific camera buttons under the Custom Keys option. This allows the camera features that you use most frequently to be easily accessed, improving your workflow efficiency.
As many LCD functions are turned off when buying the camera and must be activated manually, making full use of your rear LCD screen requires some research. The most important thing is to make it work for you and align the functions to your specific needs and preferences. To optimize your workflow and productivity, consider these six key features.
Tutorial
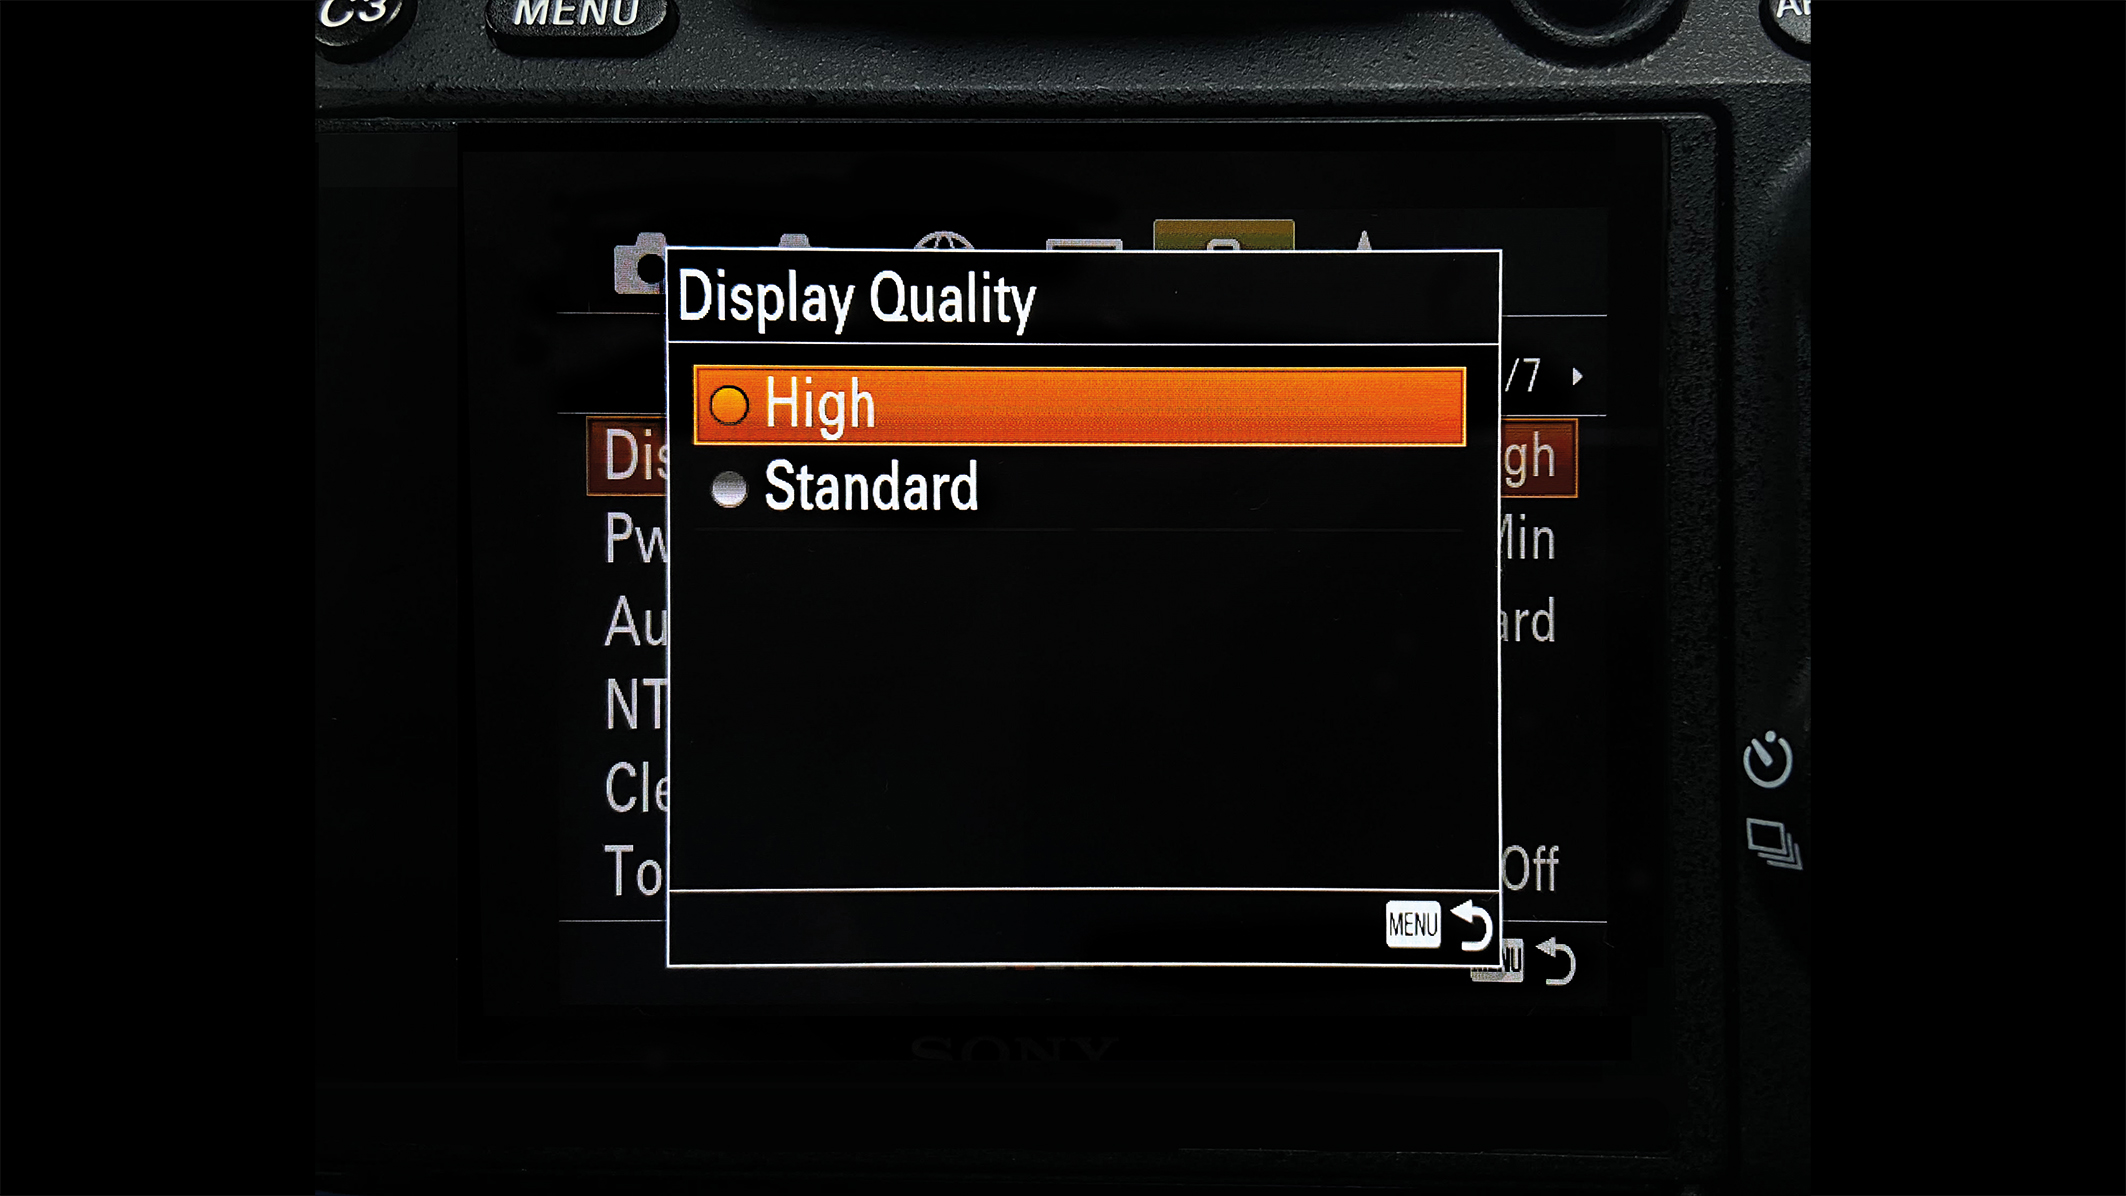
1. Choose high quality
Navigate to your camera settings and change the Display Quality to High. This will allow you to review your images more clearly and make further adjustments with confidence.
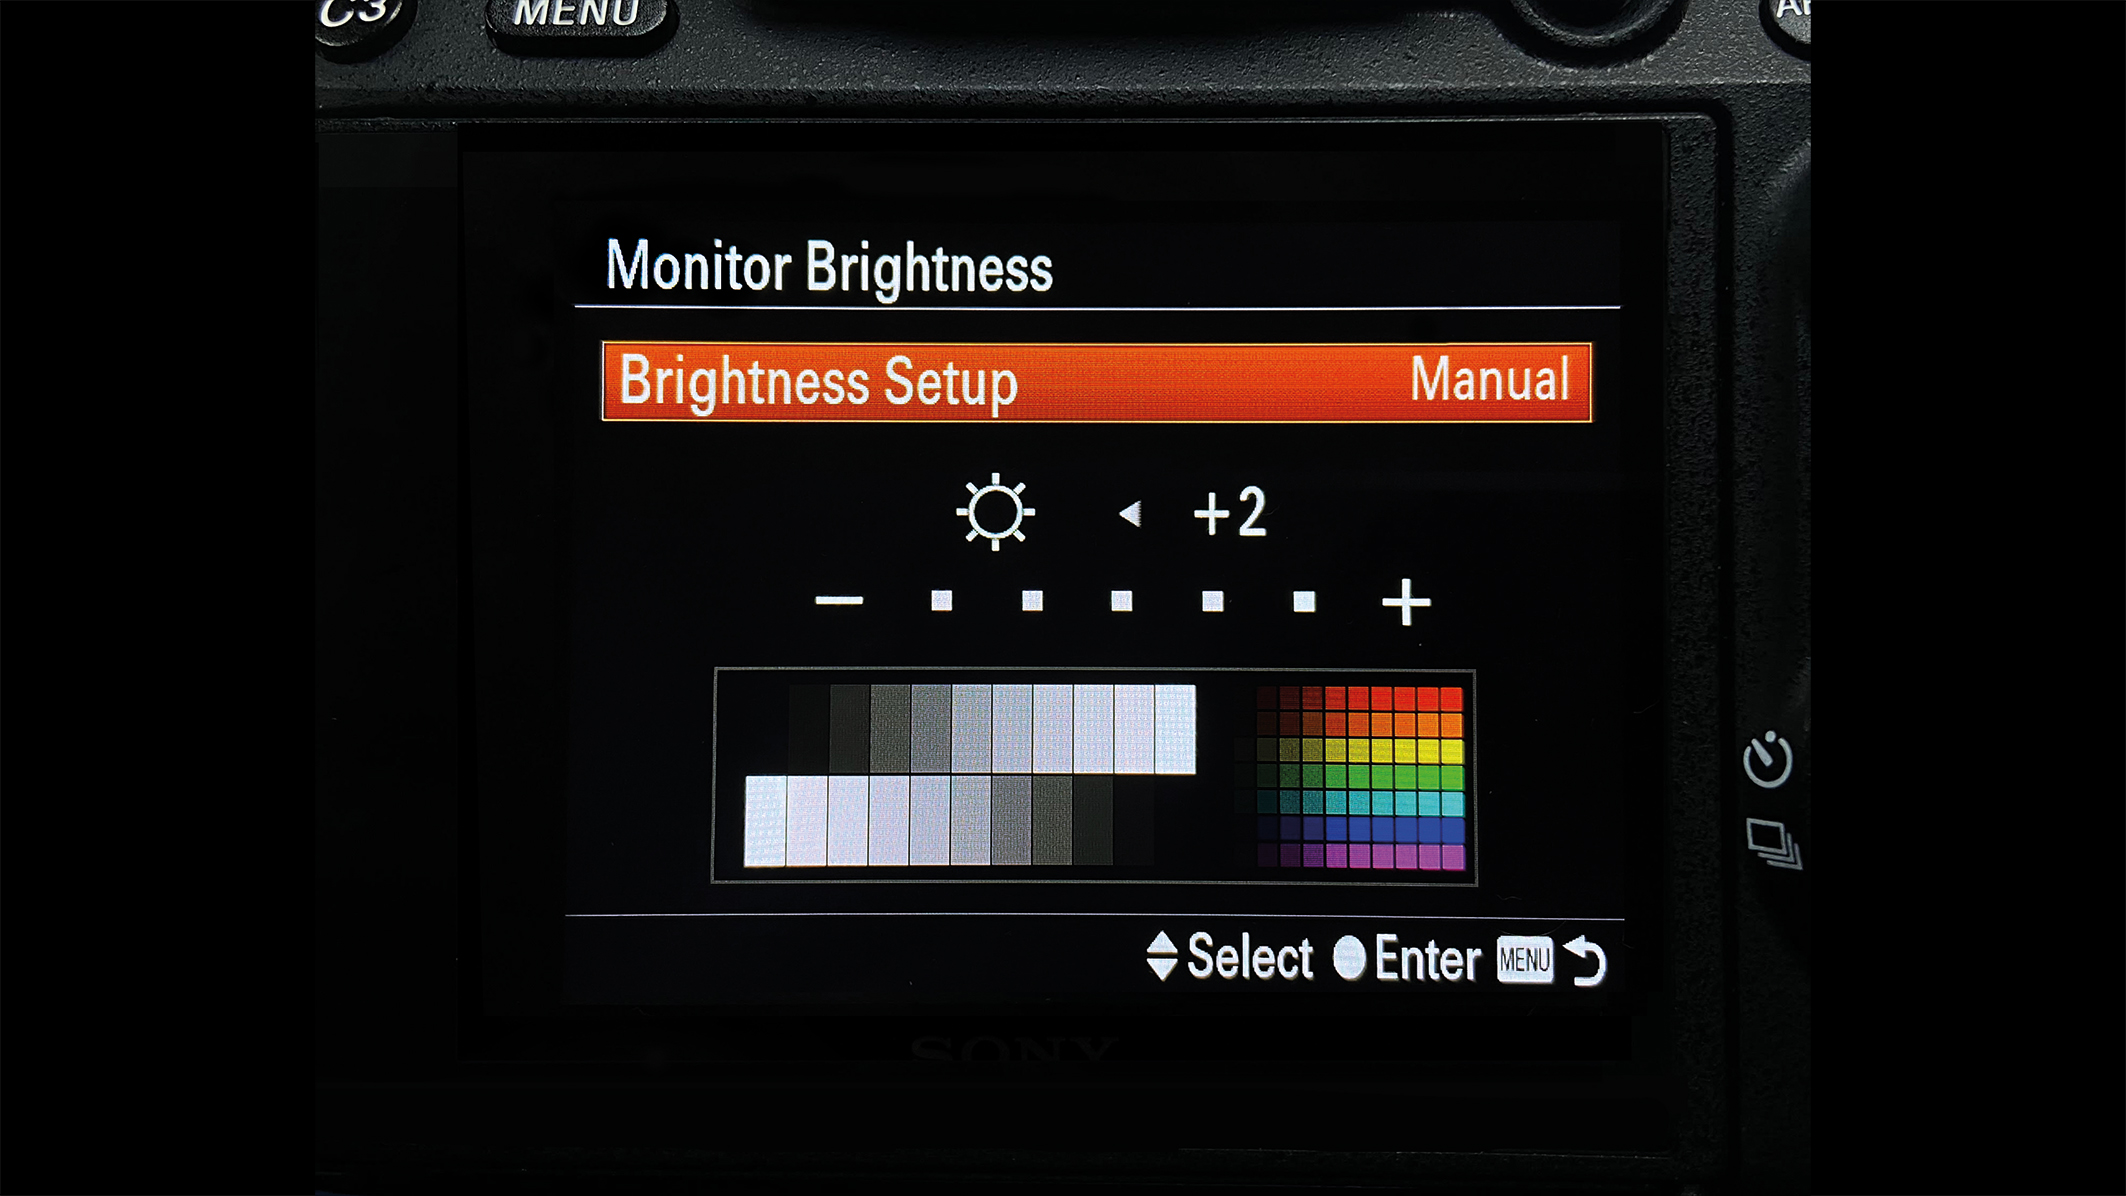
2. Calibrate LCD brightness
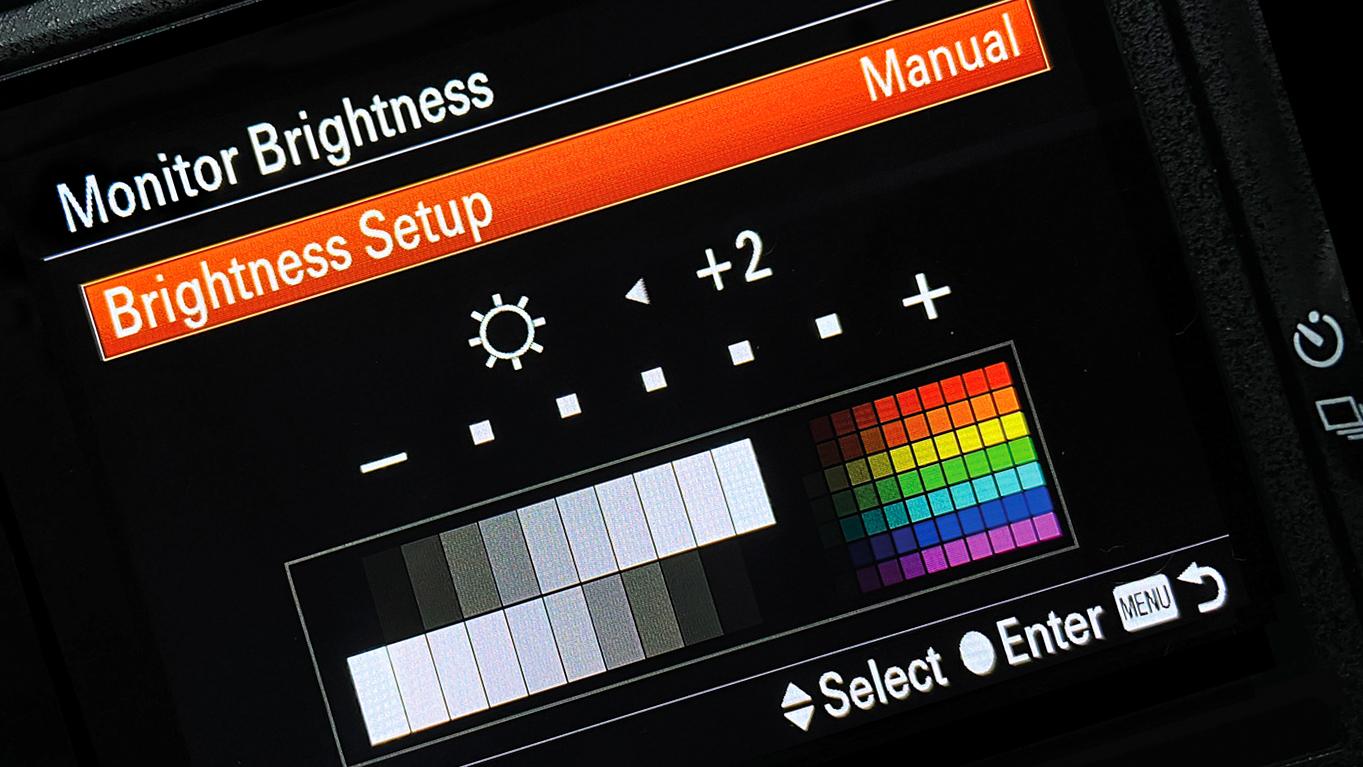
To ensure an accurate frame review, adjust the screen brightness to match your computer monitor. This maintains consistency throughout the shooting and editing processes.
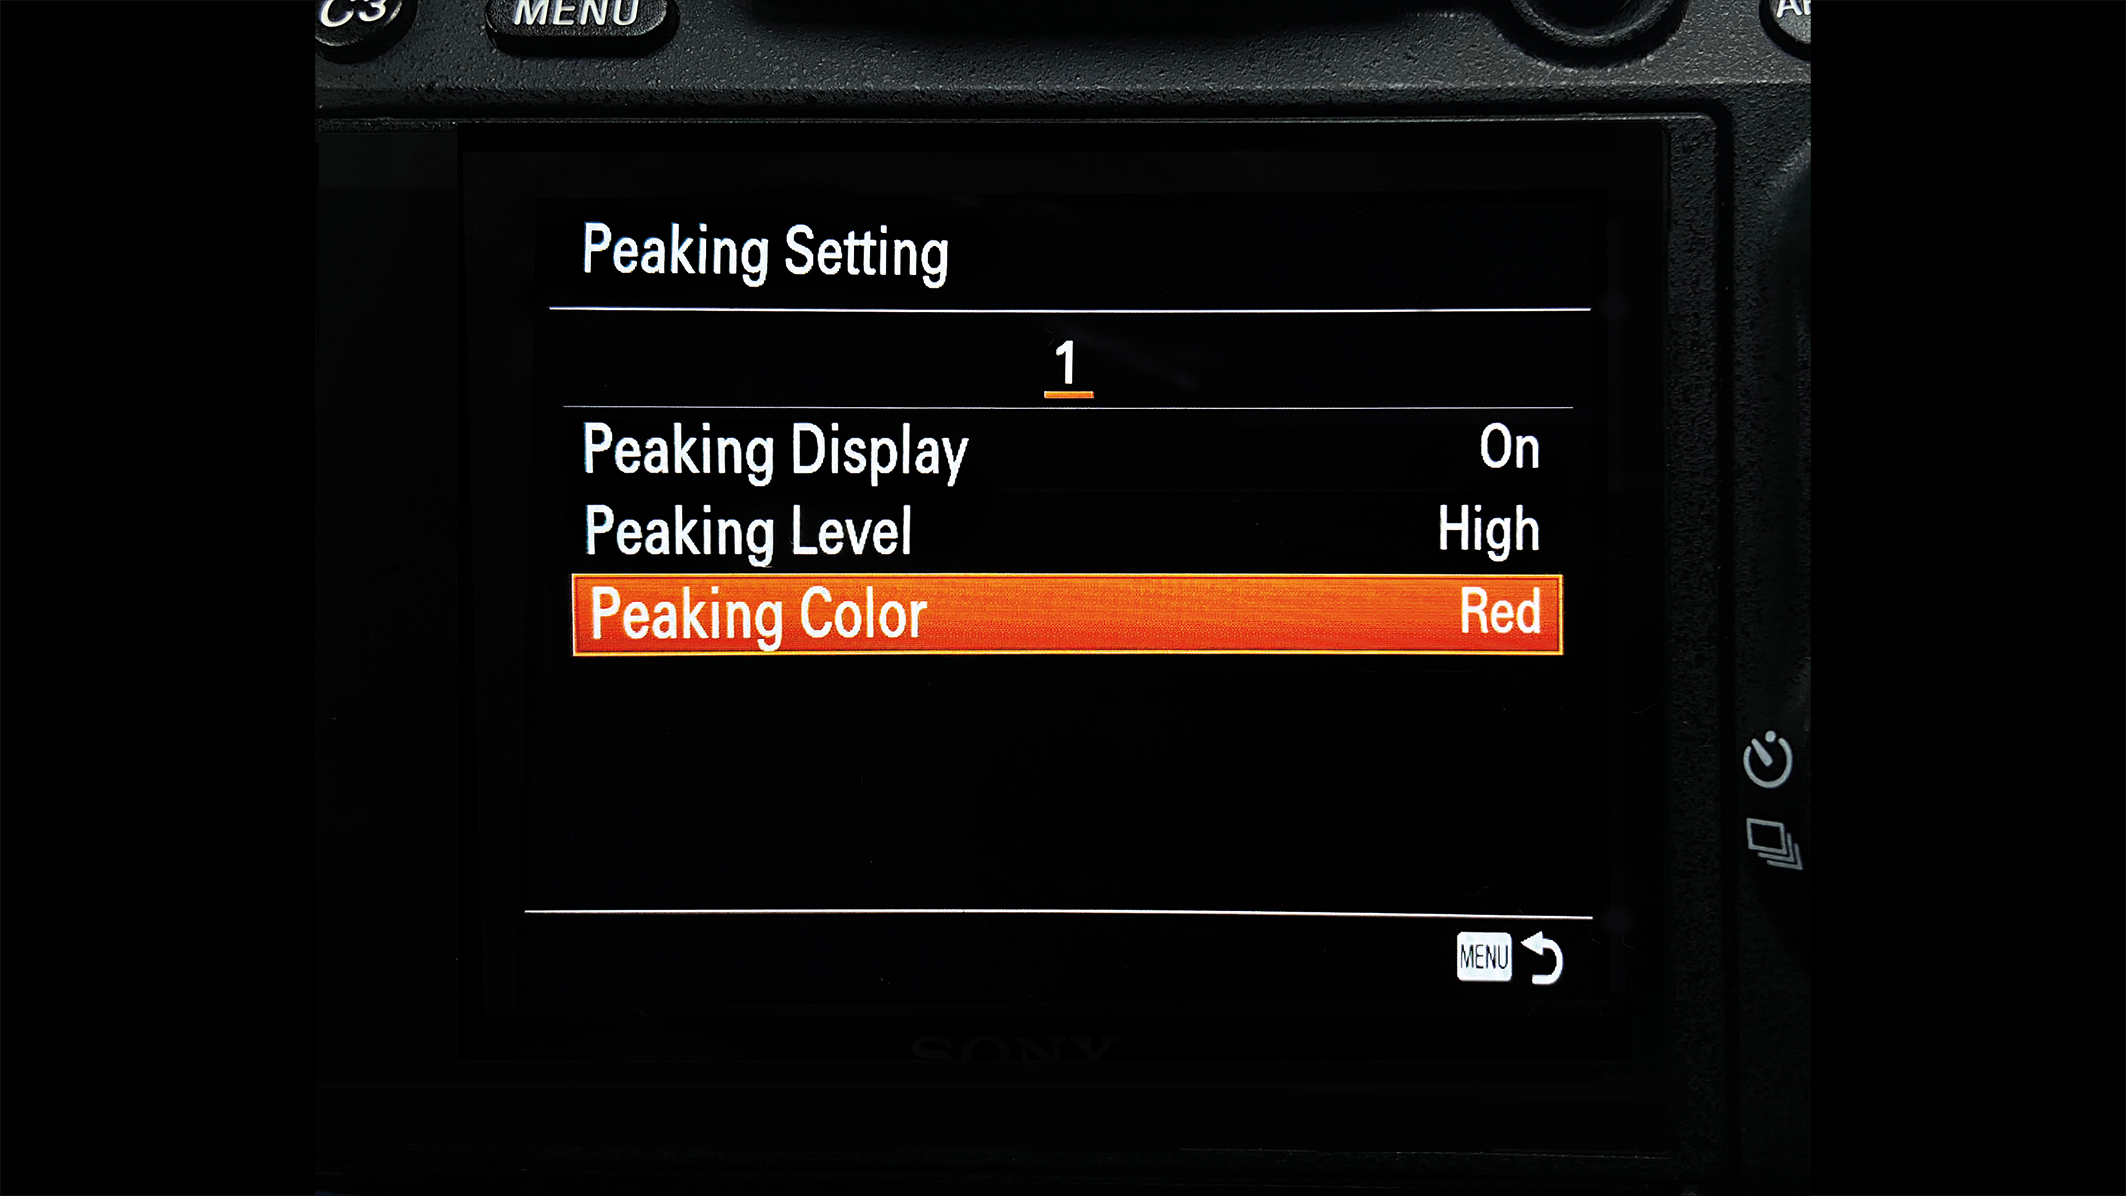
3. Focus Peaking
This feature assists you in identifying in-focus edges easily. Sharp edges are highlighted in a specific colour, depending on the camera’s brand, which can help you focus on the subject.
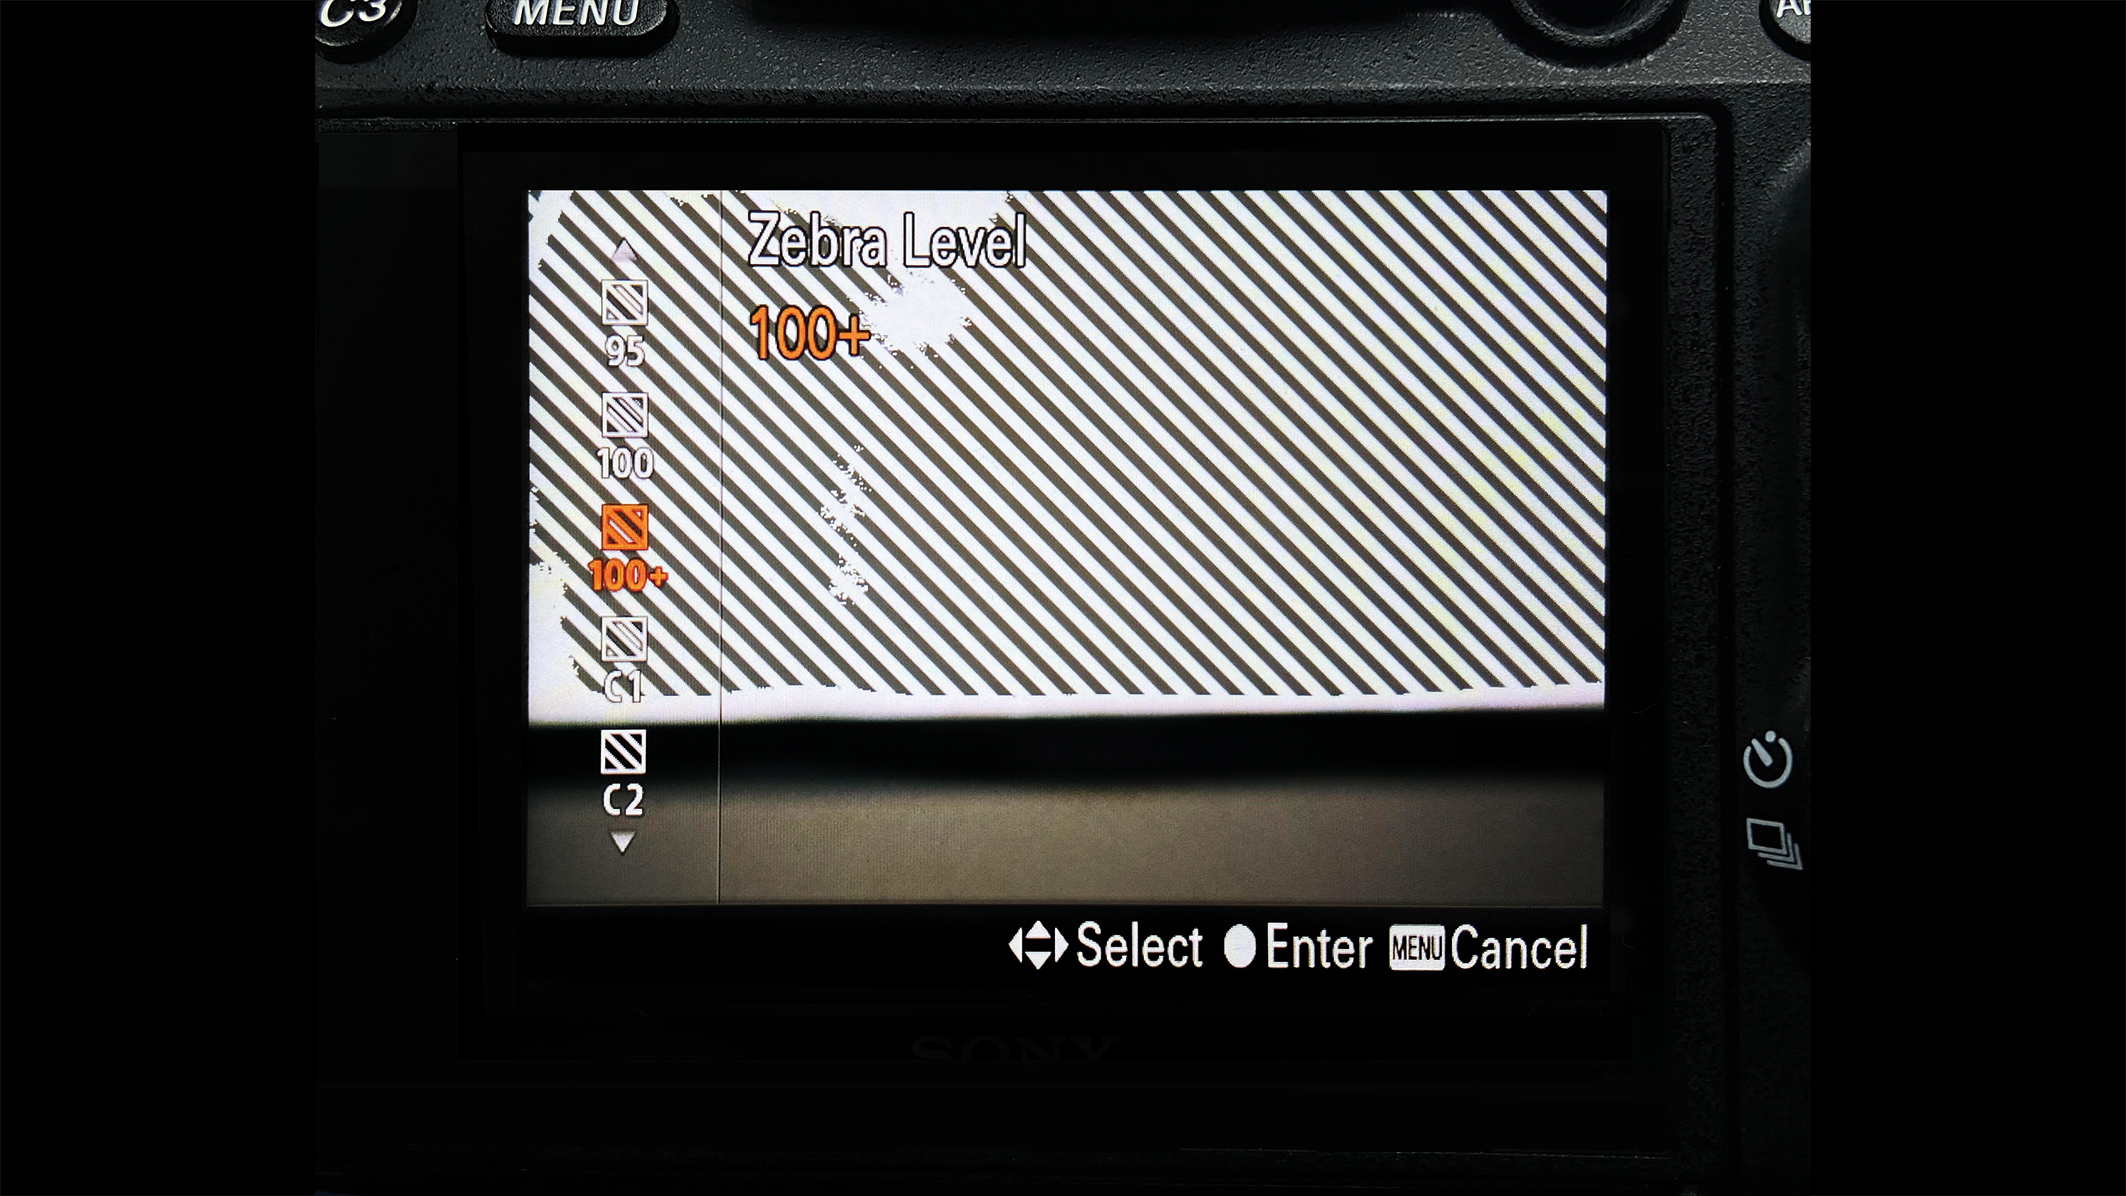
4. Enable highlight warning
The Zebra Pattern can be found in most camera menus. This feature superimposes stripes onto an image to indicate areas that are most at risk of overexposure.
5. Shortcut zoom
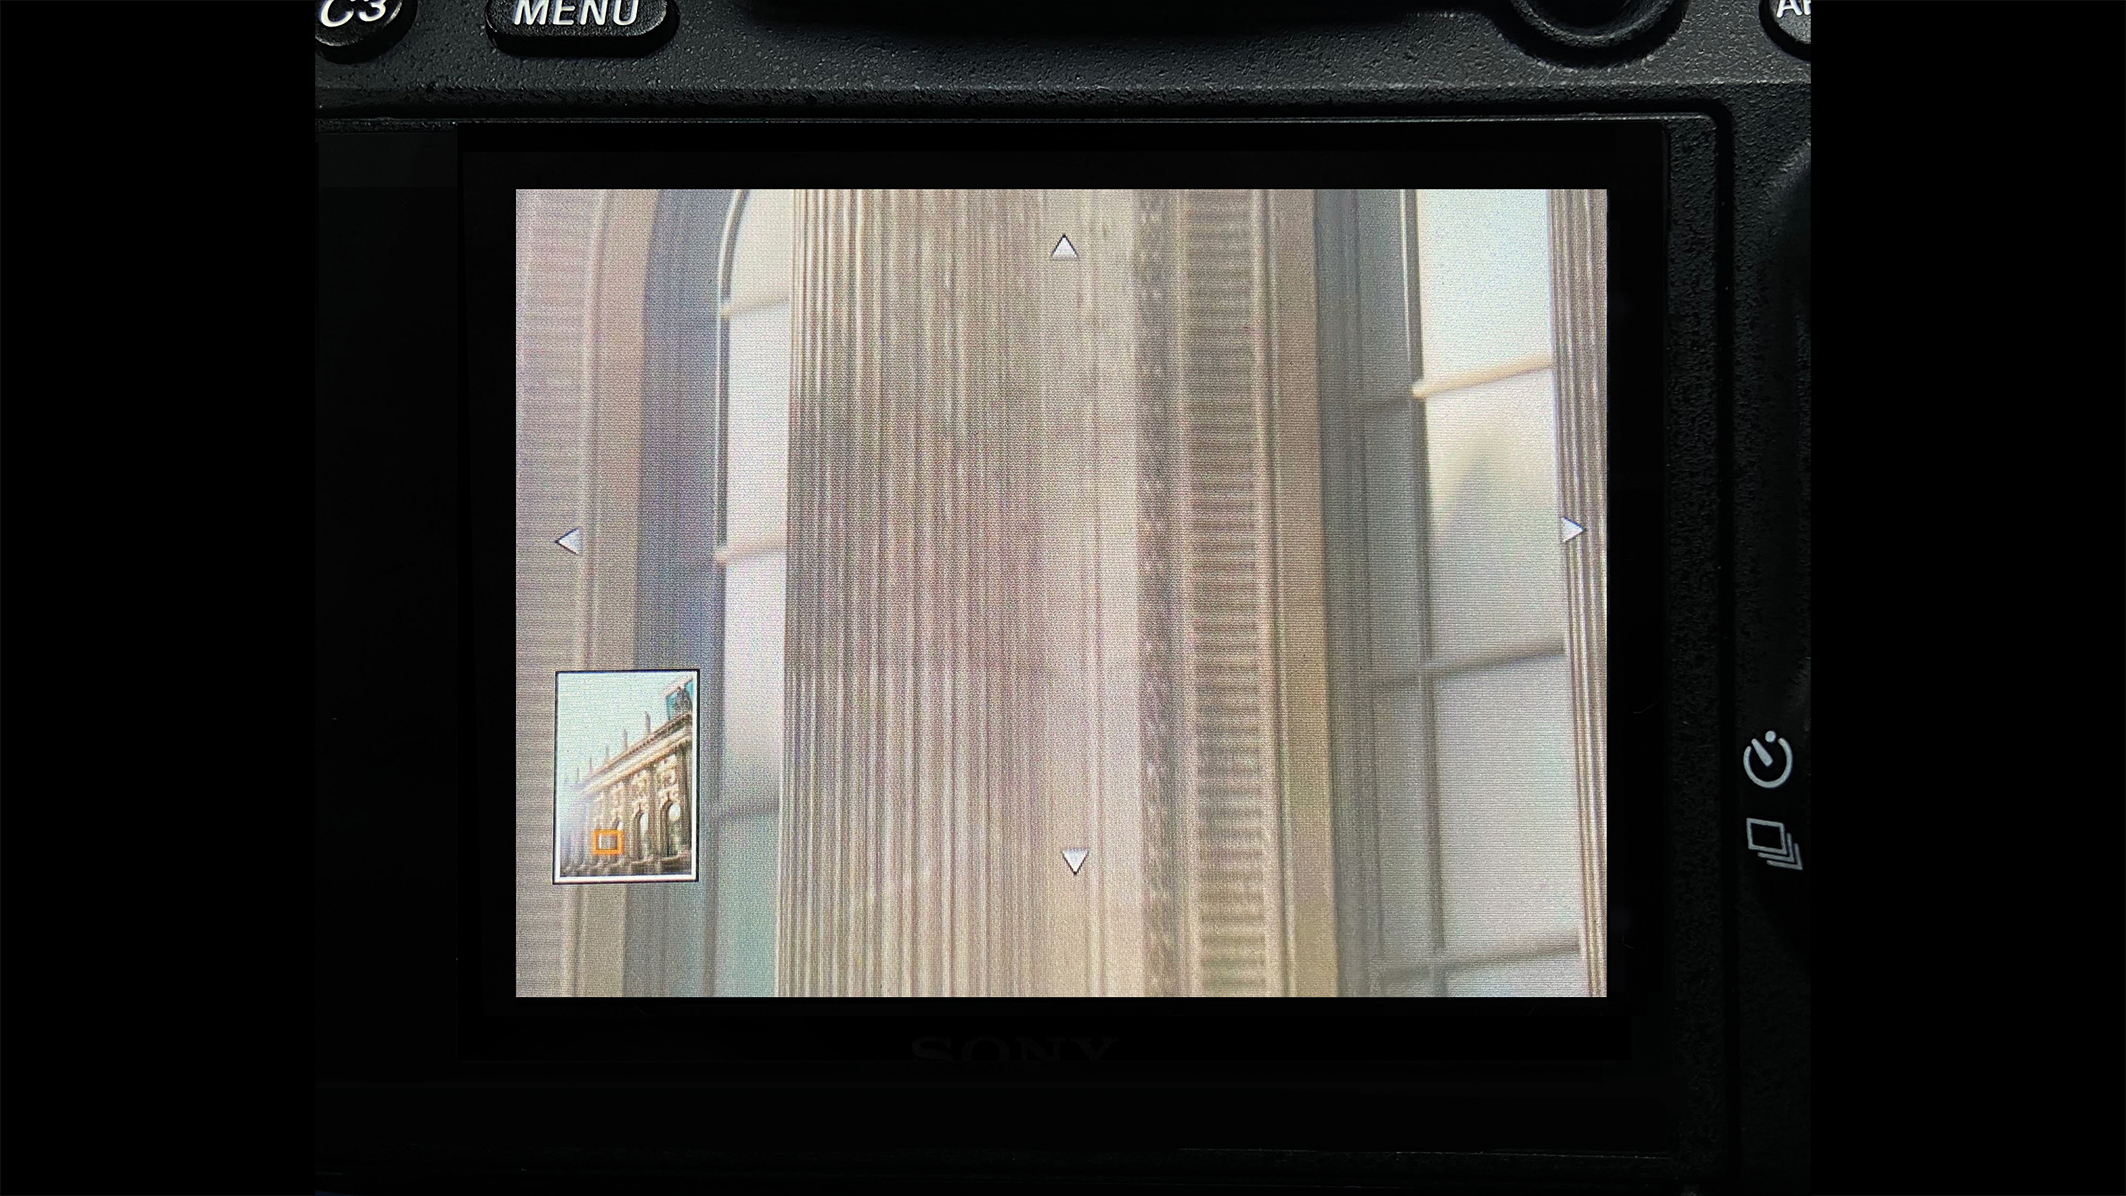
Set the zoom button to jump automatically to 100 percent magnification with just one click. This will enable you to immediately keep an eye on the sharpness, detail and noise levels.
The best camera deals, reviews, product advice, and unmissable photography news, direct to your inbox!
You might like...
Discover more tutorials:
- Ditch your tripod – try handheld HDR instead!
- Long exposure flash photography can give you mind blowing results
- How to remove distracting elements with long exposures

Kim is a photographer, editor and writer with work published internationally. She holds a Master's degree in Photography and Media and was formerly Technique Editor at Digital Photographer, focusing on the art and science of photography. Blending technical expertise with visual insight, Kim explores photography's time-honored yet ever-evolving role in culture. Through her features, tutorials, and gear reviews, she aims to encourage readers to explore the medium more deeply and embrace its full creative potential.
You must confirm your public display name before commenting
Please logout and then login again, you will then be prompted to enter your display name.
