Digital Camera World Verdict
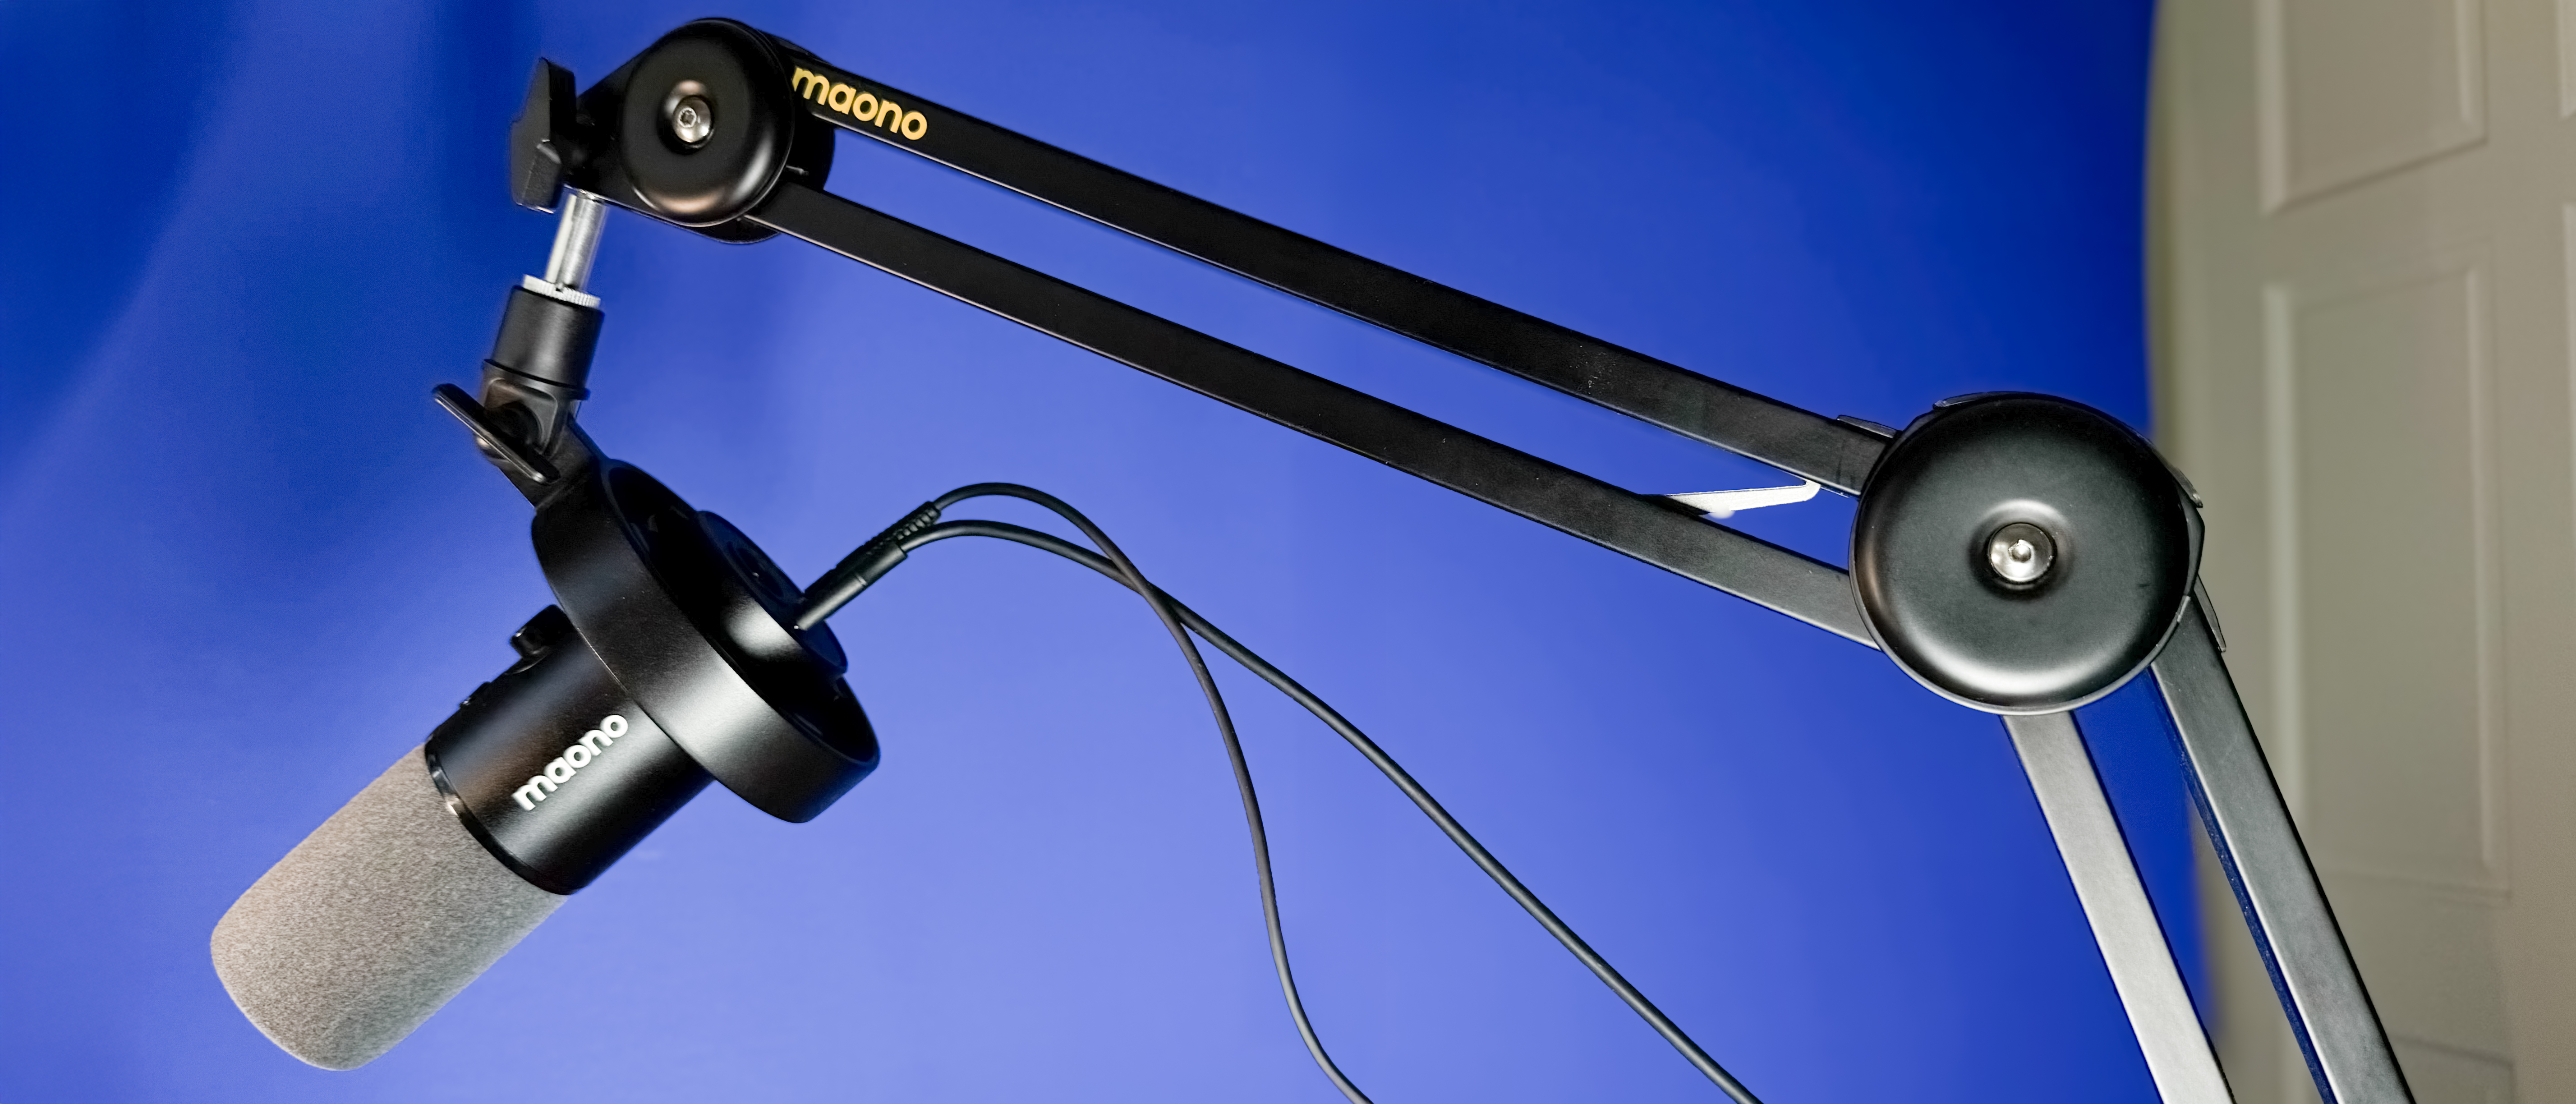
I was highly impressed by the intimate quality of the close-mic audio captured by the Maono PD300X. In fact, I’ve recently used it to record the voice-overs for a range of Digital Camera World video reviews. By working with the PD300X attached via the Maono BA37 Boom Arm to my office desk, I feel more organised and professional than I did when sitting on the sofa recording directly into my MacBook Air’s built-in mics. Plus, the audio quality captured by the Maono is sharper and clearer than the slightly muffled and ‘roomy’ sound captured via my MacBook’s mics. I believe this will be my ‘go-to ’ mic for many future voice-overs.
Pros
- +
Excellent quality 24-bit audio
- +
Physical level control knob
- +
XLR and USB-C connectivity
Cons
- -
Short boom
- -
Cable handling noise
Why you can trust Digital Camera World
I’ve worked as a sound recordist since the late 80s, so I am familiar with a wide range of the best microphone types. I’ve used clip-on wireless lapel mics such as the RØDE Wireless Go 3 to walk and talk while presenting to camera, free from the physical constraints of a cable connecting my mic to a video recorder. I’ve also used directional shotgun mics mounted on poles to capture audio for dramas. During a take, my arms would soon get tired (and the mic and pole seemed to get heavier) as I had to keep the shotgun mic pointing at the mouths of the performers at all times to capture good-quality audio.
When recording voice-overs for product reviews, I’ve favoured a desktop mic such as the Blue Yeti. This directional mic has a built-in stand and sits on my desktop, transferring my voice directly to a PC video-recording app via a USB connection.
In the past year, I’ve even relied on recording my Digital Camera World review voice-overs directly via my MacBook Air’s built-in mic as the audio quality was adequate and I could capture a voice-over from my living room sofa! Thanks to posture-induced backache, I’m back at my home office desk to test the Maono PD300X, which, as you’ll hear from my supporting video, captures superior sound to my MacBook’s built-in mics.
The Maono has a similar spec to a desktop Yeti, both of which have a cardioid (heart-shaped) polar pattern that listens to your voice from the front of the mic while ignoring sound like a PC fan from behind it. The Maono also mounts on an adjustable boom arm so, like the old pole-mounted shot-gun mics I used to build my bicep muscles, you can get the mic closer to your mouth without it appearing in the top of the frame (and without suffering any arm ache!).

Maono PD300X: Specifications
Connector Type | USB, USB Type-C, XLR |
Polar Pattern | Cardiod |
Element Type | Dynamic |
Bit Depth/Sample Rate | 24bit/192kHz |
Sensitivity | XLR:-52dBV USB:-10.5dBFS/Pa(Max) |
Max.SPL | >130dB SPL |
Adjustable Gain Range | 0 to+42dB |
Frequency Response | 40Hz-16kHz |
Maono PD300X: Price
On the official Maono site, you can purchase the Maono PD300X on its own for $109.99. You could mount the Maono on a third-party desktop mic stand courtesy of its 5/8"to 3/8" thread adapter, but to enjoy more mic-positioning versatility and control, I’d recommend paying the $164.99 to bundle the Maono with the adjustable BA37 Boom Arm. Or for $129.99, you can buy the Maono with a desktop stand, but the mic looks much cooler when mounted on the boom arm and that should appeal to video makers who want to show off their audio gear in YouTube videos (though you can, of course, place the mic out of shot and still get great quality audio!).
You can get directional mics on a boom arm for a cheaper outlay, but if audio quality is important to you and you want to show off a pro mic in your channel’s feed, then the Maono PD300X is worth its price.
Maono PD300X: Design & Handling
The Maono PD300X ships in a surprisingly small branded box that’s adorned with a Made for iPhone, iPad, and iPod badge. After I plugged it into my MacBook Air via the supplied USB-C to USB-C cable, it did indeed work straight out of the box. As a Mac user, I appreciated this ‘plug-and-play’ design, though from perusing its User Manual, it should also work the same way when plugged into a PC’s USB-C slot. The USB-C cable also powers the mic when it’s plugged into your PC.
The best camera deals, reviews, product advice, and unmissable photography news, direct to your inbox!
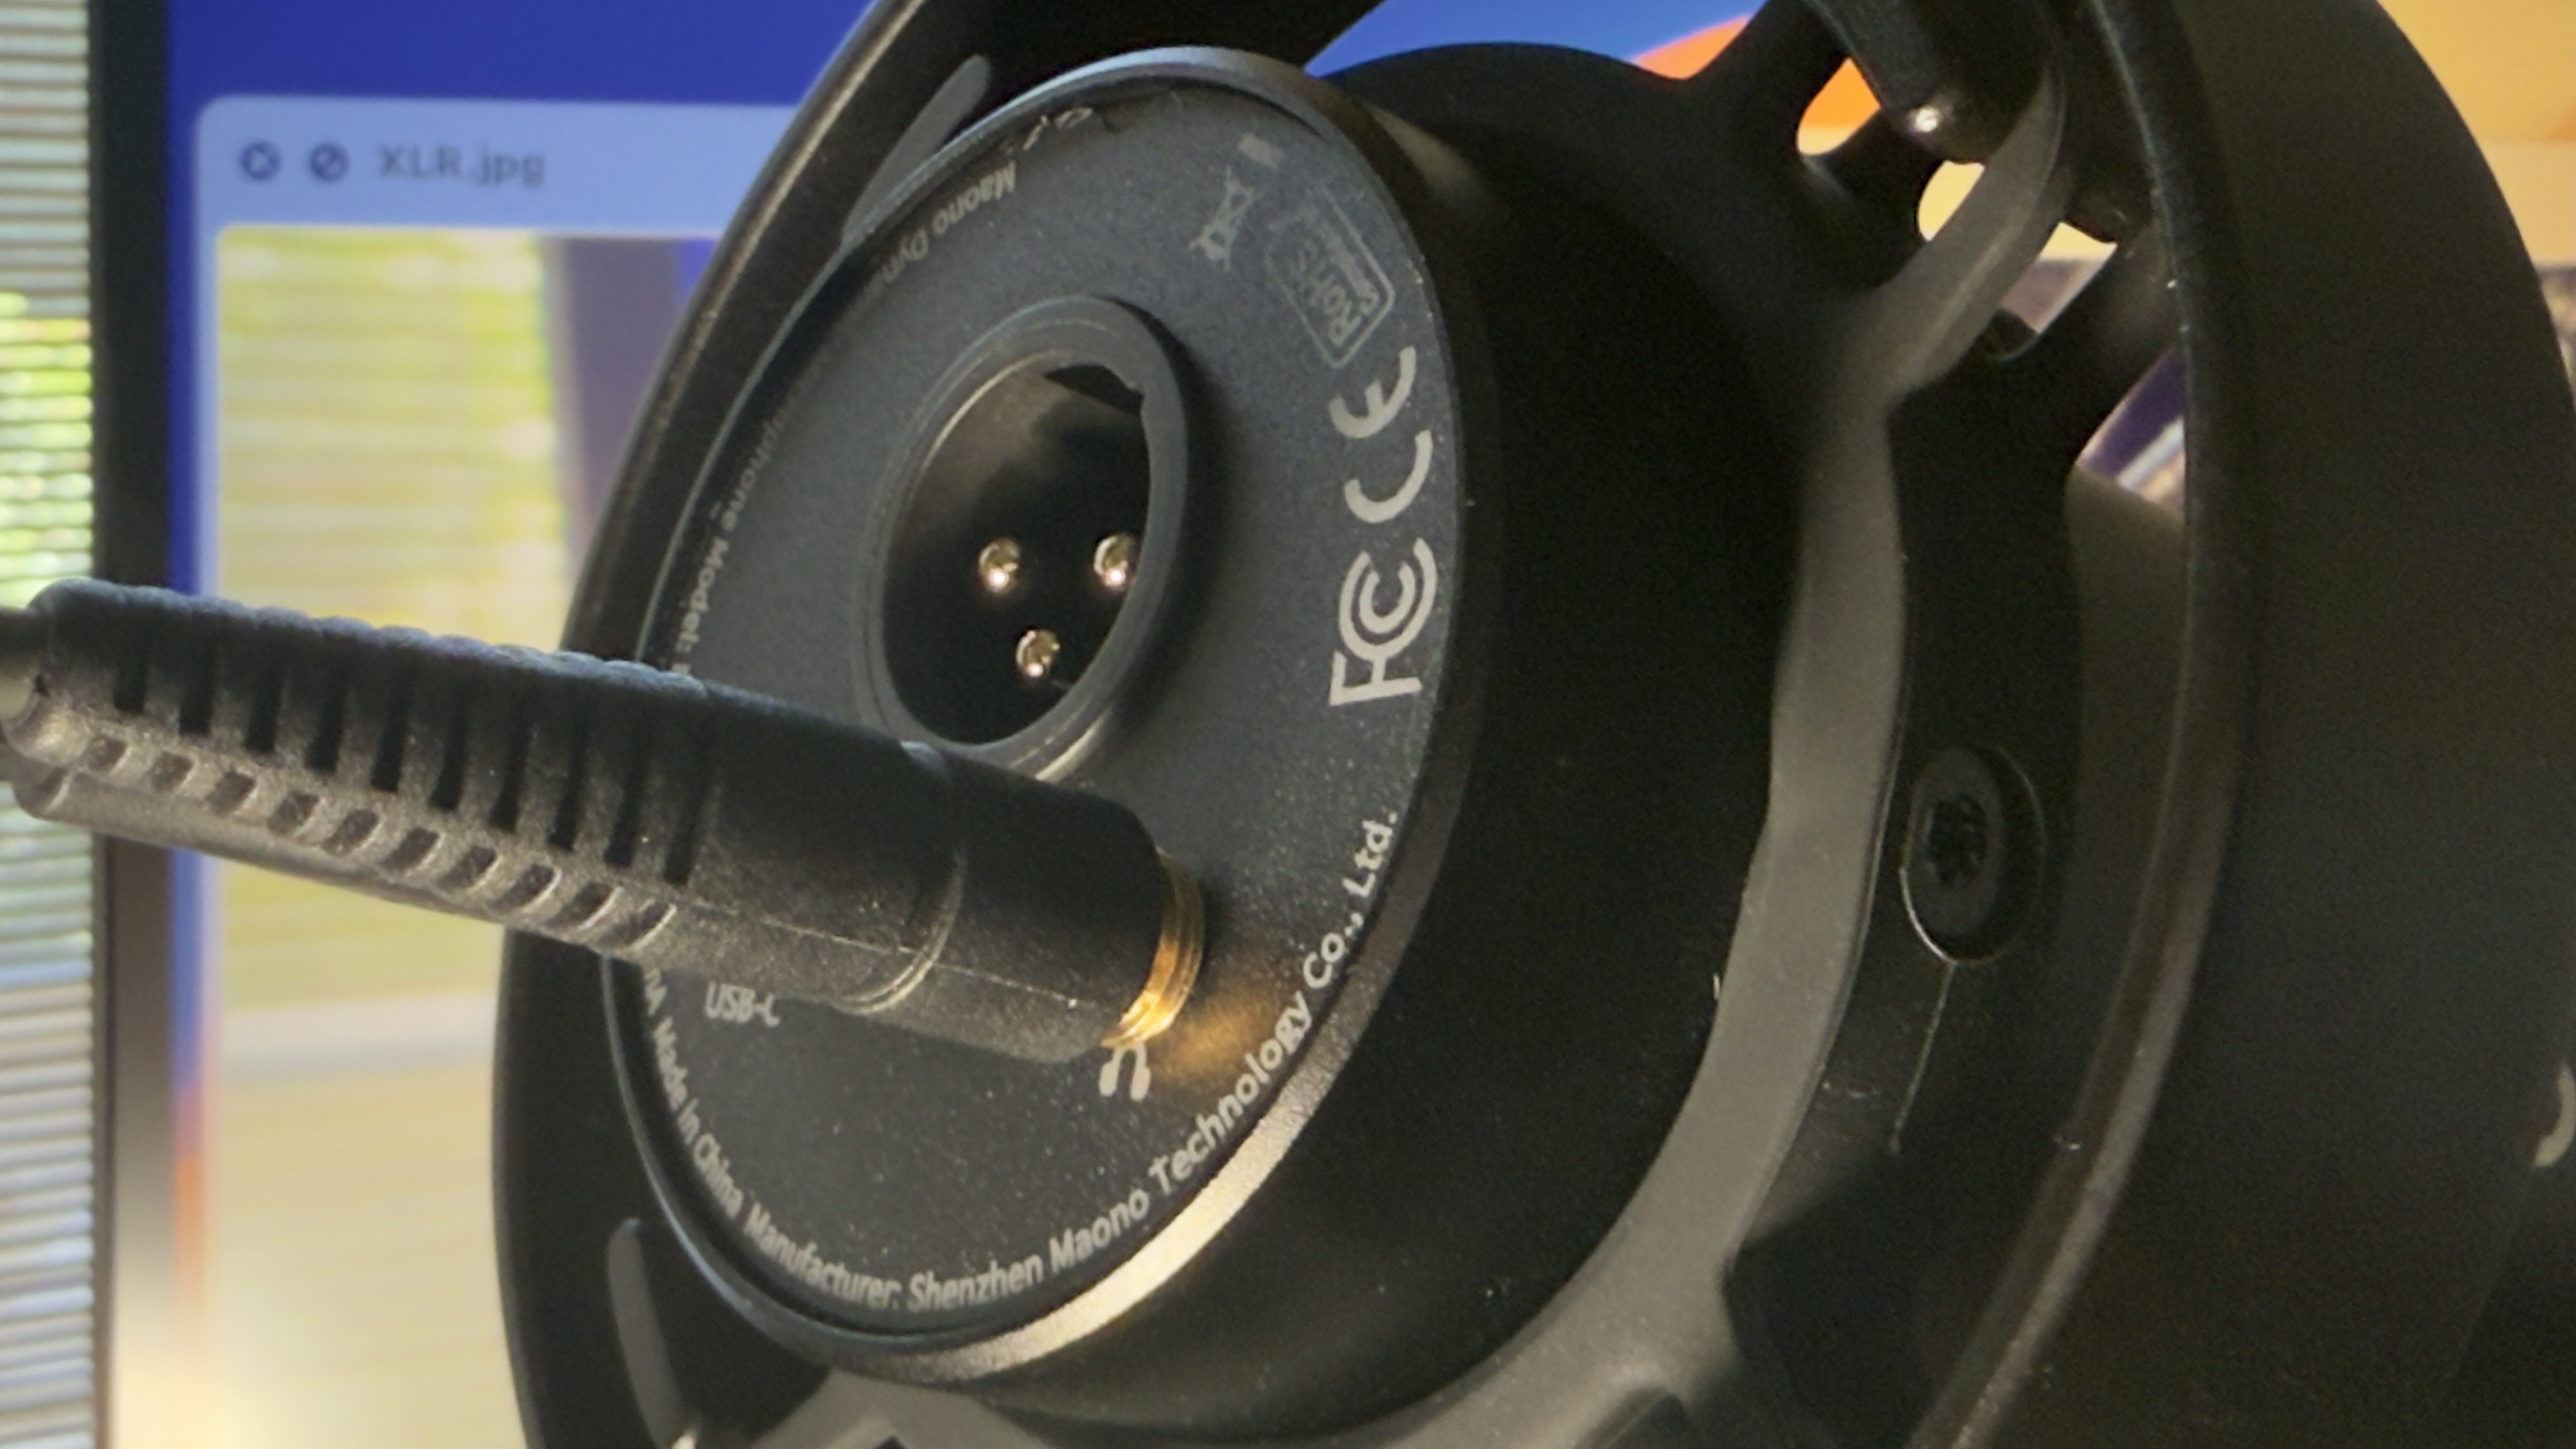
The supplied USB-C cable has a handy adapter at one end, so you can attach the mic via USB-C or via a larger USB-A plug. As well as a USB-C socket, the rear of the mic boasts a male XLR socket. This gives professional sound recordists the option of plugging an XLR to XLR cable into the mic and connecting it to a mixing desk. This pro pedigree XLR specification also enables you to capture better quality audio than you could when connecting via USB-C, though, as you’ll hear from my test video, the USB-C connection still produces impressive audio quality.
Circling back to that small box the mic shipped in, the PD300X mic itself is very compact. It was slightly shorter than my handspan, though its girth was slightly wider than my thumb-to-finger grip. Unlike cheaper plastic-bodied mics such as the Joby Wavo POD, the Maono PD300X has a metal body as befits a pro mic. Slide off the foam pop-shield and you’ll find the microphone capsule itself, protected by a dense metal mesh.
Mics that are attached to a boom that’s attached to the edge of your desk are prone to suffering from handling noise. If you drum or tap your fingers on the desk, then vibrations can travel up the boom and add a take-ruining bass rumble to your audio recording or live-stream feed. The PD300X ships in a shock mount that’s designed to reduce handling noise. This is a circular rubber cradle that suspends the mic in the metal ring that’s attached to the boom arm. The rubber is designed to absorb and dissipate noise-inducing vibrations.
However, the shock mount can’t stop handling noise for cables plugged directly into the back of the mic itself. There was a noticeable handling sound when I moved the mic, and the headphone cable rubbed against the USB-C cable. However, this isn’t a big issue as you won’t be moving the mic during a take. Check out our Performance section to see how effective the shock mount is.
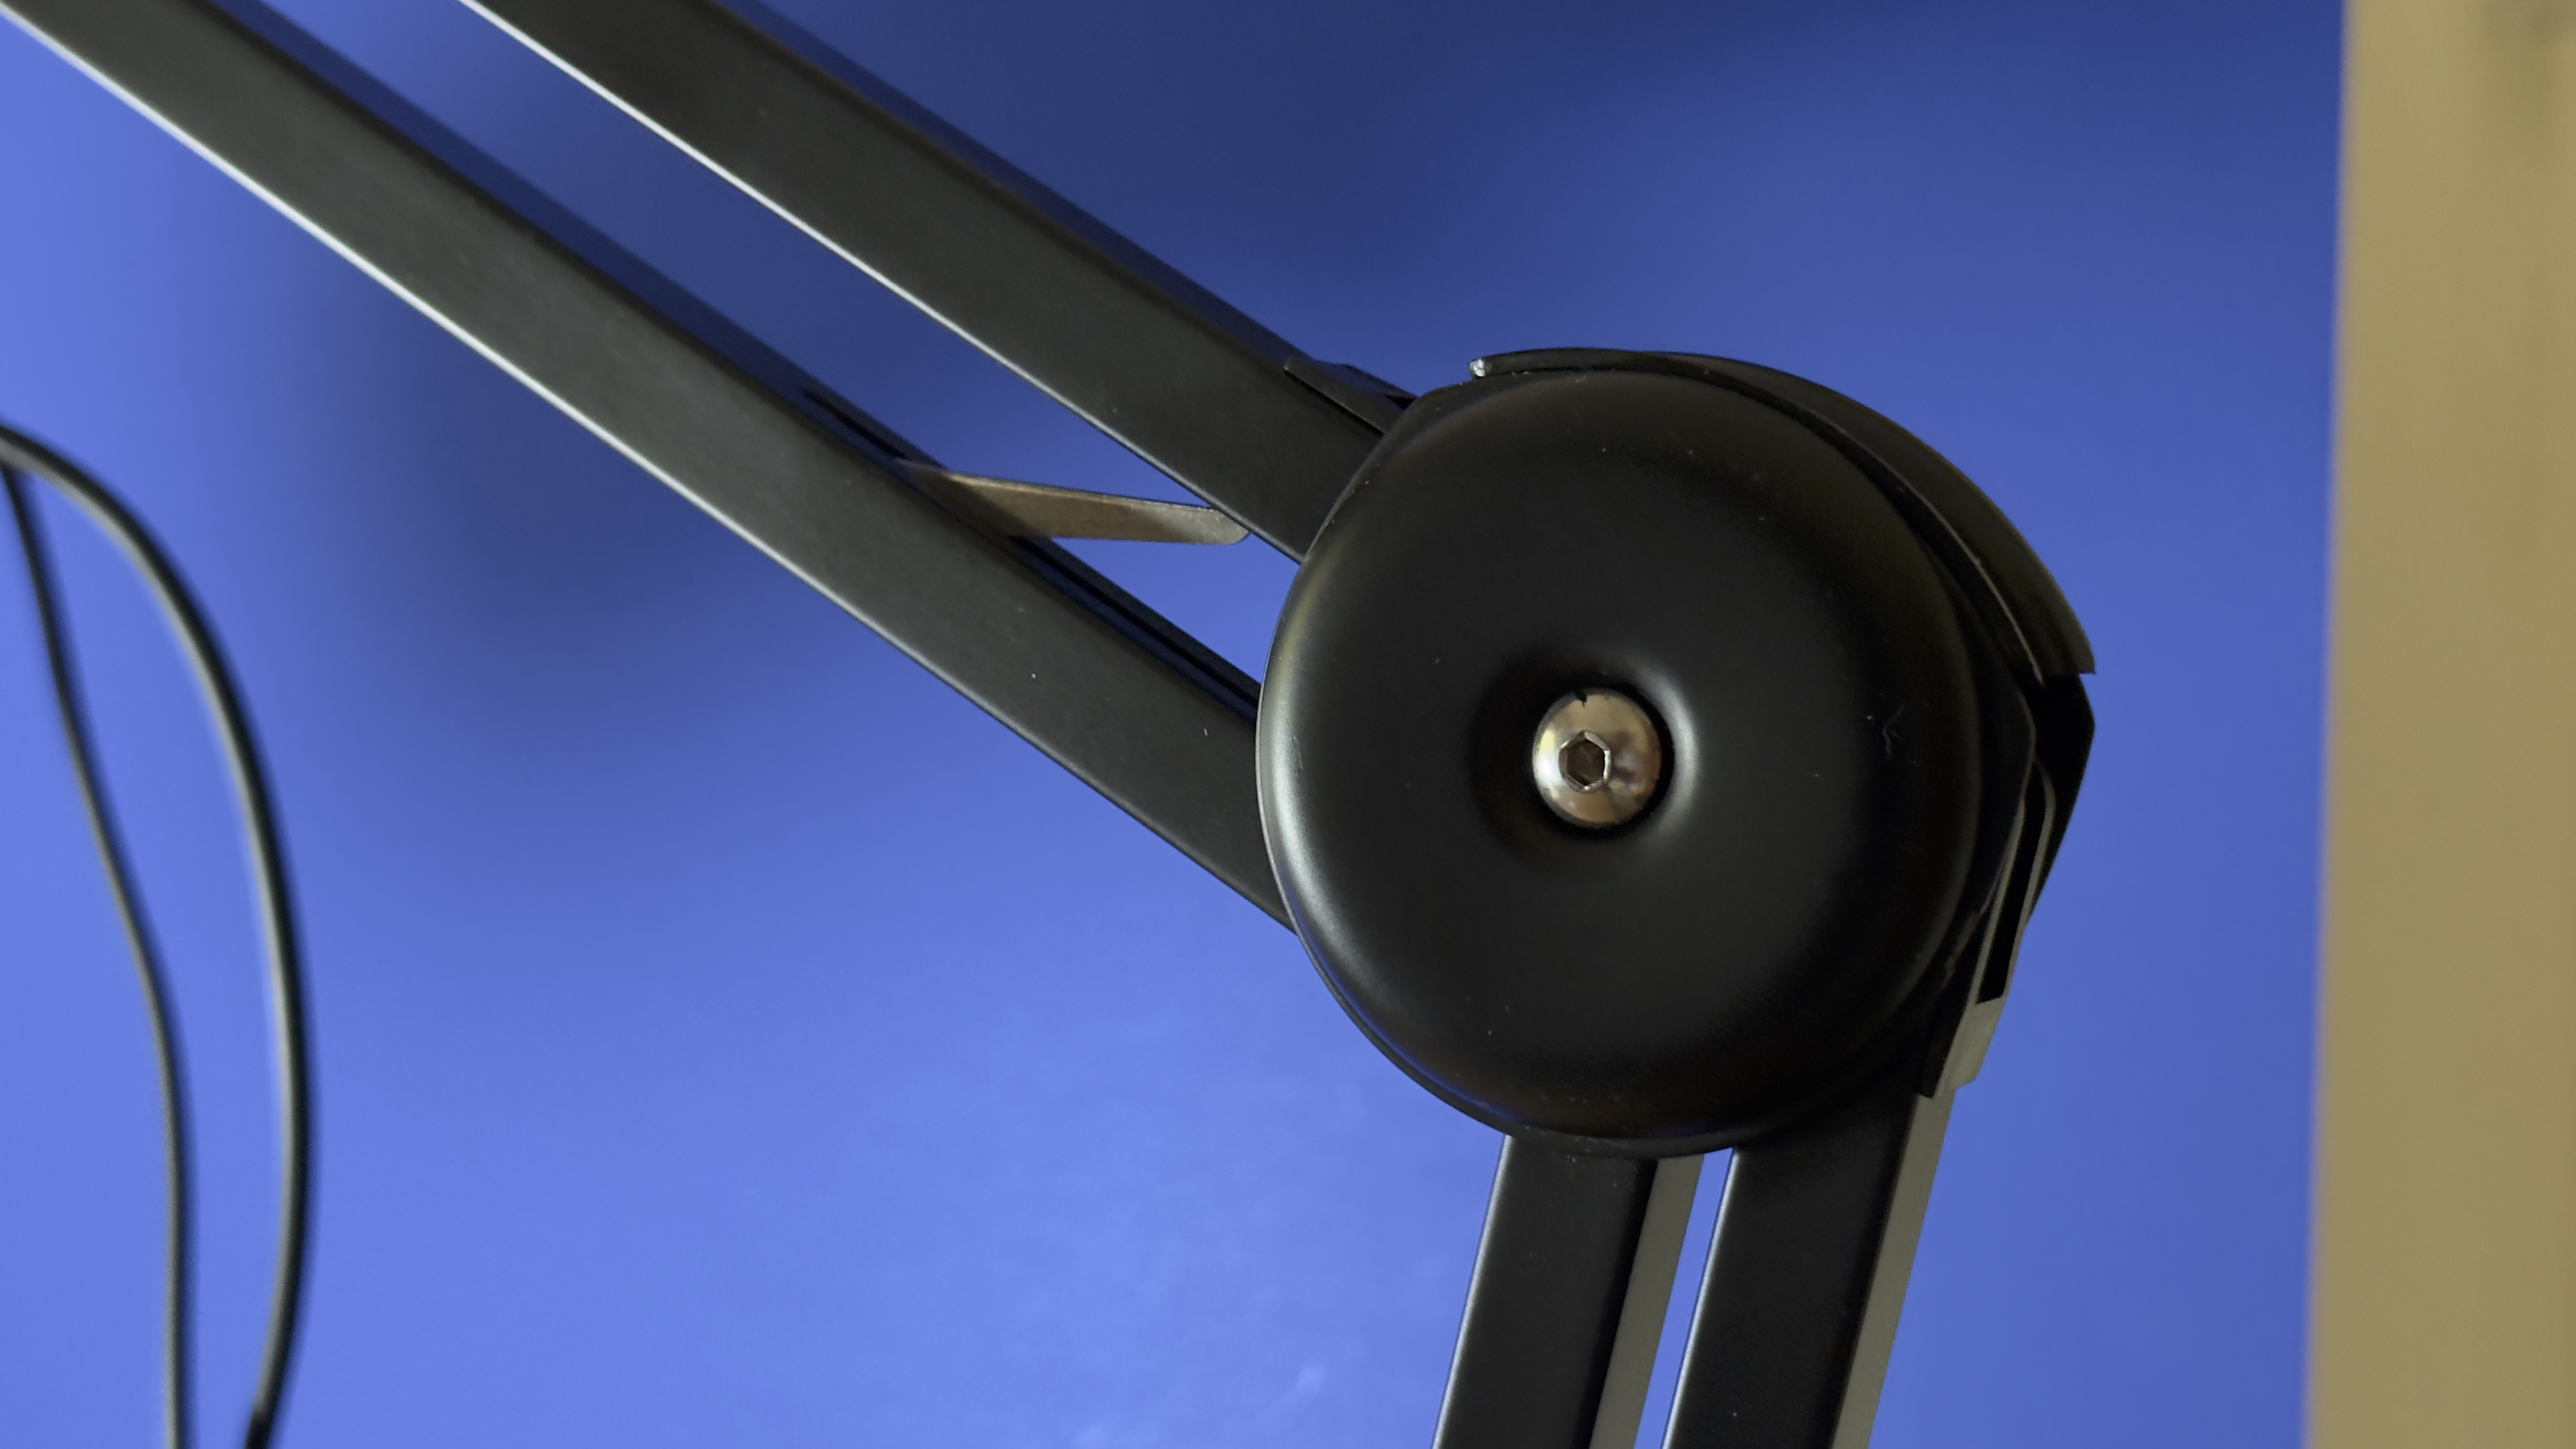
My Maono PD300X review test unit also shipped with the Maono BA37 Boom Arm. Clamping the base of the boom arm to my office desk was a simple operation. I turned a silver handle to rotate a threaded screw, ensuring a tight clamp. I then slotted the boom arm into the clamped base and rotated another handle to keep the boom arm securely in place. I then attached the mic to the boom via a thread on the shock mount ring. The boom has three hinges that enable you to raise the mic up or stretch it forwards so that you can ensure that it’s pointing directly at your mouth from a low or high angle.
Traditionally, the separate sections of a boom arm have springs that help it stay in place as you adjust the mic’s position. The Maono BA37 Boom Arm didn’t have any visible springs, but it took a little effort to articulate it, and it stayed in the desired position at all times, so there’s no danger of the mic dropping or drifting during a take.
On the downside, the boom is a little short. Stretched to its full height, it measures approx 26”. When the mic is angled to point at your mouth, this drops it by 7”, so the tip of the mic is only 19” above your desktop. This is high enough if you want the mic to be out of sight as you chat to the webcam of a laptop, but if you’re using a larger PC, such as a 27” iMac, then the mic will probably be visible near the top of the frame. However, this isn’t a problem if you want to show off the fact that you have a studio-quality boom mic in your YouTube channel broadcasts, though it might be overkill to see a boom mic in a Zoom chat with family or colleagues.
Maono PD300X: Performance
To truly appreciate the audio quality of the Maono PD300X, 24-bit Bit Depth and 192 kHz sample rate, play this review’s supporting video. When recording my voice via the Maono, it sounded crisp and clear, with a nice level of bass on the default EQ settings. I then unplugged the Maono to compare its audio quality with the sound captured by my MacBook Air’s built-in mics.
The quality of the audio captured by my MacBook’s built-in mic sounded more muffled in comparison to the Maono, and there was a more boomy quality to the Mac’s audio due to sound bouncing from the walls. The Maono avoided ambient room noise thanks to its cardioid polar pattern, so it only listened to a narrower field of audio when pointed directly at my mouth. Thanks to the adjustable boom arm, the Maono was physically closer to my mouth than a desk stand-mounted mic, so it gave my voice a close-mic quality reminiscent of late-night radio presenters.
This intimate audio quality will help you get closer to your audience, though on the downside, you can occasionally hear ‘glossops’. This is not a standard industry term, but one employer I worked with used ‘glossop’ to describe slimy, sibilant sounds caused by swallowing, lip-smacking, and general mouth and throat noises that you might need to trim from a voice-over after talking very close to a mic. Thanks to the foam pop shield, none of my plosive sounds (such as those you get when you say words beginning with B or P) turned into audible ‘pops!’
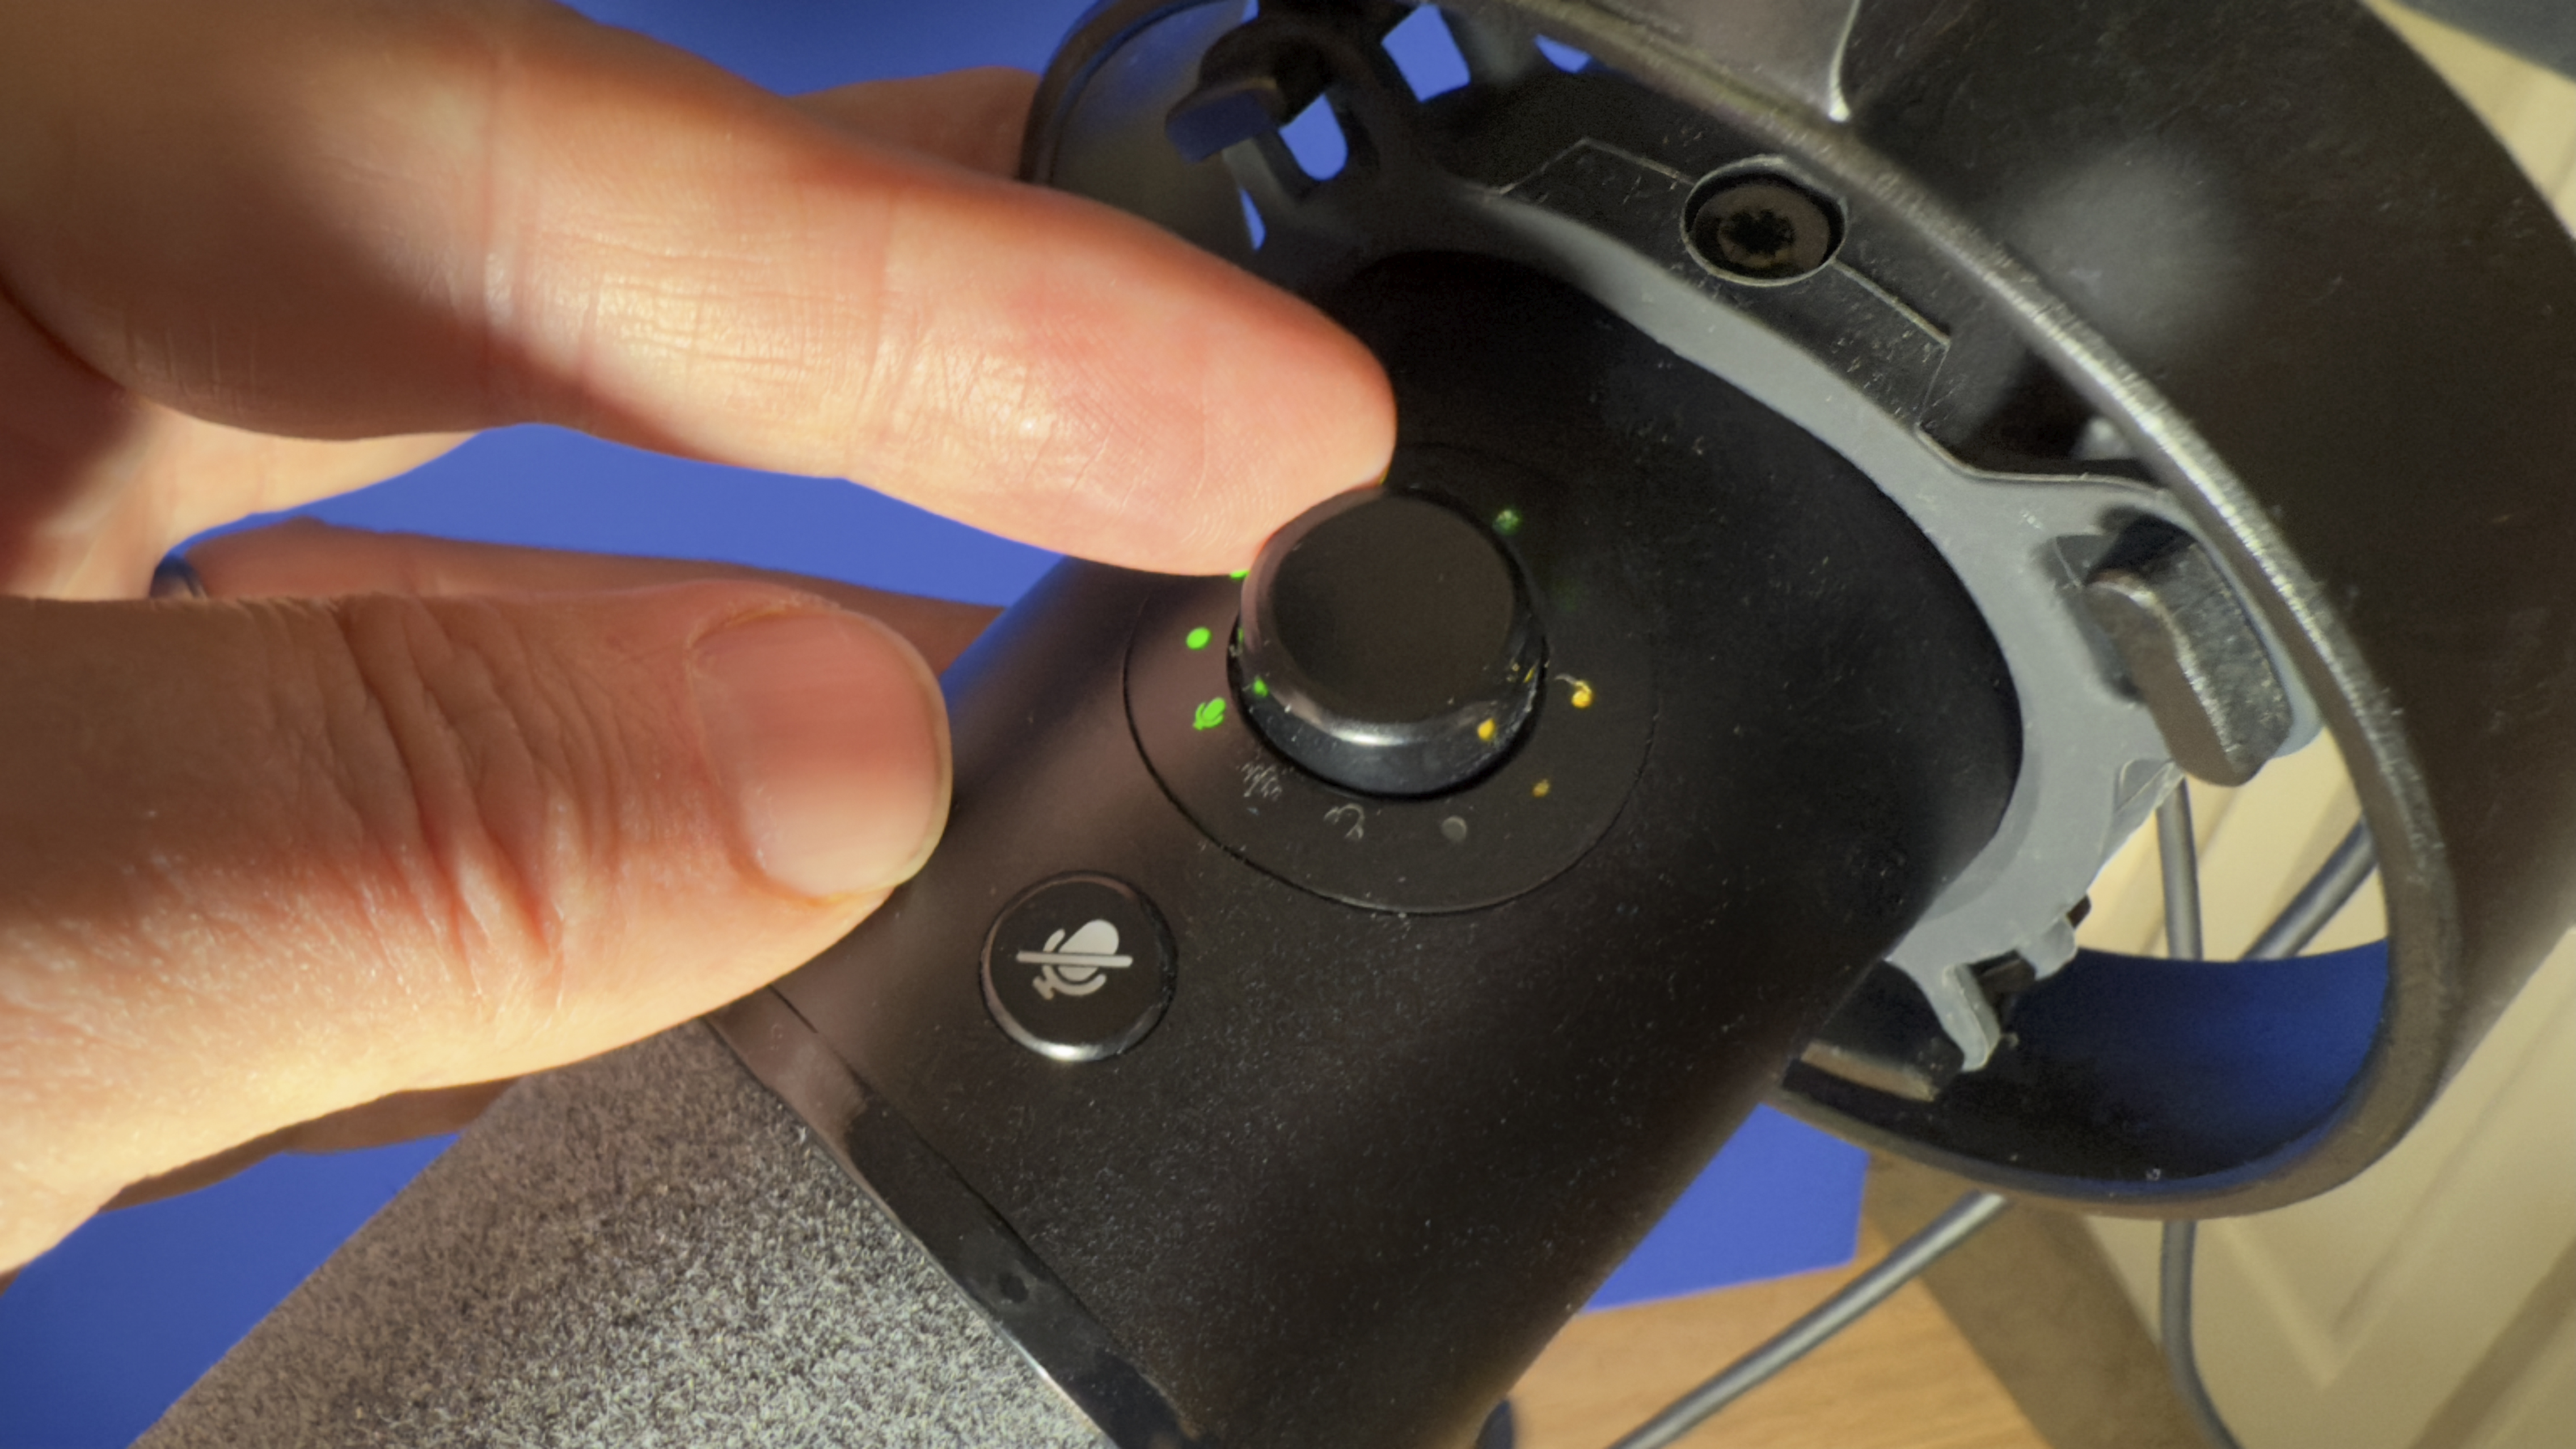
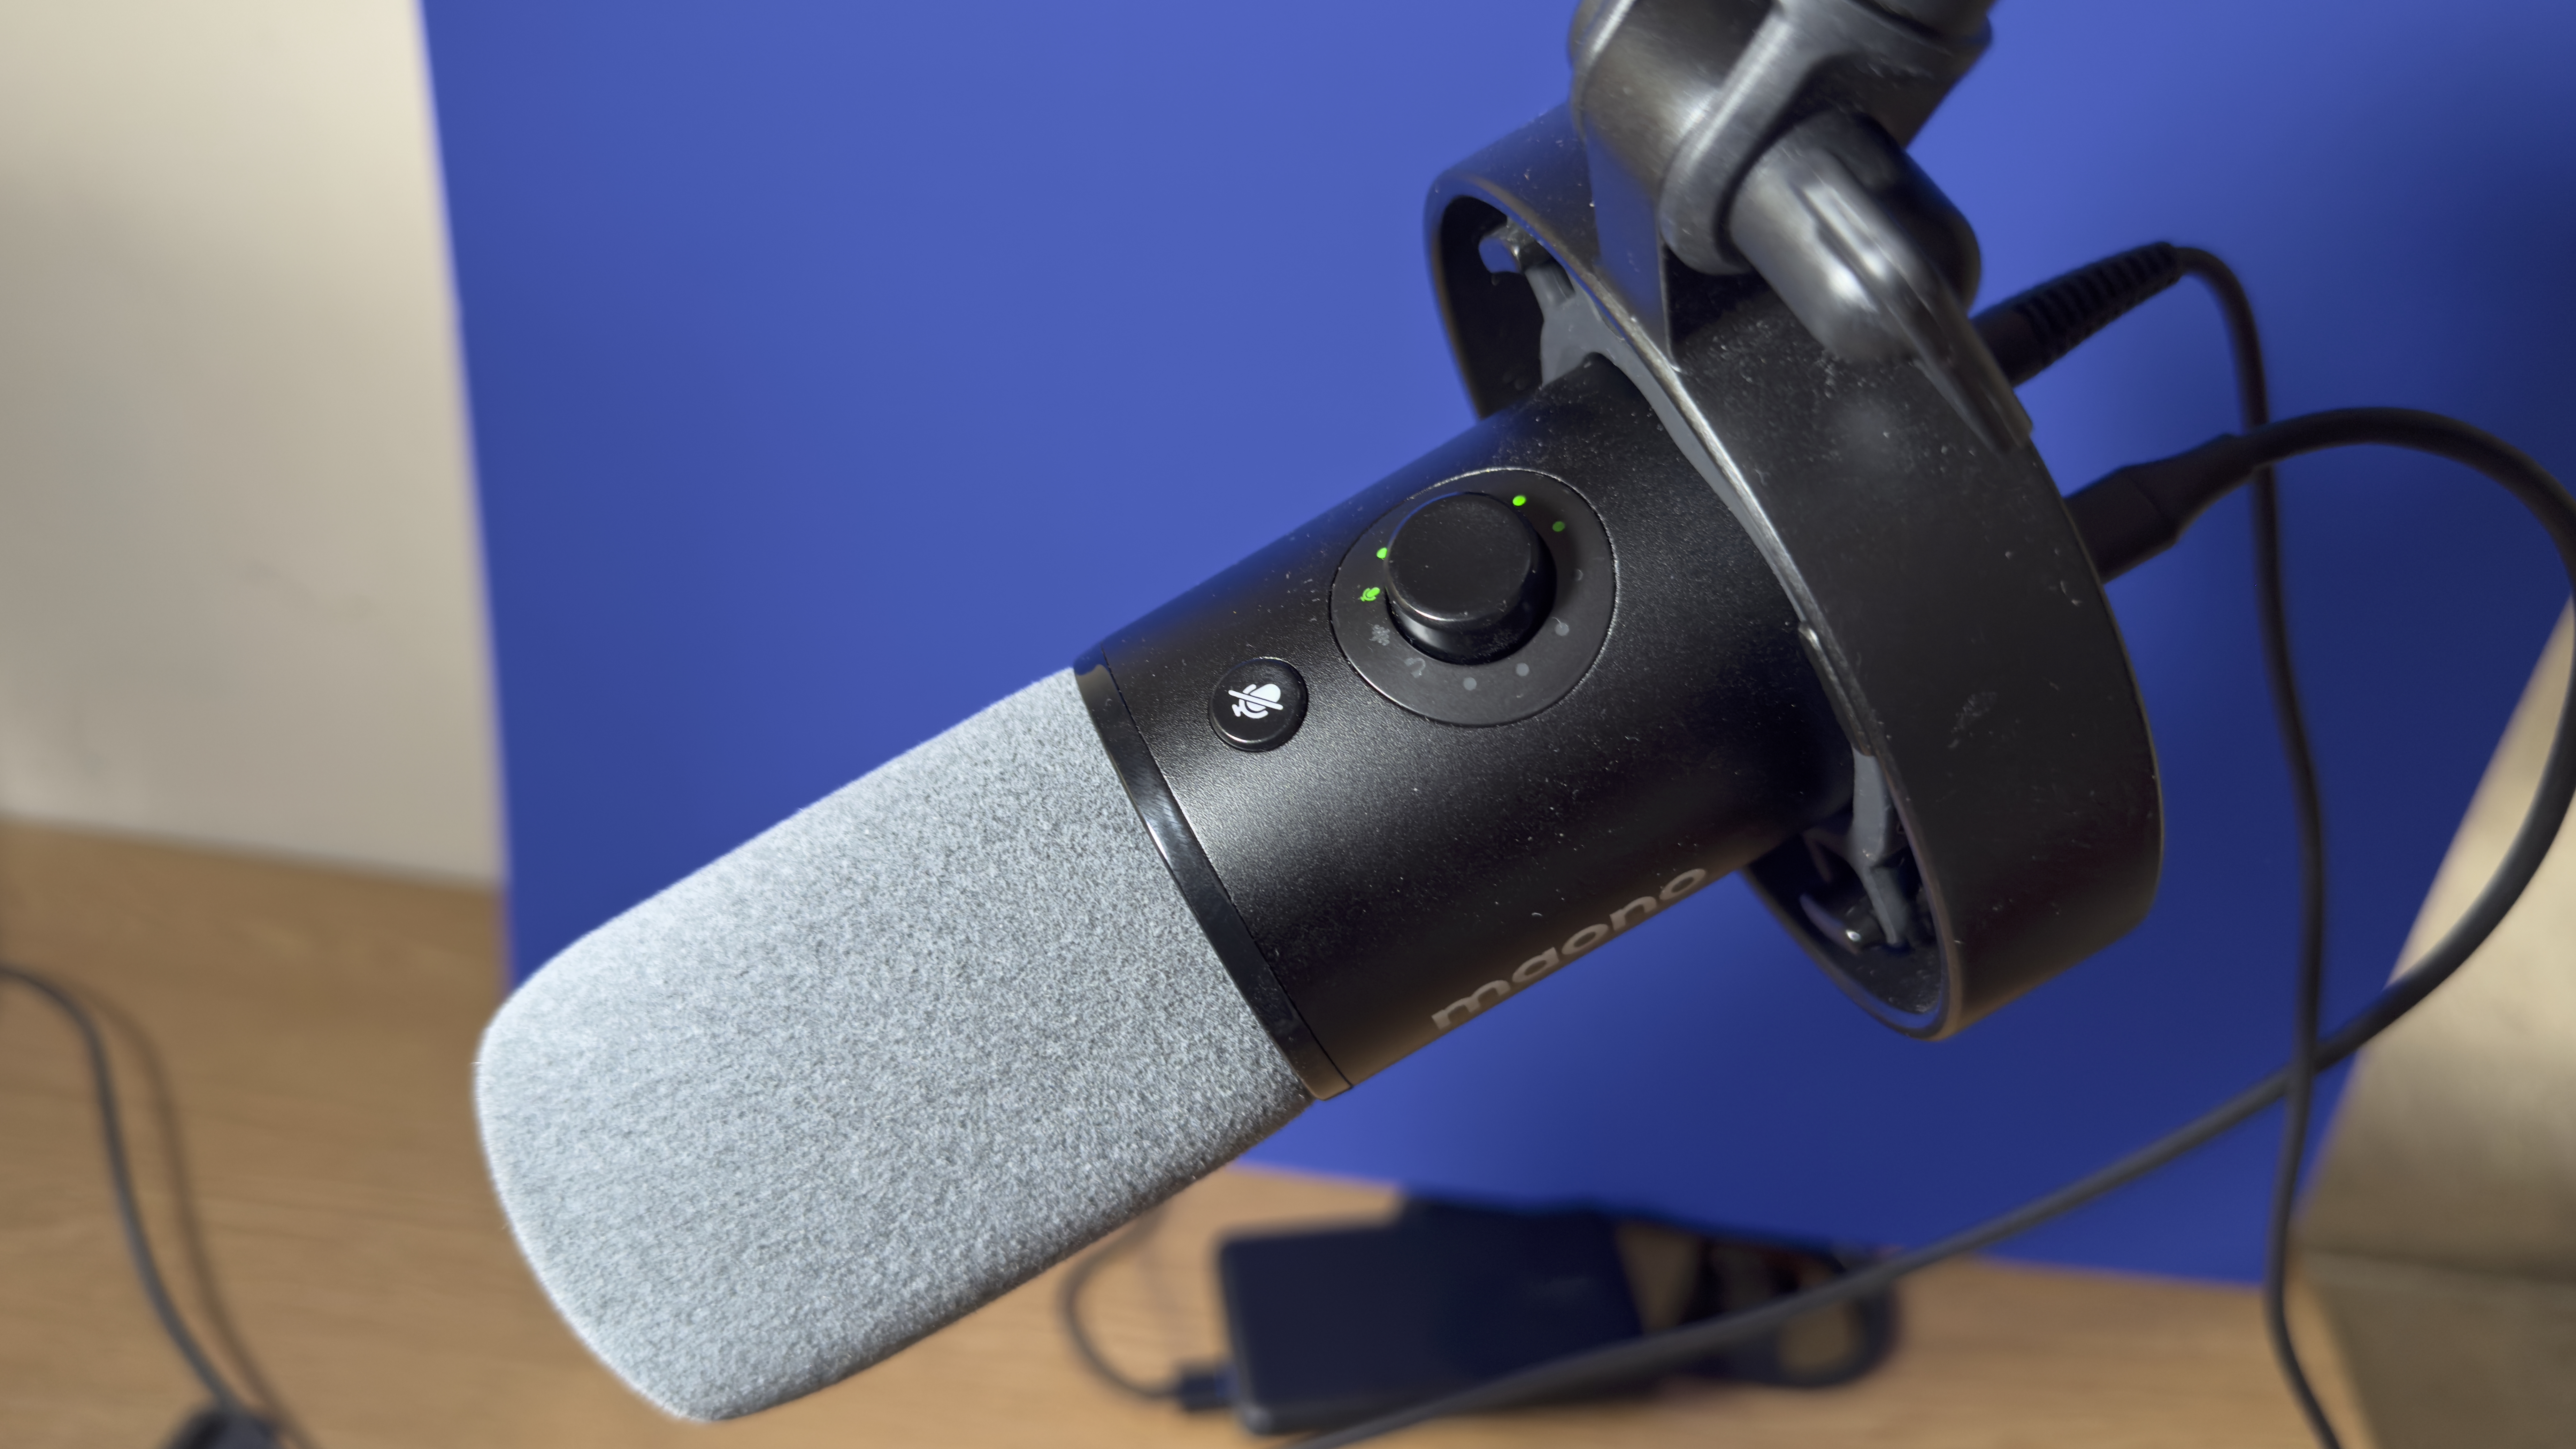
One feature I really liked was the tactile control knob on the Maono’s shaft. By rotating this knob, you can adjust audio input levels. Green level indicator lights that circle the knob indicate the strength of your voice, and they turn yellow (or red) if your sound level is in danger of peaking too high. You can also press the knob to toggle between adjusting input levels and headphone monitoring volume (and headphones can be plugged firstly into the rear of the mic).
On the downside, the control knob will add handling noise when you press or rotate it because it’s on the mic itself, so it doesn’t benefit from the protection of the shock mount. The shock mount did do a better job of reducing noise-induced vibration when I tapped the desk that the boom arm was attached to.
The audio in my supporting test video comes directly from the Maono’s default EQ settings. I didn’t tweak any EQ for the Maono’s audio recording or for my Mac’s comparison built-in mic. However, you can use the free Maono Link app to manually adjust EQ for a shaper or bassier sound. It also features one-click presets that configure the Maono’s settings for different Scenes, such as Podcasting, Recording and Gaming. Gaming, for example, might involve a bit of shouting as you chat to friends and followers, as well as quieter levels of audio, so this Scene turns on a limiter to keep noise distortion to a minimum and a compressor to lift the quieter levels of speech. The Maono Link app also enables you to create custom EQ presets and update the firmware of the Maono mic, so it’s well worthwhile downloading it.
Maono PD300X: Verdict
The Maono PD300X mic enables you to make your audio production values match the excellent quality of your HD footage, leading to a more professional-sounding recording. Thanks to the BA37 Boom Arm, you can get the mic closer to your mouth for intimate-sounding audio that will connect with your audience. The boom-mounted mic also looks slick and professional when it features in your footage, though you can of course place it out of shot if you don’t need to show it off! The physical control knob on the body of there mic enables you to tweak the levels and avoid peaking thanks to the ring of coloured LEDs around it - just don’t tweak the knob while recording or you’ll hear handling noise!
Features ★★★★☆ | The Maono PD300X’s levels/headphone volume adjustment knob is very effective and the BA37 Boom Arm’s shock mount limits unwanted sounds such as fingers tapping on the table |
Design ★★★★☆ | The BA37 Boom Arm is a little shorter than I’d prefer, but the attached Maono PD300X can still be positioned out of shot at the top of the frame. |
Performance ★★★★★ | The Maono PD300X provides clean, full-bodied audio via USB-C. It should sound even better when connected via a pro XLR cable. |
Value ★★★★☆ | The Maono PD300X isn’t the cheapest boom mic on the market but you get what you pay for. |
George has been freelancing as a photo fixing and creative tutorial writer since 2002, working for award winning titles such as Digital Camera, PhotoPlus, N-Photo and Practical Photoshop. He's expert in communicating the ins and outs of Photoshop and Lightroom, as well as producing video production tutorials on Final Cut Pro and iMovie for magazines such as iCreate and Mac Format. He also produces regular and exclusive Photoshop CC tutorials for his YouTube channel.
You must confirm your public display name before commenting
Please logout and then login again, you will then be prompted to enter your display name.
