The best camera deals, reviews, product advice, and unmissable photography news, direct to your inbox!
You are now subscribed
Your newsletter sign-up was successful
Watch video: How to frame your shots in Photoshop Elements
What do you do with your best pictures? For many of us the answer is to upload them to social media, but we shouldn’t forget about printing, as there’s no better feeling than seeing your photos hanging up proudly on the wall at home.
To do your shots justice, though, you’ll want to frame your images to make them look more professional. And we’ve got 10 border templates that you can download for free to really do them justice.
There’s a mixture of portrait and landscape oriented frames and some with clean edges, others with artistic textured edges like ours. All of the frames are Photoshop PSD files that you can pop your images in, and add your own title and your photographer’s credit.
Watch the video lesson above and follow the steps below to see how you can start using them now in Photoshop Elements 2020.
• Read more: 100 Photoshop tips
01 Open your pictures
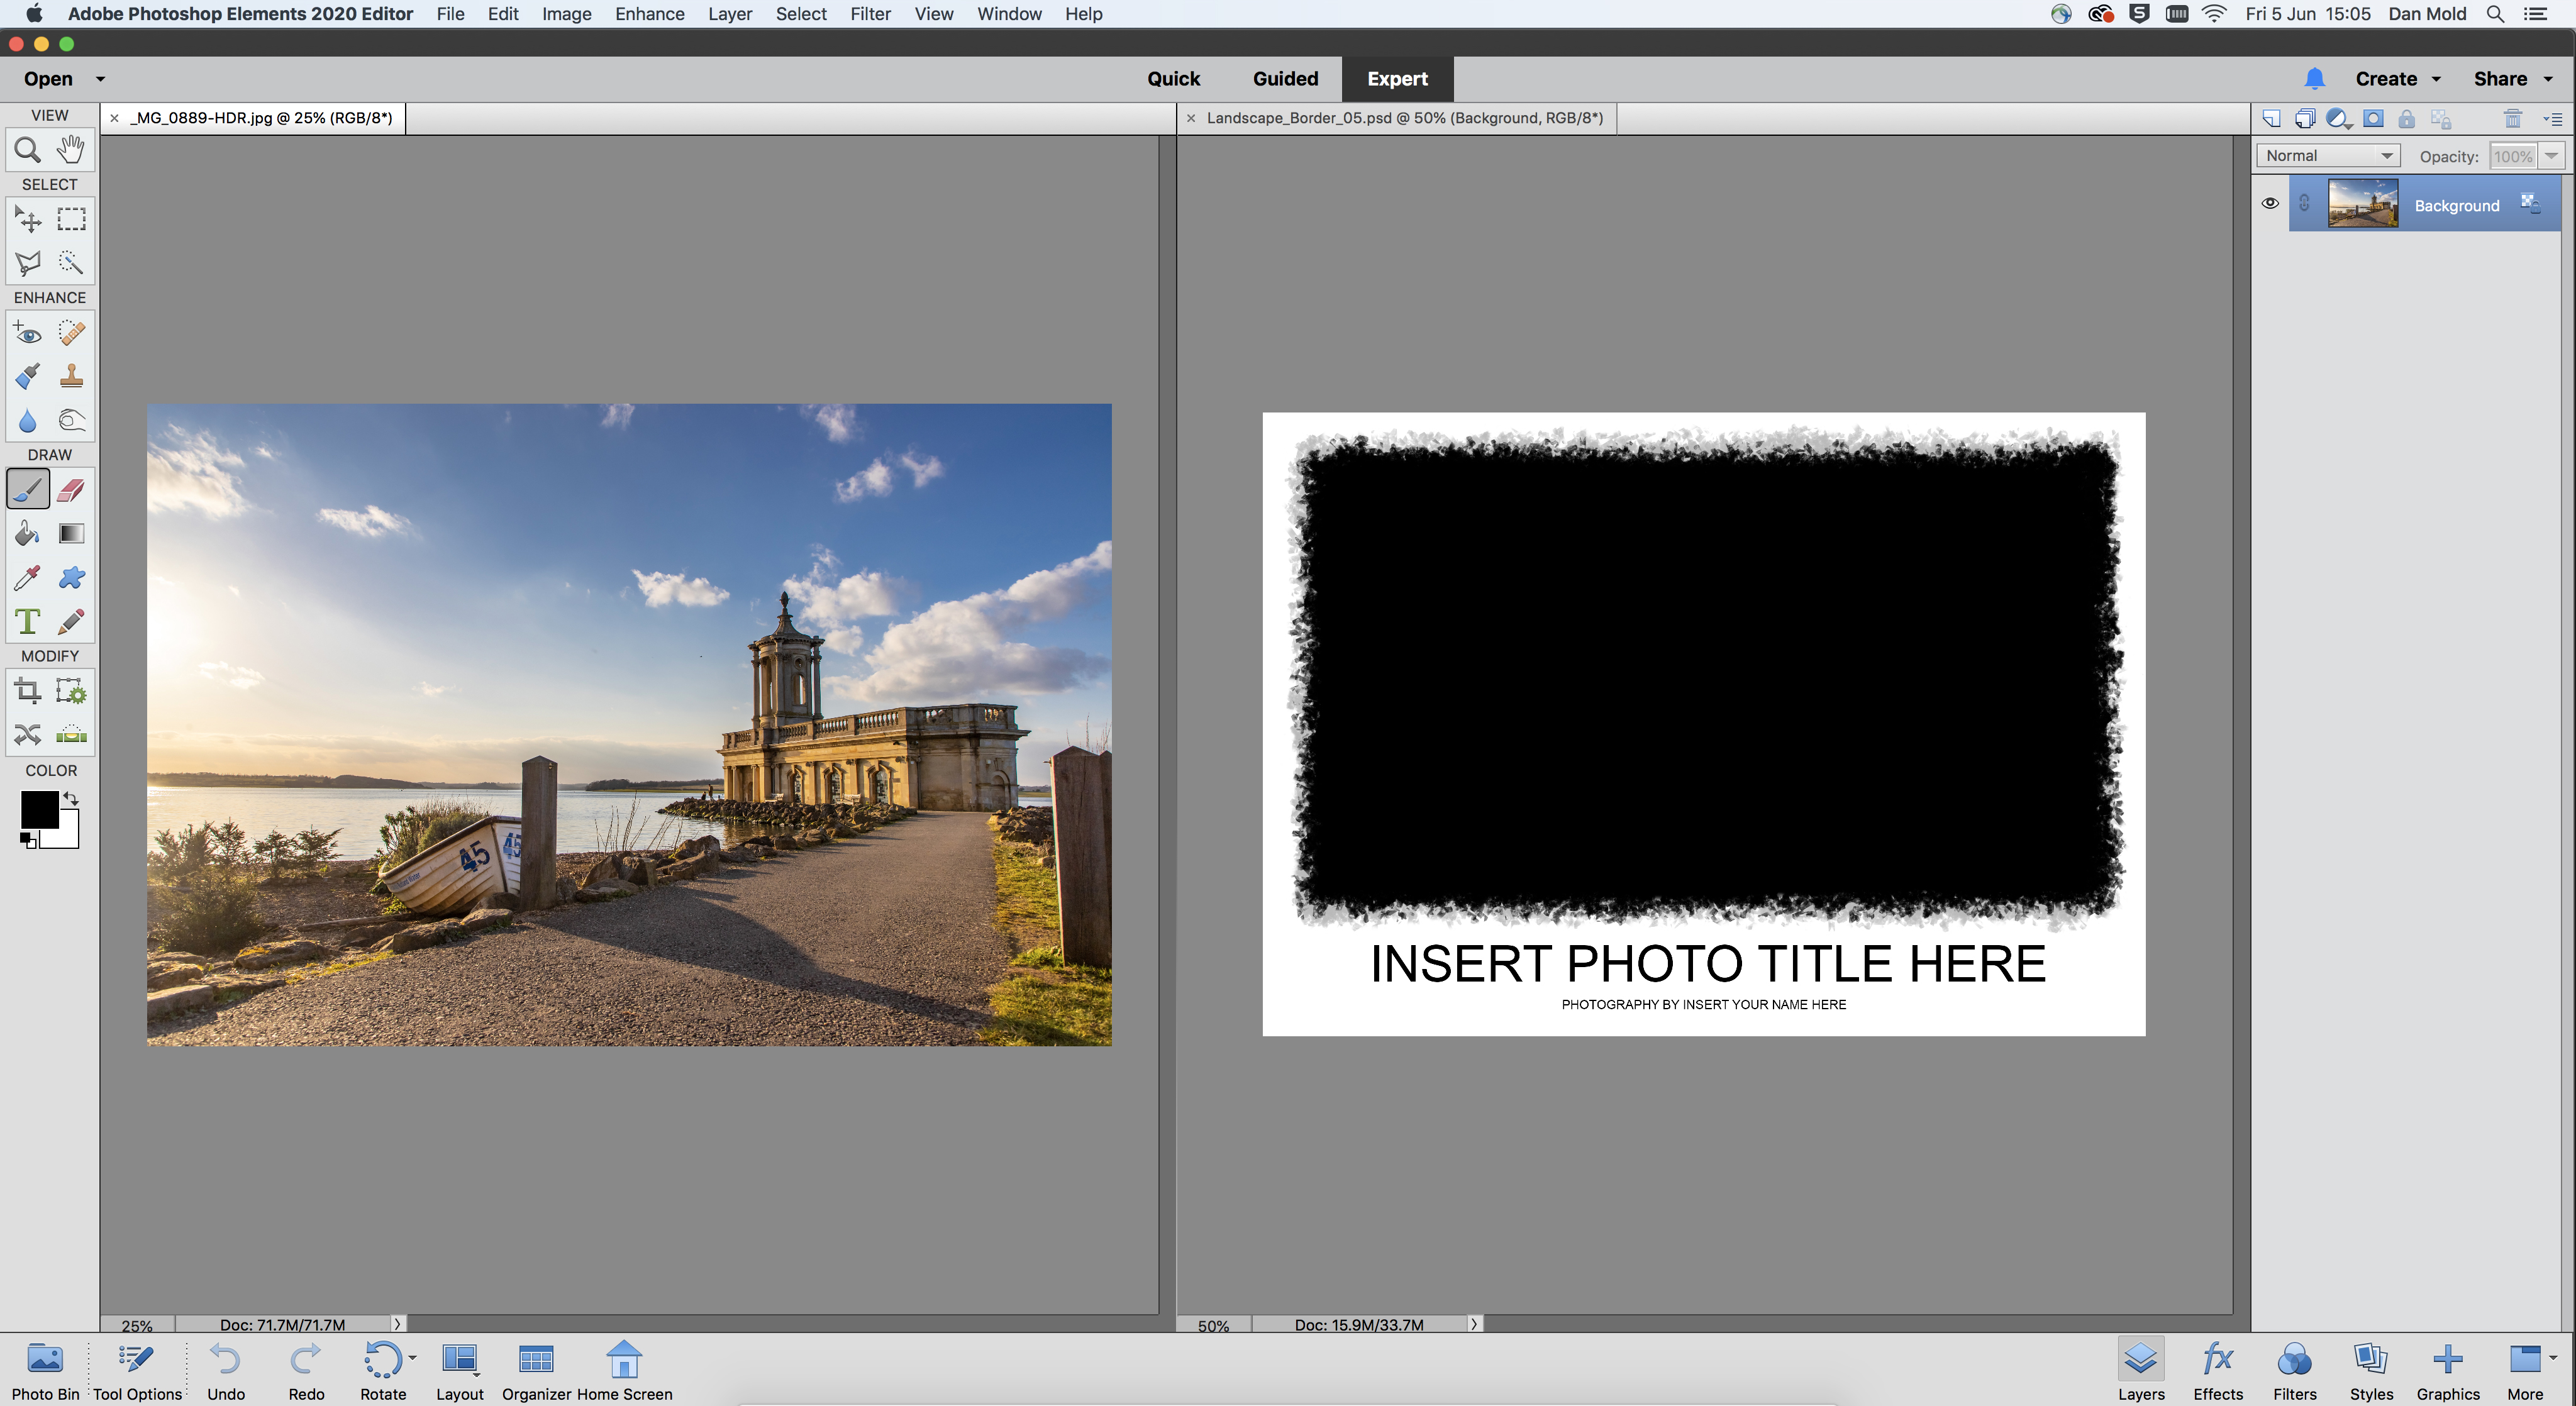
Download your free frames here – then find the image you want to frame and choose one of the border templates you like. Open them both into Photoshop or Elements to begin (the steps are the same in both pieces of software).
The best camera deals, reviews, product advice, and unmissable photography news, direct to your inbox!
02 Paste in your pic and resize
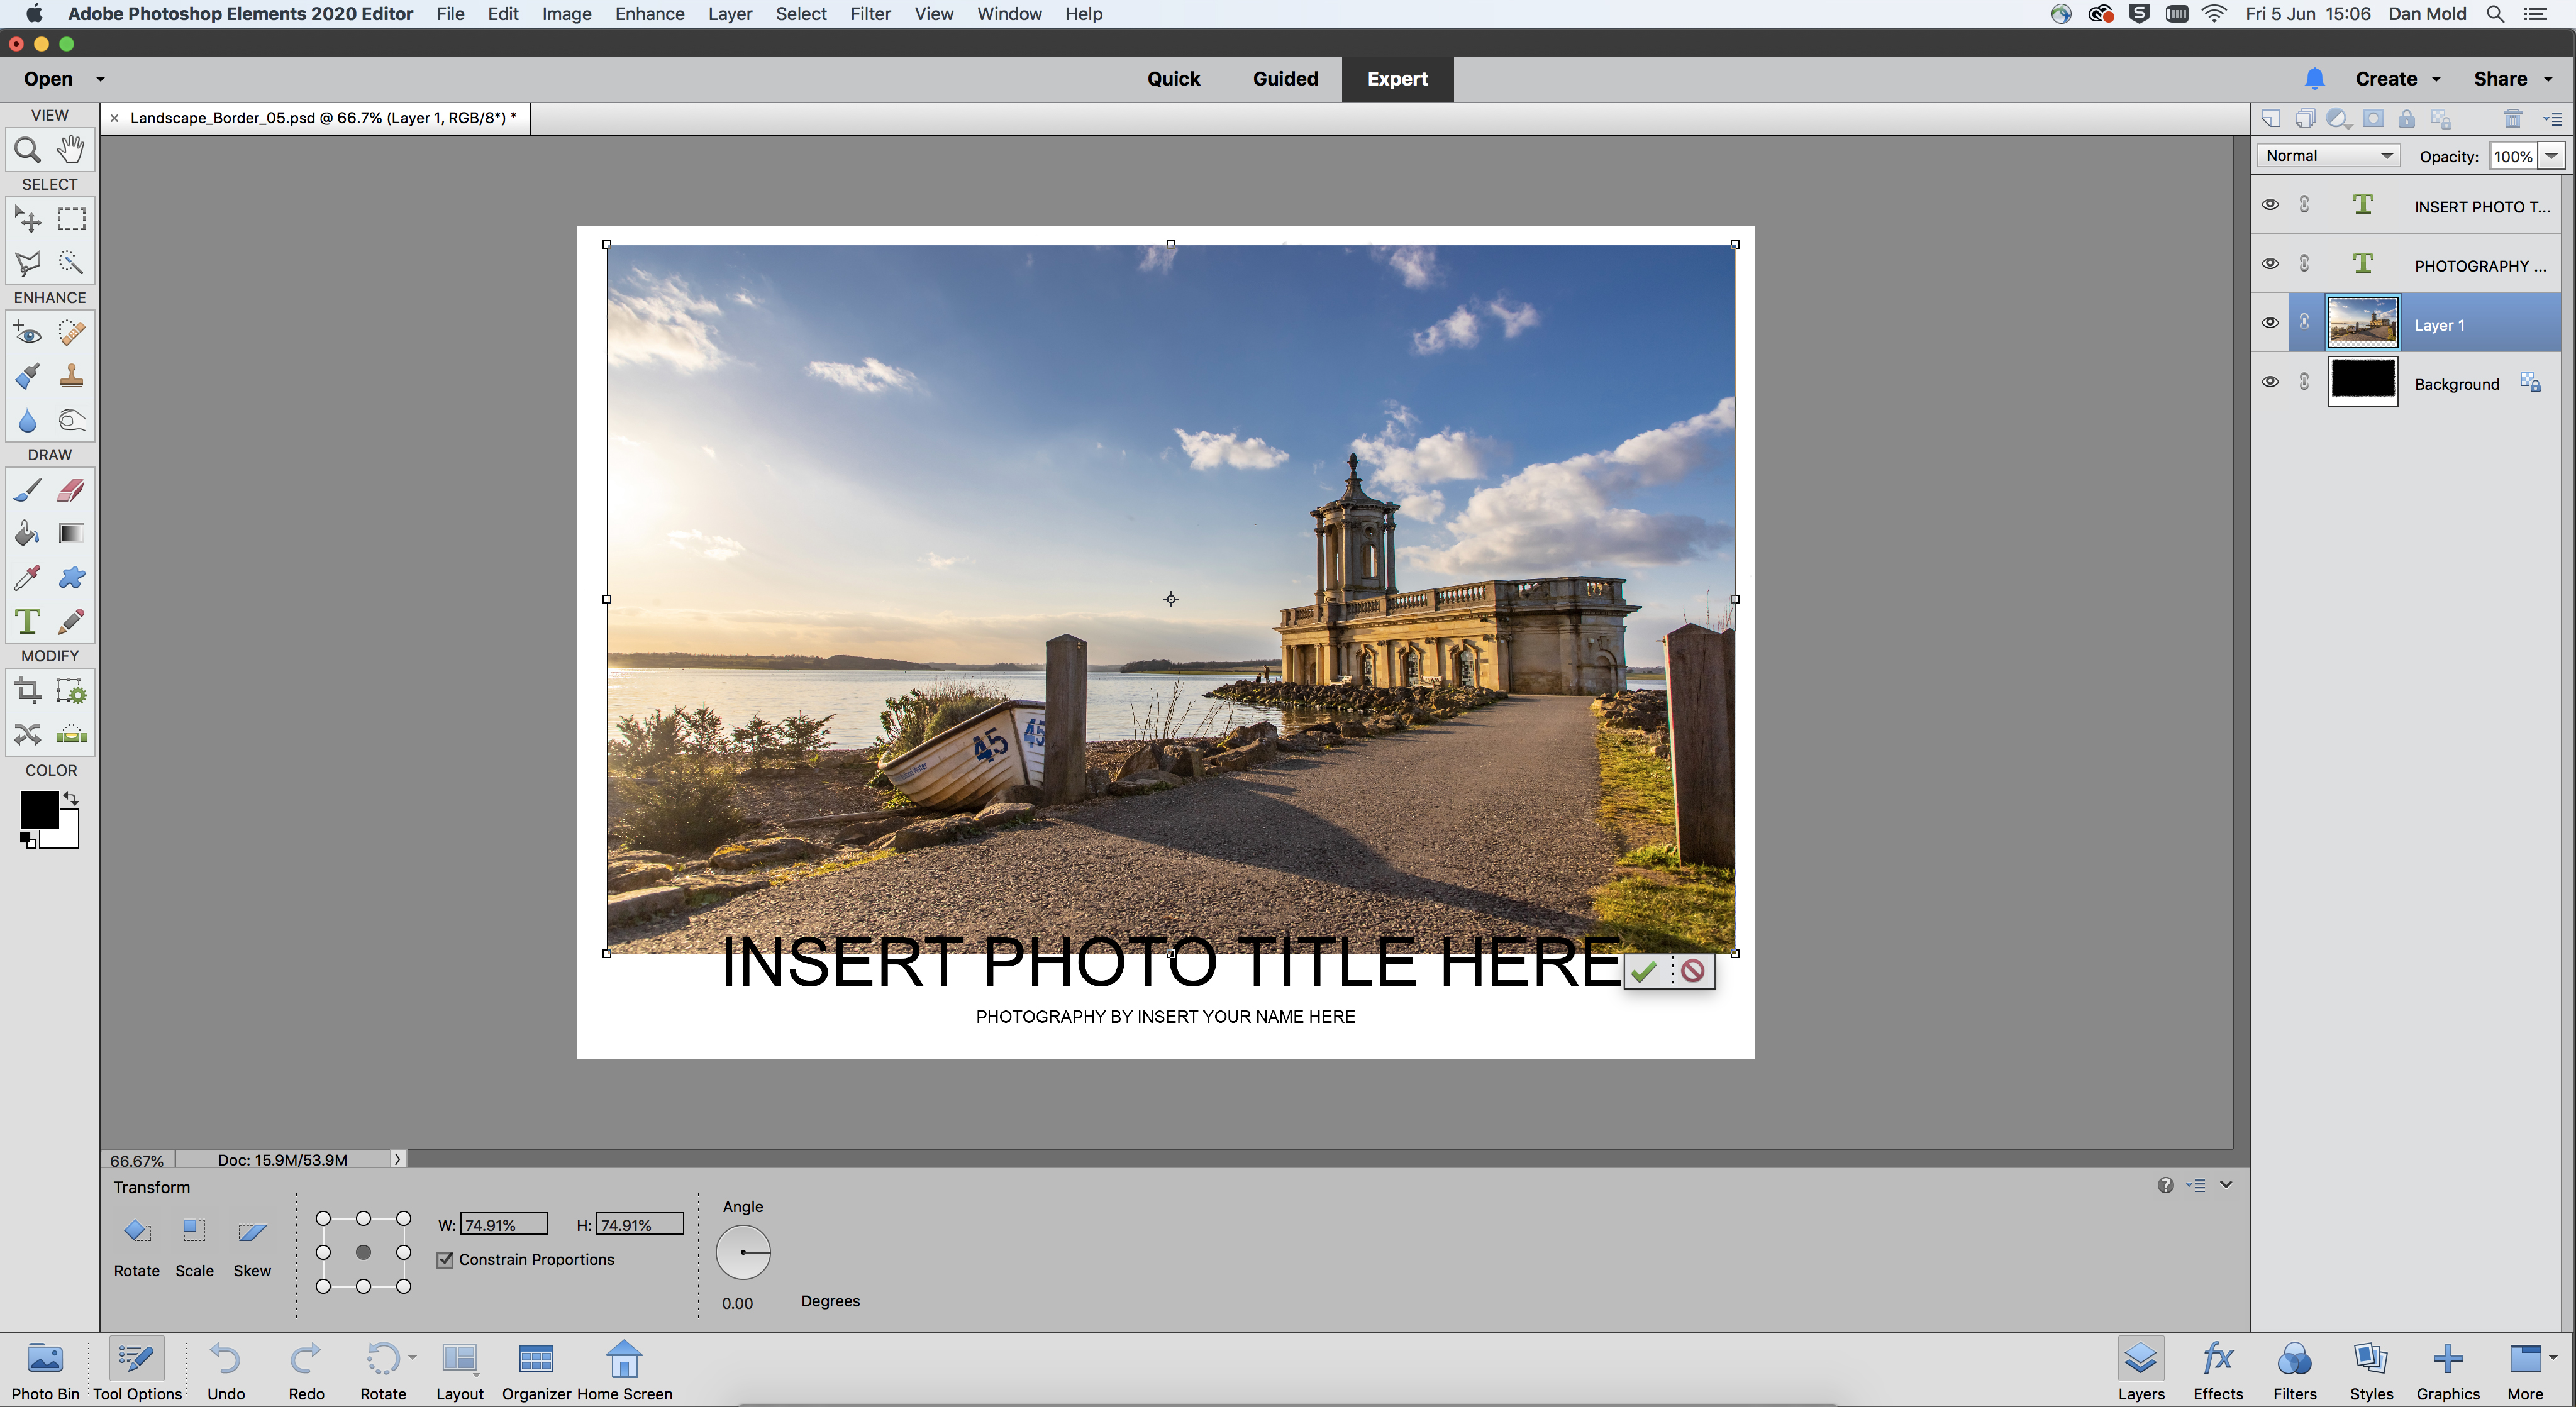
Go to your main image and hit Ctrl / Cmd + A to select it, Ctrl / Cmd + C to copy it and then click to the border template and hit Ctrl / Cmd + V to paste it in. Next, hit Ctrl + T to resize it with Free Transform. Make sure your constrain proportions box is ticked and drag the corners of the bounding box outwards to fill all of the black window in the border template and hit Enter to set it in place.
03 Blend it into the border
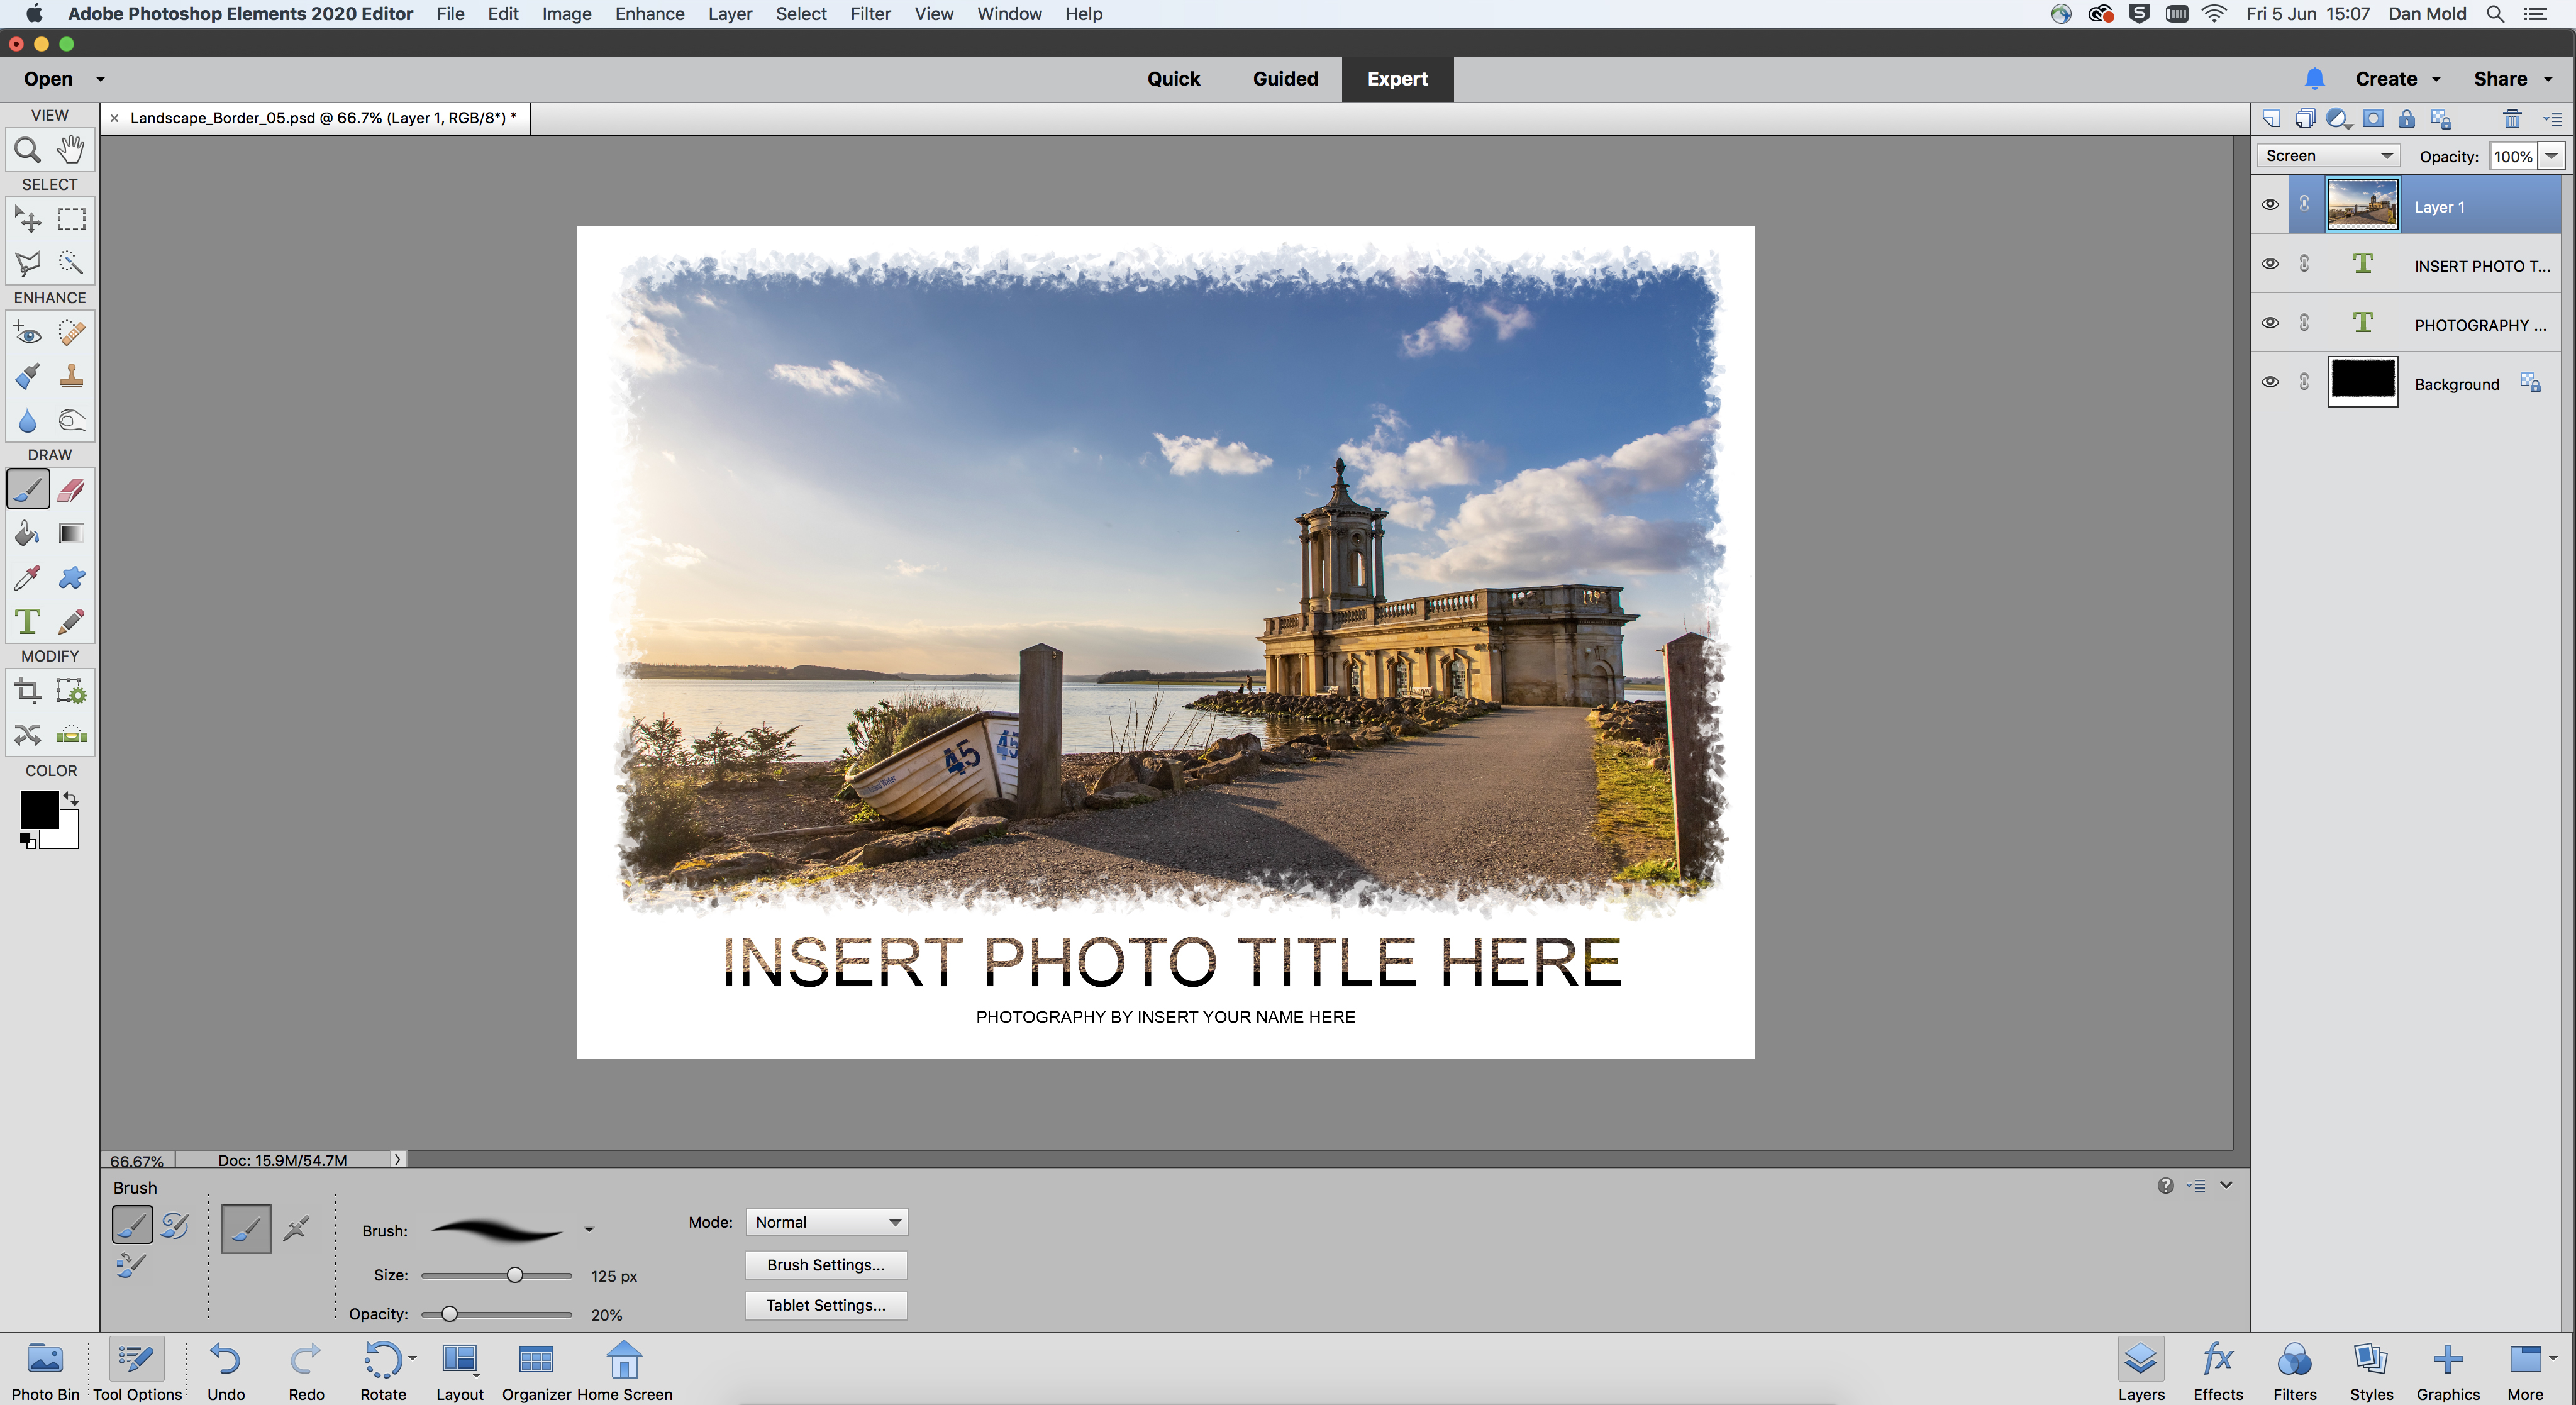
Hit Enter when finished resizing and go to the Layers panel (Window > Layers). Next, change the blending mode from Normal to Screen, so that your shot only appears in the black parts of the template.
04 Stop it going over the text
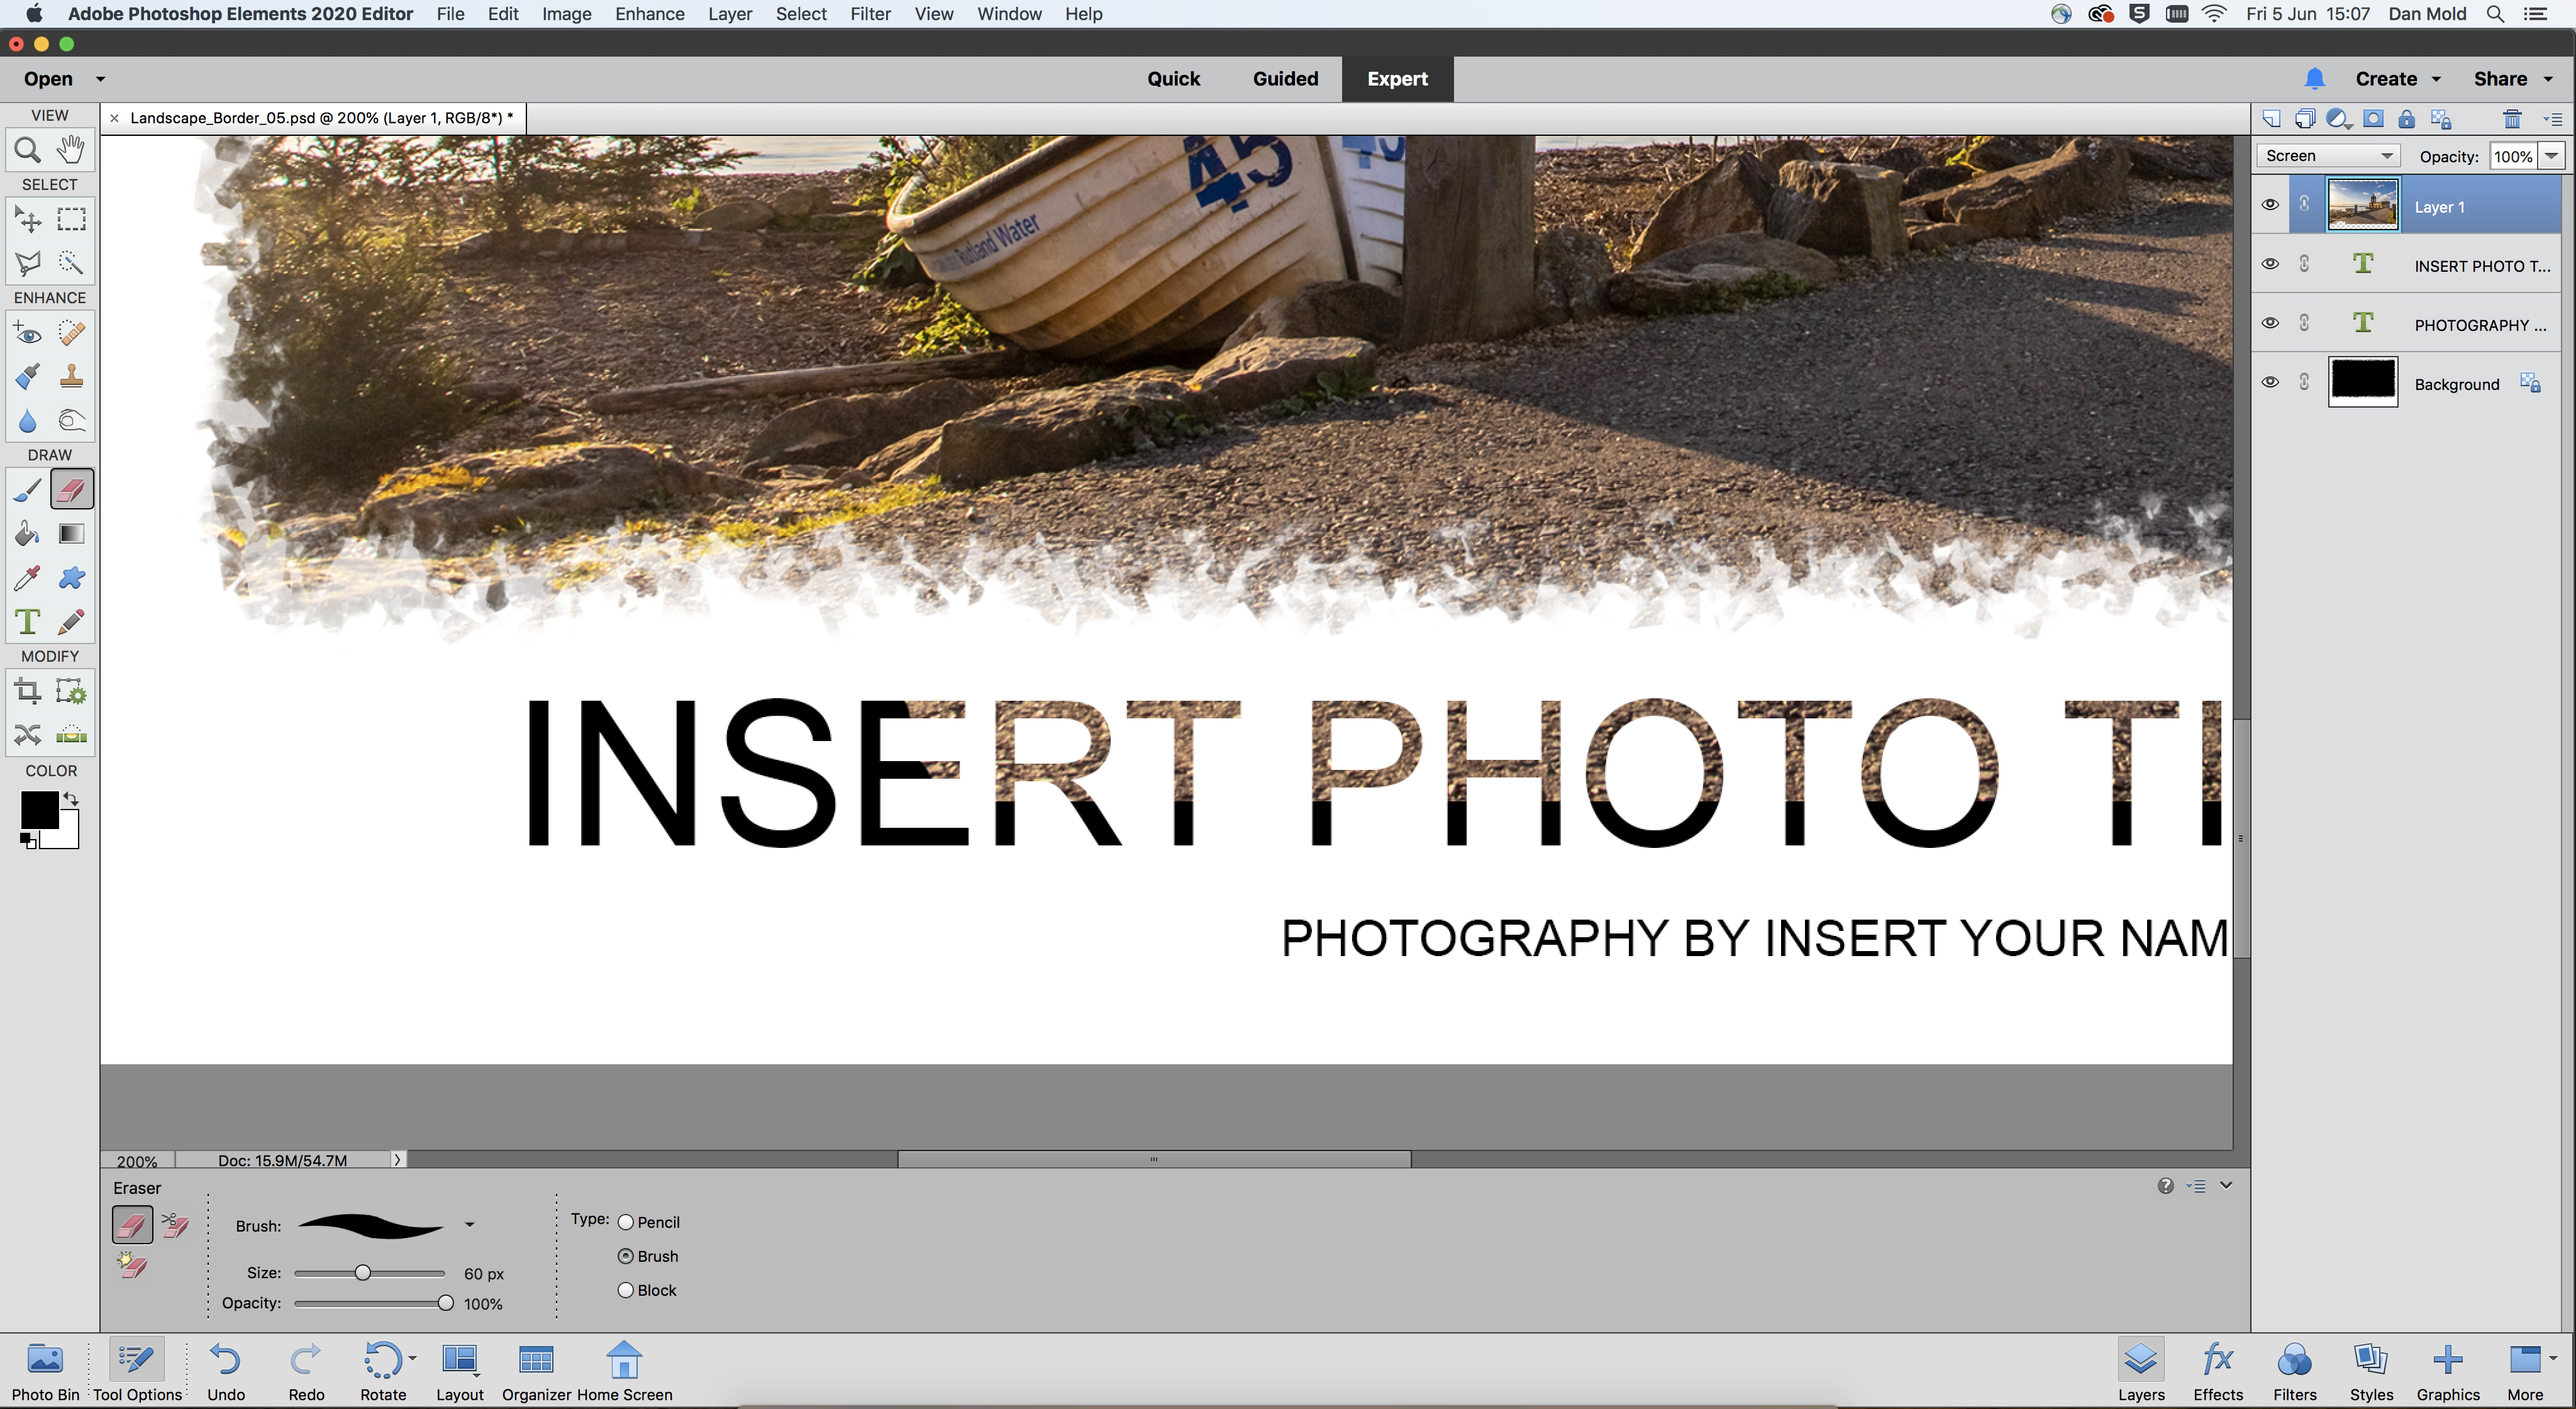
Grab a hard-edged Eraser tool from the toolbox, set the opacity to 100% and resize it with the [ and ] keys. Now brush over any areas of the text that the image is appearing in to stop this happening.
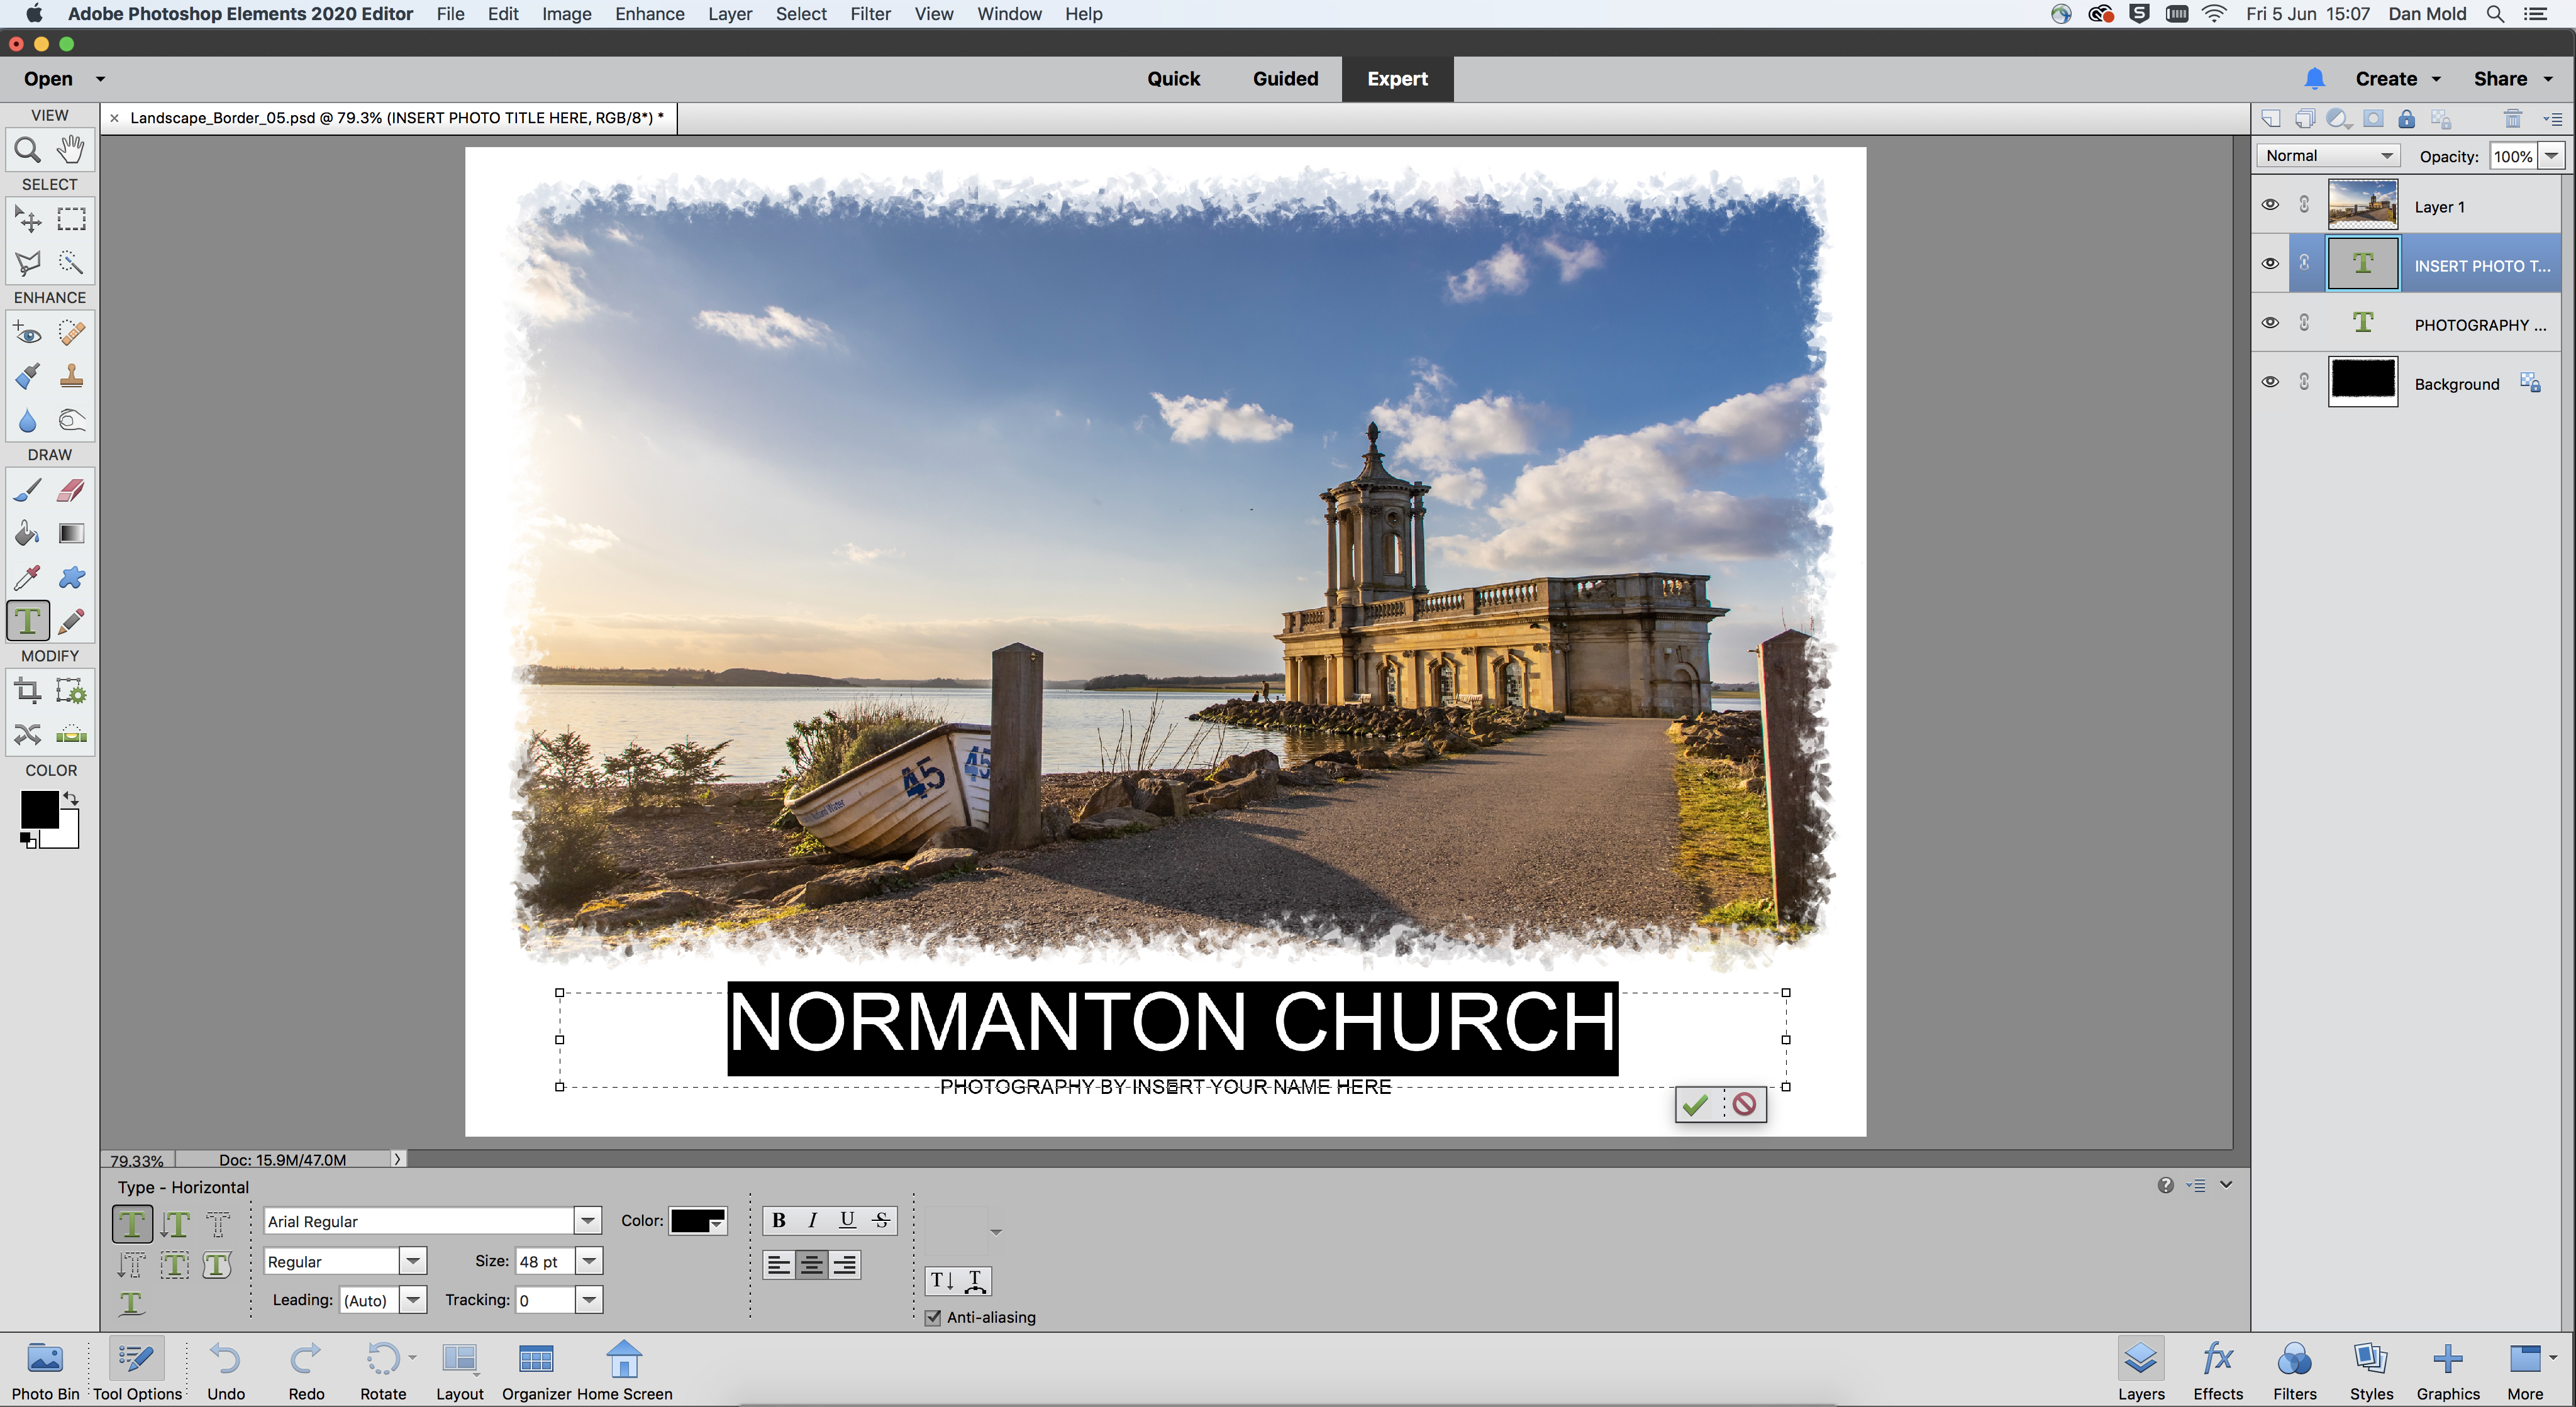
05 Add your image title and photographer's credit
In the Layers panel double-click on the ‘T’, which is the thumbnail of the ‘Insert Title Here’ layer. You’ll then be able to type in the title of your image, then do the same for your photo credit on the layer below.
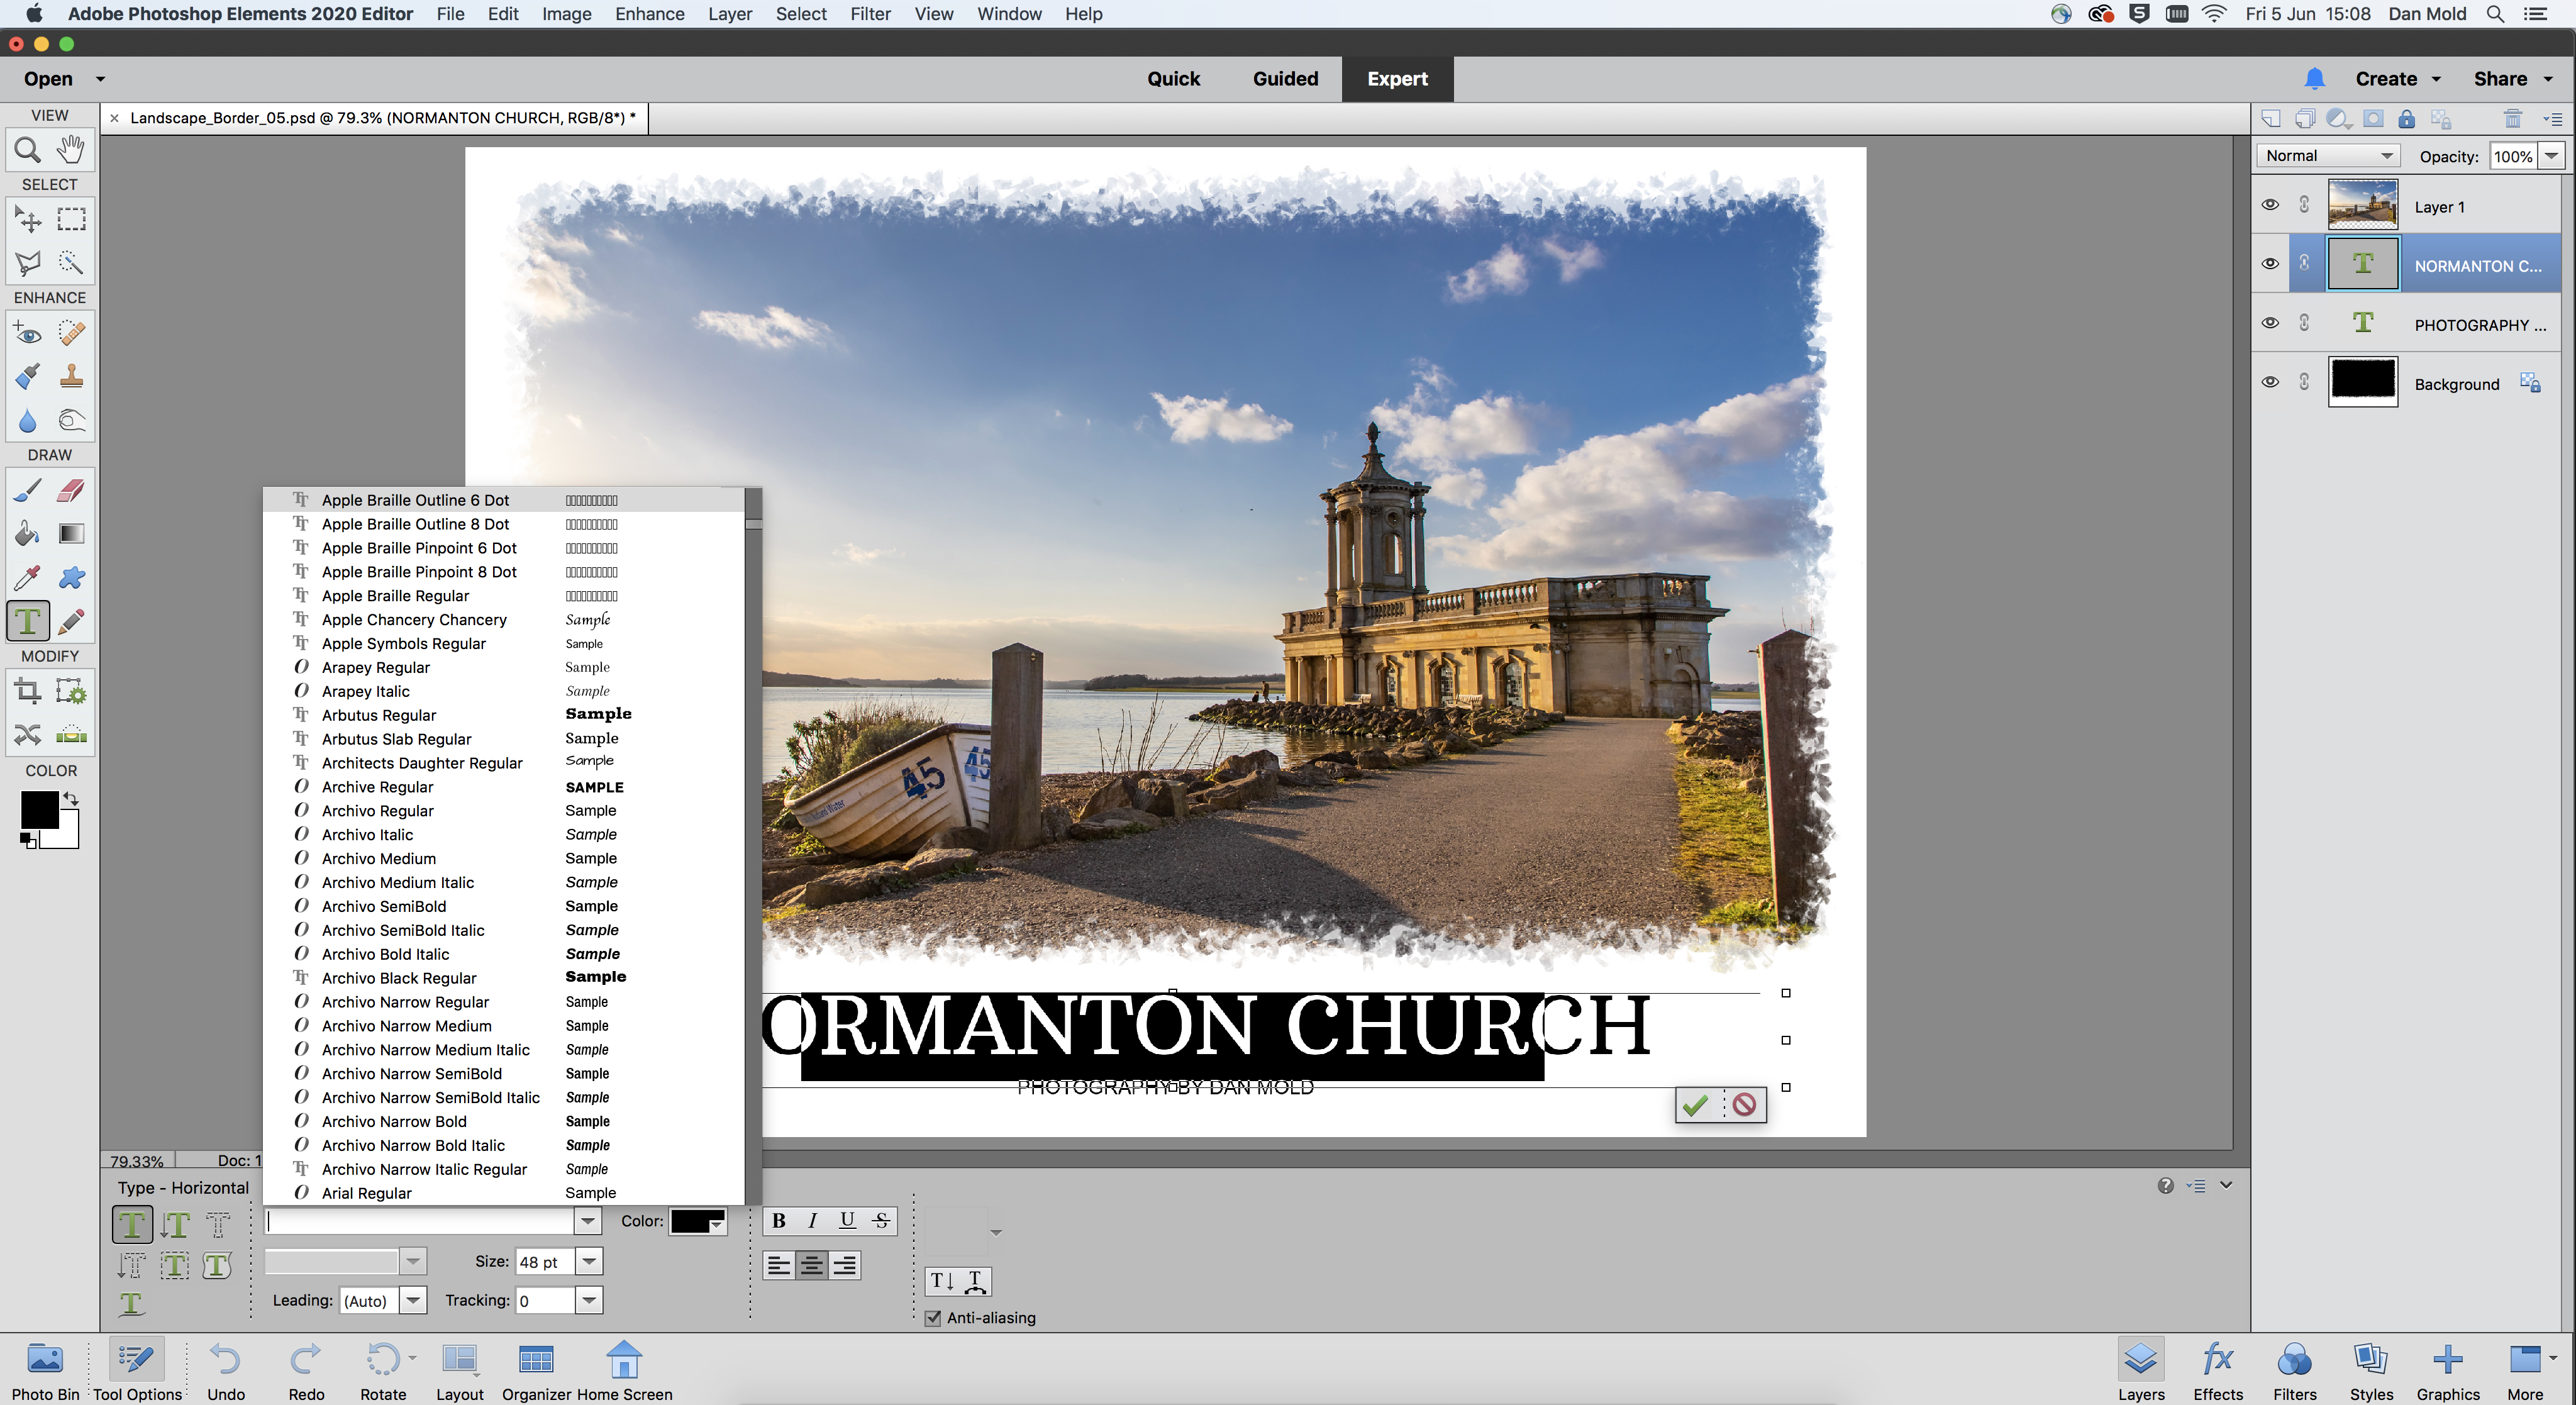
06 Play with the font type
You can, of course, experiment with different font choices, colors and sizes. Just use the tool options bar at the bottom of the screen to customize the text until you’re happy with the results.
PhotoPlus: The Canon Magazine is the world's only monthly newsstand title that's 100% devoted to Canon, so you can be sure the magazine is completely relevant to your system.
Read more:
The best photo editing software: image editors for novices through to pros
The best photo-editing laptops: top laptops for photographers
10 best online photography courses – from beginner guides to masterclasses

In addition to being a freelance photographer and filmmaker, Dan is a bona fide expert on all things Canon and Adobe. Not only is he an Adobe-certified Photoshop guru, he's spent over 10 years writing for specialist magazines including stints as the Deputy Editor for PhotoPlus: The Canon Magazine, Technical Editor for Practical Photography and Photoshop Editor on Digital Photo.
