Sharpen your images to perfection with Lightroom and Photoshop CC
Make your images razor-sharp with a few adjustments in Adobe's powerful Lightroom and Photoshop CC programs
The best camera deals, reviews, product advice, and unmissable photography news, direct to your inbox!
You are now subscribed
Your newsletter sign-up was successful
Watch video: Sharpen images in Lightroom and Photoshop CC
Sharpening is an essential part of image-editing, but it often leads to confusion over what tools to use, when to sharpen and how much to apply. As such, it can be helpful to think of sharpening as part of a wider workflow, as we’ll do in this tutorial.
Along the way we’ll perform initial sharpening and noise reduction in Lightroom, then take our image into Photoshop CC for retouching to remove the distracting leaf. Then we’ll round-trip back to Lightroom for final sharpening. As such, our workflow involves two distinct sharpening stages, one at the beginning and another at the end.
The first stage is often called Capture sharpening. This involves general sharpening to correct for inherent softness in the image, or to crisp up important details. It’s best done in Lightroom’s Detail panel (or in the near-identical panel in Photoshop’s Adobe Camera Raw). Capture sharpening can sometimes amplify image noise, especially in high-ISO images. So this is also a good time to apply noise reduction if the image requires it. We’ll do so here with the Adjustment Brush, which lets us paint in noise reduction selectively to the areas in the photo that need it most.
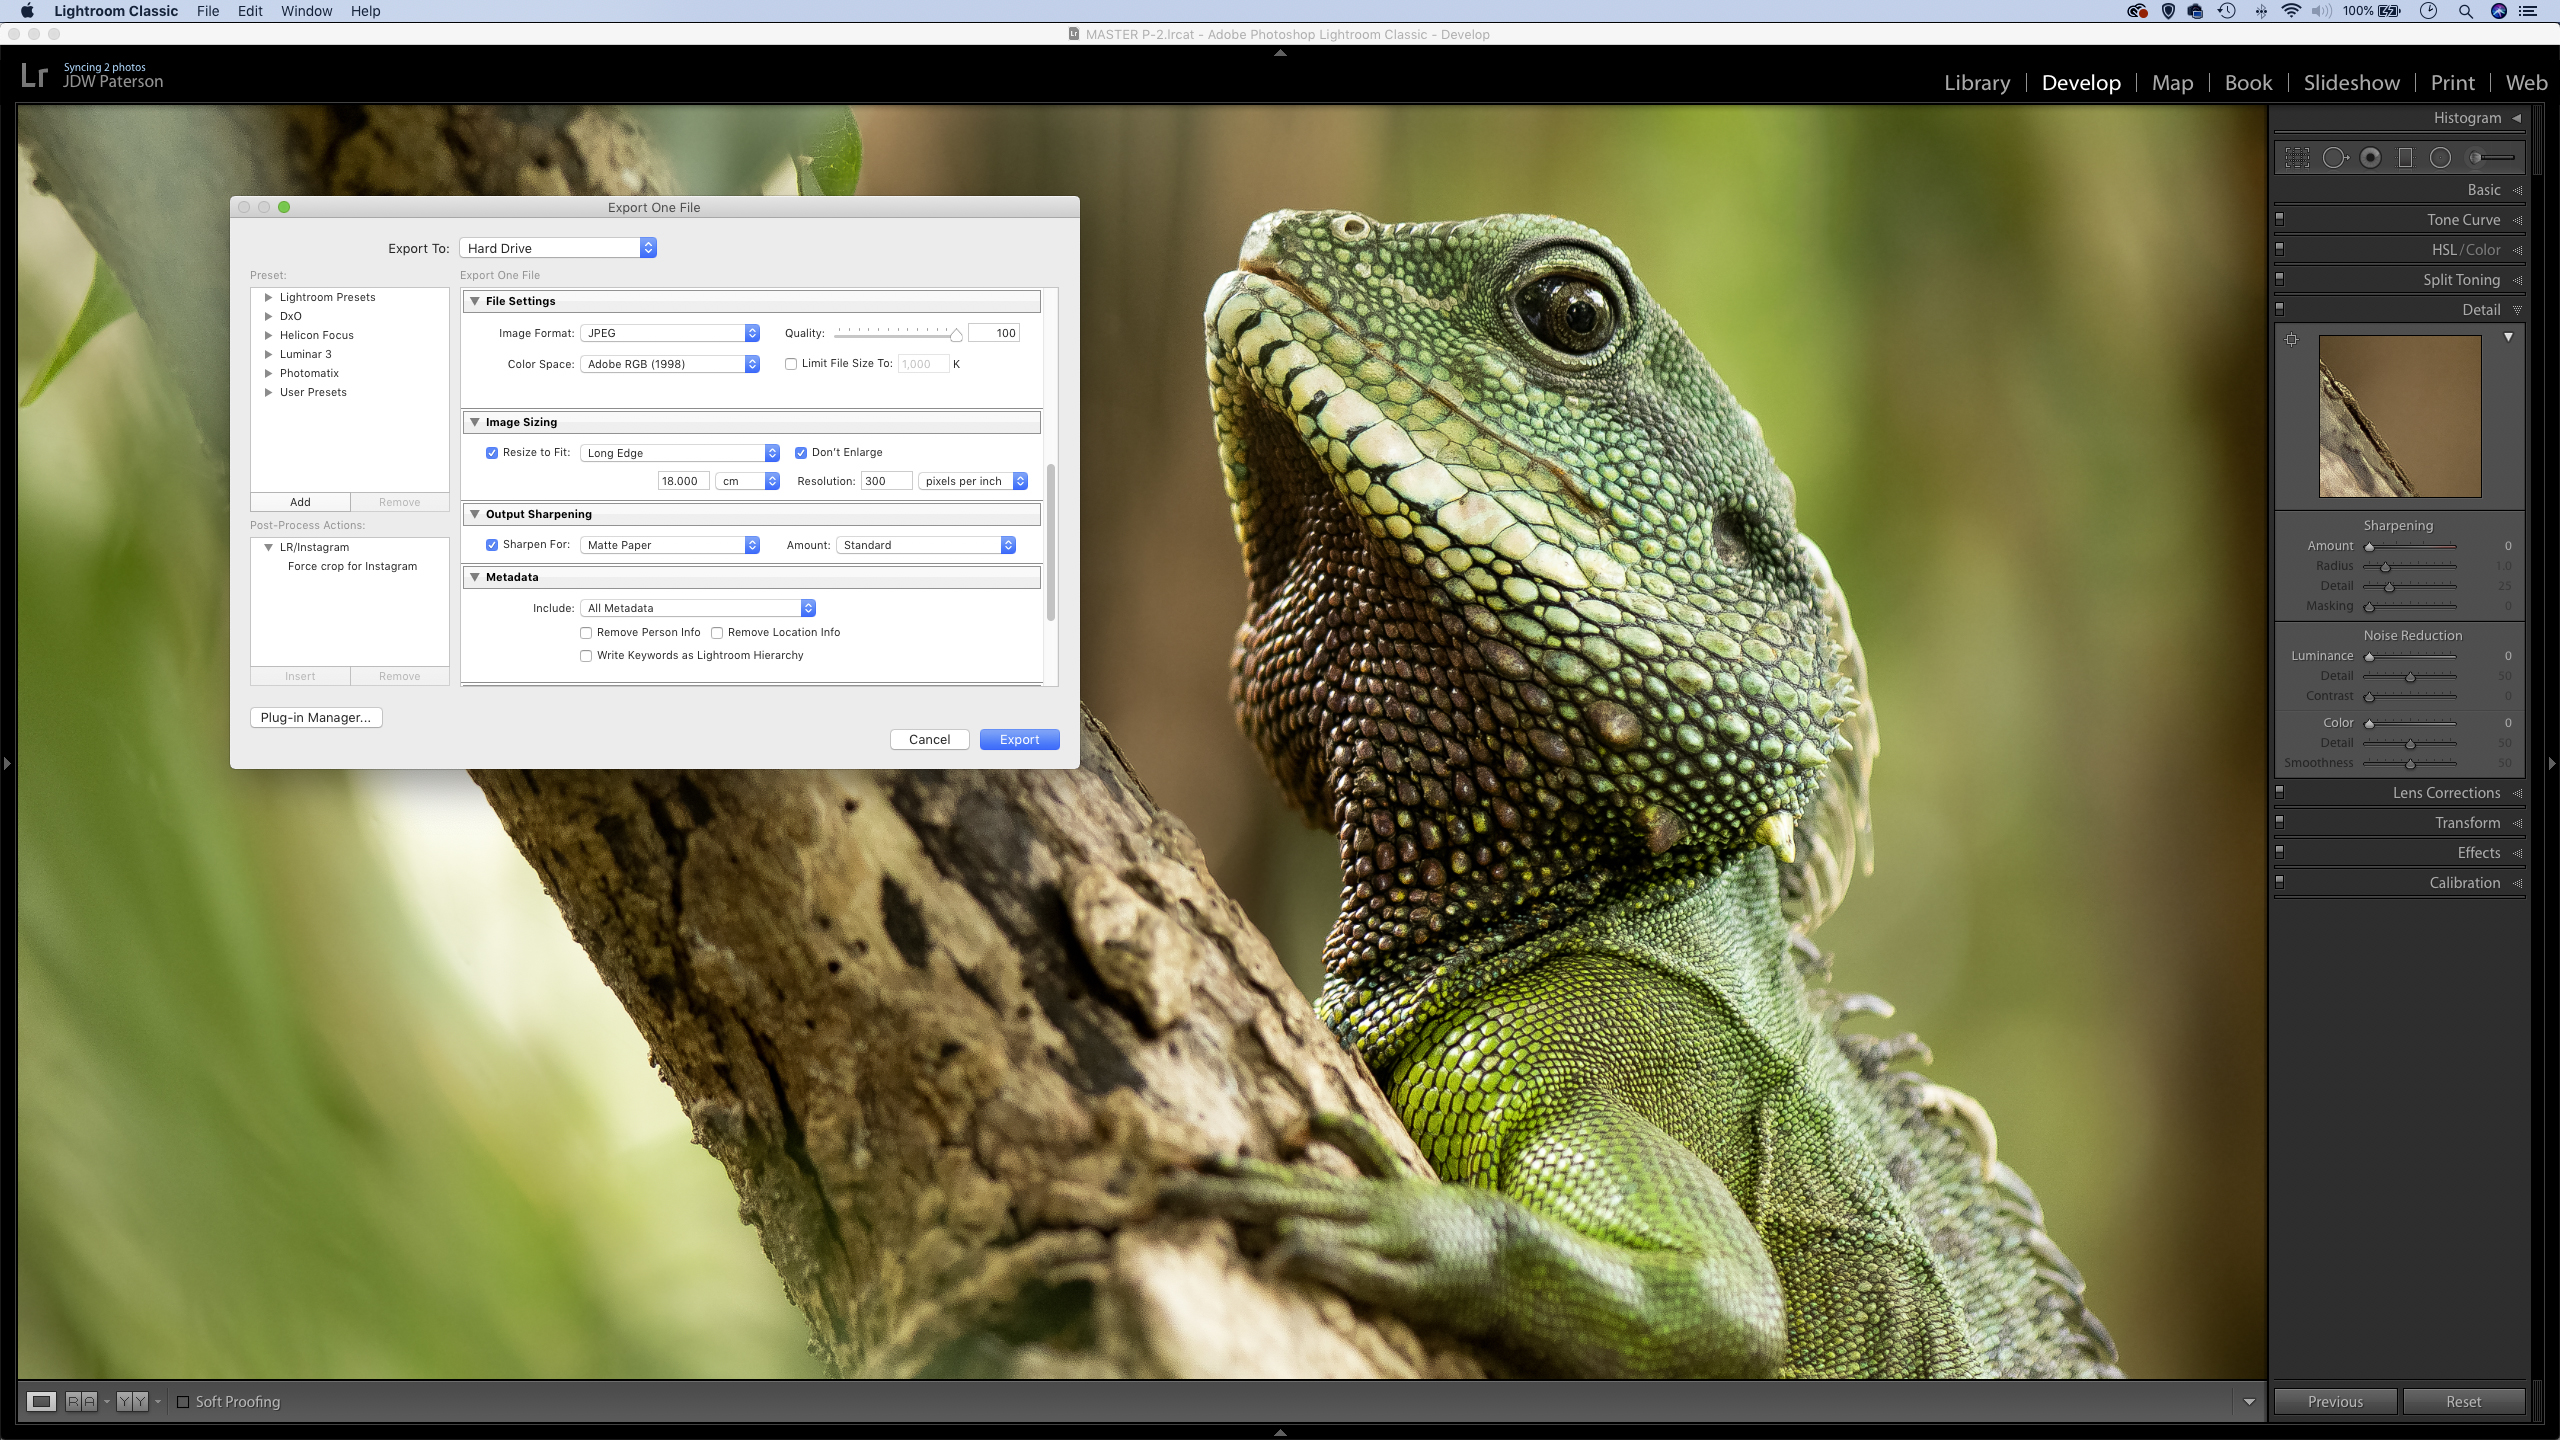
As well as one of the first things we’ll do to our image, sharpening is also often one of the last. This is called Output sharpening, and this time the aim is to optimize the detail with a specific output and resolution in mind – whether that be a print size or for viewing on-screen. We’ll use the Output Sharpening controls within Lightroom’s Export Dialog to make this a simple task.
01 Prepare the view
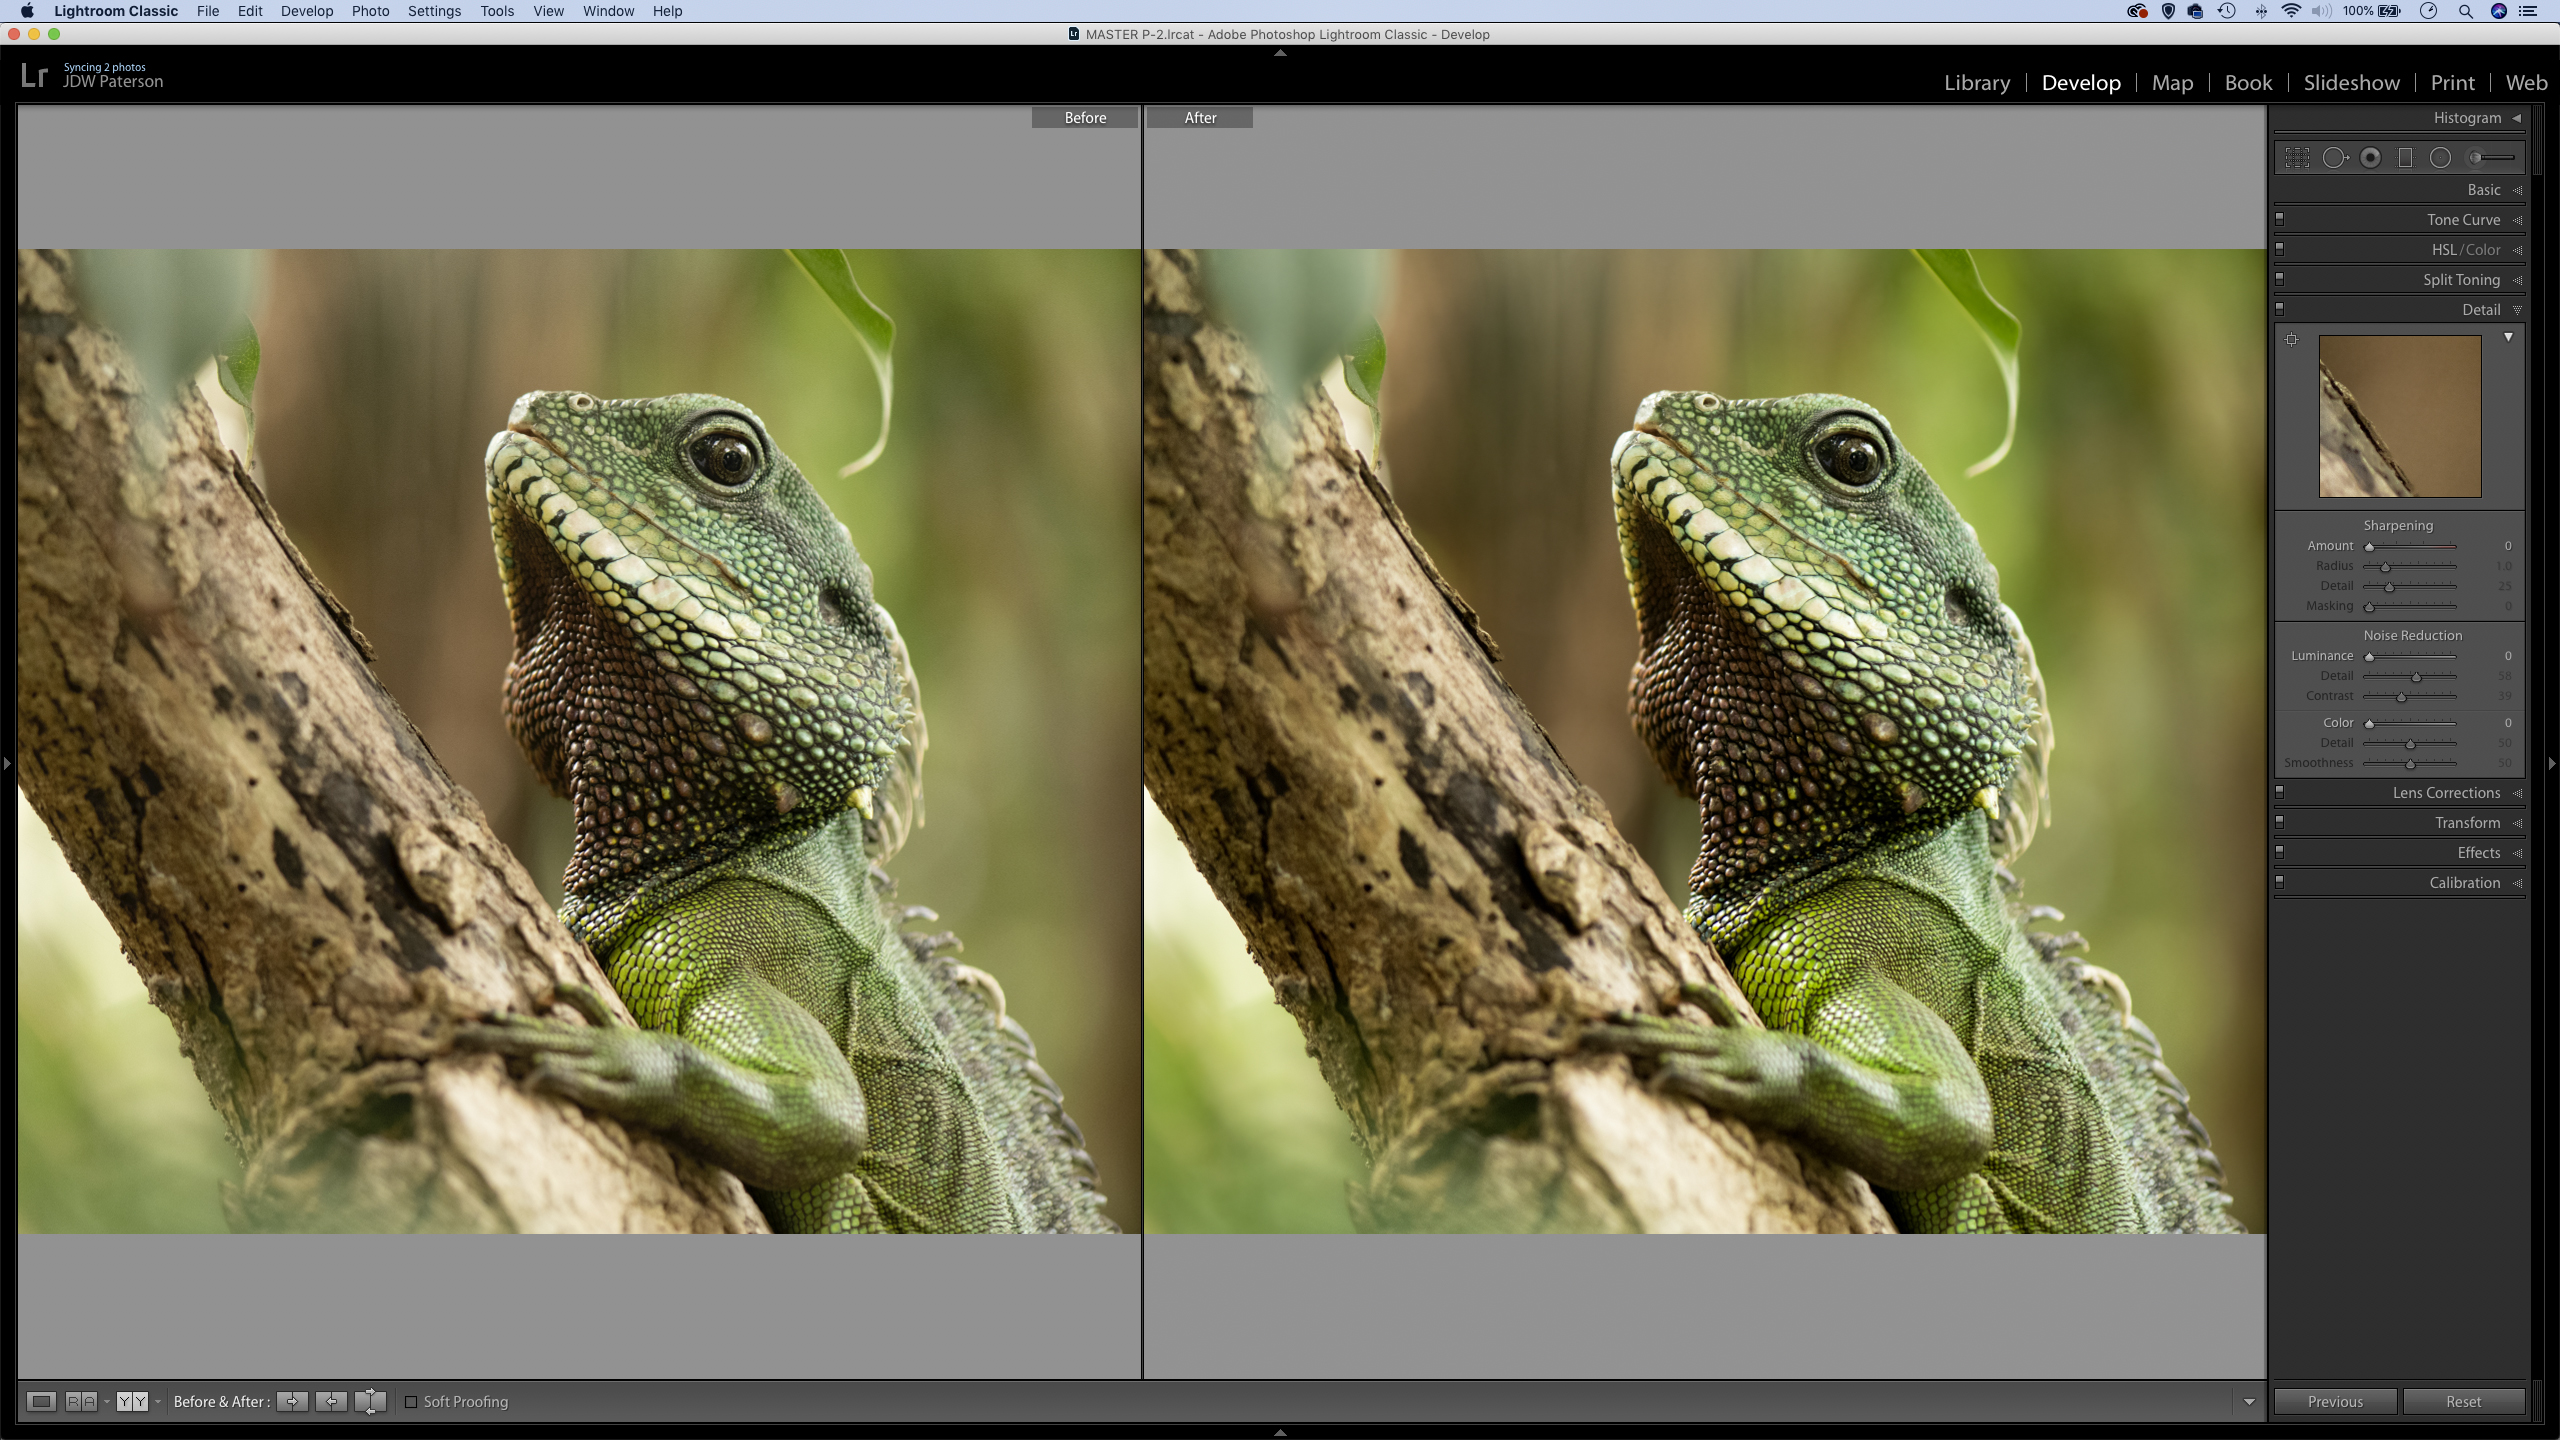
Open your image into Lightroom Classic, then go to the Develop Module. After making some tweaks in the Basic panel, go to the Detail panel. Click the Before / After view at bottom left, then zoom in close to the image. A 100% view is best for judging sharpening.
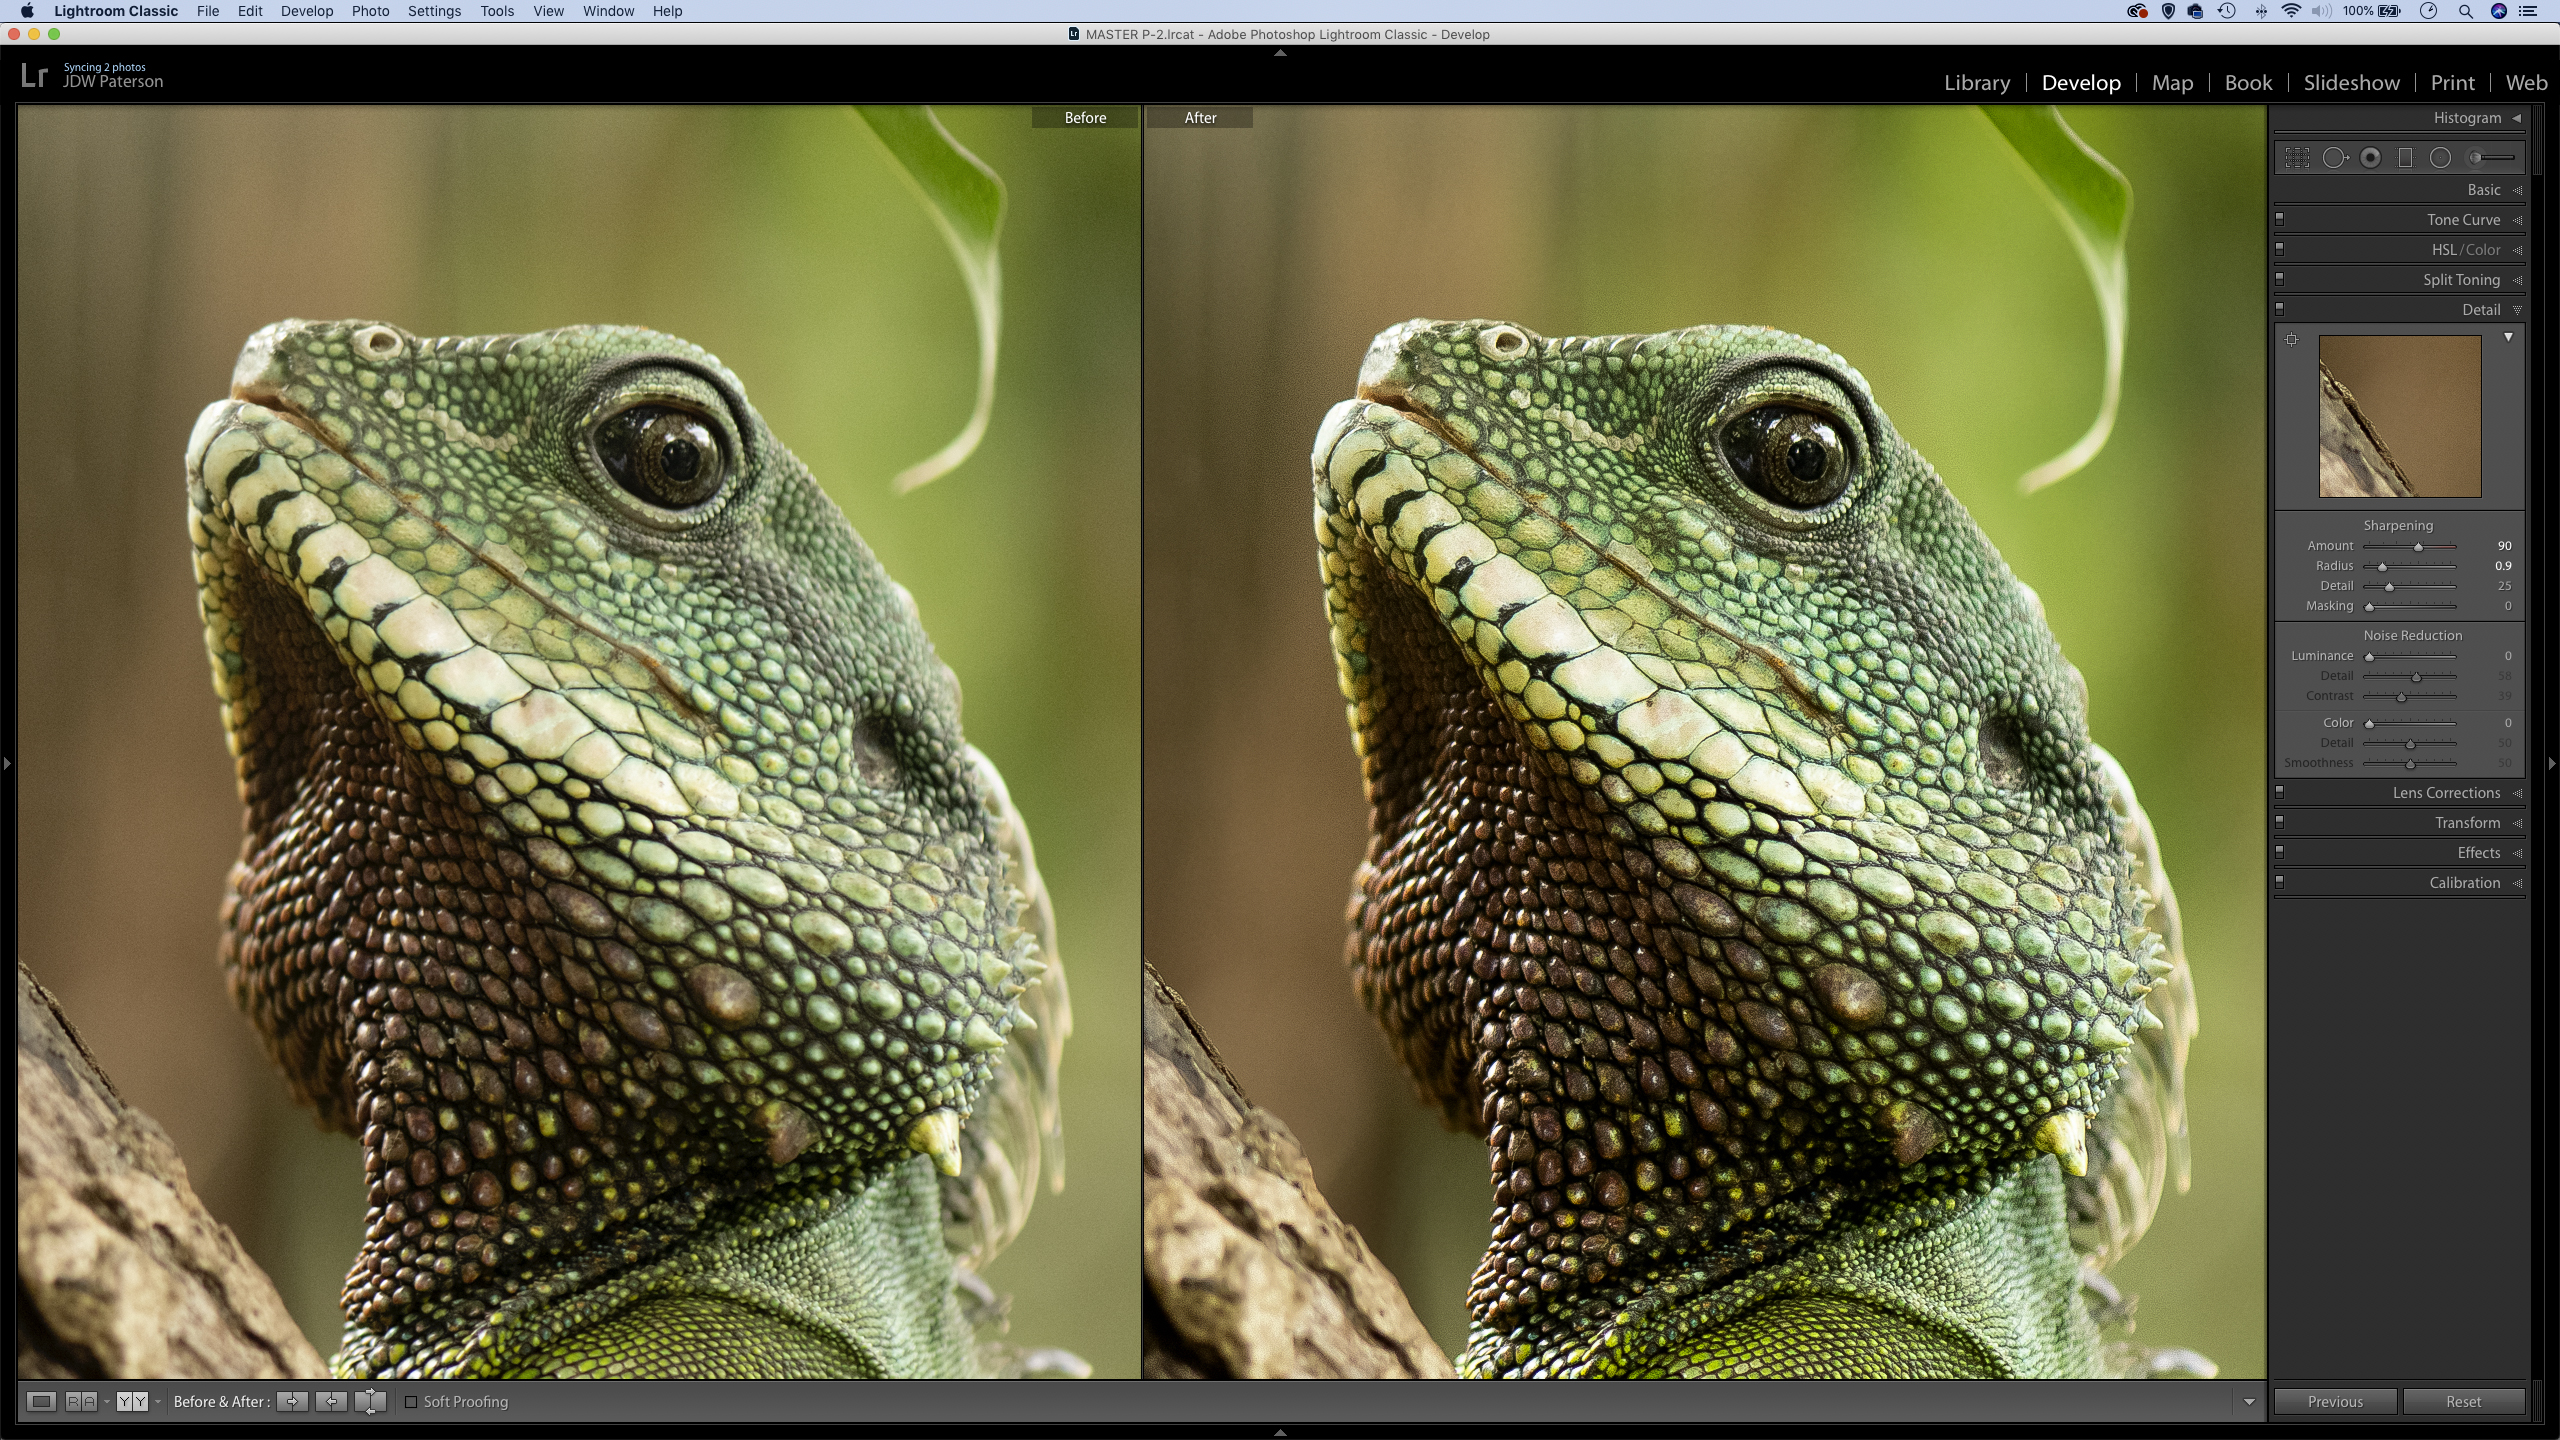
02 Apply capture sharpening
Begin in the Detail panel by upping the Sharpening Amount. Next, Adjust the Radius, which sets the distance from edges in which the sharpening occurs. A low radius is usually better for high-frequency detail like the lizard skin. We’ve set Amount 90, Radius 0.9.
The best camera deals, reviews, product advice, and unmissable photography news, direct to your inbox!
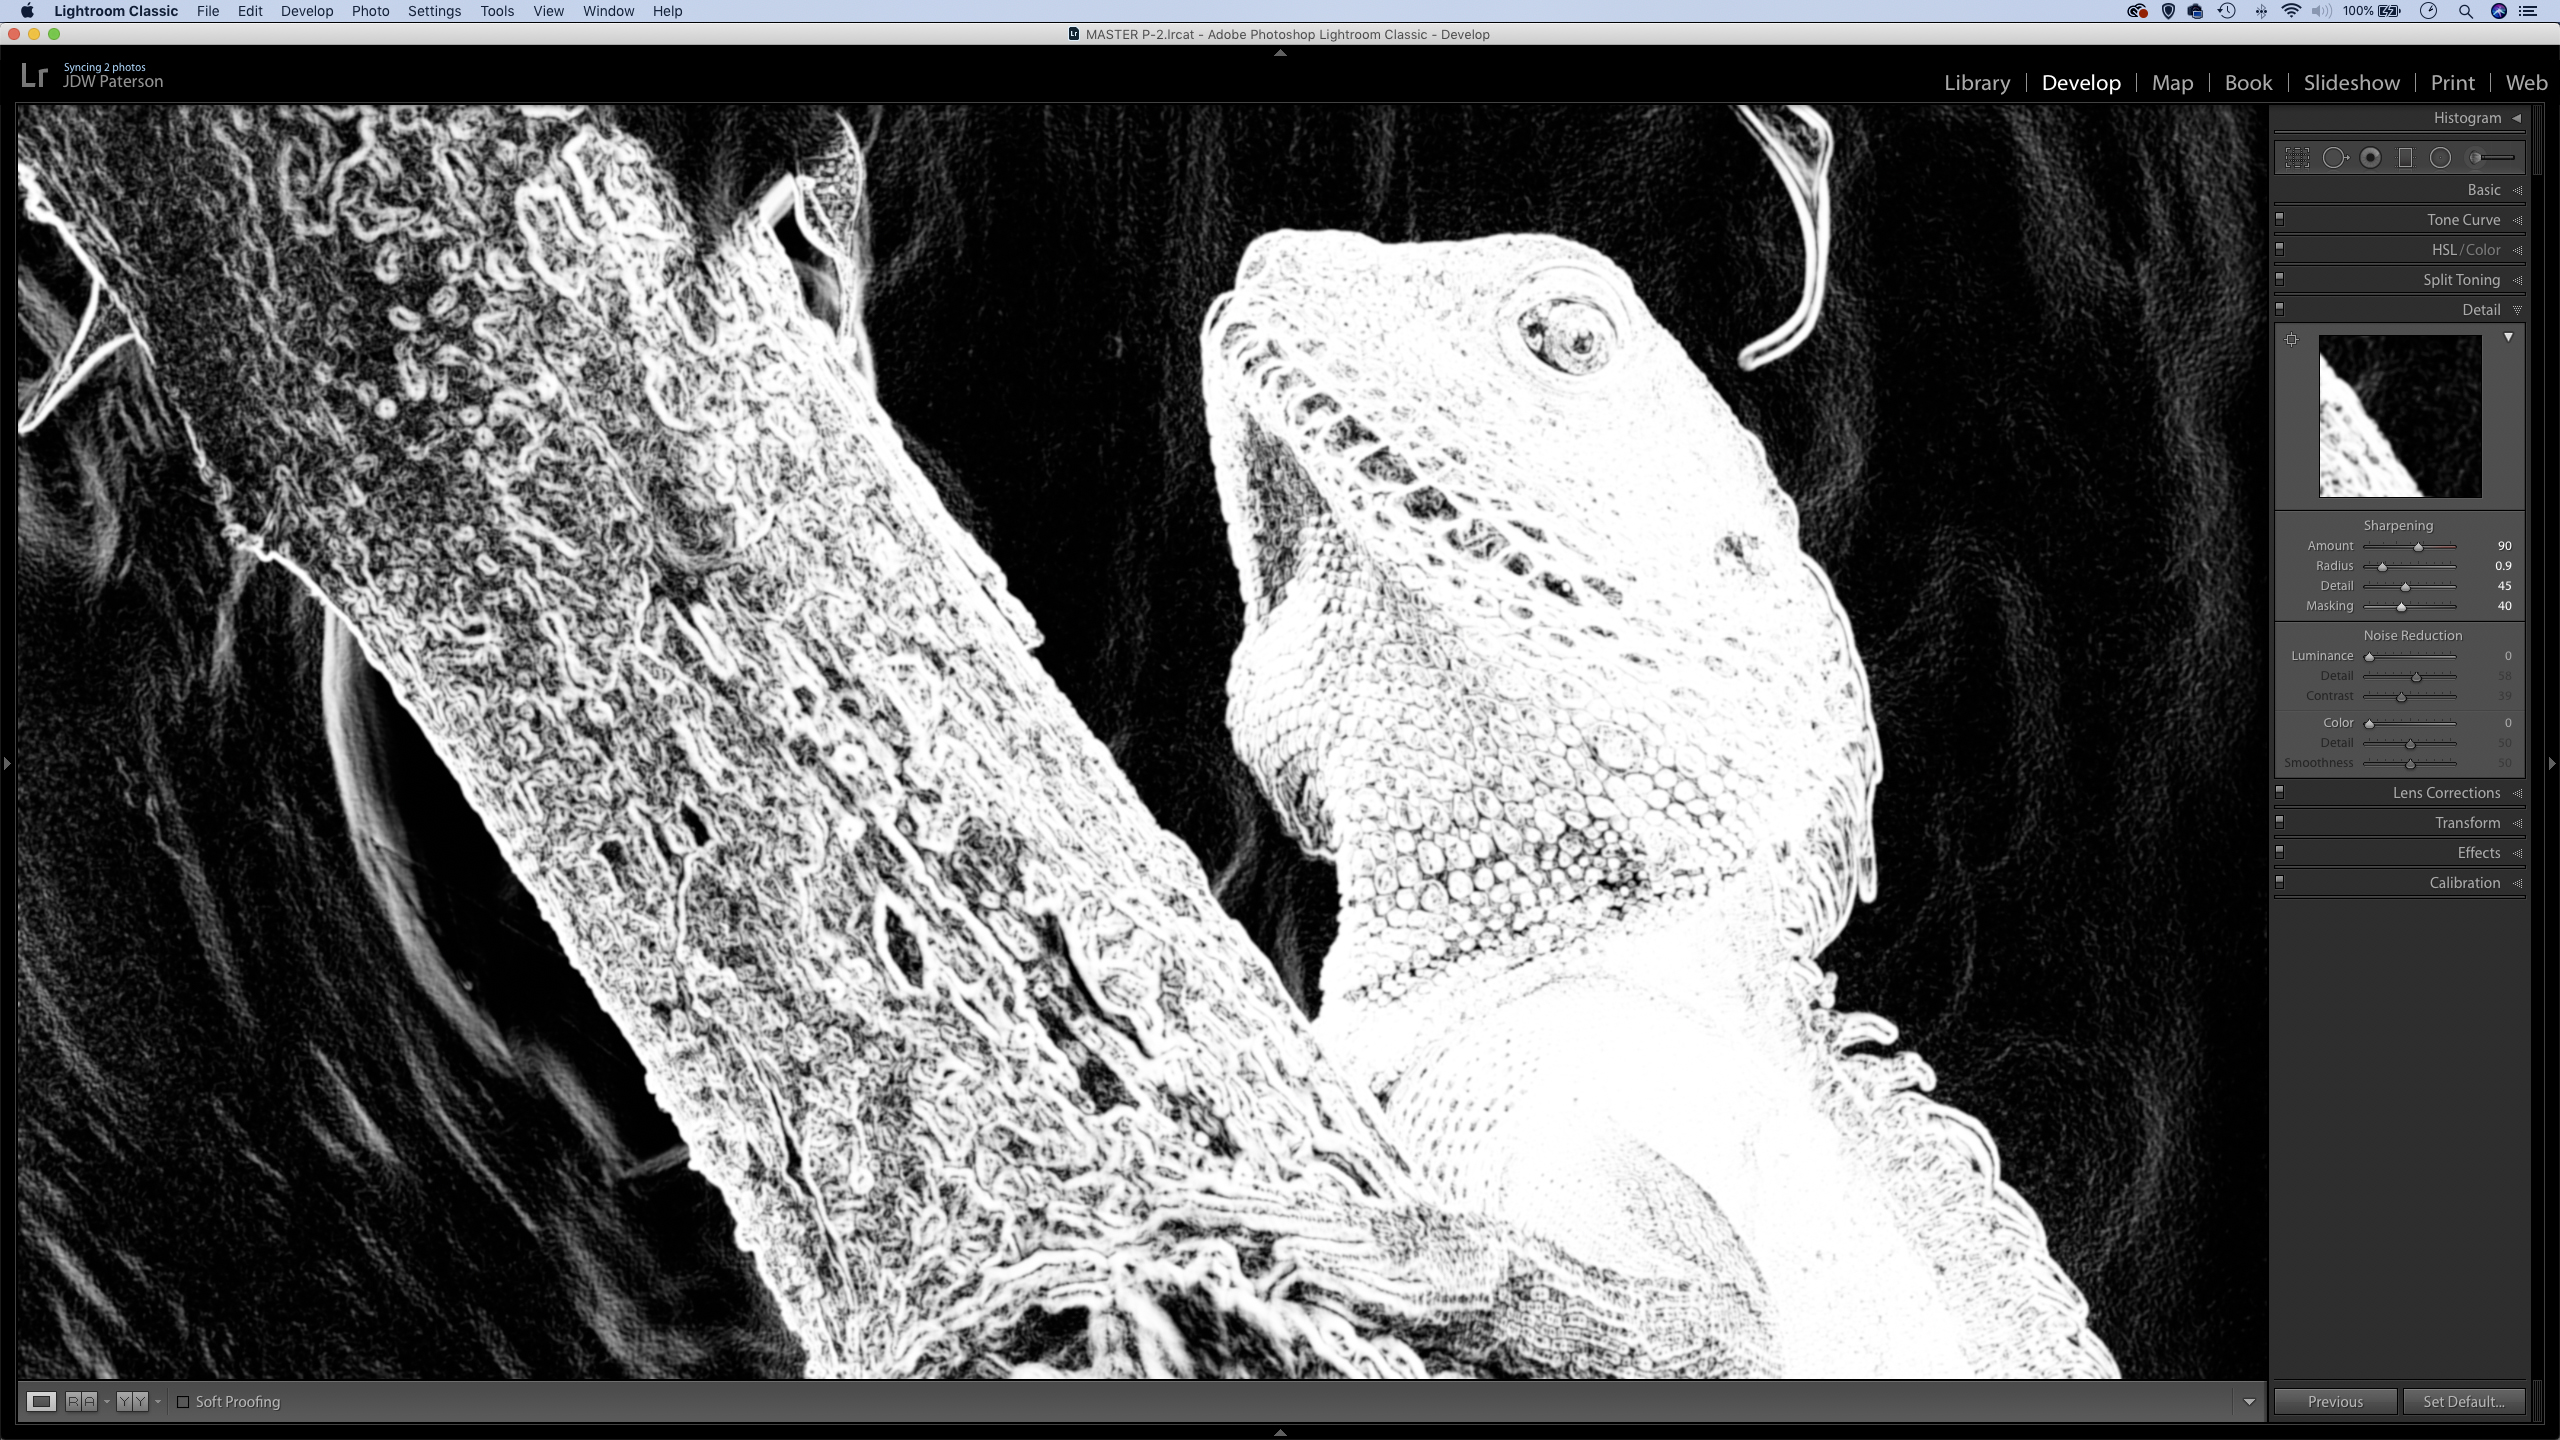
03 Set detail and masking
The Sharpening Detail slider controls how much fine edges are sharpened. High amounts can amplify noise. Masking lets us correct this. Hold Alt and drag Masking for a black and white view. Softer bits show in black as you drag and are masked from sharpening.
04 Fix the noise
We could reduce noise using the sliders in the Detail panel, but we only want to correct the softer areas, so selective adjustments may be better. Get the Adjustment Brush, check Auto Mask, set Noise to 80 and paint the blurred areas to reduce noise.
05 Make a round-trip to Photoshop
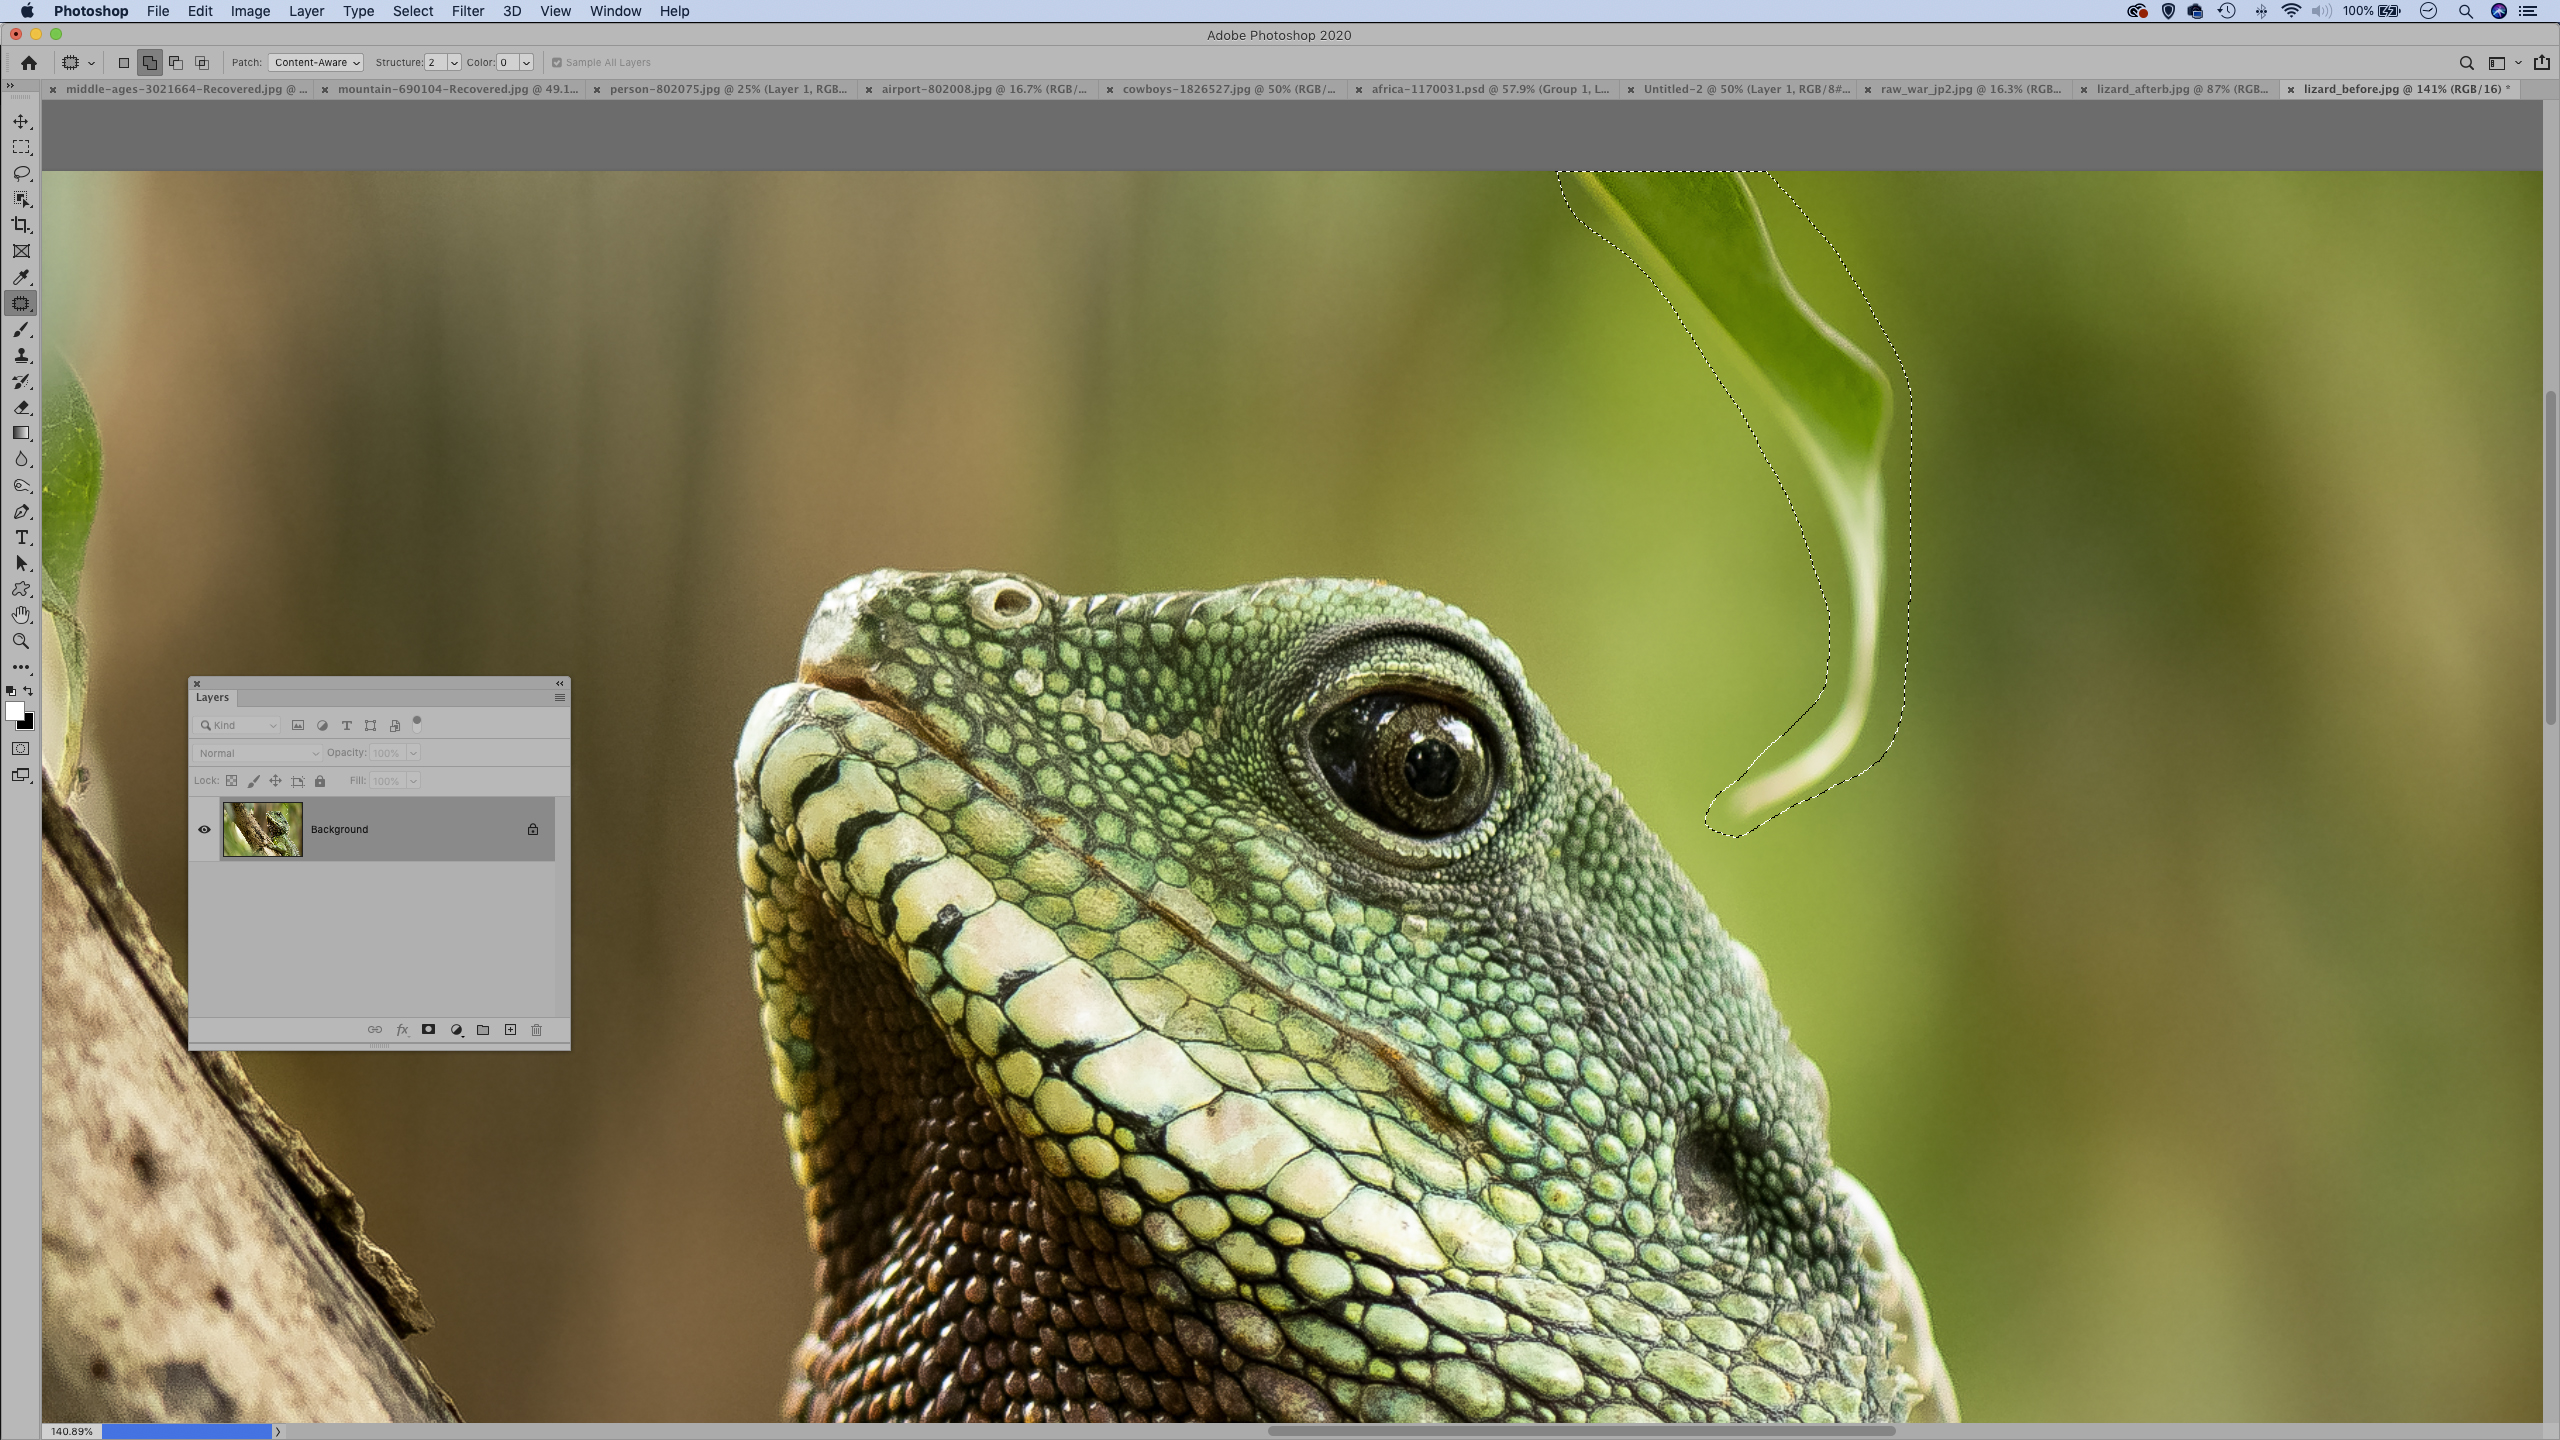
Next, take the image into Photoshop CC for retouching. Right-click the shot and ‘Edit in Photoshop’, choose ‘Edit a Copy with Lightroom Adjustments’, hit OK. In Photoshop, use the Patch tool to remove the leaf by the lizard’s head, close the image to go to Lightroom.
06 Set the output sharpening
Finally, export the image for a print size and use Output Sharpening. Go File > Export, set Image Format to JPEG. In Image Sizing check Resize to fit: Long Edge, set 18cm at 300 pixels per inch. In Output Sharpening pick Sharpen for Matte Paper, Amount Standard and hit OK.
PhotoPlus: The Canon Magazine is the world's only monthly newsstand title that's 100% devoted to Canon, so you can be sure the magazine is completely relevant to your system.
Read more:
100 Photoshop tips
Lightroom tutorials
The best photo editing software: image editors for novices through to pros
The best photo-editing laptops: top laptops for photographers
10 best online photography courses – from beginner guides to masterclasses
The lead technique writer on Digital Camera Magazine, PhotoPlus: The Canon Magazine and N-Photo: The Nikon Magazine, James is a fantastic general practice photographer with an enviable array of skills across every genre of photography.
Whether it's flash photography techniques like stroboscopic portraits, astrophotography projects like photographing the Northern Lights, or turning sound into art by making paint dance on a set of speakers, James' tutorials and projects are as creative as they are enjoyable.
He's also a wizard at the dark arts of Photoshop, Lightroom and Affinity Photo, and is capable of some genuine black magic in the digital darkroom, making him one of the leading authorities on photo editing software and techniques.
