The best camera deals, reviews, product advice, and unmissable photography news, direct to your inbox!
You are now subscribed
Your newsletter sign-up was successful
Watch video: How to add snow to your images digitally
If we said "winter" you would probably think about shorter days, longer nights, a sharp drop in temperature and, of course, fluffy white snow that coats landscapes in a fine powder and makes for a white festive season (if you get lucky!).
However, depending on where you live, a snowy spell is not always a guaranteed, so this month we're going to reveal an easy way to add snow to your winter images. And this technique works in both Photoshop CC and the budget Photoshop Elements 2020, which is what we used for this project.
You’ll need a wintery image, or our climber starter image, as well as the snow brush file, which you can download both for free here.
Whichever image you decide to try it out on, the effect will look its best if the scene looks wintry from the start – even our starter image has some snow on the mountains already, but there isn’t any falling in the air. So we’ve brushed in some extra snow to make the landscape look more dramatic. It also gives you full control over where you want the snow to appear in the final product.
01 Load up your free snow brush file
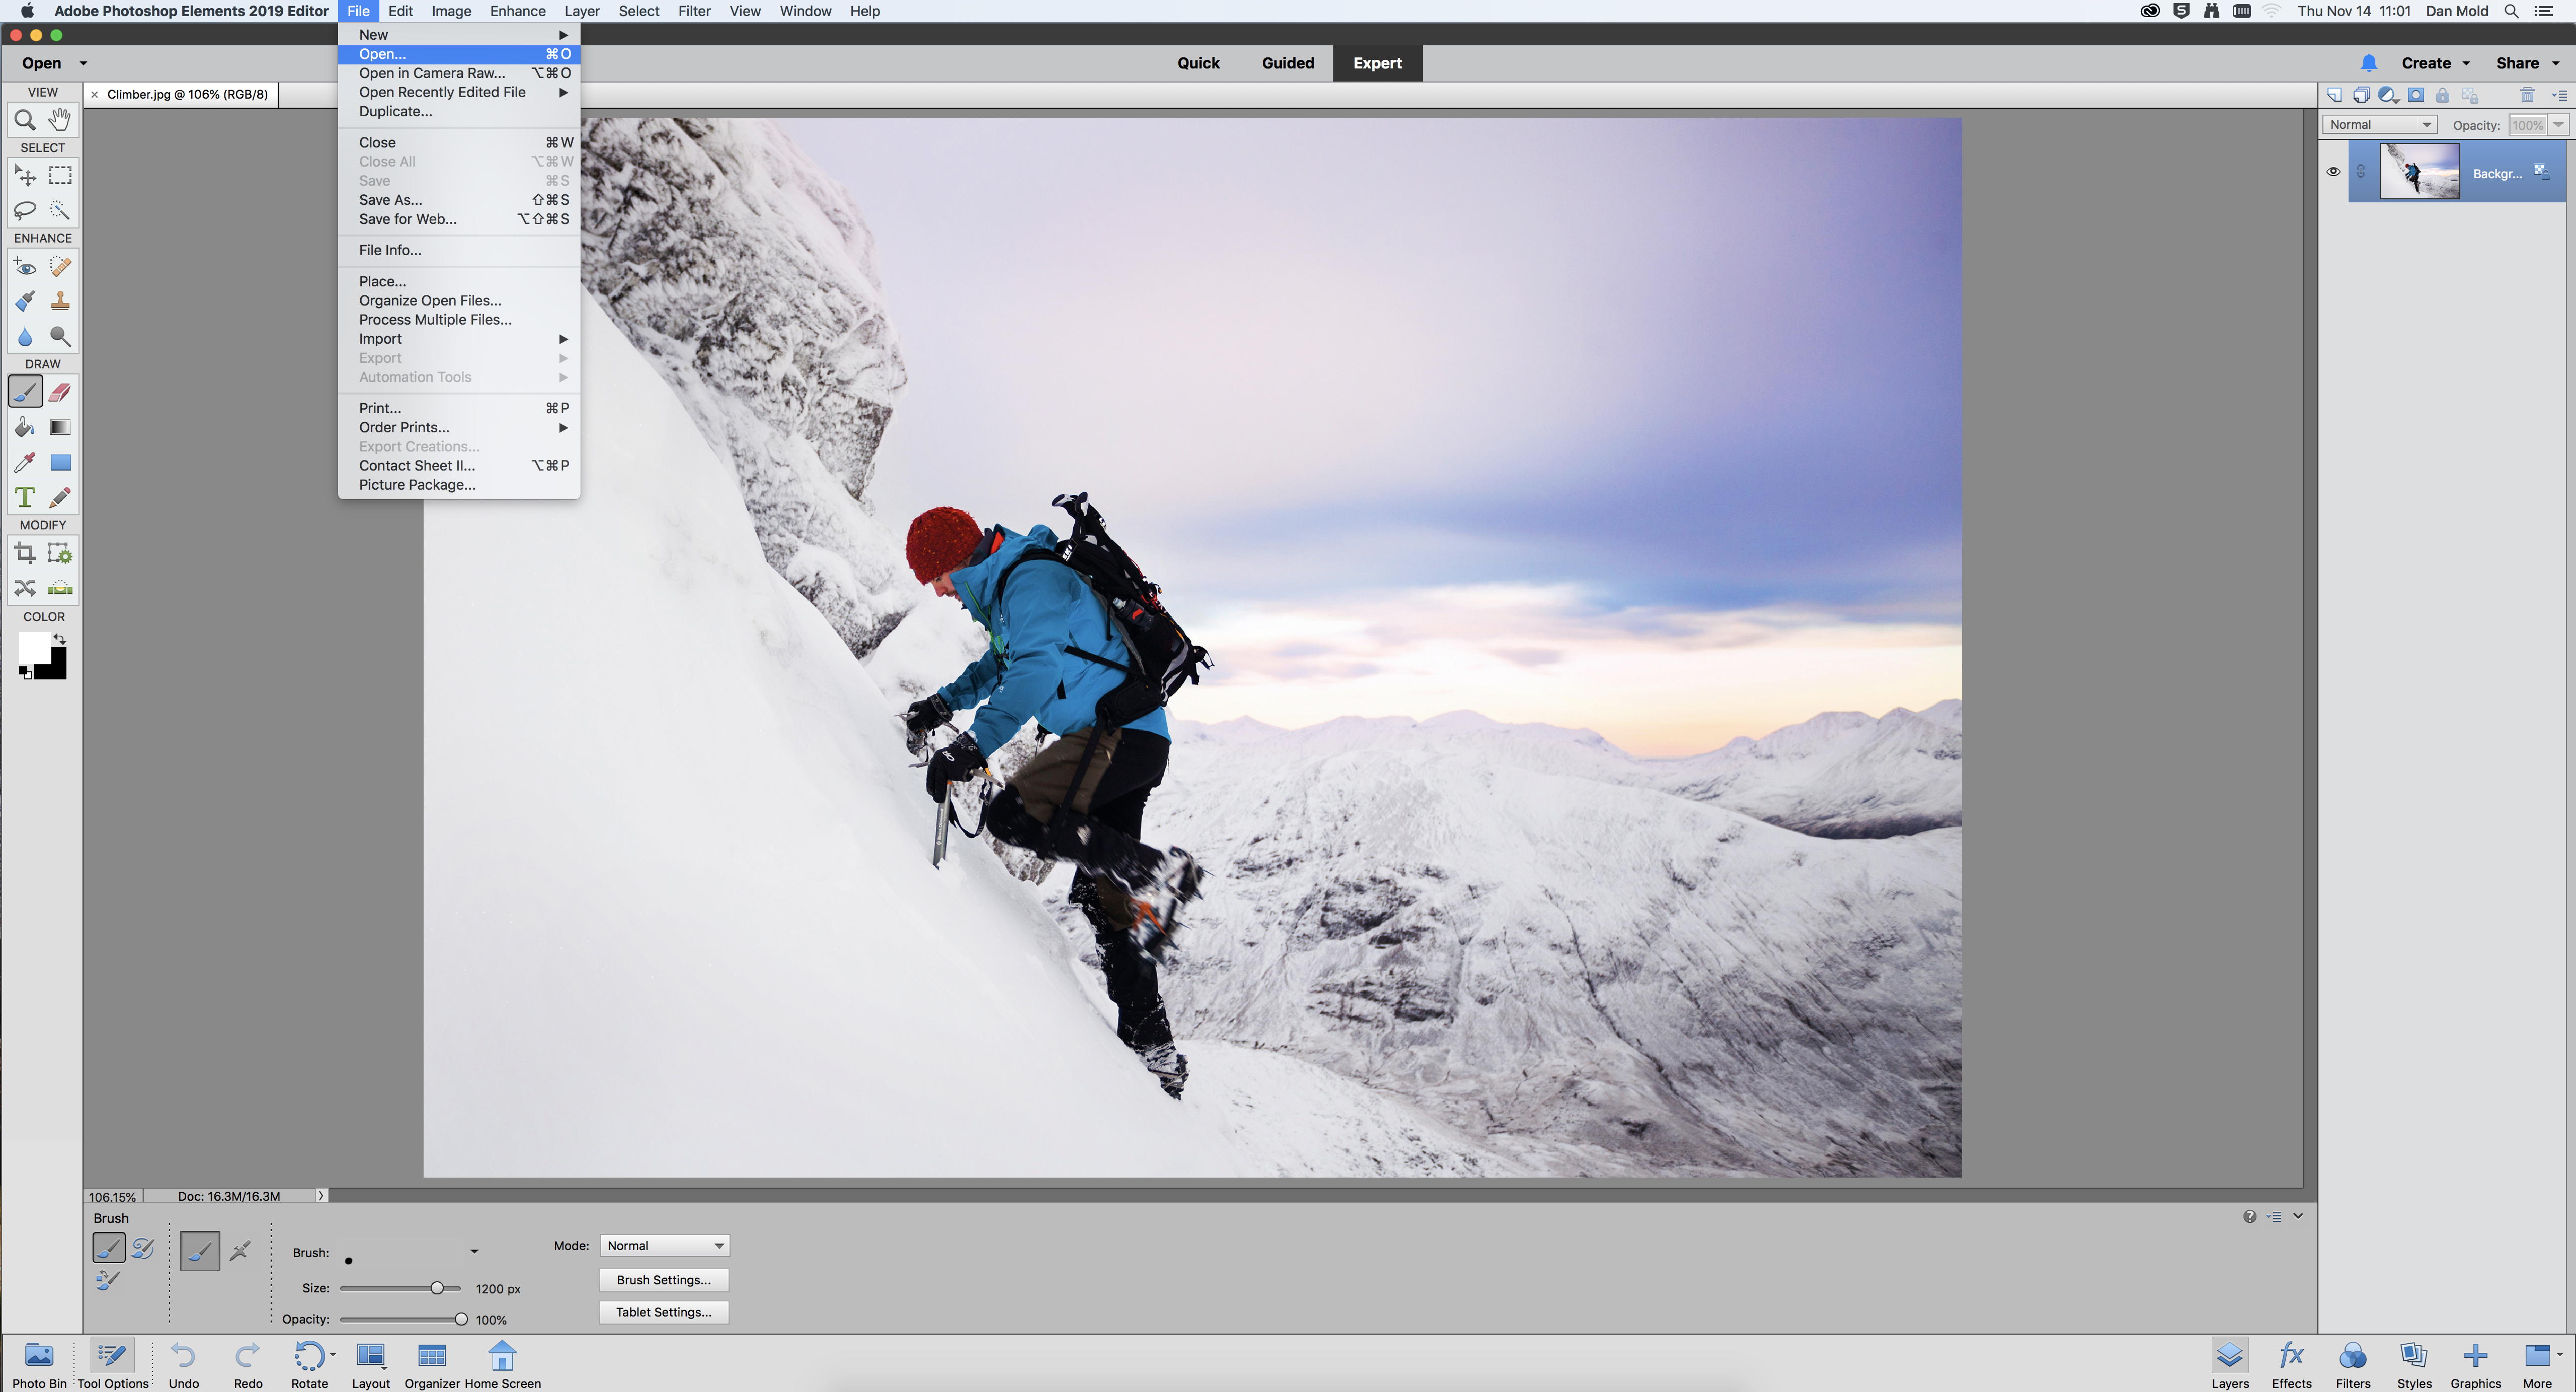
Open the winter scene you’d like to add snow to, then click on the Brush Tool to active it. Click on the Brush list and on the settings button choose Load brushes from the flyout menu. Now find the ‘Snow Brush.abr’ file on your computer (download here).
The best camera deals, reviews, product advice, and unmissable photography news, direct to your inbox!
02 Randomize how the brush works
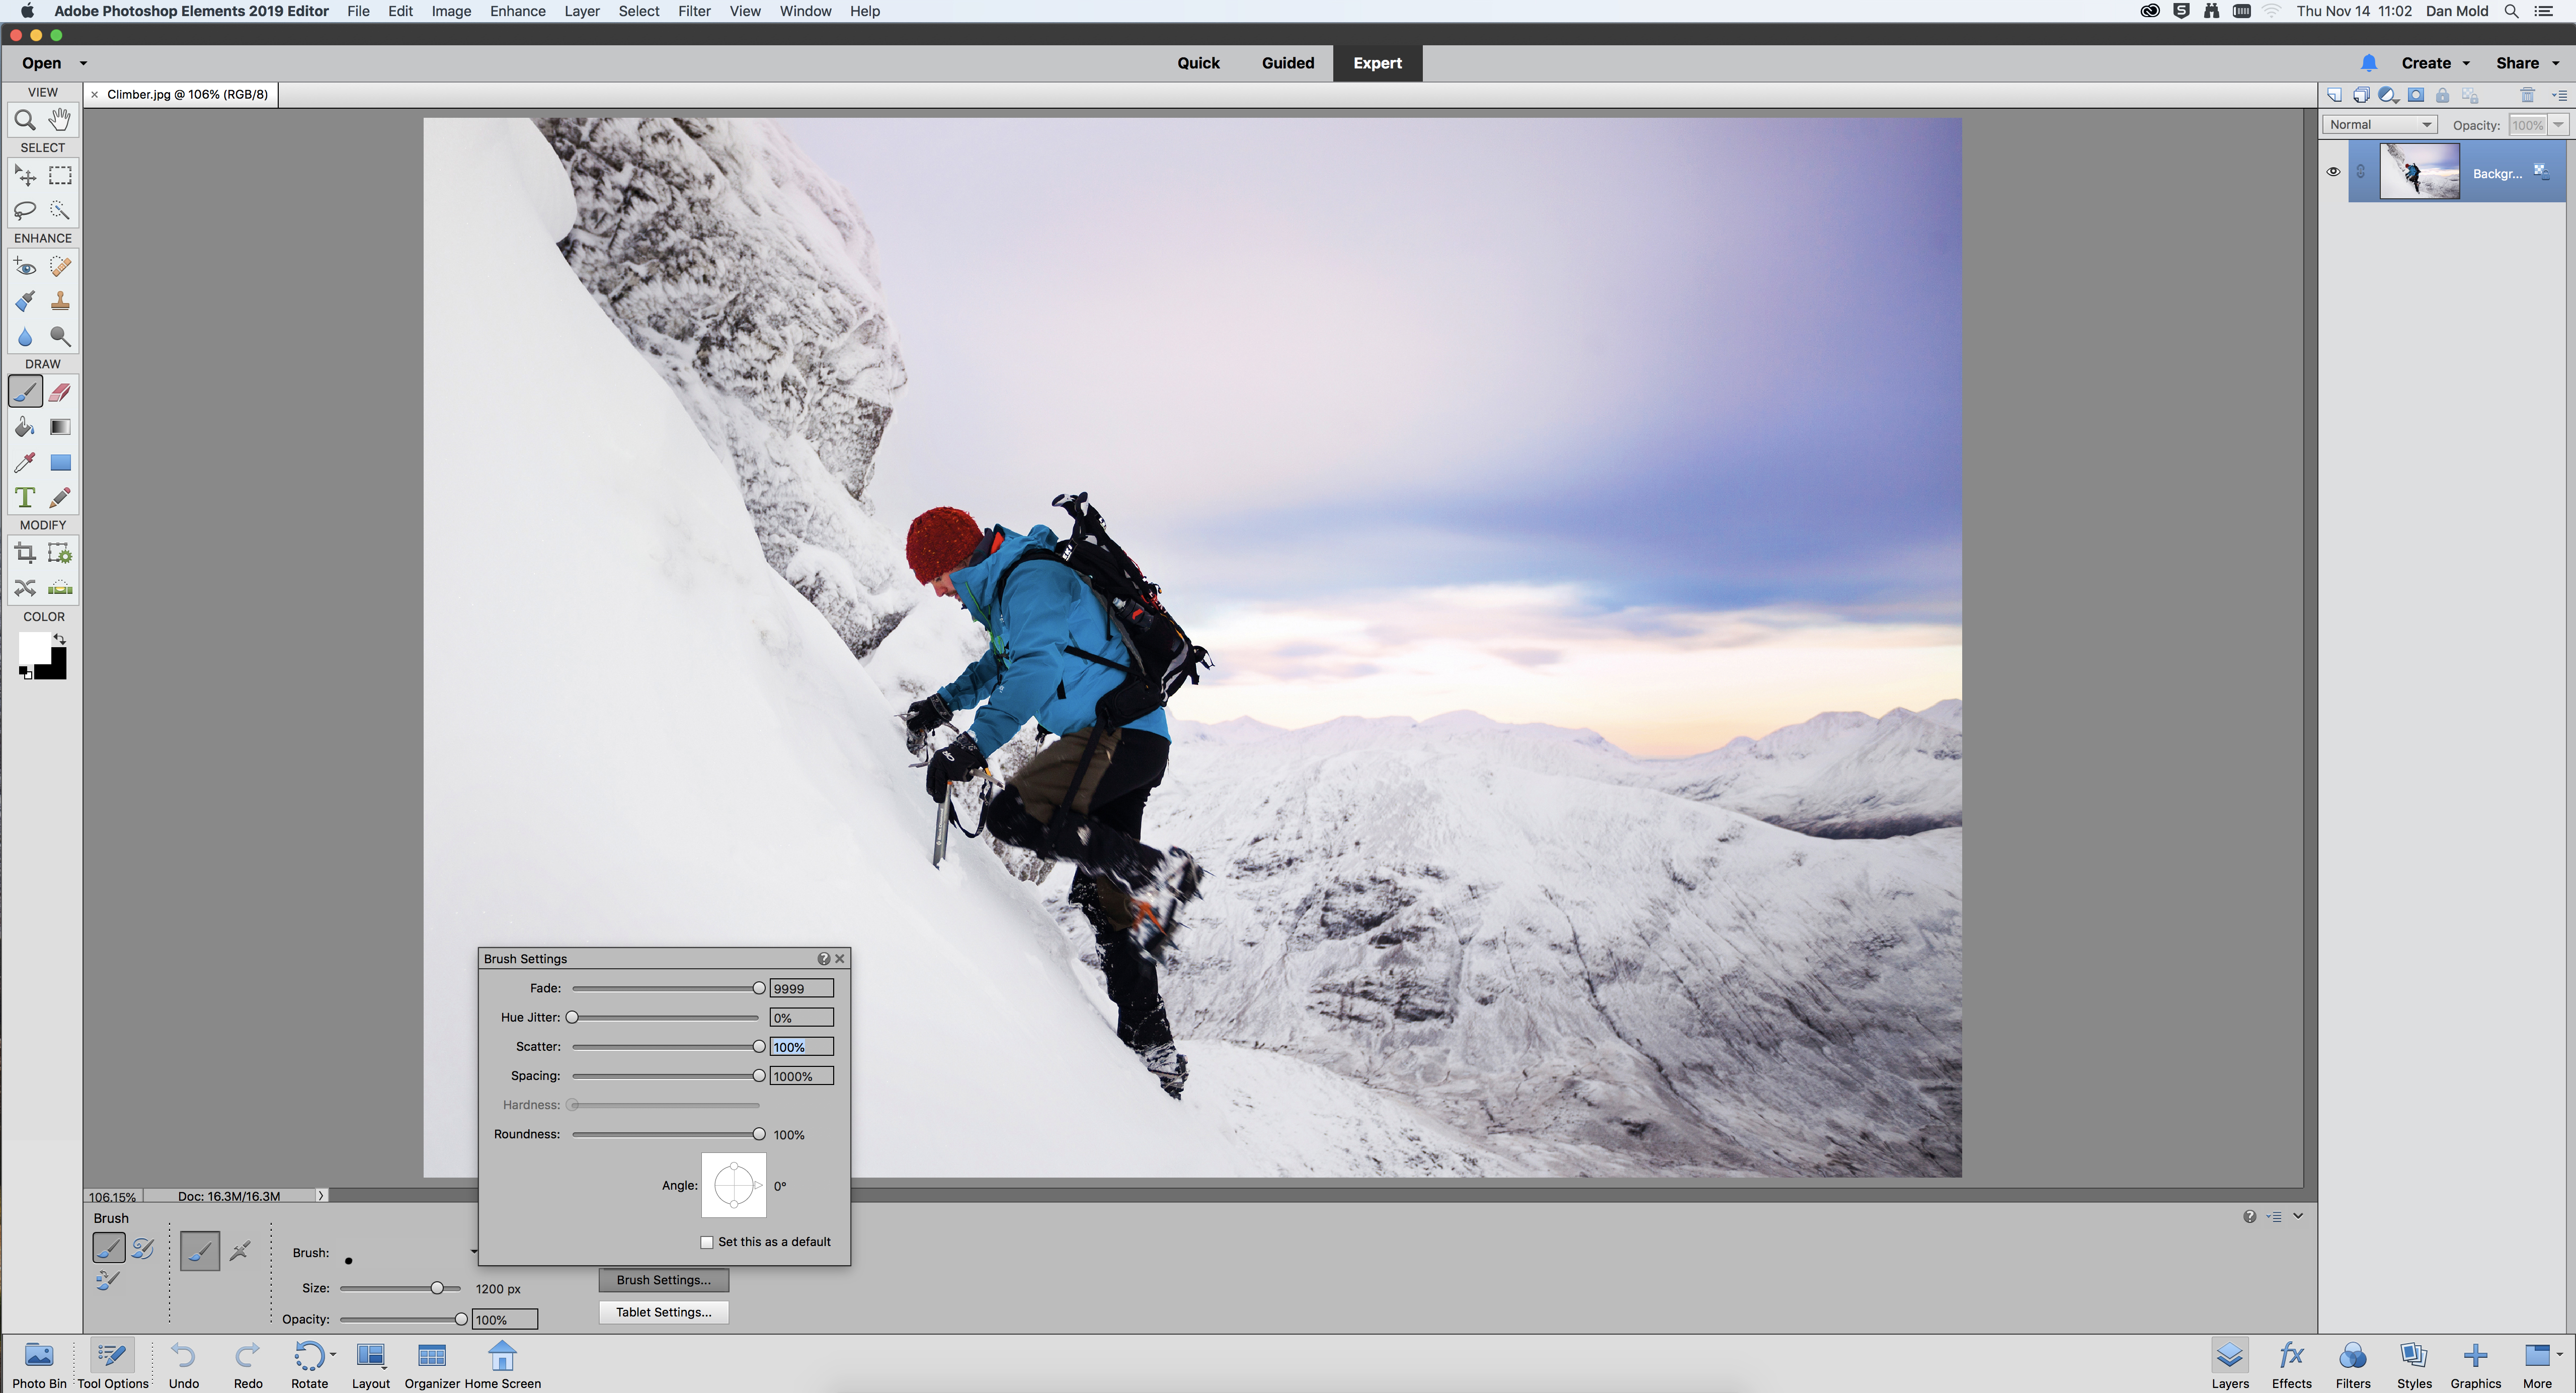
In the tool options bar click on Brush Settings and set Fade, Scatter, Spacing and Roundness to their maximum values by dragging the sliders all the way to the right. This will make paint your snow in a random way, to make it look more natural.
03 Paint your snow on to a new layer
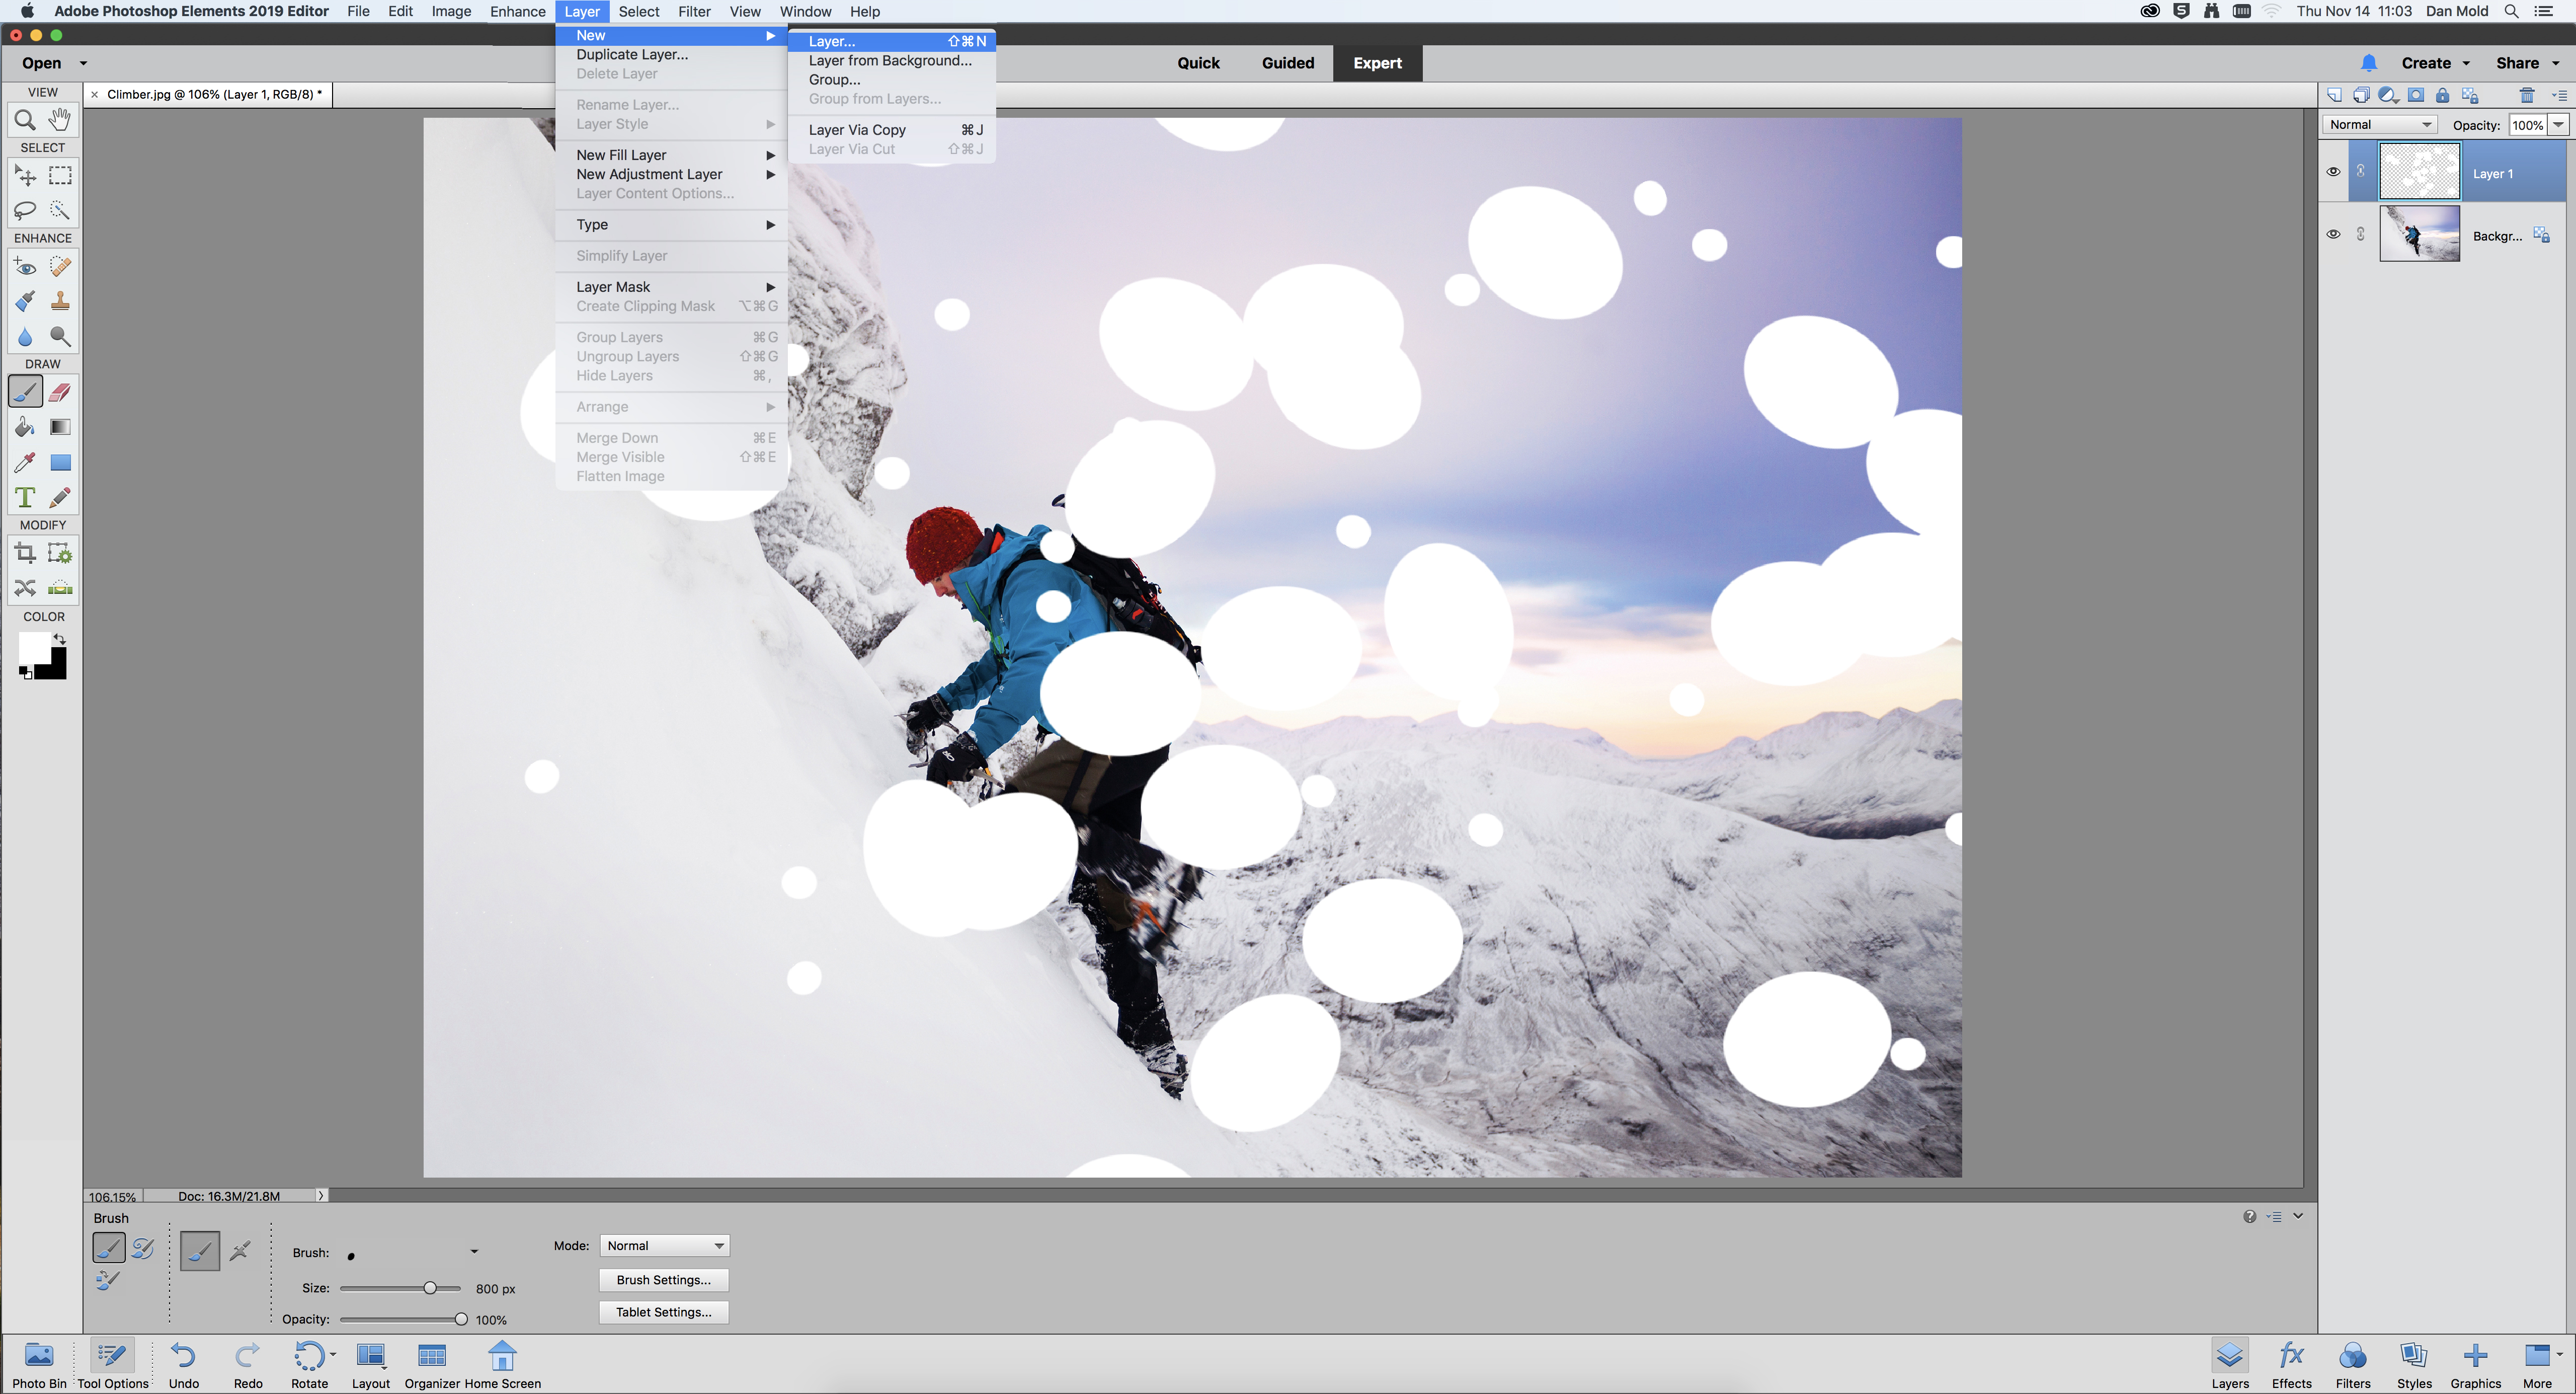
To avoid painting directly onto your image go to Layer > New Layer to create a new layer to paint on – you’ll find this in the Layers panel (Window>Layers). Now set the foreground color to white and resize with the [ and ] keys, and paint snow over the top.
04 Defocus using a Gaussian Blur filter
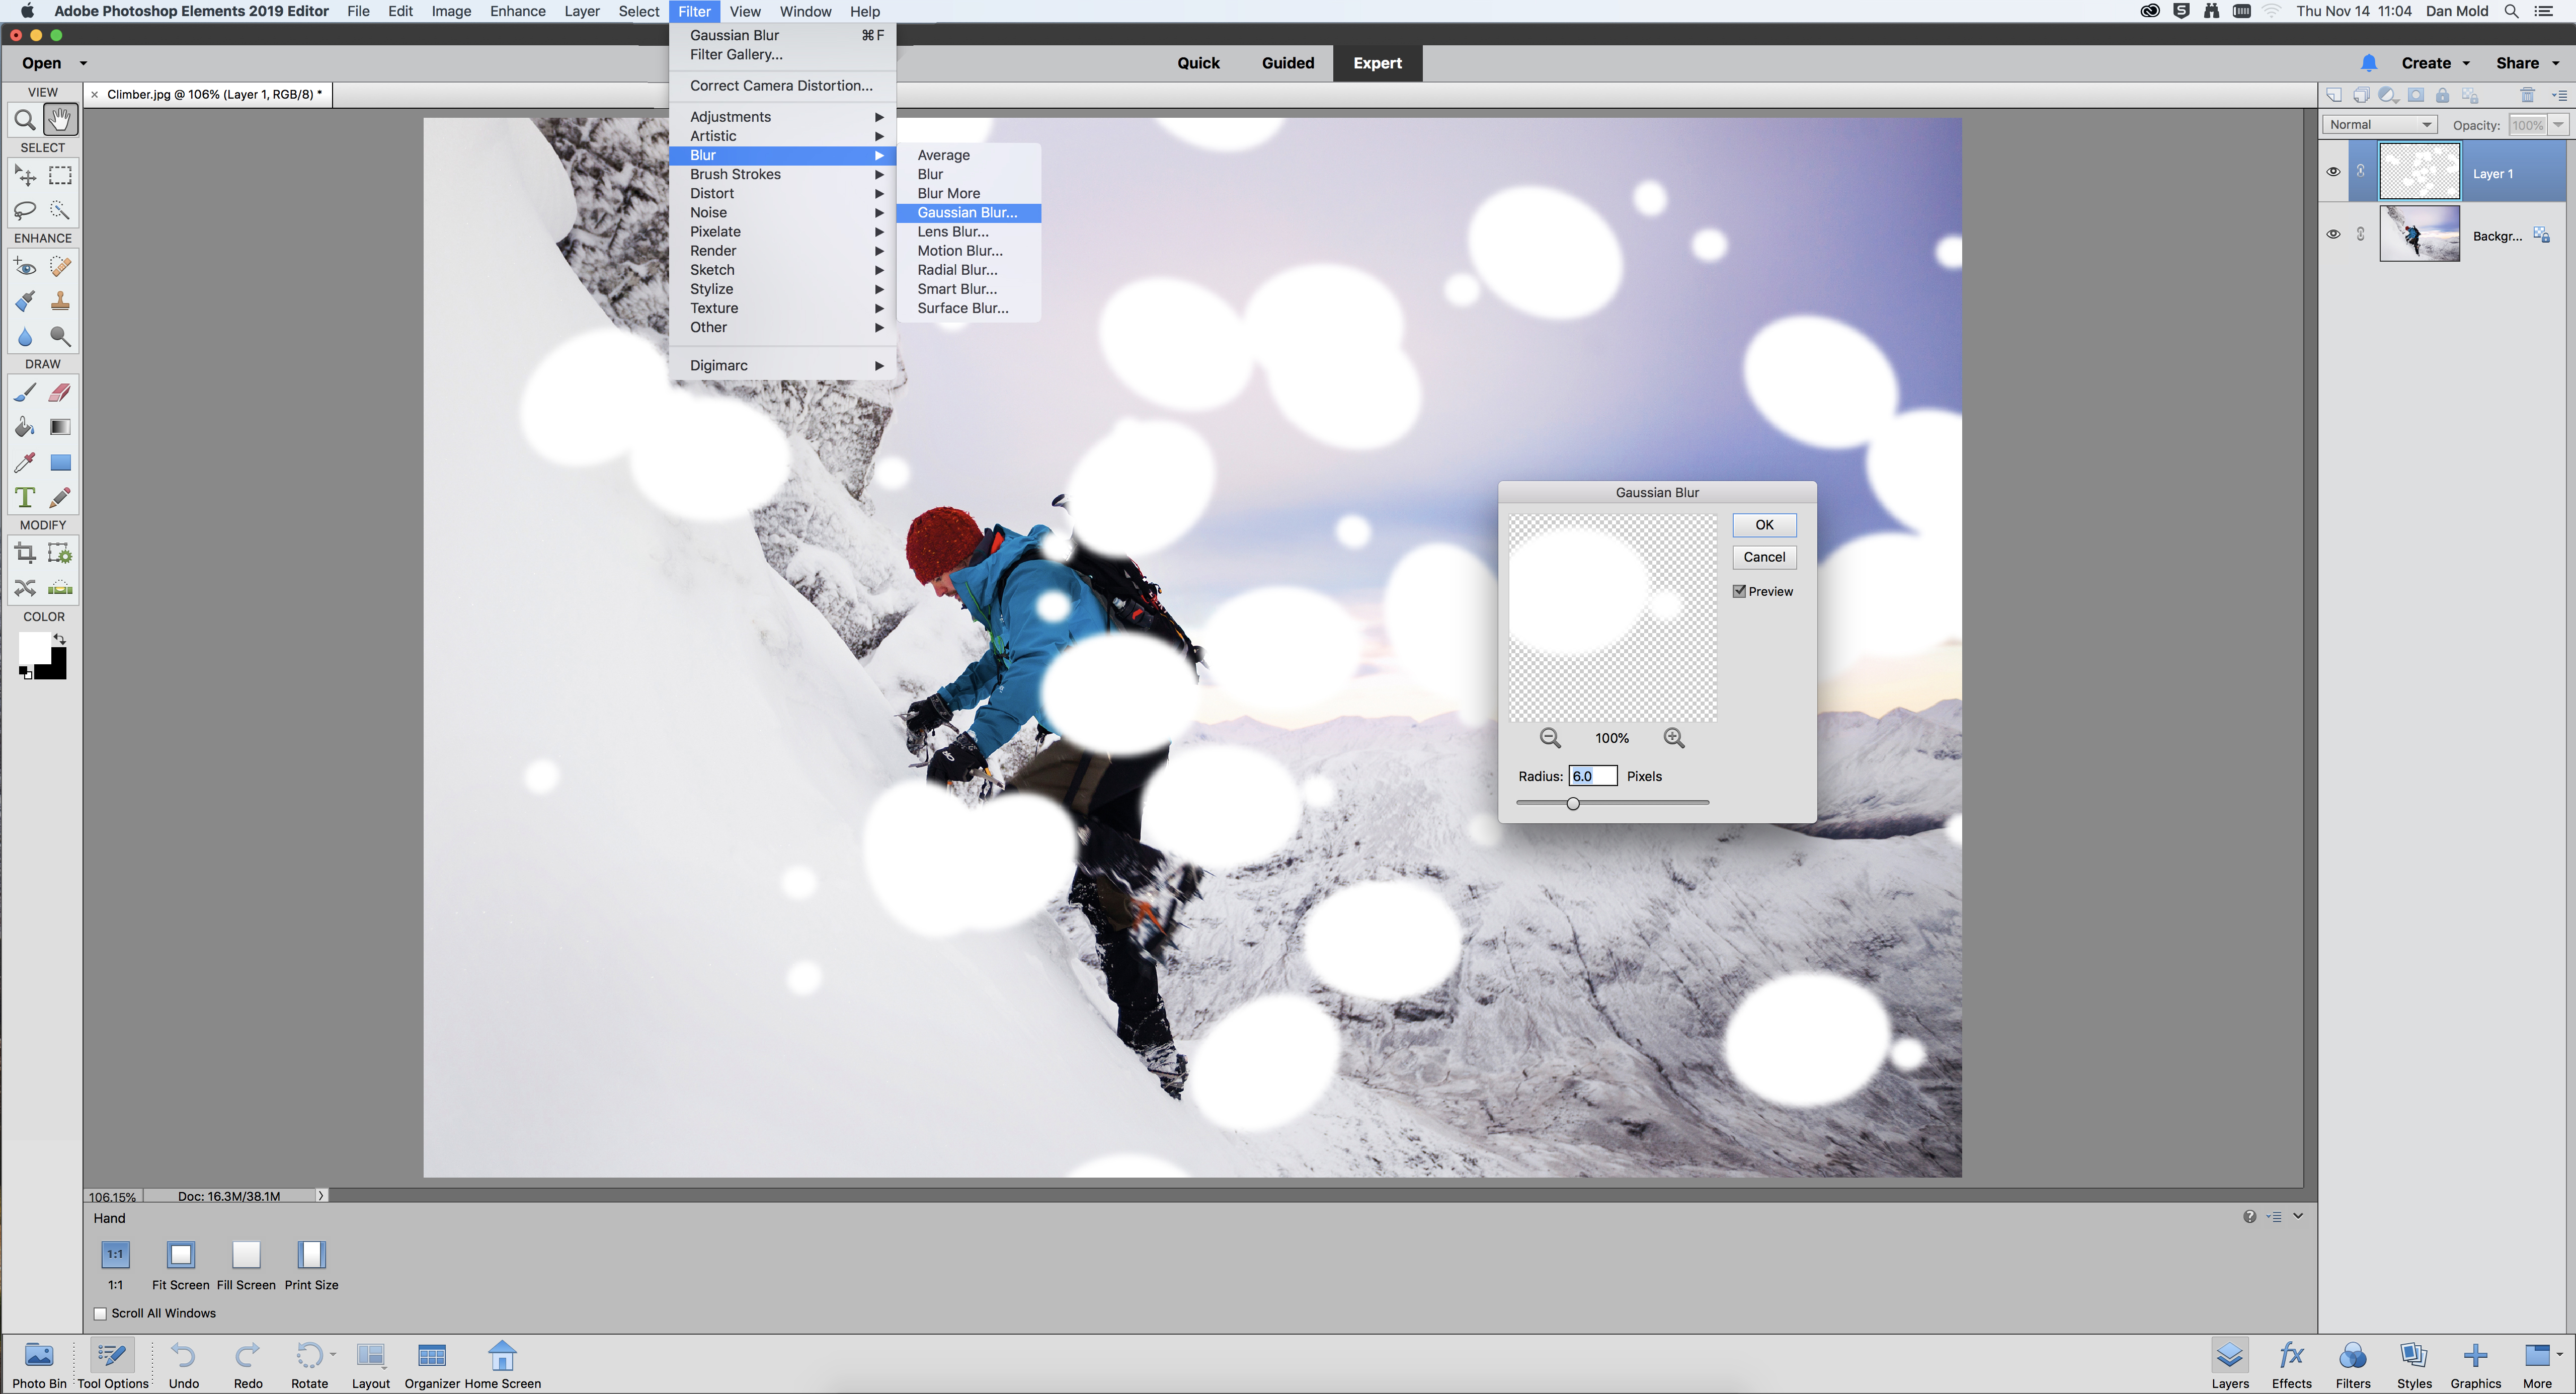
The snow will look more realistic if it’s blurred a little, so go to Filter > Blur > Gaussian Blur. In the panel that appears, choose a small value around 5px to make the snow look slightly out of focus, and hit OK to make the change.
05 Add movement to make it look like it's falling
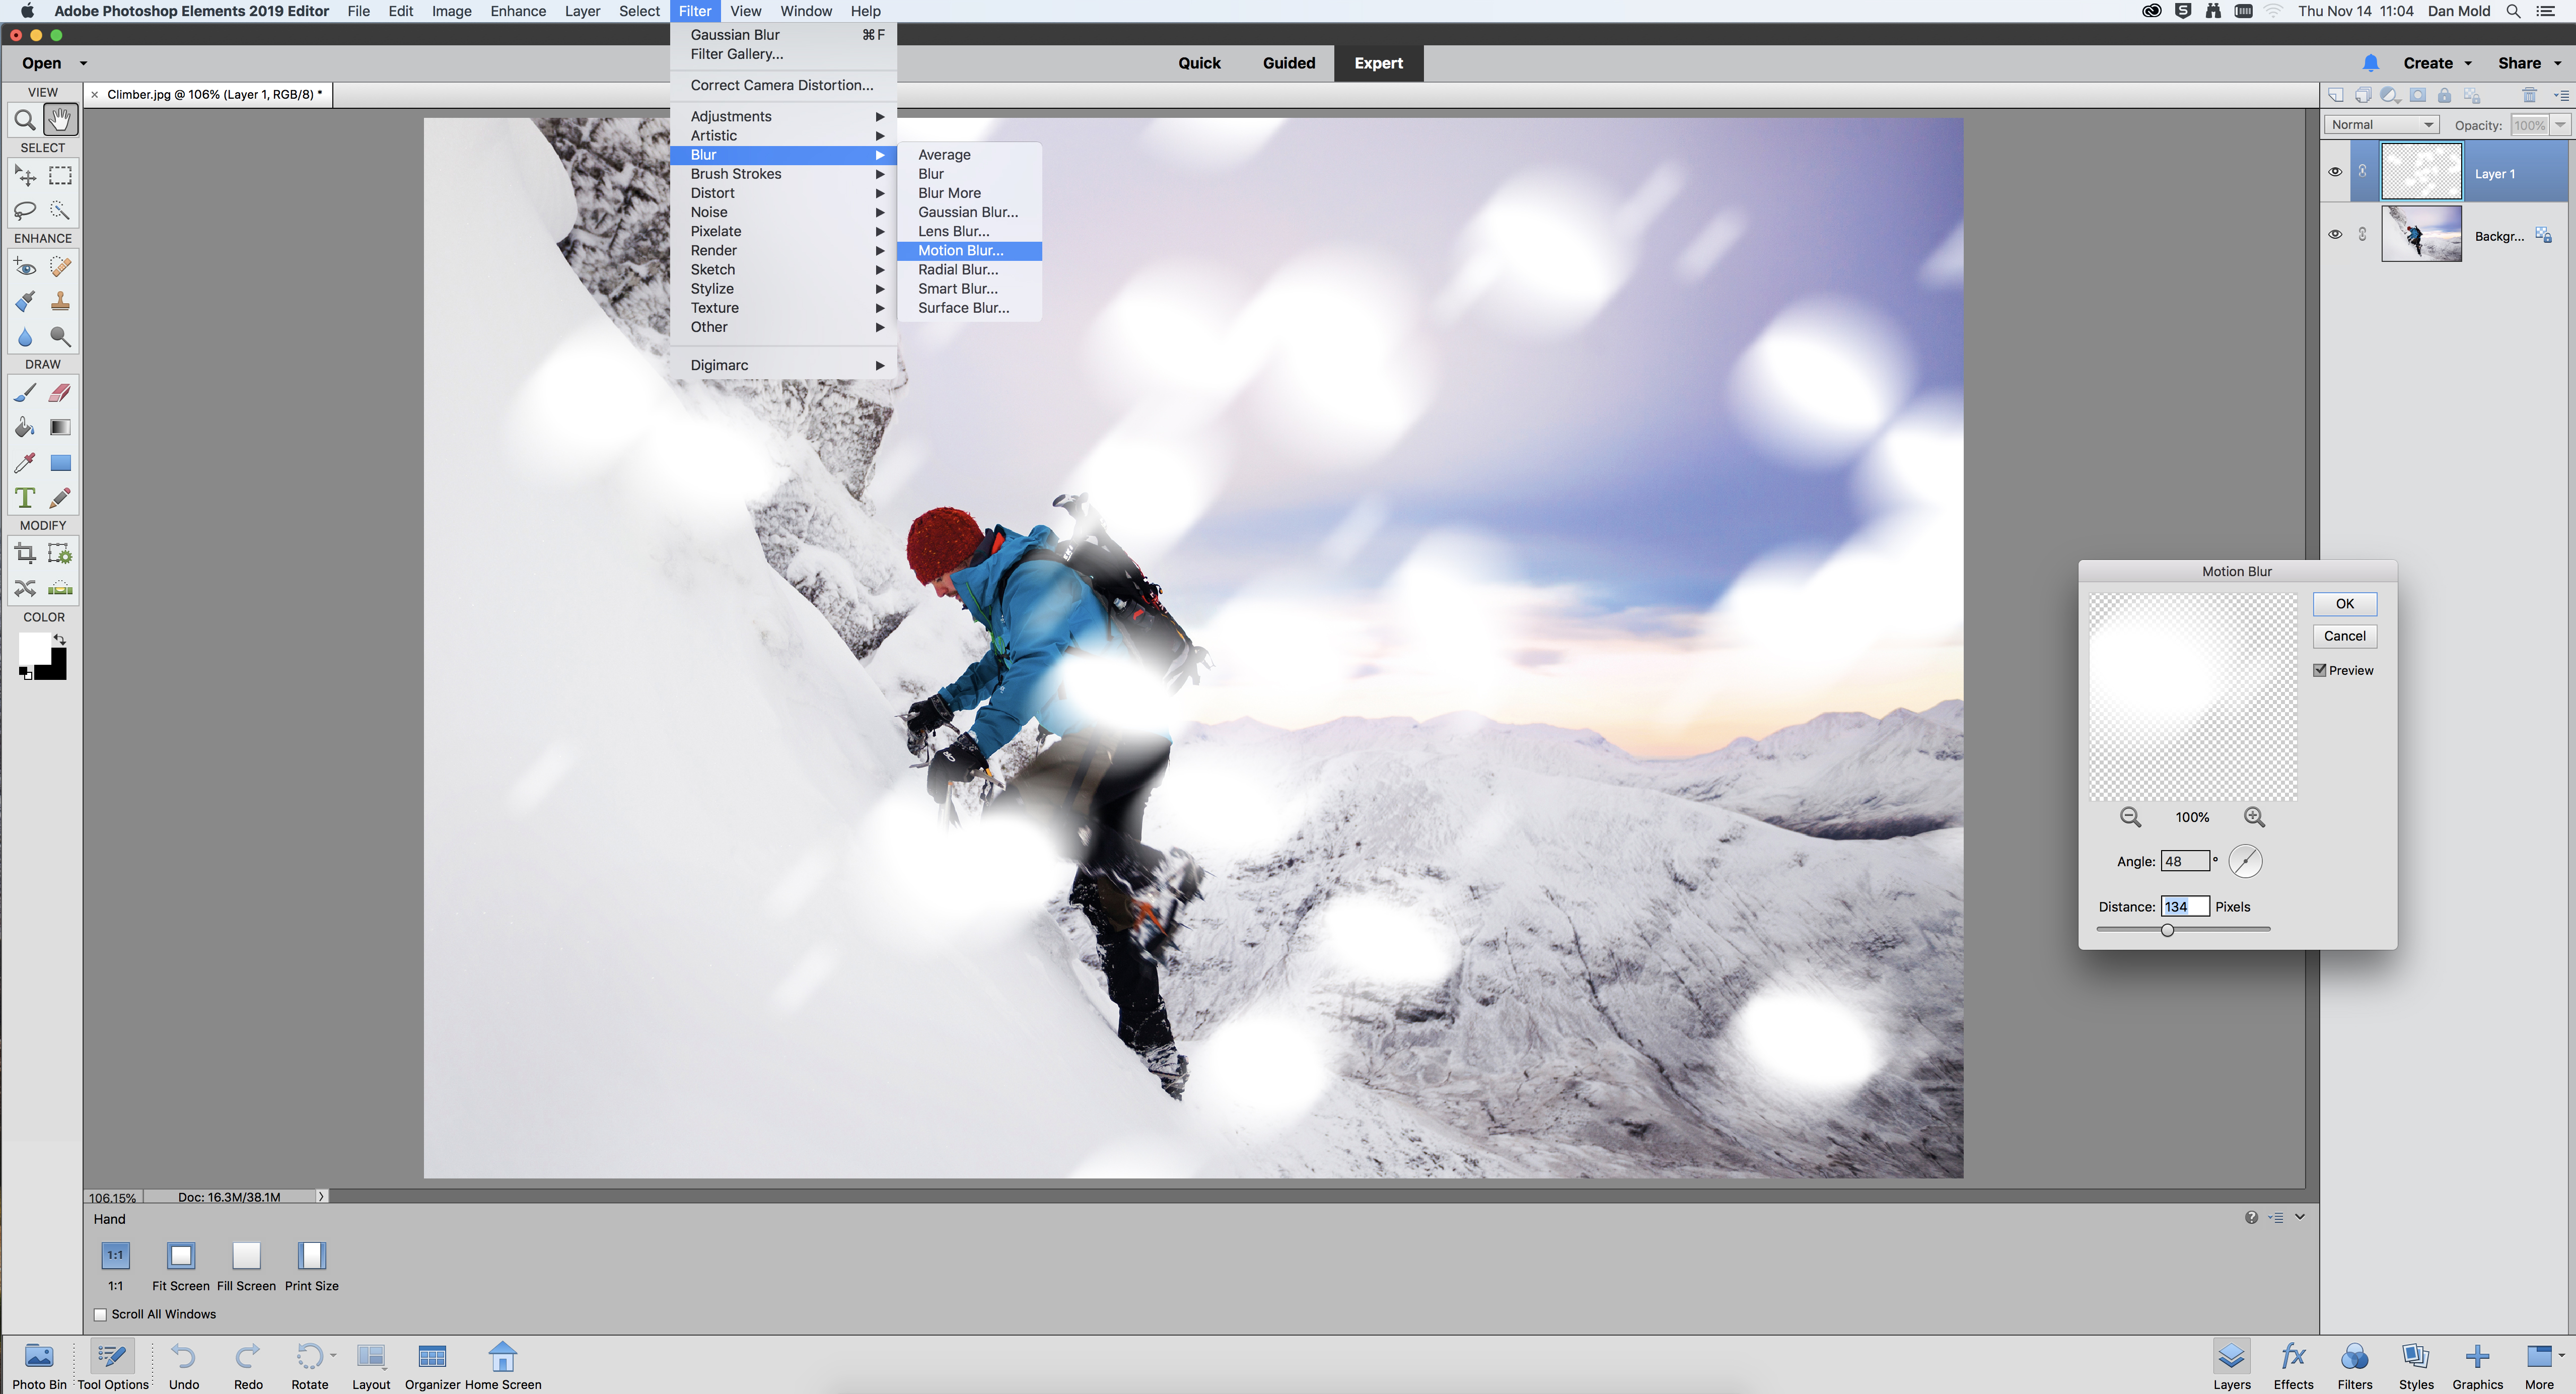
Now we need to add a little directional blur, so go to Filter > Blur and this time choose Motion Blur from the list. In the panel that appears, set the Angle to change the direction the motion is applied, and the Distance to set how strong the effect is and hit OK.
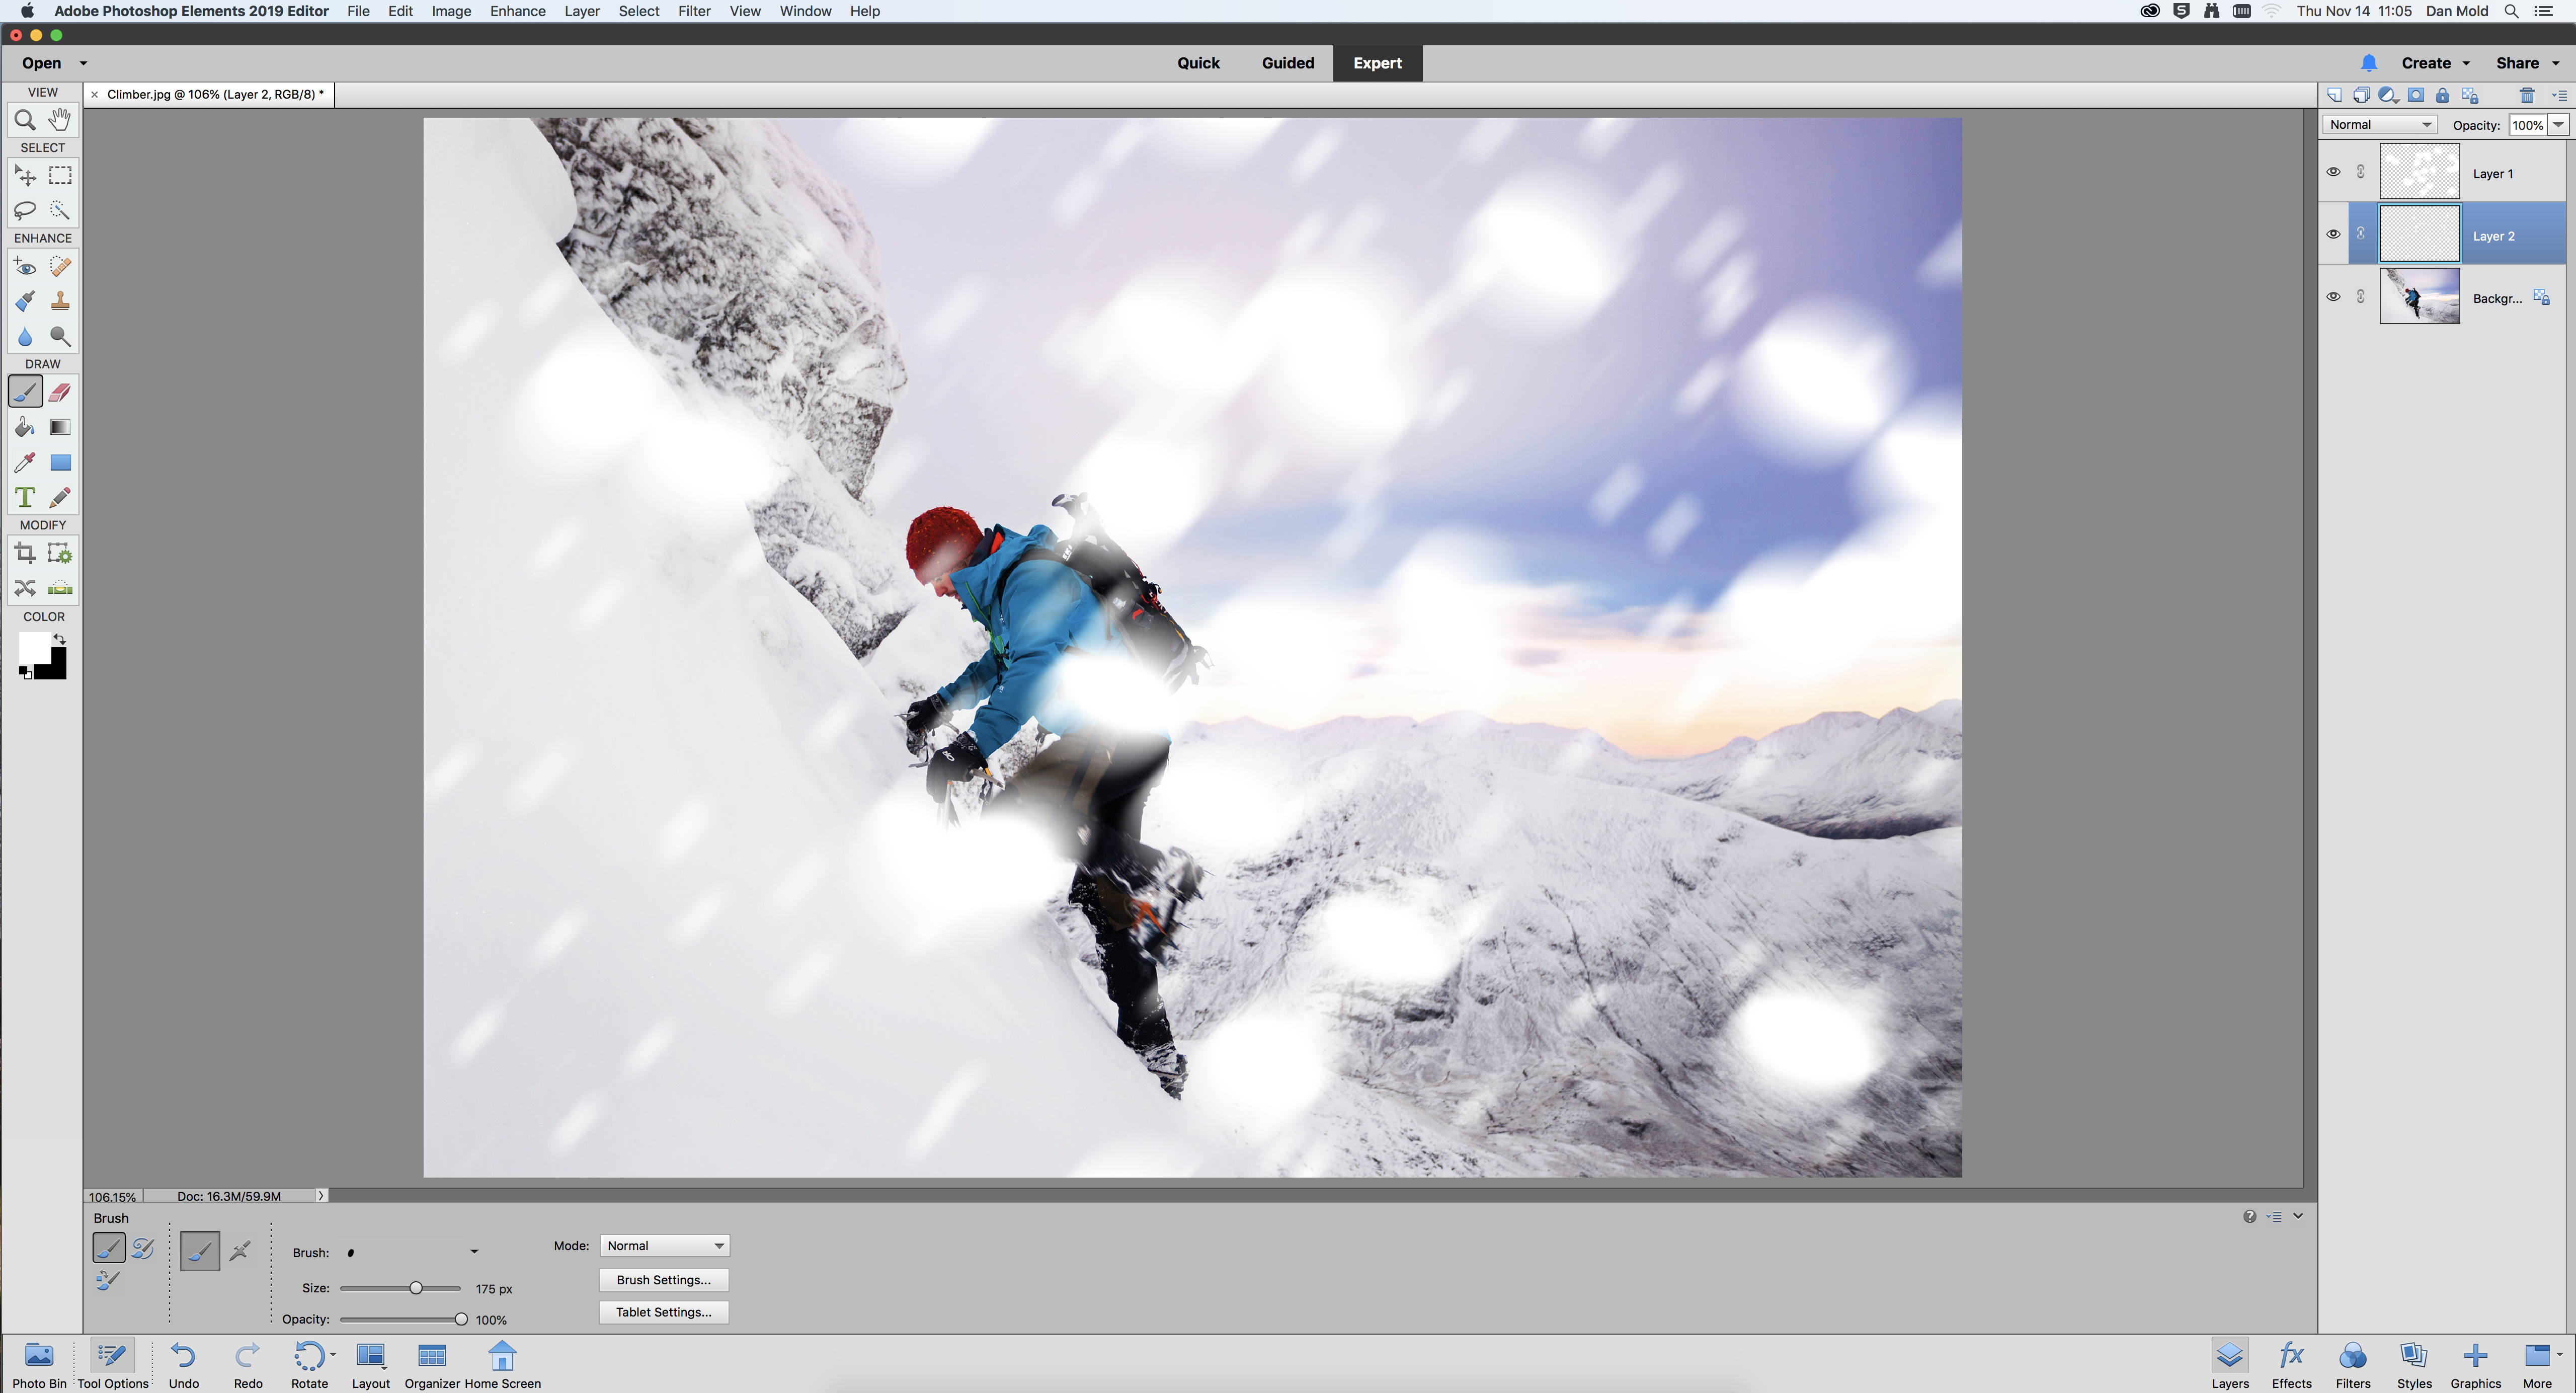
06 Repeat the process to build up the effect
Finally, you need to repeat the whole process making new layers with different sizes of snow on each layer to give the shot some depth. If snow appears over an area you don’t want it to, you can brush over it with a soft Eraser Tool to remove it.
PhotoPlus: The Canon Magazine is the world's only monthly newsstand title that's 100% devoted to Canon, so you can be sure the magazine is completely relevant to your system.
Read more:
The best photo editing software: image editors for novices through to pros
The best photo-editing laptops: top laptops for photographers
10 best online photography courses – from beginner guides to masterclasses

In addition to being a freelance photographer and filmmaker, Dan is a bona fide expert on all things Canon and Adobe. Not only is he an Adobe-certified Photoshop guru, he's spent over 10 years writing for specialist magazines including stints as the Deputy Editor for PhotoPlus: The Canon Magazine, Technical Editor for Practical Photography and Photoshop Editor on Digital Photo.
