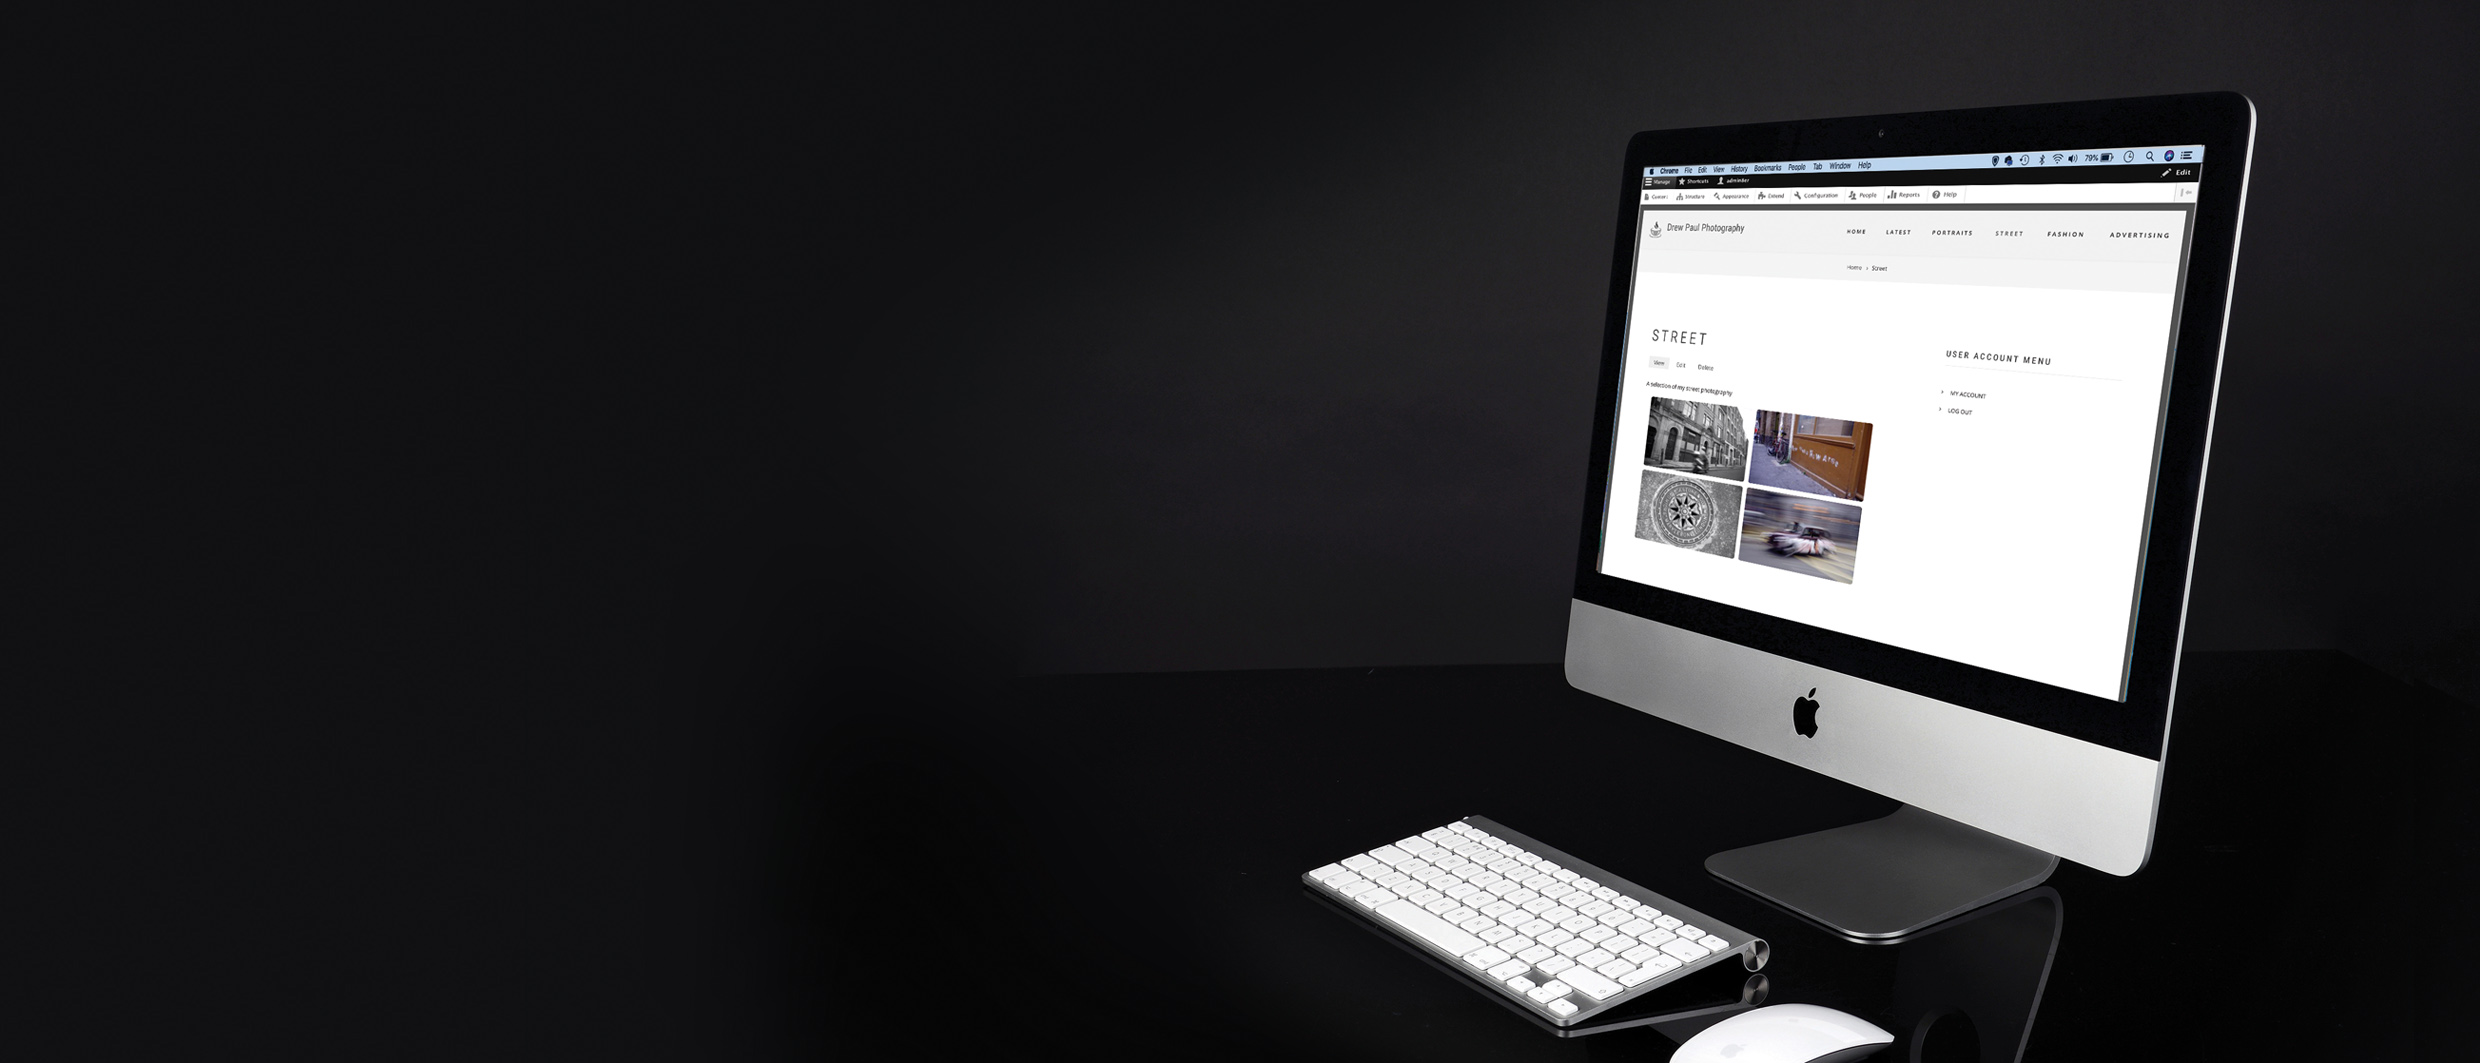
How to build a photo website in Drupal, part 3
Concluding the building and testing of our photography website on this open-source content management system
The best camera deals, reviews, product advice, and unmissable photography news, direct to your inbox!
You are now subscribed
Your newsletter sign-up was successful
For the final part of this series, we’re going to walk you through the final stages of building a photography website from scratch using the Drupal content management system (CMS).
Websites built using a CMS are more sophisticated than ones consisting of fixed or ‘static’ pages of text, and are essential for displaying images.
As an open-source general-purpose CMS, Drupal boasts a large community of contributing developers, and is popular with governments, non-profit firms and educational institutions.
Building a website in Drupal is more involved than doing it in other CMSs like WordPress, so it will appeal to computer-literate people who like the idea of going ‘behind the curtain’ of a website.
The reward will be a bespoke and secure website built on a highly customisable platform where added functionality is bestowed via installing modules (extra features) and themes (which determine the look and feel).
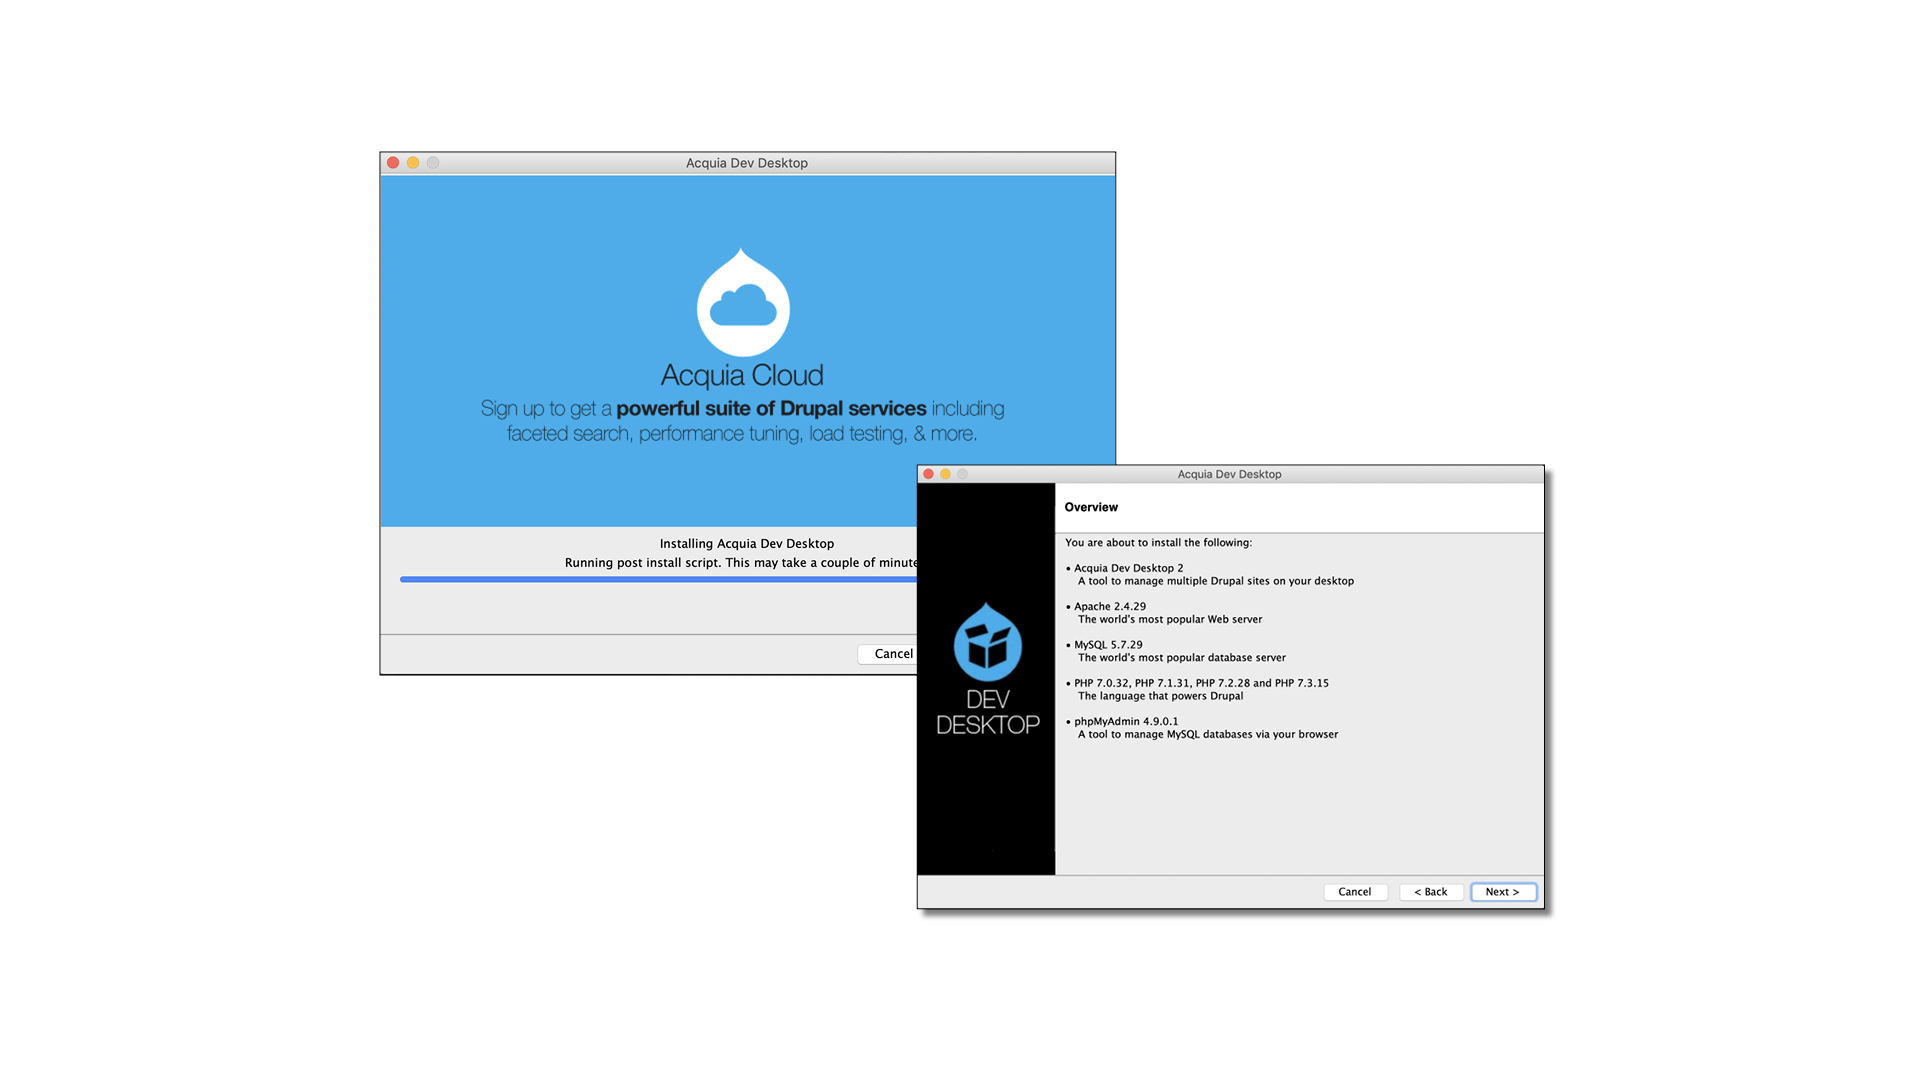
To get to this point, we started our site build in a local environment, using the Acquia Dev Desktop local host.
Start by downloading Acquia Dev Desktop and running the installer, then launch the software and select Start From Scratch.
The best camera deals, reviews, product advice, and unmissable photography news, direct to your inbox!
Use the suggested default for locating the codebase files on your system, enter the name of your site, and accept the default prompts for the version of PHP and the database name. Choose v8.9.1 under Install A Drupal Distribution, enter any required information and Drupal will be installed.
Next, install the Media Gallery module and the Showcase Lite theme. Then start creating your galleries…
What you’ll need to build a photo website in Drupal
- Computer
- Internet access
- Images ready for upload
- Development application (we’re using Acquia Dev Desktop)
- Time: 1 week (build)
The three stages of developing a Drupal site
1. Start by setting up your domain name
Unlike wordpress.com, Drupal doesn’t offer a hosting option, so you’ll need to make these arrangements yourself.
Before you start, you’ll also need to acquire a domain name for your site – visit Domain.com, Bluehost or www.123-reg.co.uk, or search online for a supplier.
Enter your desired site name and you’ll get a list of available extensions (.com, .co.uk, etc) and registration fees.
2. Develop your Drupal site on your own computer
You could install Drupal on a web hosting site and build it there, but developing your site on a local host (your own computer) makes things much easier. You can build the site at your own pace, fixing any snags that arise, and refine the look and feel as you go along.
3. Deploy the finished site to your hosting provider
When your site is ready, you can deploy it to your hosting provider. Transferring the files to the host site and configuring all the settings could take up to one day, but then your photo website is ready for its big reveal.
Build a Drupal photo website in 10 steps
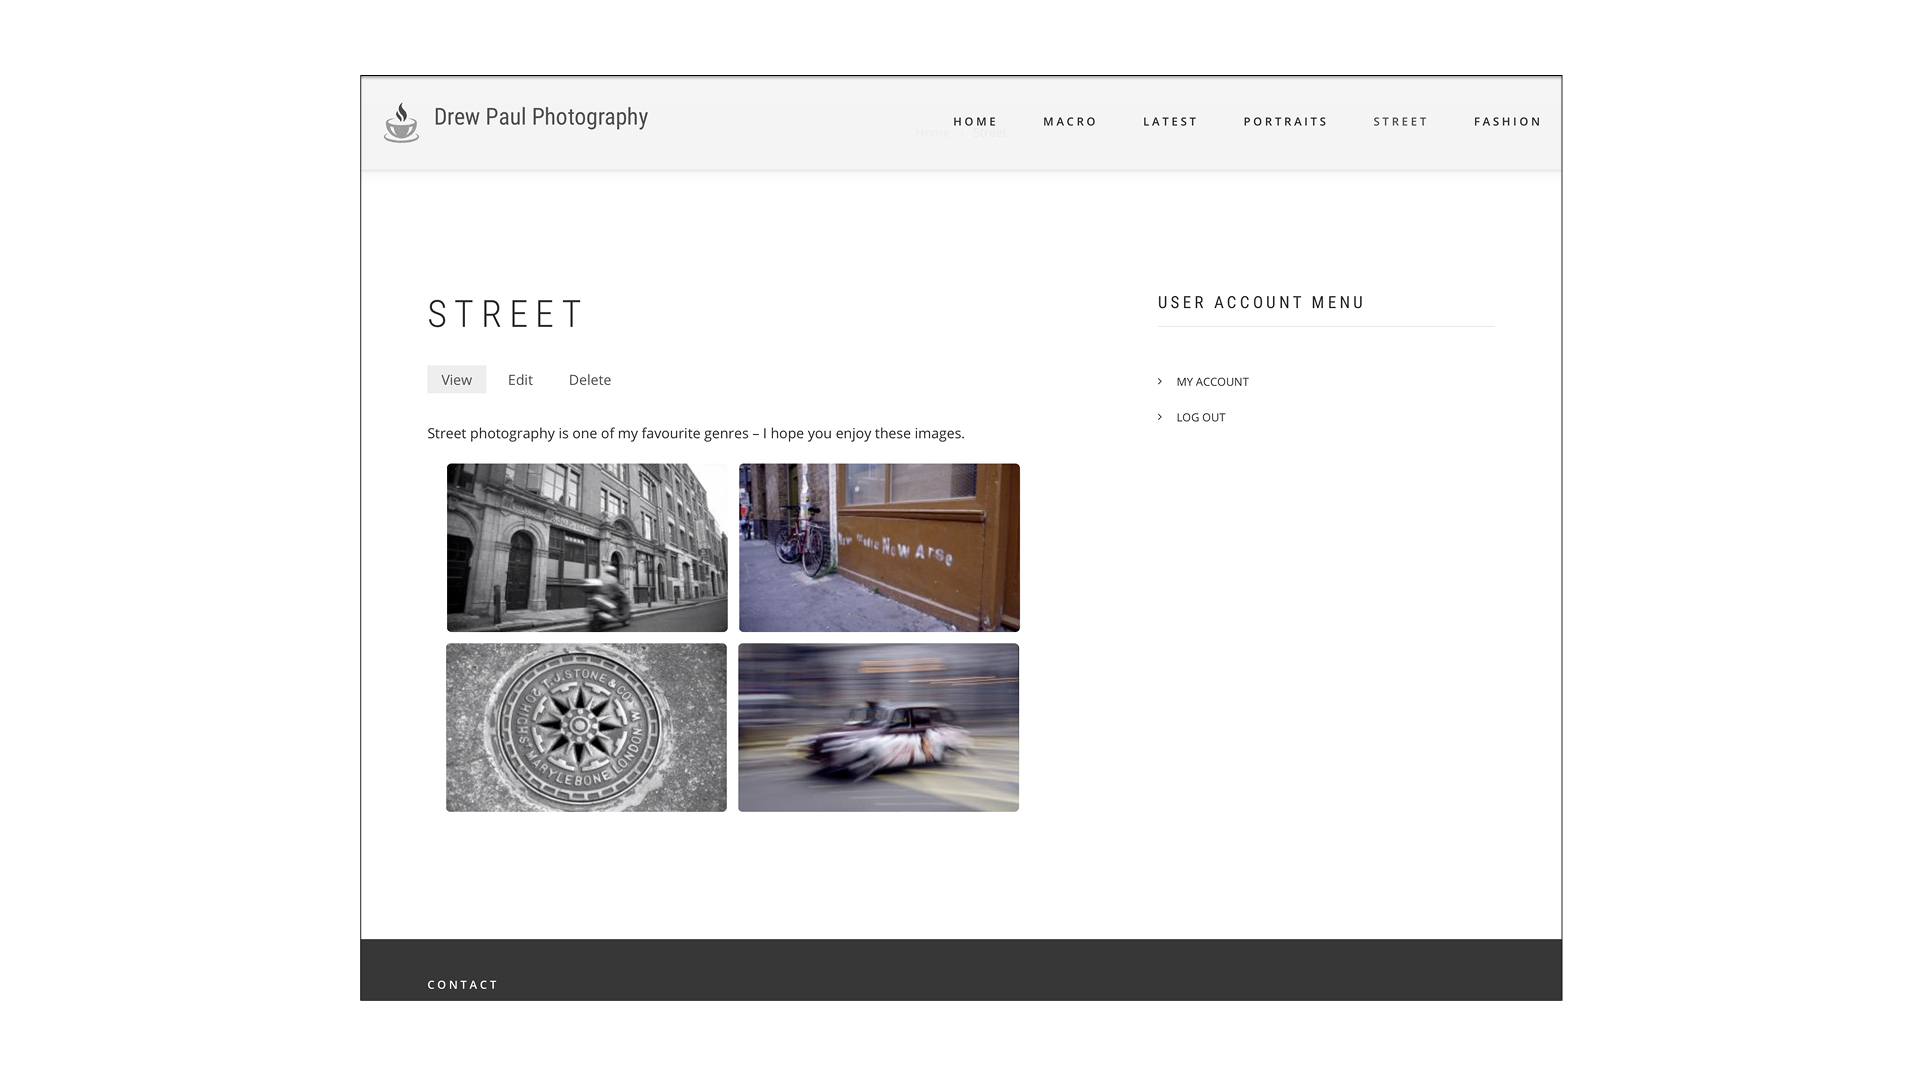
Using the Acquia Dev Desktop local environment, we continue developing our
site before testing and subsequent deployment to a website hosting platform…
01 Create menu links for the galleries
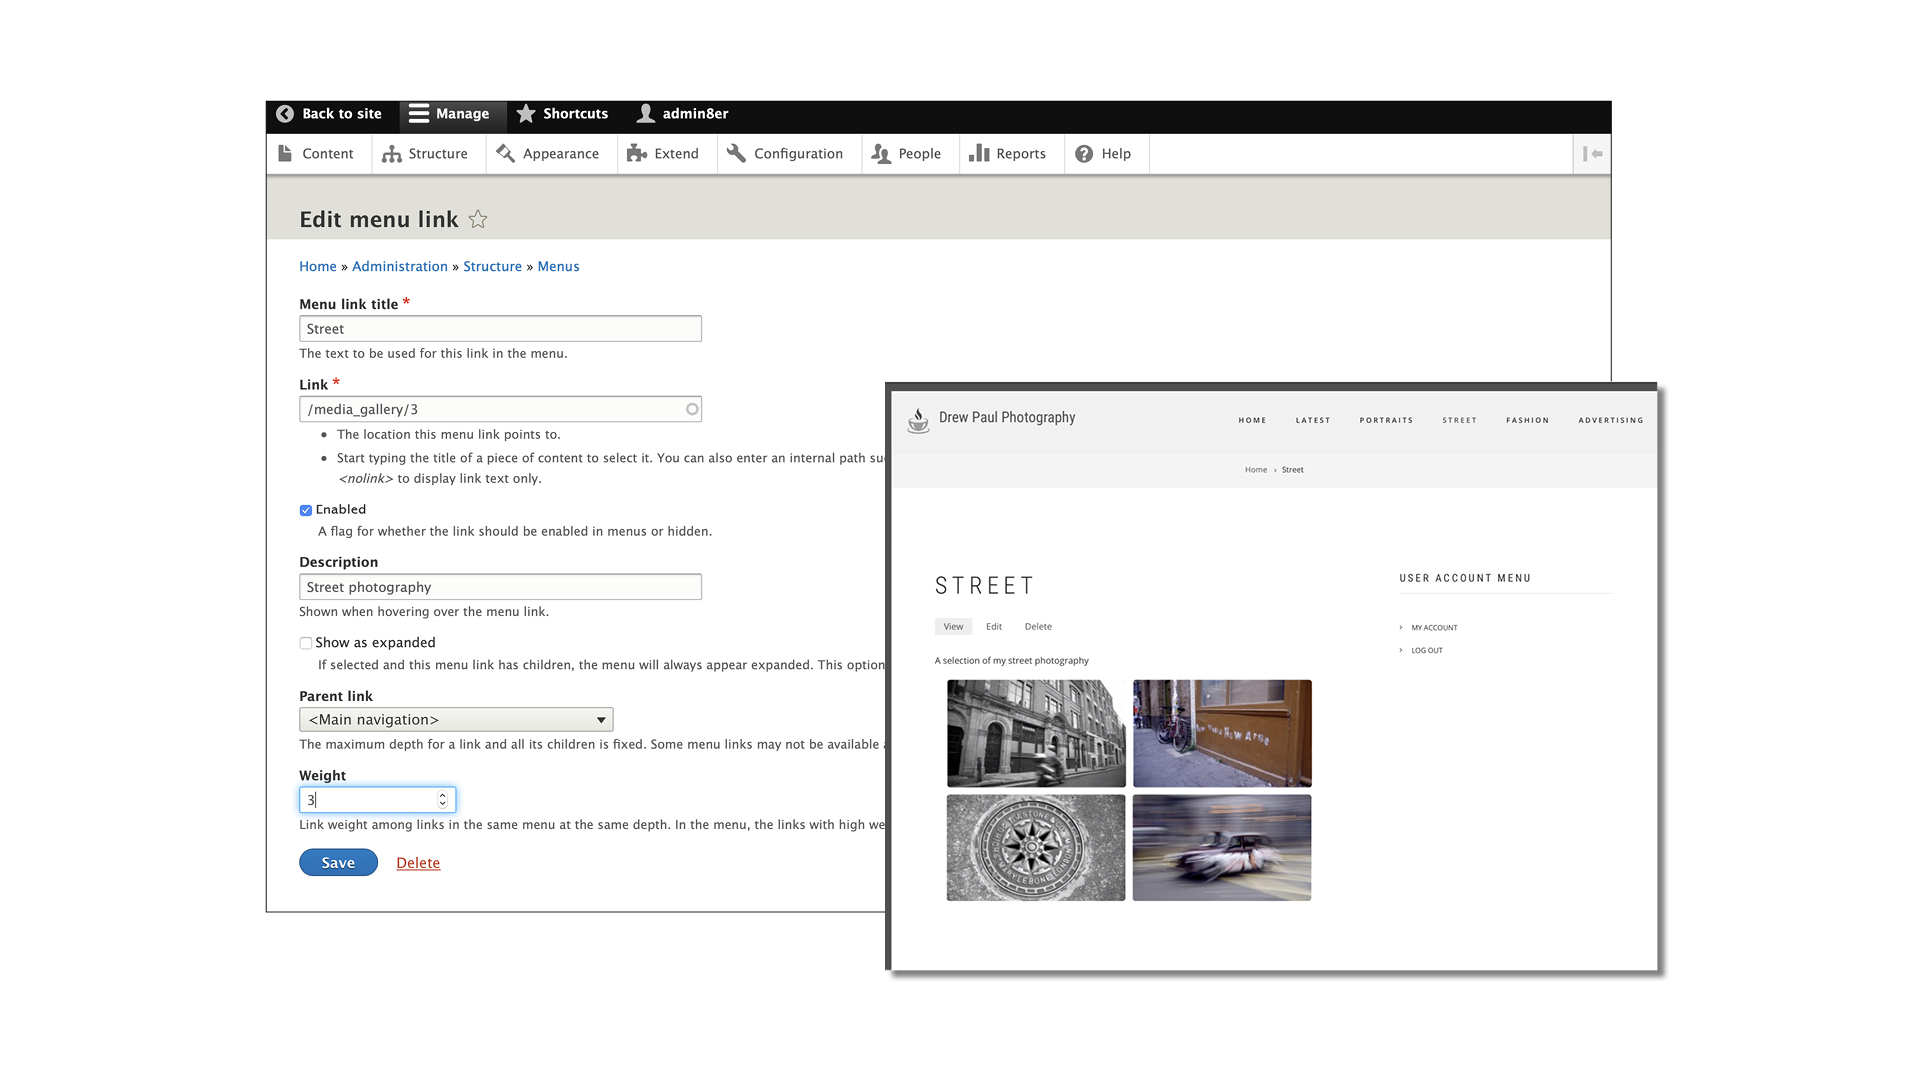
After creating some galleries, we linked them to the main navigation so that site visitors can browse them easily. In the Admin area, we clicked on Structure then Main Navigation and Edit Menu.
We entered a title for the menu link, then typed ‘/media_gallery/1’ in the Link field, repeating this step for the other galleries, replacing ‘/1’ with ‘/2’, ‘/3’, and so on.
02 Improving the image displays
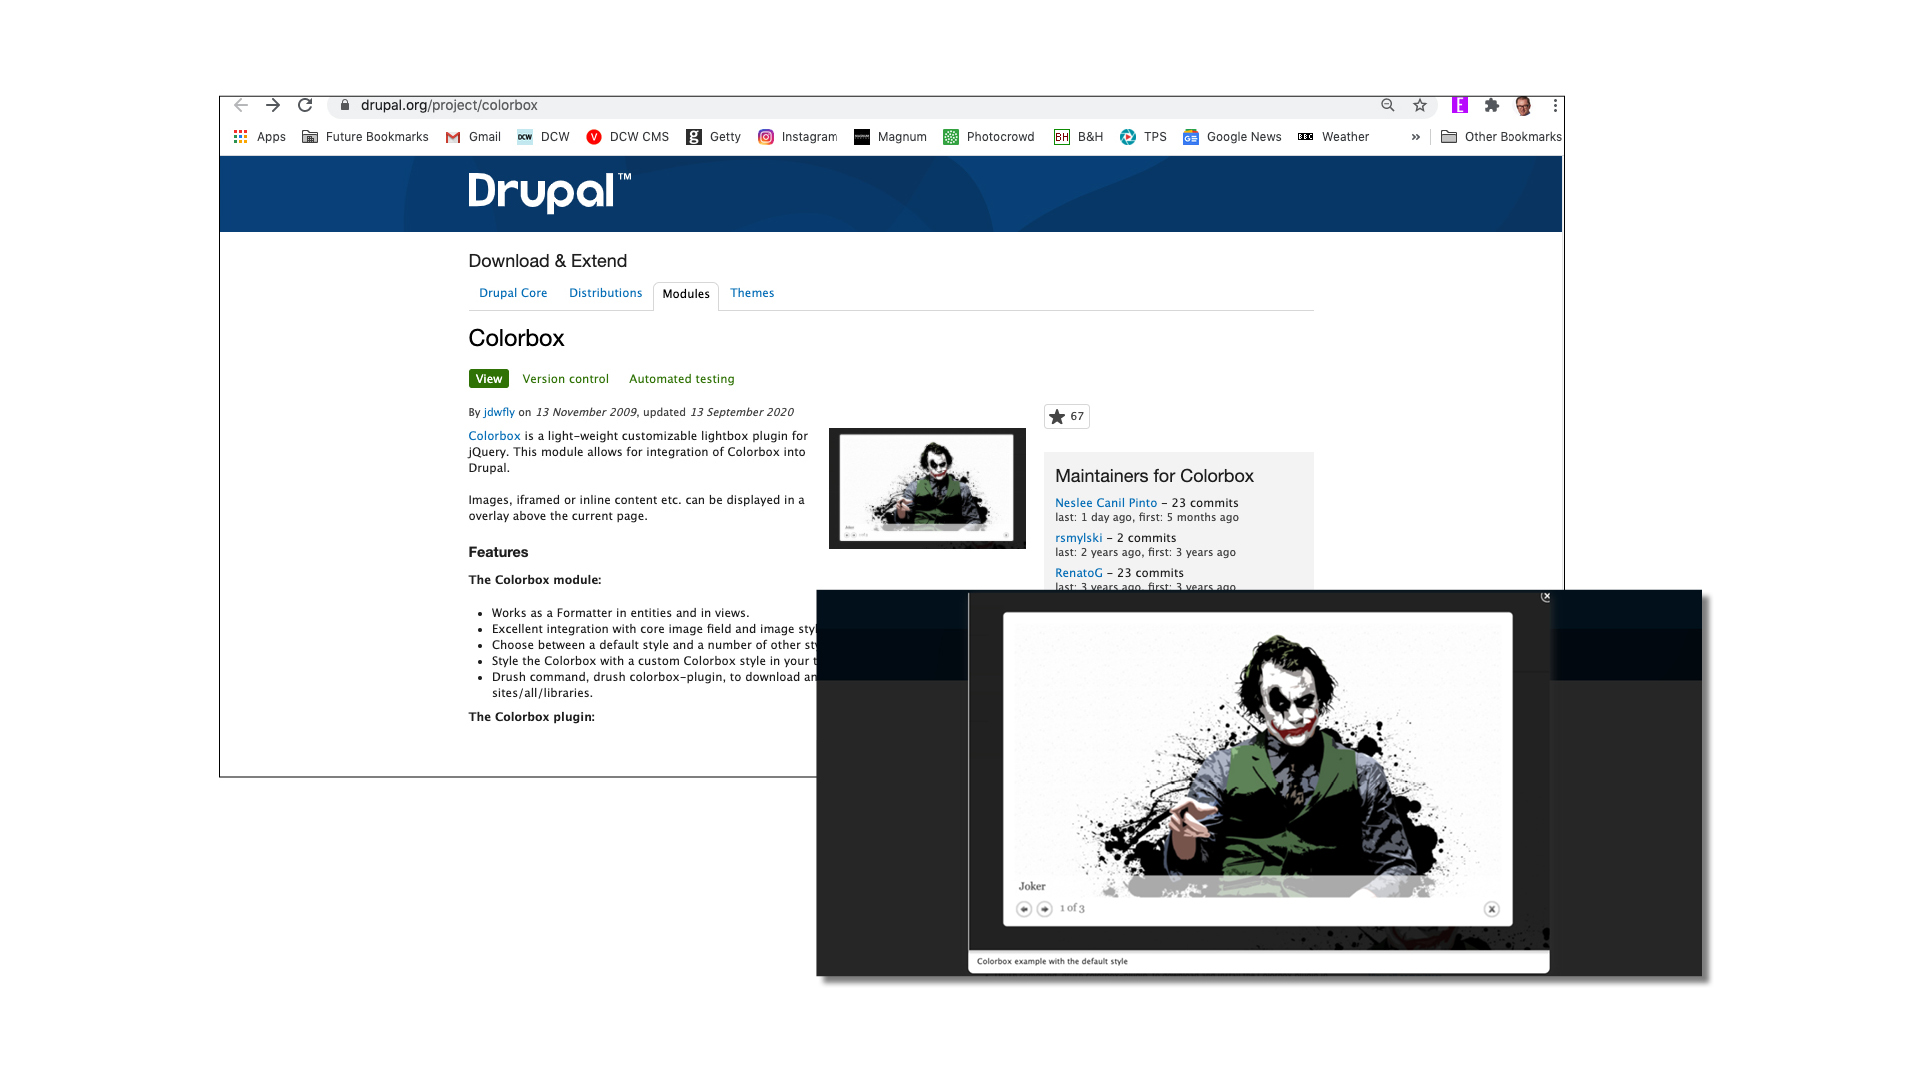
Our galleries would benefit from a ‘lightbox’ to display the photos. Selecting an image would open a pop-up overlay, which we can click through to view all the images displayed in the gallery.
Colorbox is a popular lightbox plug-in that has worked with several versions of Drupal, so it’s well-established and is actively maintained.
You can find its page here – have a peek at the description of the plug-in to see what it can do.
03 Download the Colorbox module
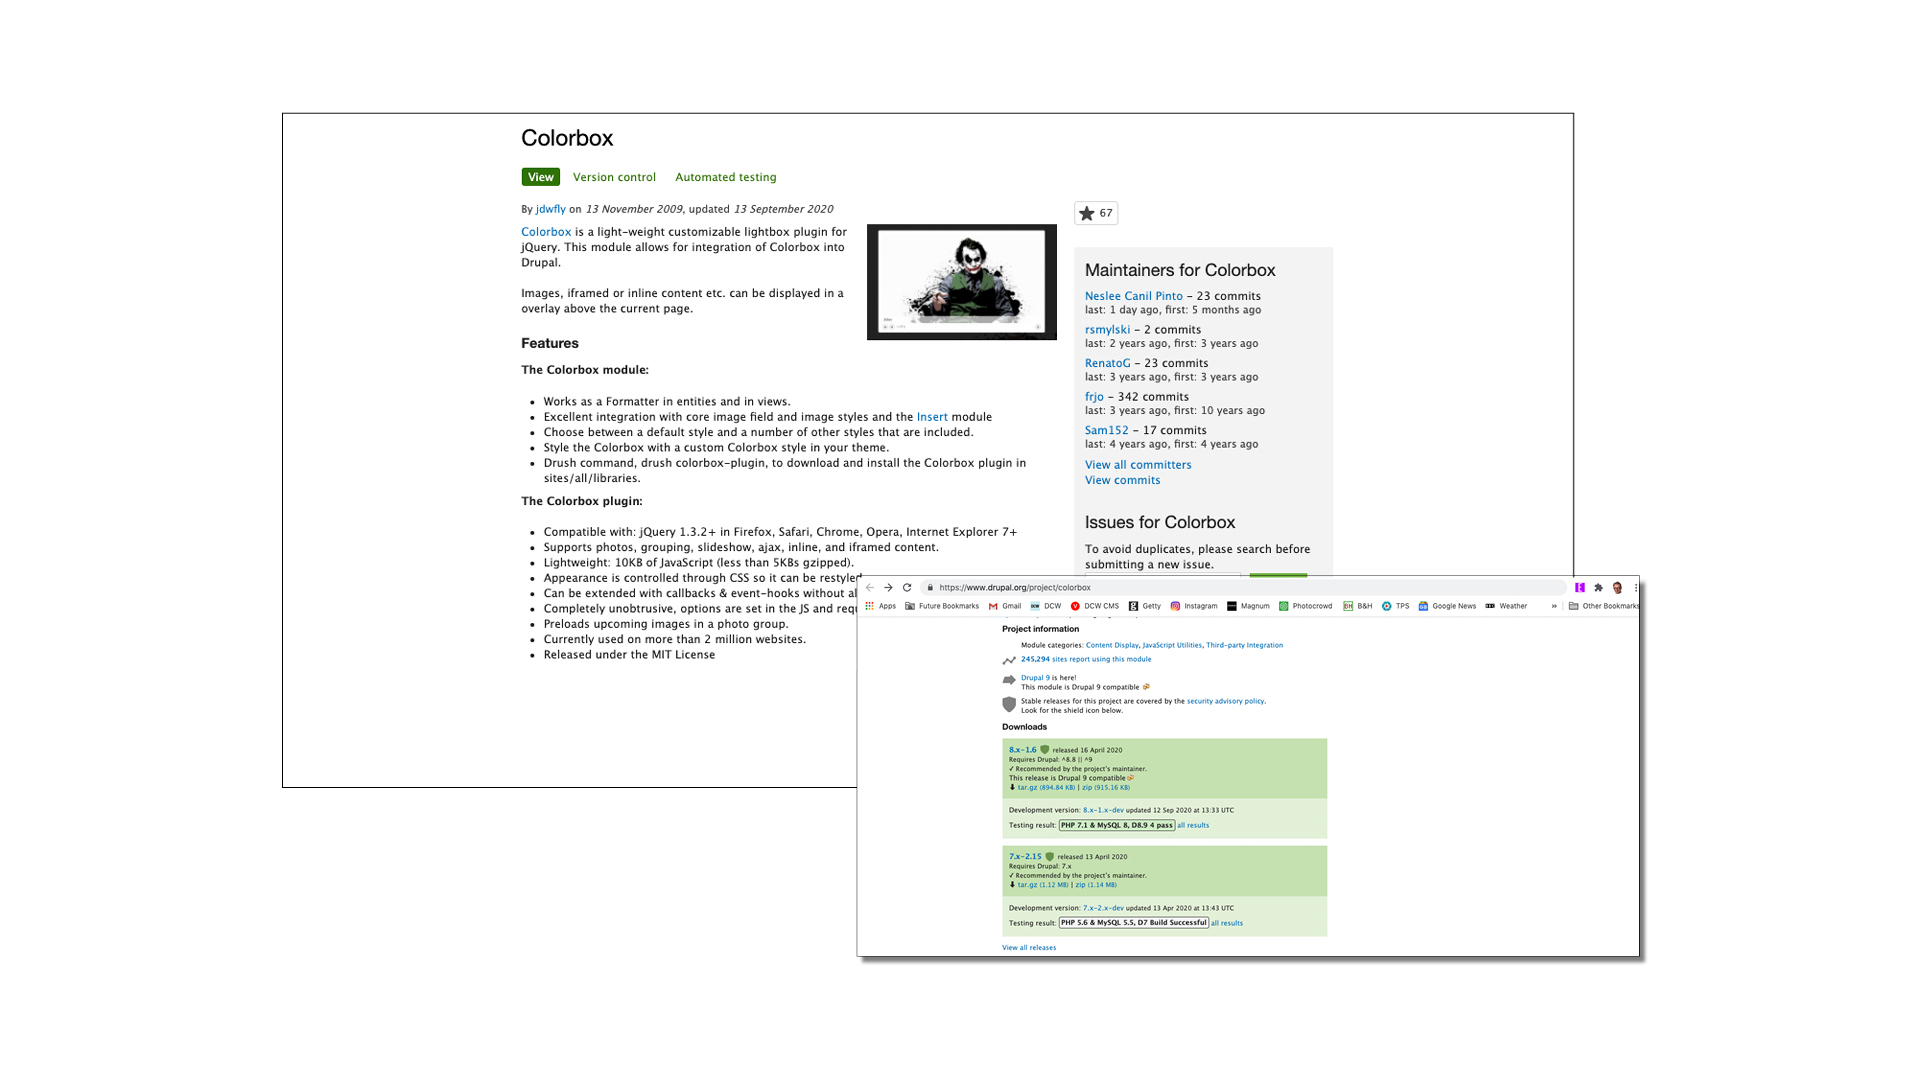
You’ll notice from the description that there are two discrete elements to Colorbox – a module and a plug-in – and the plug-in is a separate download.
Let’s start with the module. Scroll to the bottom of the page and locate the Drupal 8 version (it’s the top one of the two green boxes), mouse over the tar.gz link, right-click and select Copy Link Address.
Back in the site’s Admin area, click on the Extend tab, click Install New Module, paste in the URL and click Install.
04 Download the Colorbox plug-in
Return to the Colorbox download page; immediately under Dependencies, click the Colorbox Plugin 1.x link. This will save a compressed archive file to your computer’s nominated location for downloads.
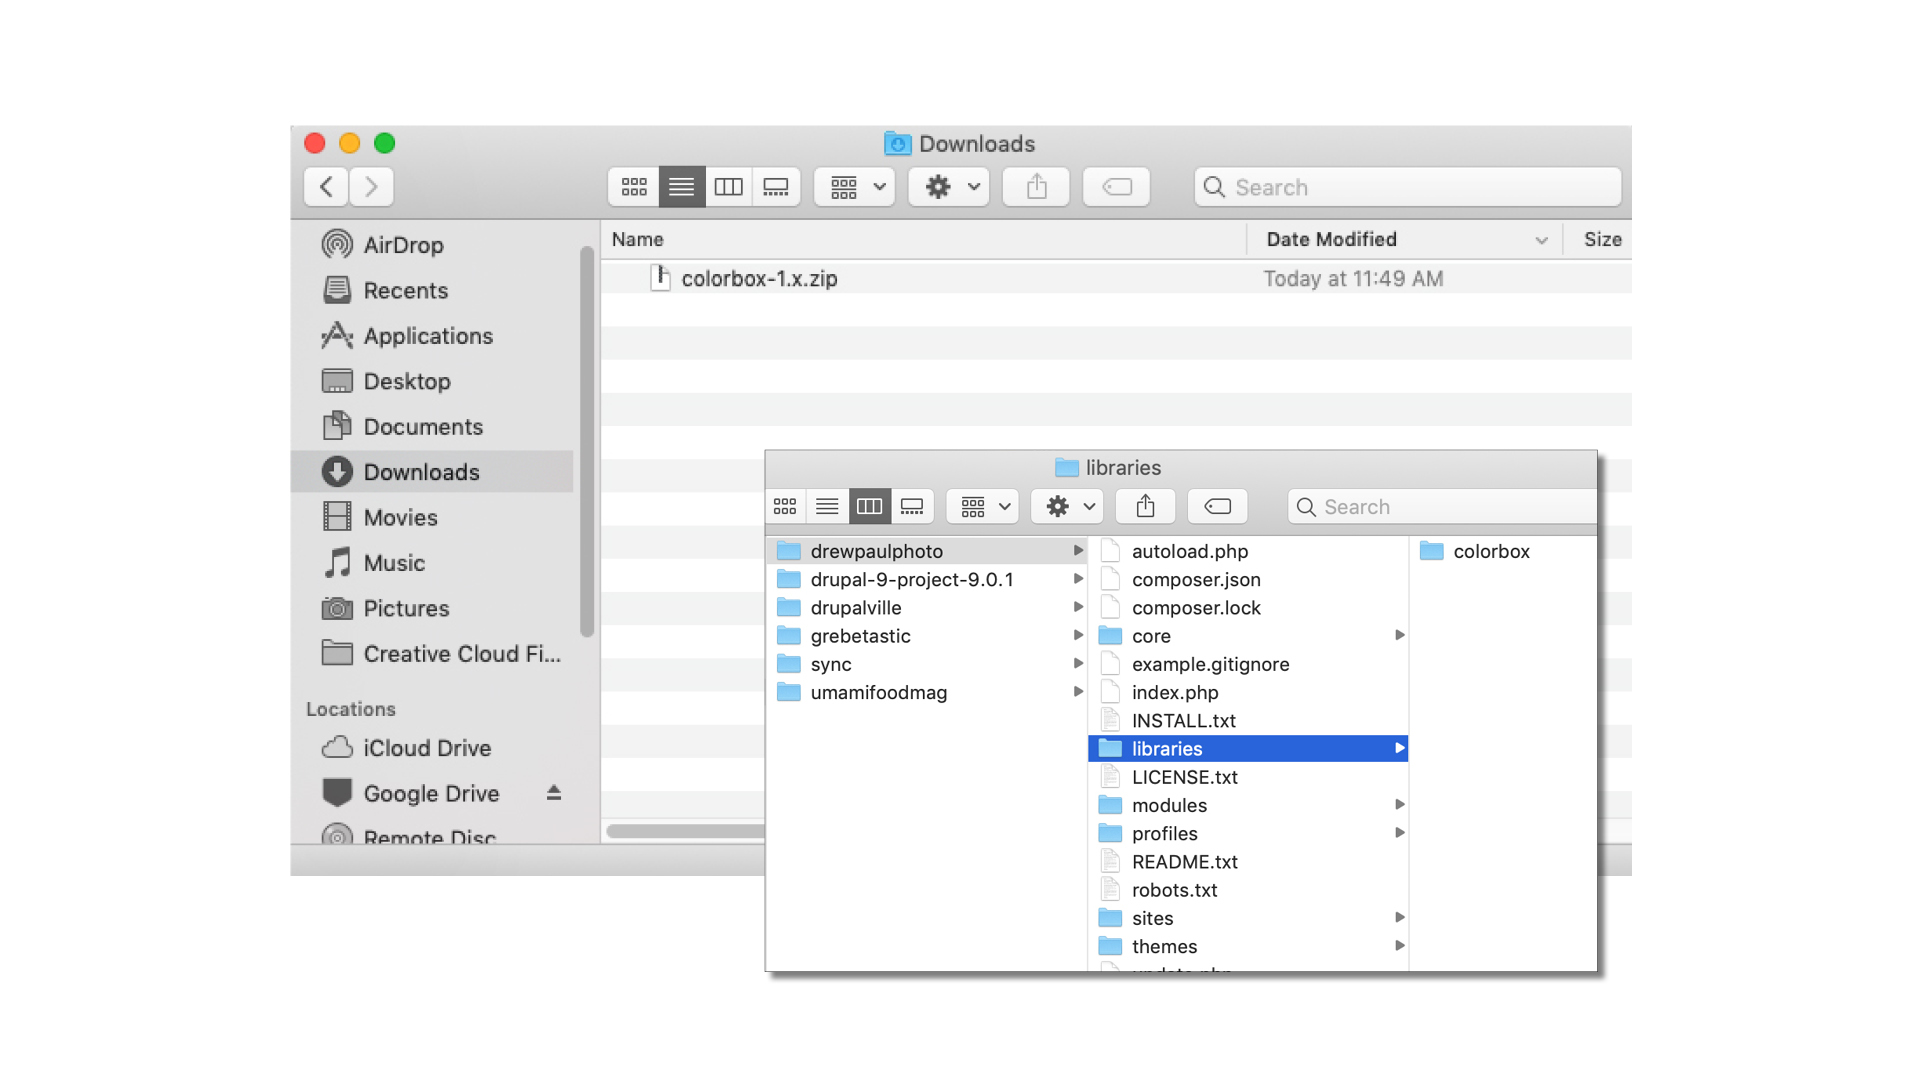
Now you need to create a directory on your system for the Colorbox plug-in files. As per the instructions on the Colorbox download page, create a directory so that the path to the files becomes [site name]/libraries/colorbox/, then unpack the archive in that location.
05 Place the uncompressed plug-in files
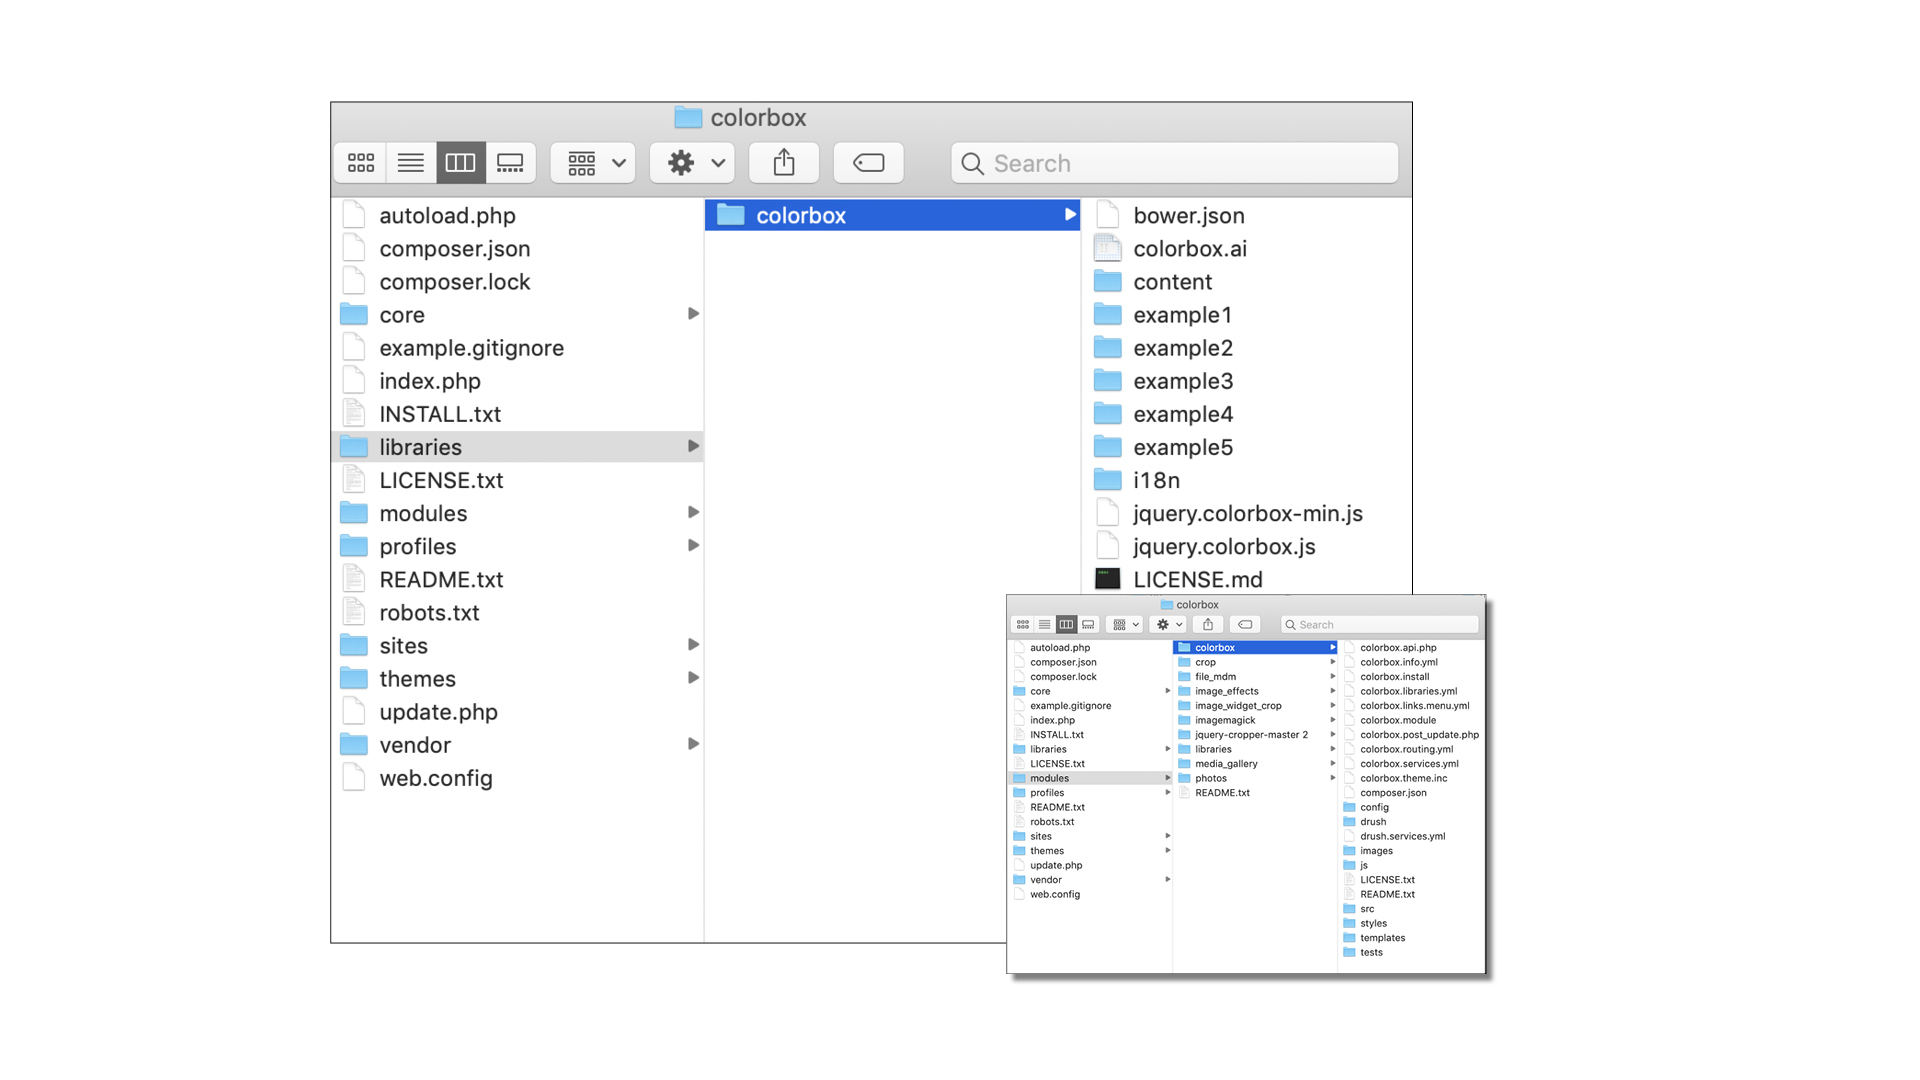
With the archive uncompressed, you should be able to see 14 files in the directory, including the all-important jquery.colorbox-min.js JavaScript file.
If your folder displays anything different, make sure you’re looking in the right place – the [sitename]/modules/colorbox folder features syntax that’s very similar. (This folder should contain 22 files, including eight sub-folders – see inset, above.)
06 Enable the Colorbox module
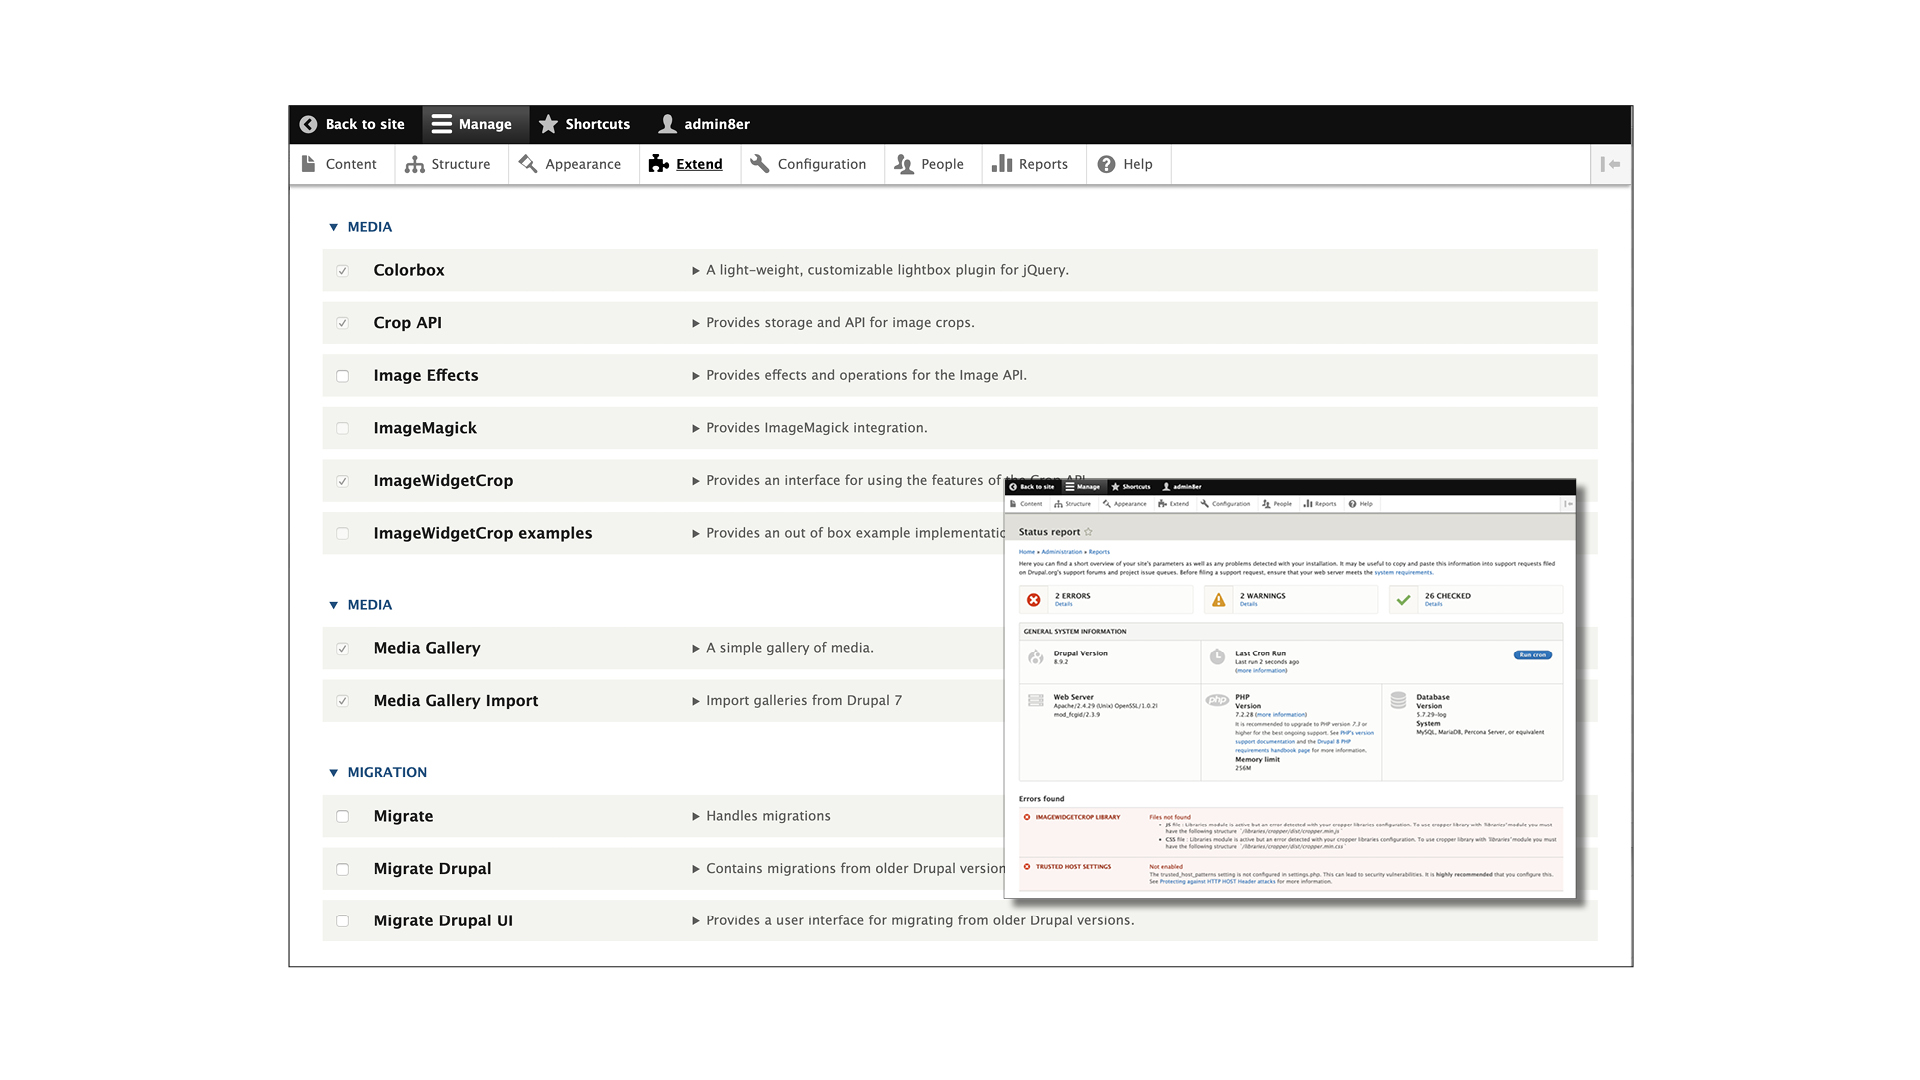
Having already installed the Colorbox module, we now need to enable it. (This process isn’t automatic.) Go back to your site’s Admin area and click the Extend tab.
Scroll down two thirds of the page; under the Media section, place a tick to the left of Colorbox. Right at the bottom of the page, click Install.
Go to Reports and run a status report: if Colorbox isn’t listed in Errors Found, then all is well.
07 Check out the effect of our new lightbox
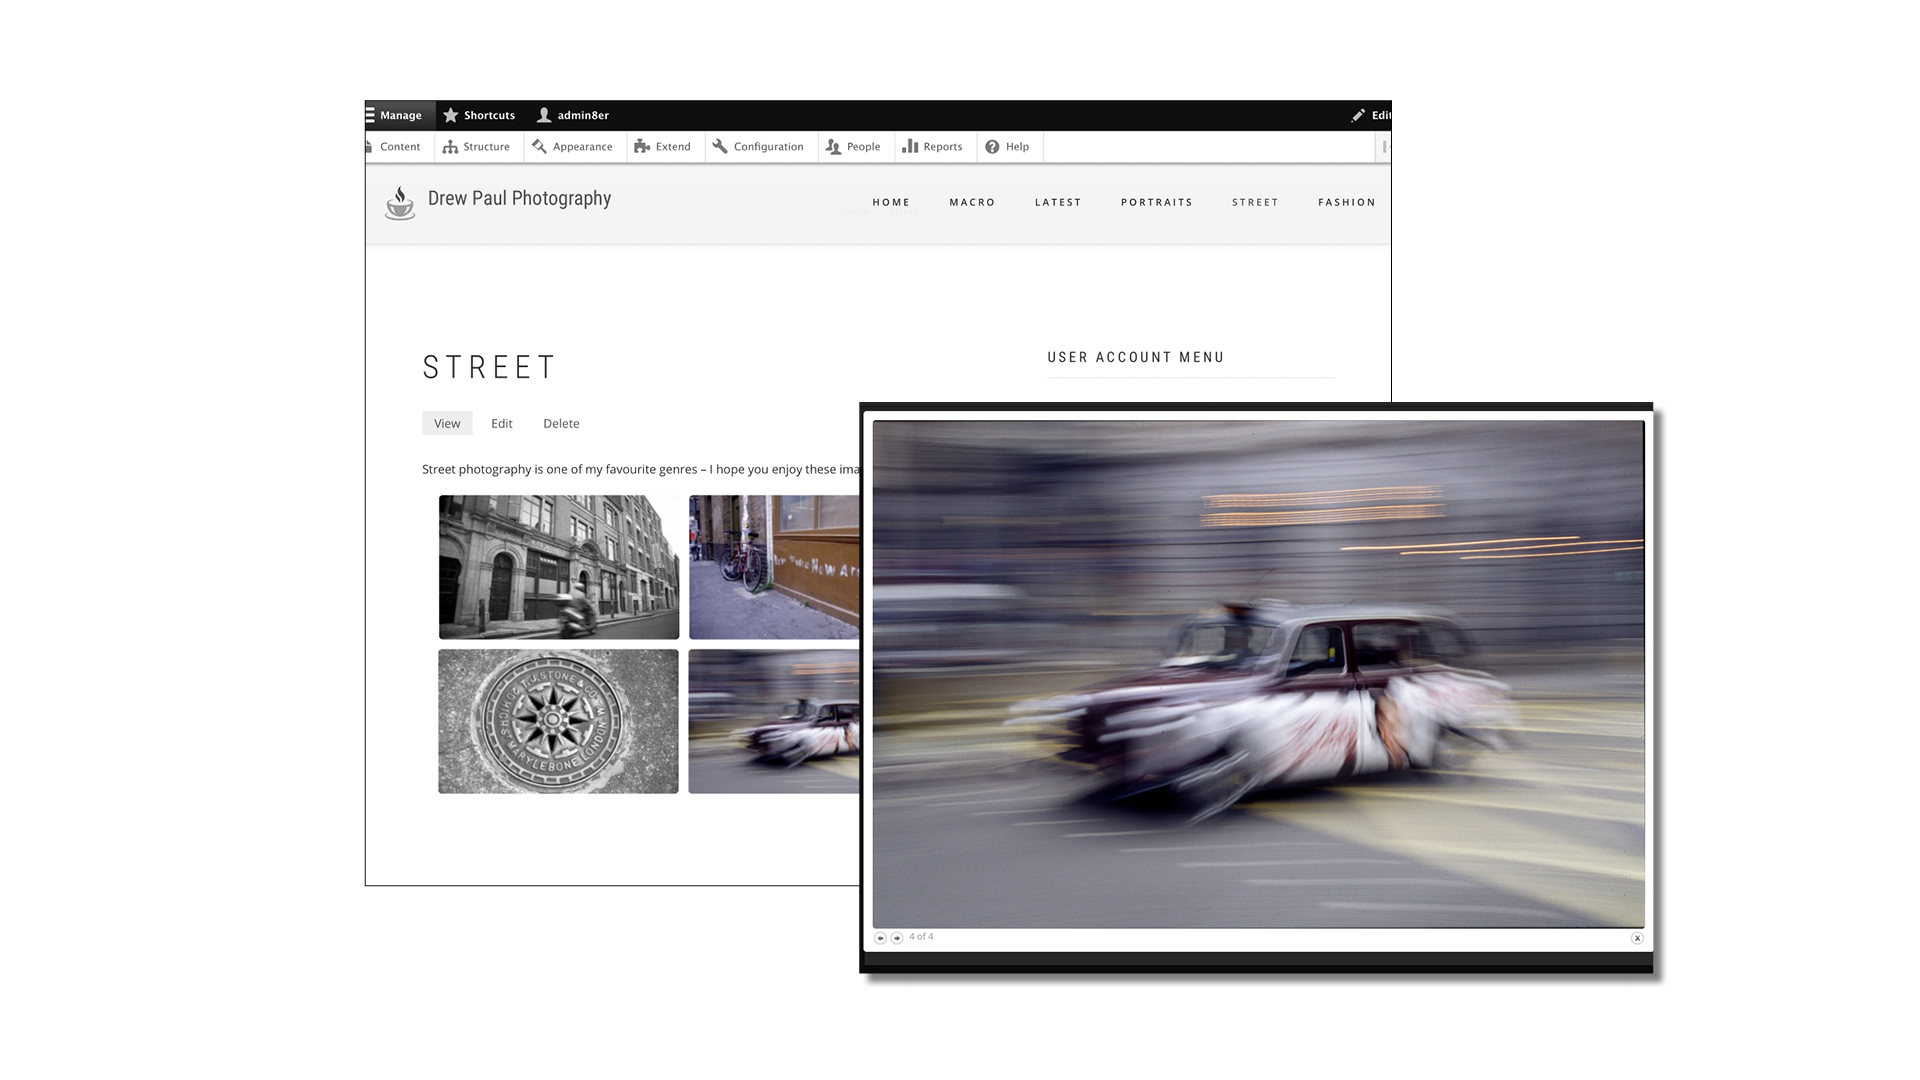
Now let’s see what difference having an image lightbox has made. Click Back To Site in the top-left corner of the screen and call up one of the galleries that you added to the main navigation.
Click on an image and it will open in a pop-up overlay. A pair of buttons in the bottom-left corner allow you to move through the images in the gallery, while an X in the bottom-right closes the pop-up – everything is working fine.
08 Review the image caption information
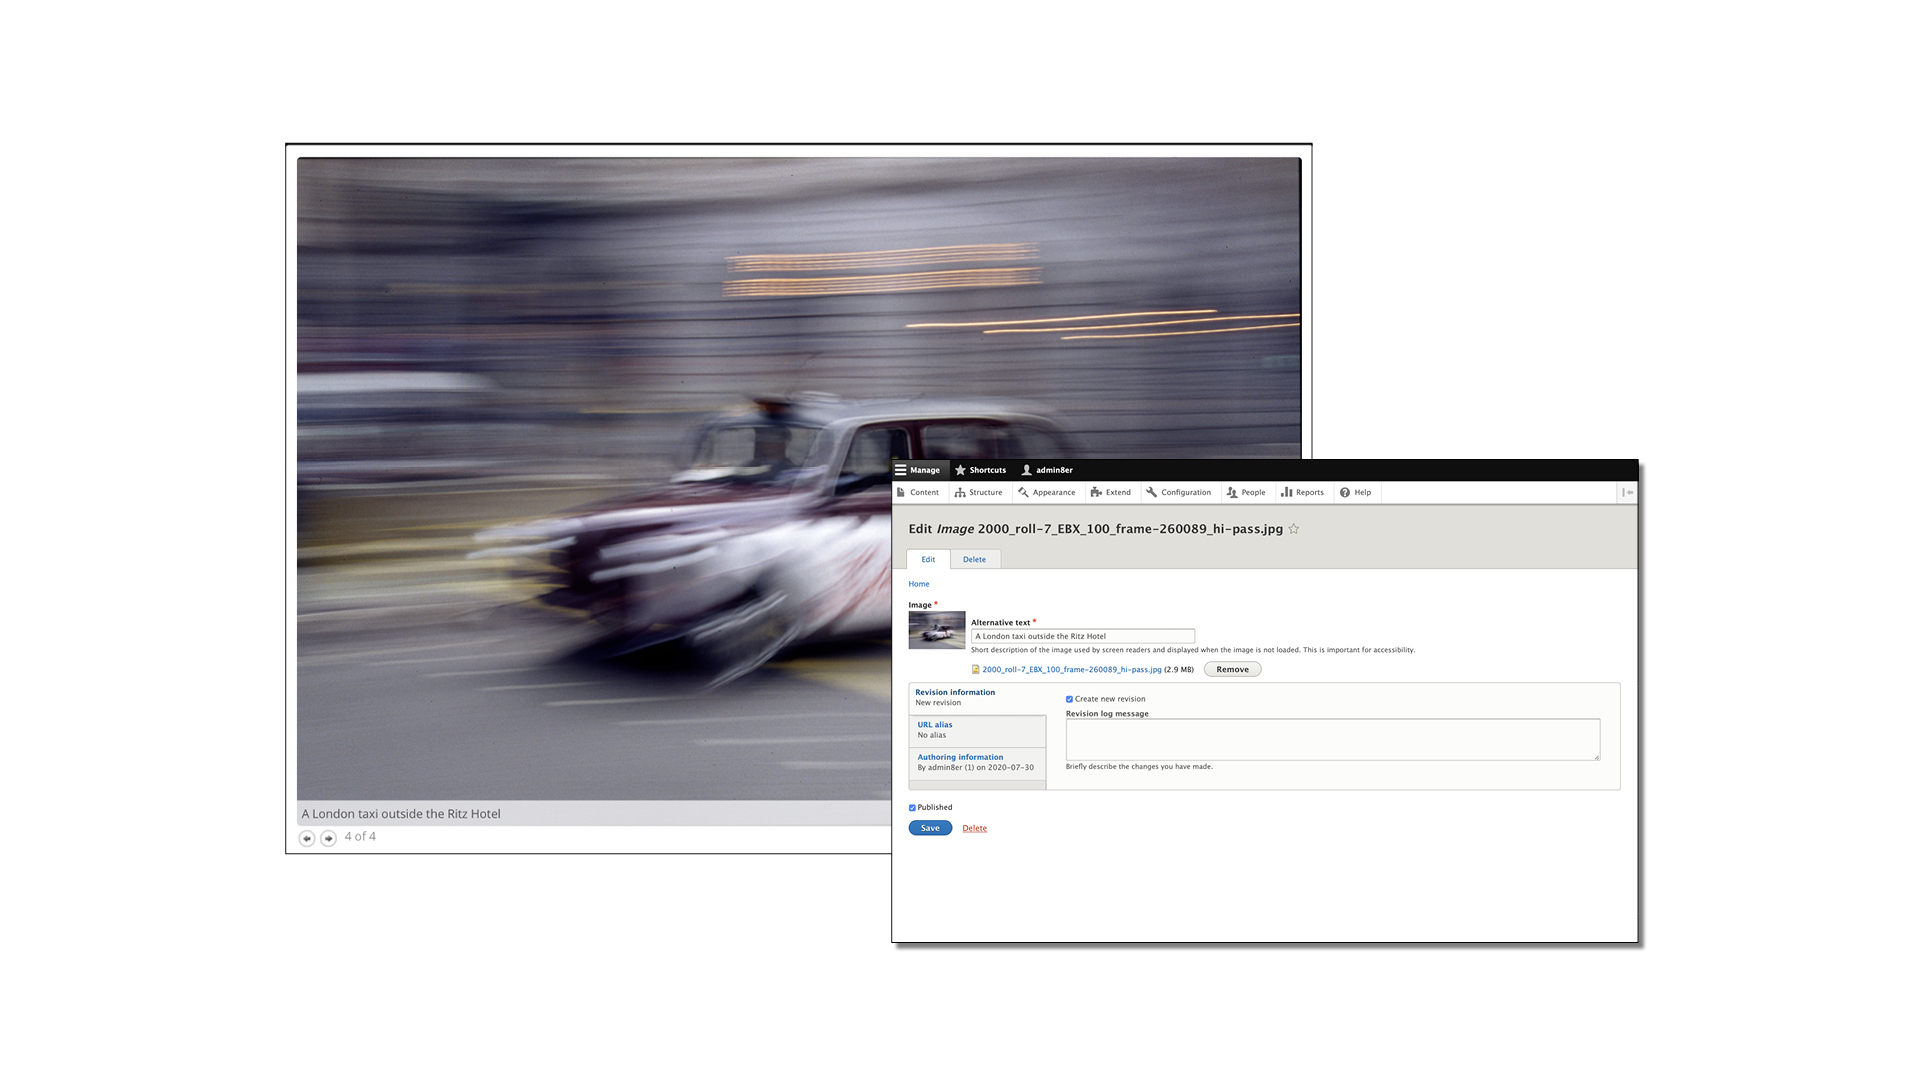
Another feature of Colorbox is its ability to display a caption for the images, which pops up from the bottom of the image being viewed when you mouse over it.
At present, it’s using the alternative text (a short description used by screen readers or when an image doesn’t load) that we input for each photo while uploading the image files. To change any captions, open the image file in the Content/Files menu.
09 Add some other key pages to the site
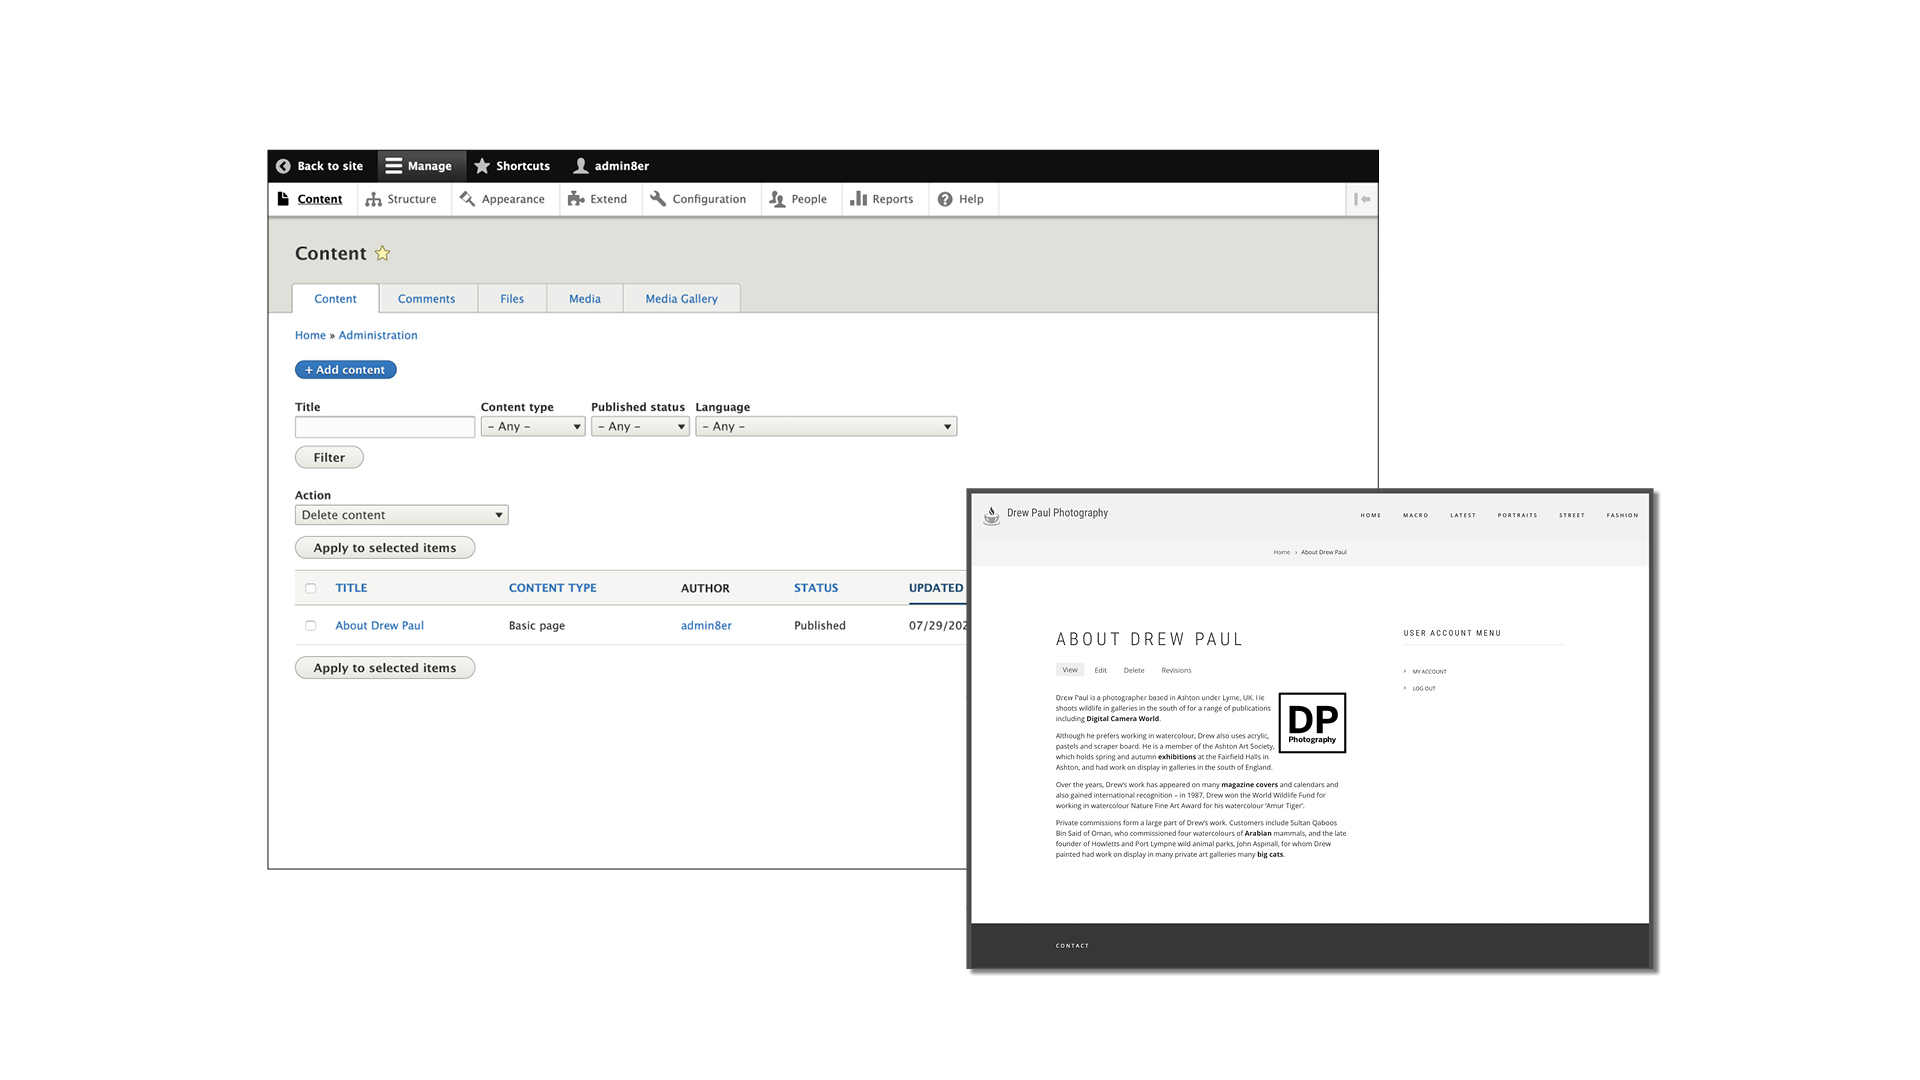
With the image display looking better now, we can start building out the site and adding some other key elements. First off, let’s create an About page to outline the photographic services we’re offering.
Click on the Content tab, click Add Content and select Basic Page. Enter the desired text plus an inline image cropped to an appropriate size. (We used 200 x 200 pixels.) Other pages to build include the Welcome page.
10 Assess progress and add other elements
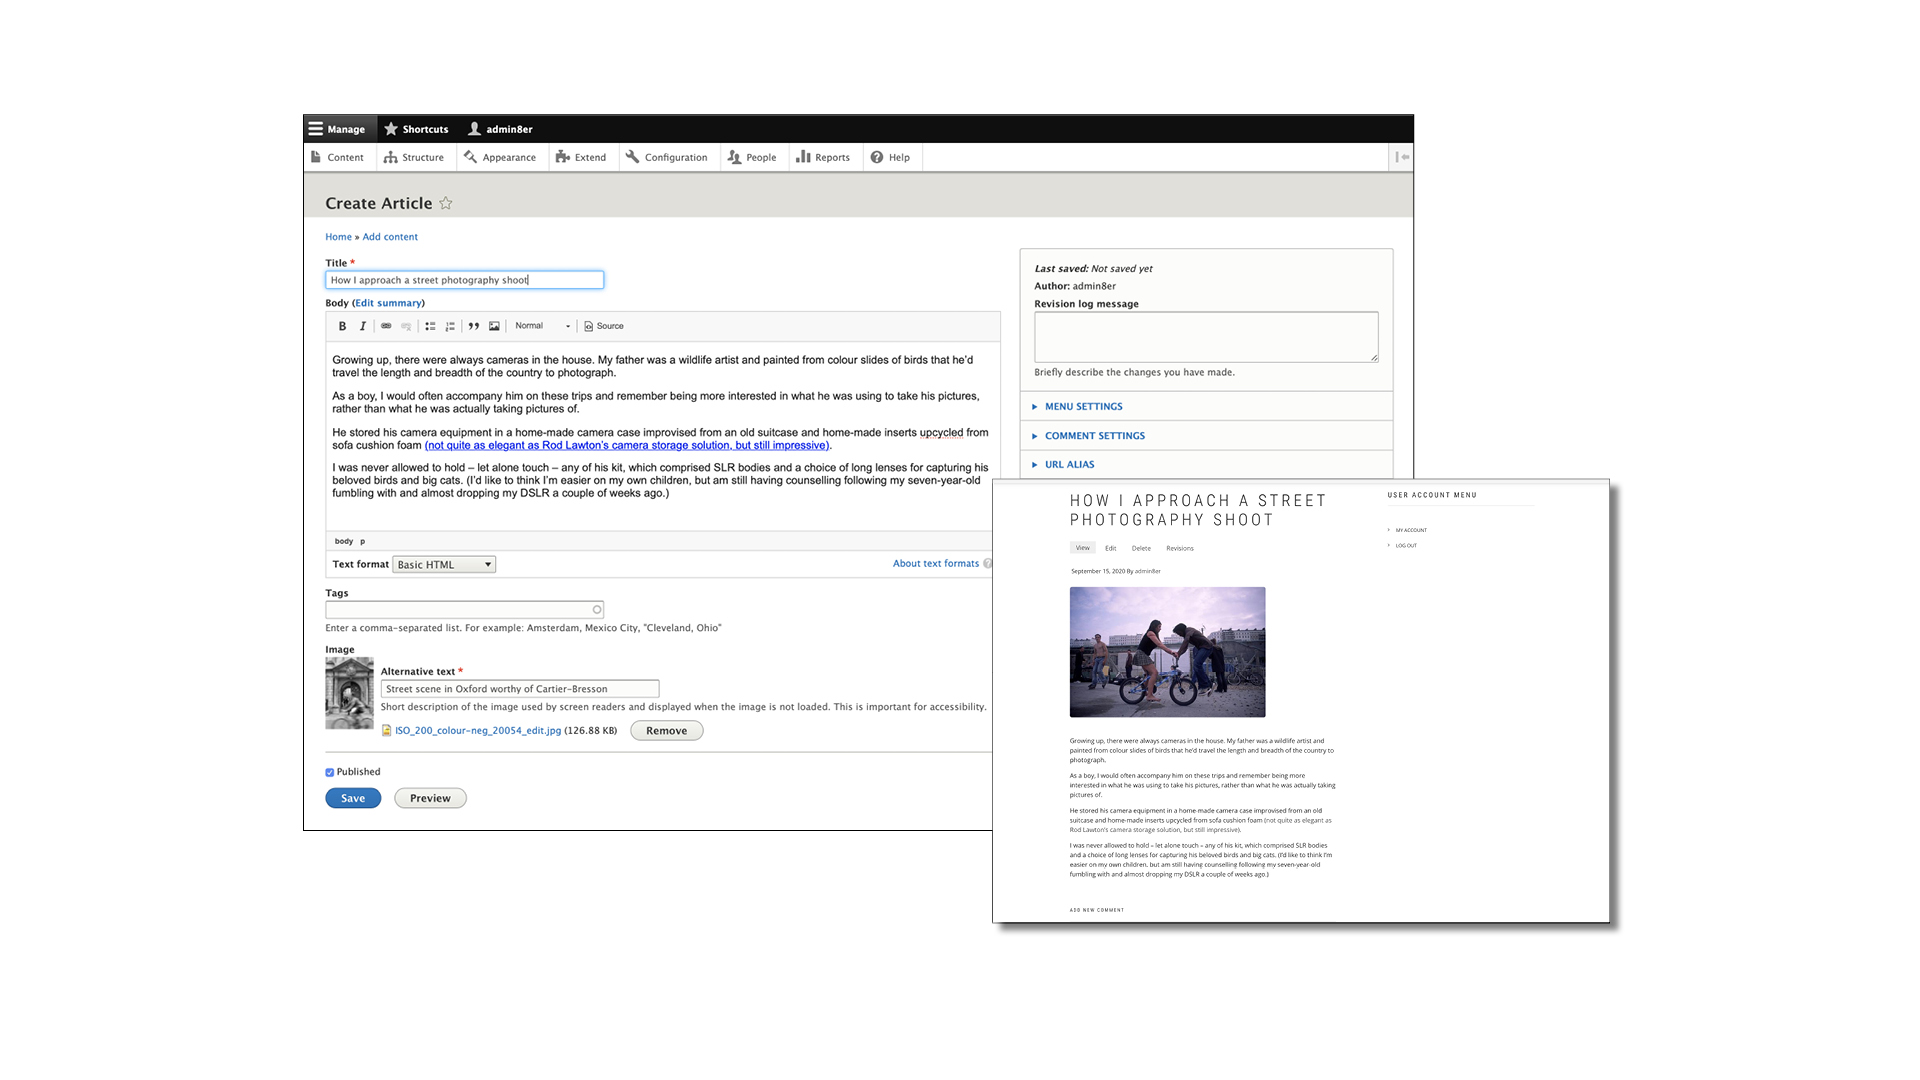
So now we have a fully functioning photography website, organised into a series of galleries that display the images in a pop-up overlay with caption information.
It’s a good start, but this is only the beginning. Other site elements you could think about adding include regular blog posts, to open a conversation with visitors to your site – and this is another function that Drupal supports right out of the box.
Final steps: deploy your local site to the net
So you’ve completed your build and have ironed out some rough edges by fully testing it – now it’s time to deploy your site to the internet and reveal it to a global audience. Here’s how it’s done…
1. Find a hosting service provider
Once your site is fully built and tested, and any bugs or snags are smoothed out, it’s ready to be released to a global audience.
The first step is to find a hosting provider. Make sure that your hosting provider can support PHP and MySQL, both required by Drupal.
2. Download an FTP client to your computer
File Transfer Protocol (FTP) is the means by which you upload your local site’s files to your web hosting provider. One of the most popular FTP clients is FileZilla, which works on both Windows and macOS. You can find FileZilla here.
3. Upload the files using Control Panel
Your provider will give you access to a control panel, for all-in-one-place site management – cPanel is a popular option. Follow your provider’s instructions for deployment, but be aware that the file transfer and settings configuration could take up to a whole day.
Digital Camera World is the world’s favorite photography magazine. Every issue is packed with the latest news, reviews, tutorials, expert buying advice, tips and inspiring images. Plus, every issue comes with a selection of bonus gifts of interest to photographers of all abilities.
Read more:
Best website hosting sites for photographers: get your portfolio online
Best free cloud storage options for photographers: platforms and apps
Best online photography courses – from beginner guides to masterclasses
Best website builders for photographers
Best password managers
Best student laptop
Best photo editing software

Niall is the editor of Digital Camera Magazine, and has been shooting on interchangeable lens cameras for over 20 years, and on various point-and-shoot models for years before that.
Working alongside professional photographers for many years as a jobbing journalist gave Niall the curiosity to also start working on the other side of the lens. These days his favored shooting subjects include wildlife, travel and street photography, and he also enjoys dabbling with studio still life.
On the site you will see him writing photographer profiles, asking questions for Q&As and interviews, reporting on the latest and most noteworthy photography competitions, and sharing his knowledge on website building.
