How to build a photo website in Drupal, part 2
We continue developing and testing our photography website using this open-source content management system
The best camera deals, reviews, product advice, and unmissable photography news, direct to your inbox!
You are now subscribed
Your newsletter sign-up was successful
In part 1 of this series, we showed how to start building a photography website from scratch using the Drupal content management system (CMS).
This approach is an alternative to enlisting the services of a dedicated website-builder platform like SmugMug, Squarespace or Wix (see part 2 of this series), or using the WordPress CMS (see part 3).
Drupal is an open-source general-purpose CMS, with a large community of contributing developers. It’s popular with governments, non-profit firms and educational institutions.
Security is one of its USPs – vital for anyone looking to use their photography website to sell images or prints – and its relative lack of penetration compared with the ubiquitous WordPress makes Drupal less vulnerable to hackers, who tend to target larger platforms.
Once Drupal’s ‘Core’ code has been installed, it is highly customisable via the addition of modules (features that offer functionality) and themes (how the site looks).
Last time, we showed how to install Drupal’s ‘Umami’ demo site in a local environment (on a computer).
Now let’s start building our live site, before developing and testing it ahead of uploading it to a web hosting platform (a process known as ‘deployment’).
The best camera deals, reviews, product advice, and unmissable photography news, direct to your inbox!
What you’ll need to build a photo website in Drupal
- Computer
- Internet access
- Images ready for upload
- Development application (MAMP PRO or Laravel Homestead, for example)
- Time: 1 week (build)
The three stages of developing a Drupal site
1. Start by setting up your domain name
Unlike wordpress.com, Drupal doesn’t offer a hosting option, so you’ll need to make these arrangements yourself.
Before you start, you’ll also need to acquire a domain name for your site – visit Domain.com, Bluehost or www.123-reg.co.uk, or search online for a supplier.
Enter your desired site name and you’ll get a list of available extensions (.com, .co.uk, etc) and registration fees.
2. Develop your Drupal site on your own computer
You could install Drupal on a web hosting site and build it there, but developing your site on a local host (your own computer) makes things much easier. You can build the site at your own pace, fixing any snags that arise, and refine the look and feel as you go along.
3. Deploy the finished site to your hosting provider
When your site is ready, you can deploy it to your hosting provider. Transferring the files to the host site and configuring all the settings could take up to one day, but then your photo website is ready for its big reveal.
Build a Drupal photo website in 10 steps
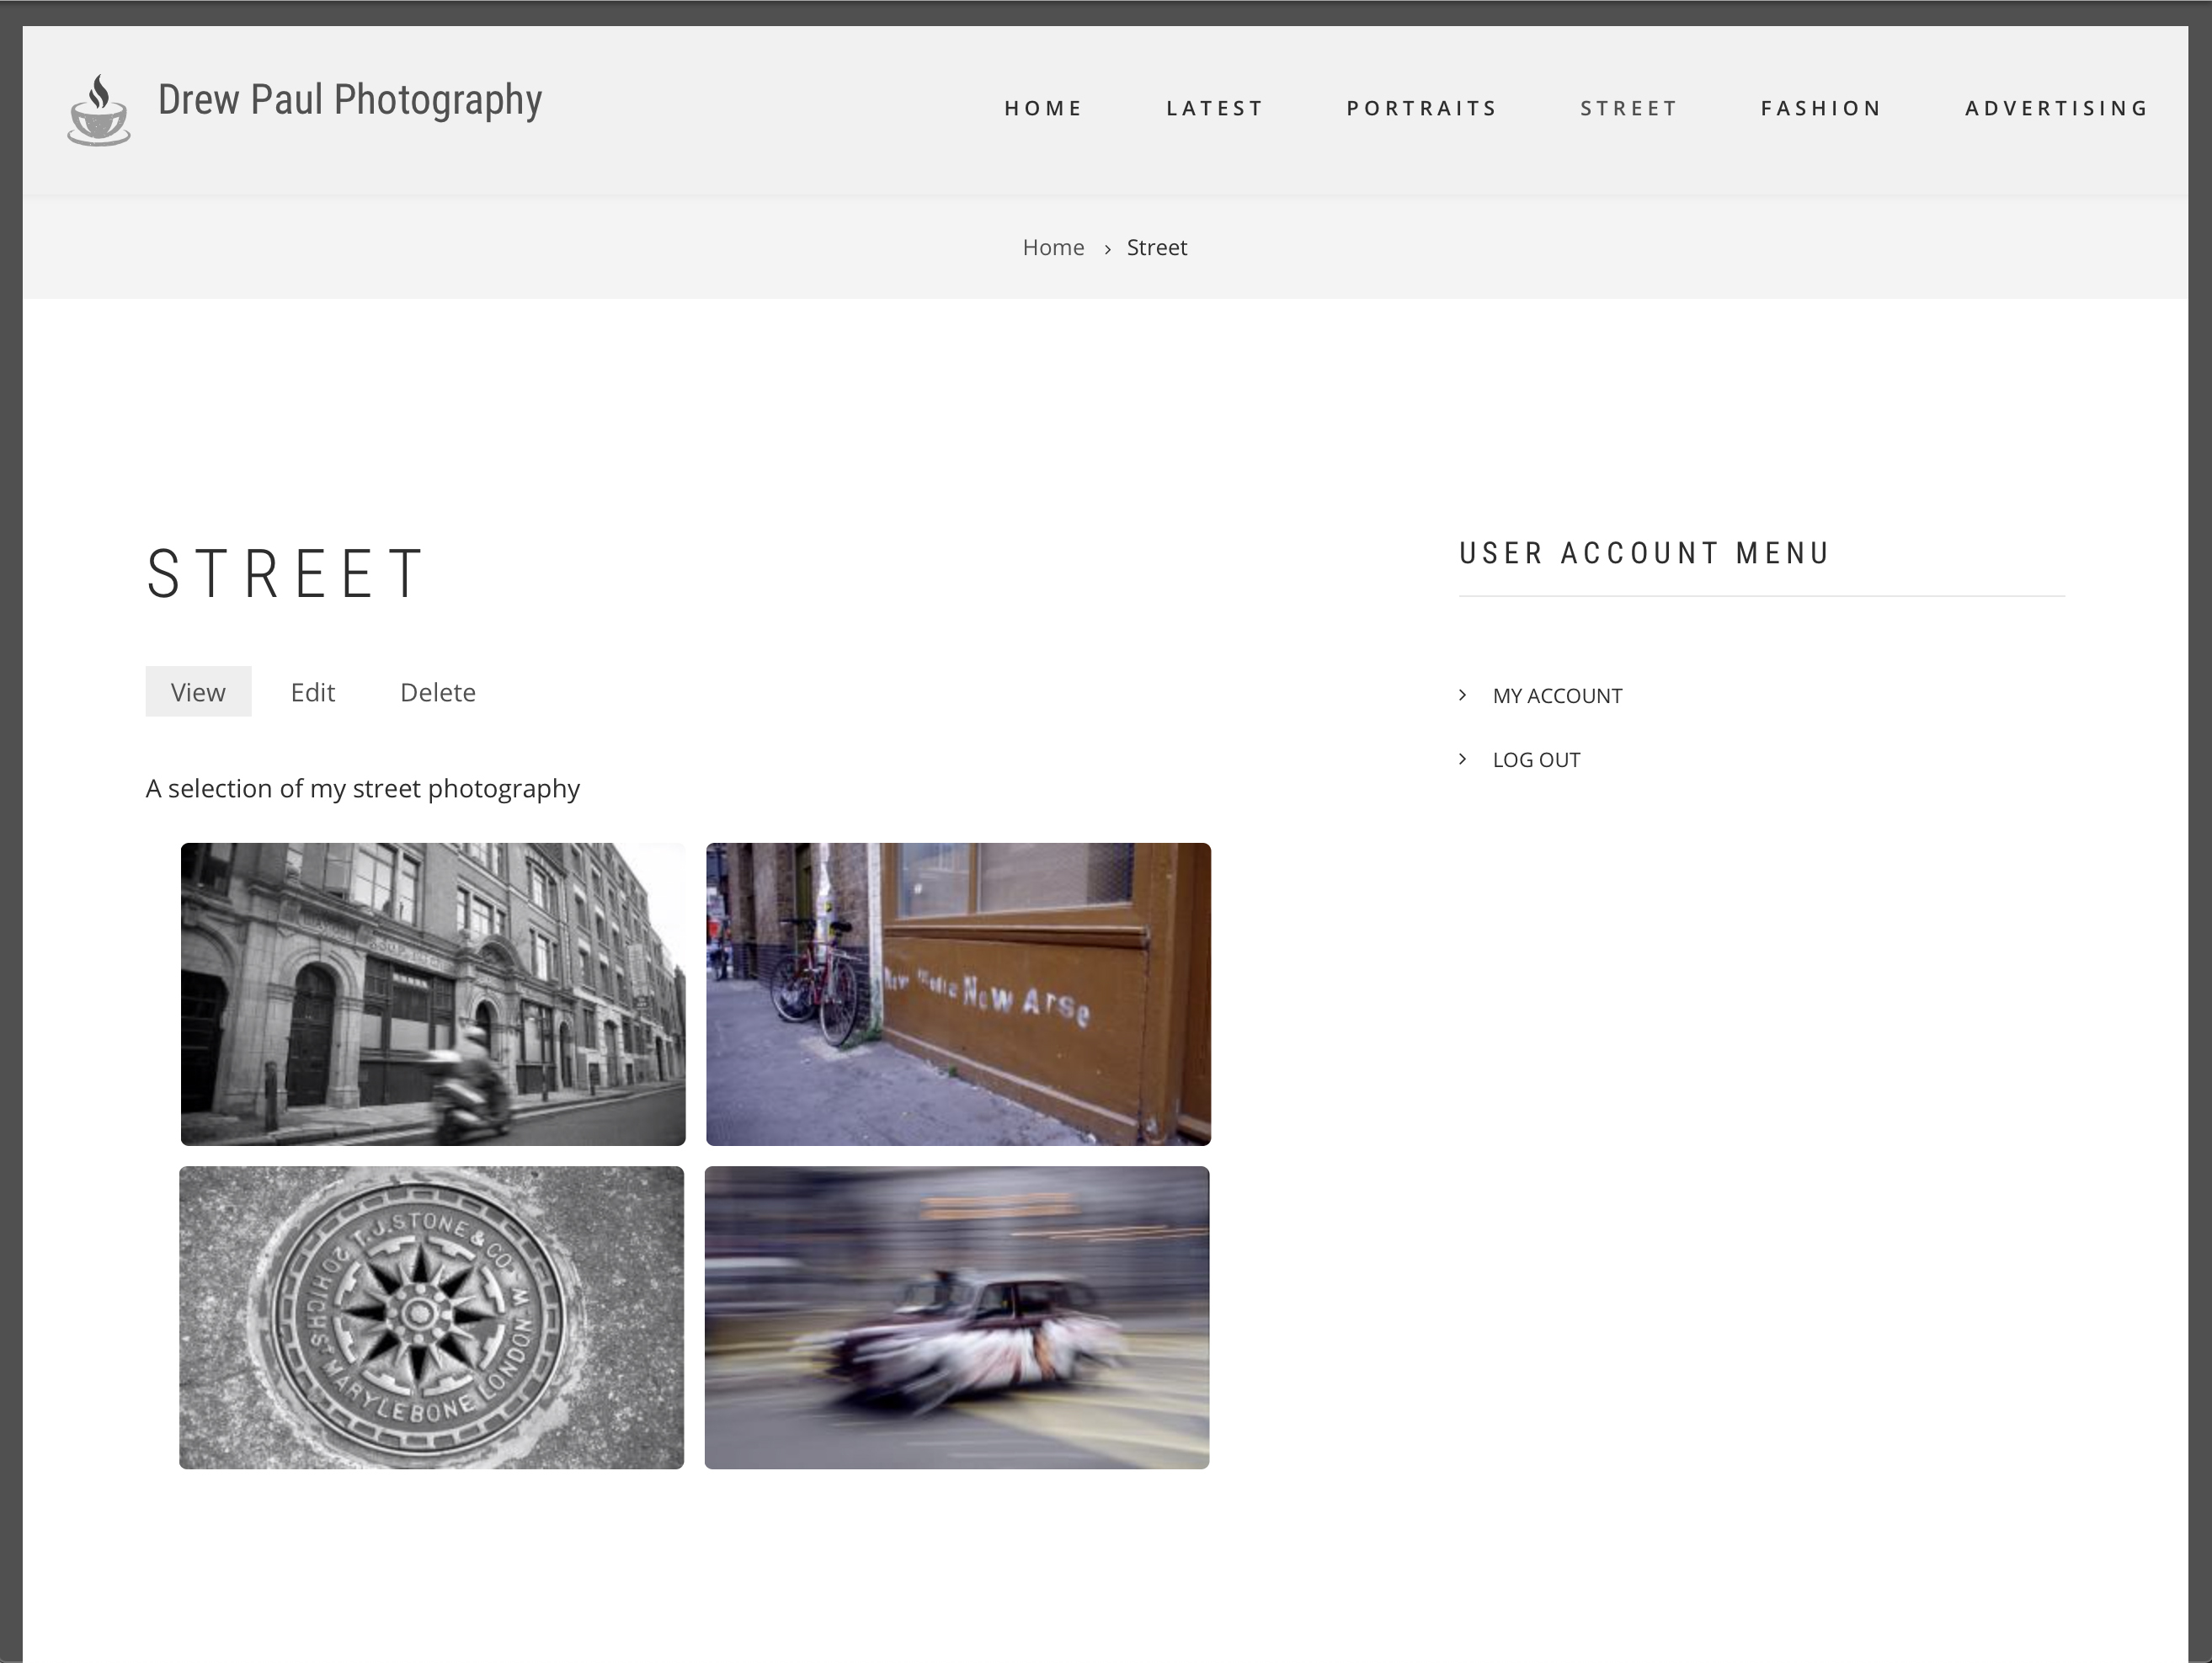
Using an application called Acquia Dev Desktop, we’re going to develop our site locally, before testing and subsequent deployment to a website hosting platform…
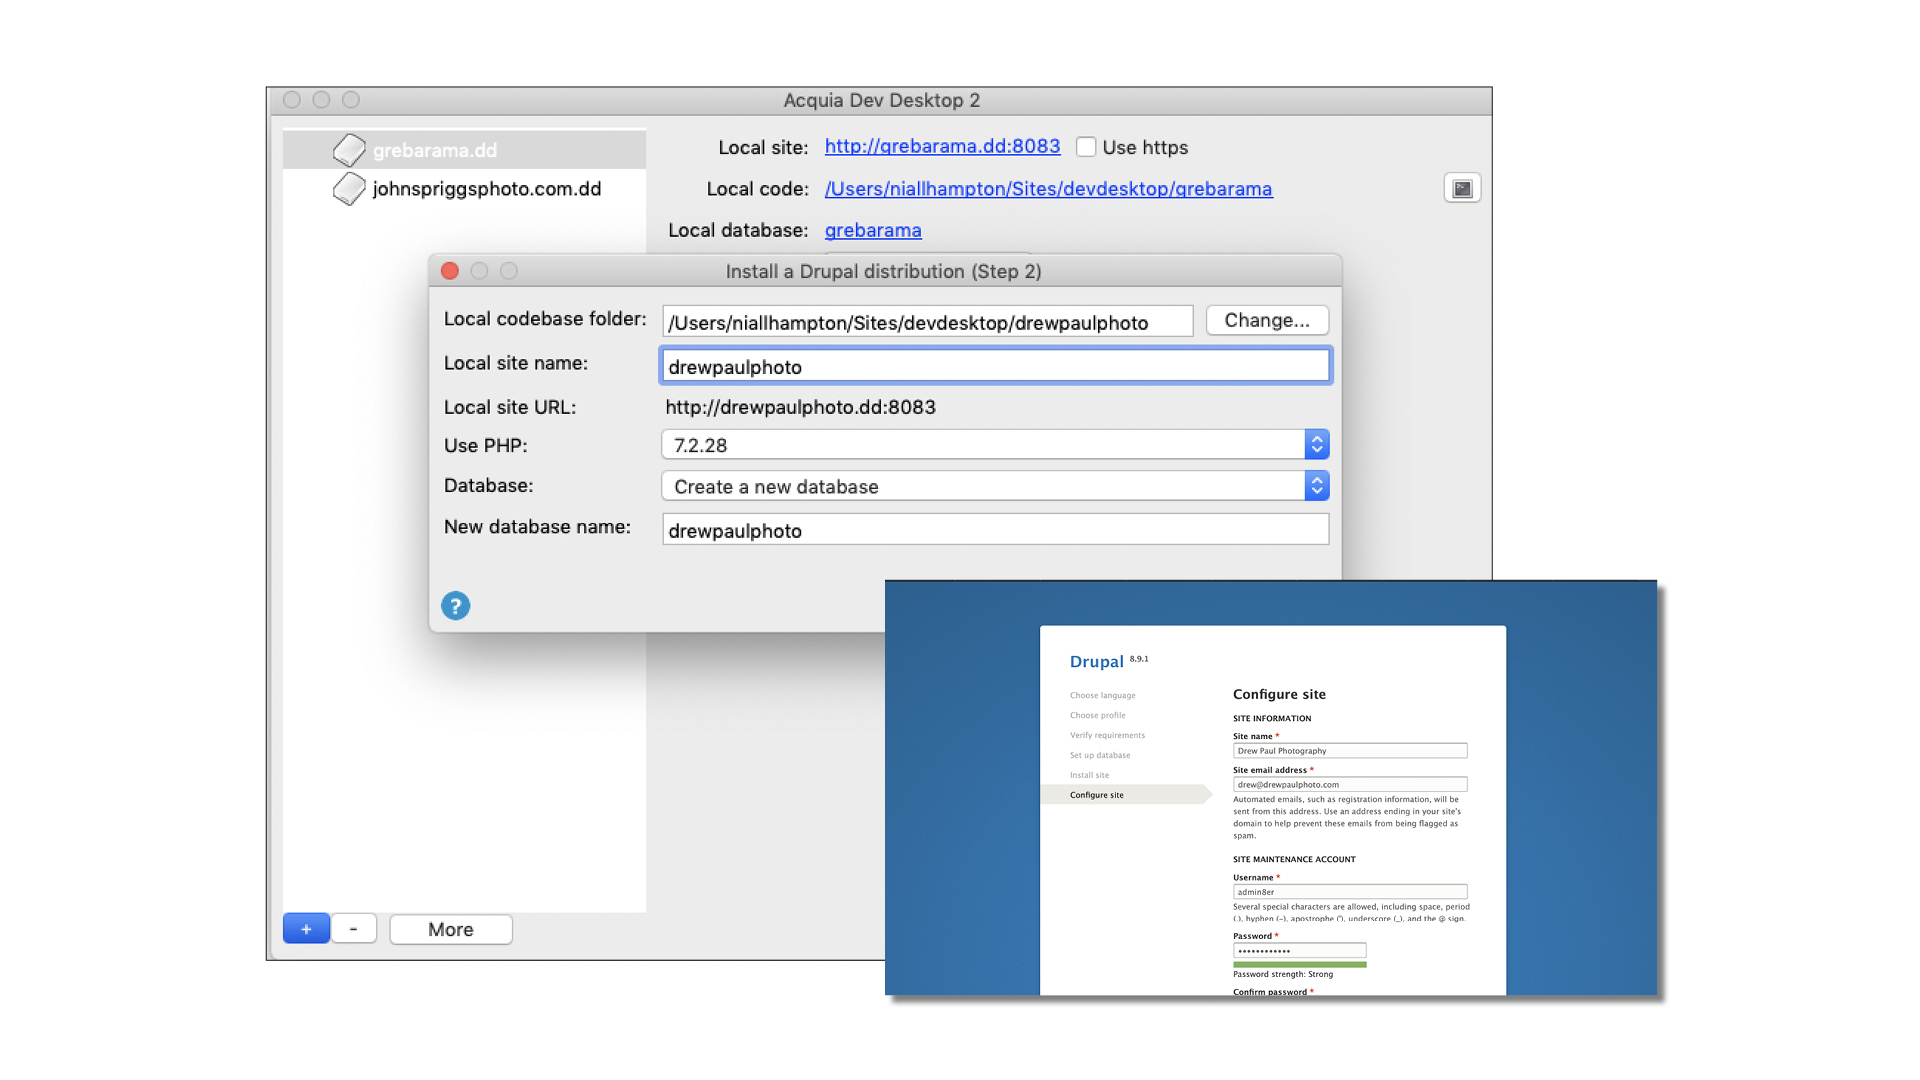
01 Enter the site’s configuration settings
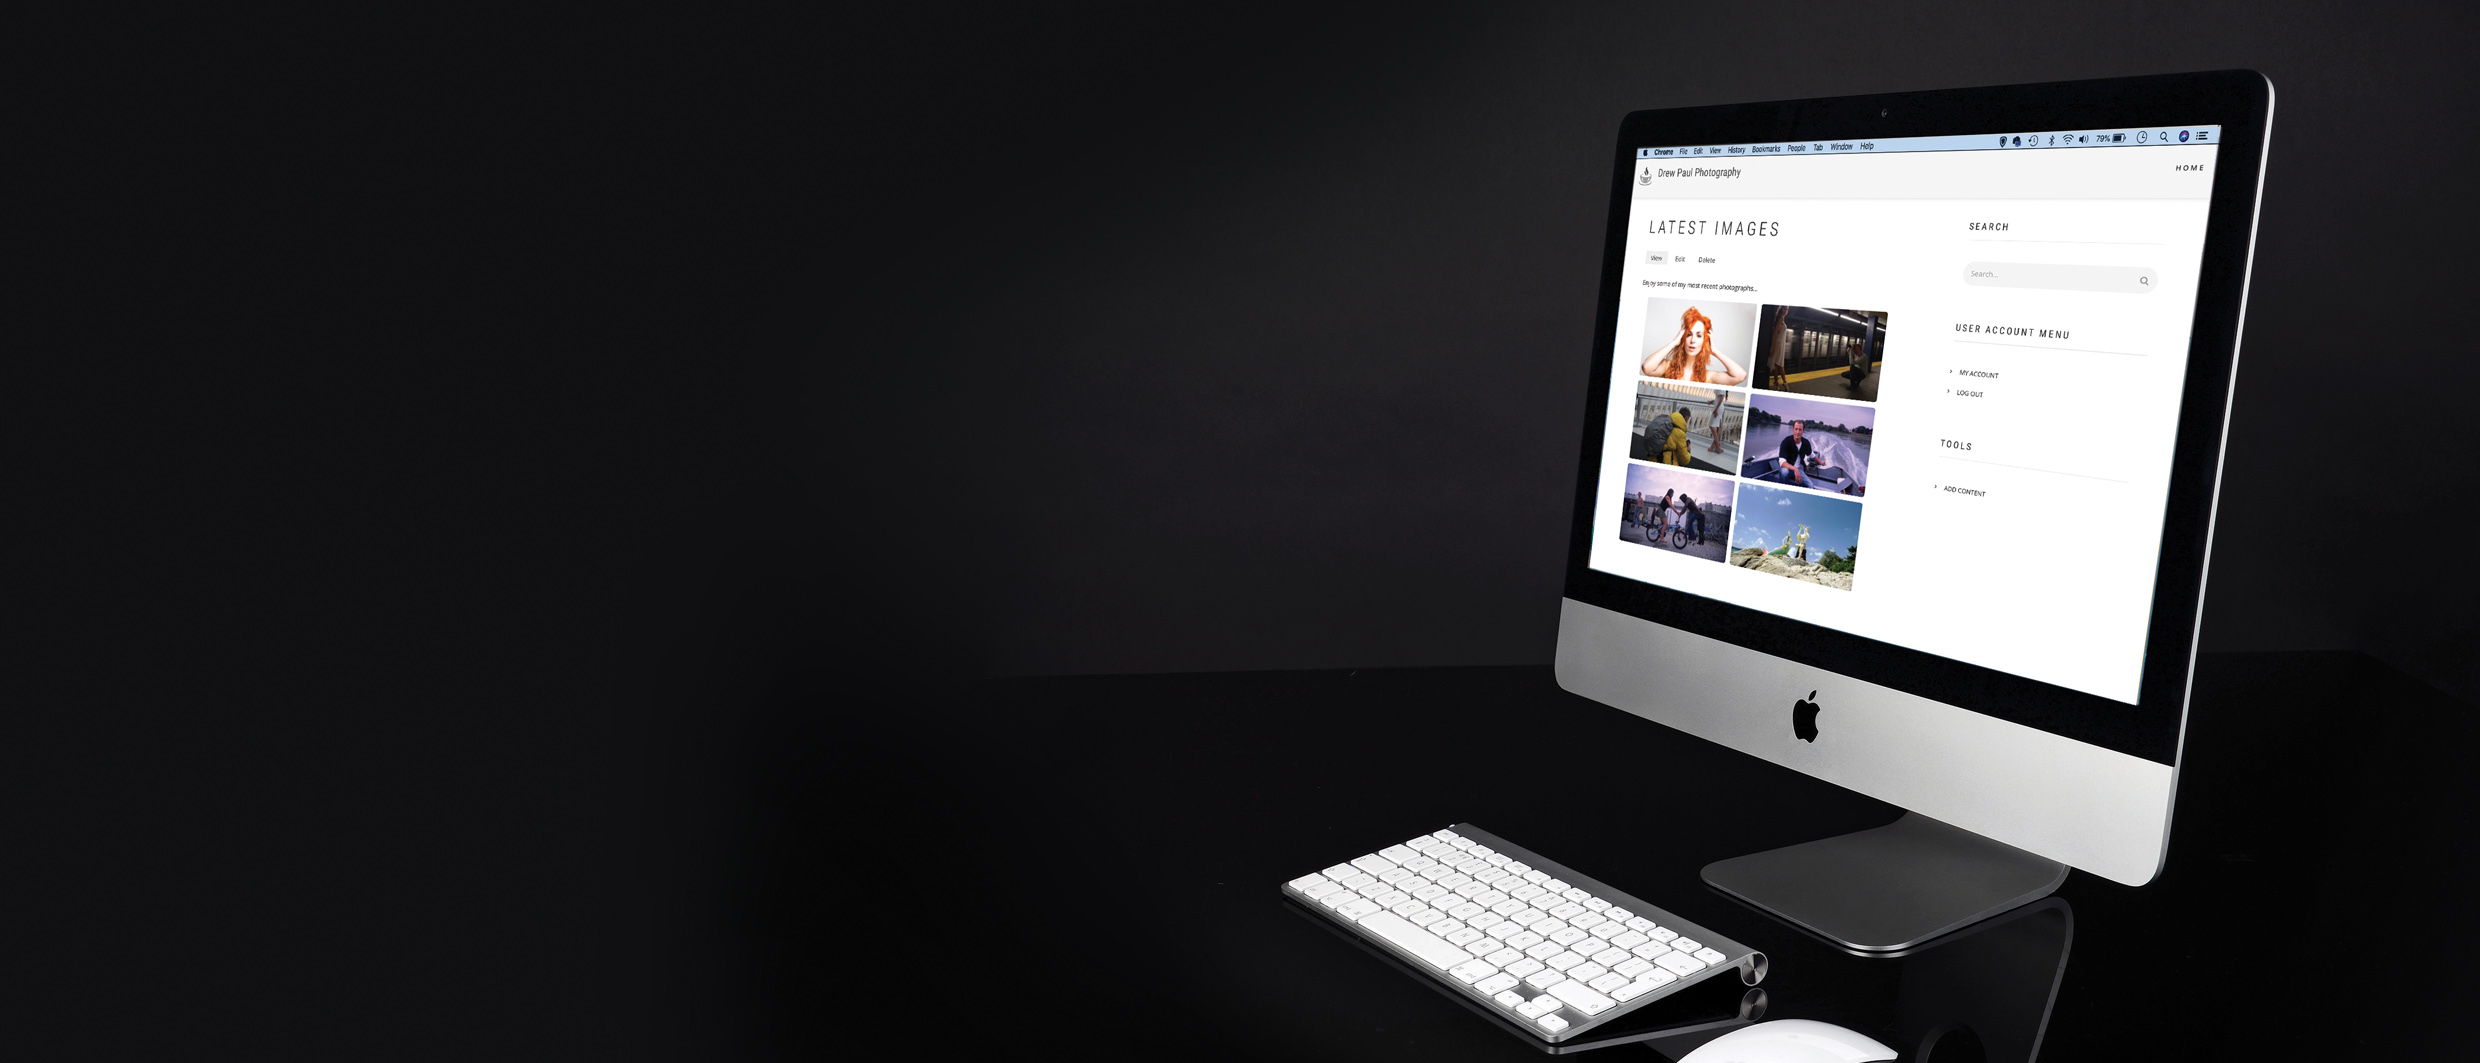
Click on the local site link and select Standard on the Drupal installation screen. Enter the requested details on the Configure Site page, including a name for the website (we’re using ‘Drew Paul Photography’), an administrator account name and password.
Click Save And Continue, and voilà – your site’s front page is displayed and you’re up and running.
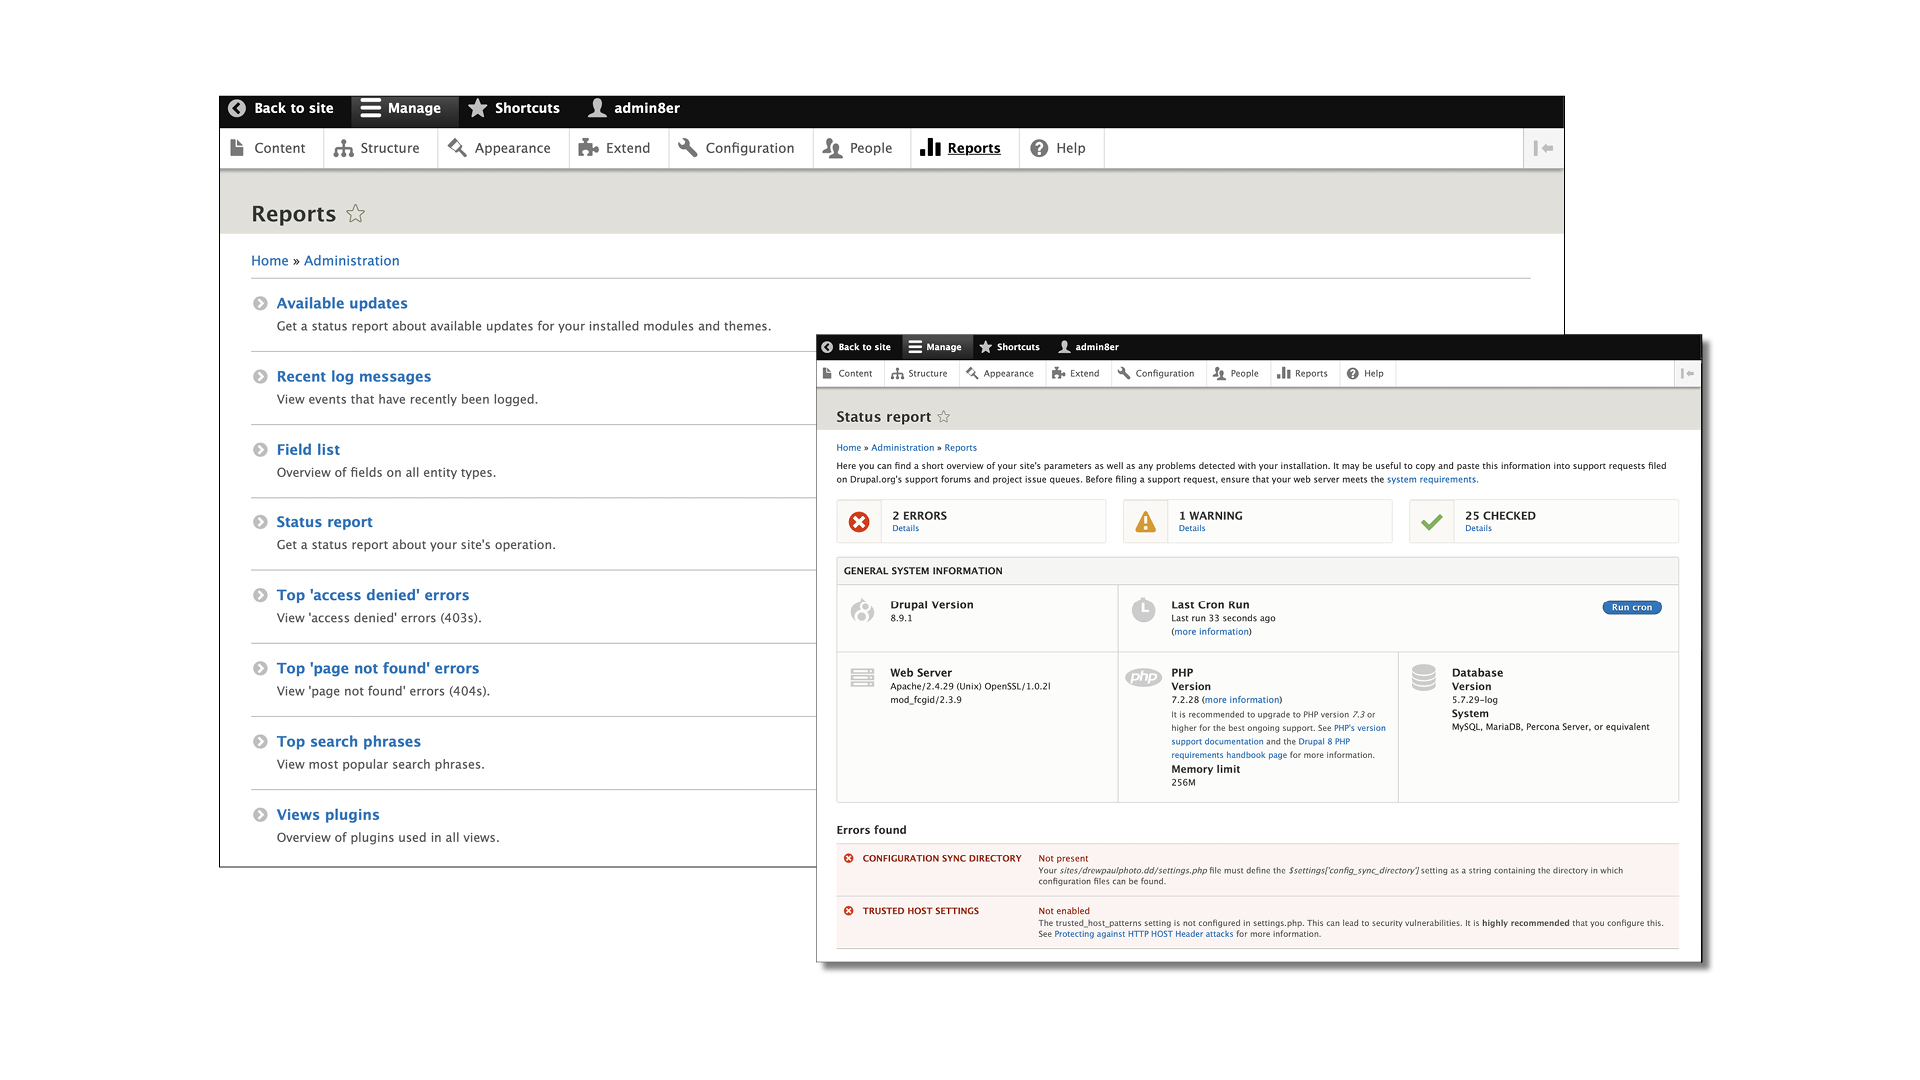
02 Run a site status report
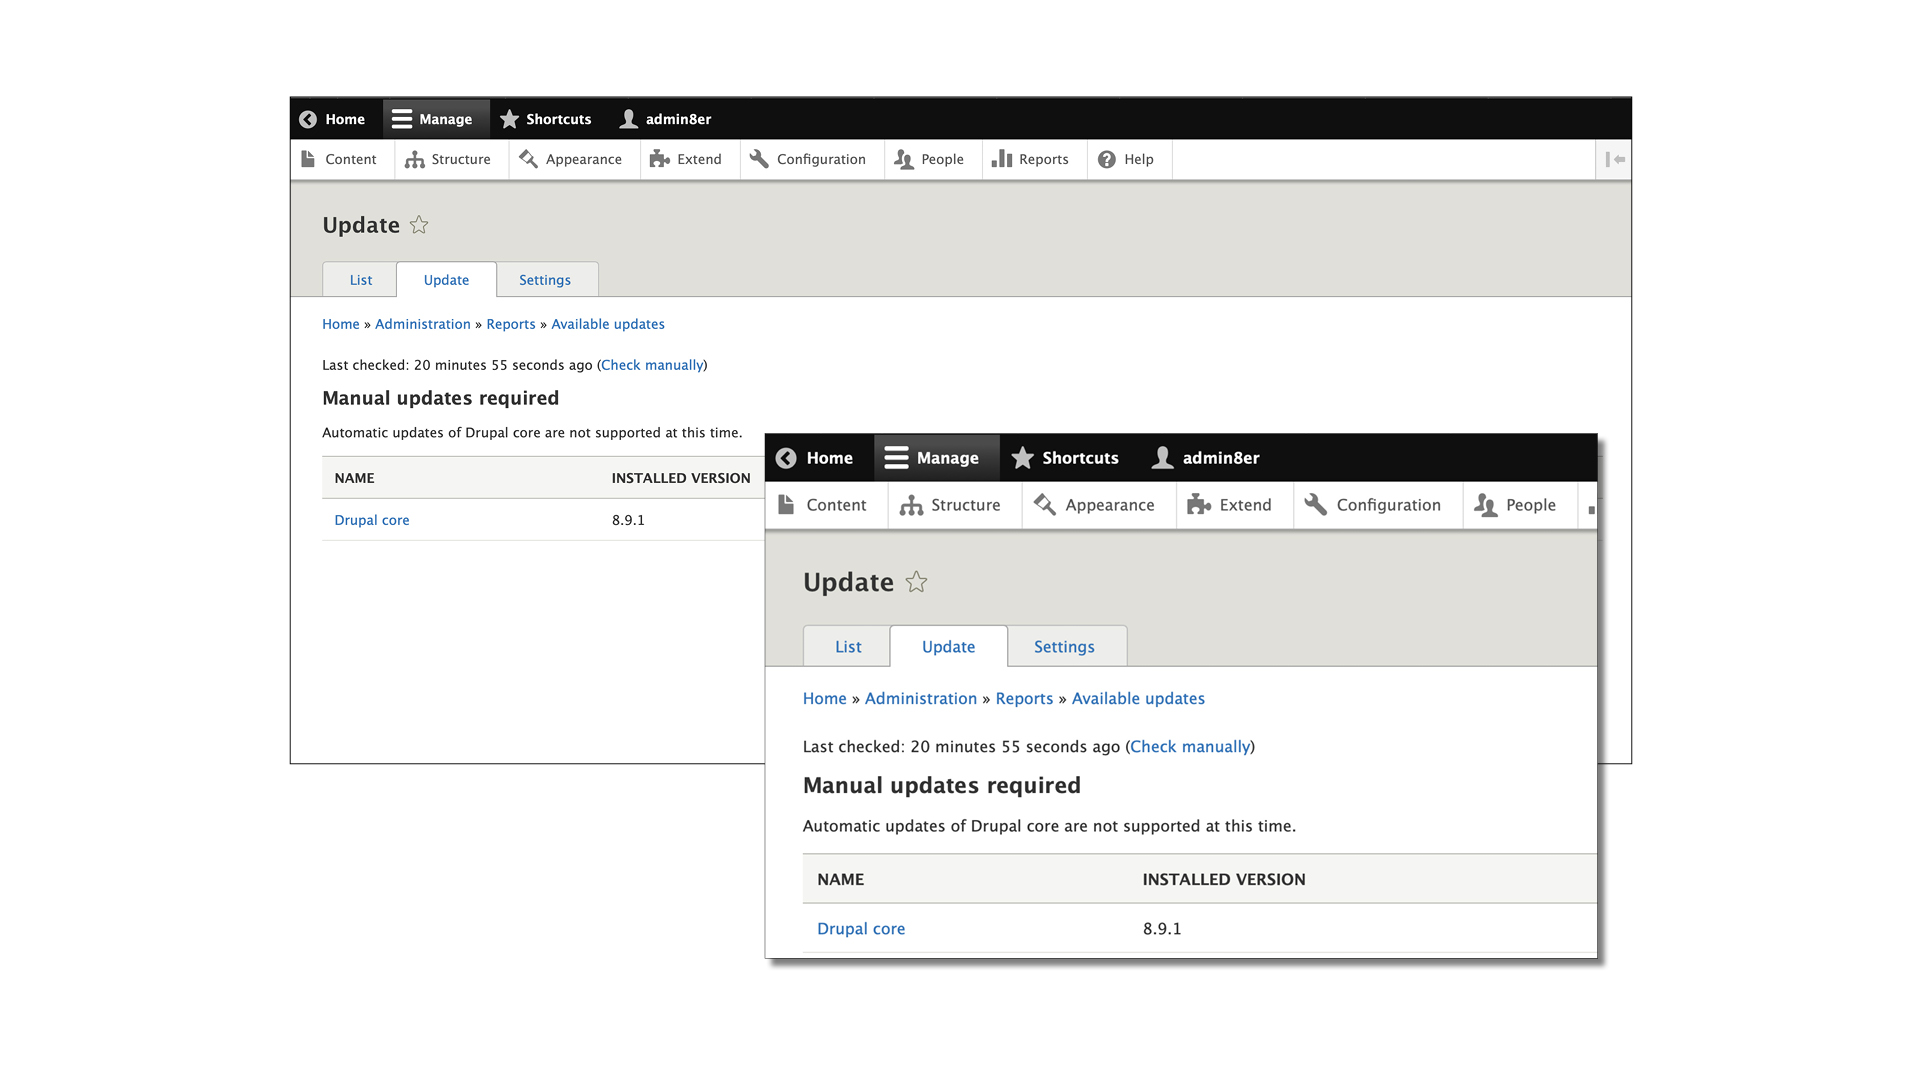
The first thing to do is to click on Reports in the site administration bar at the top of the page, then click on Status Report. Even though you installed v8.9.1 in Acquia Dev Desktop, a more recent version of Drupal’s core will be available.
Search on drupal.org for instructions on how to update it. Once done, clear any other errors and warnings in the status report, searching online for help if necessary.
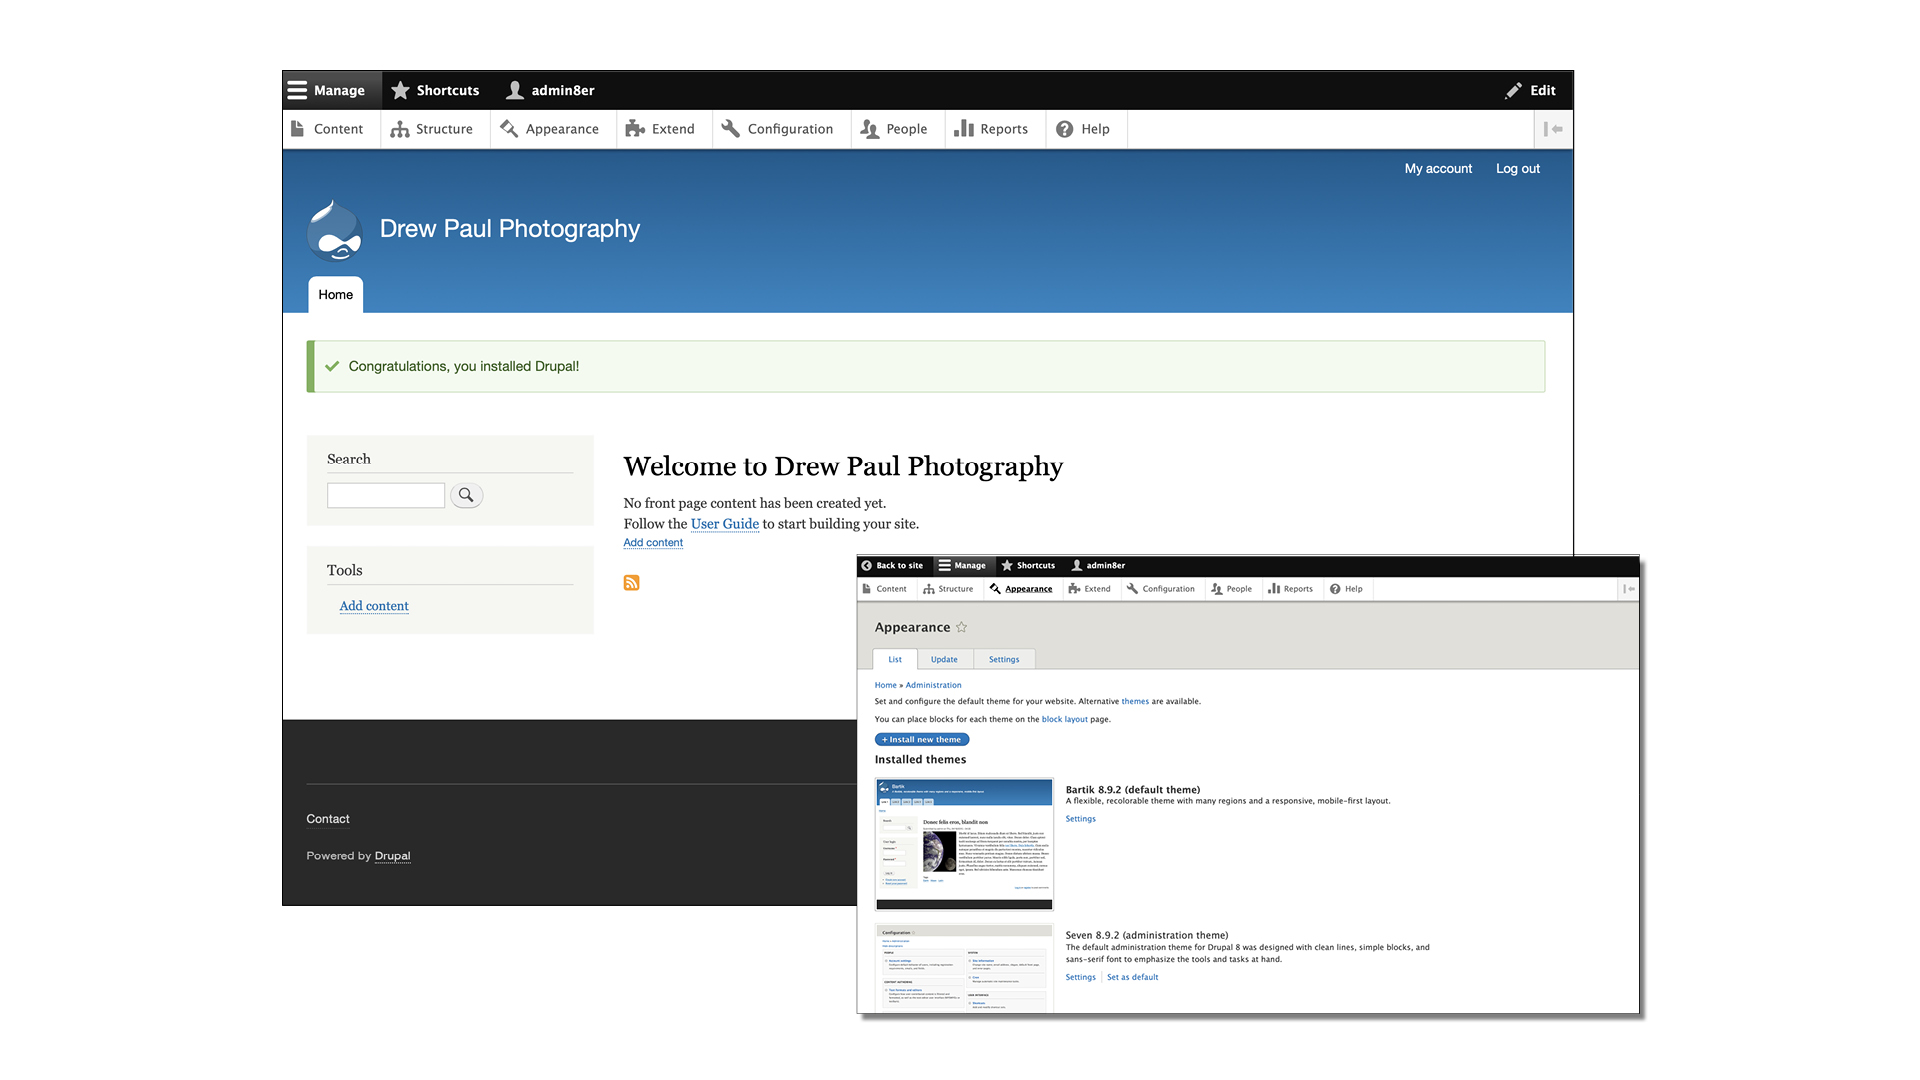
03 Get acquainted with the default theme
Drupal uses themes to determine how a site will look. The default theme of our site is Bartik; while it may look rudimentary, it is customisable and also responsive – this means that the display will adapt to whatever device a site visitor is using for browsing.
As web browsing largely takes place on mobile platforms these days, this is an essential feature. To explore the Bartik interface, click Back To Site.
04 Explore the Drupal administration menus
Now let’s go back behind the administration curtain and have a look around. (The theme changes to Seven for ease of use.)
Click on any of the tabs in the white bar along the top of the screen. (If you can’t see the bar, click Manage, next to the ‘hamburger’ icon in the top-left.)
On any of the pages you’ll access here, there are helpful short descriptions so you can easily find what you’re looking for.
05 Take a look at the Content panel
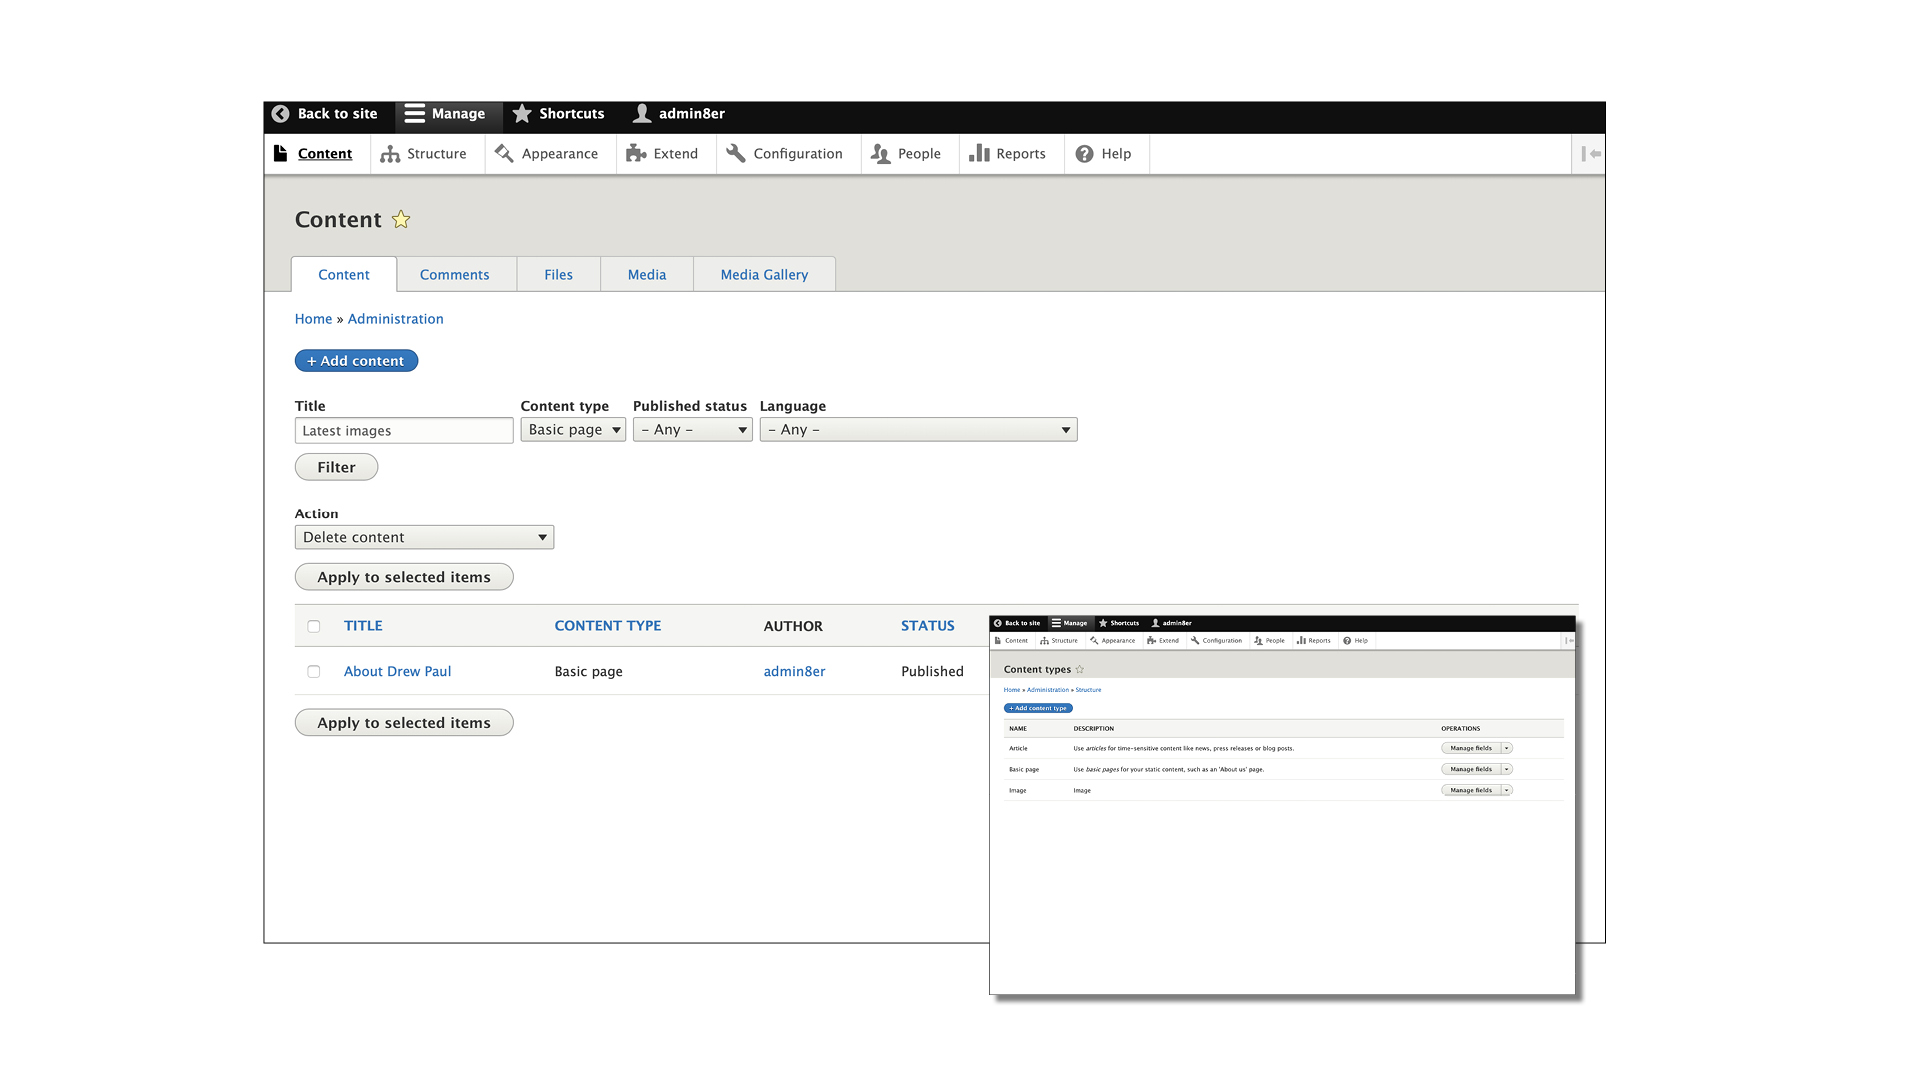
Now click on Content to bring up a list of content posted to the site. (The list display is useful for sites that have multiple users posting content; the display of items can be filtered according to need.)
To see which types of content exist out of the box, click Structure in the top bar, then Content Types. Here, you’ll find them all listed – Basic Page, Article and Image – with brief descriptions.
06 Expand functionality with a new module
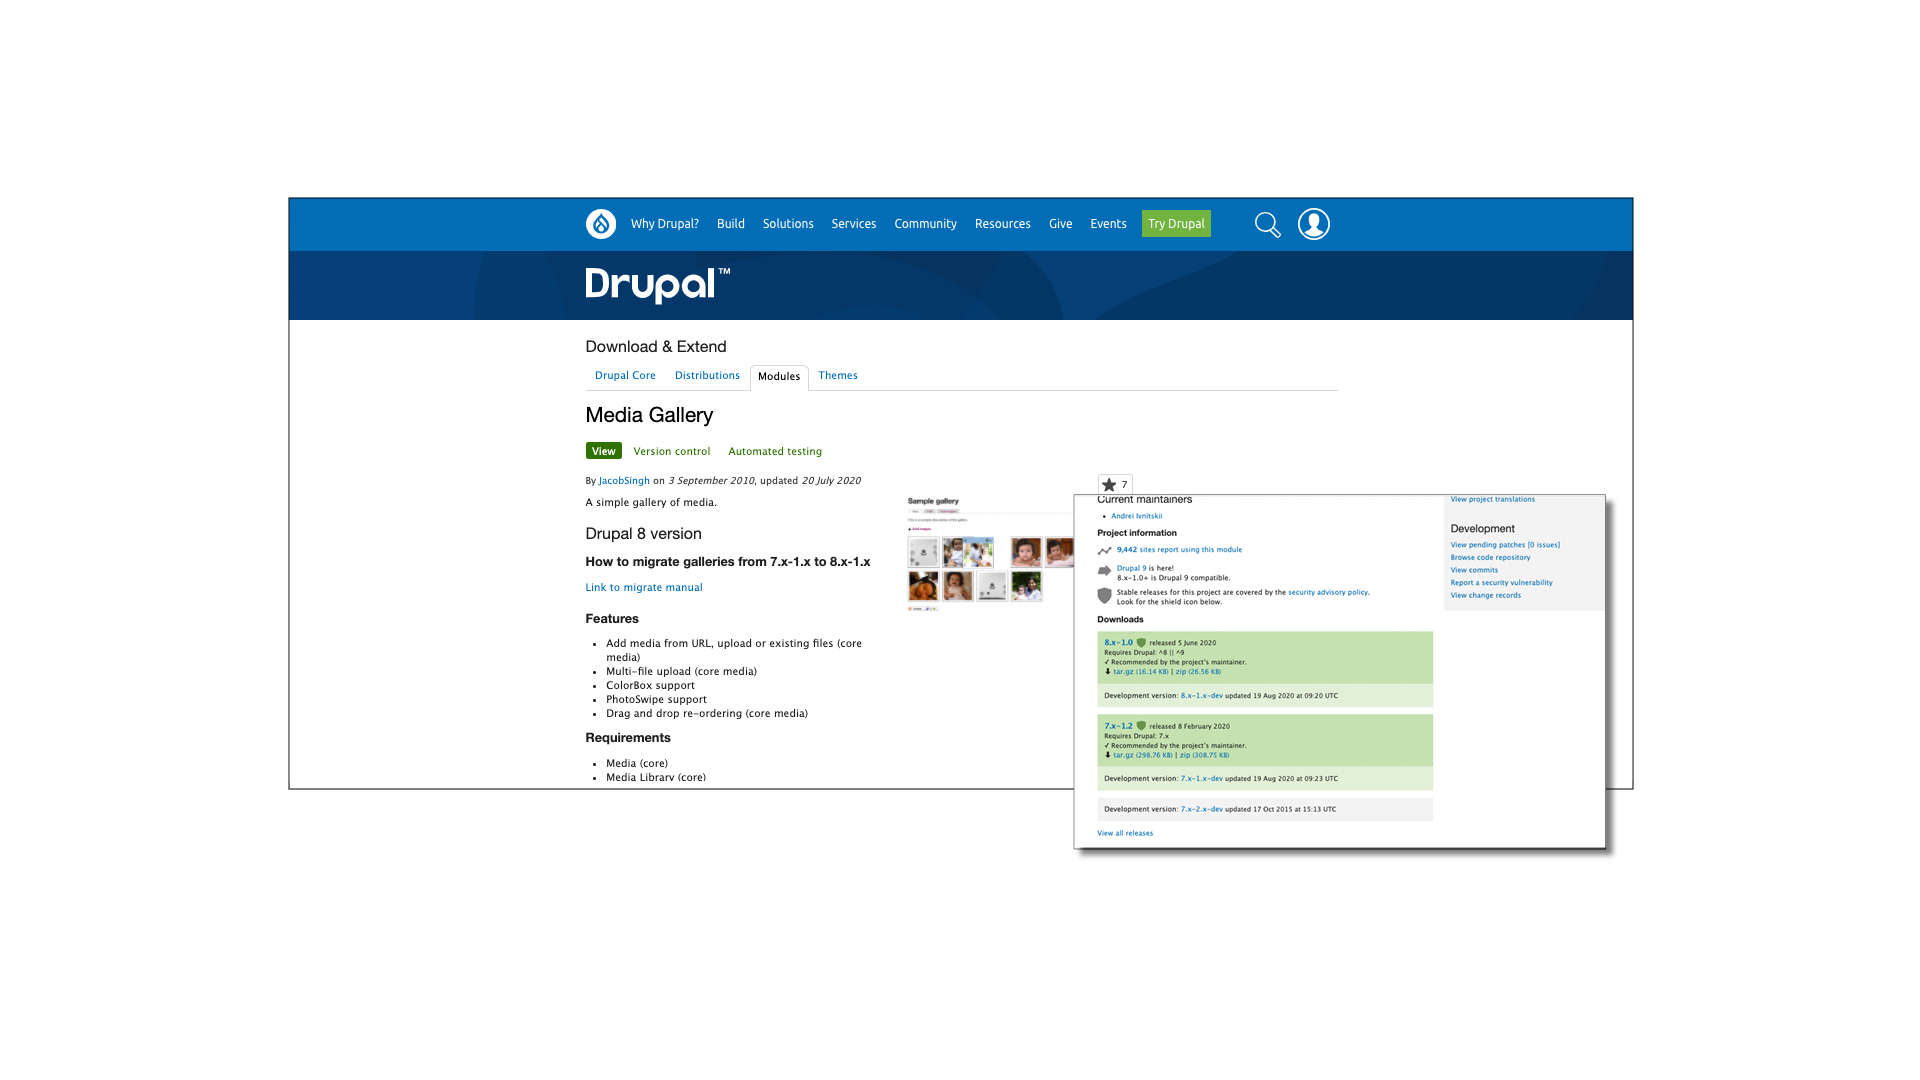
For our photography website, we’re going to display our images by using a module called Media Gallery. Modules add extra functionality to Drupal sites; they have to be downloaded and installed.
Locate Media Gallery here – at the bottom of the page, in the green box with ‘8.x-1.0’ at the top, mouse over ‘tar.gz’ and copy the link address.
07 Install the Media Gallery module
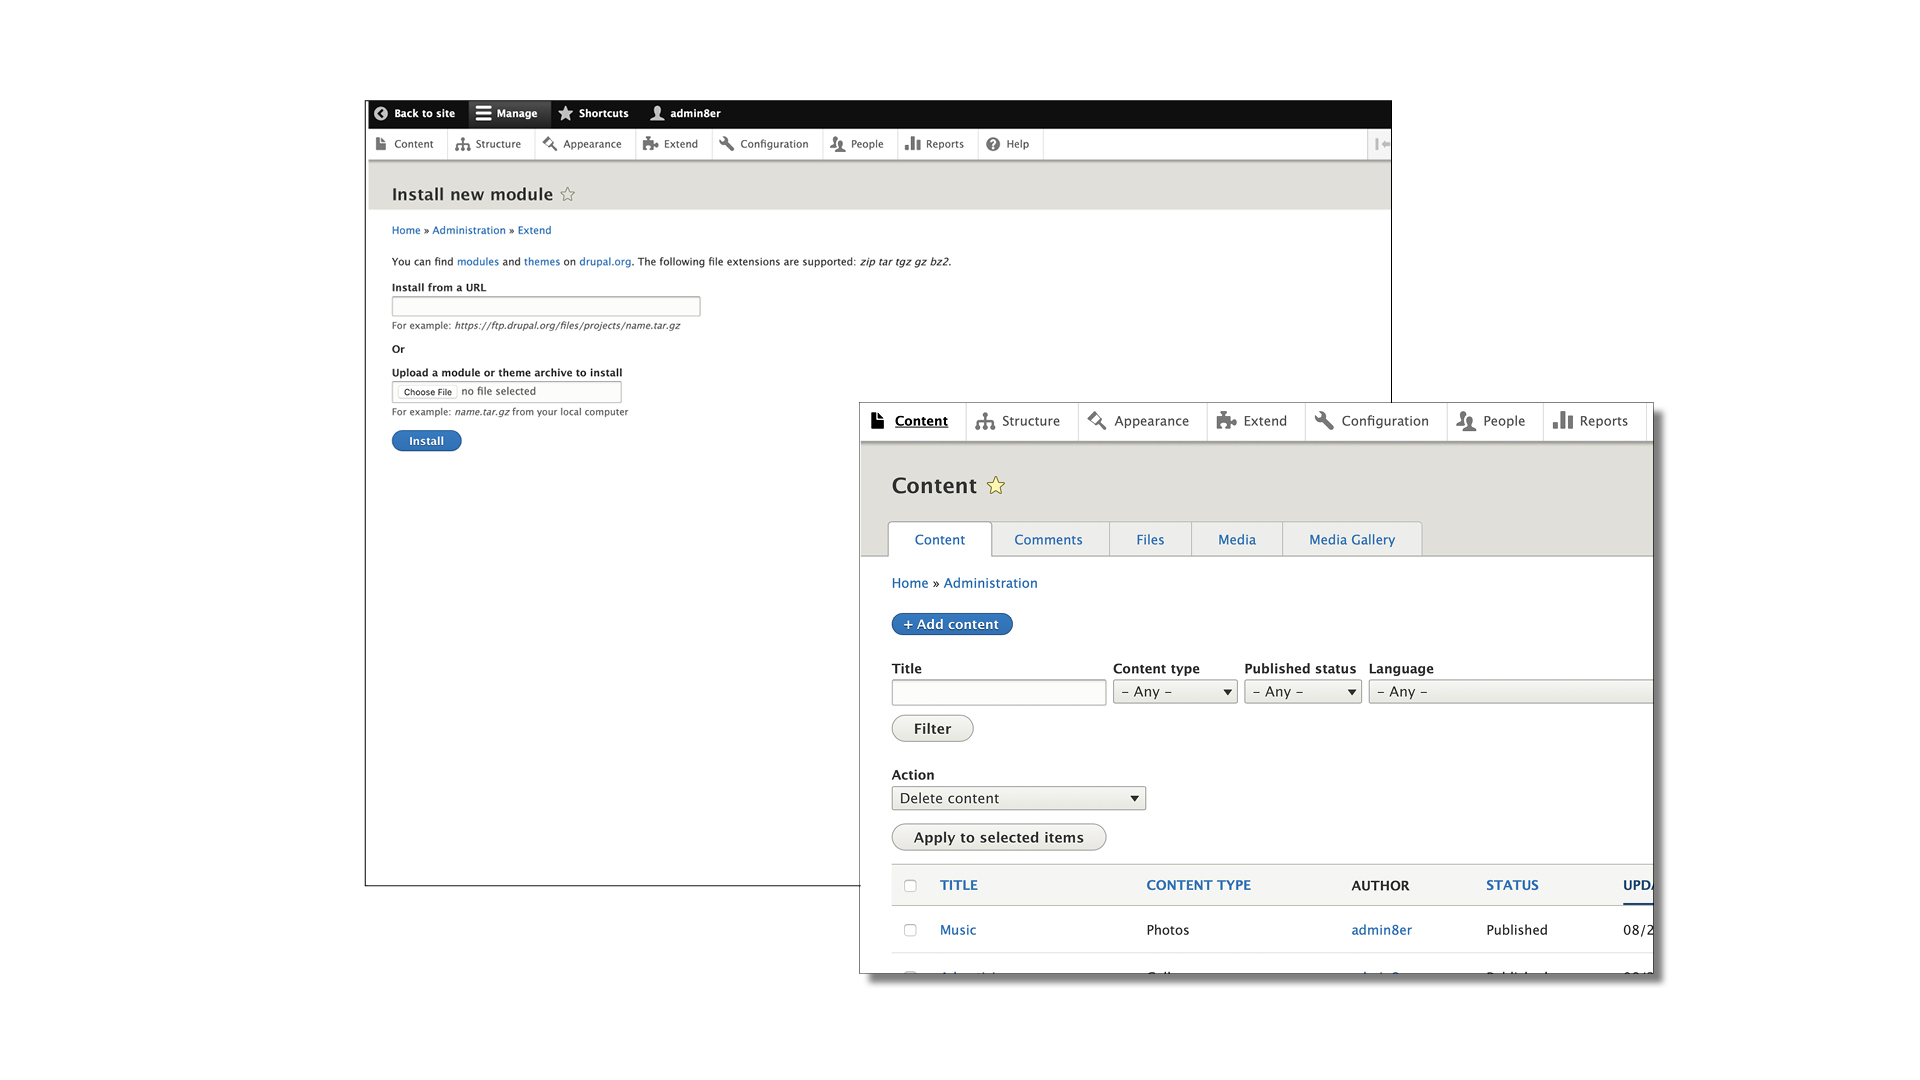
Back in the administration area of your site, click on Extend and then the blue Install New Module button.
In the first box, ‘Install from a URL’, paste the link you copied from the Drupal page, then click Install. The files for Media Gallery will be extracted into your Drupal directory.
Now click on Content, and you’ll see that a Media Gallery tab has been added to the four content tabs at the top of the page.
08 Change the site’s theme to Showcase Lite
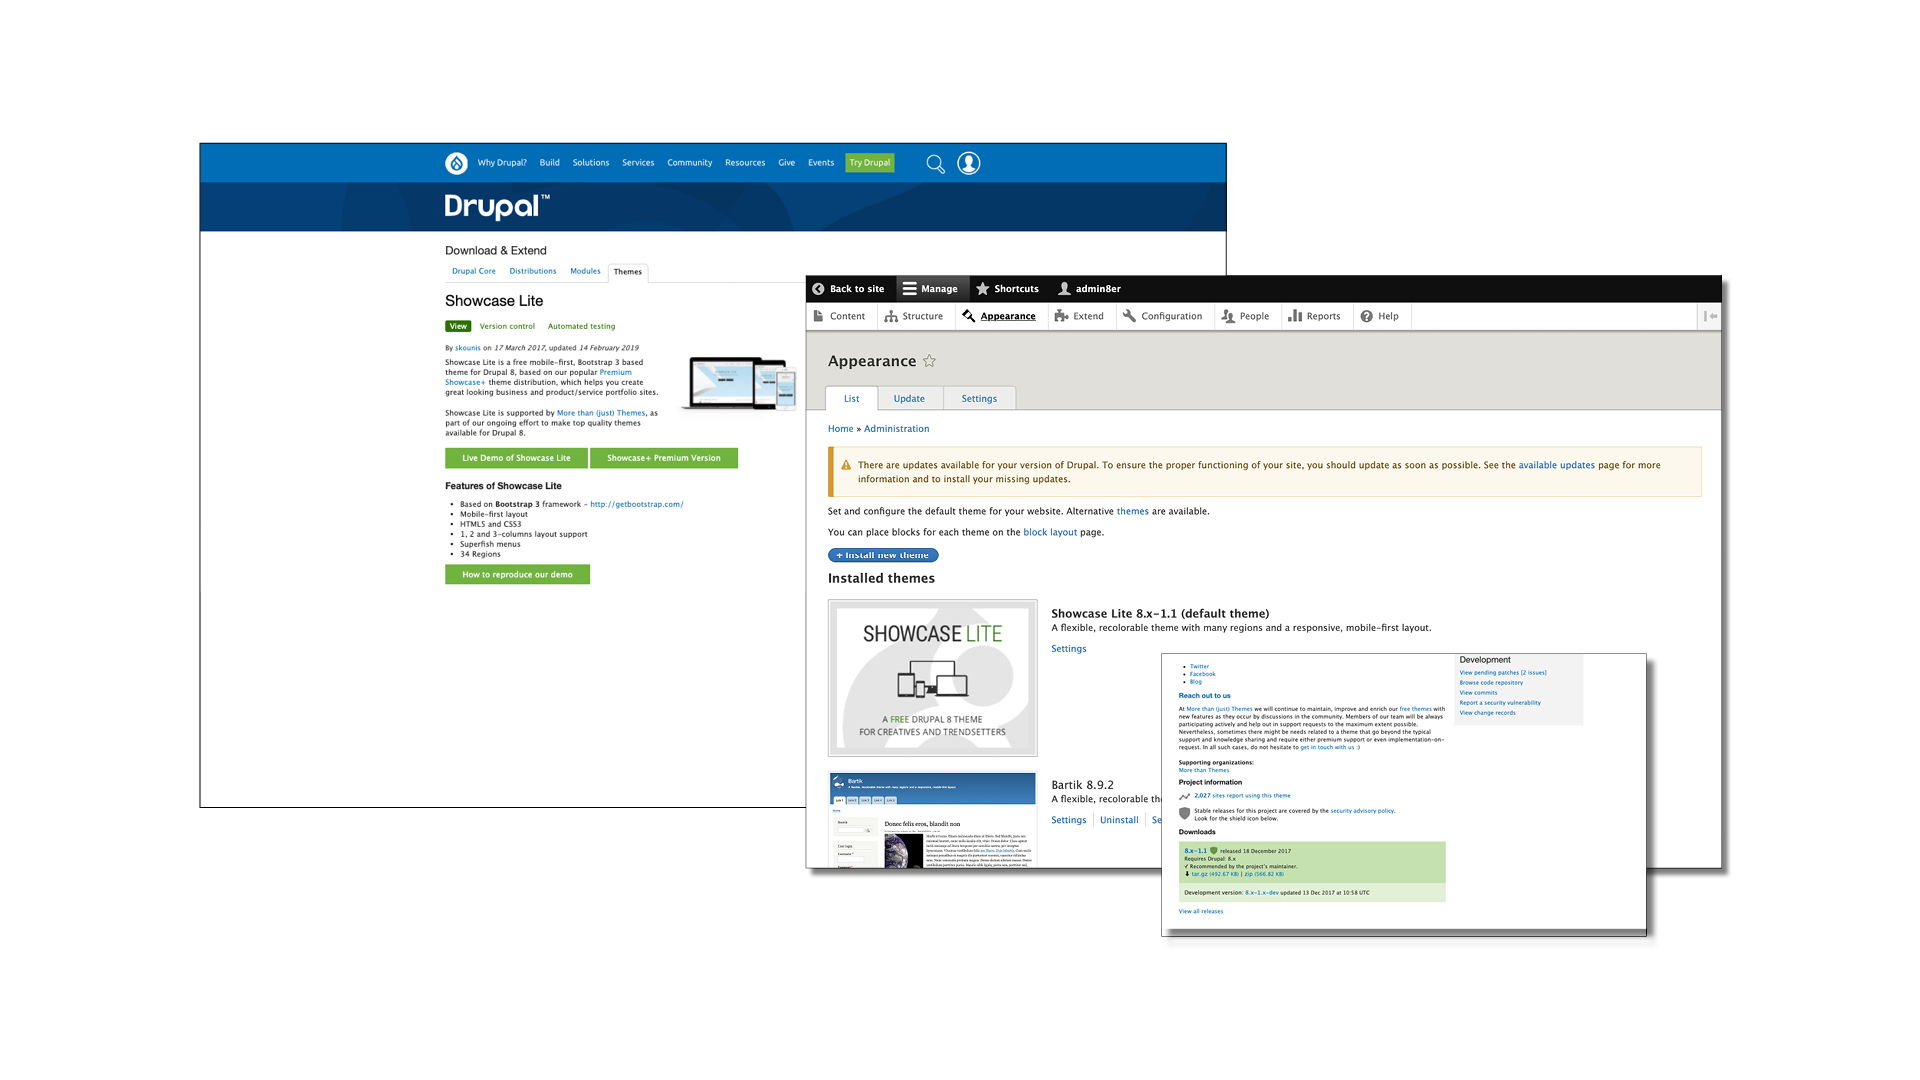
In the first of this series on Drupal, we identified Showcase Lite as a potential theme for a photography website. It has a clean, uncluttered design, and is also responsive. Let’s download and install it now.
Go to the Showcase Lite download page and copy the tar.gz link. Back at your site, click Structure and Install New Theme. Once done, click Install And Set As Default.
09 Upload images and create your galleries
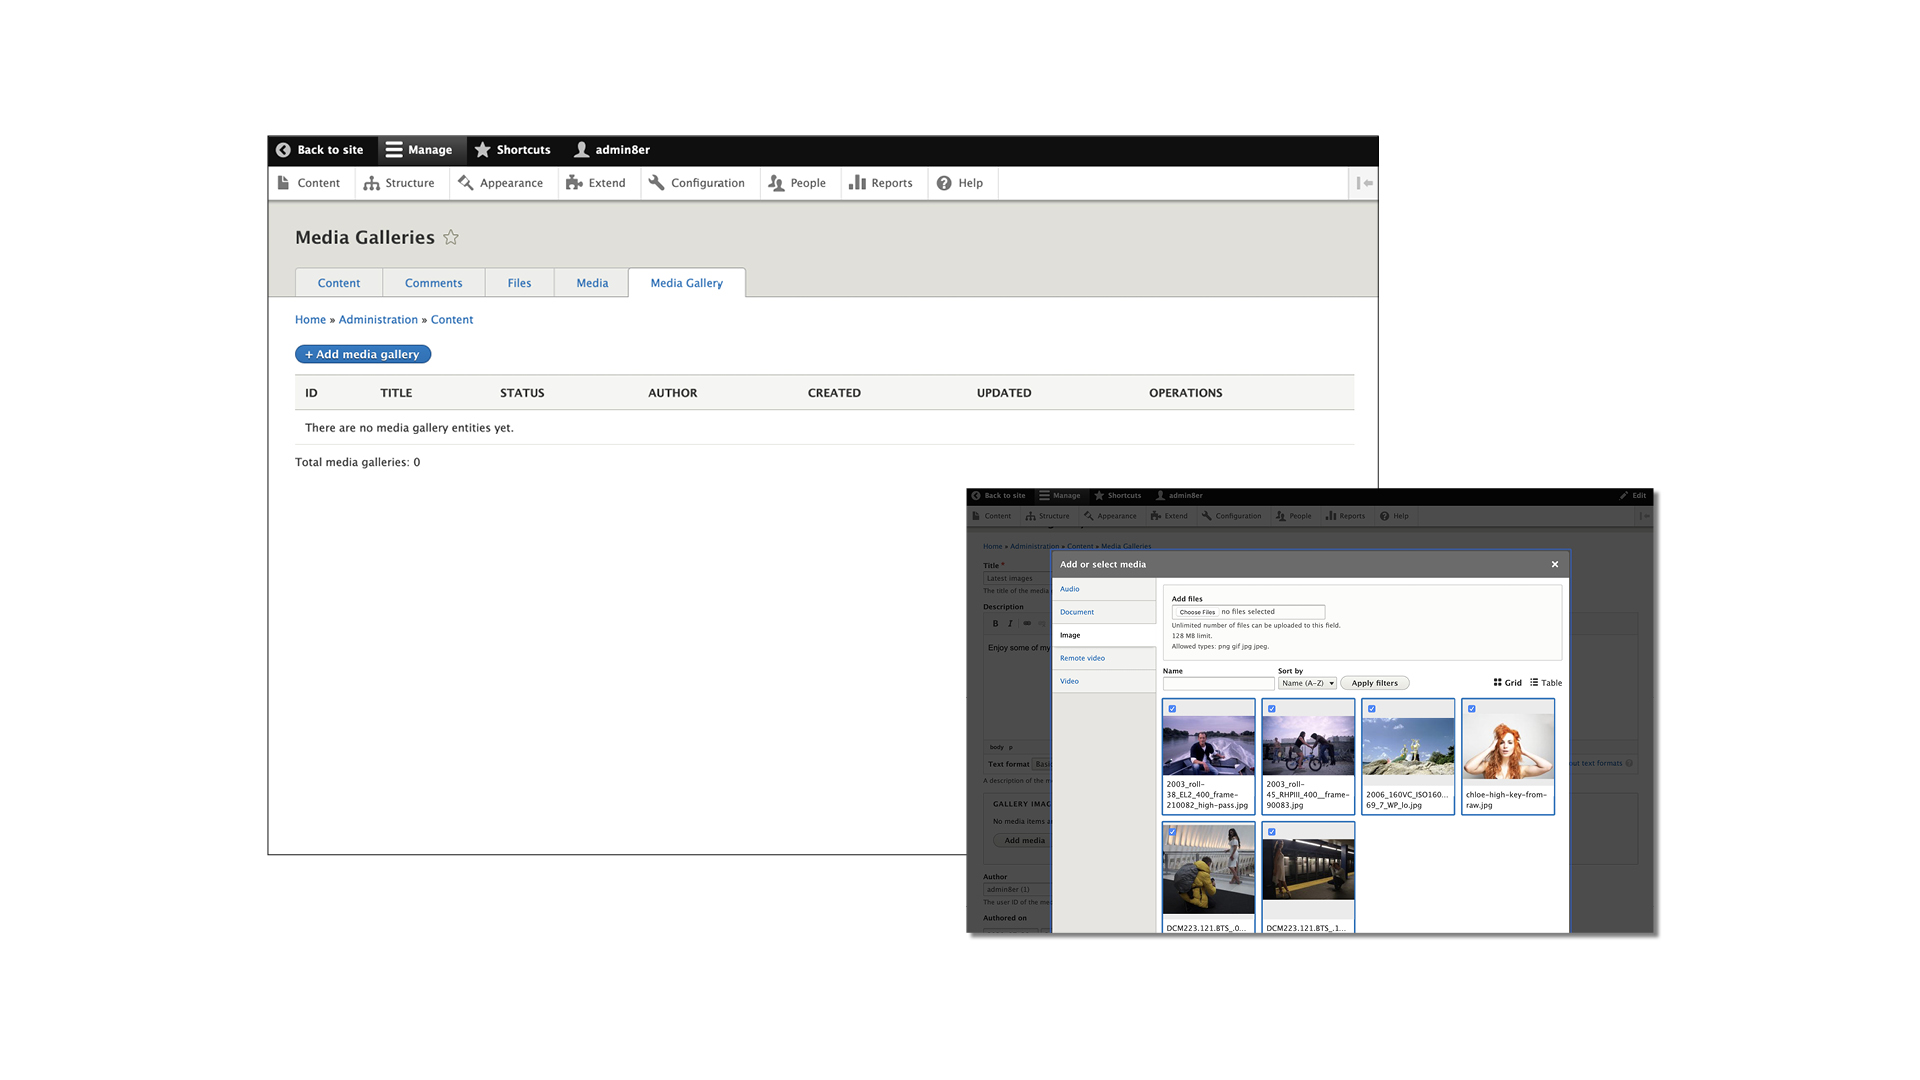
Now let’s add some galleries and start populating the site with images. Select the Media Gallery tab in Content, then Add Media Gallery. Enter all the required information (title, description, etc). Under Gallery Images, click Image then Add Files.
Images will display in upload order, but you can change this by clicking Show Media Item Weights. Repeat this process for the number of galleries you wish to add to your site.
10 Link the galleries to the site’s navigation
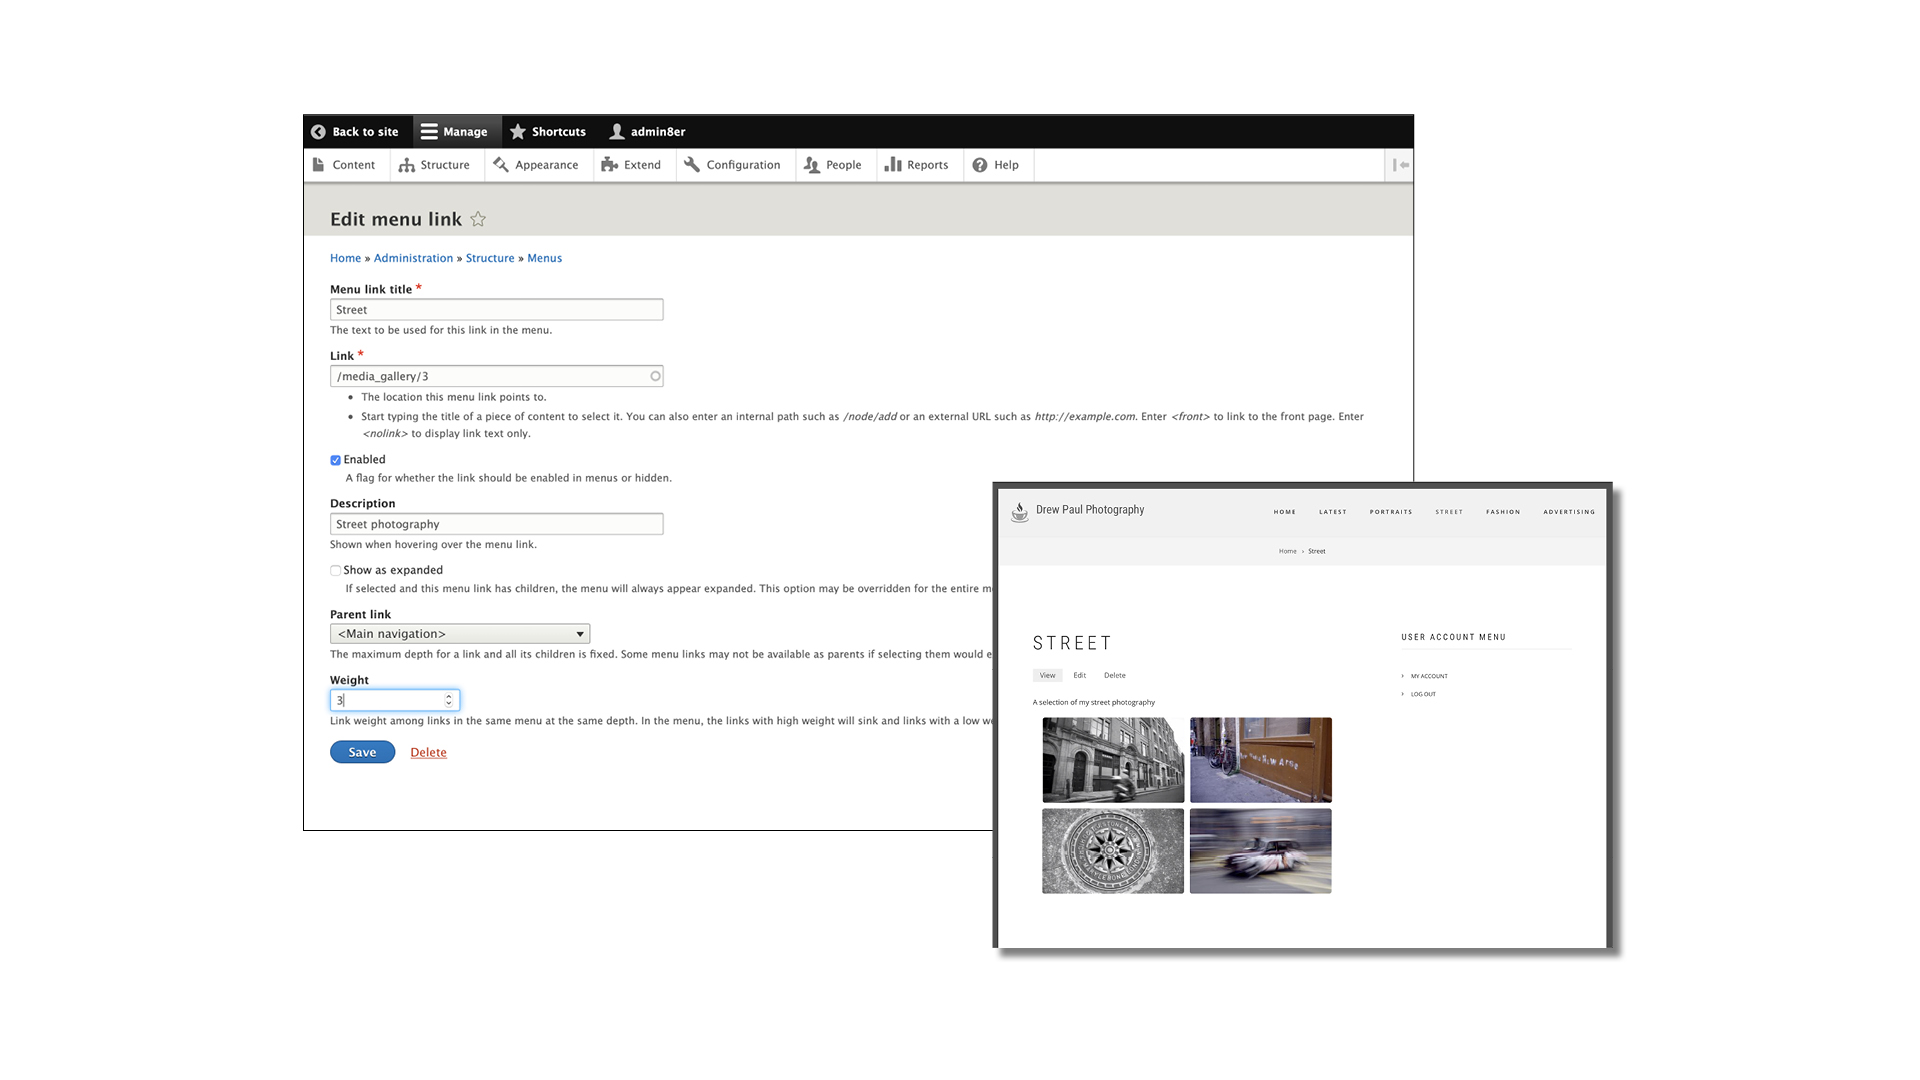
So that site visitors can find the galleries, click on Structure. Then, in the list underneath, Main Navigation and finally Edit Menu. Enter a title for the menu link, then type ‘/media_gallery/1’ in the Link field.
Do the same for the other galleries, replacing ‘/1’ with ‘/2’, ‘/3’, and so on. Enter a description for the gallery, click Save at the bottom of the page, and you can access your galleries from the navigation.
This concludes tutorial 2 of 3 – in part 3, we conclude the site build and finesse its look and feel.
Digital Camera World is the world’s favorite photography magazine. Every issue is packed with the latest news, reviews, tutorials, expert buying advice, tips and inspiring images. Plus, every issue comes with a selection of bonus gifts of interest to photographers of all abilities.
Read more:
Best website hosting sites for photographers: get your portfolio online
Best free cloud storage options for photographers: platforms and apps
Best online photography courses – from beginner guides to masterclasses
Best website builders for photographers
Best password managers
Best student laptop
Best photo editing software

Niall is the editor of Digital Camera Magazine, and has been shooting on interchangeable lens cameras for over 20 years, and on various point-and-shoot models for years before that.
Working alongside professional photographers for many years as a jobbing journalist gave Niall the curiosity to also start working on the other side of the lens. These days his favored shooting subjects include wildlife, travel and street photography, and he also enjoys dabbling with studio still life.
On the site you will see him writing photographer profiles, asking questions for Q&As and interviews, reporting on the latest and most noteworthy photography competitions, and sharing his knowledge on website building.
