Lightroom series part 13: How to edit and retouch a low-key portrait
Become a dedicated follower of fashion, and learn how to retouch low-key images using the handy tools in Lightroom
The best camera deals, reviews, product advice, and unmissable photography news, direct to your inbox!
You are now subscribed
Your newsletter sign-up was successful
Just like fashion, there are trends in photography. They’re hard to ignore, and so they should form part of your photographic arsenal. For a long time, high-key portraits (where the background is white, and the rest of the image is above middle grey) have been popular – but low-key (where the background and clothes are dark) is definitely on the way back in.
Welcome to the 13th instalment of our Lightroom series, first published in Digital Camera magazine (see below for subscription offers).
If you are already a Lightroom user, you could discover some new tricks and processes you haven't tried yet. If you don't use Lightroom, then scroll down to the bottom where you'll discover how to get it and which Adobe Photography Plan is best.
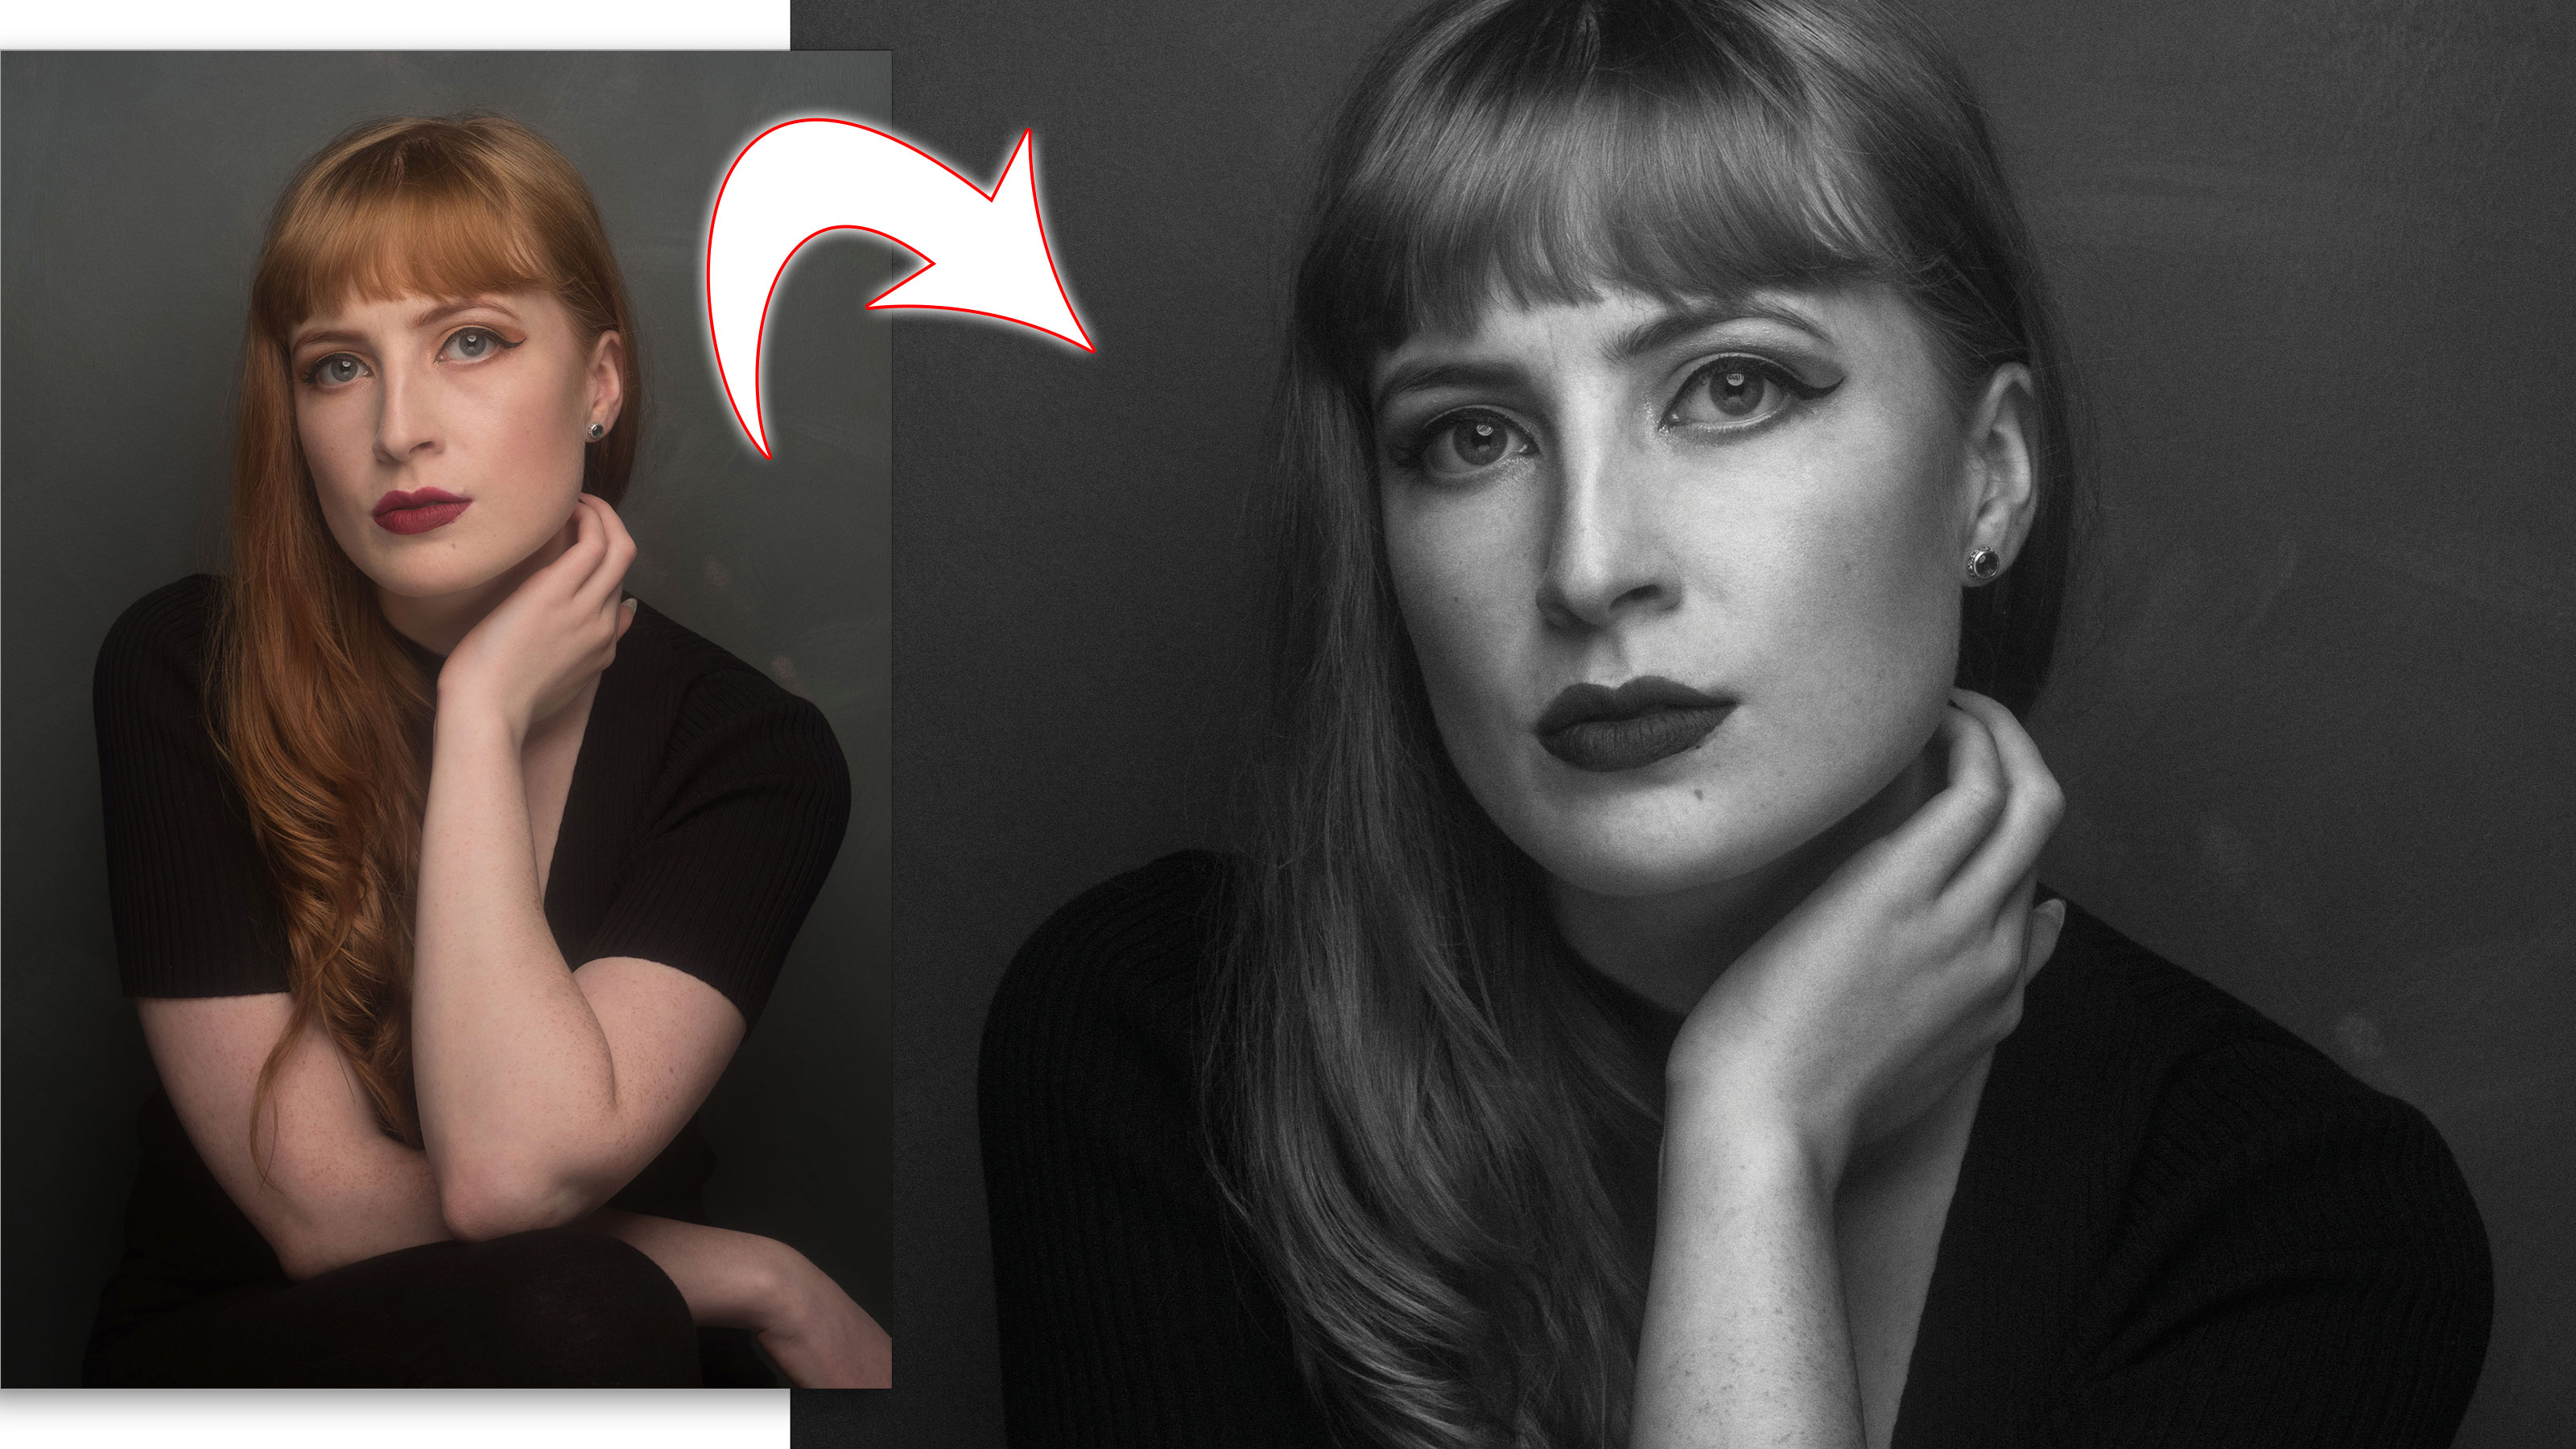
With many rock star photographers shooting this look, perhaps it’s time to consider it. Vintage lenses are all the rage as well, so for this Lightroom Skills lesson, we’re going to retouch a low-key portrait shot with a vintage lens. In this case it’s a Helios 53mm f/2.8 lens, which has a low- contrast look with nice softening.
• See more Lightroom tutorials
1. Darken the image
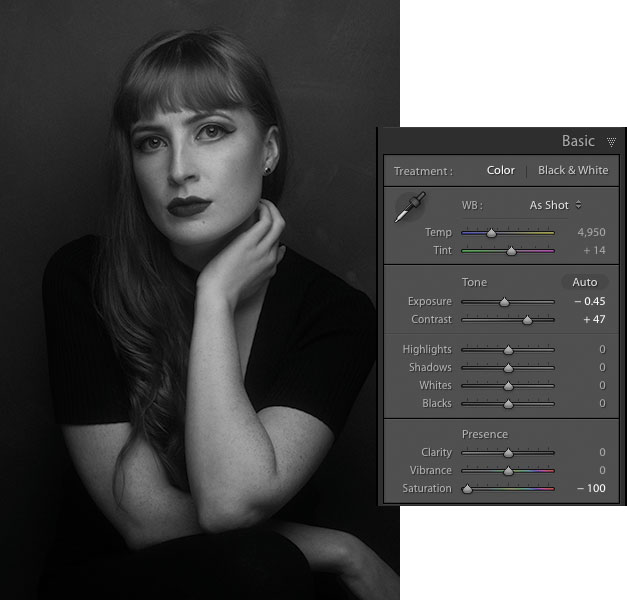
Our original photo was shot correctly exposed, but our first step is to darken it slightly to -0.45 using Exposure. Don’t worry, we’ll bring back the highlights another way. Next, we need to increase the Contrast to +47. Finally we put Saturation at -100 for a black-and-white image and set Grain to 25 in Effects.
2. Show skin shine
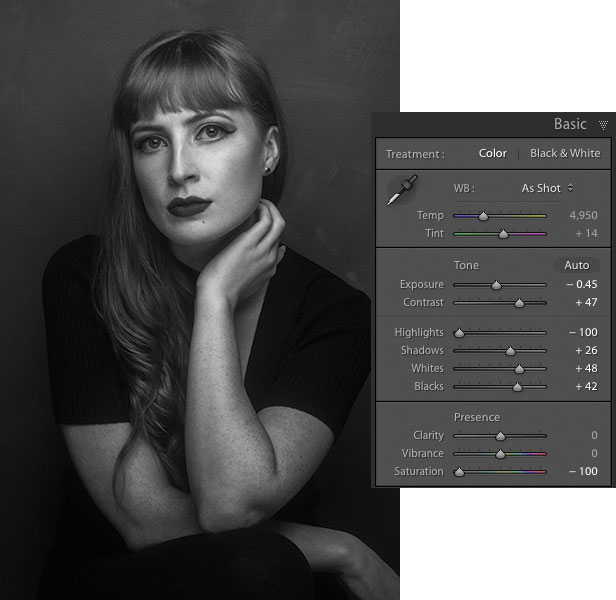
To emphasise skin shine here, we pull Highlights down to -100 and push Whites to +48. To open the shadows, we set Blacks to +42 and Shadows to +26.
The best camera deals, reviews, product advice, and unmissable photography news, direct to your inbox!
3. Remove unwanted blemishes
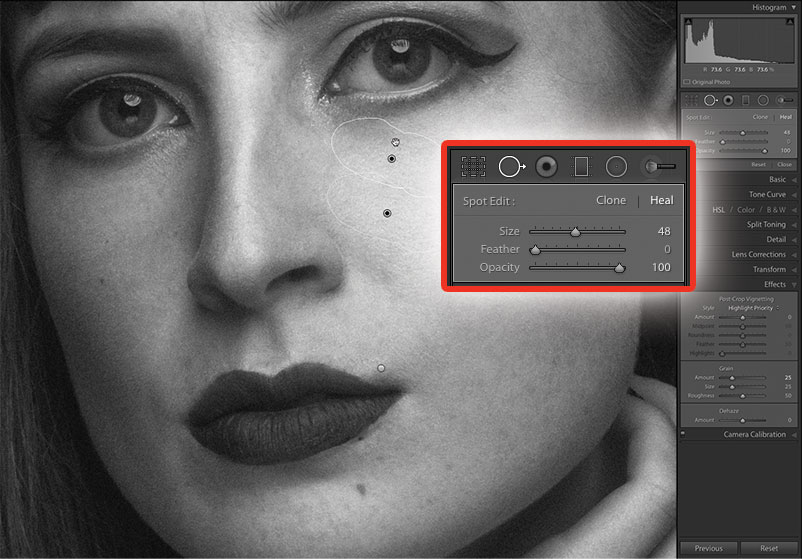
Next, we’ll remove all the blemishes from the skin using the Spot Removal tool set to Heal, with Opacity at 100, setting the Size to match the width of the blemishes. There’s a dark patch under the eye that needs fixing, so a quick brush around removes it.
4. Use the Adjustment Brush
Now we open the Adjustment Brush tool in the Toolstrip – this is located below the Histogram. You can also press K as a keyboard shortcut to activate it, and then you can set the size to suit the area you’re working on. It’s important to keep it soft.
5. Get brushing
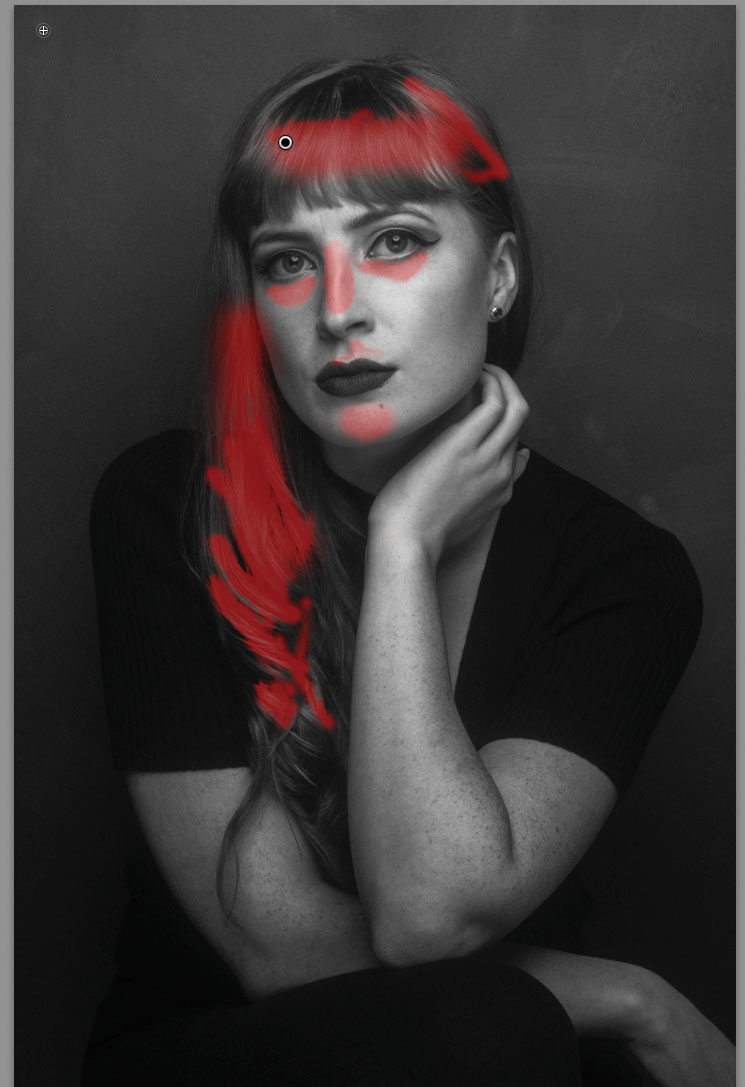
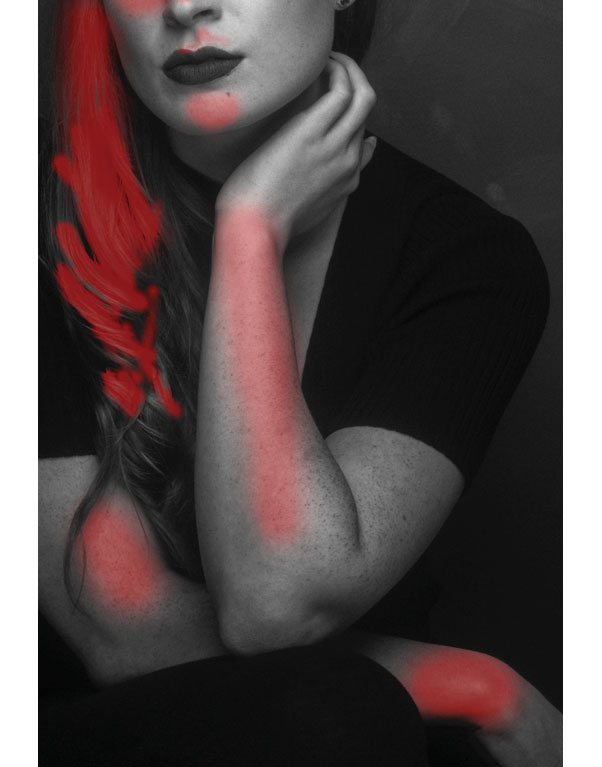
We set the brush Exposure in the tool to 0.15-0.2. This allows us to brighten the skin slightly. We start brushing on the bridge of the nose, on the cheekbones, the centre of the forehead and the chin. Anywhere that’s bright, add to it. Press O to see exactly where you’ve already painted.
6. Brush the rest
With the face done, it’s time for the rest. We brush along the brighter parts of our subject's arms, and brush the hair to emphasise the highlights here. While we’re at it, we do the white part right beside the iris, and a little crescent in the eyes and fix up any other areas too.
Expert tip: Take your tablets
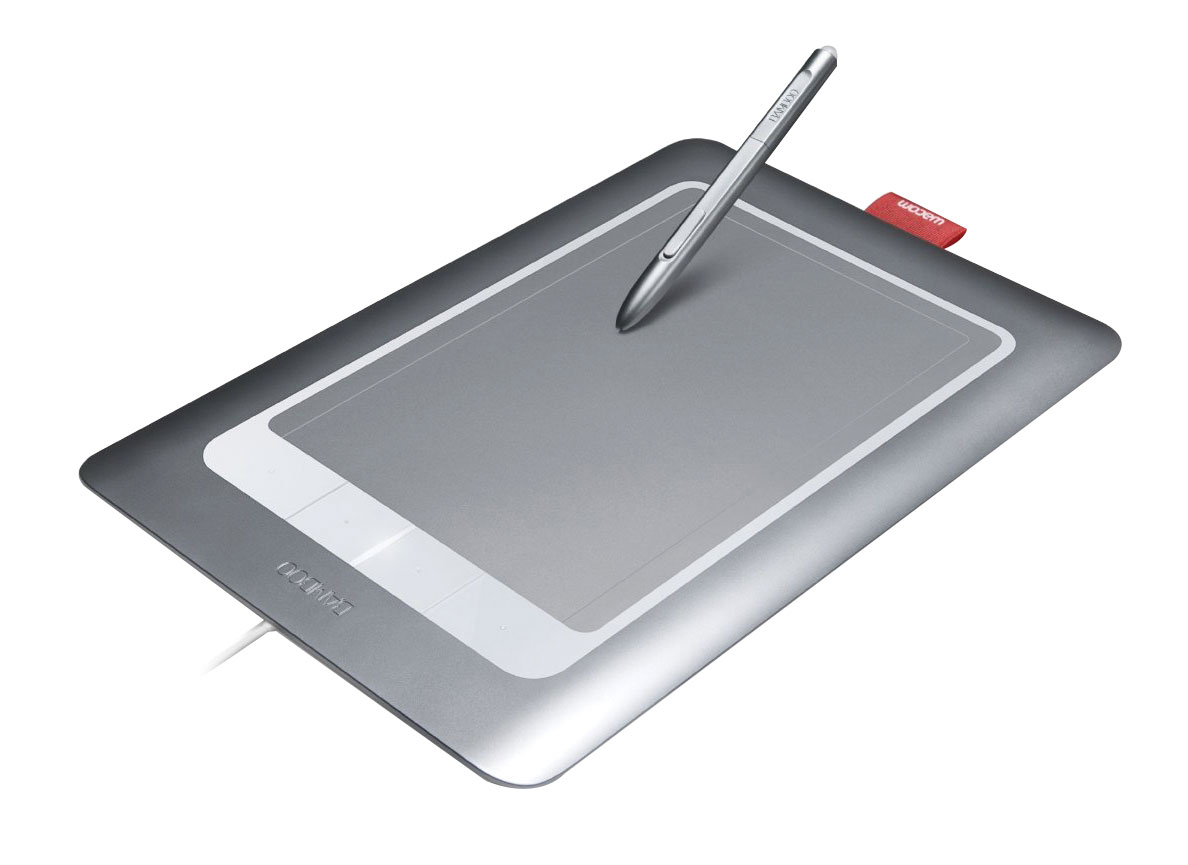
This isn’t a software tip, but it will certainly make using software easier. Using the Adjustment brush with a mouse can be rather awkward to do properly. Brushing is quite similar to drawing, and we’re all far more used to a pen or pencil for doing that. This is where a pen and graphics tablet come in. There are many makers; I happen to use a now-discontinued Wacom Intuos Draw. It takes a little bit of getting used to, but I don’t even use a mouse at all any more. I use the pen and tablet for everything. The Intuos Draw also features shortcut keys for quicker access to software tools, which can make Photoshop and Lightroom use much faster.
• See our guide to the best graphics tablets for photo editing
About Digital Camera magazine
This tutorial originally appeared in Digital Camera Magazine, the monthly newsstand magazine for all photographers. Why not subscribe to a print edition, and have the magazine delivered direct to your door every month?
Alternatively, we have a number of different digital options available, including:
• Apple app (for iPad or iPhone)
• Zinio app (multi-platform app for desktop or smartphone)
• PocketMags (multi-platform app ideal for Android devices)
• Readly (all-you-can-eat digital magazine subscription service)
If you wanted a printed version of any of our most recent issues we have a selection of back issues to choose from in our online store.
How to get Adobe Lightroom
Adobe Lightroom is available in two versions: the regular Adobe Lightroom Classic CC designed for desktop users, which is what we cover in this series, and a new cloud-based Adobe Lightroom CC, which stores your files online and offers a similar but reduced set of features. For regular desktop users we recommend Adobe Lightroom Classic CC.
Adobe offers three subscription based Photography Plans which you can click on below. We recommend either the regular Photography Plan, or the Photography Plan (1TB) which costs more but comes with 1TB online storage in case you decide to go with Lightroom CC.
For this set of tutorials and for anyone who likes to work on a single main computer, we recommend the regular Creative Cloud Photography Plan. This is the cheapest way to get started AND it comes with Photoshop CC too.
Read more:
• This is the best photo-editing software today
• These are the best laptops for photographers right now
• We help you choose the best desktop computers for photo editing
Sean McCormack is a commercial, and editorial photographer, book author, and regular contributor to Digital Camera magazine based in Galway, Ireland. He has extensive experience with Lightroom, dating back to its original beta version, and has tried out just about every plugin and preset available. His latest book is Essential Development 3: 25 Tips for Lightroom Classic’s Develop Module.
