Watch video: How to add texture in Photoshop Elements
Sometimes your images need a little extra punch to make them really stand out, and textures are a brilliant way of doing precisely that! Texture files can be stored on your computer, added to your images to give them additional depth, or even add multiple textures to build up the effect. They’re great fun to play around with and also a brilliant way to learn more about Layers and Layer Masks in Photoshop.
We’re using the budget-friendly Photoshop Elements 2020 for this tutorial, but the steps are the same if you’d like to try it out in Photoshop CC too. PhotoPlus magazine is supplying you with 15 textures that you can download here (look for the Texture Pack folder, inside the Elements folder). These are full-color files but, if you don’t want the colors of your original image to be affected, you can turn the texture image to mono by pressing Ctrl / Cmd + U. Read on to see how you can leave an impression with textures…
01 Load up your free textures
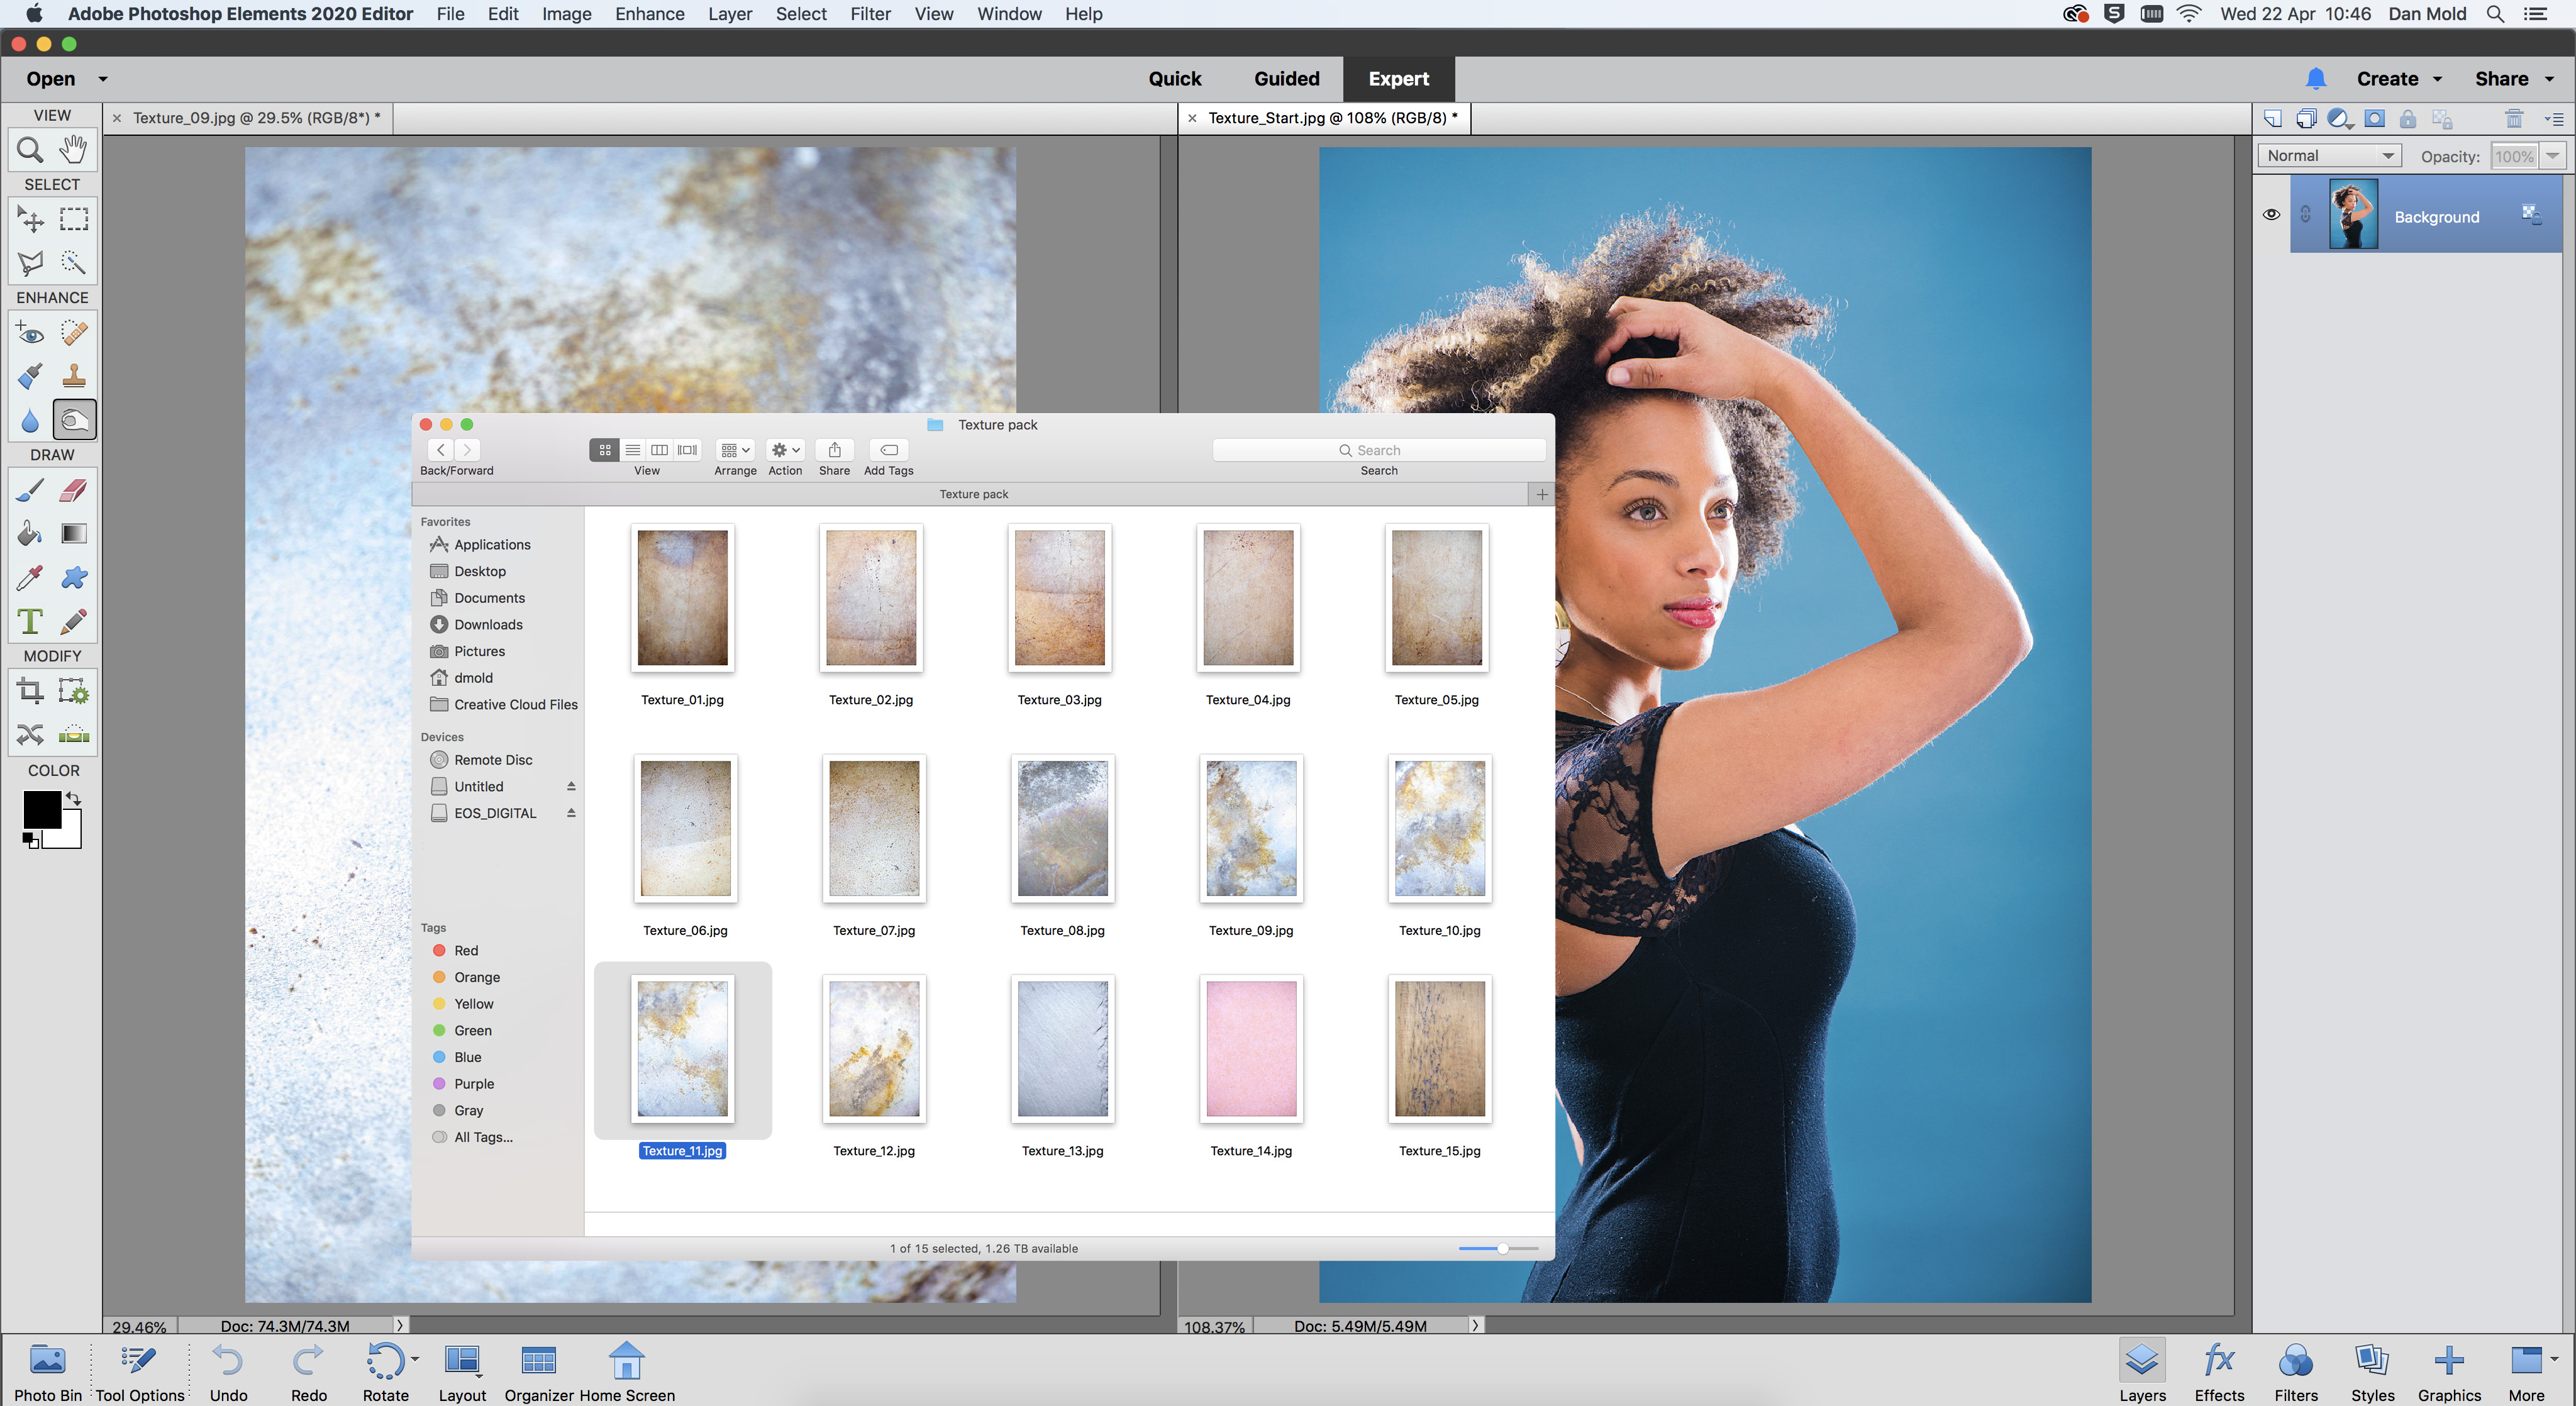
Open up your free textures in Resources > Elements and pick one you like, then open it into Photoshop Elements in the Expert mode. Then open up another shot that you want to add the texture to.
02 Add the texture to your pic and resize
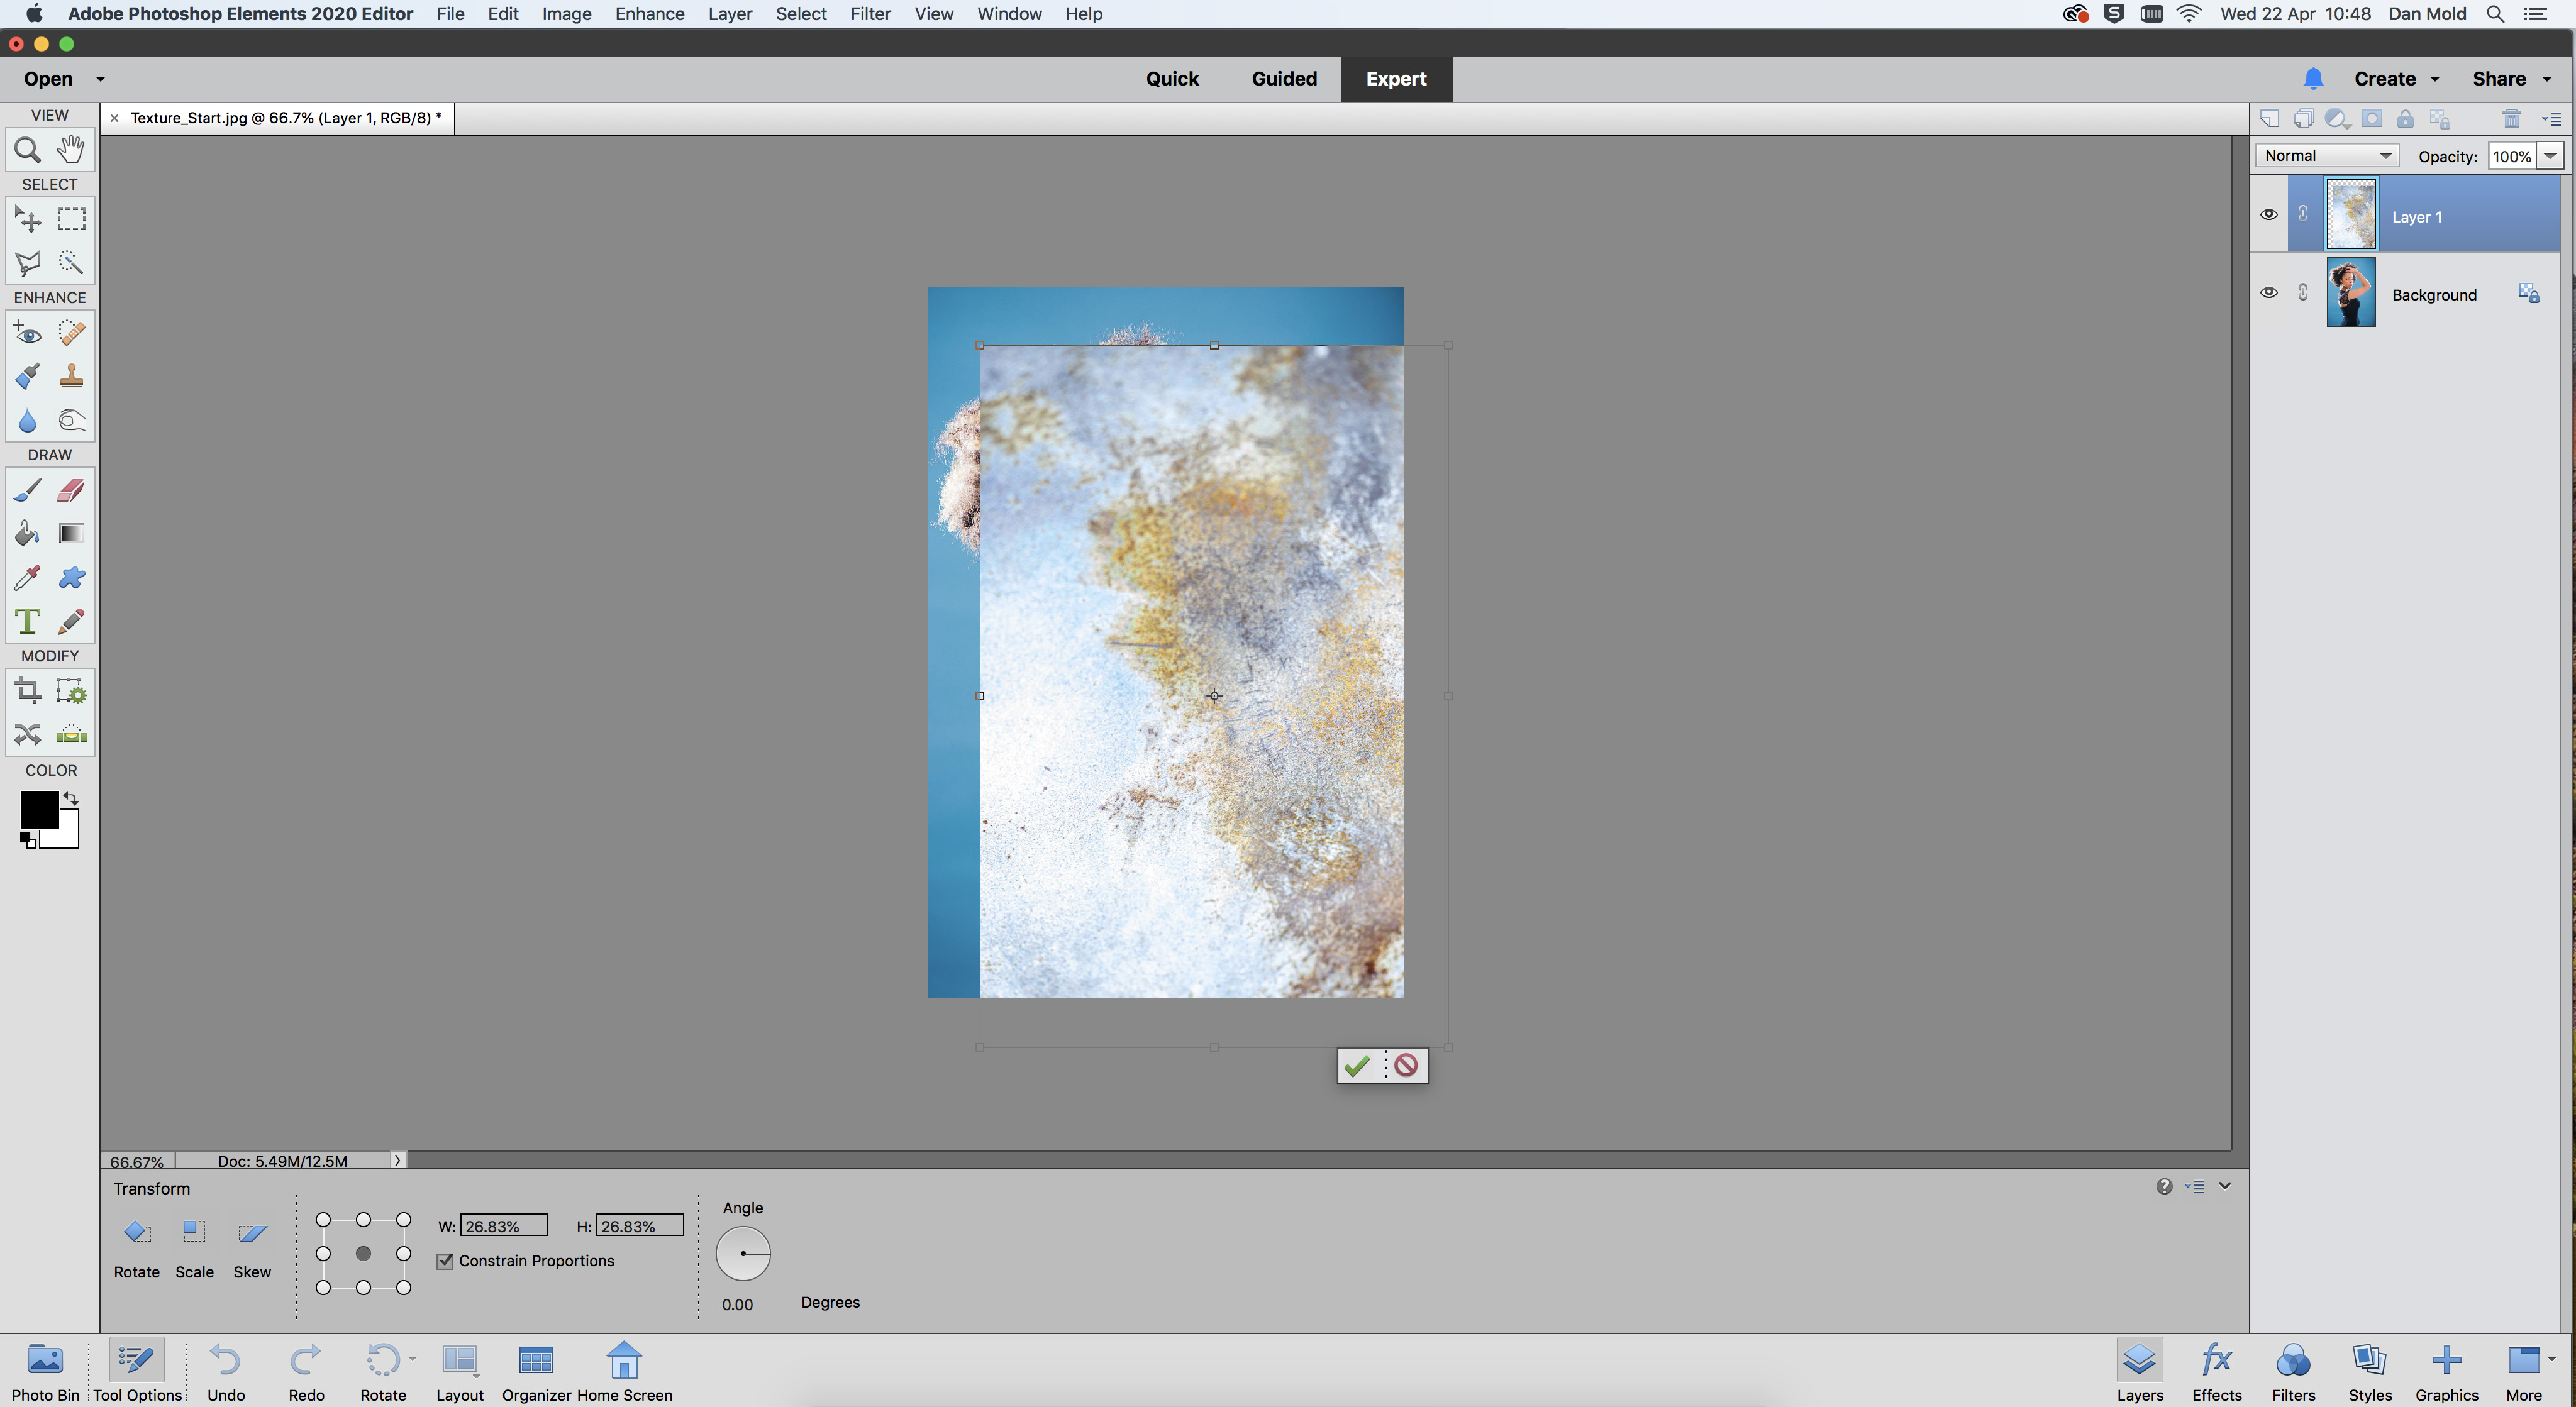
Hit Ctrl / Cmd + A to select the texture, Ctrl / Cmd + C to copy it, and then in your other image press Ctrl / Cmd + V to paste it in. Hit Ctrl / Cmd + T to use Free Transform mode and pull the corners to resize it.
03 Blend the texture in
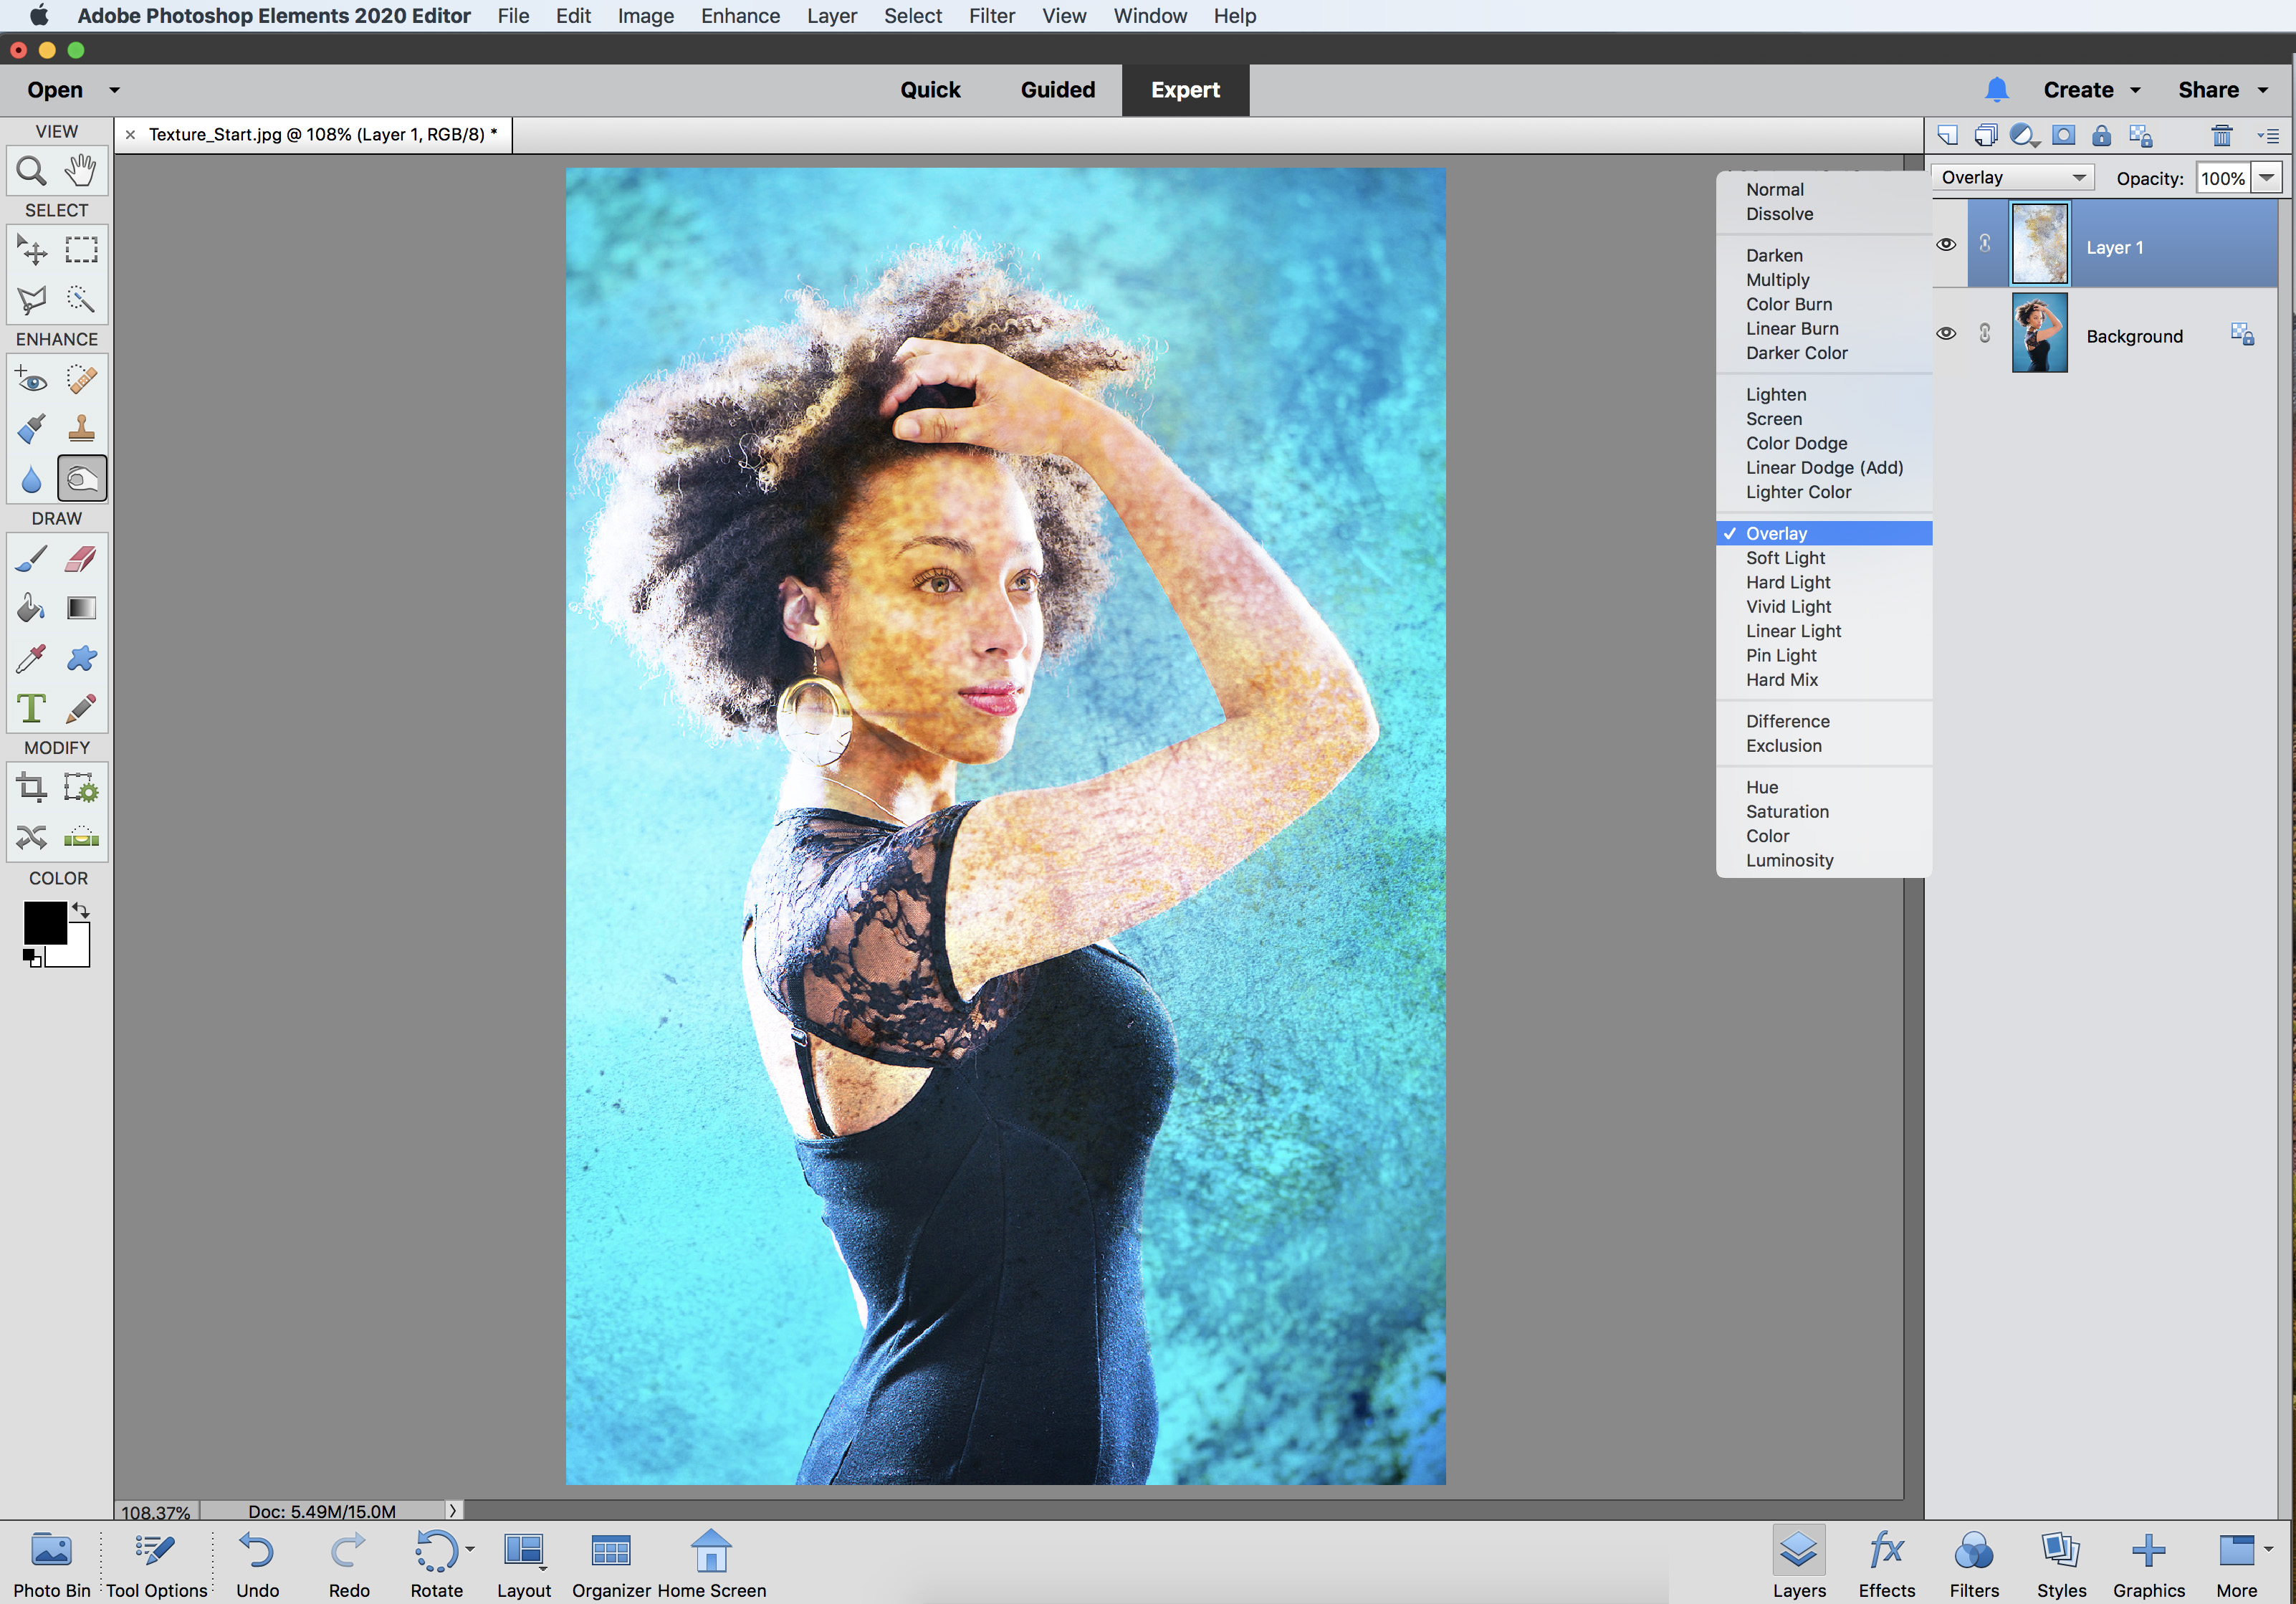
Go to the Layers panel (Window > Layers) and change the blending mode from Normal to one of the options in the list to blend it in. Overlay, Soft Light, Hard Light and Screen usually work well.
The best camera deals, reviews, product advice, and unmissable photography news, direct to your inbox!
04 Mask off the effect
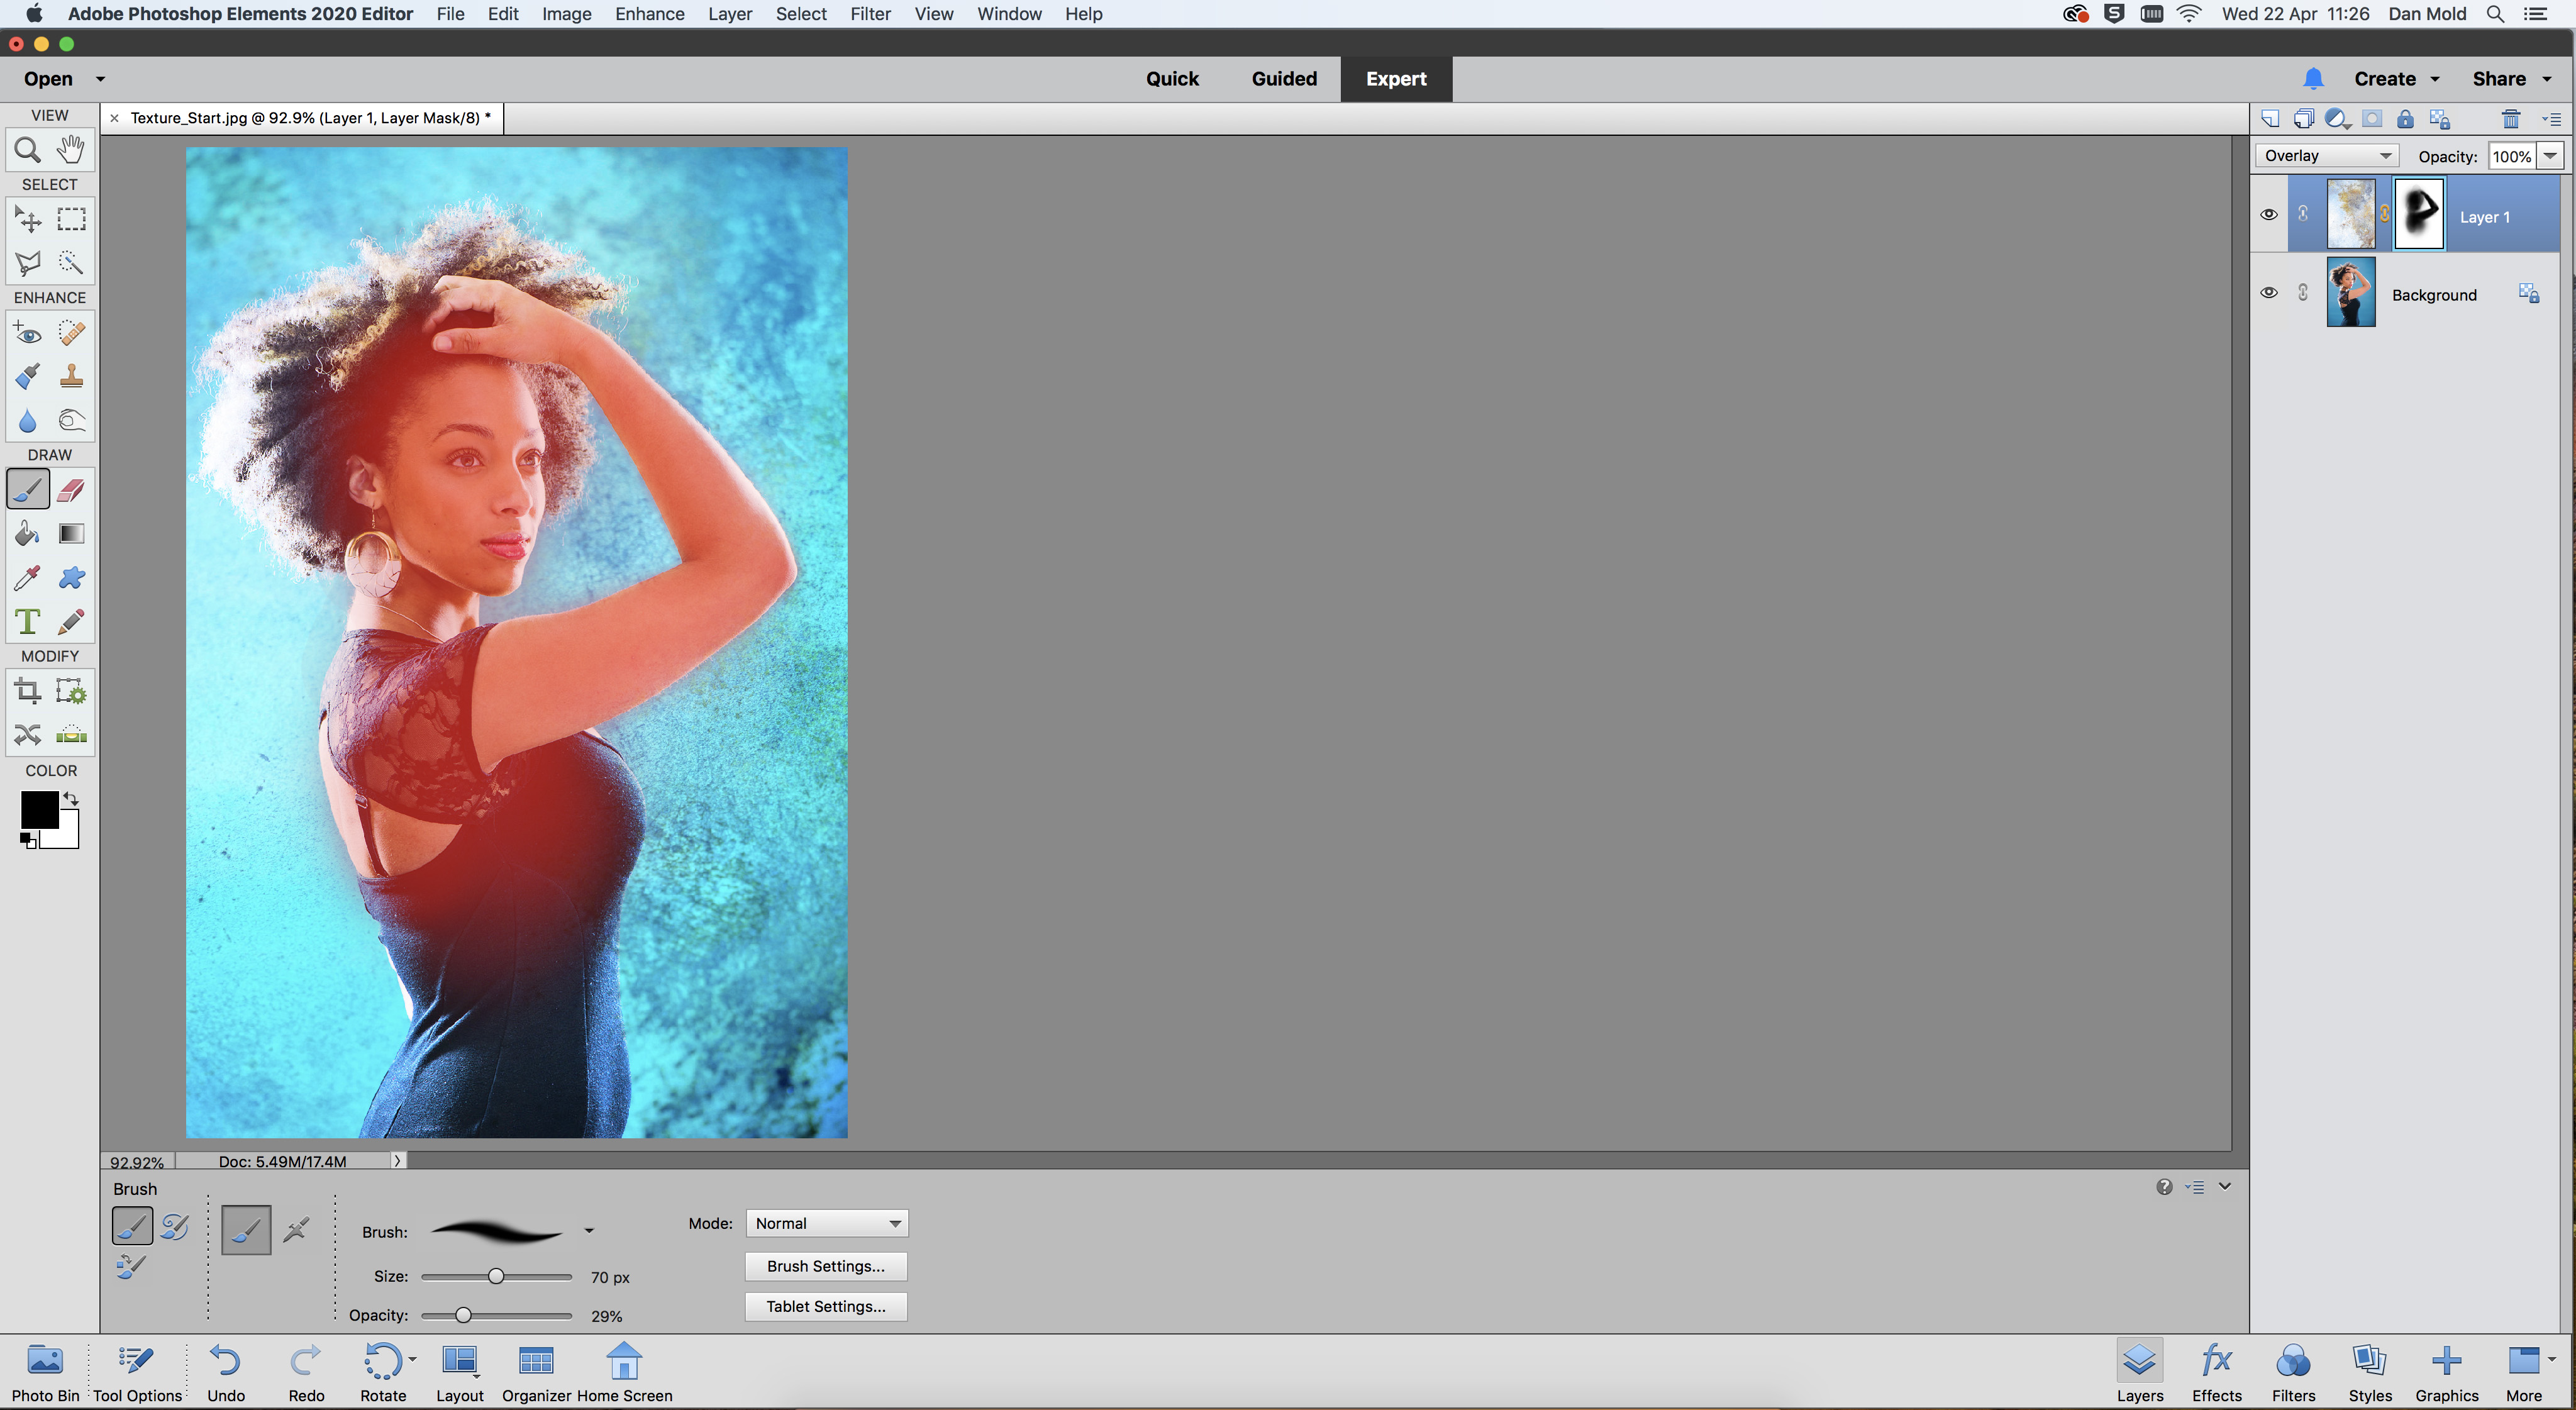
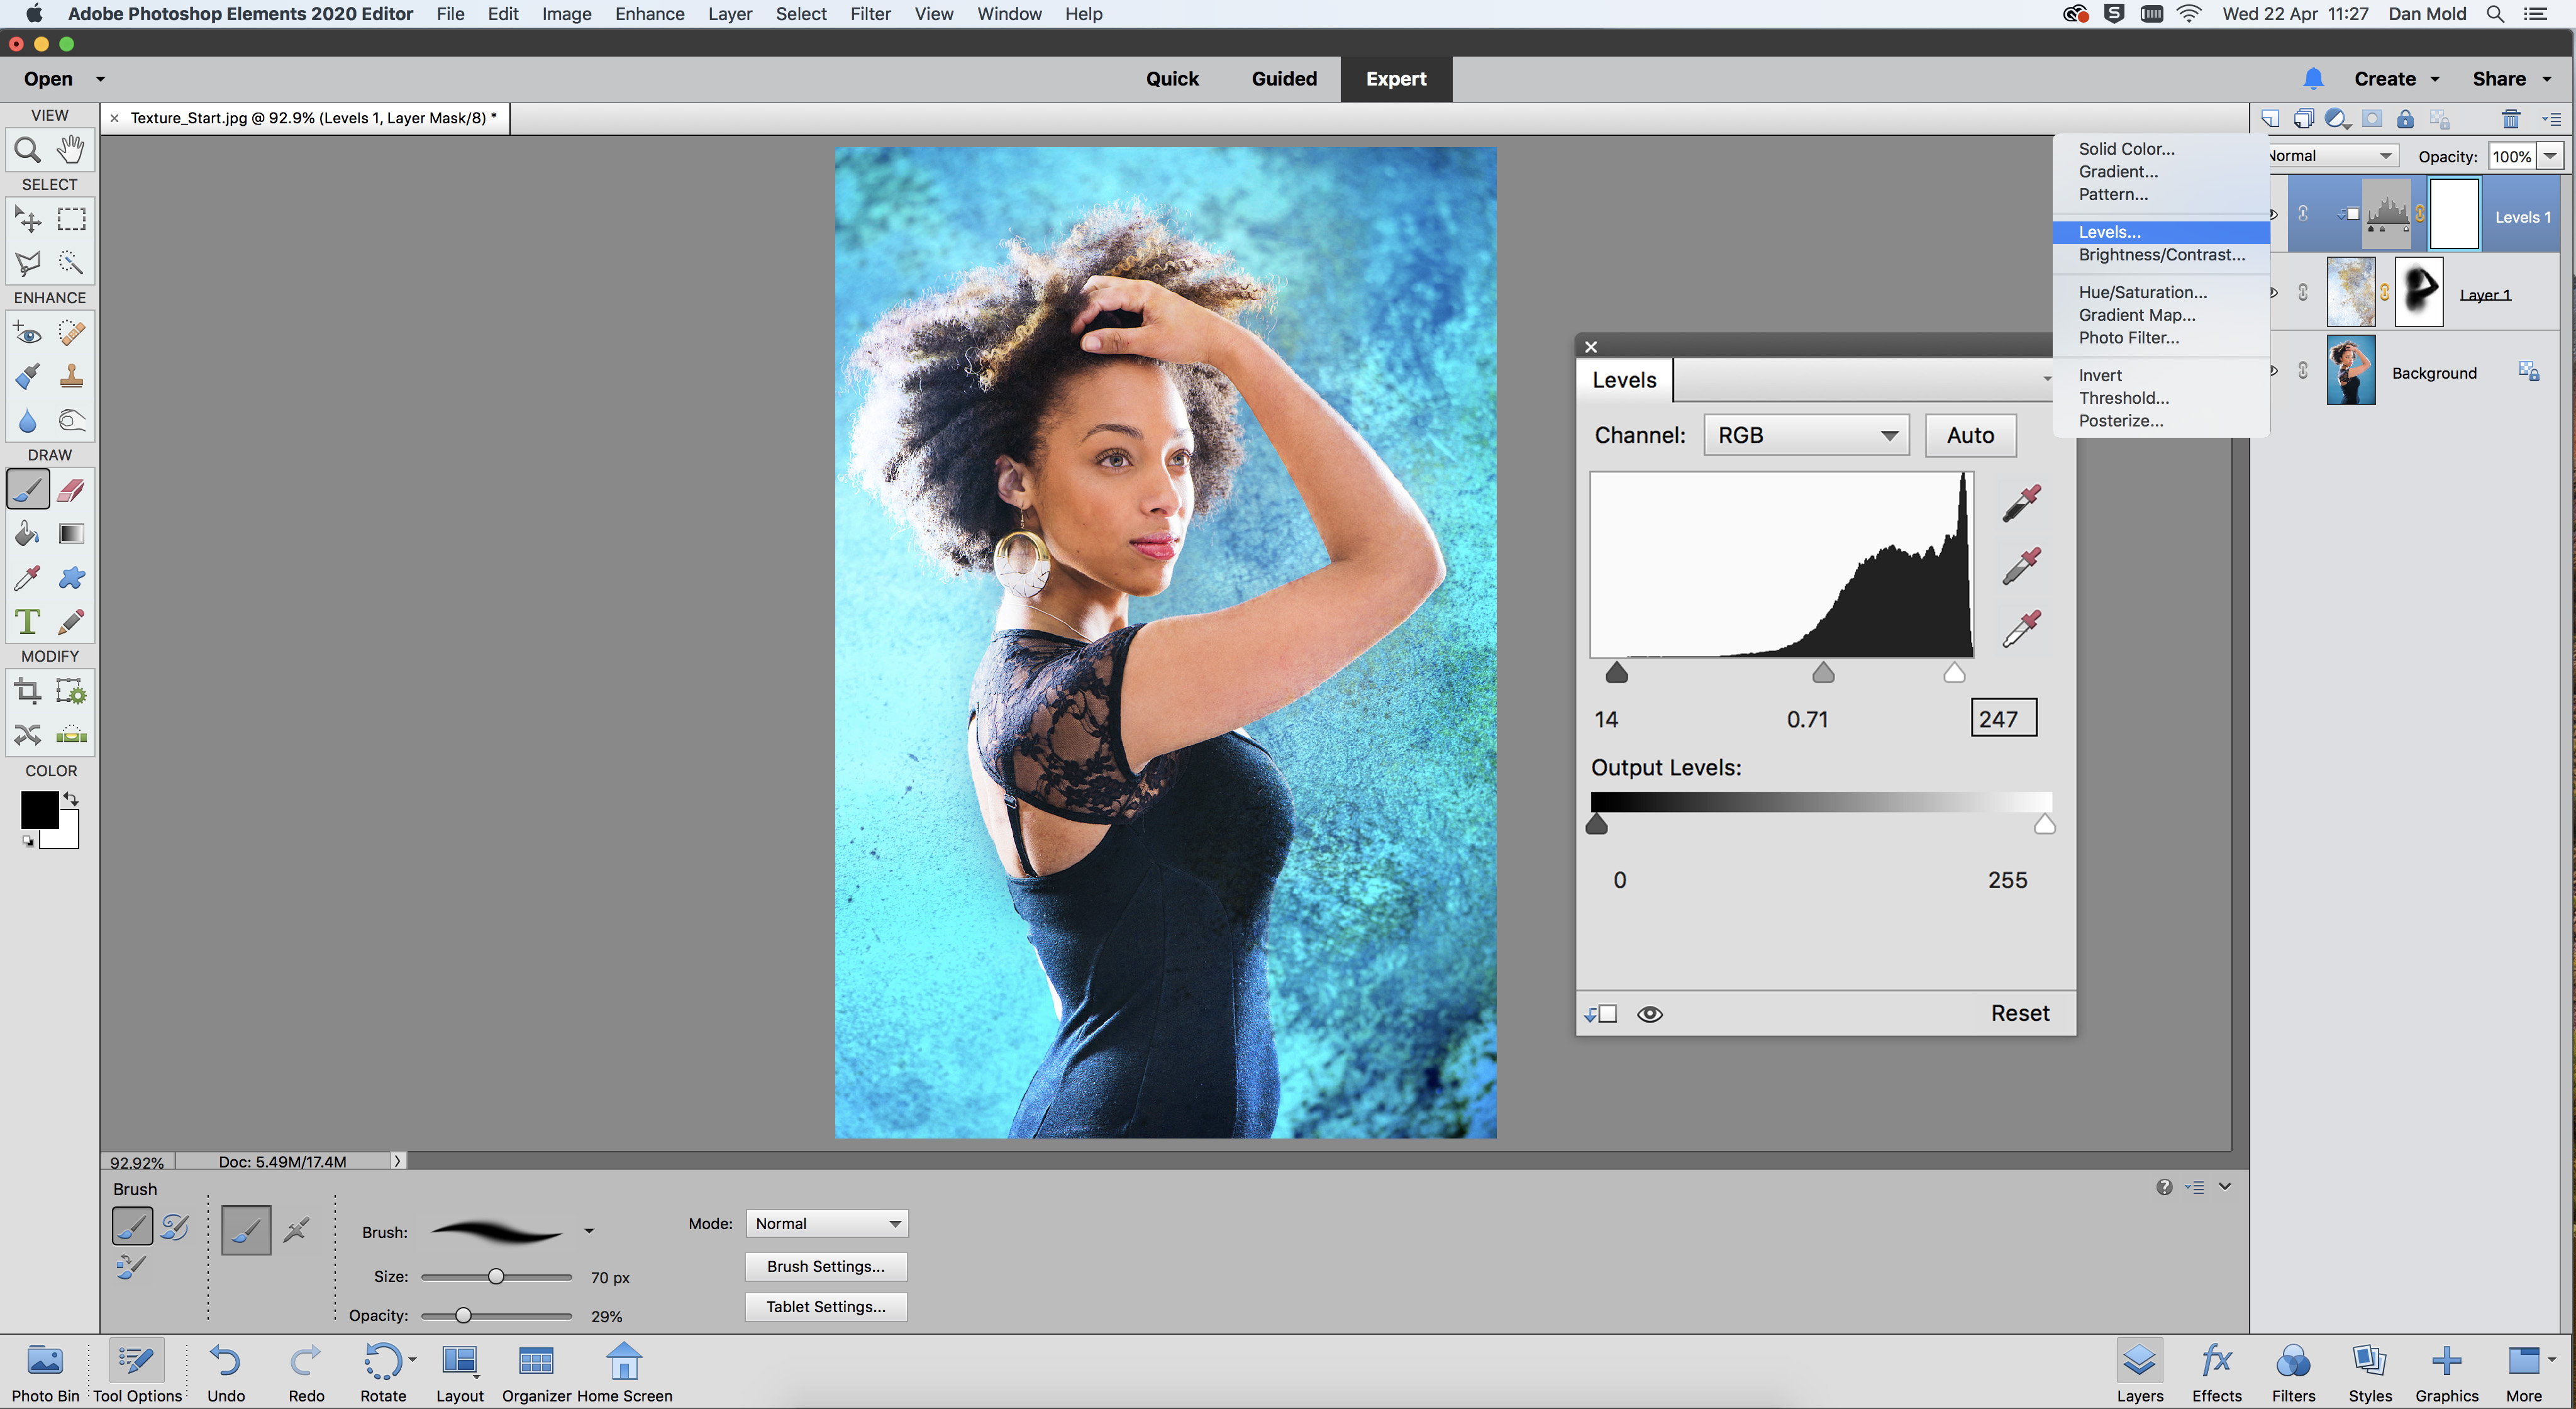
Click the Layer Mask icon in the Layers panel and use a soft black Brush Tool to paint over areas that you don’t want the texture layer to affect, such as the model’s face in our picture.
05 Adjust the contrast
Click on the Add New Adjustment Layer > Levels in the layers panel, then right-click on this layer and choose Create Clipping Mask. Now you can tweak the contrast of just the texture using the levels panel.
06 Build up the effect
Now it’s time to build up the effect, so open up another texture and repeat the previous steps to blend it in and add even more texture. Be sure to try out different blending modes to get different results.
PhotoPlus: The Canon Magazine is the world's only monthly newsstand title that's 100% devoted to Canon, so you can be sure the magazine is completely relevant to your system.
Read more:
The best photo editing software: image editors for novices through to pros
The best photo-editing laptops in 2020: top laptops for photographers
10 best online photography courses – from beginner guides to masterclasses

In addition to being a freelance photographer and filmmaker, Dan is a bona fide expert on all things Canon and Adobe. Not only is he an Adobe-certified Photoshop guru, he's spent over 10 years writing for specialist magazines including stints as the Deputy Editor for PhotoPlus: The Canon Magazine, Technical Editor for Practical Photography and Photoshop Editor on Digital Photo.
