How to use Lightroom Classic: tame bright skies with the Graduated Filter tool
We show you how to use Lightroom Classic CC to tone down bright skies with the Graduated Filter
Watch video: Use the Graduated Filter tool in Lightroom Classic CC
Every photographer crosses their fingers for a stunning sunset on a landscape shoot, but what happens if the sky is so bright that you struggle to be able to properly expose your image?
Luckily, that’s where the Graduated Filter tool in Lightroom Classic CC comes in. In lieu of using a physical filter to cut down the amount of light entering the lens and darkening the sky, this virtual version uses the information within your image to mimic the effect.
• Read more: Free Lightroom presets
This means you can simply select the areas of your image that you want darkened or lightened and Lightroom will do the rest. You can download the same start file we’re using here, or open one of your own landscape shots into Lightroom Classic to follow along (a raw file works even better).
Watch the video lesson above to see how it’s done in real time!
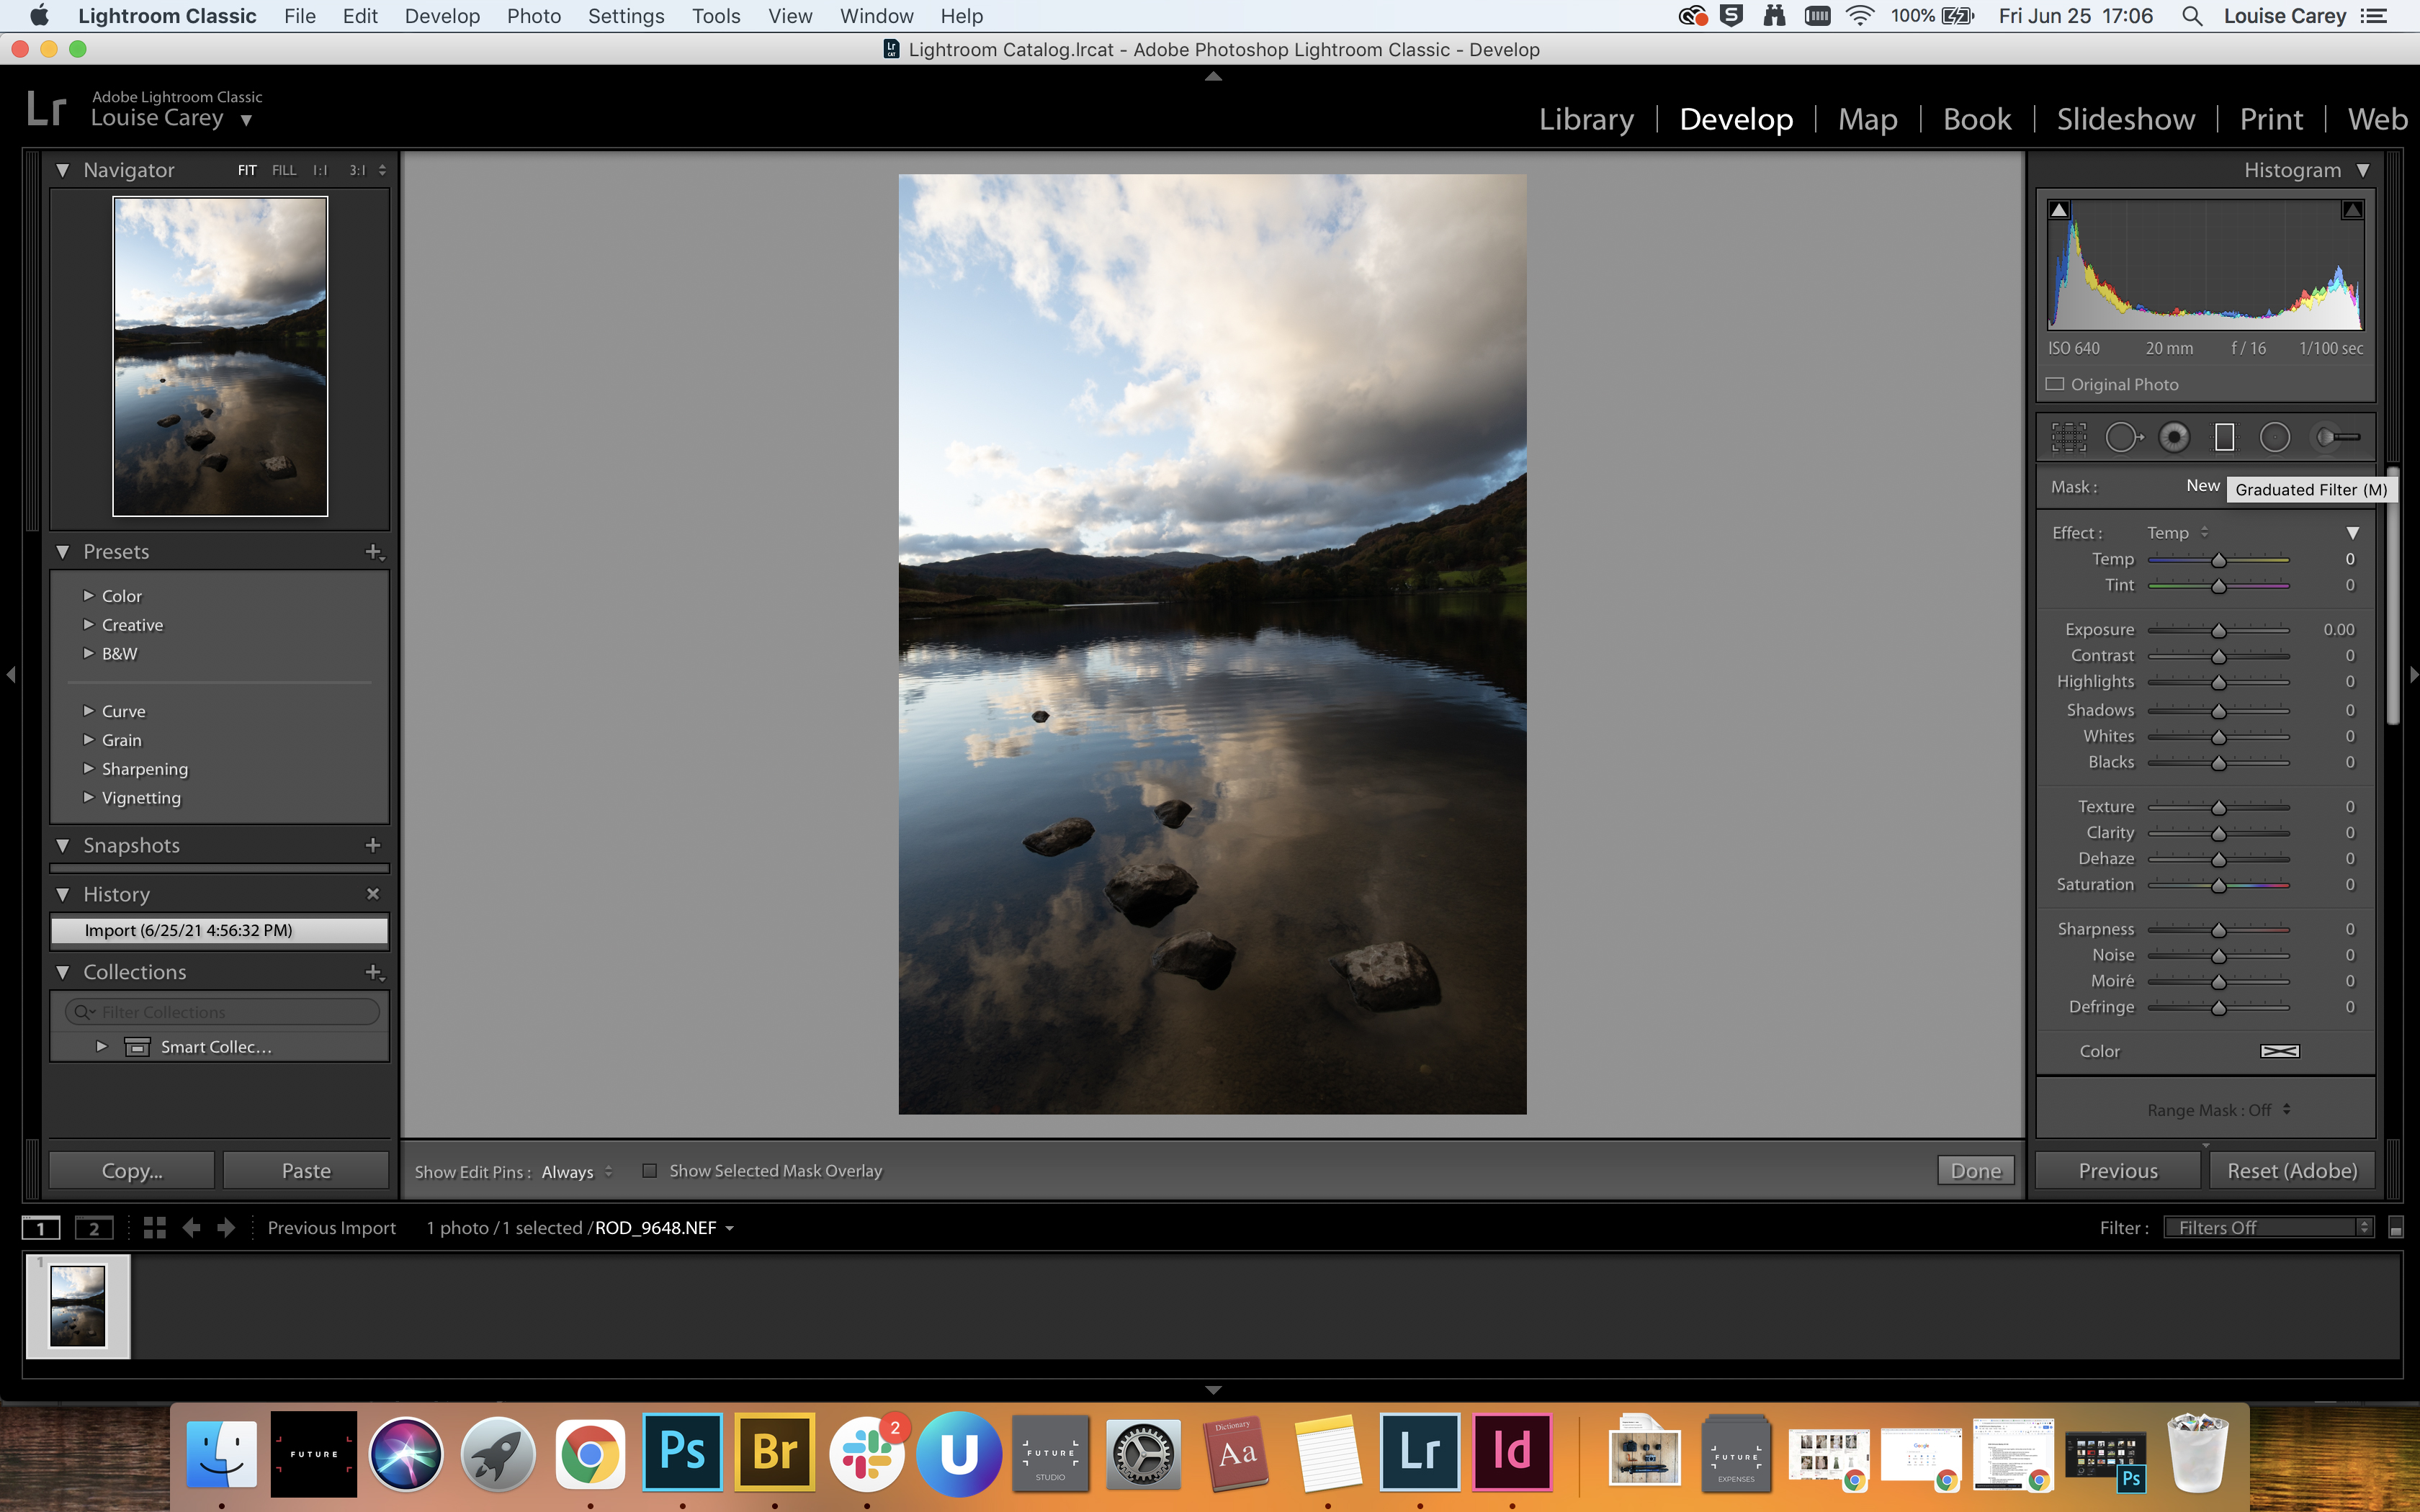
01 Find the Graduated Filter tool
Open your image in Lightroom Classic and navigate to the Develop module in the top menu. Above the Basic panel, you’ll see the rectangular shape of the Graduated Filter tool. Alternatively, you can simply press ‘M’ on your keyboard.
The best camera deals, reviews, product advice, and unmissable photography news, direct to your inbox!
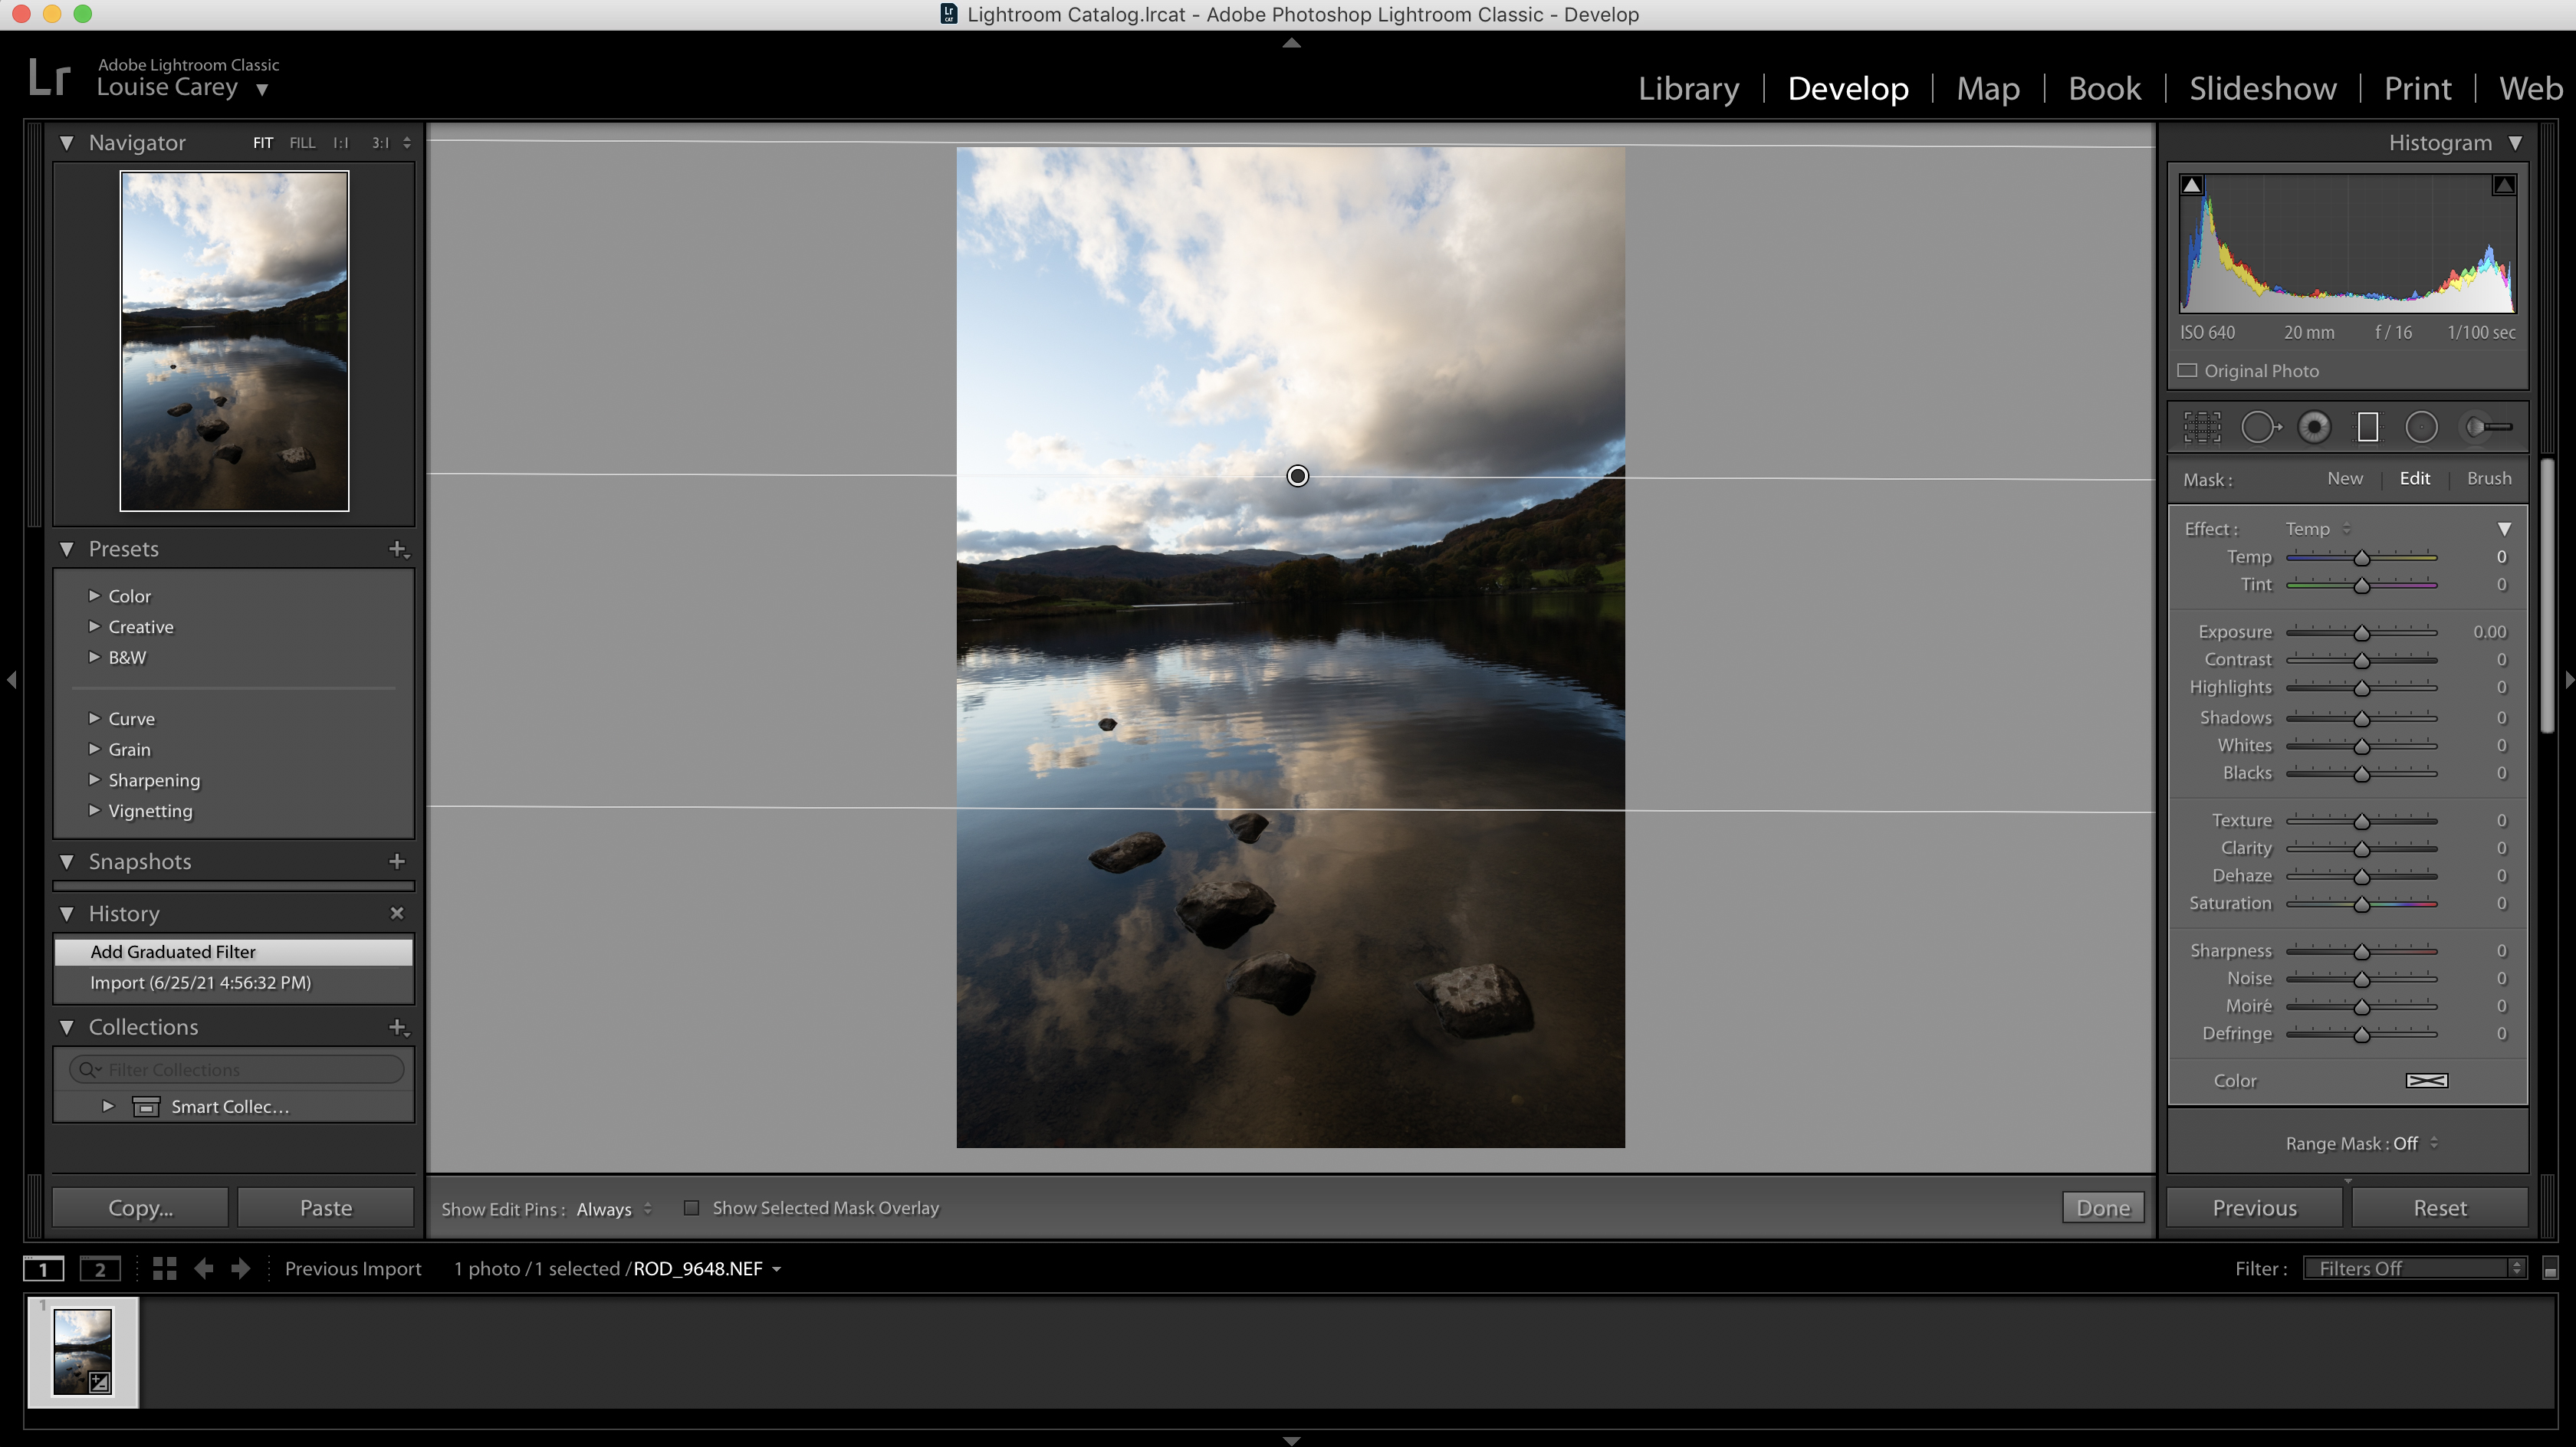
02 Define your selection
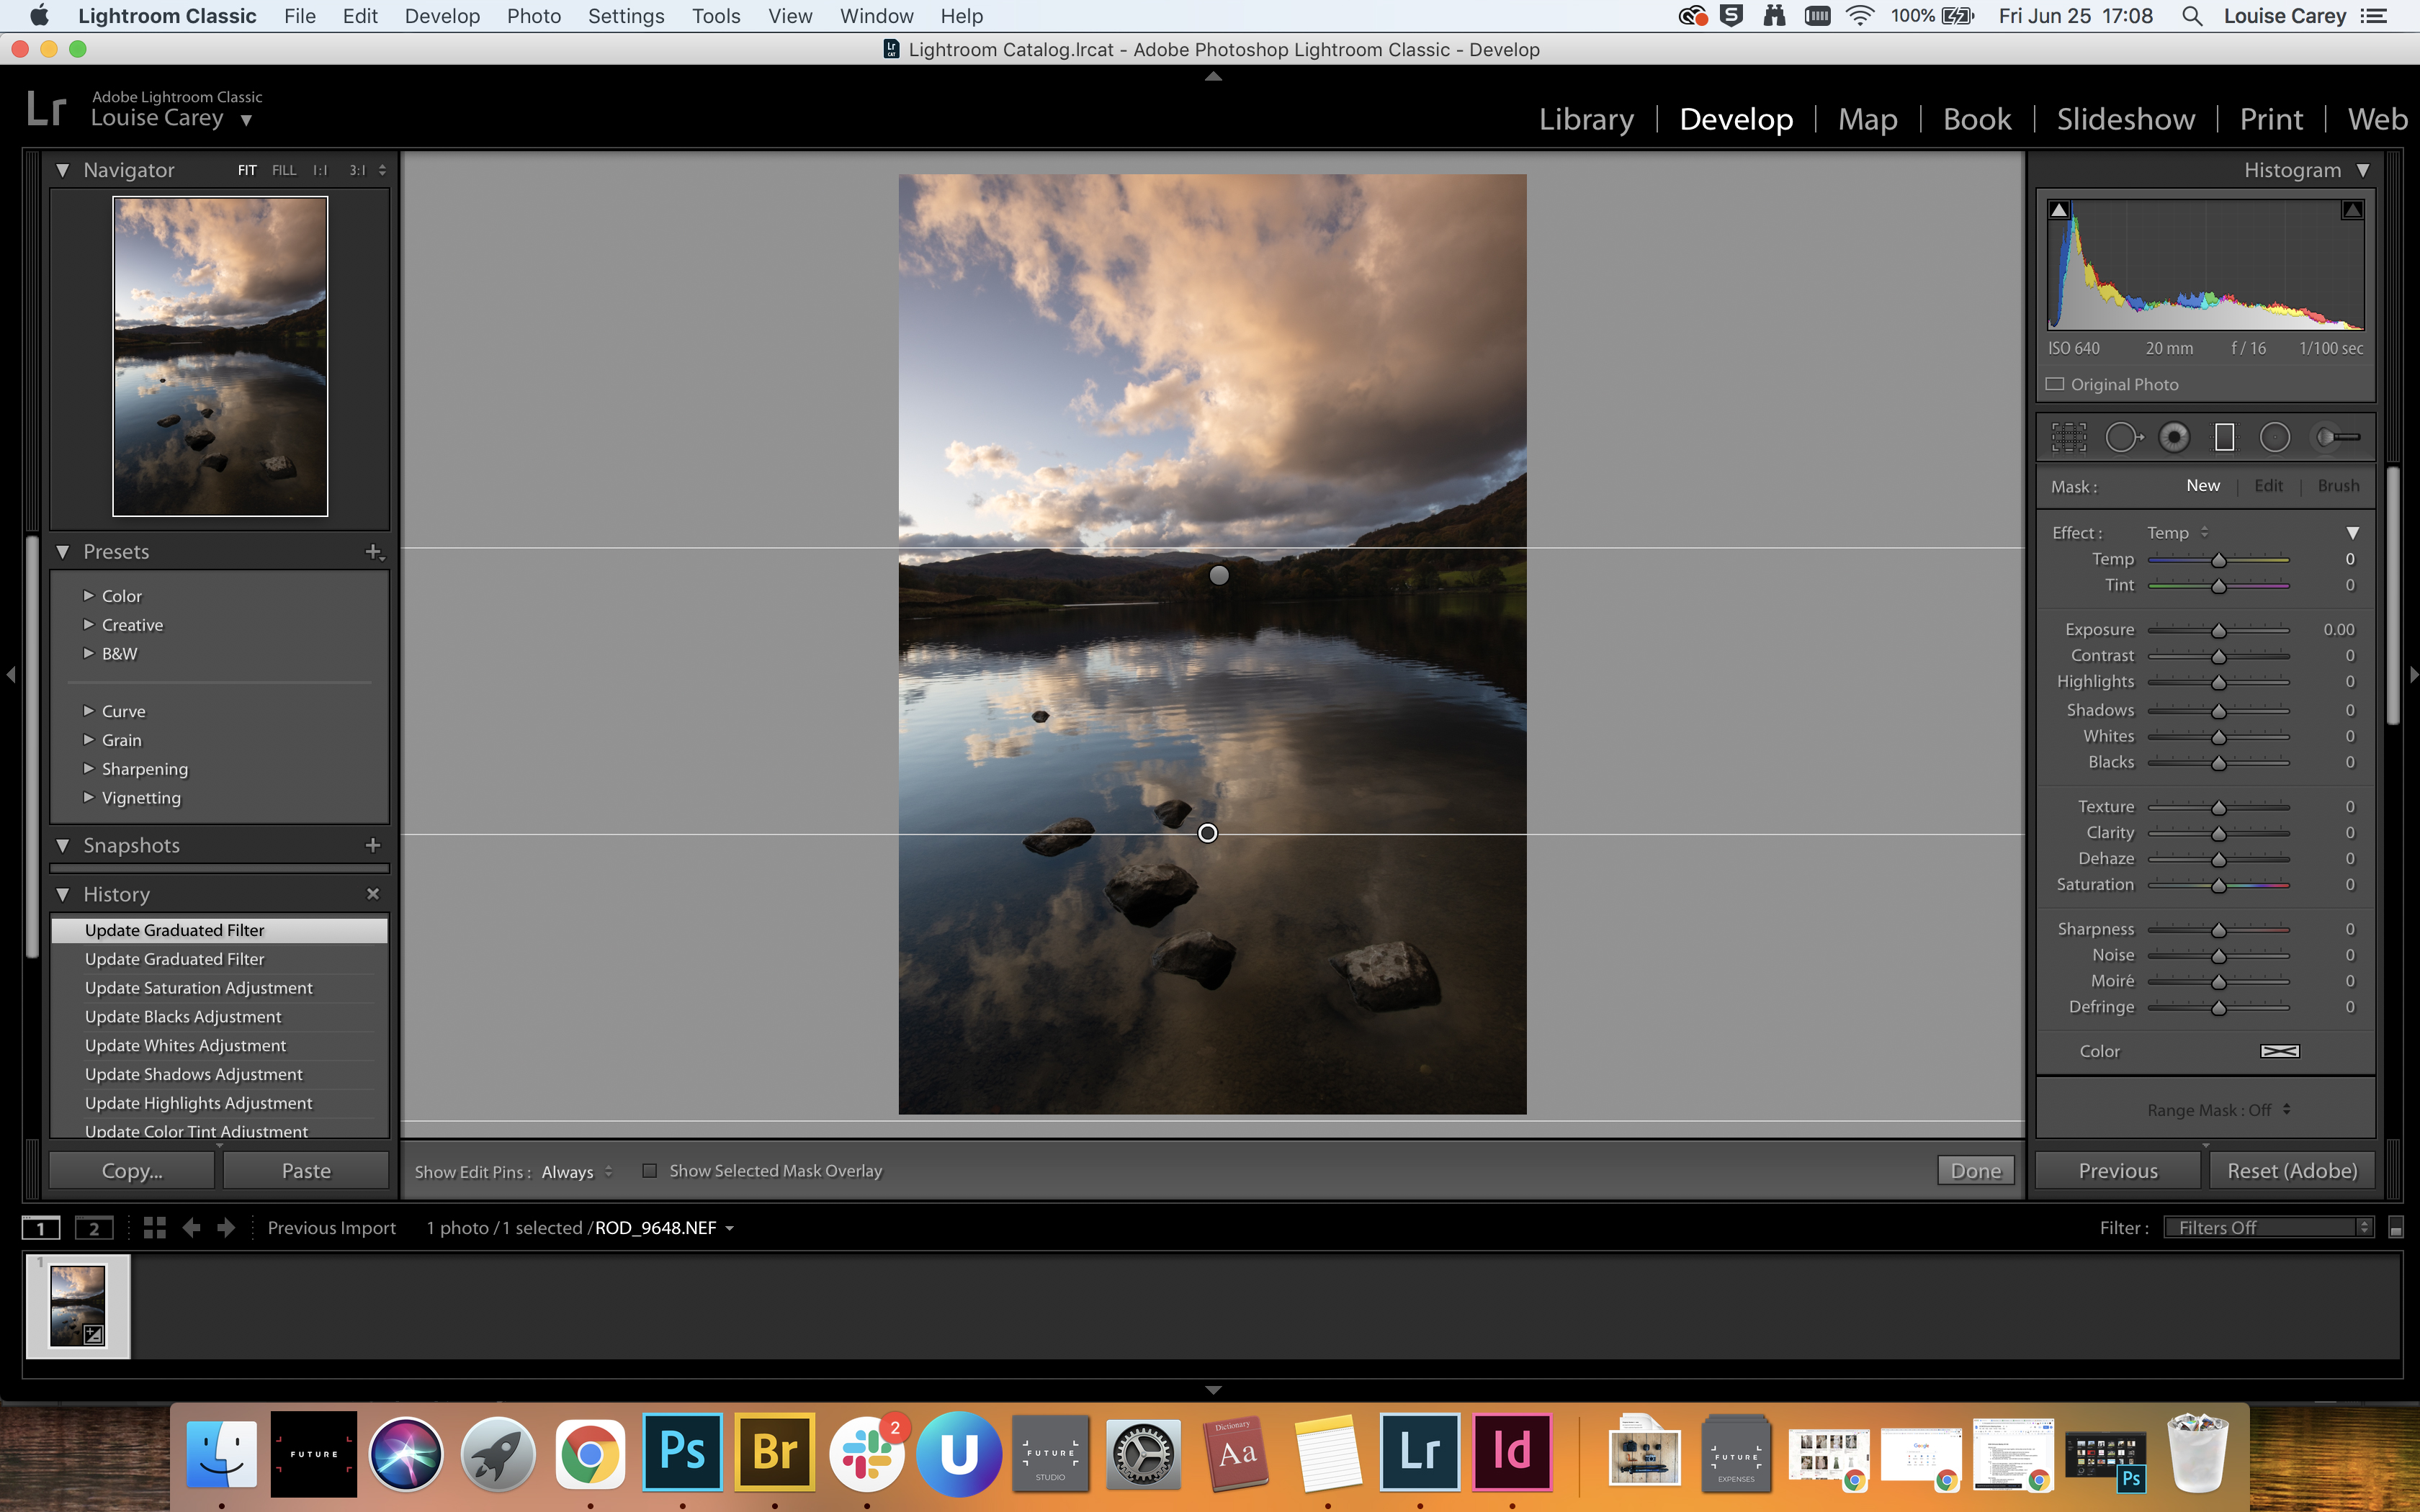
For the most realistic look, begin your selection from the edge of your image, drawing inwards until you’ve covered the area you want to affect. Generally speaking, the larger your selection, the subtler the Graduated Filter effect will be.
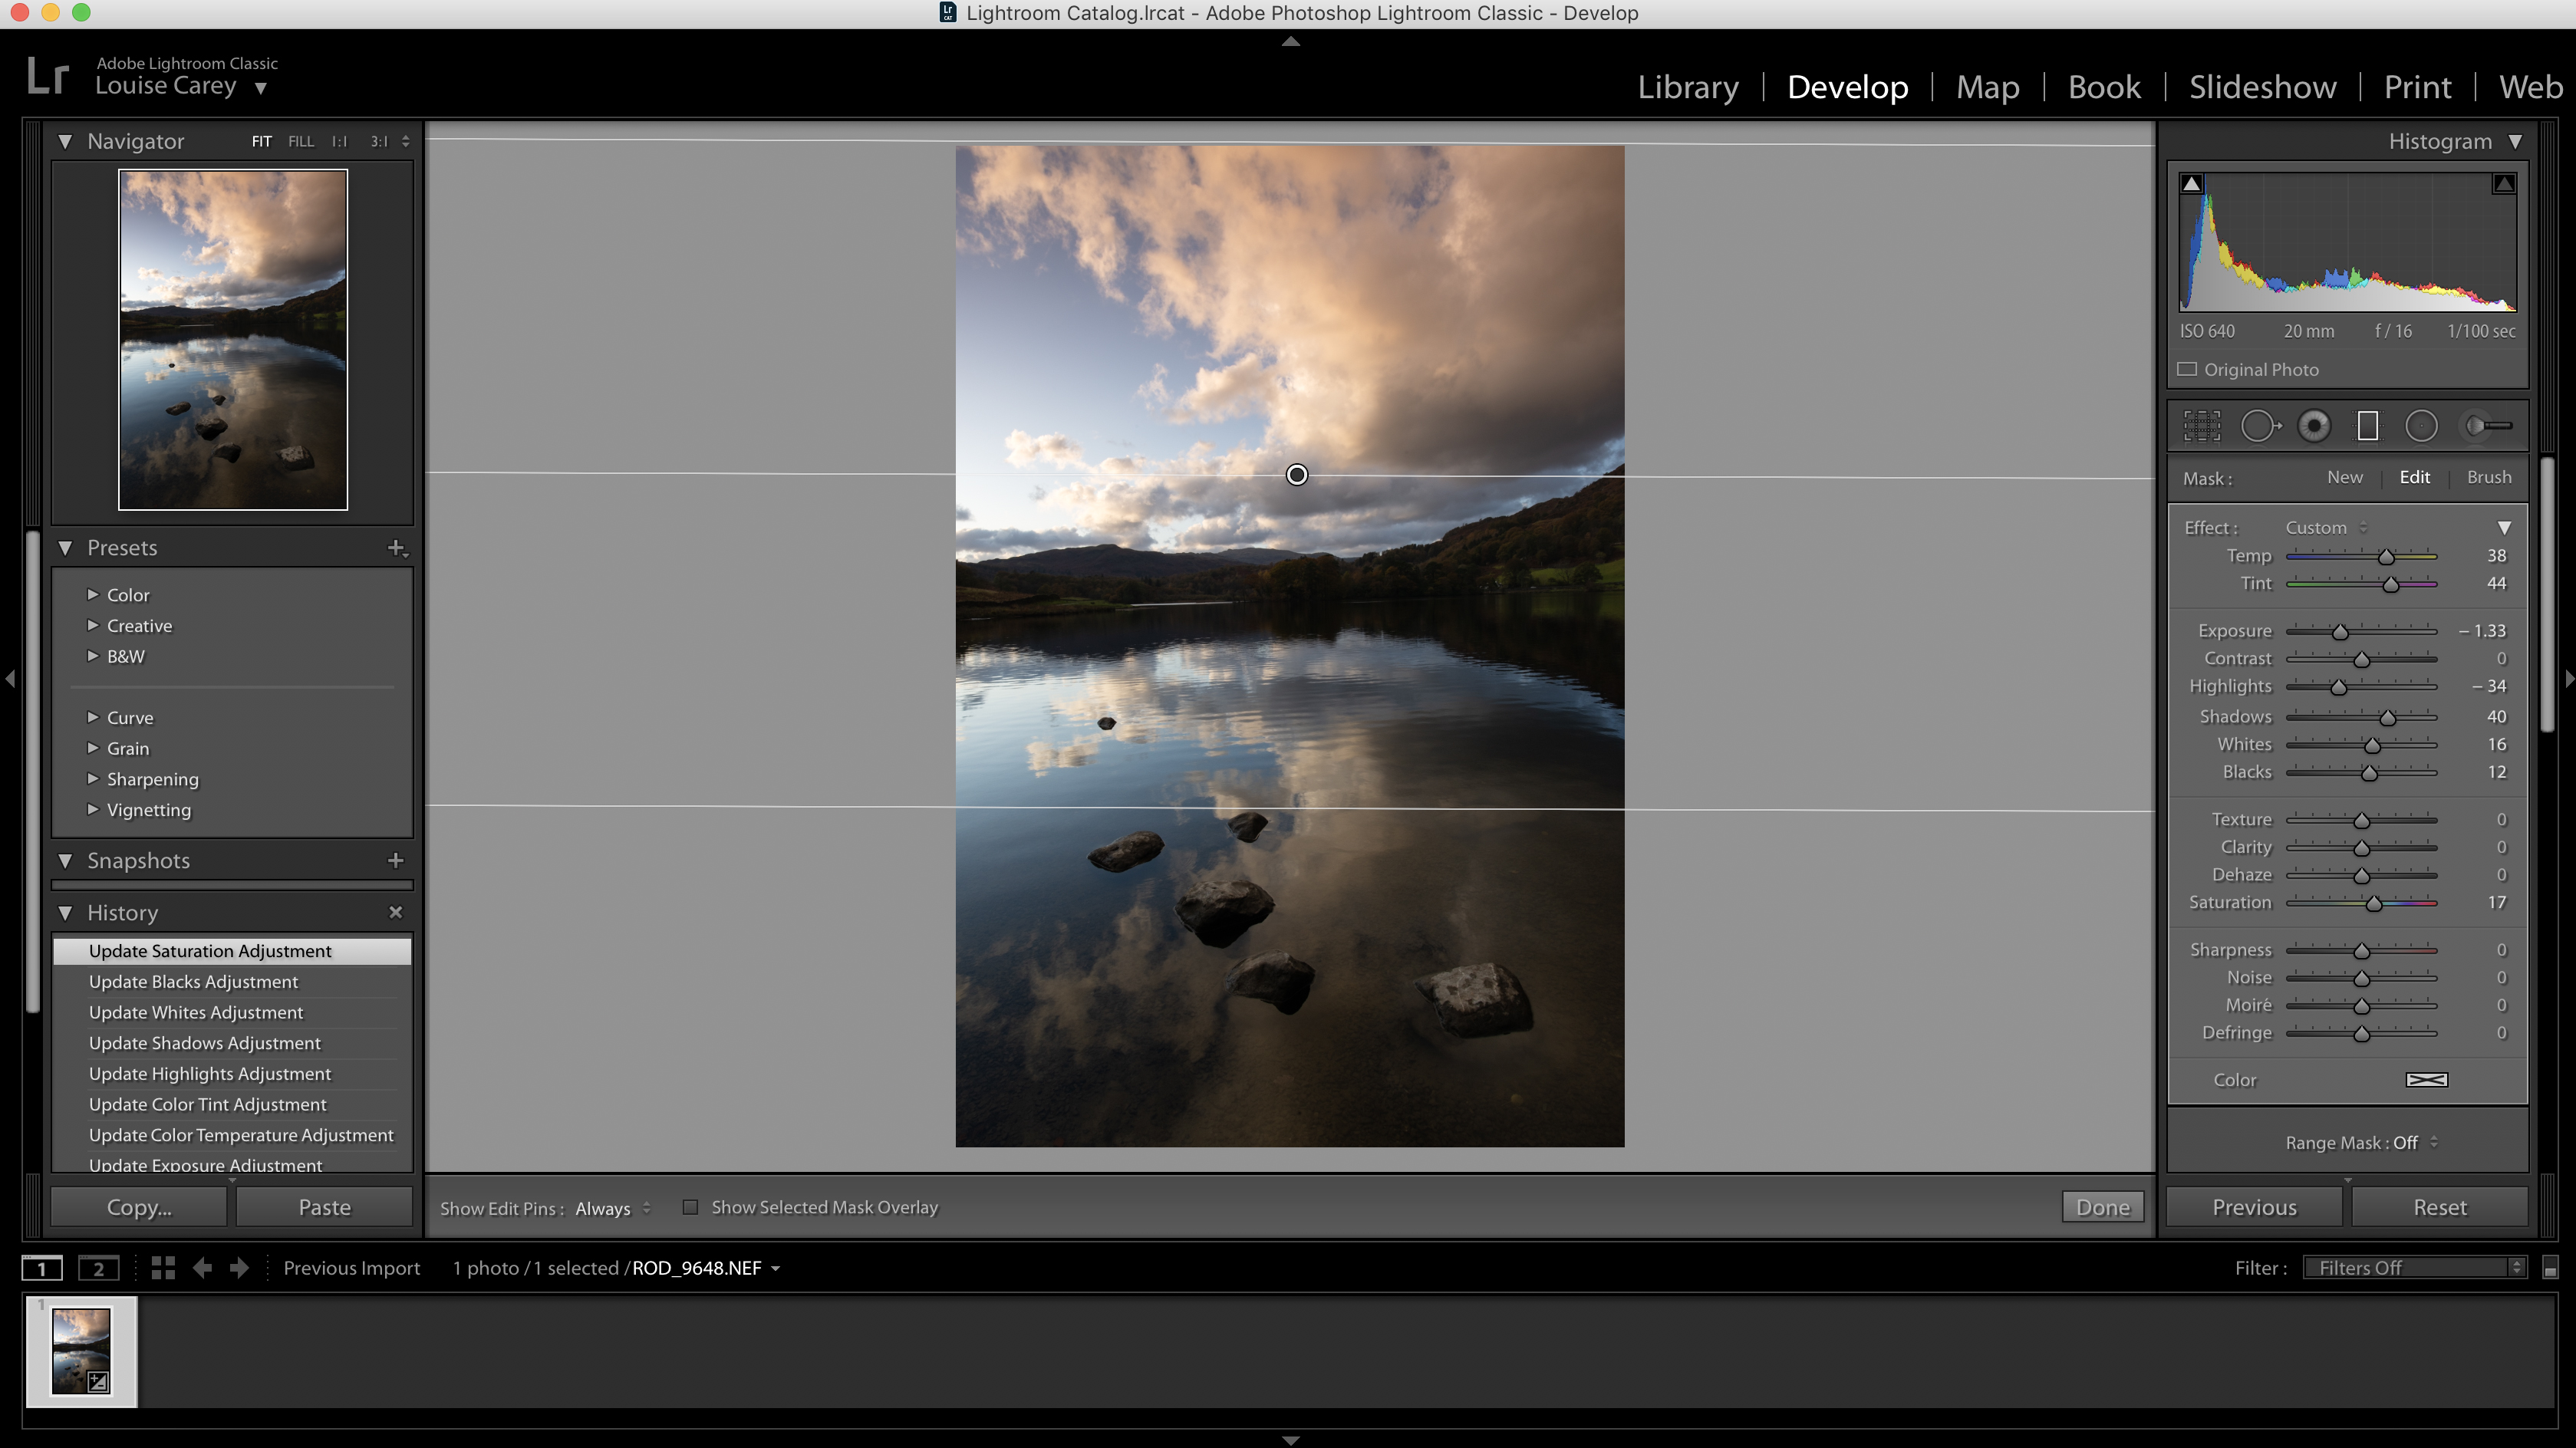
03 Make your adjustments
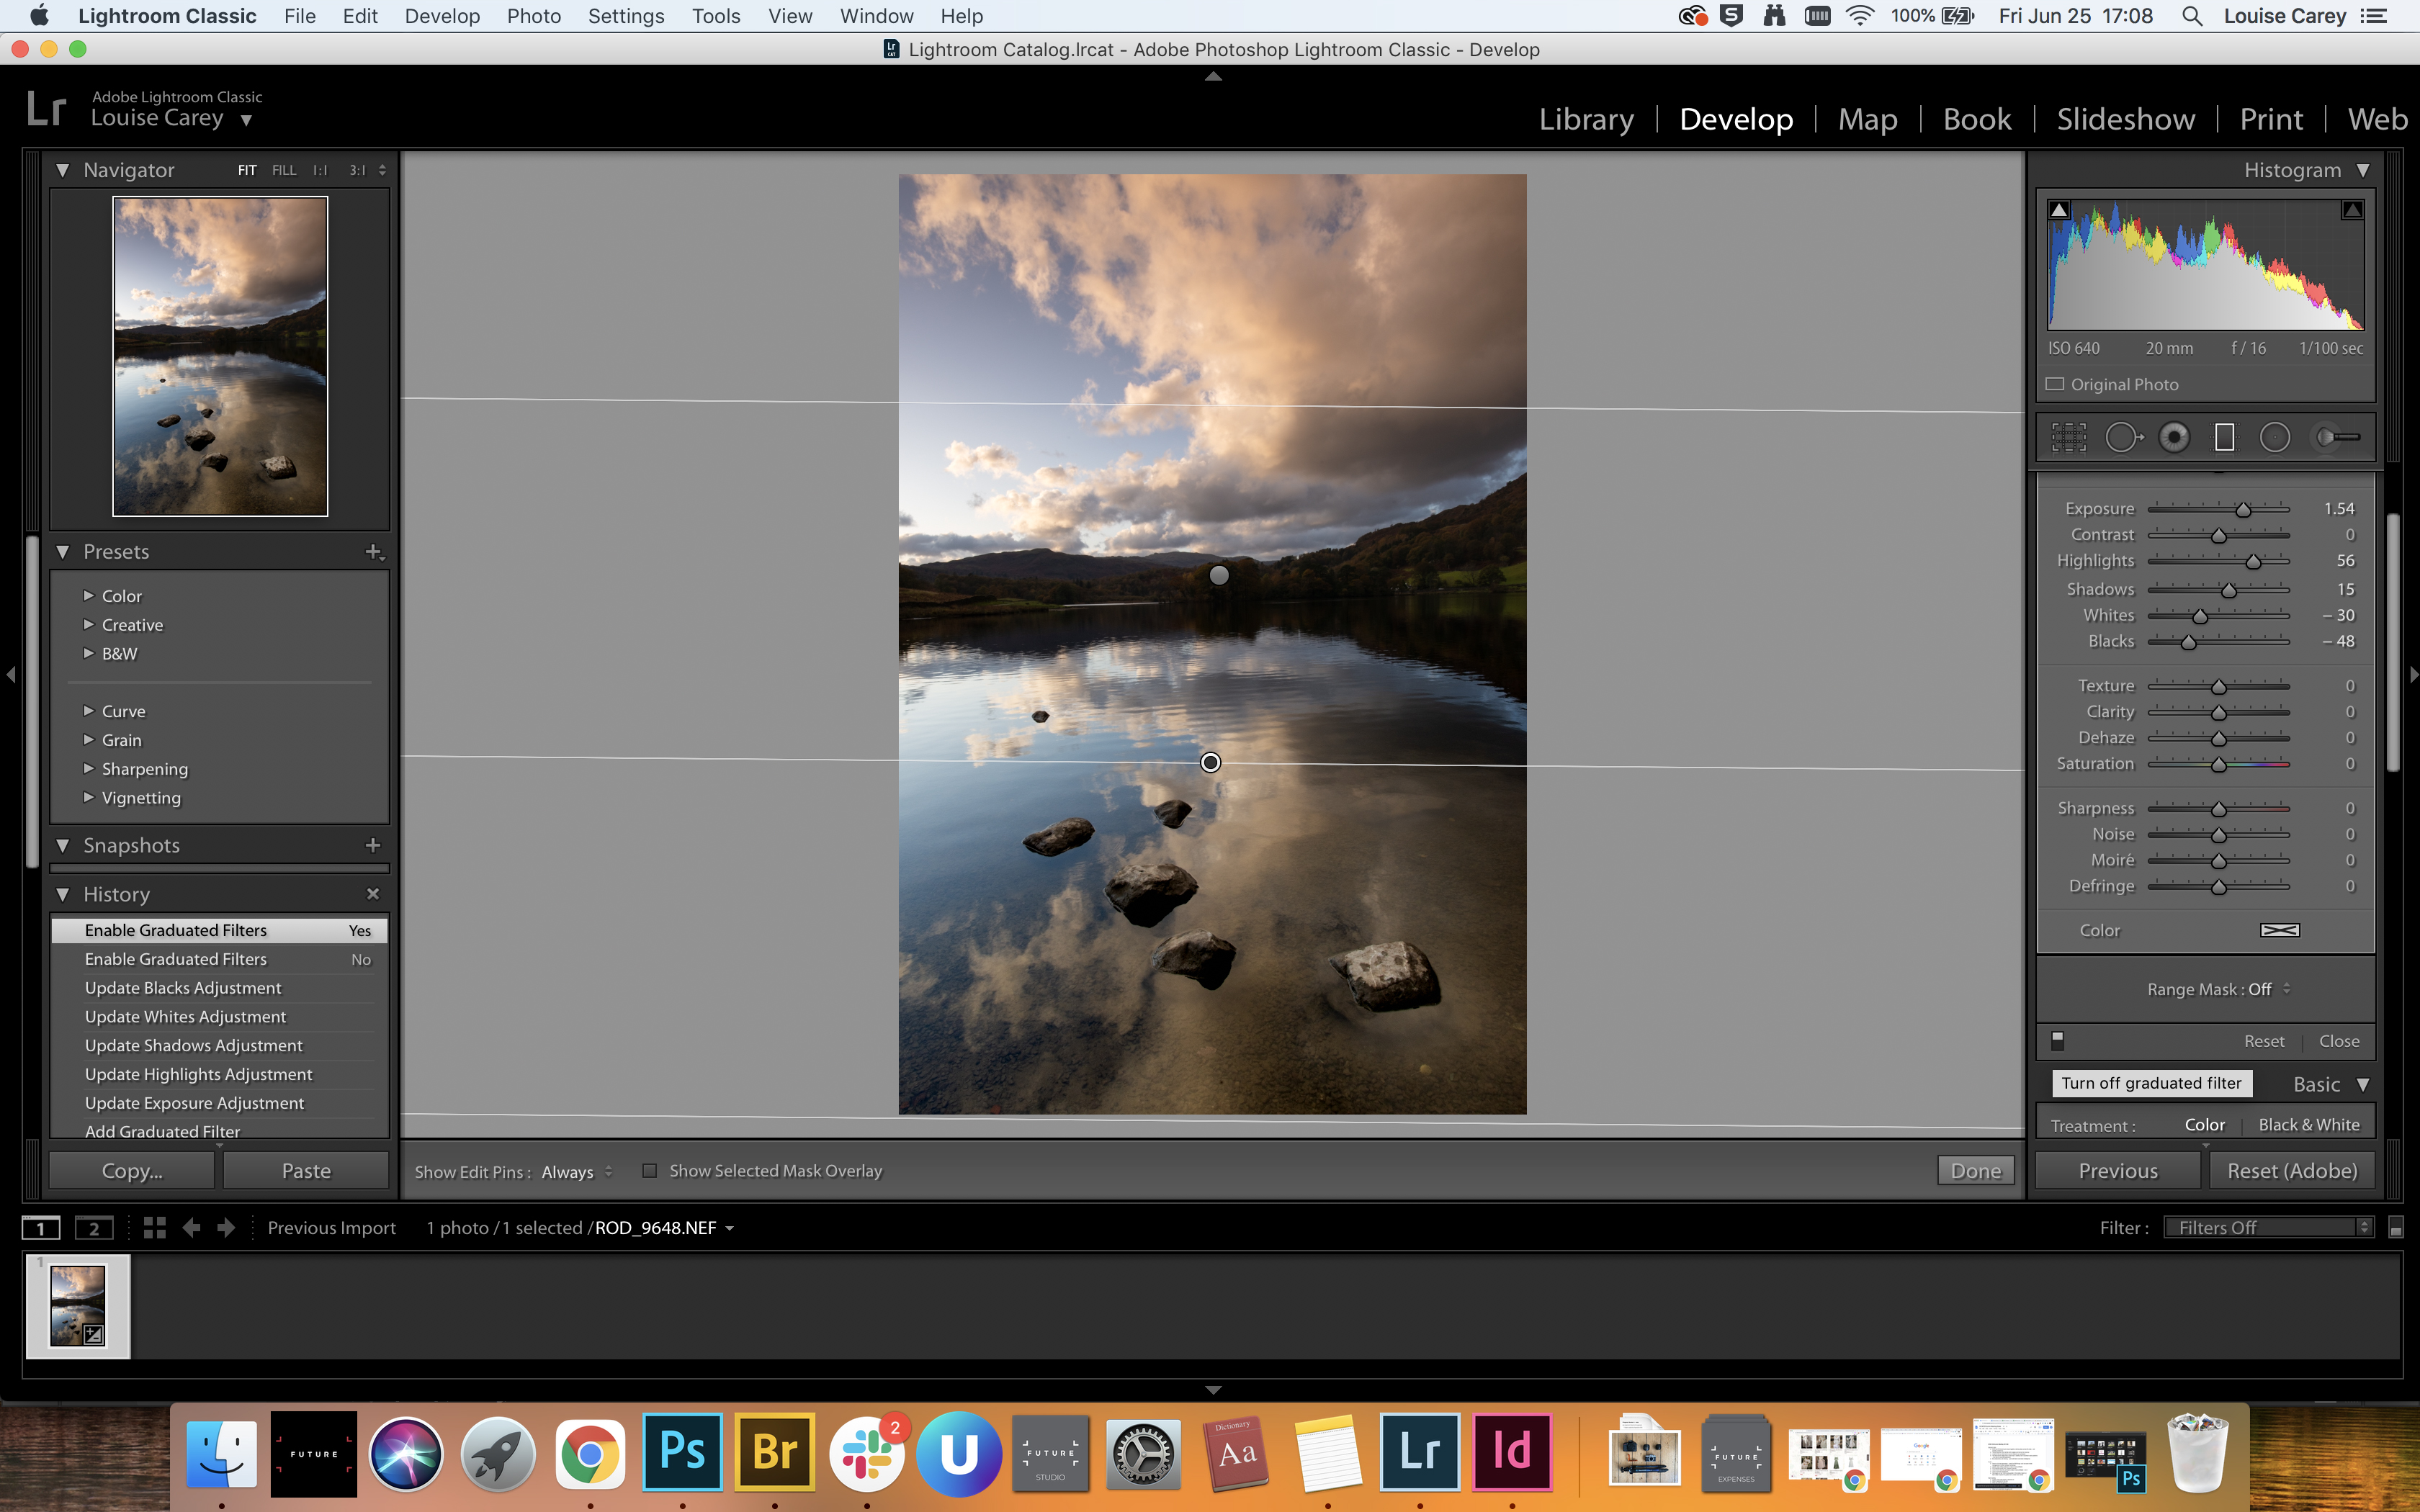
The Graduated Filter tool has its own panel of adjustment sliders, including Exposure, Temperature, Saturation and more. To bring out details in an overexposed sky, drag the Exposure and Highlights sliders to the left to darken the selected area.
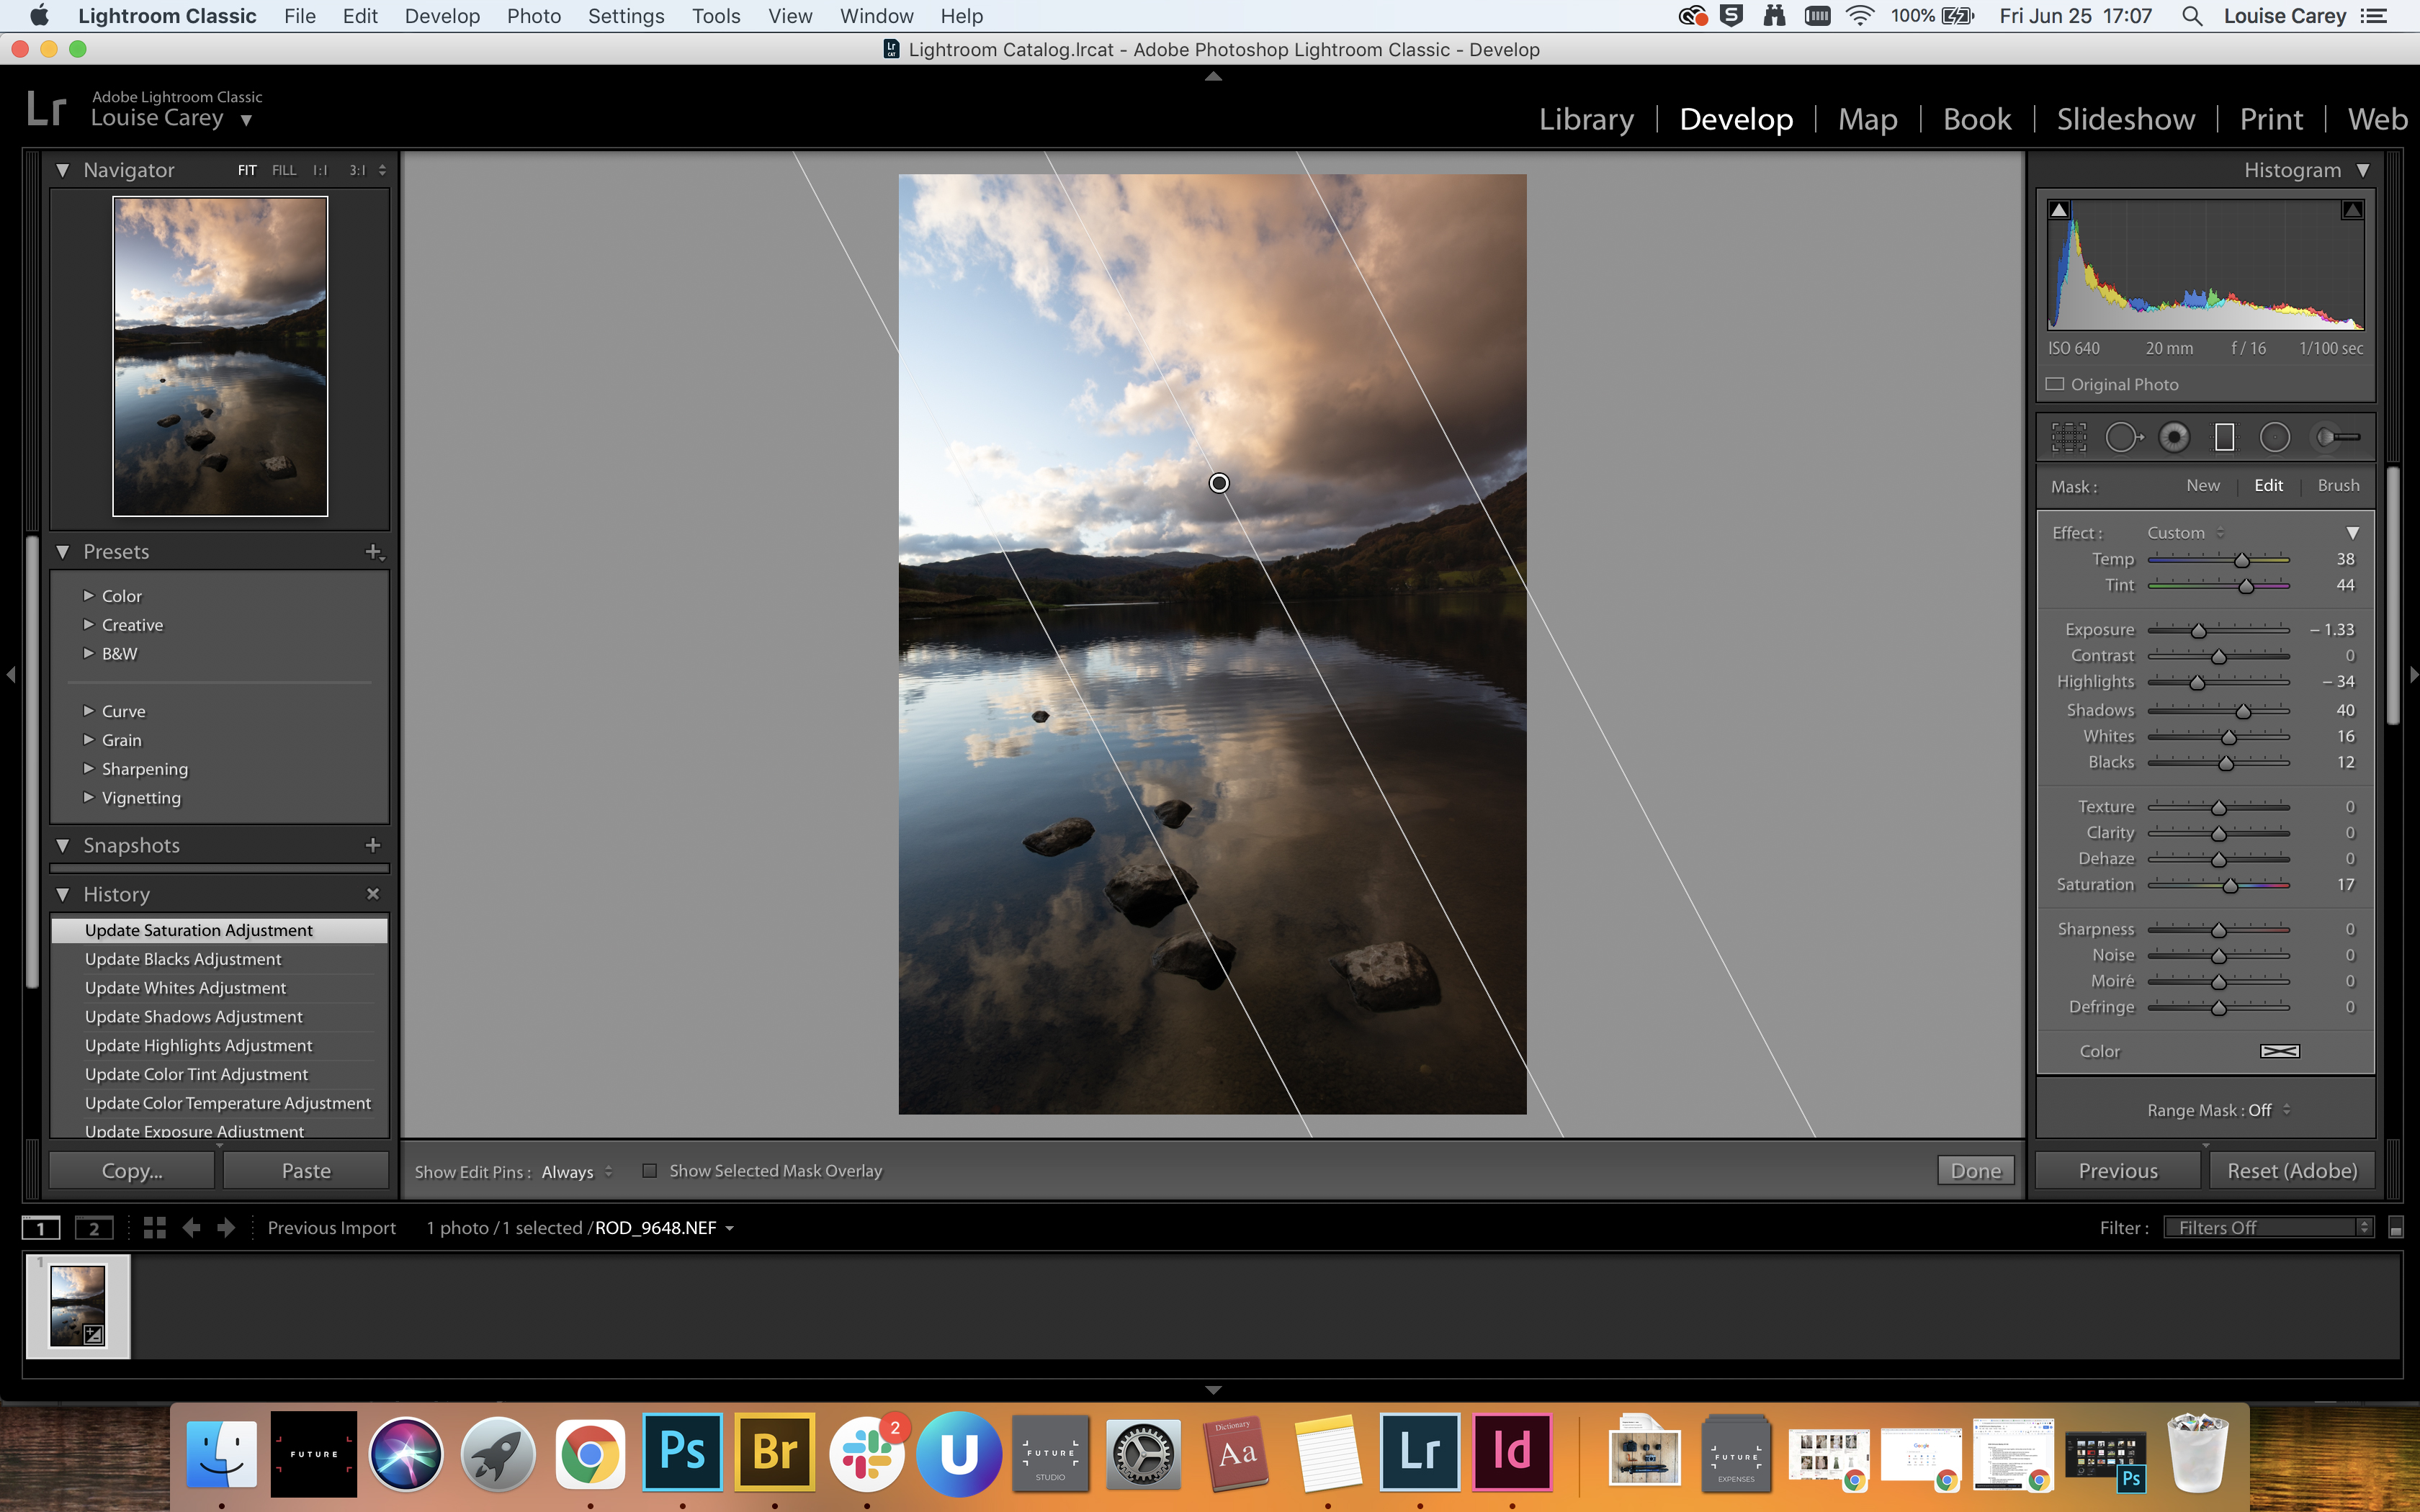
04 Edit your selection
To shrink or enlarge your original selection, move the top or bottom line. To move the entire area, drag the central selection point around the image. Alternatively, you can also tilt the selection area by clicking and moving the central line.
05 Make another selection
If you want to edit another area of your image (such as an underexposed foreground), you just need to click on the ‘New’ option in the ‘Mask’ area of the Graduated Tool panel (found directly above the adjustment sliders).
06 Check your edits
Make sure that your photo looks natural by toggling the ‘Turn off graduated filter’ button at the bottom of the panel. To tone a graduated filter selection down, just click on its central point to bring up the adjustment sliders again.
PhotoPlus: The Canon Magazine is the world's only monthly newsstand title that's 100% devoted to Canon, so you can be sure the magazine is completely relevant to your system.
Read more:
The best photo editing software: image editors for novices through to pros
The best photo-editing laptops: top laptops for photographers
10 best online photography courses – from beginner guides to masterclasses
With over a decade of photographic experience, Louise has a wealth of knowledge on photographic technique and know-how – something at which she is so adept that she's delivered workshops for the likes of ITV and Sue Ryder. Louise also brings years of experience as both a web and print journalist, having served as features editor for Practical Photography magazine and contributing photography tutorials and camera analysis to titles including Digital Camera Magazine and Digital Photographer, as well as previously working as Digital Camera World's ecommerce editor. Louise currently shoots with the Fujifilm X-T200 and the Nikon D800, capturing self-portraits and still life images.
