I used Nikon’s Focus Shift Shooting for the first time – here’s why I’ll think twice before focus stacking manually again
You can make focus stacking a breeze by automating the process using your Nikon camera’s Focus Shift Shooting function

The best camera deals, reviews, product advice, and unmissable photography news, direct to your inbox!
You are now subscribed
Your newsletter sign-up was successful
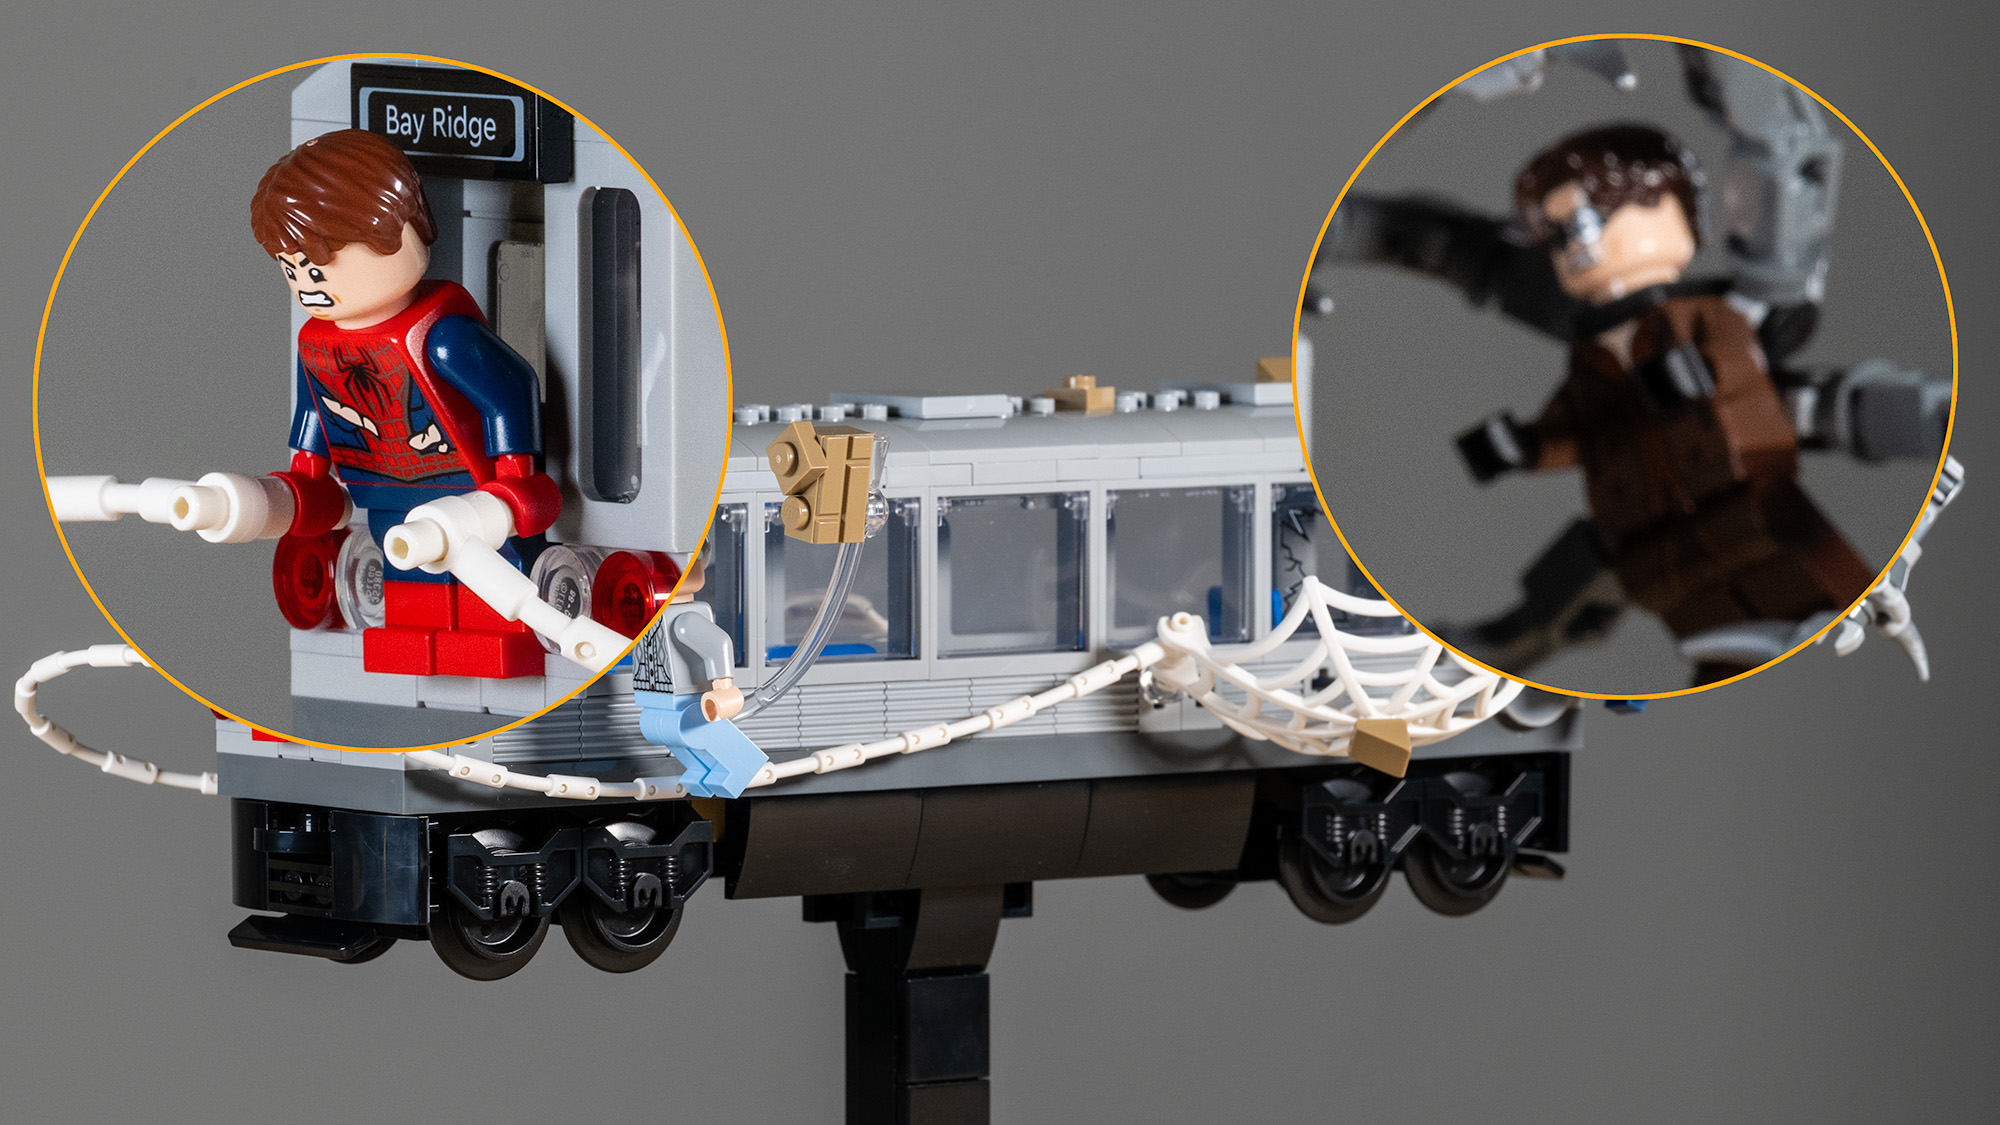
I’ve done my fair share of focus stacking in my time. Not only is it a laborious process, but you’re never quite sure you’ve got it right until you reach the editing stage, at which point, it’s too late to fix any mistakes. Cameras have featured automatic focus-stacking functions for years, but I’ve always done it the old-fashioned way, so I thought it was high time I gave my Nikon Z8’s Focus Shift Shooting a fair shake. Spoiler: I’m impressed.
In fact, I was so happy with the results, I can’t see myself returning to my manual focus-stacking ways. Well, not unless I’m capturing an extremely detailed macro stack, but for general close-ups and landscapes, I’m a Focus Shift convert. With that in mind, read on to find out how to use Focus Shift.
What is focus stacking?
Focus stacking is used to create a larger depth of field than is otherwise possible, whether to render the entire subject in focus or the entire image for front-to-back sharpness. It works by capturing multiple images with exactly the same framing while incrementally moving the point of focus from front to back. Those images are then blended together in post-production, typically in Adobe Photoshop or with specialist focus-stacking software, like Helicon Focus.
The traditional way to focus stack is to focus on the element closest to the camera that you want sharp, using manual focus, and taking the shot. Then, identifying where the focus starts to drop off and manually shifting the focus ring accordingly, repeating until you’ve covered the entirety of your subject.
Focus peaking has made this process easier, but if you don’t get this right, you can end up with out-of-focus patches when you blend your images together. As such, it’s worth capturing several stacks to help mitigate this problem. Ultimately, manually focus stacking is laborious, but plenty of cameras are able to automate the process.
How to use Nikon’s Focus Shift Shooting
Focus Shift Shooting is relatively easy to set up and completes the entire stacking process in a matter of seconds. All you have to do is blend the images together in post-production. Here’s how to activate Focus Shift Shooting…
- Compose your shot, ensuring the camera is locked on a tripod to maintain consistent framing
- Focus on the element you want sharp that’s closest to the camera/lens
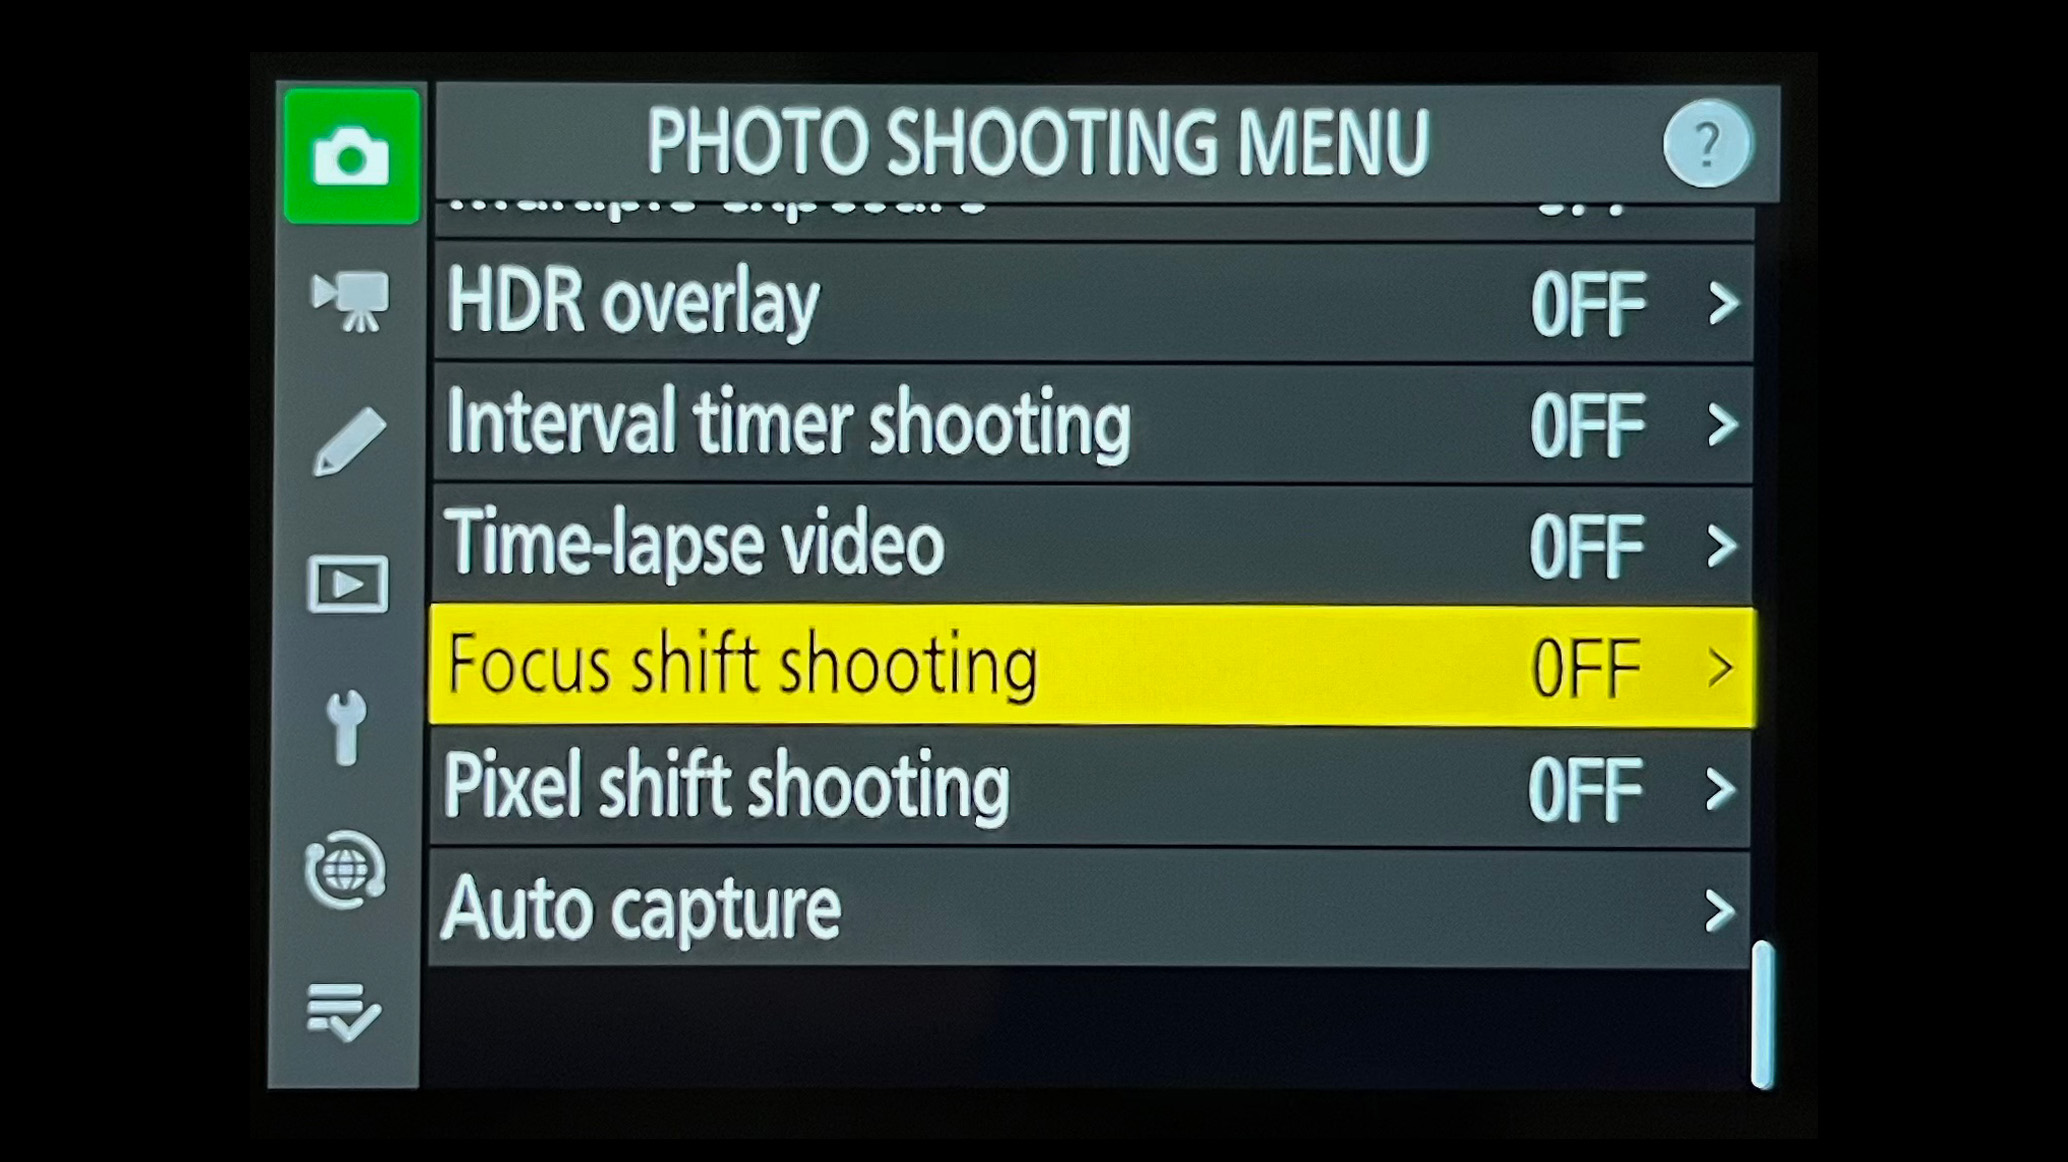
- Hit the Menu button and select the ‘Photo shooting menu’ (camera icon)
- Scroll down to ‘Focus shift shooting’
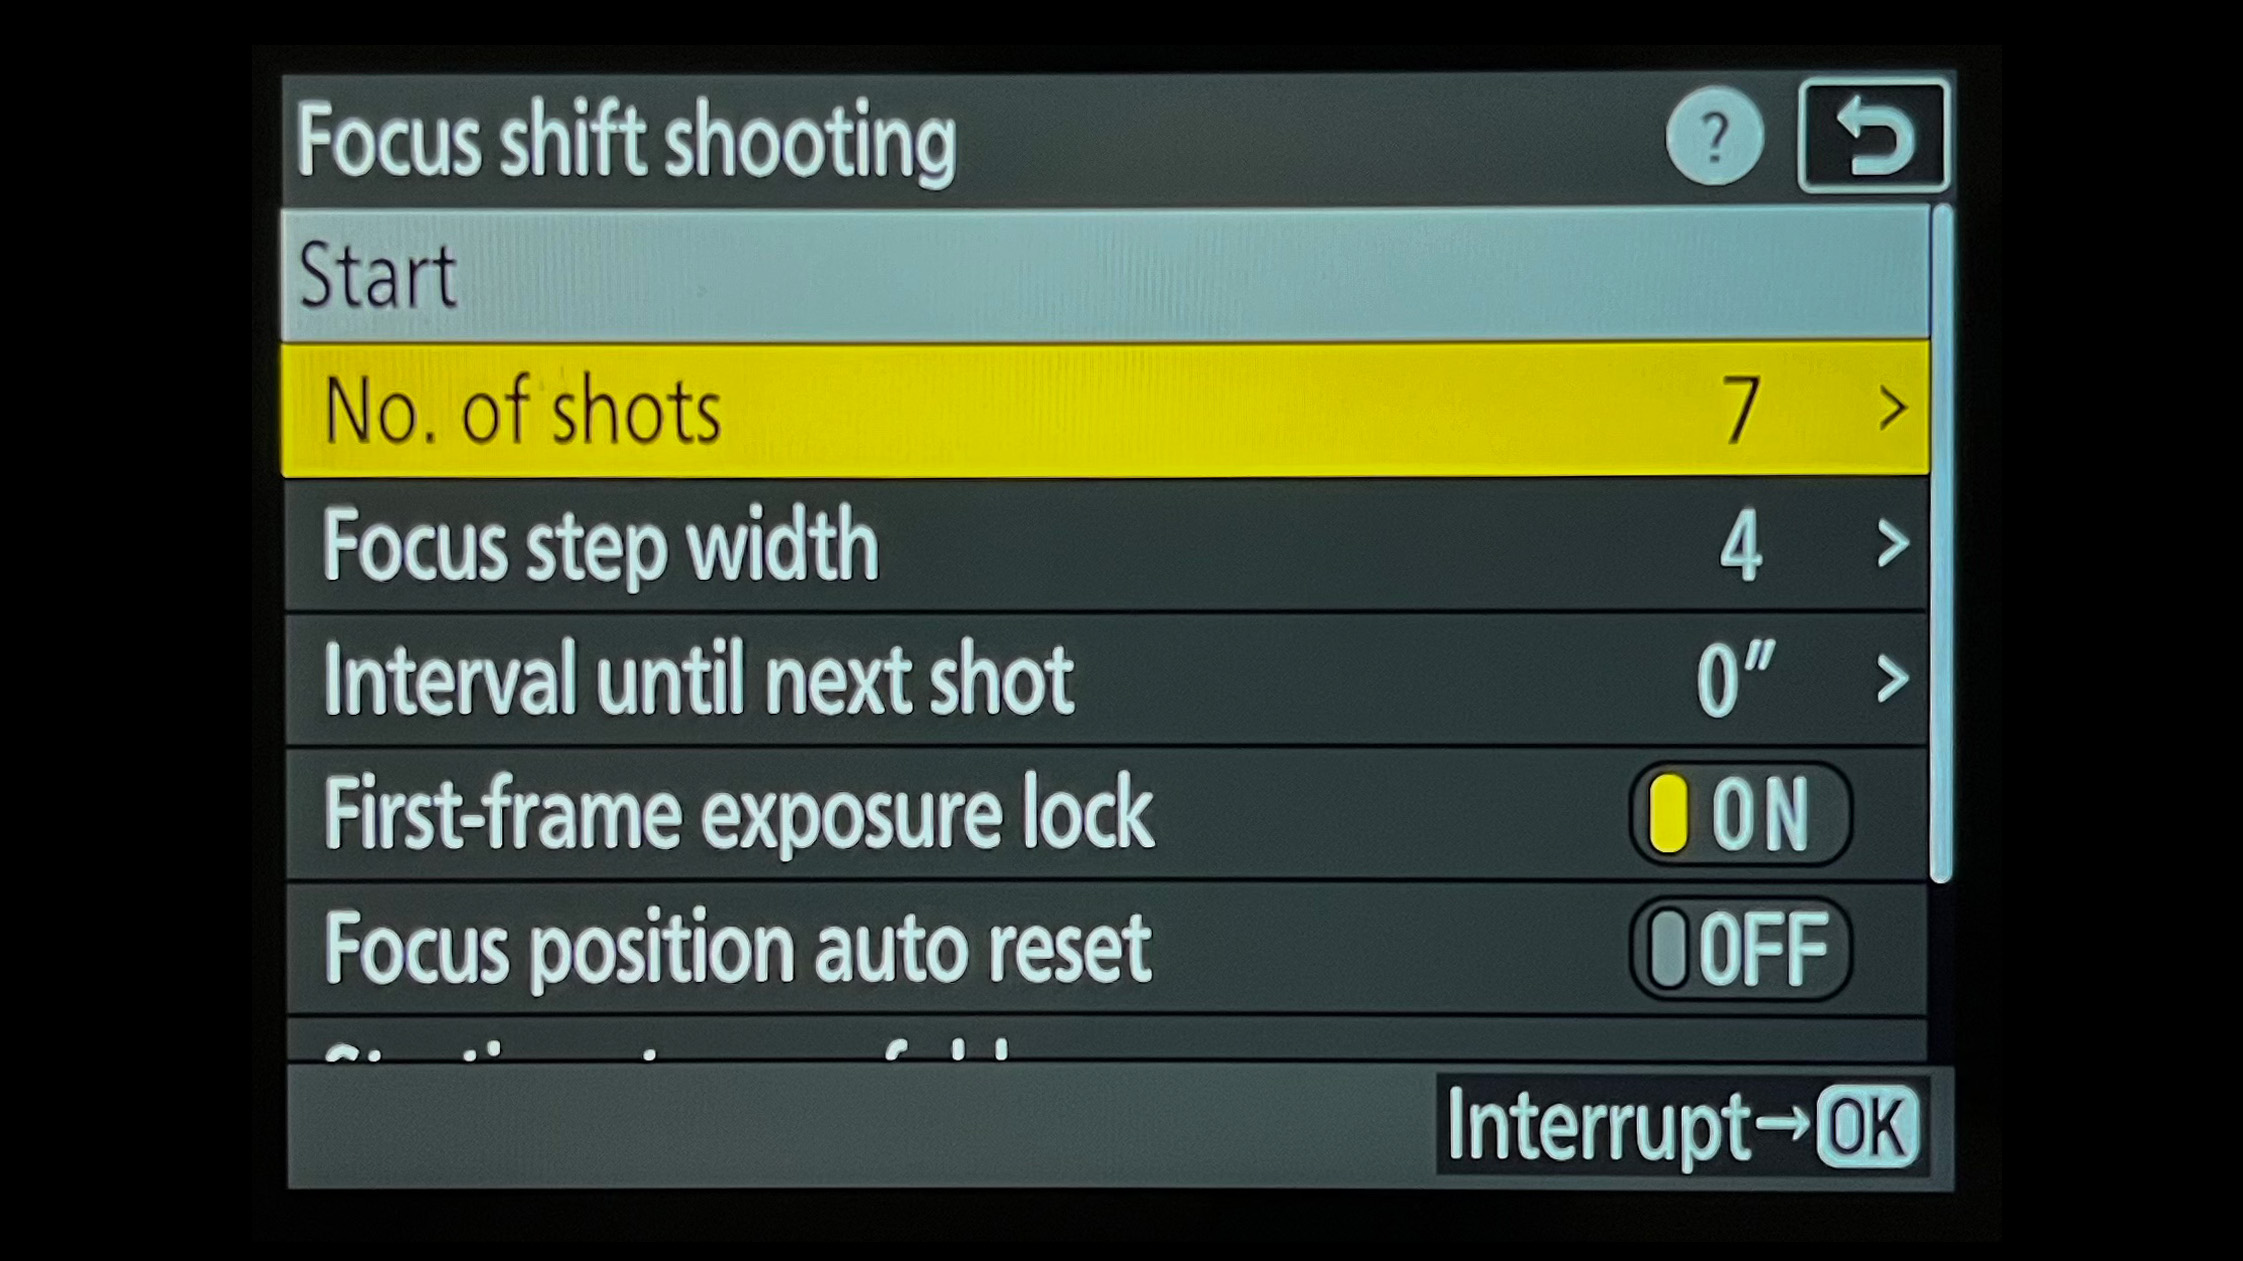
- Input your desired settings (explained below) and hit ‘Start’
- Leave your camera to complete the focus stack
Perhaps the most complicated bit is understanding what the many options within the Focus Shift Shooting menu do. So here’s a breakdown.
The best camera deals, reviews, product advice, and unmissable photography news, direct to your inbox!
No. of shots: This is the number of shots that will feature within the stack. I captured a stack of seven shots, but my Nikon Z8 is able to capture up to 300. Bear in mind that the more shots you have to stack, the more demanding the stacking process will be on your desktop computer or MacBook. Larger stacks are more necessary when focus stacking at extreme magnifications, due to working with extremely shallow depths of field.
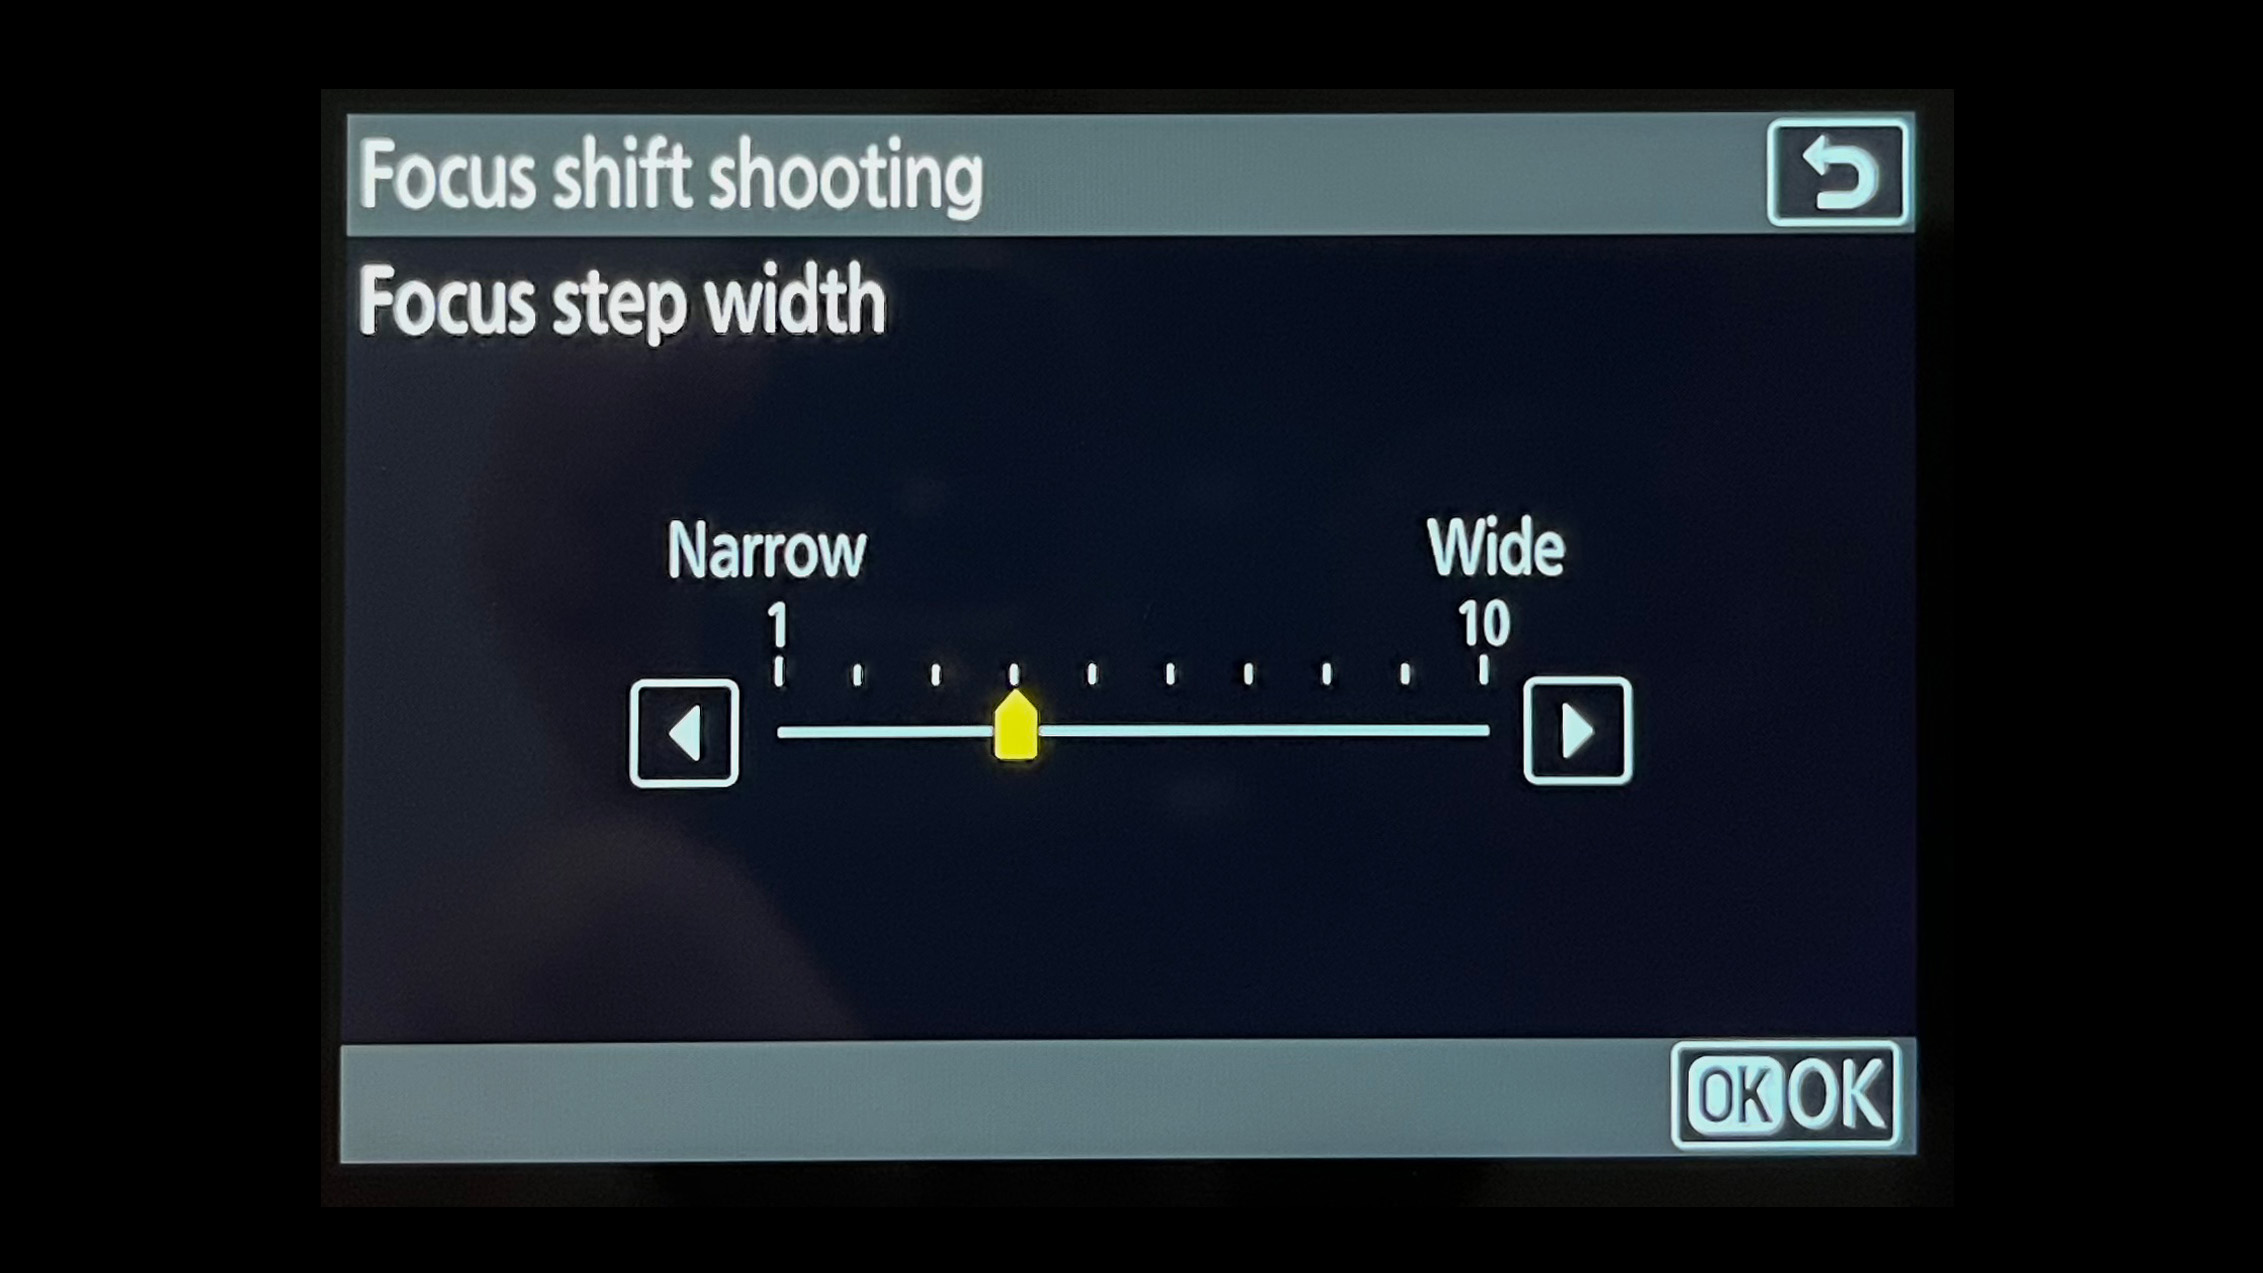
Focus step width: This is how much the focus distance changes between increments, and is the trickiest setting to get right, because it’s a little abstract. Go too high and the camera will focus beyond the point of drop off, leaving you with blurry patches at the blending stage.
I like to start at five, right in the middle of the scale, and take a test stack. I then cycle through the stack in Playback and gauge whether I think there are any gaps. If in any doubt at all, I’ll lower the distance. Do be aware that if you lower the distance, you may need to increase the number of shots; otherwise, the camera might not cover the entirety of your subject before it finishes the stack.
Interval until next shot: This is simply the time taken before the next shot. Set it to zero and it will move onto the next shot immediately, completing the stack in the fastest time possible. The only reasons you’d have to increase the interval are if you need time for a flash to recharge or you’re shooting at such a high magnification you’re worried that vibrations from the closing shutter could cause camera shake (assuming your camera has a mechanical shutter).
First-frame exposure lock: This will lock the exposure of the first shot, so you can maintain a consistent exposure throughout your focus stack.
Focus position auto reset: A handy addition to some newer Nikon cameras, this returns focus to the point of focus at the beginning of the sequence.
You might also like...
I'm not the only one who likes Focus Shift: I can focus-stack insects “much quicker” with the Nikon Z8, says pro macro photographer. Want more photography techniques? Make sure you understand the foundation of all photography, the exposure triangle. Plus, using a tripod might seem simple, but make sure you're not making these common tripod mistakes.

Mike studied photography at college, honing his Adobe Photoshop skills and learning to work in the studio and darkroom. After a few years writing for various publications, he headed to the ‘Big Smoke’ to work on Wex Photo Video’s award-winning content team, before transitioning back to print as Technique Editor (later Deputy Editor) on N-Photo: The Nikon Magazine.
With bylines in Digital Camera, PhotoPlus: The Canon Magazine, Practical Photography, Digital Photographer, iMore, and TechRadar, he’s a fountain of photography and consumer tech knowledge, making him a top tutor for techniques on cameras, lenses, tripods, filters, and more. His expertise extends to everything from portraits and landscapes to abstracts and architecture to wildlife and, yes, fast things going around race tracks...
You must confirm your public display name before commenting
Please logout and then login again, you will then be prompted to enter your display name.


