Photography cheat sheet: How to understand ISO settings
What is ISO in photography and how to make sense of your camera sensor's sensitivity

The best camera deals, reviews, product advice, and unmissable photography news, direct to your inbox!
You are now subscribed
Your newsletter sign-up was successful
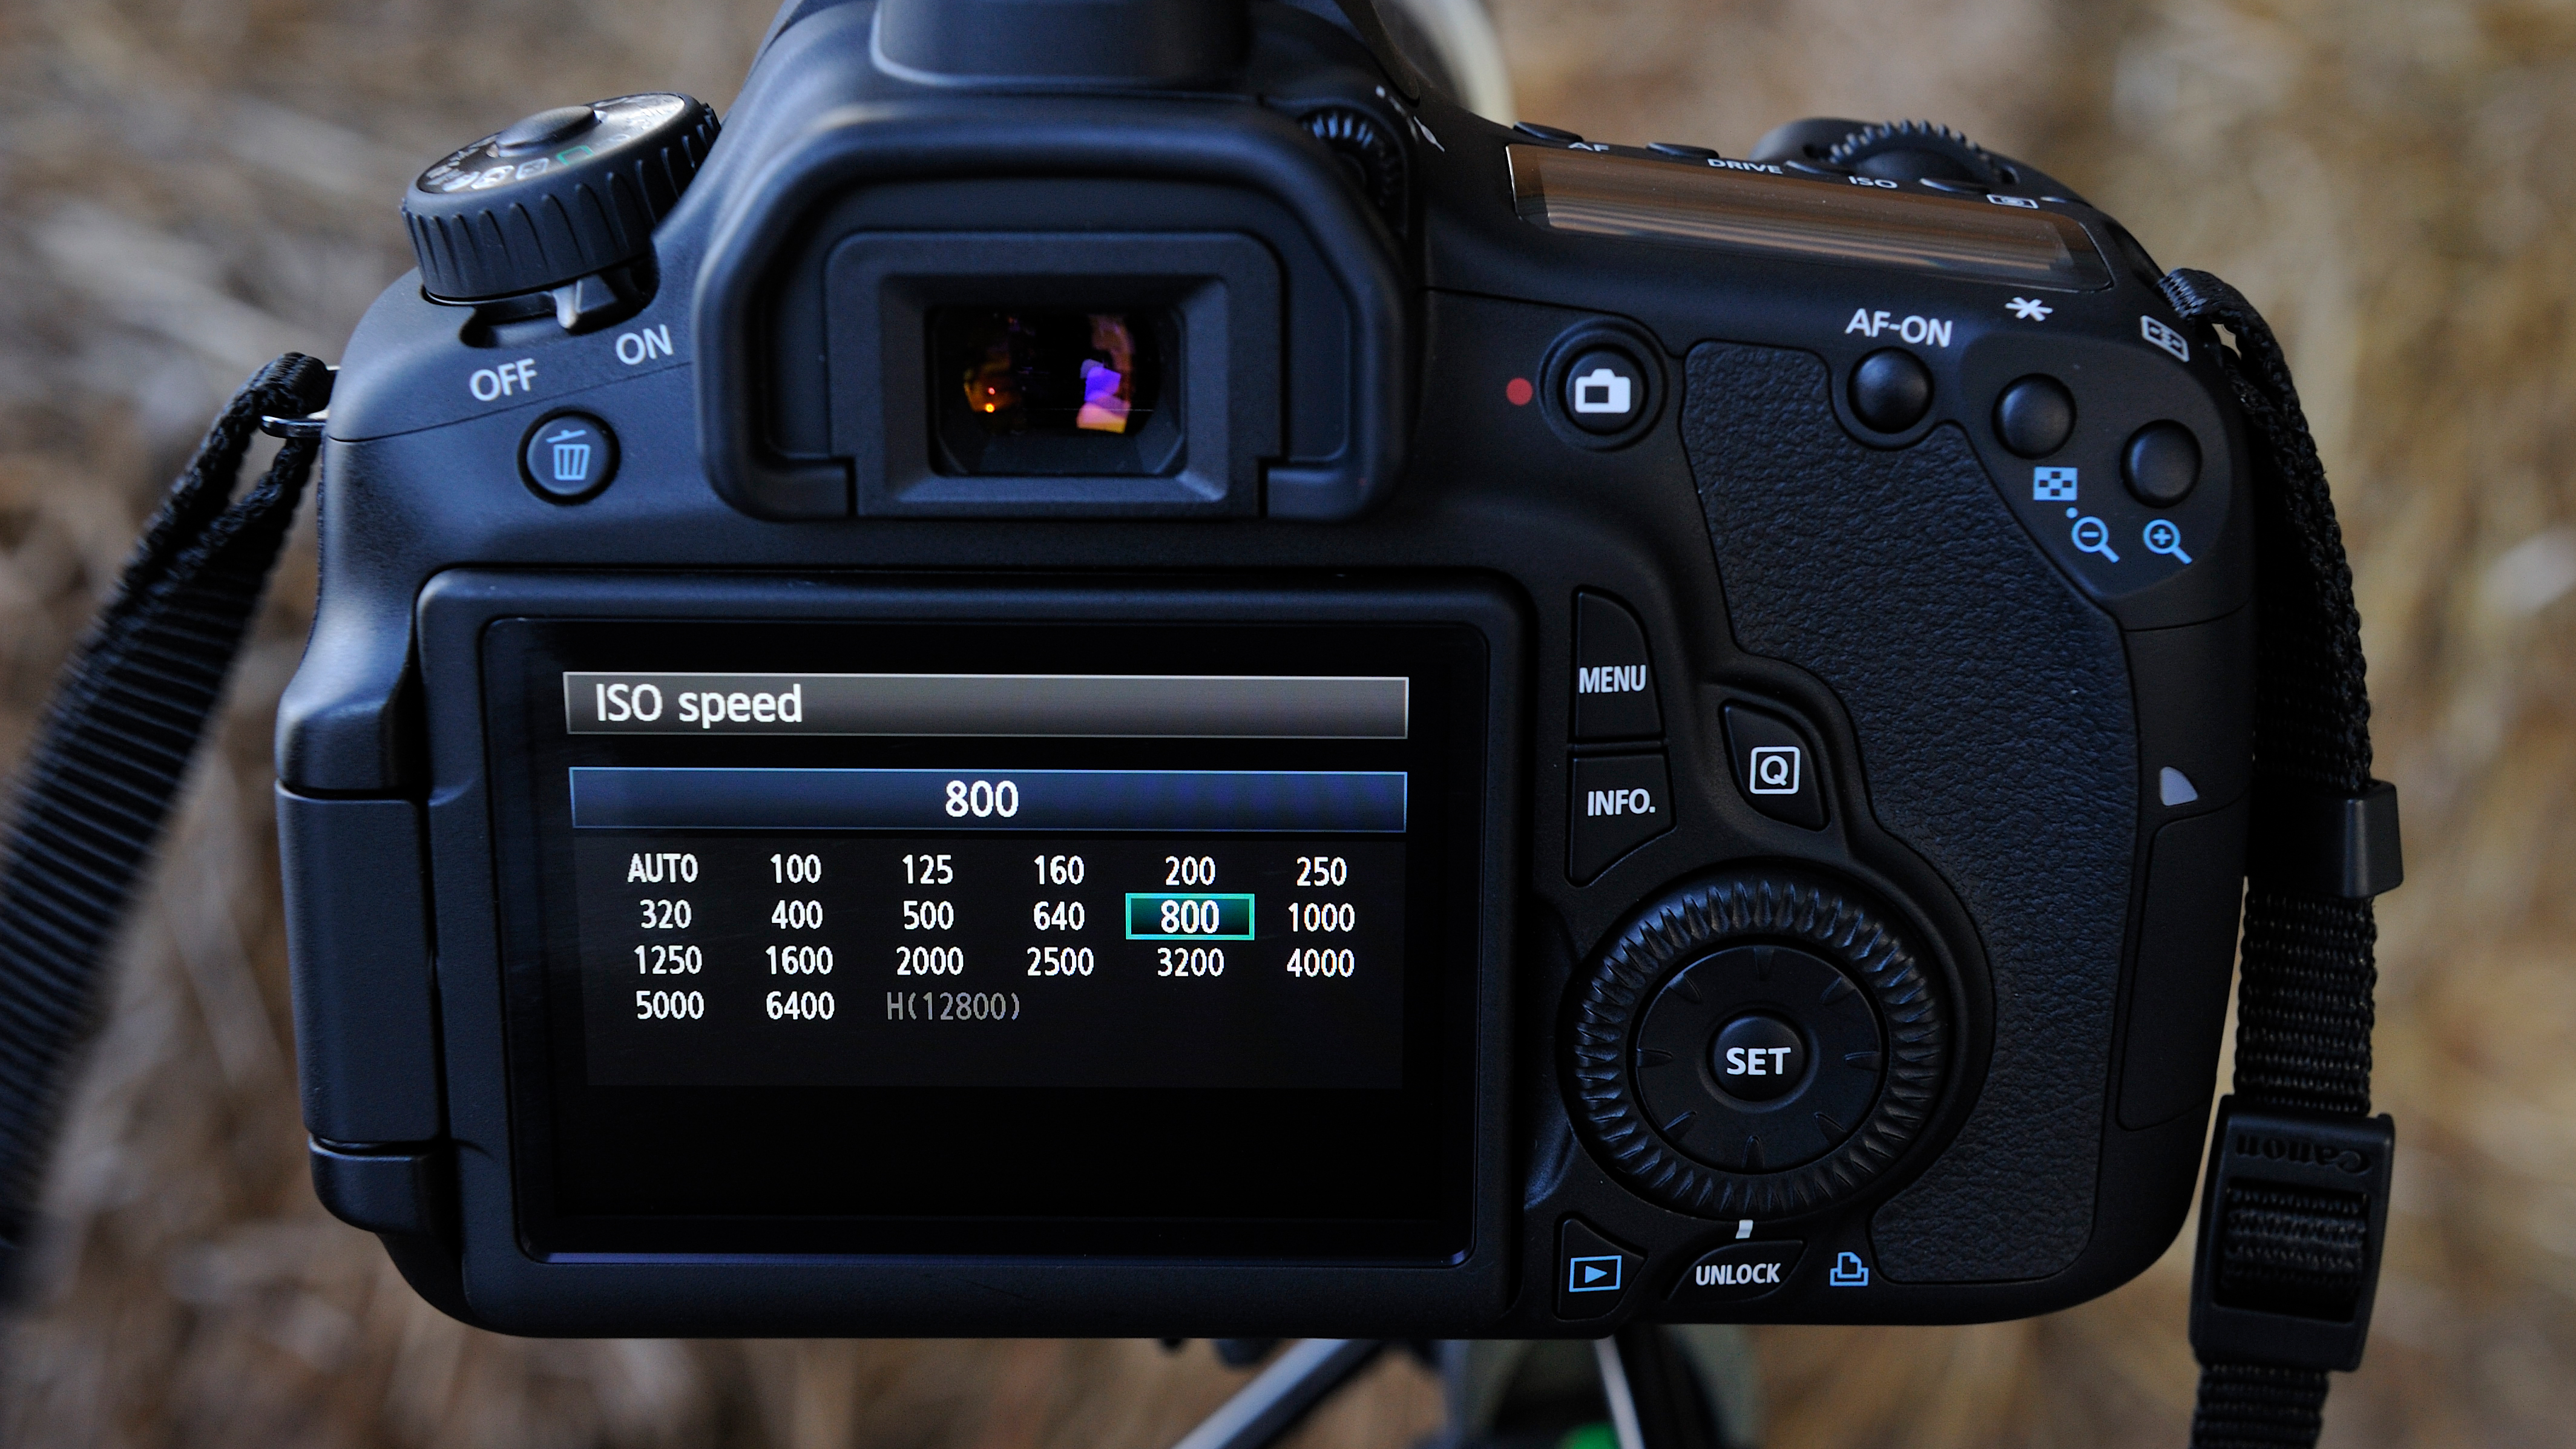
The ability to adjust your camera's sensitivity (ISO) is one of the great advantages of digital capture. Unlike with film cameras, you can change the ISO for every shot with ease, should you wish to. But when and why should you change this fundamental photographic control, which, along with aperture and shutter speed, makes up part of the exposure triangle.
But what is ISO, exactly? Changing your ISO setting means that you can tailor the camera to various situations. Doing so will help you to end up with an image that's sharp and appropriately exposed, whatever the environment.
What ISO setting should you use?
The best low-light cameras are more capable of shooting in dim conditions than other cameras, but as a general rule, you want to stick to the lowest ISO possible, as this will give you the cleanest images.
This is easy in good lighting conditions as your camera doesn't need a very high ISO setting to capture the image. So, if there's plenty of light in the scene, you can use a setting such as ISO 100 or 200.
When shooting in trickier conditions, you may need to raise this ISO, perhaps to ISO 3200 or 640000 – or maybe even higher. Doing this will give you a faster shutter speed to work with, which in turn helps you to end up with a sharp image.
Image noise, however, is likely to be more visible. This gives images a colored, grainy texture, and it can obscure details, so you want to keep this to a minimum.
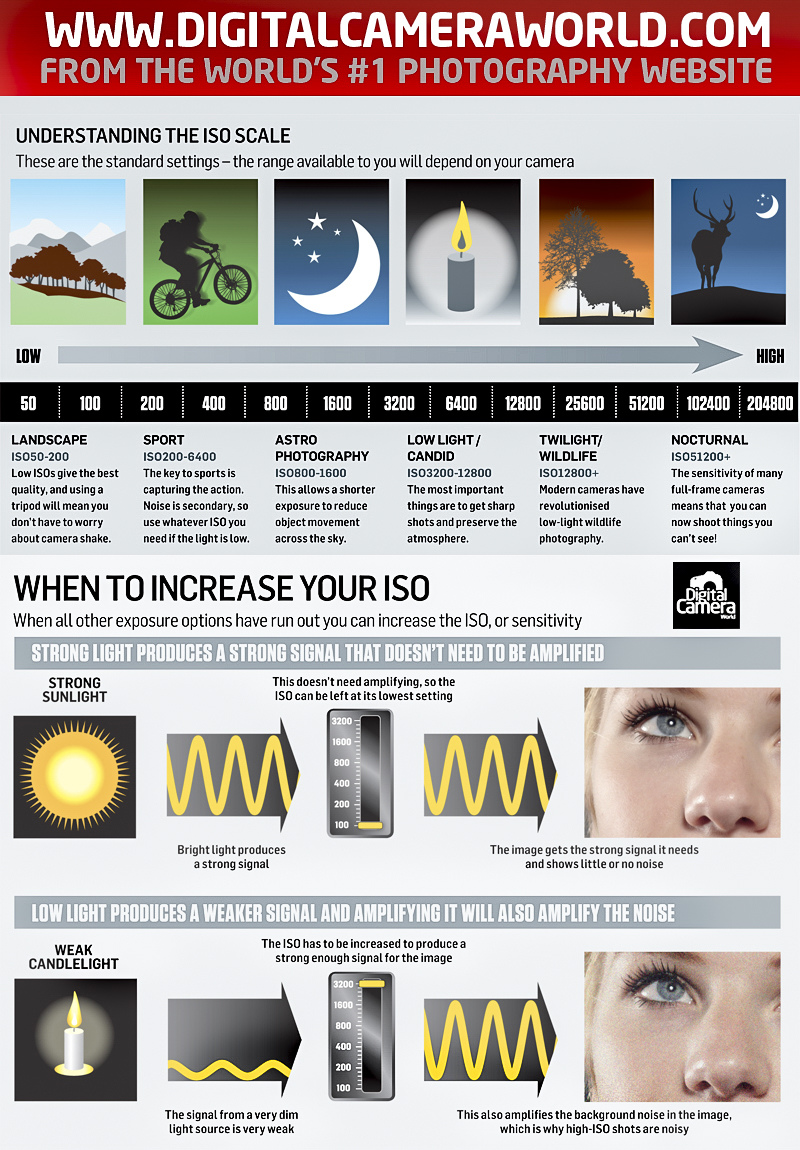
Our photography cheat sheet below can help you to understand the ISO scale, and when to use different ISO settings for different subjects.
The best camera deals, reviews, product advice, and unmissable photography news, direct to your inbox!
Photography cheat sheet: ISO settings
If you're using your camera on a tripod, you can use a lower ISO setting than you would normally be able to, which will help with the quality of your images. This is because the camera is not subject to any movement during the exposure as it's not being held by the user, which makes longer shutter speeds practical.
To give an example, a sensitivity of ISO 100 may require a shutter speed of three or four seconds in a particular situation. This is too long to be useful when hand-holding the camera; the result will be a blurry image.
On a tripod, however, you can use this kind of ISO and shutter speed in the knowledge that the camera won't move at all during the exposure. This is great as it allows you to record moving subjects, such as flowing water or traffic, with a pleasing blur.
Today's cameras allow you to select an Auto ISO option. This allows the camera to choose the best ISO for a particular situation, basing its decision on your lens and the shooting conditions, and conveniently alter this from frame to frame.
There may be times, however, when you want to overrule this, perhaps for creative reasons. So, it's good to understand what's happening.
Save our cheat sheet and make sure you never get stuck with ISO again!
We've got many more photography cheat sheets for you, on subjects as diverse as woodland photography to cityscapes.

Chris George has worked on Digital Camera World since its launch in 2017. He has been writing about photography, mobile phones, video making and technology for over 30 years – and has edited numerous magazines including PhotoPlus, N-Photo, Digital Camera, Video Camera, and Professional Photography.
His first serious camera was the iconic Olympus OM10, with which he won the title of Young Photographer of the Year - long before the advent of autofocus and memory cards. Today he uses a Sony A7 IV, alongside his old Nikon D800 and his iPhone 15 Pro Max.
He is the author of a number of books including The Book of Digital Photography, which has been translated into a dozen different languages.
In addition to his expertise in photography and videomaking, he has written about technology for countless publications and websites including The Sunday Times Magazine, The Daily Telegraph, What Cellphone, T3 and Techradar.

