Color grading – how to give your video footage a cinematic feel
Color grading will add a cinematic feel to your footage but first you'll need to understand the difference between logs and LUTs

The best camera deals, reviews, product advice, and unmissable photography news, direct to your inbox!
You are now subscribed
Your newsletter sign-up was successful
If you’ve recently been thinking about having a go at videography, you may have heard of 'log' and 'LUTs'. While the two are closely linked, one is an in-camera setting you need to set before you start shooting and the other is a setting you apply in post to manipulate colors.
The best video editing software supports log video and LUTs as part of the production process, generally known as 'color grading'.
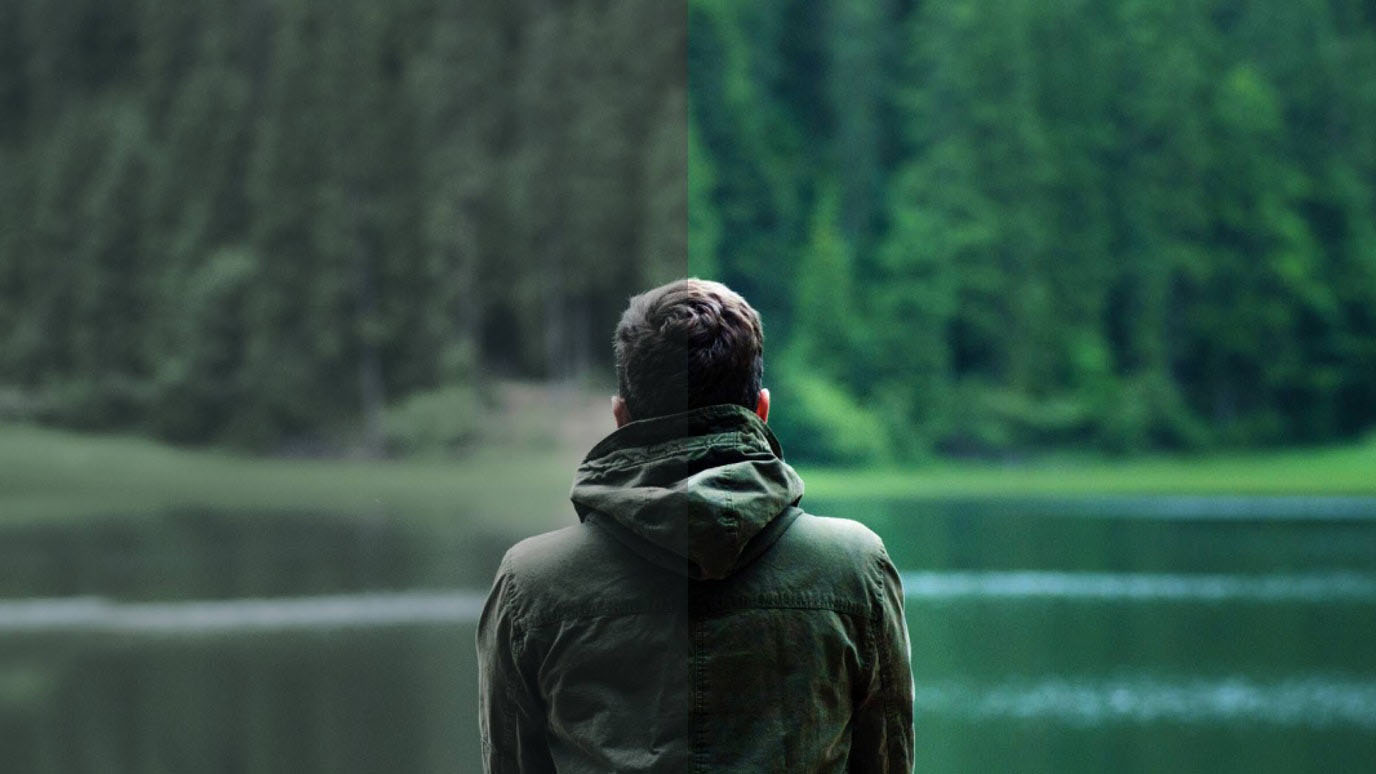
Color grading your video footage will give your final edit a cinematic feel, and it is much easier to grade log footage than it is to grade footage shot in a normal color space. This guide will help you understand why.
Color grading log footage
Log is short for 'logarithmic', and when shooting in log you use a logarithmic rather than a linear tone curve. Not all cameras offer log modes – this is associated with higher end models and is a key selling point.
Log options can be found in your video settings menu and will usually be displayed as S-Log2/S-Log3/C-Log2 on Sony cameras, F-Log for Fujifilm and so on for other camera brands.
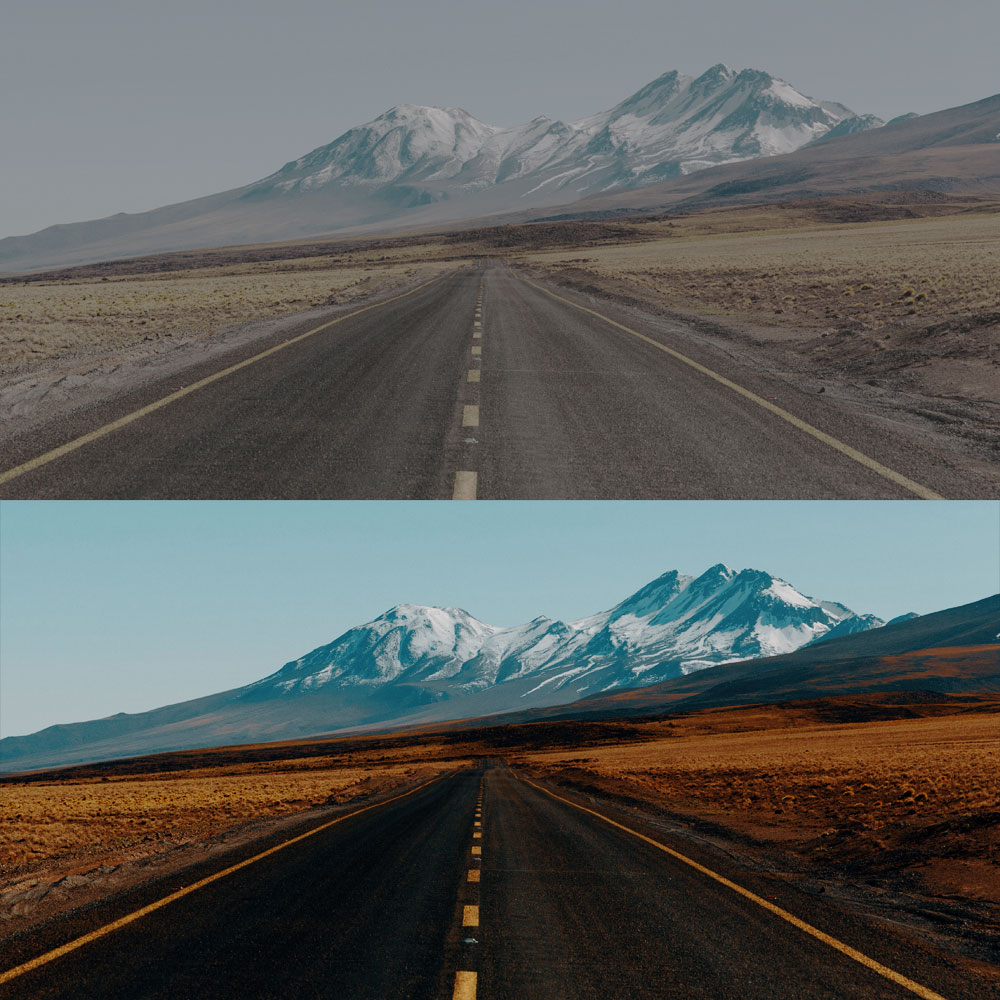
Log footage has extra processing 'headroom' for color grading, but will initially appear flatter and with contrast that when shooting in a “normal” color space known as Rec 709 (which is basically how we see). All log clips need to be edited in post to make the footage look finished.
• Read more: Best video editing software
The best camera deals, reviews, product advice, and unmissable photography news, direct to your inbox!
When to shoot in log
The purpose of shooting log footage is to capture a full range of highlights, shadows and whites so that you get the widest possible dynamic range. When shooting in log, colors look less saturated, so it’s necessary to 'color grade' in post-production to get the colors back. Videographers still choose to shot in log so they can retain information in the shadows and highlights, as color can easily be replicated after.
What is a LUT?
If you choose to shoot in a Log profile, you'll want to apply a LUT (look up table) to your footage before you start color grading. You can do it without but if you're just starting out it'll make your life a whole lot easier. You can think of a LUT as an Instagram filter (for creative effects) or a correction profile for translating log footage into natural-looking colors. For example, a LUT can make your reds more orange, your greens bluer, or make the footage more vibrant.
Applying a LUT is the first step to achieving a cinematic color grade. Each camera will have its own recommended LUT to apply. LUTs can be downloaded from websites such as PHLearn, Lutify.me (subscription-based service) and Push Focus. Some LUTs will give a standard Rec 709 feel. This is a standard video color space that is to video what the sRGB color space is to stills photography. Some LUTs are designed to add more artistic look.
How to apply a LUT
How you actually apply the LUT to your video footage will be different depending on what video editing software you use, but the process is usually quite similar. After you've imported your clips, you'll typically open an effects browser which gives you hundreds of different effects you can apply from. Look for a color preset menu and within this, you can select the custom LUT effect and drag it on to your clip.
To add custom LUT to your clips, you'll need to import the actual LUT file into your video editing software – LUTs have a standard .cube file format. You can also import a file of multiple LUTs if you need to apply more than one to your footage.
Now that you've applied the LUT you can fiddle with things like intensity, contrast and saturation or make fine adjustments to the color grade using the color wheels for highlights, mid-tones and shadows. This is the stage in the editing process where it will really help if you've set your white balance in-camera so you don't have to spend ages matching up scenes that have different color temperatures and exposures.
Different types of LUT
You will come across different types of LUTs that all have their own uses, including a transformation LUT that converts footage from one color space to another, a viewing LUT which gives you an idea of how footage will appear in post and a 1D LUT which controls just one image parameter. A 3D but gives you the most artistic control as they can change the hue, saturation and luma (brightness) – these are the ones with the .cube extension.
Color grading your footage can completely transform now only how it looks but it can help emphasize emotions conveyed in the video. We see it in films all the time; often horror films will have a dark, moody look to them while rom-coms or lighthearted films have a much warmer glow to them. Don't be afraid to play around with setting before settling on something you're happy with. With these things, experimenting often is the best way to learn what works and achieve the look you want.
Read more:
• Best free video editing software
• Best laptops for video editing
• Best monitors for video editing
• Best on-camera monitors

Having studied Journalism and Public Relations at the University of the West of England Hannah developed a love for photography through a module on photojournalism. She specializes in Portrait, Fashion and lifestyle photography but has more recently branched out in the world of stylized product photography. Hannah spent three years working at Wex Photo Video as a Senior Sales Assistant, using her experience and knowledge of cameras to help people buy the equipment that is right for them. With eight years experience working with studio lighting, Hannah has run many successful workshops teaching people how to use different lighting setups.

