Social media has demonstrated that you can teach an old dog tricks. Here are 5 photo and video techniques I’ve learned
Get creative with your clips and stills using these social-media-inspired tips, tricks, and techniques
The best camera deals, reviews, product advice, and unmissable photography news, direct to your inbox!
You are now subscribed
Your newsletter sign-up was successful
Amongst the non-stop stream of social media photos and reels are some nuggets of gold to be panned for, especially when it comes to getting ideas for creative smartphone photo techniques!
Over the last few years I’ve been using iPhones to source tutorial footage for magazines such as MacFormat, and social media has been a great source of ideas and inspiration. Most of these techniques should work on other smartphone models (except the in-camera clone one, which relies on the way the iPhone stitches panoramic images together).
Here are five of my favorite social media-inspired iPhone photo (and video) techniques that are well worth a try.
Above: check out all these techniques in action.
1. Seeing Double
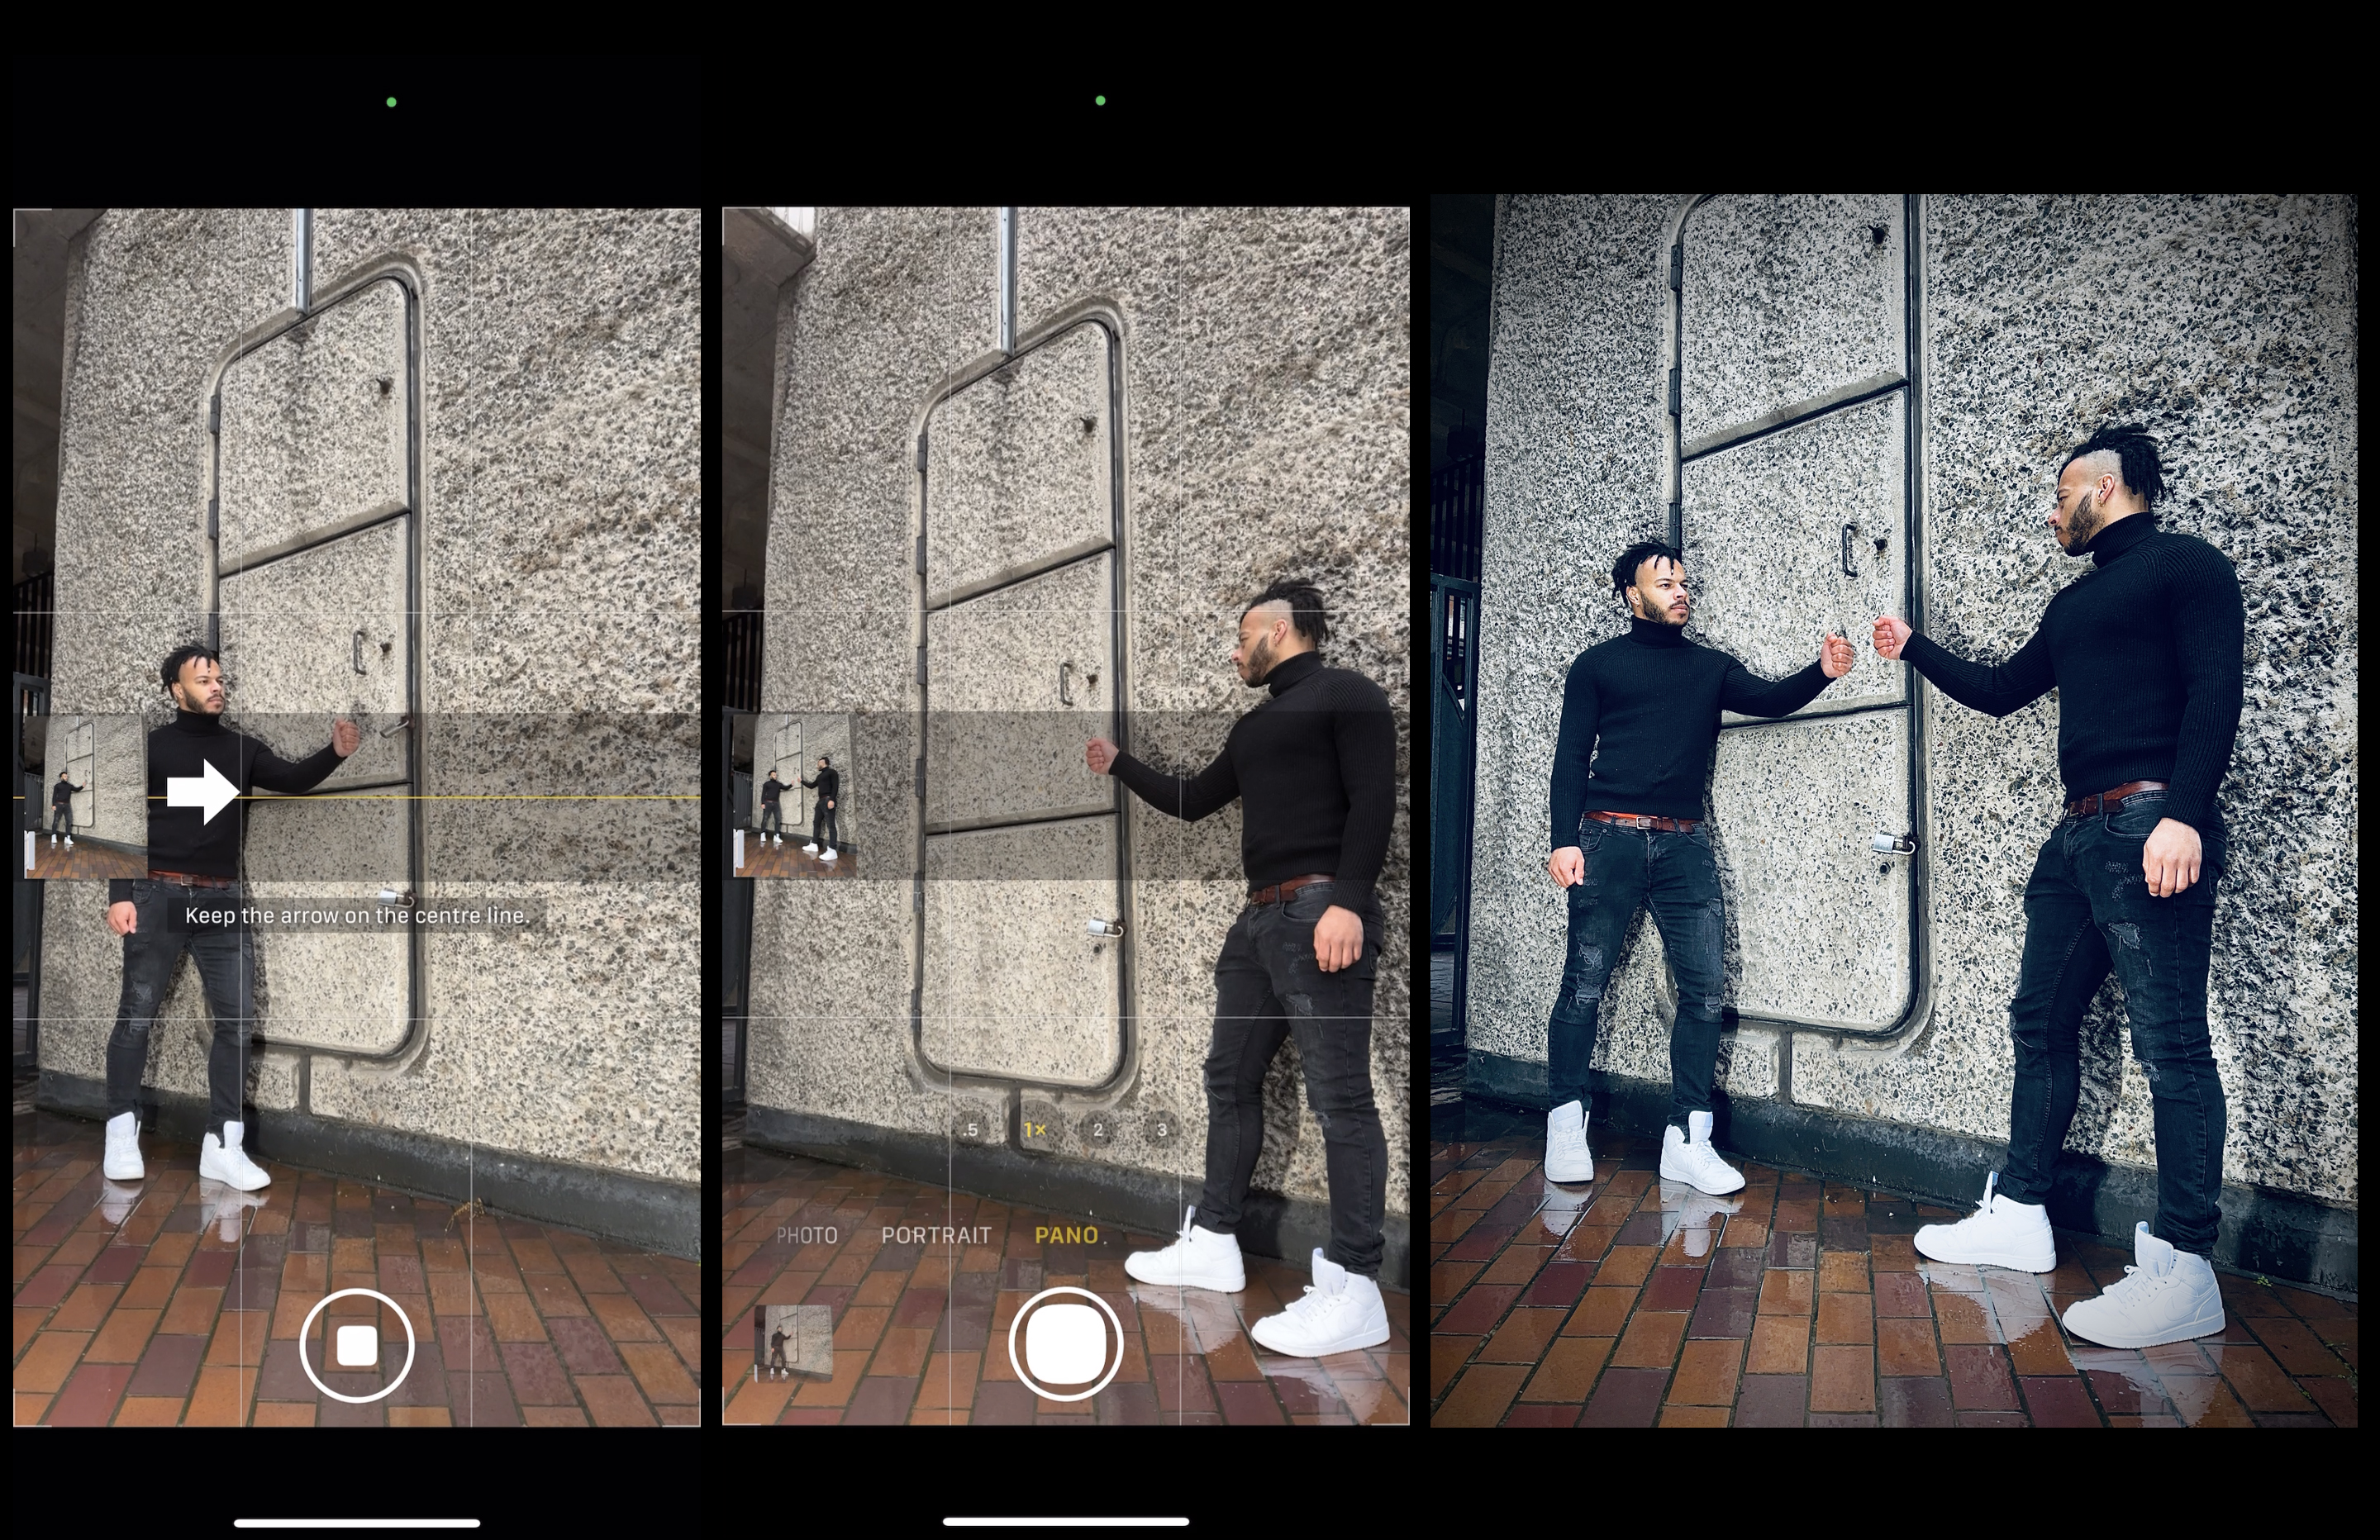
Like most iPhone users, I’ve enjoyed using the Camera app’s Pano mode to capture wide views of landscapes. Pano mode works by stitching the feed from the panning camera into a panoramic image. However, you can use this ‘stitching over time’ technology to produce surprisingly convincing trick shots such as turning one person into two! Here’s how to create your own digital doppelgänger entirely in-camera. We also cover the technique in our supporting video to help you get the timing right.
Set the Camera app to Pano mode. Tell your subject to stand at the left of the frame. Tap to start capturing a panoramic snap. After waiting a second or two tell your subject to stand in the right of the frame. Wait another second or so and tap to stop capturing the panoramic shot.
You don’t need to pan while you perform this panoramic capture. If you’re lucky with the timing the Camera app’s software will create a composite image that features the person on the left of the frame and then thanks to auto-stitching you’ll see them on the right too!
The best camera deals, reviews, product advice, and unmissable photography news, direct to your inbox!
This is a hit-and-miss technique. If the subject moves too soon or too late you may catch bits of their body (such as a foot) getting cut off by the automatically created masks used to stitch the camera feed together. A bit of practice helps, and of course a wide panning panorama gives plenty of chance to get it right.
2. Soup up your selfies
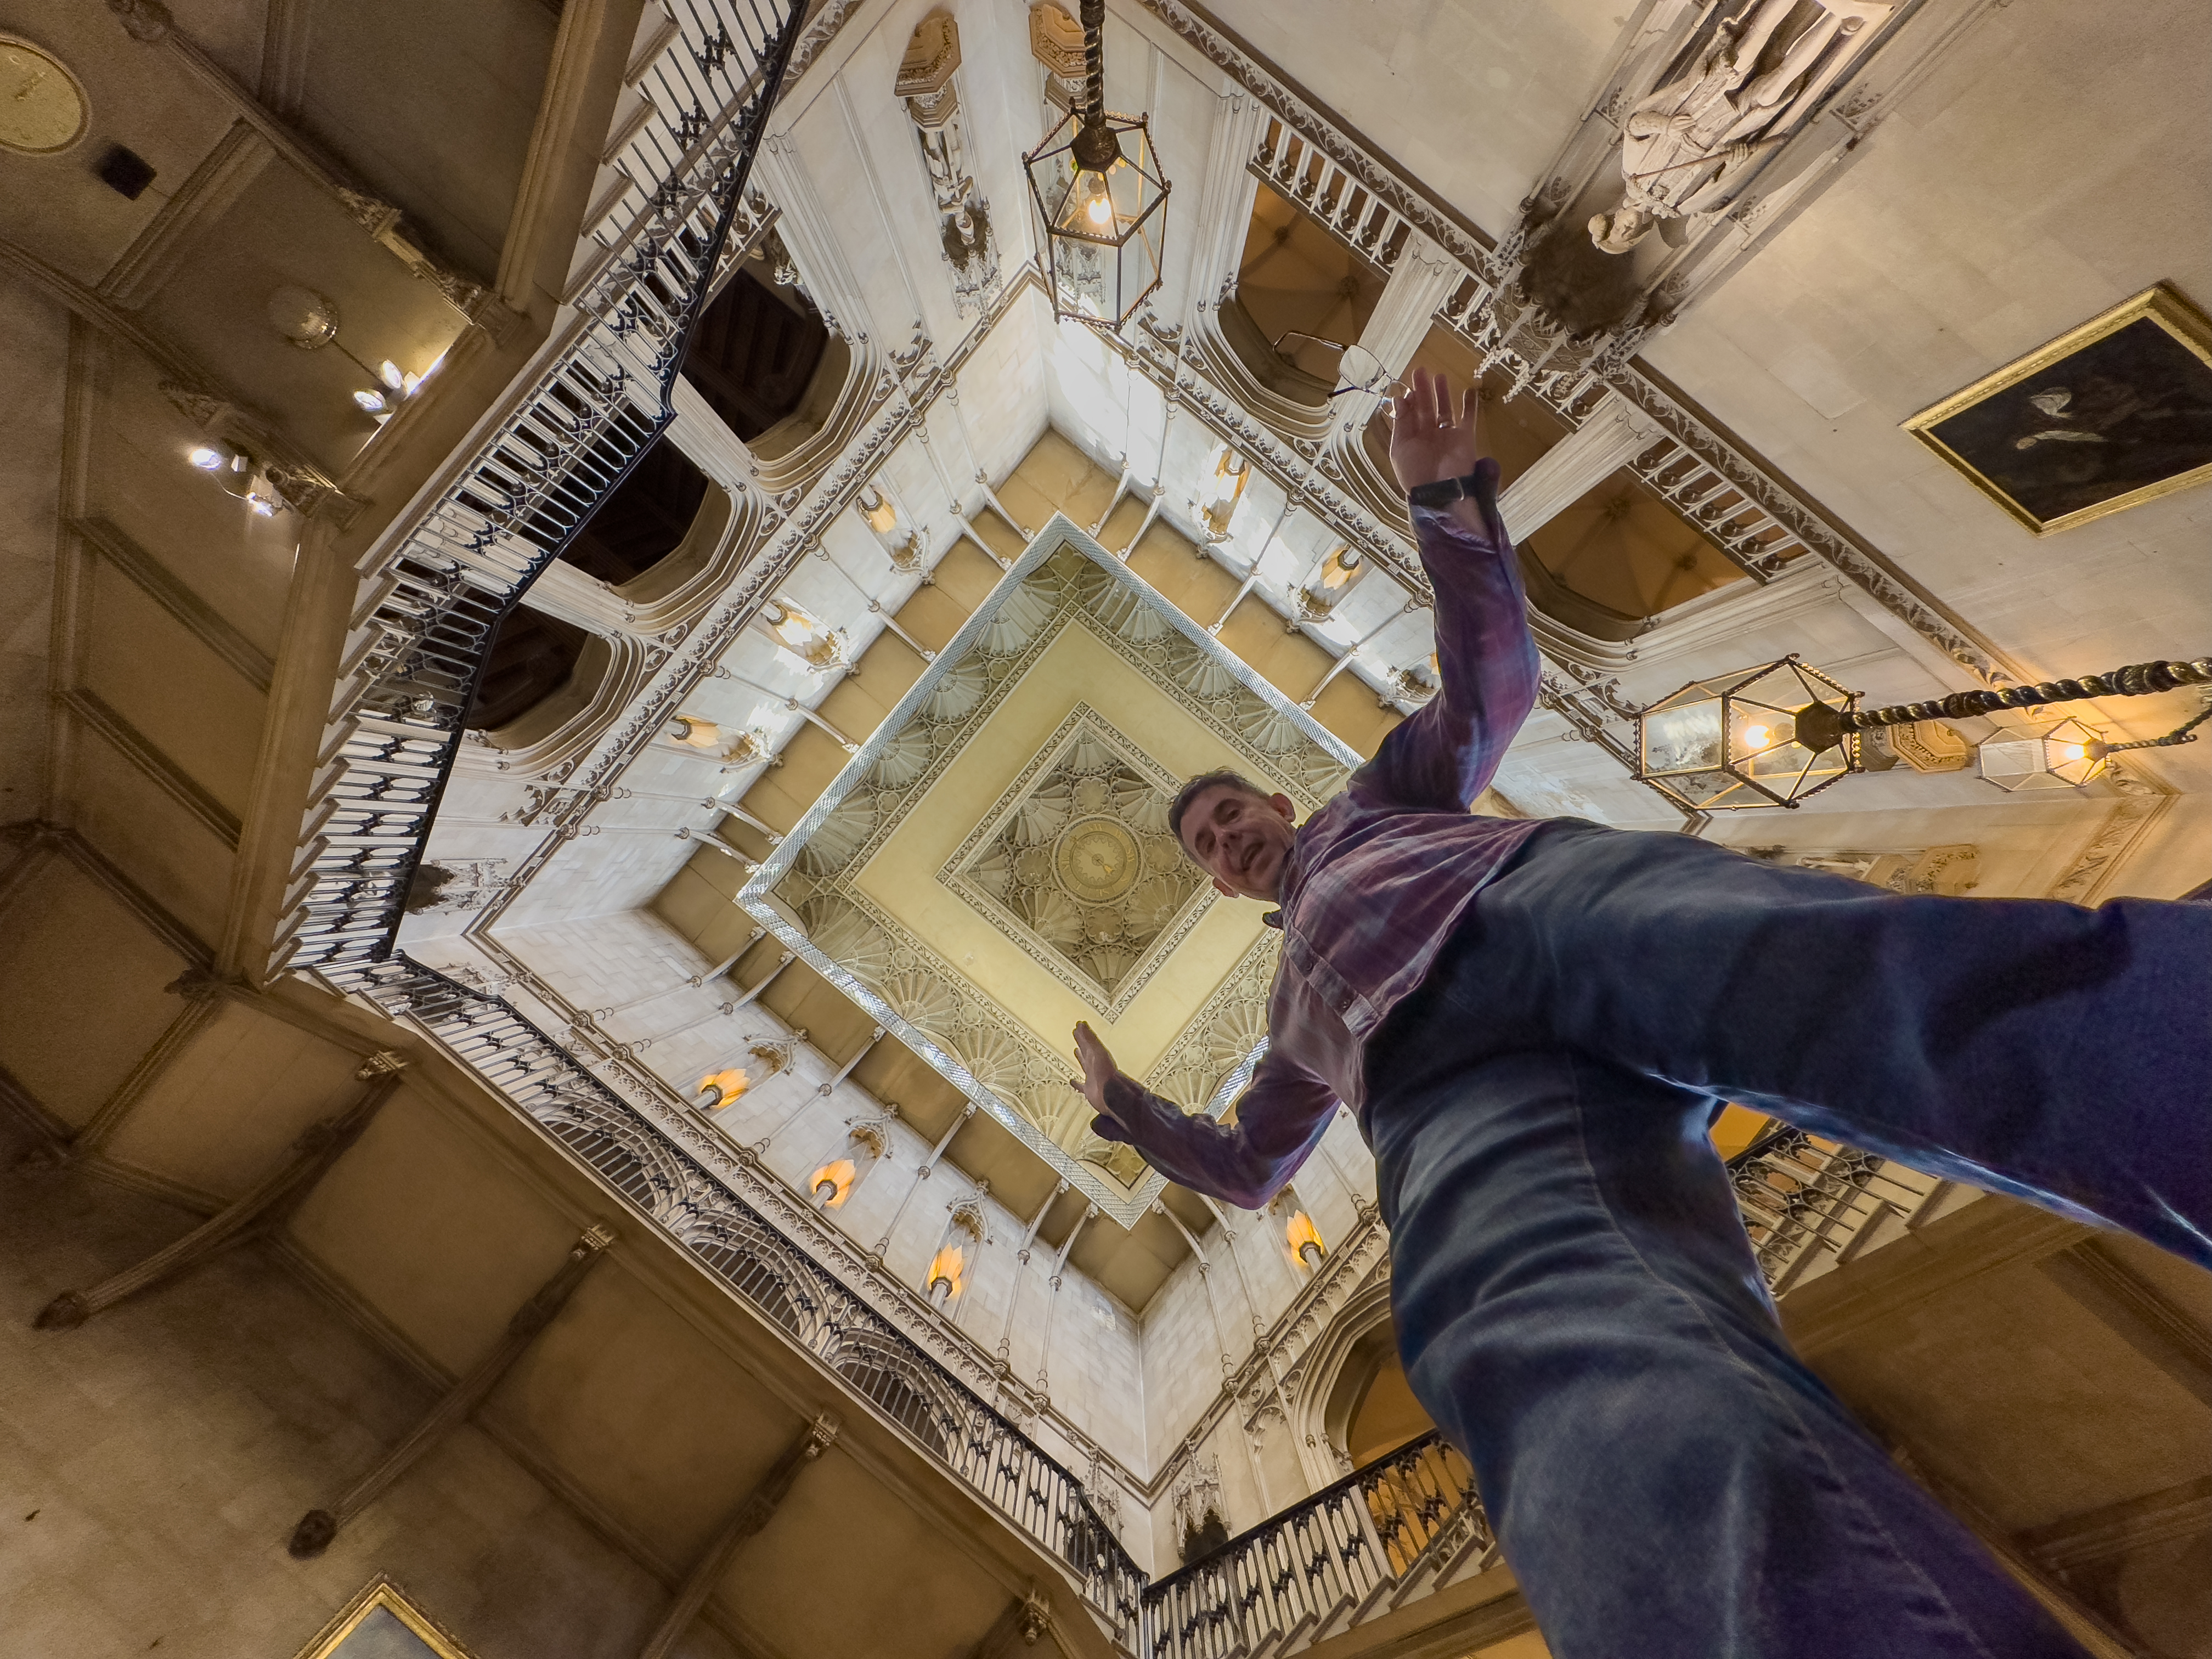
Thanks to its small size it is relatively easy to lean a smartphone against a wall or pop it on a window ledge, set the self-timer, and strike a selfie pose. Social media feeds are full of selfie-shooting tips such as going low and wide. The iPhone Pro range’s 0.5x Ultra Wide camera uses a 13mm focal length to capture strikingly wide views of your surroundings.
At low angles, it also elongates the human form which is a great way of making a shortish person like me look satisfyingly tall! By popping the iPhone on its front so the back camera is pointing up vertically you can exaggerate the distortion properties of the Ultra Wide and create a strikingly surreal selfie.
3. Enlarge background objects
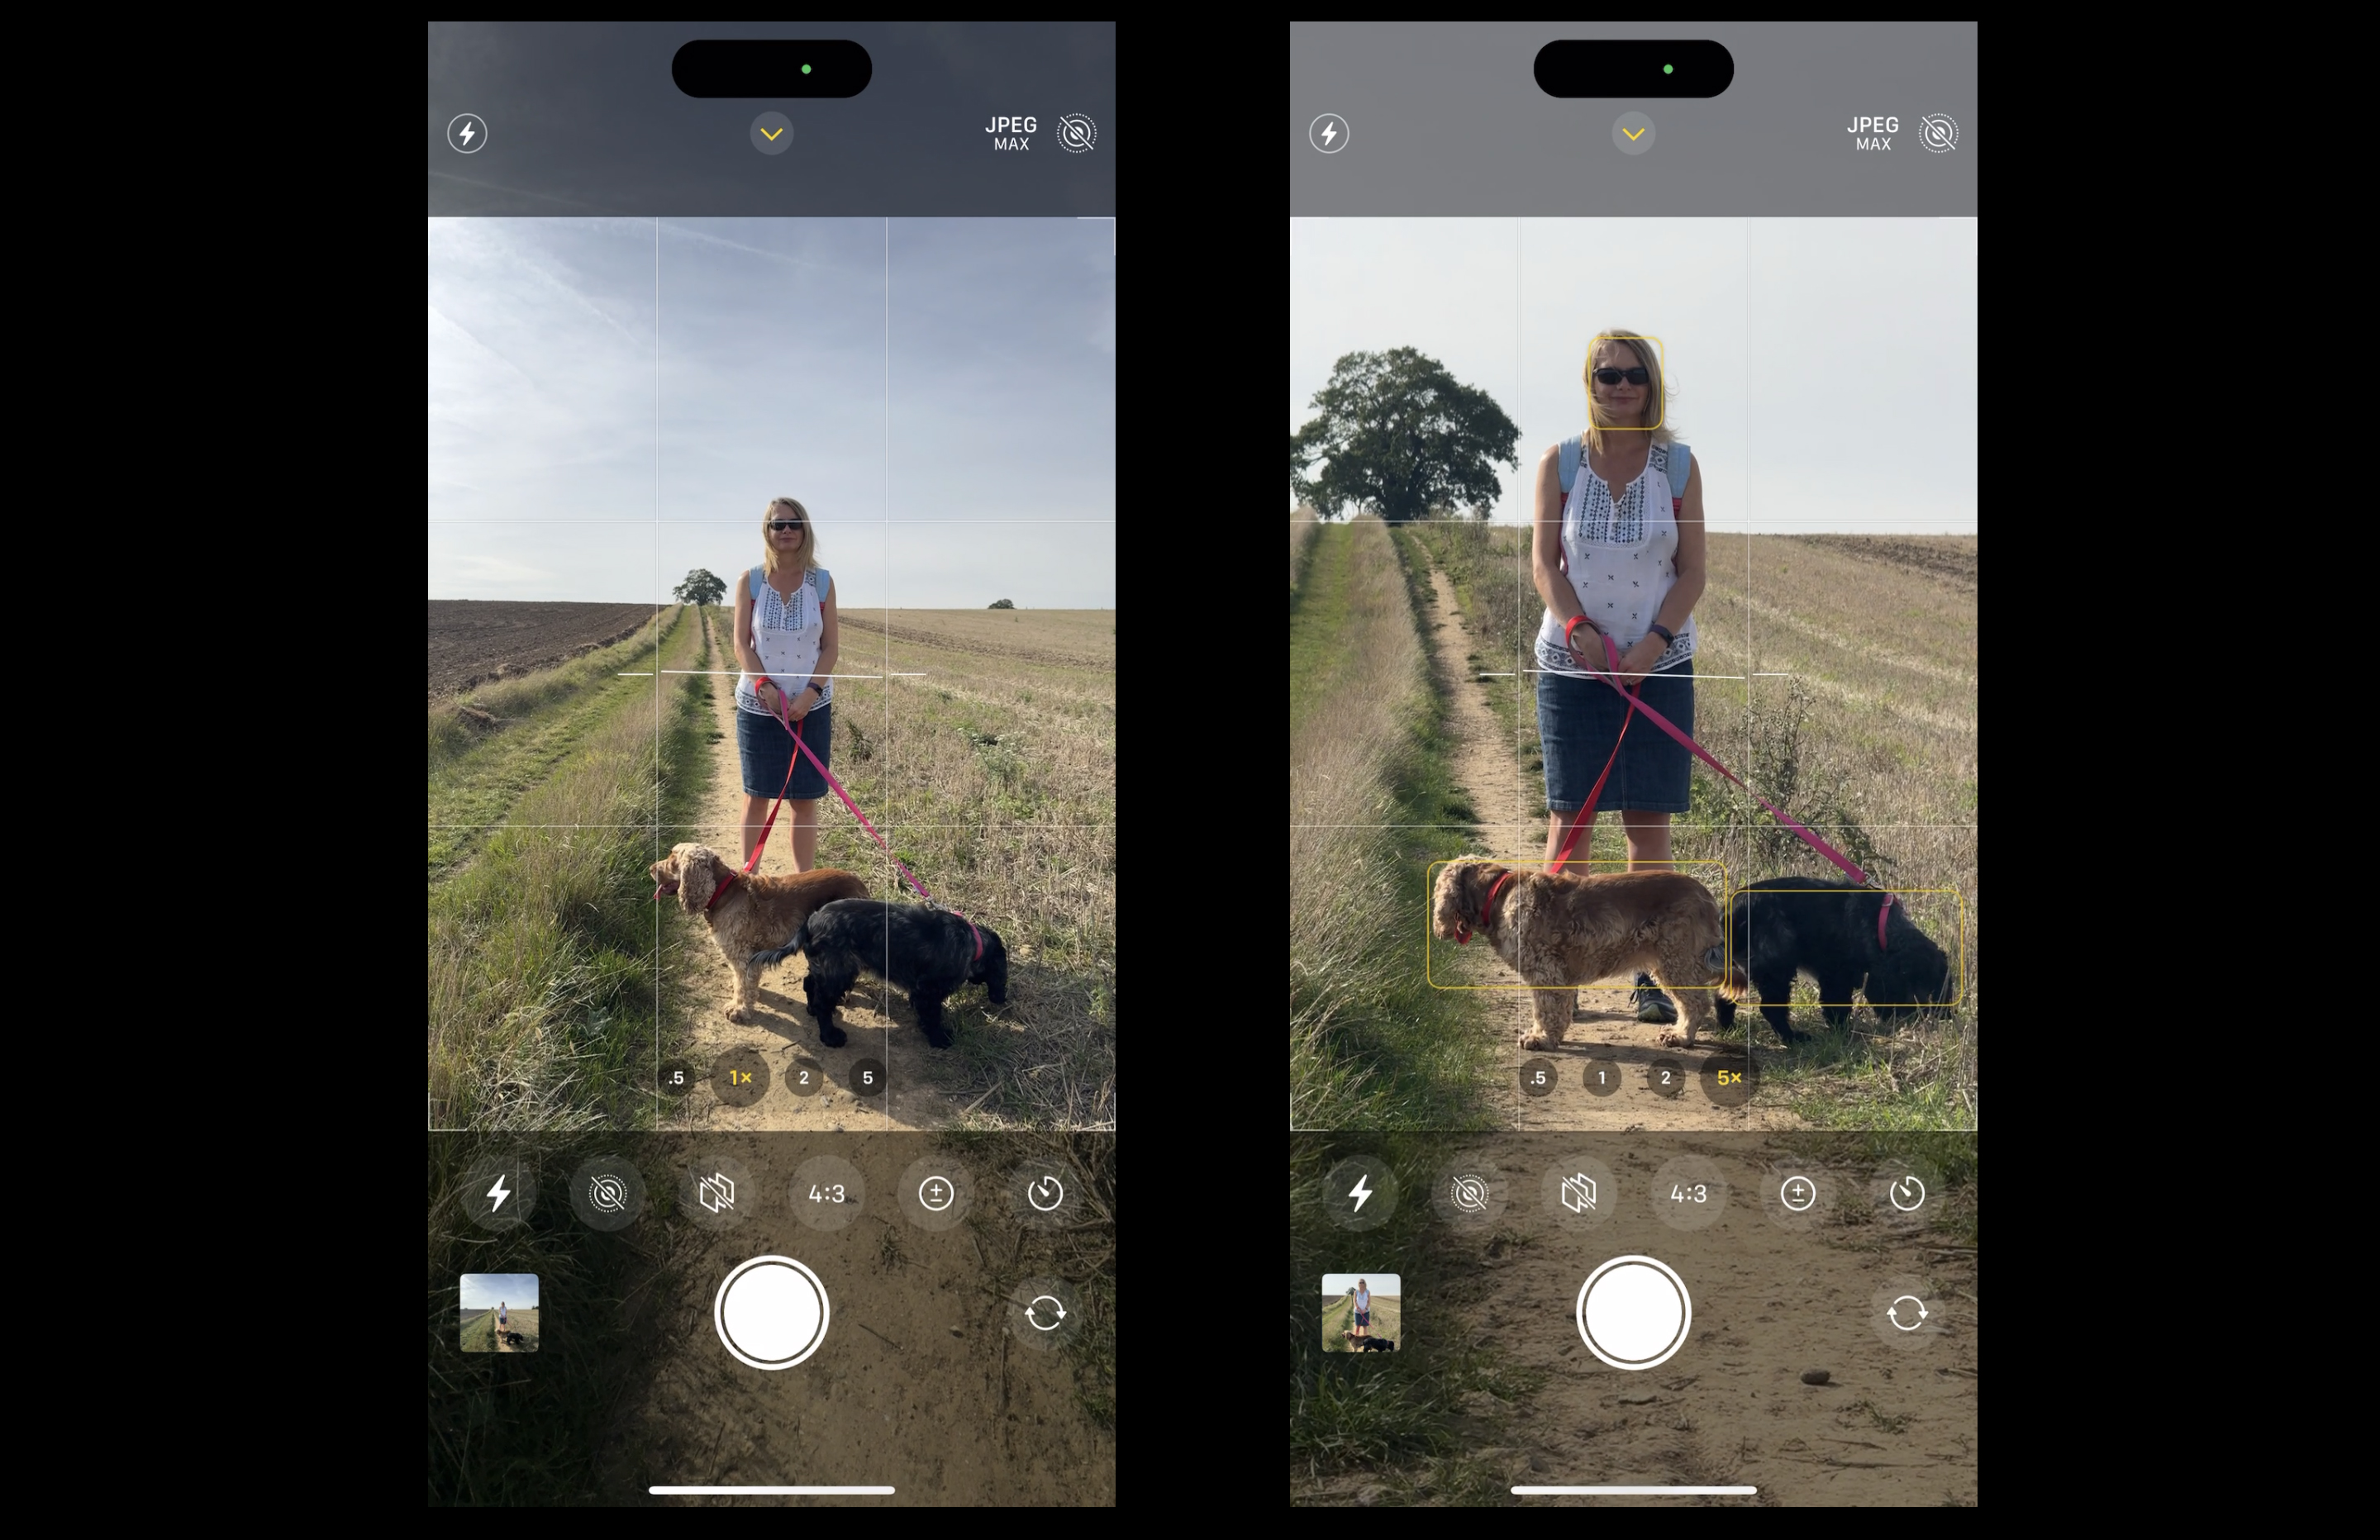
When you’re shooting a portrait set against a distant landmark (such as a tourist standing on London’s Southbank with Big Ben in the background), then the landmark can look too small compared with the foreground person. Here’s another social media trick I picked up to make a distant landmark look much larger and more impressive in the frame.
Compose your shot so that the person and background landmarks are visible in the frame. For our example, we used an iPhone 15 Pro Max which has a handy 5x (120mm) optical zoom. When snapping a shot with the main camera’s 1x (24mm) zoom our lady and dogs looked large enough in the frame but the distant tree was far too small. By stepping back 5 meters and using the iPhone Pro Max’s 5x (120mm) zoom I was able to compress the distance between the tree and the girl.
This made the distant landmark look far more prominent in the frame. Check out our supporting video to see how we captured our shot on location.
4. Hyperlapse
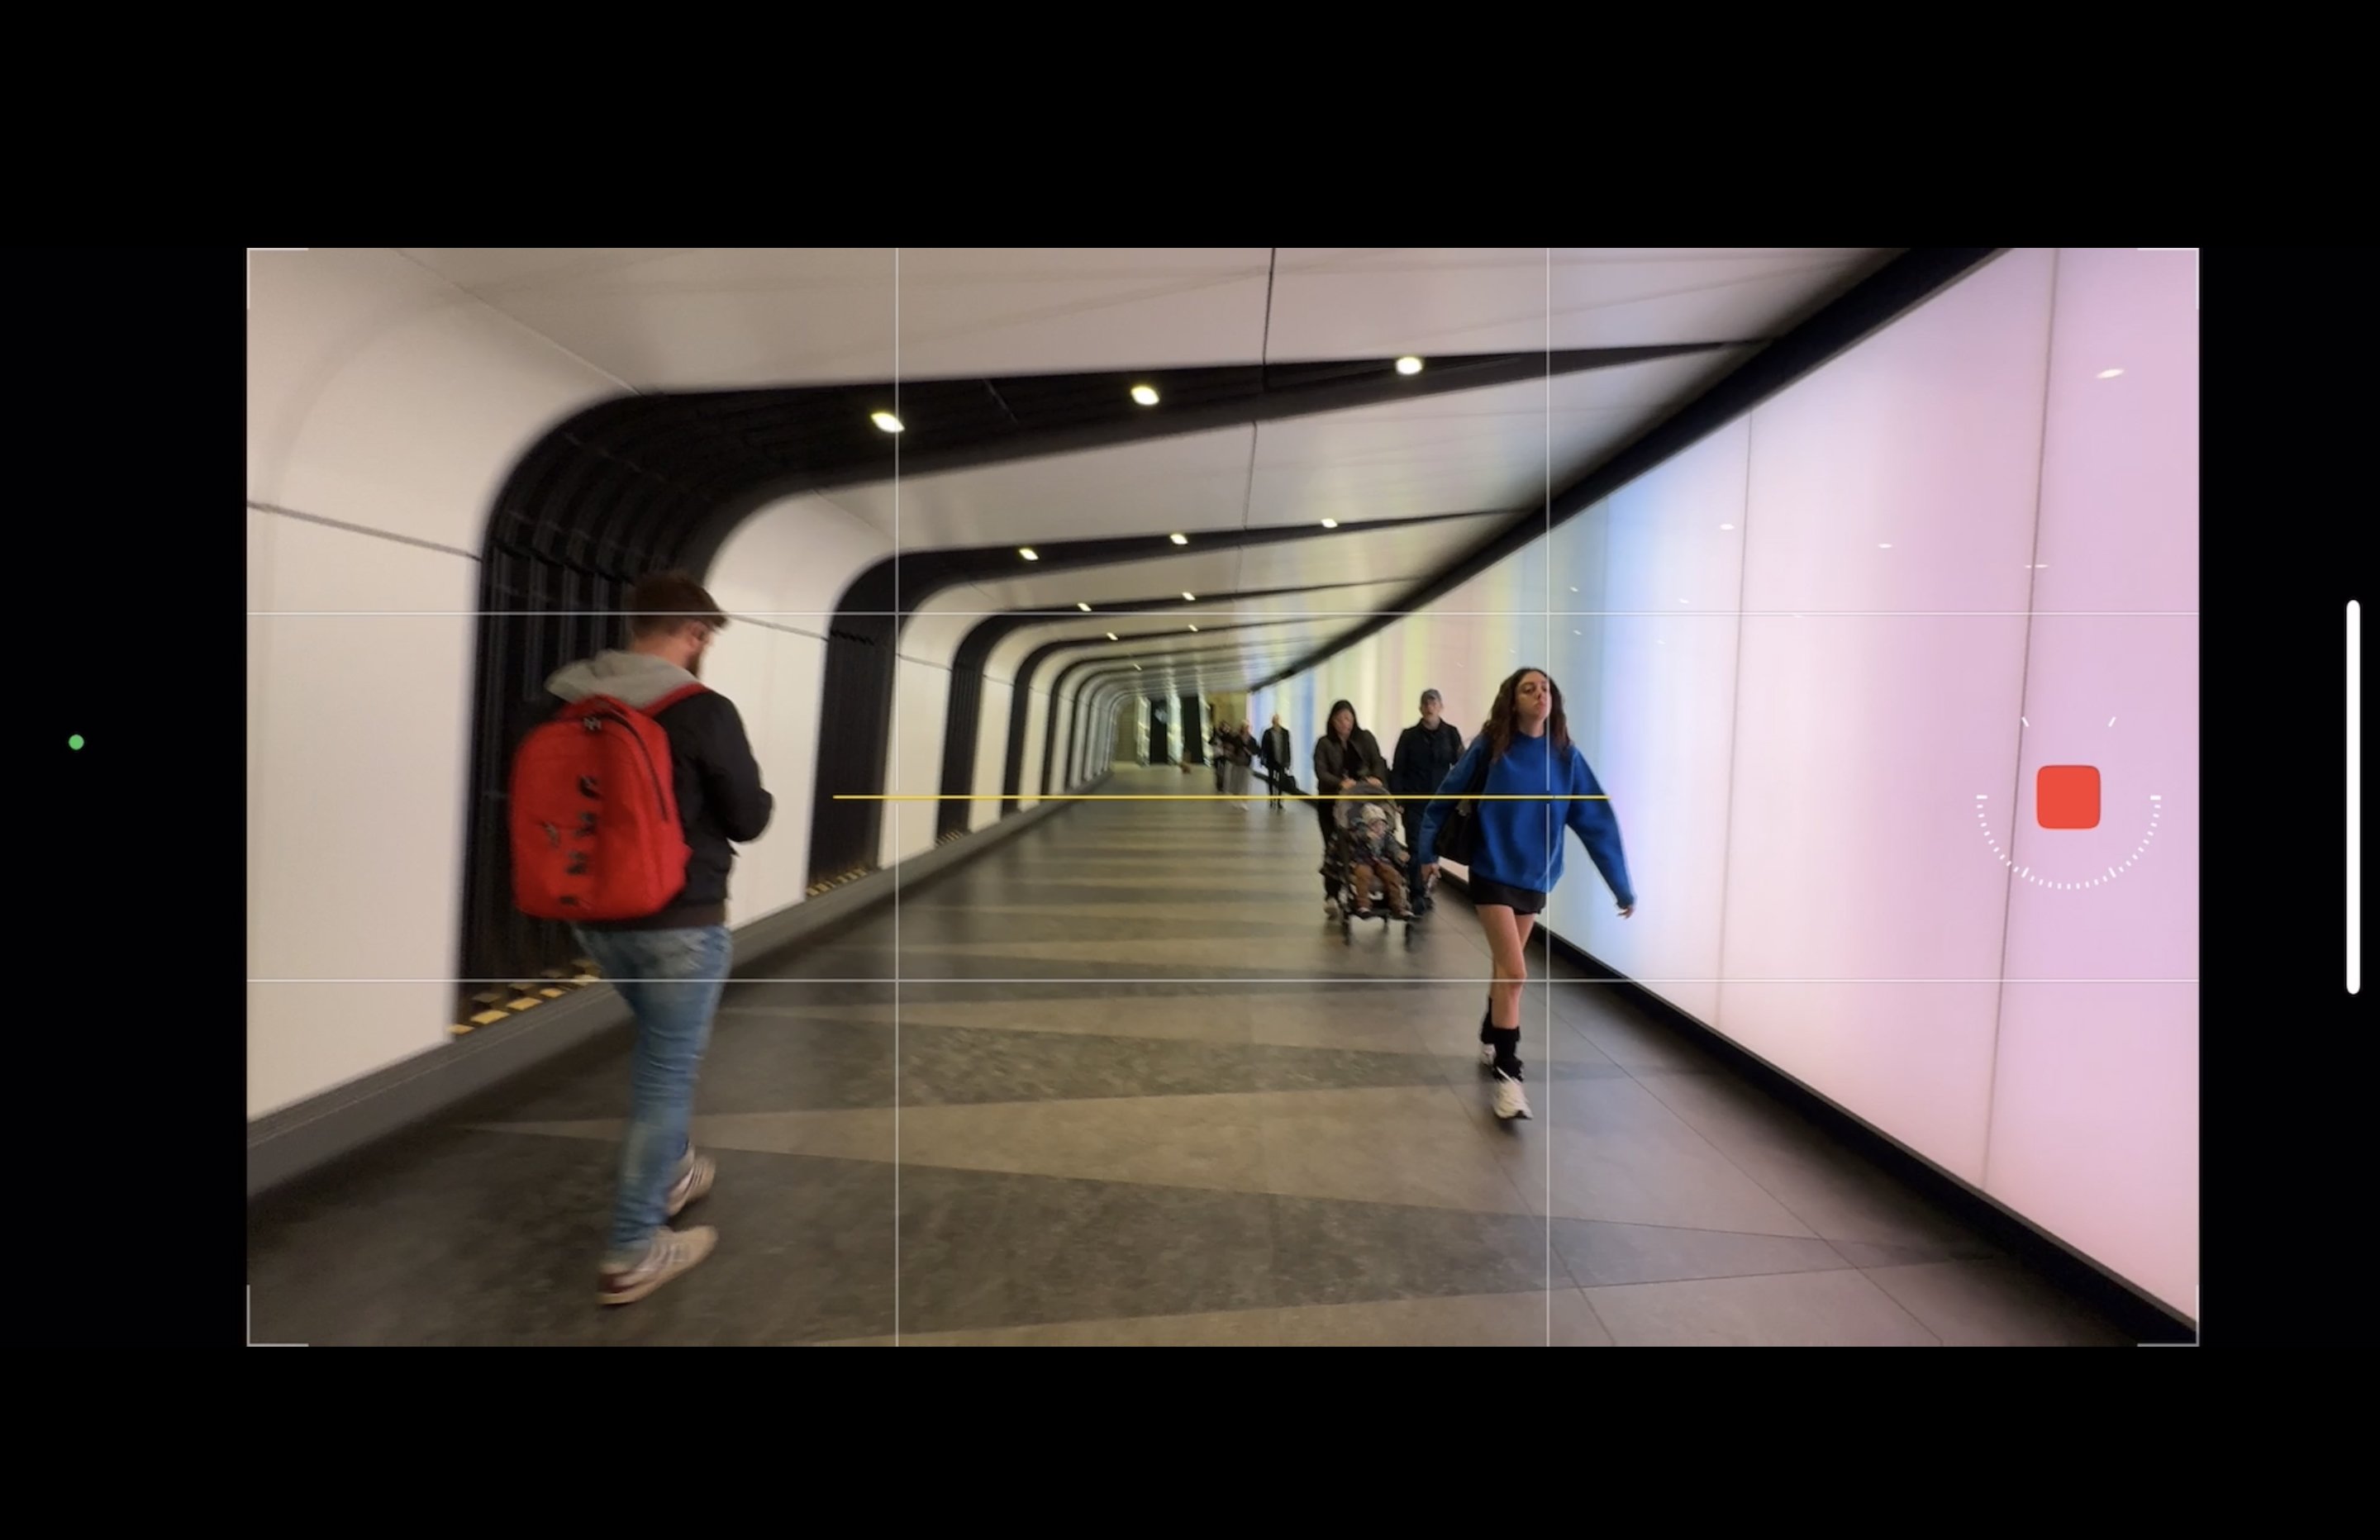
A time-lapse is a sequence of stills snapped at regular intervals, usually from a static tripod-mounted camera. When these stills are run together as a movie time speeds up dramatically, with clouds shooting across the sky as streams of pedestrians blur by. A hyperlapse involves moving the camera, snapping a shot, and then moving the camera again (over and over again). This creates a moving time-lapse sequence where we dolly towards a distant landmark as people whizz by at high speed.
Creating a time-lapse with a DSLR is a fiddly and time-consuming business (especially if you’re also moving a tripod and trying to adjust the tripod head to keep a distant subject in the same part of the frame).
Most smartphone cameras have a time-lapse mode that snaps a still at intervals (such as one picture every two seconds). Thanks to the iPhone 15 Pro Max’s sensor-shift stabilization (and software stabilization) we were able to capture a super smooth hyperlapse by simply setting the Camera app to Time-Lapse and walking along a tunnel. Check out our supporting video to see our hyperlapse sequence being recorded handheld and then replayed as a smooth hyperlapse sequence. No post-production stabilization was required. Check out our supporting video to see how we captured a hyperlapse.
5. Terrific transitions
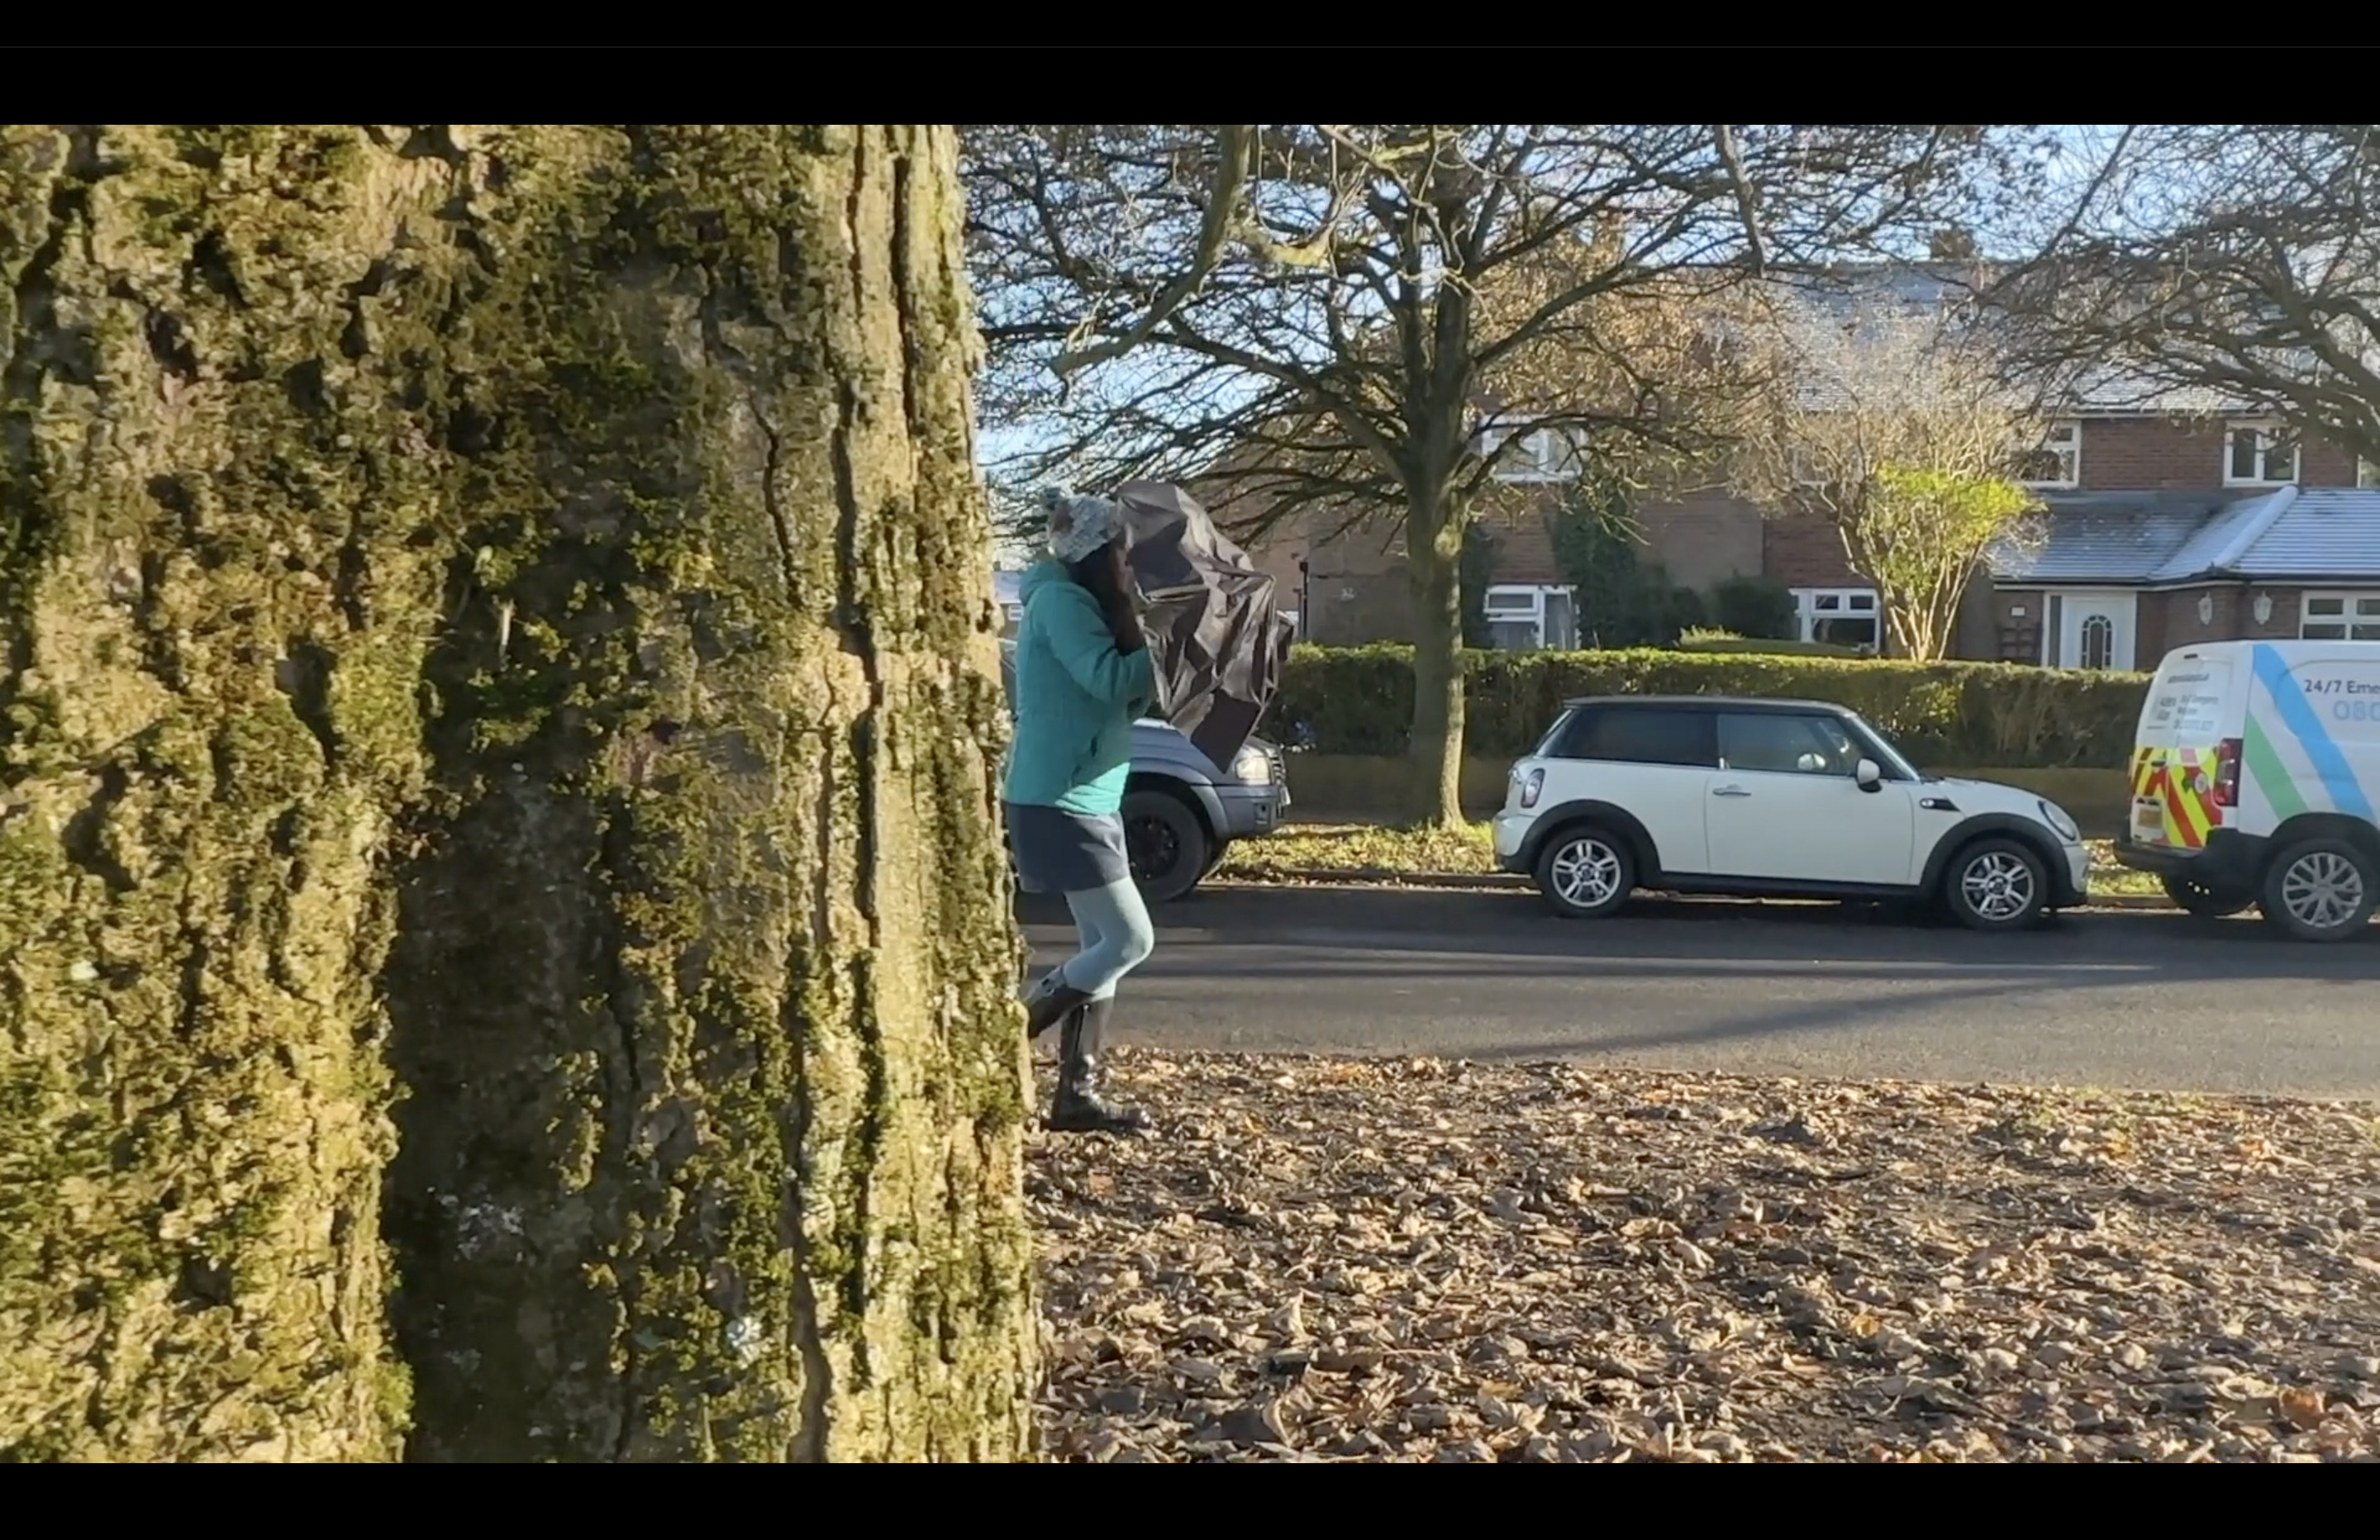
Most non-linear video editing apps are packed full of transitions that enable you to move from one clip to another using dissolves and wipes. There are many inspiring social media reels that show you how to mimic transitions such as wipes by combining creative camera moves with simple cuts. We shot a sequence of a woman out for an Autumnal walk – see our supporting video to see the edited sequence.
In shot 1 we filmed her walking towards the camera. We asked her to raise her umbrella to fill the frame with black. This created the effect of a wipe so we could cut to shot 2 where the umbrella is raised in a separate location. Here we filled the umbrella with leaves and then asked the woman to raise it so the leaves would fall.
We then cut to shot 3 where we popped a leaf over the iPhone’s lens and then dropped the iPhone while filming leaves falling from the umbrella in Slo-Mo mode. (We would have been less happy to drop a DSLR!) As the iPhone fell, the leaf slid away from the lens, creating another wipe effect.
We also tracked the woman walking until a tree filled the frame, enabling us to create a wipe effect to the next shot as another tree revealed the woman walking in a different location. Check out our supporting video to see our social-media-inspired Autumnal sequence, complete with creative camera transitions.
Check out the latest iPhone generations to find the best iPhone camera for your budget. Or if you want to see the best phones from all brands check out our top picks for the best camera phone.
George has been freelancing as a photo fixing and creative tutorial writer since 2002, working for award winning titles such as Digital Camera, PhotoPlus, N-Photo and Practical Photoshop. He's expert in communicating the ins and outs of Photoshop and Lightroom, as well as producing video production tutorials on Final Cut Pro and iMovie for magazines such as iCreate and Mac Format. He also produces regular and exclusive Photoshop CC tutorials for his YouTube channel.
