You HAVE to try this "star child" portrait effect in Affinity Photo
Make your portraits look out of this world, with this amazing Affinity Photo tutorial
Watch video: Create out-of-this-world portraits in Affinity Photo
There are plenty of websites out there that offer free downloadable images, but for sheer quality, nothing comes close to the NASA site. Start exploring the collections of high-resolution, incredibly detailed images of stars, planets, nebulae and more.
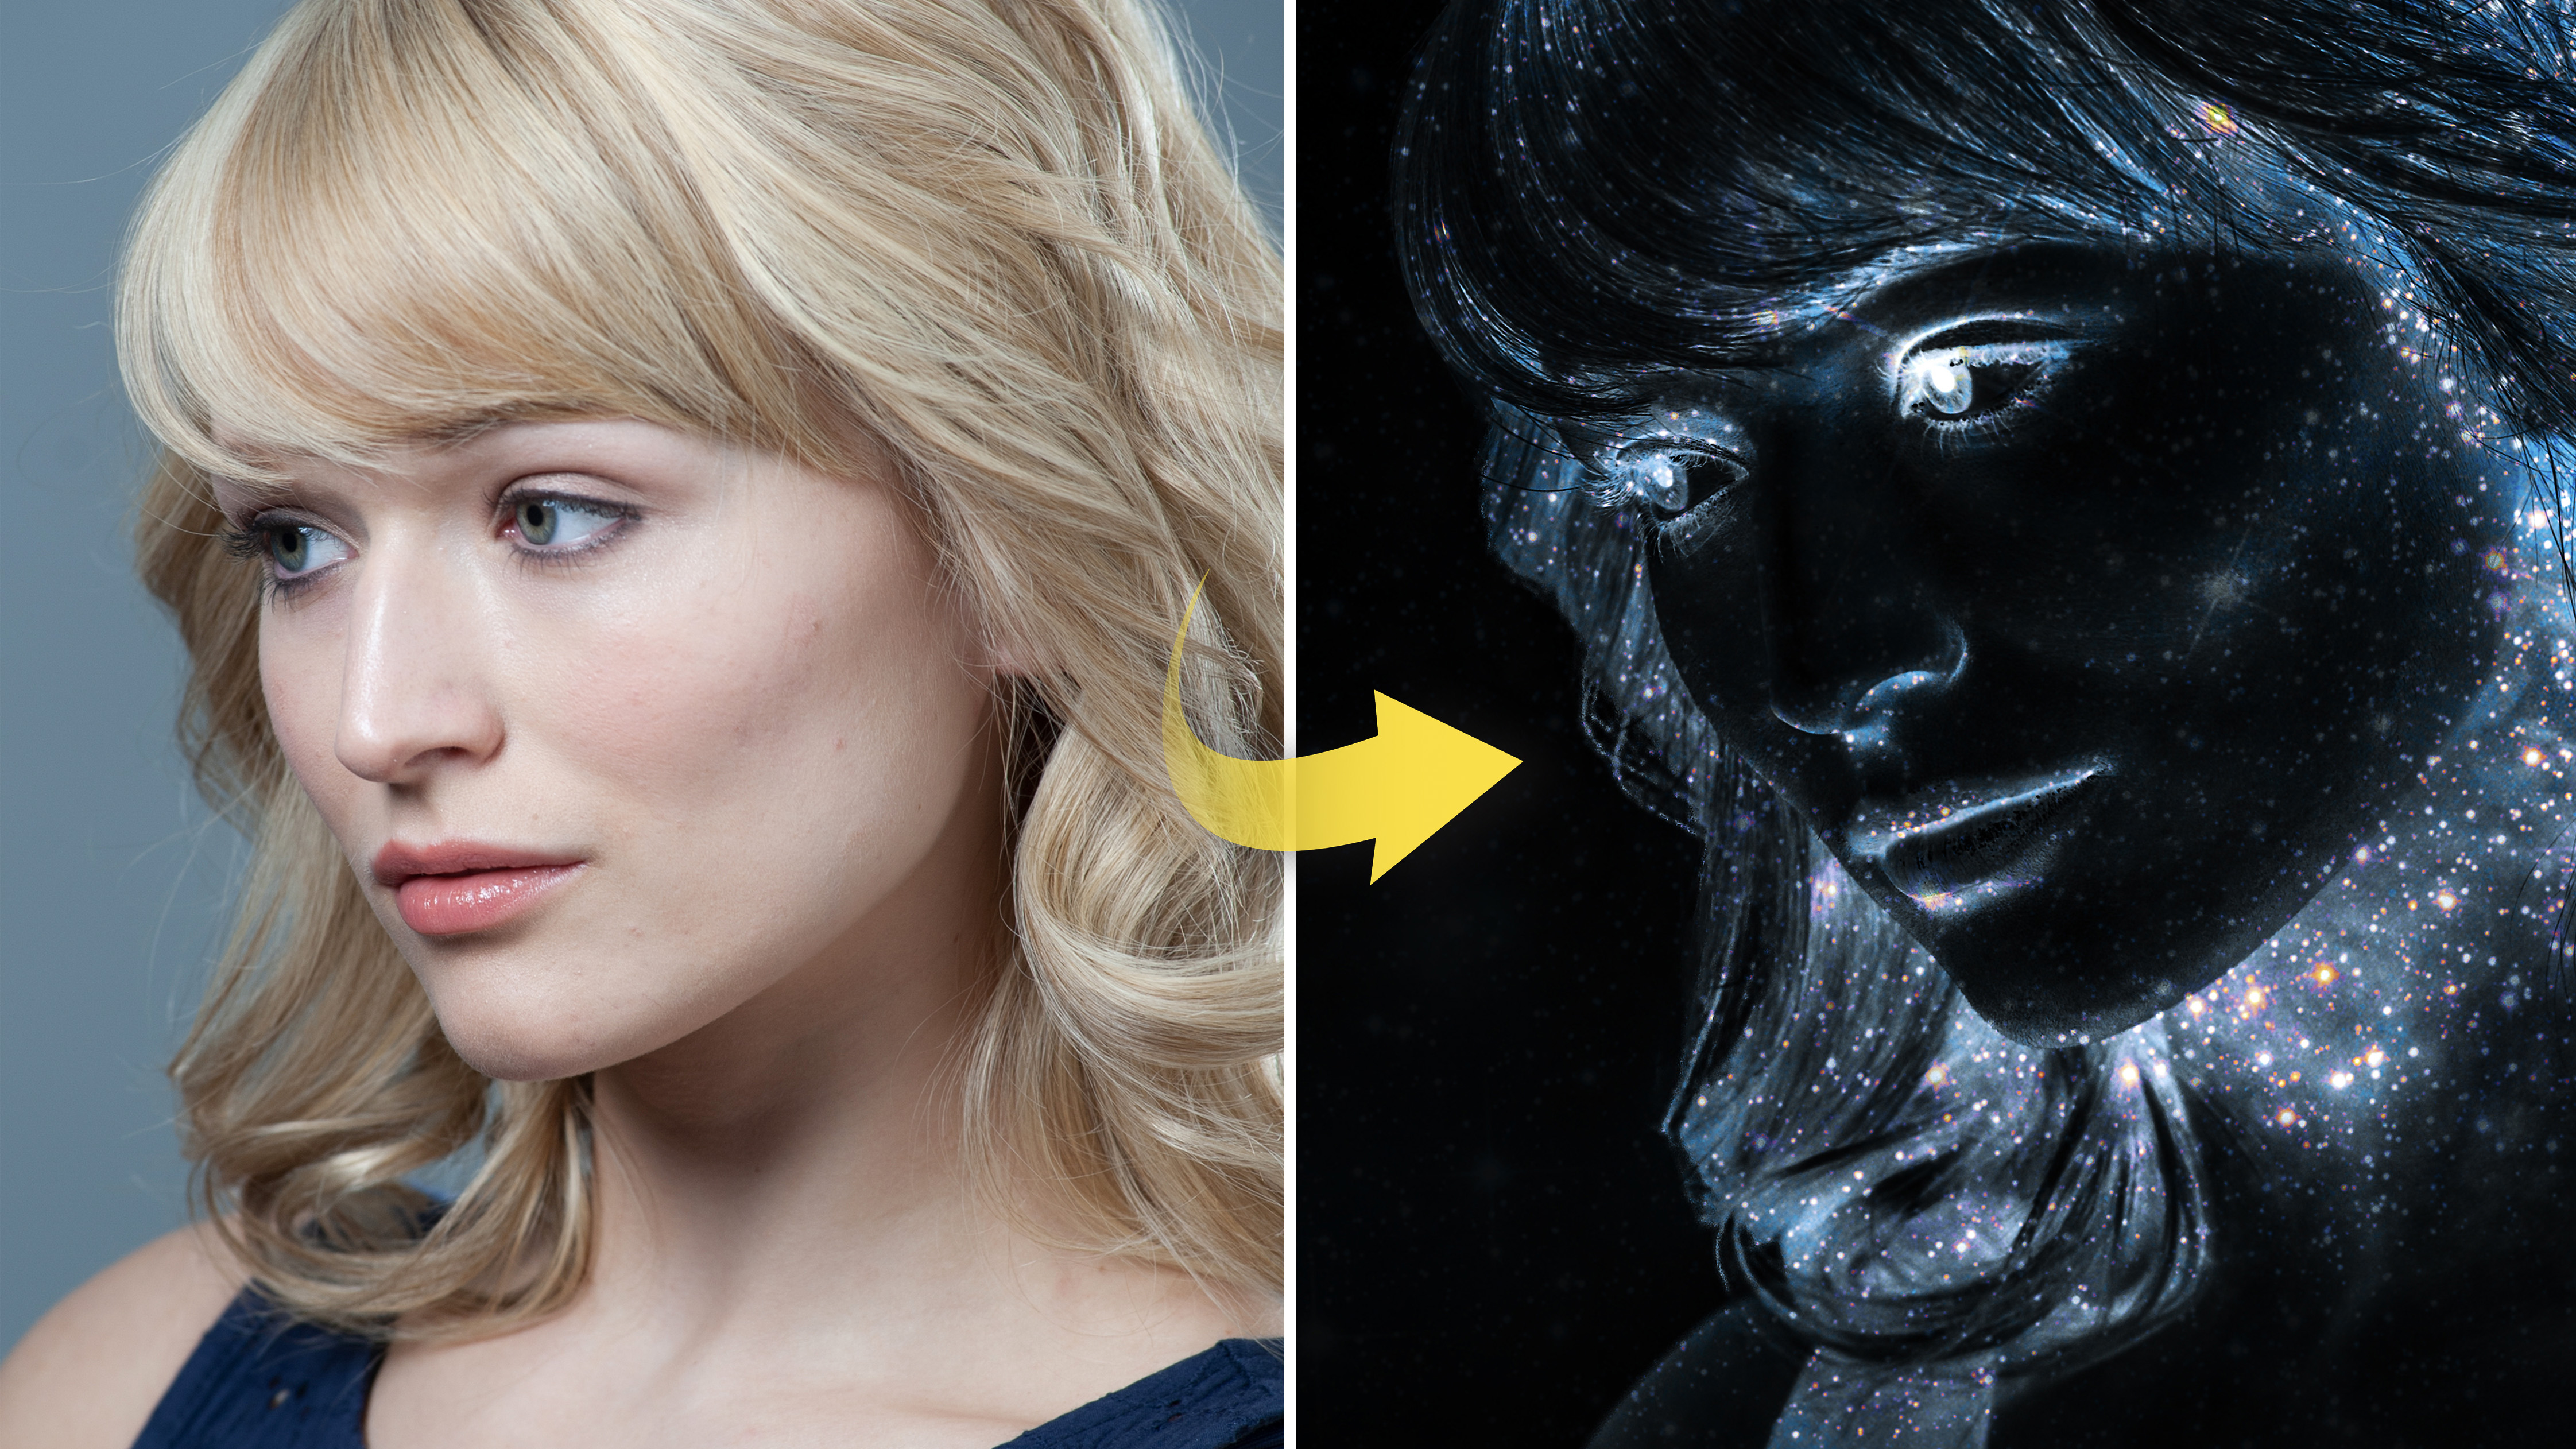
They’re visually stunning as they are, but if you like you can also make use of them for creative effects in software including Affinity Photo – such as our star-studded portrait treatment here. This involves a cunning combination of tonal tricks and blend modes, and it only takes a few minutes to bring together.
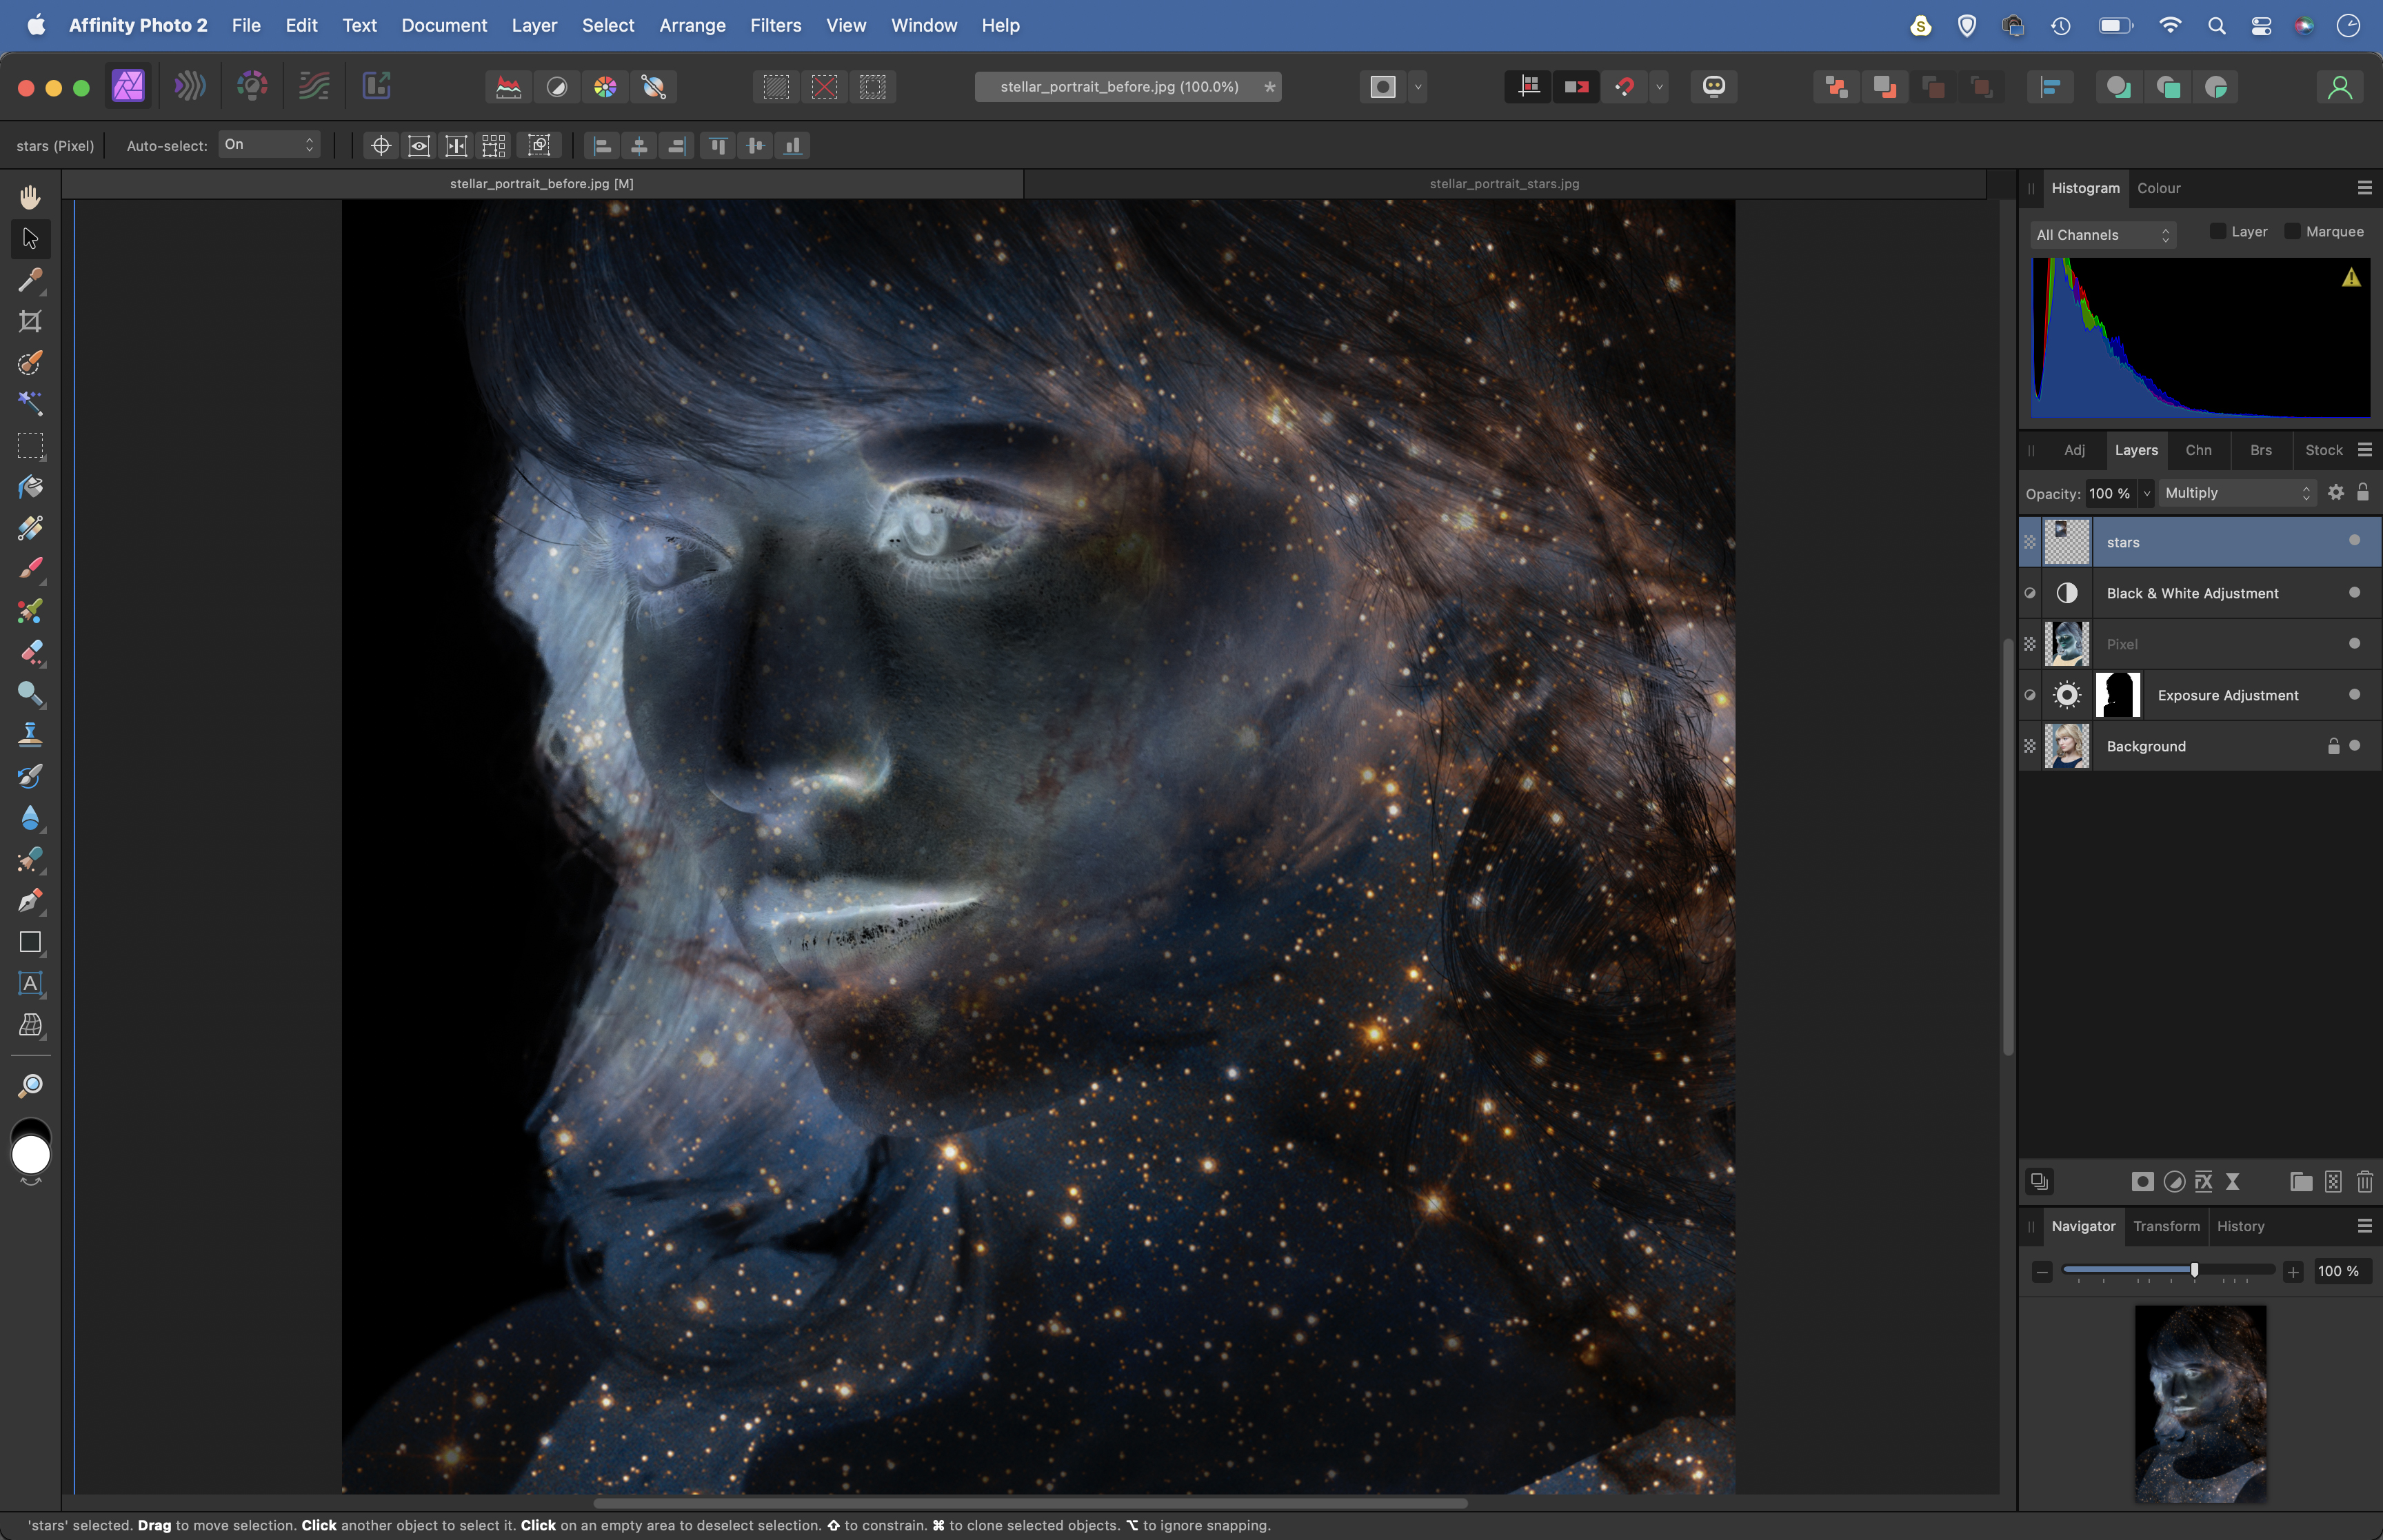
We begin by preparing our portrait starter image, then copy in a NASA star image and blend with the Multiply layer blending mode. This enables us to merge the bright stars with the brightest parts of our portrait for stellar results. Once done, we finish off by perfecting the tones and colors.
Along the way, we explore a host of fundamental layer skills in Affinity Photo. We’ve supplied a portrait with the free project files (which you can download here), but if you want to use your own then it’s best to frame the person against a perfectly white background. This way, when we invert the portrait, the background becomes fully black, so the stars are restricted to the details in the face.
Don’t worry if your portrait isn’t against white, though, as we’ll show you how to blow out the backdrop on any portrait to get you started. Here's how you can pull it off…
1. Select the background
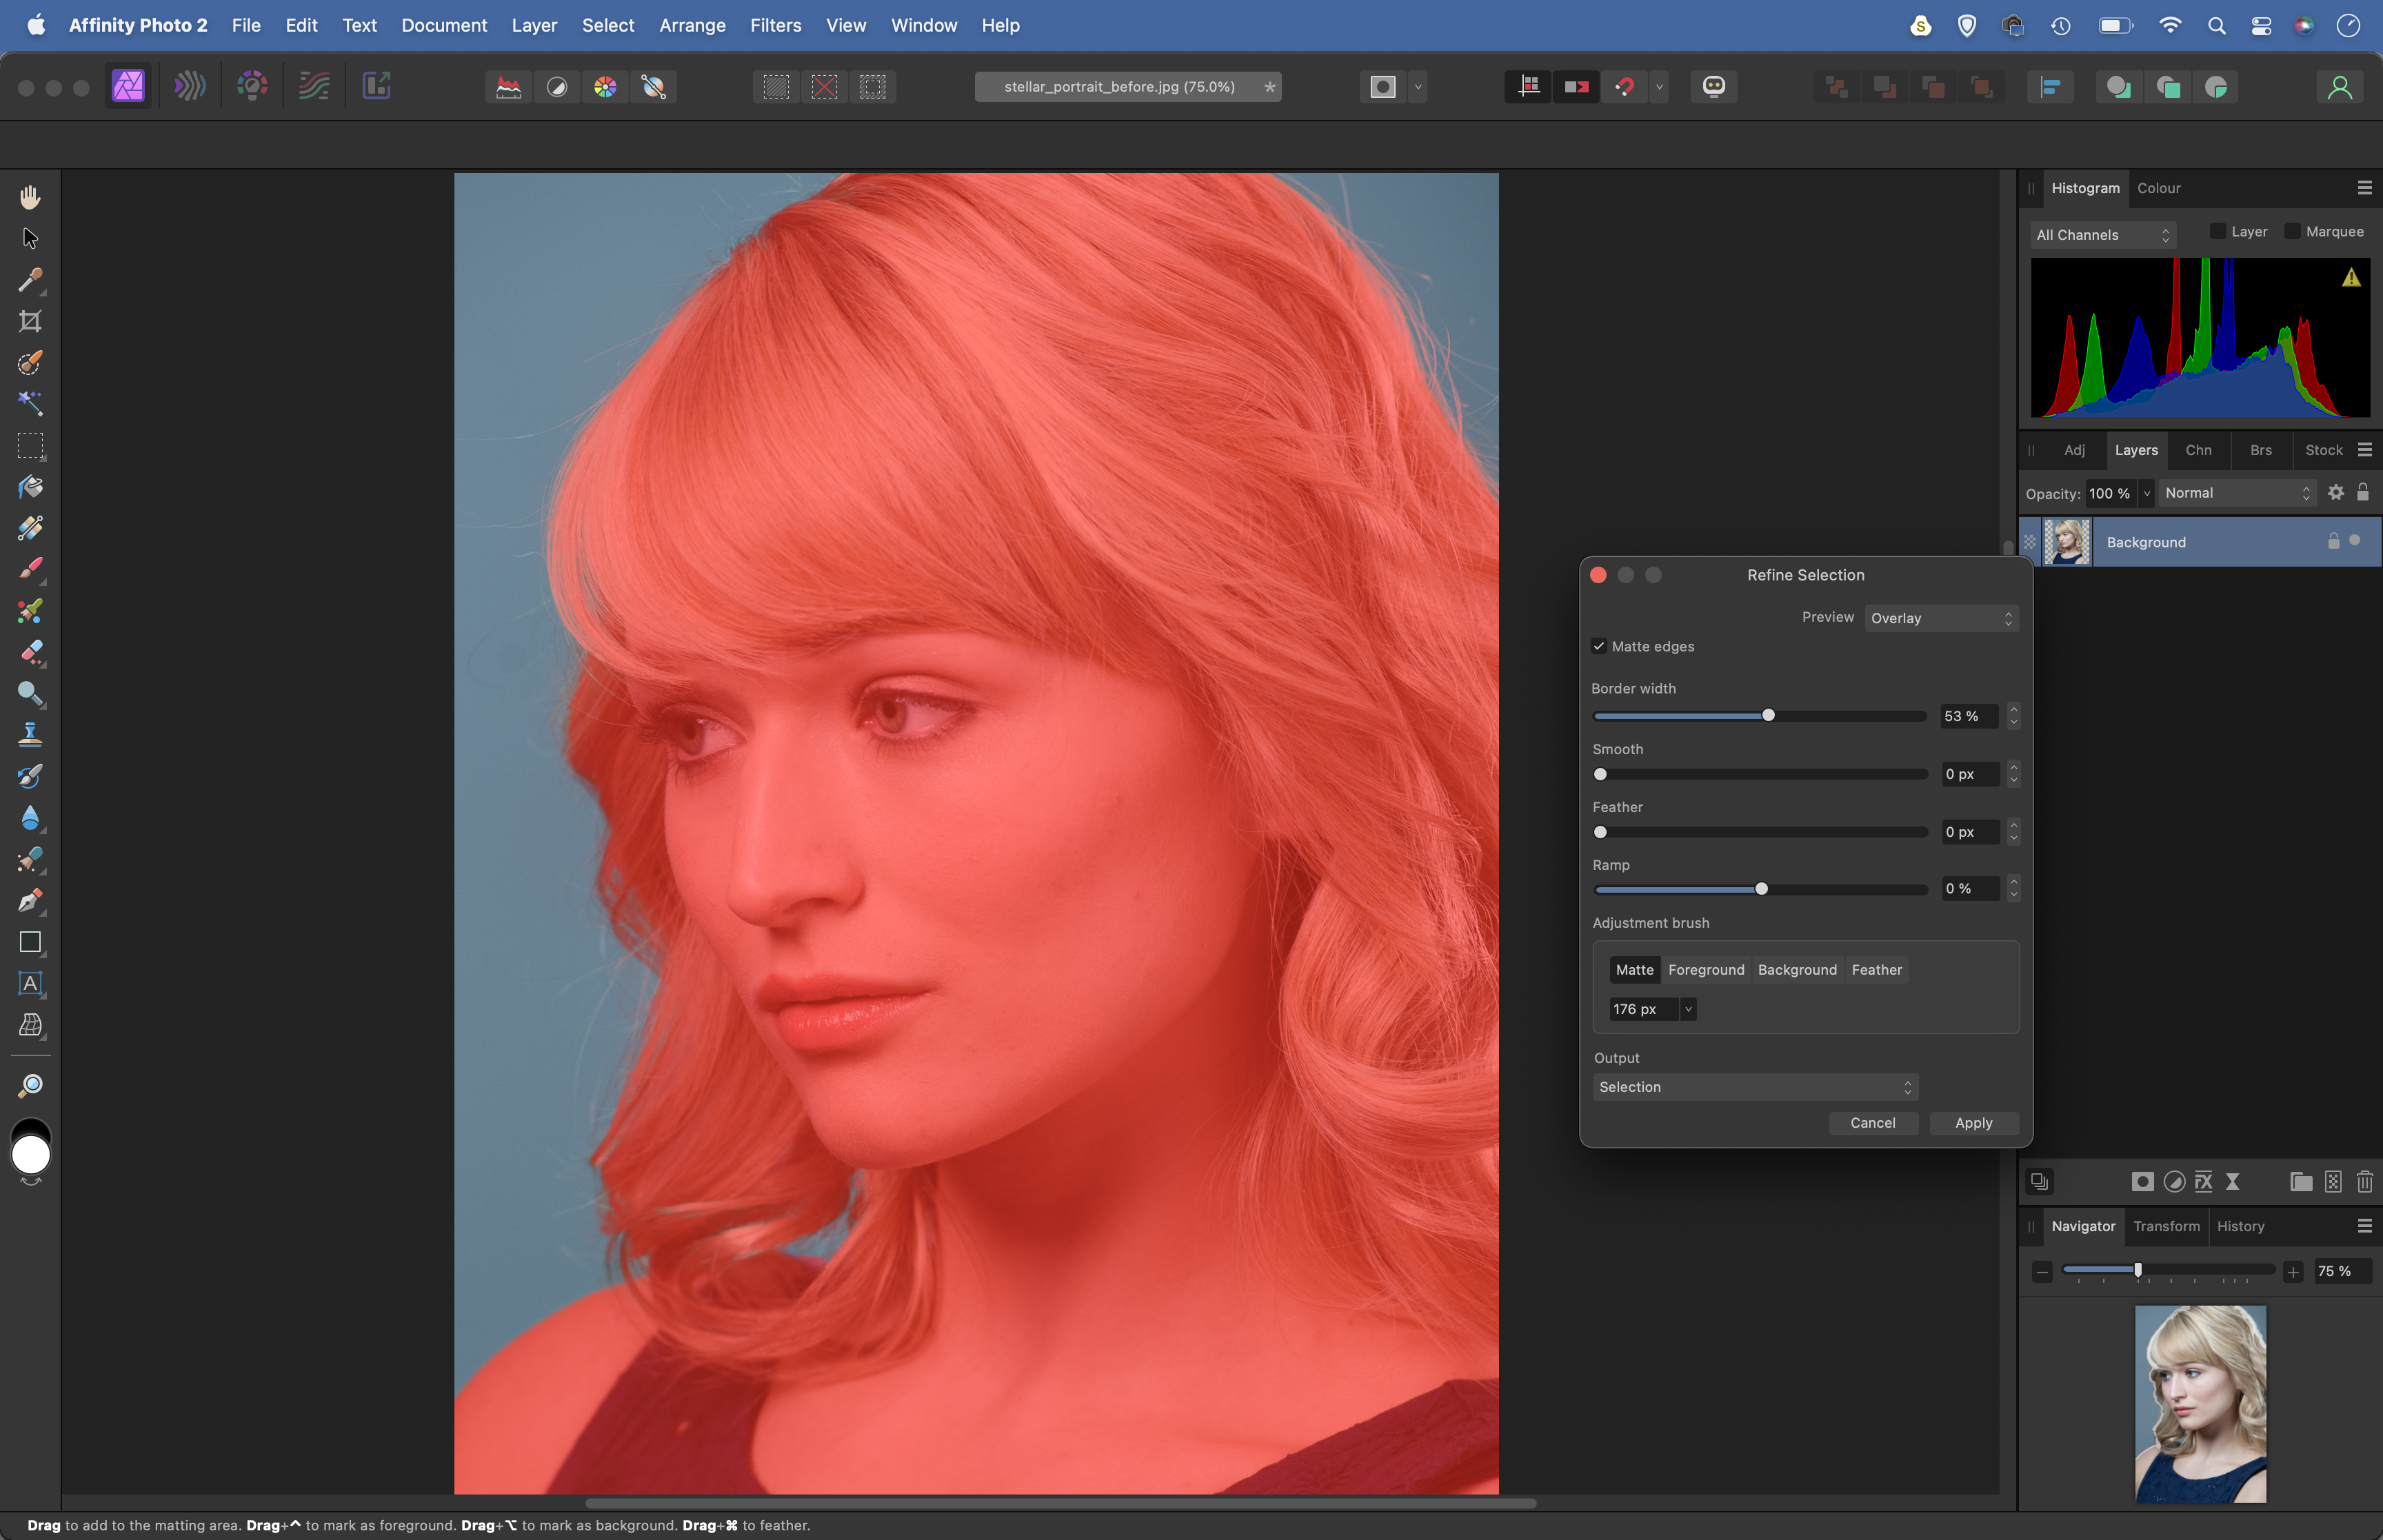
Open our or your portrait. Grab the Selection brush, check Snap To Edges in the options and then paint over the background to select it. If this goes wrong, you can hold Alt and paint to subtract. Once done, hit the Refine button at the top. Use the controls to improve the selection edge.
The best camera deals, reviews, product advice, and unmissable photography news, direct to your inbox!
2. Blow out the backdrop
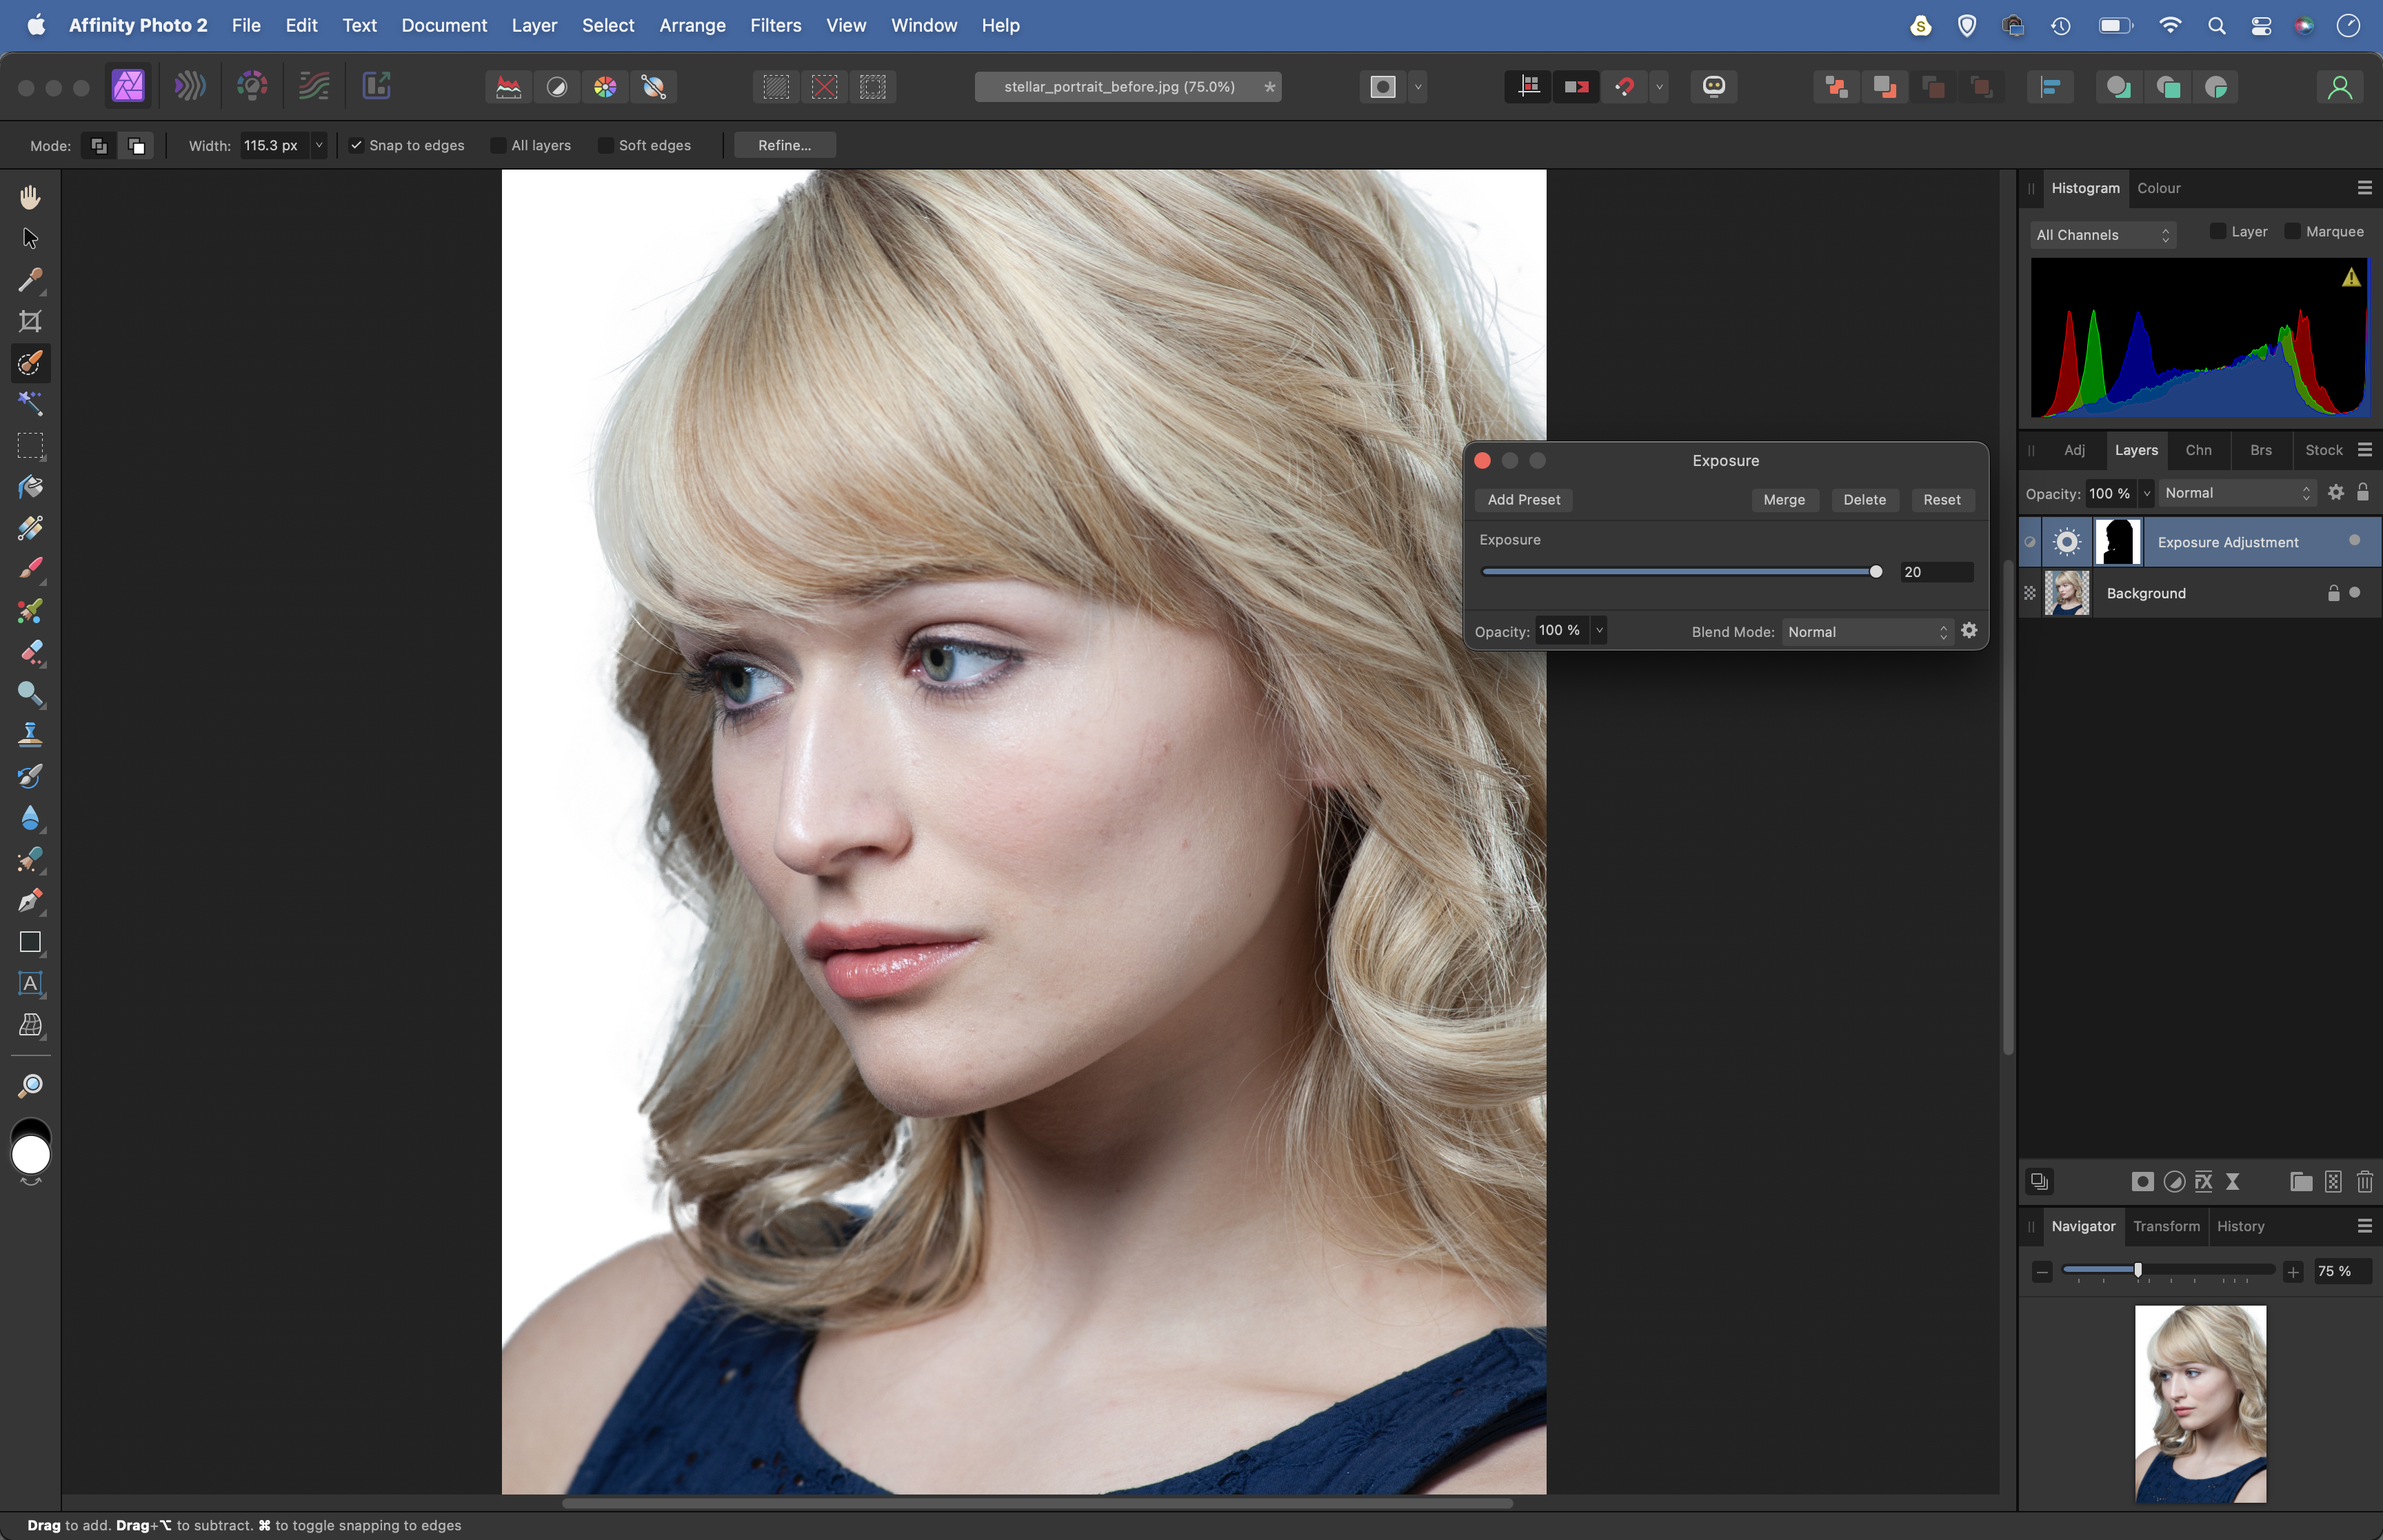
Increase Border Width, then paint with the Matte brush along the hair where it meets the background to expand the refinement. Once done, set output to Selection and hit OK. Click the Adjustment icon in the Layers Panel and choose Exposure, then increase exposure to blow out the backdrop.
3. Invert the tones
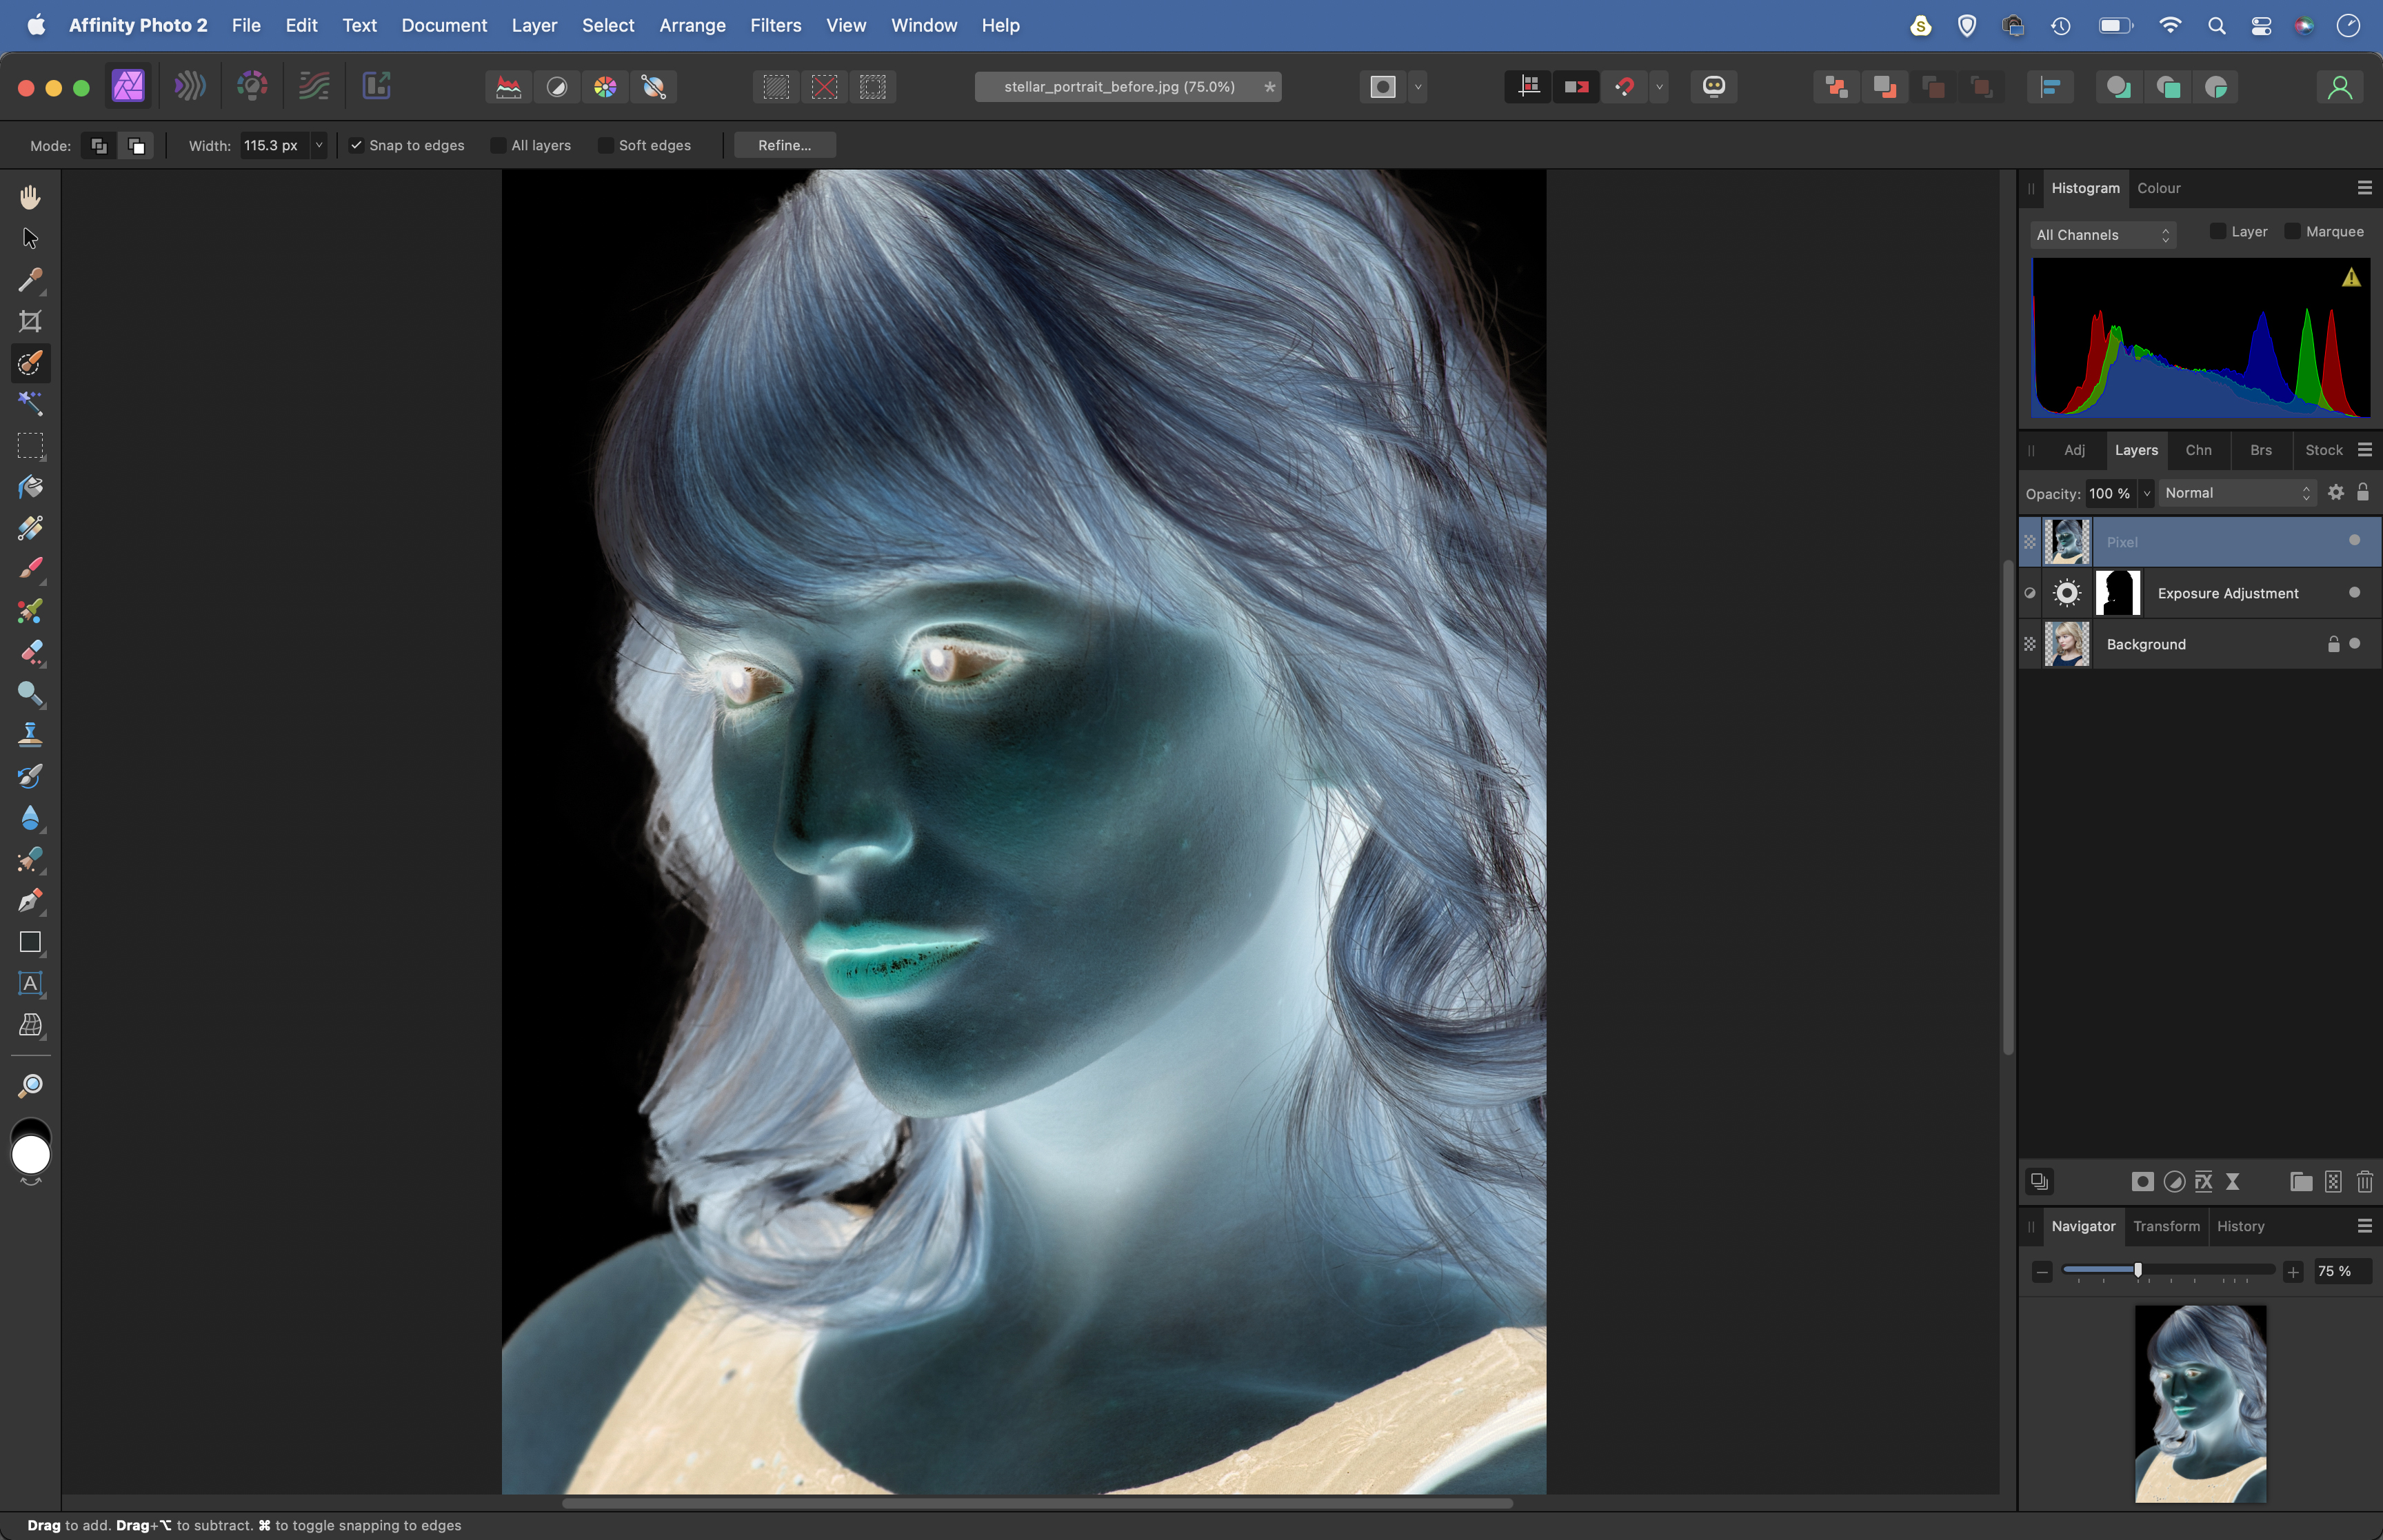
Hit Cmd/Ctrl + Shift + Alt + E to merge a copy of the layers (or, if you’re starting with a white background portrait and have skipped steps 1 and 2, hit Cmd/Ctrl + J to copy the background layer), then go to Layer > Invert to invert the tones, resulting in a negative version of the image.
4. Copy in the stars
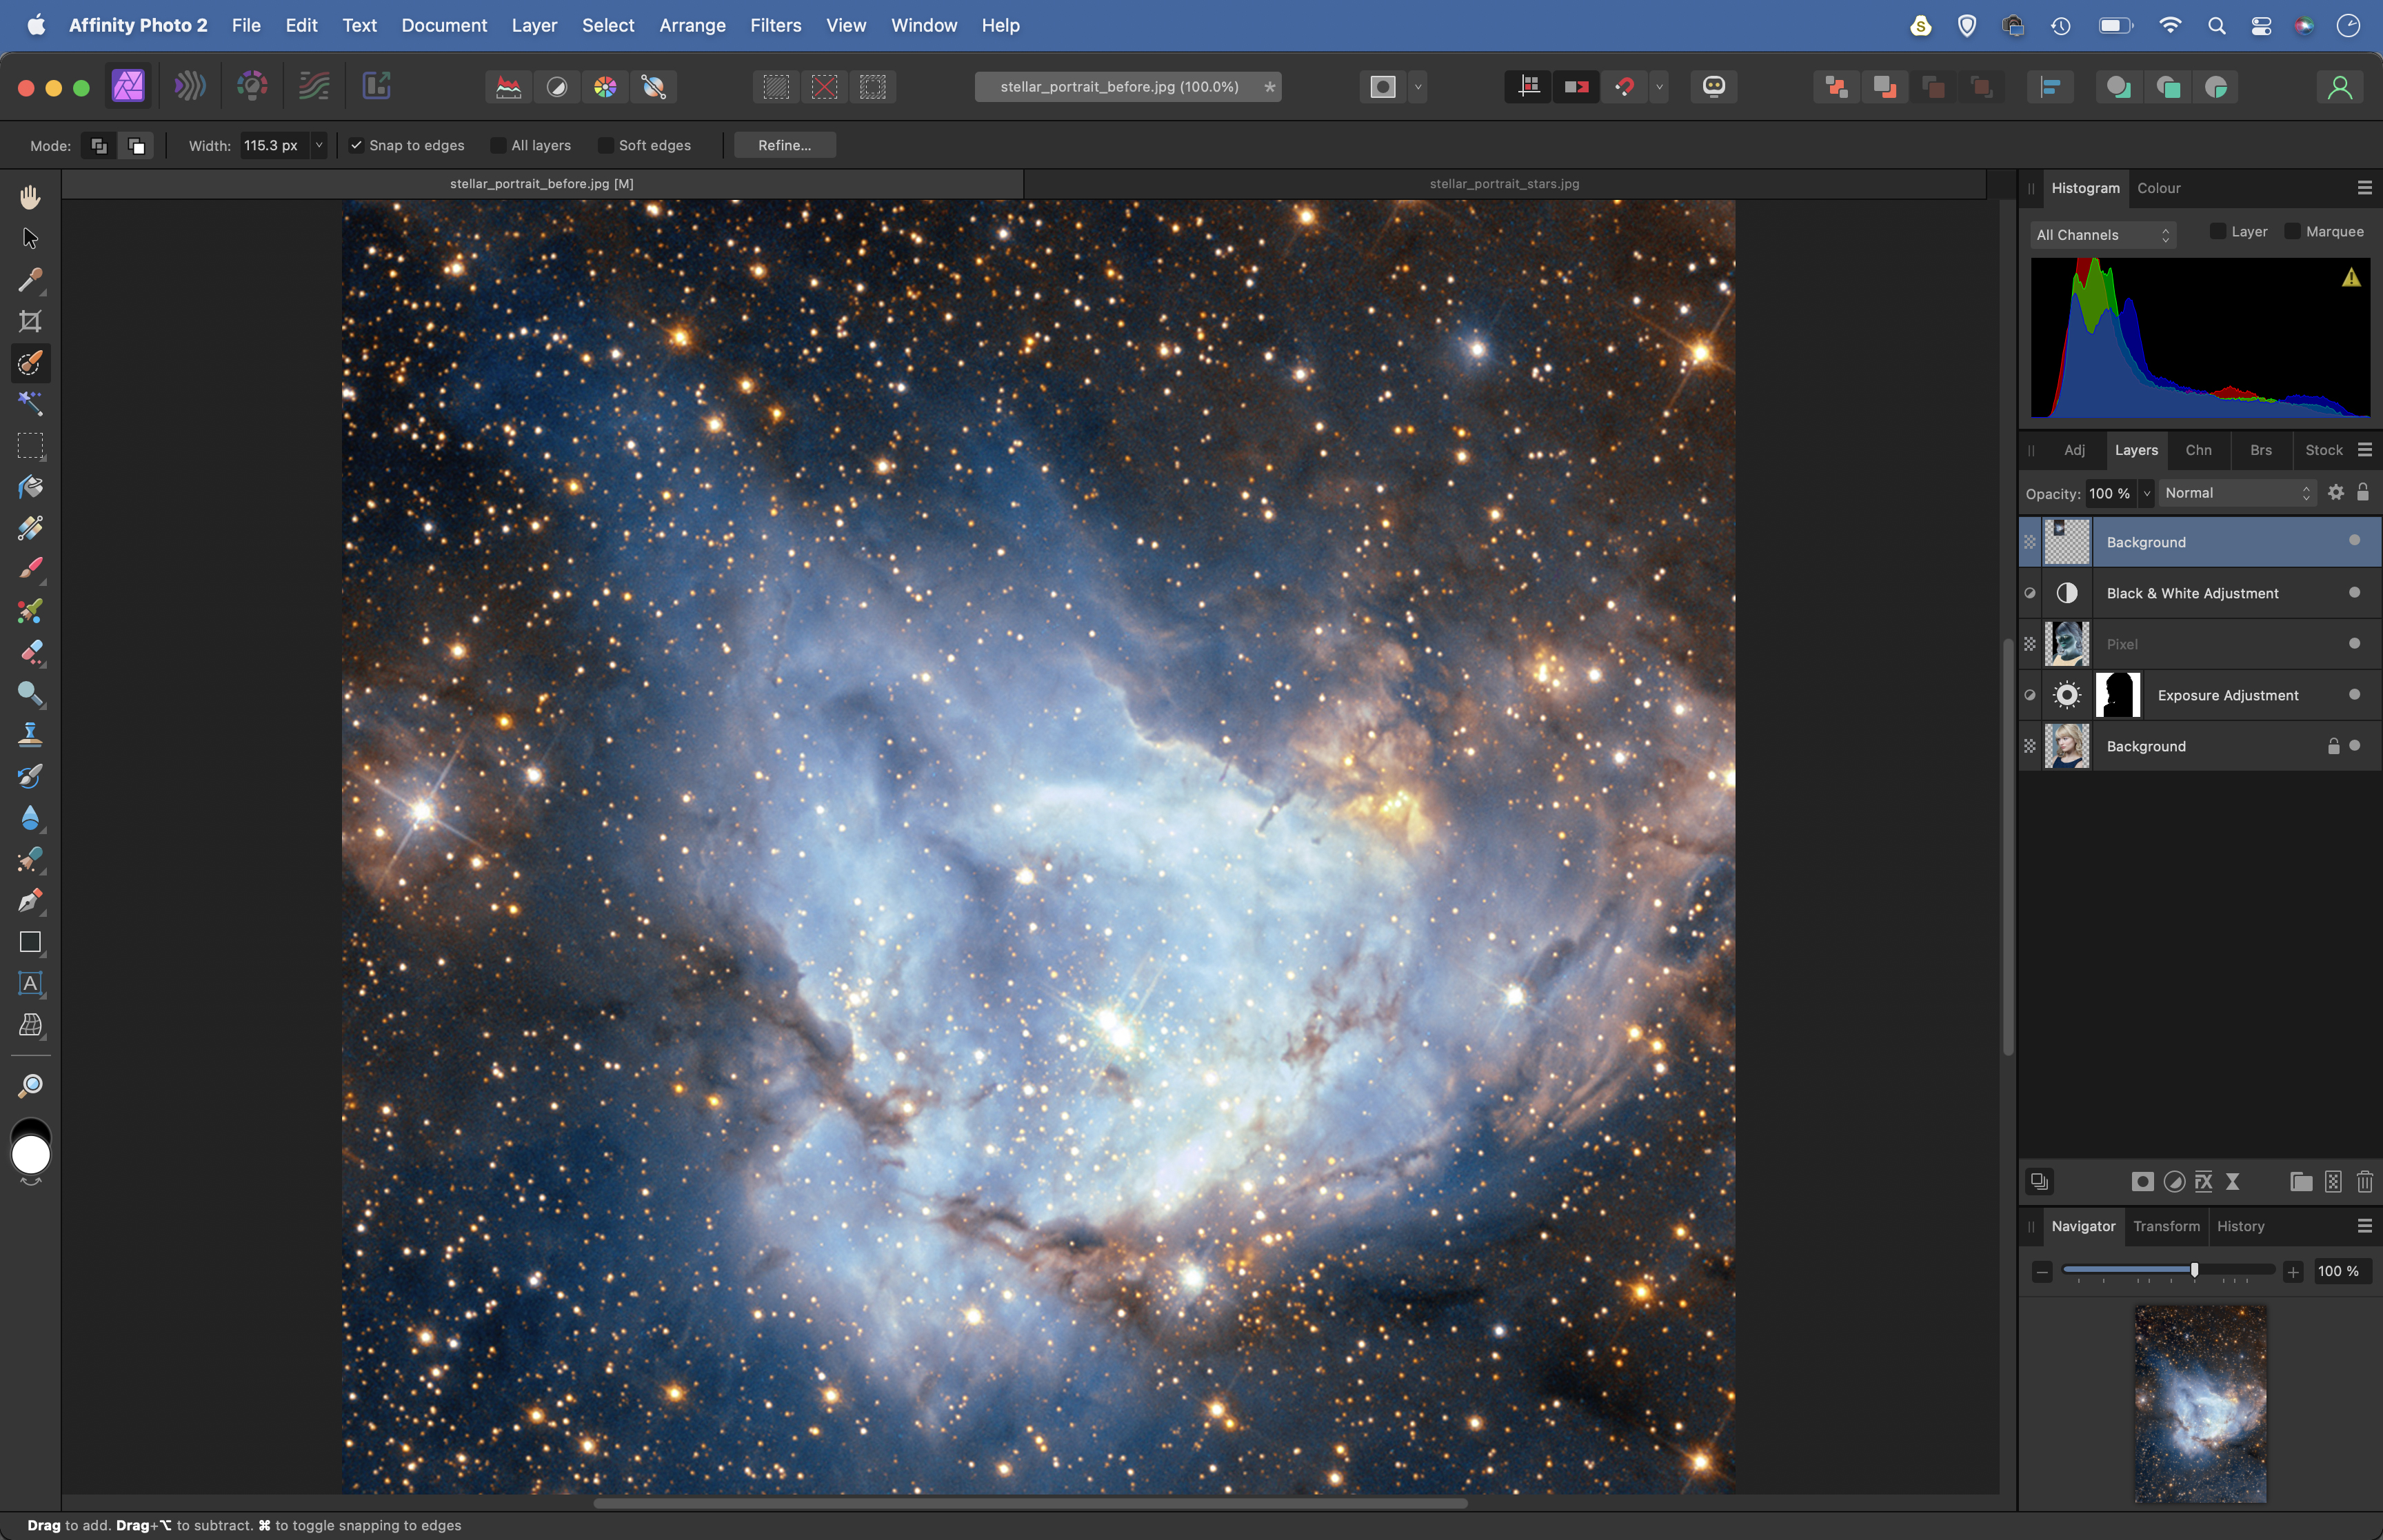
Click the Adjustment icon in the Layers panel and choose Black And White. Next open the star image into Affinity Photo – you'll find it on the NASA site, just search for “stormy stellar nursery”. Hit Cmd/Ctrl + C to copy, then go to the portrait image and press Cmd/Ctrl + V to paste the stars in.
5. Blend the layers
Click the Blend Mode drop-down at the top of the Layers Panel and choose Multiply. This multiplies the darkness values on each layer, so that areas can only stay the same or become even darker. It results in the brighter parts of the inverted portrait becoming filled with stars.
6. Position the stars
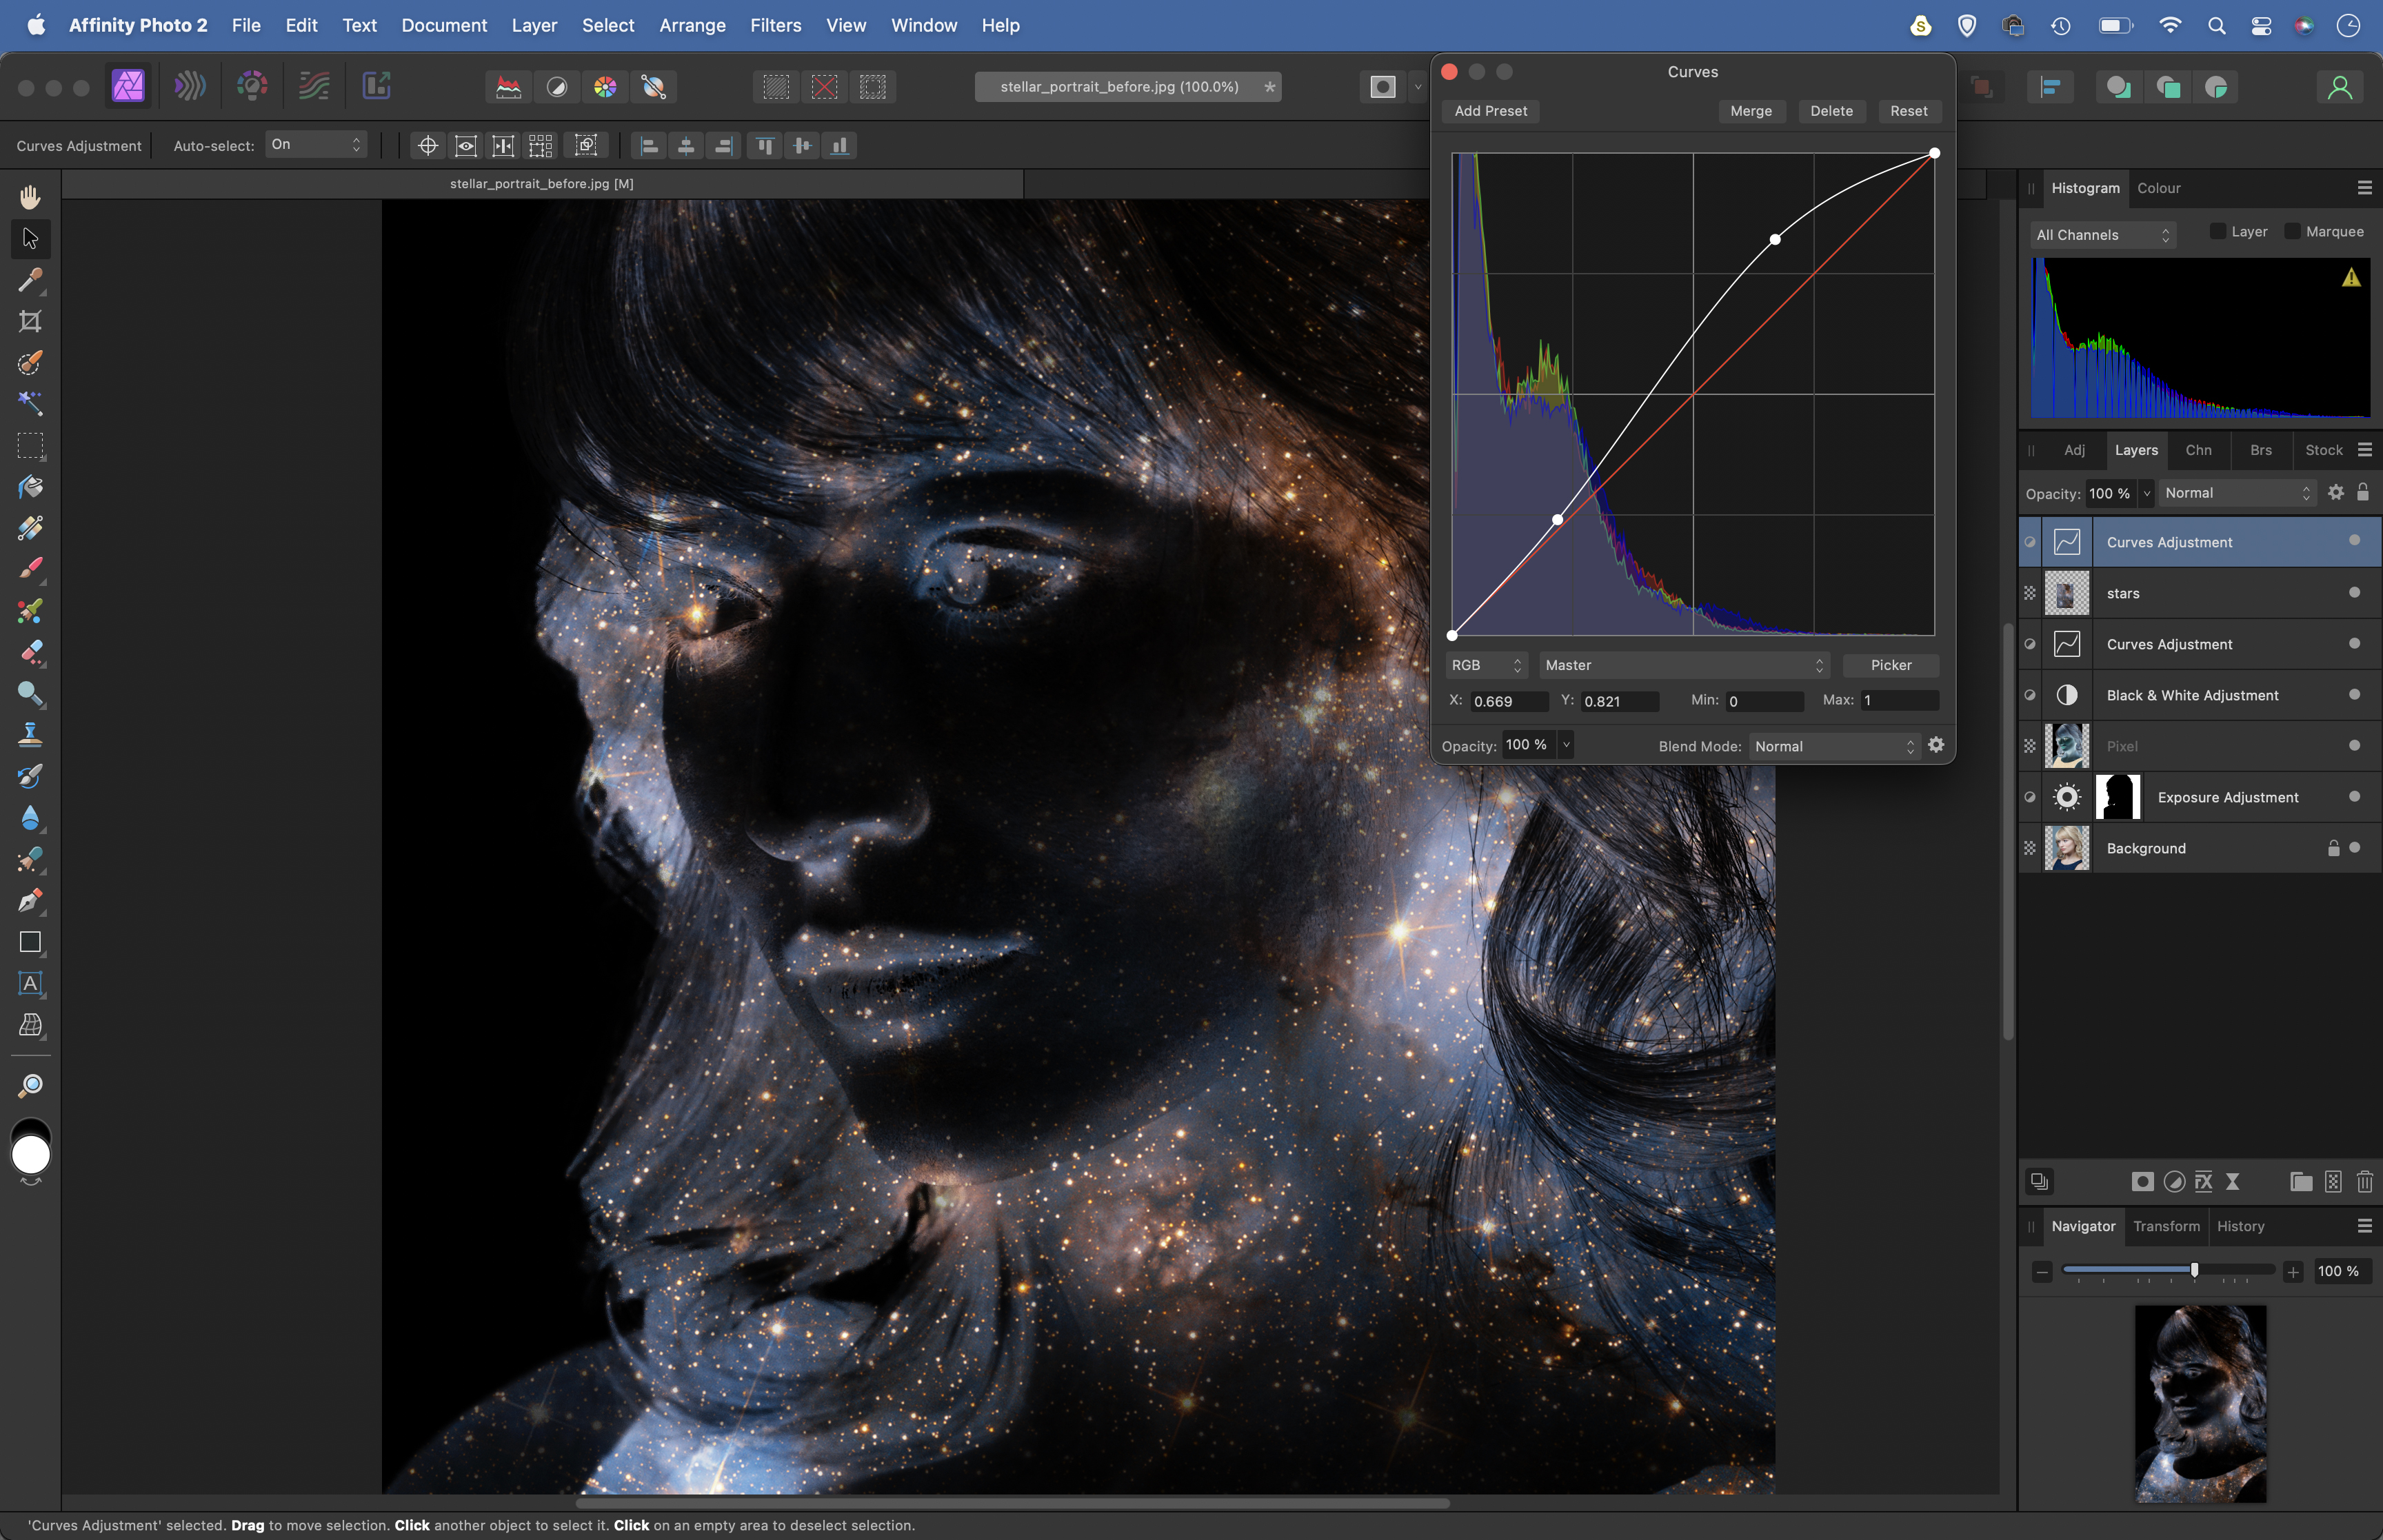
Grab the Move tool and position the stars layer until it fits nicely with the portrait (drag the corners to resize).The image is likely to need brightening, so click the Adjustment icon again and choose Curves. Drag up on the curve line to brighten the image, and make any other colour changes you like.
• See more of our Affinity Photo tutorials
PhotoPlus: The Canon Magazine is the world's only monthly newsstand title that's 100% devoted to Canon, so you can be sure the magazine is completely relevant to your system.
Check out more Affinity Photo tutorials, along with the best photo editing software reviews. You might also like to investigate the best cameras for portraits and the best lenses for portraits.
The lead technique writer on Digital Camera Magazine, PhotoPlus: The Canon Magazine and N-Photo: The Nikon Magazine, James is a fantastic general practice photographer with an enviable array of skills across every genre of photography.
Whether it's flash photography techniques like stroboscopic portraits, astrophotography projects like photographing the Northern Lights, or turning sound into art by making paint dance on a set of speakers, James' tutorials and projects are as creative as they are enjoyable.
He's also a wizard at the dark arts of Photoshop, Lightroom and Affinity Photo, and is capable of some genuine black magic in the digital darkroom, making him one of the leading authorities on photo editing software and techniques.
