Use Affinity Photo to make intricate image enhancements in seconds
Learn how to use Affinity Photo to make intricate image enhancements in seconds with quick mask skills
Watch video: Mask skills in Affinity Photo
Luminosity masking in Affinity Photo is a technique that enables you to zero in on different parts of the tonal range – or different ranges of luminosity – in order to adjust and enhance areas of your photos. It’s especially useful for landscape editing, because landscapes often have an imbalance between bright areas, such as skies, and darker parts, like a foreground in shade.
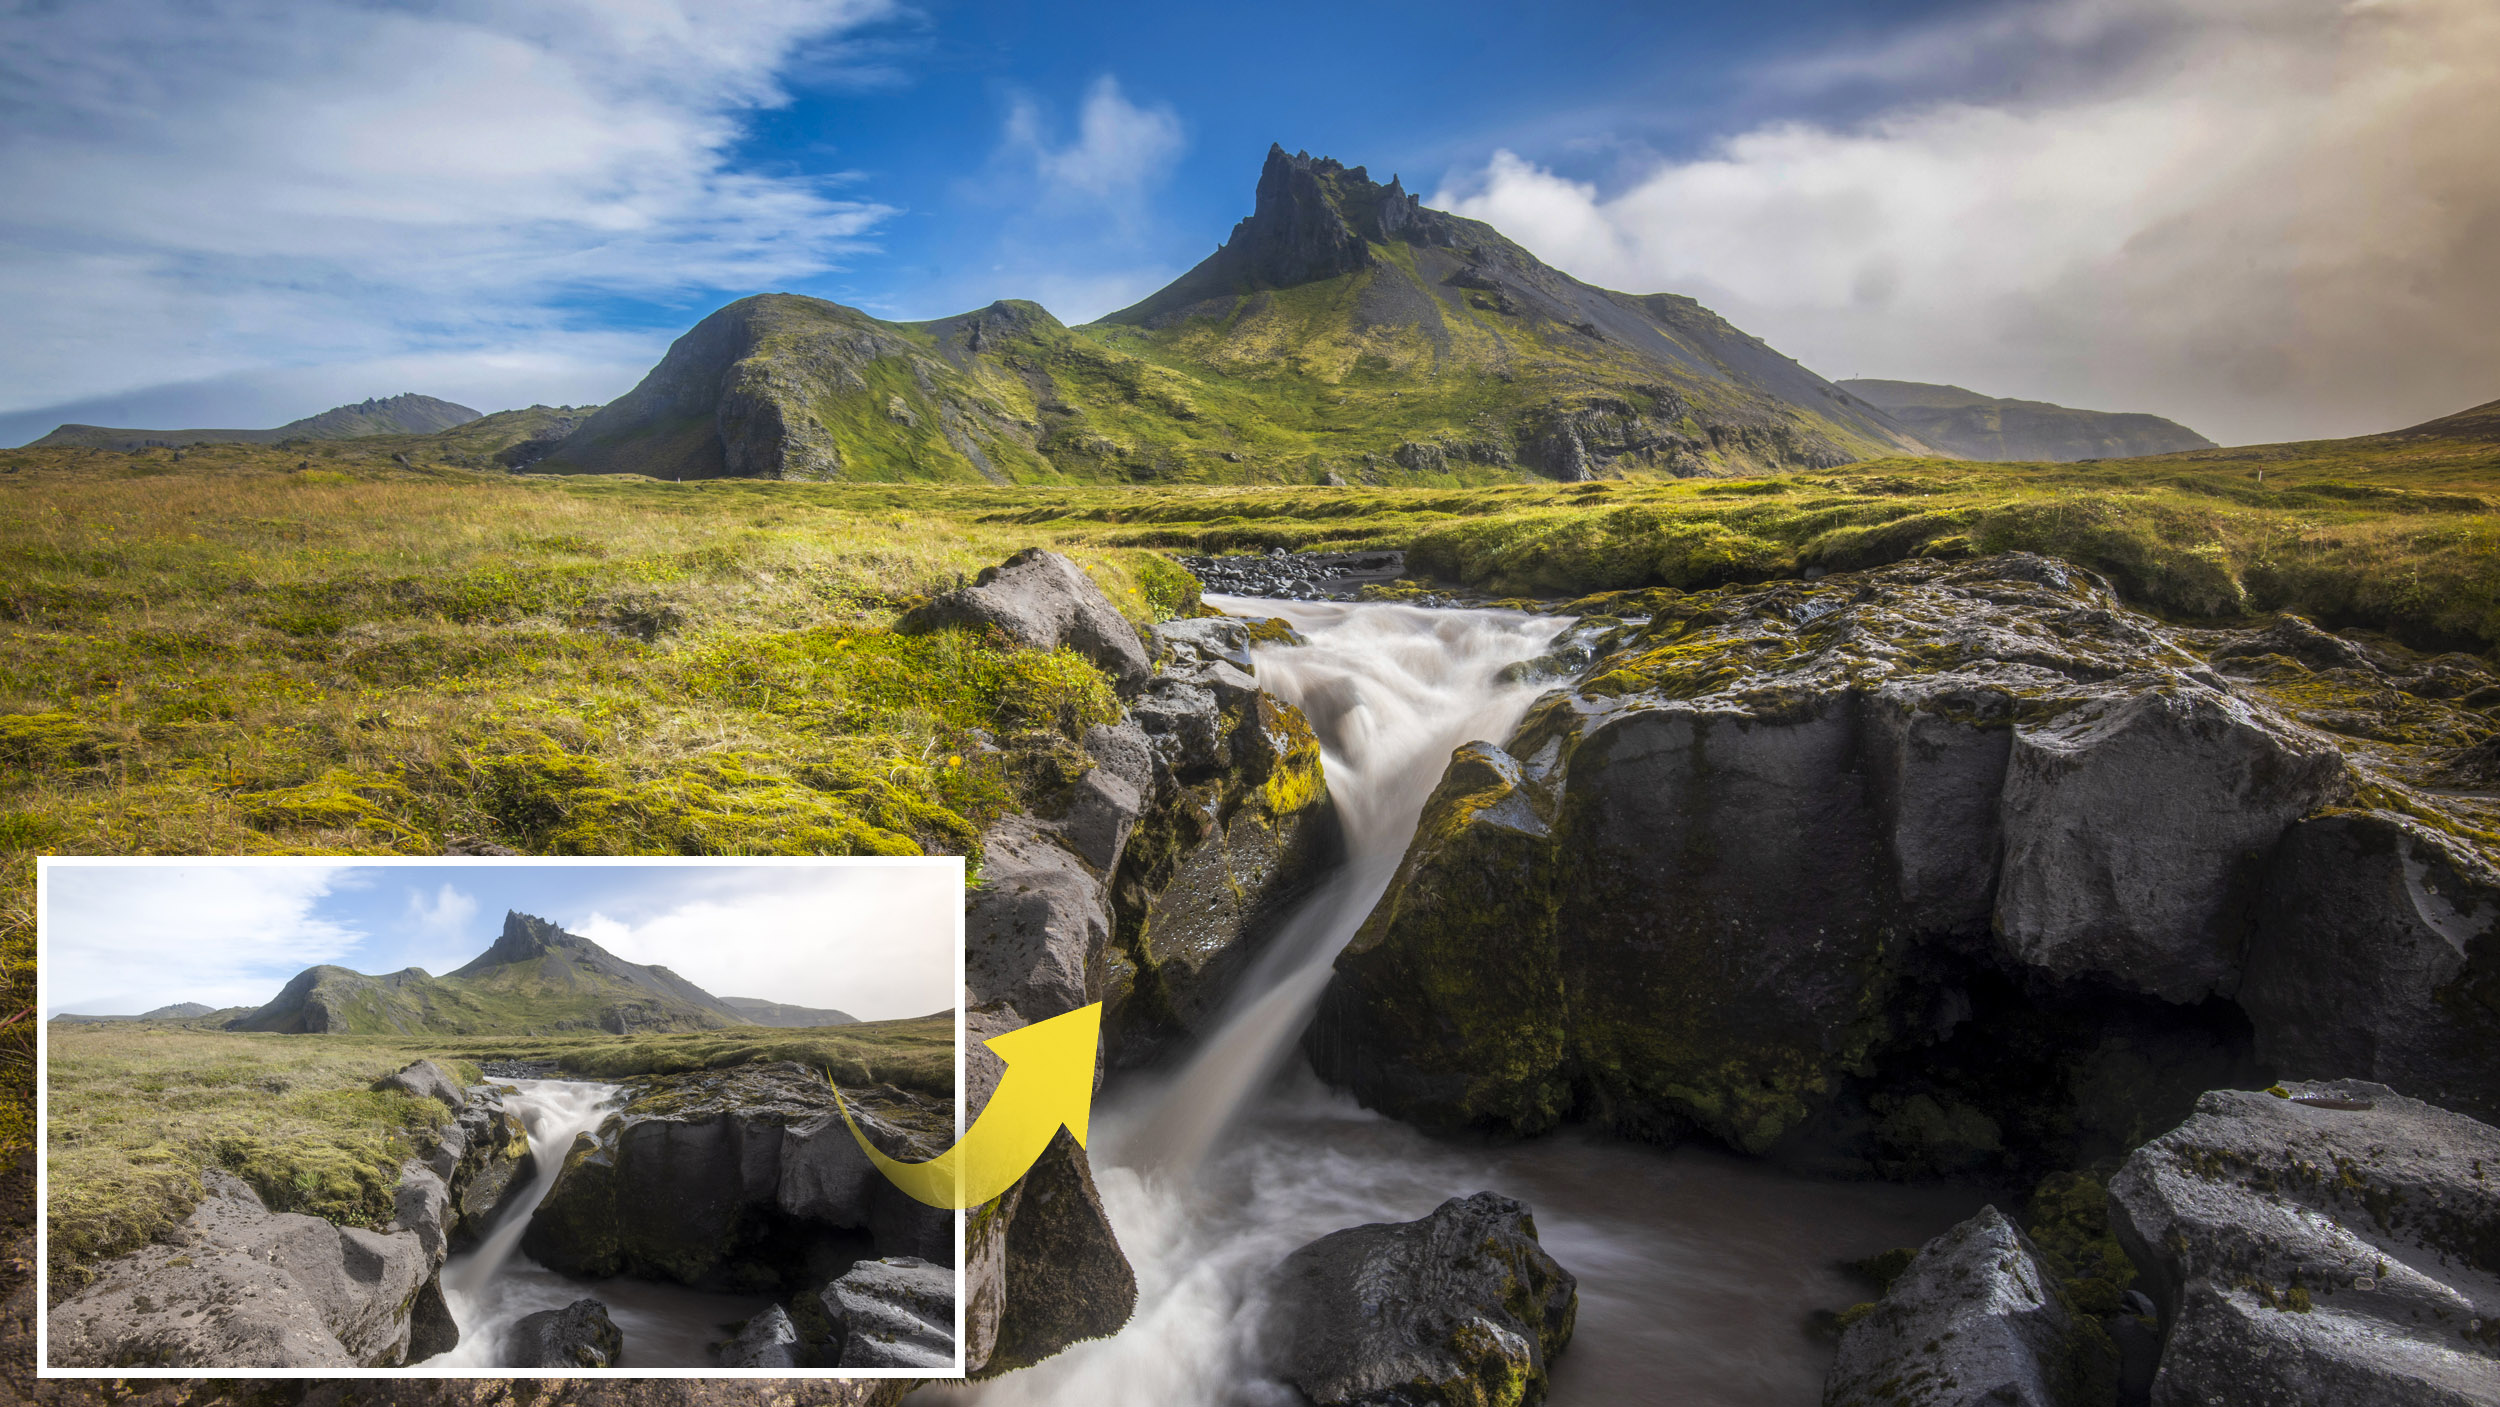
As such, we can target brighter pixels and claw back detail, then boost shadows or different color ranges in the scene. Here it enables us to pull back the overly bright sky, tone down any strong blues in the water and boost the greens in the grass.
Best of all, these tonal adjustments can be made in a few seconds, without the need to paint fiddly masks. Instead we make use of the luminosity information within the image to create our masks. So, we can just load the luminosity of the image with a simple keyboard shortcut to immediately target the brighter areas, then begin enhancing them without affecting the darker tones. Of course, we could invert the selection if we want to work on the darker details instead.
To take the technique one step further, we can also delve into the three channels that make up our photo – red, green and blue – then load the luminosity of different channels in order to zero in on colors in our photos. Here it enables us to boost the greens with ease. And because each edit is on a separate adjustment layer, we can fine-tune the overall strength at any time.
Download the start image here to follow along with the image-editing tutorial…
1. Load the luminosity
Open the waterfall image, then go to the Layers panel. Hold Cmd/Ctrl + Alt and click on the layer thumbnail to load the luminosity of the image as a selection. Click the Adjustment icon in the Layers panel and choose Curves. The selection is applied to the Curves layer.
The best camera deals, reviews, product advice, and unmissable photography news, direct to your inbox!
2. Darken the sky
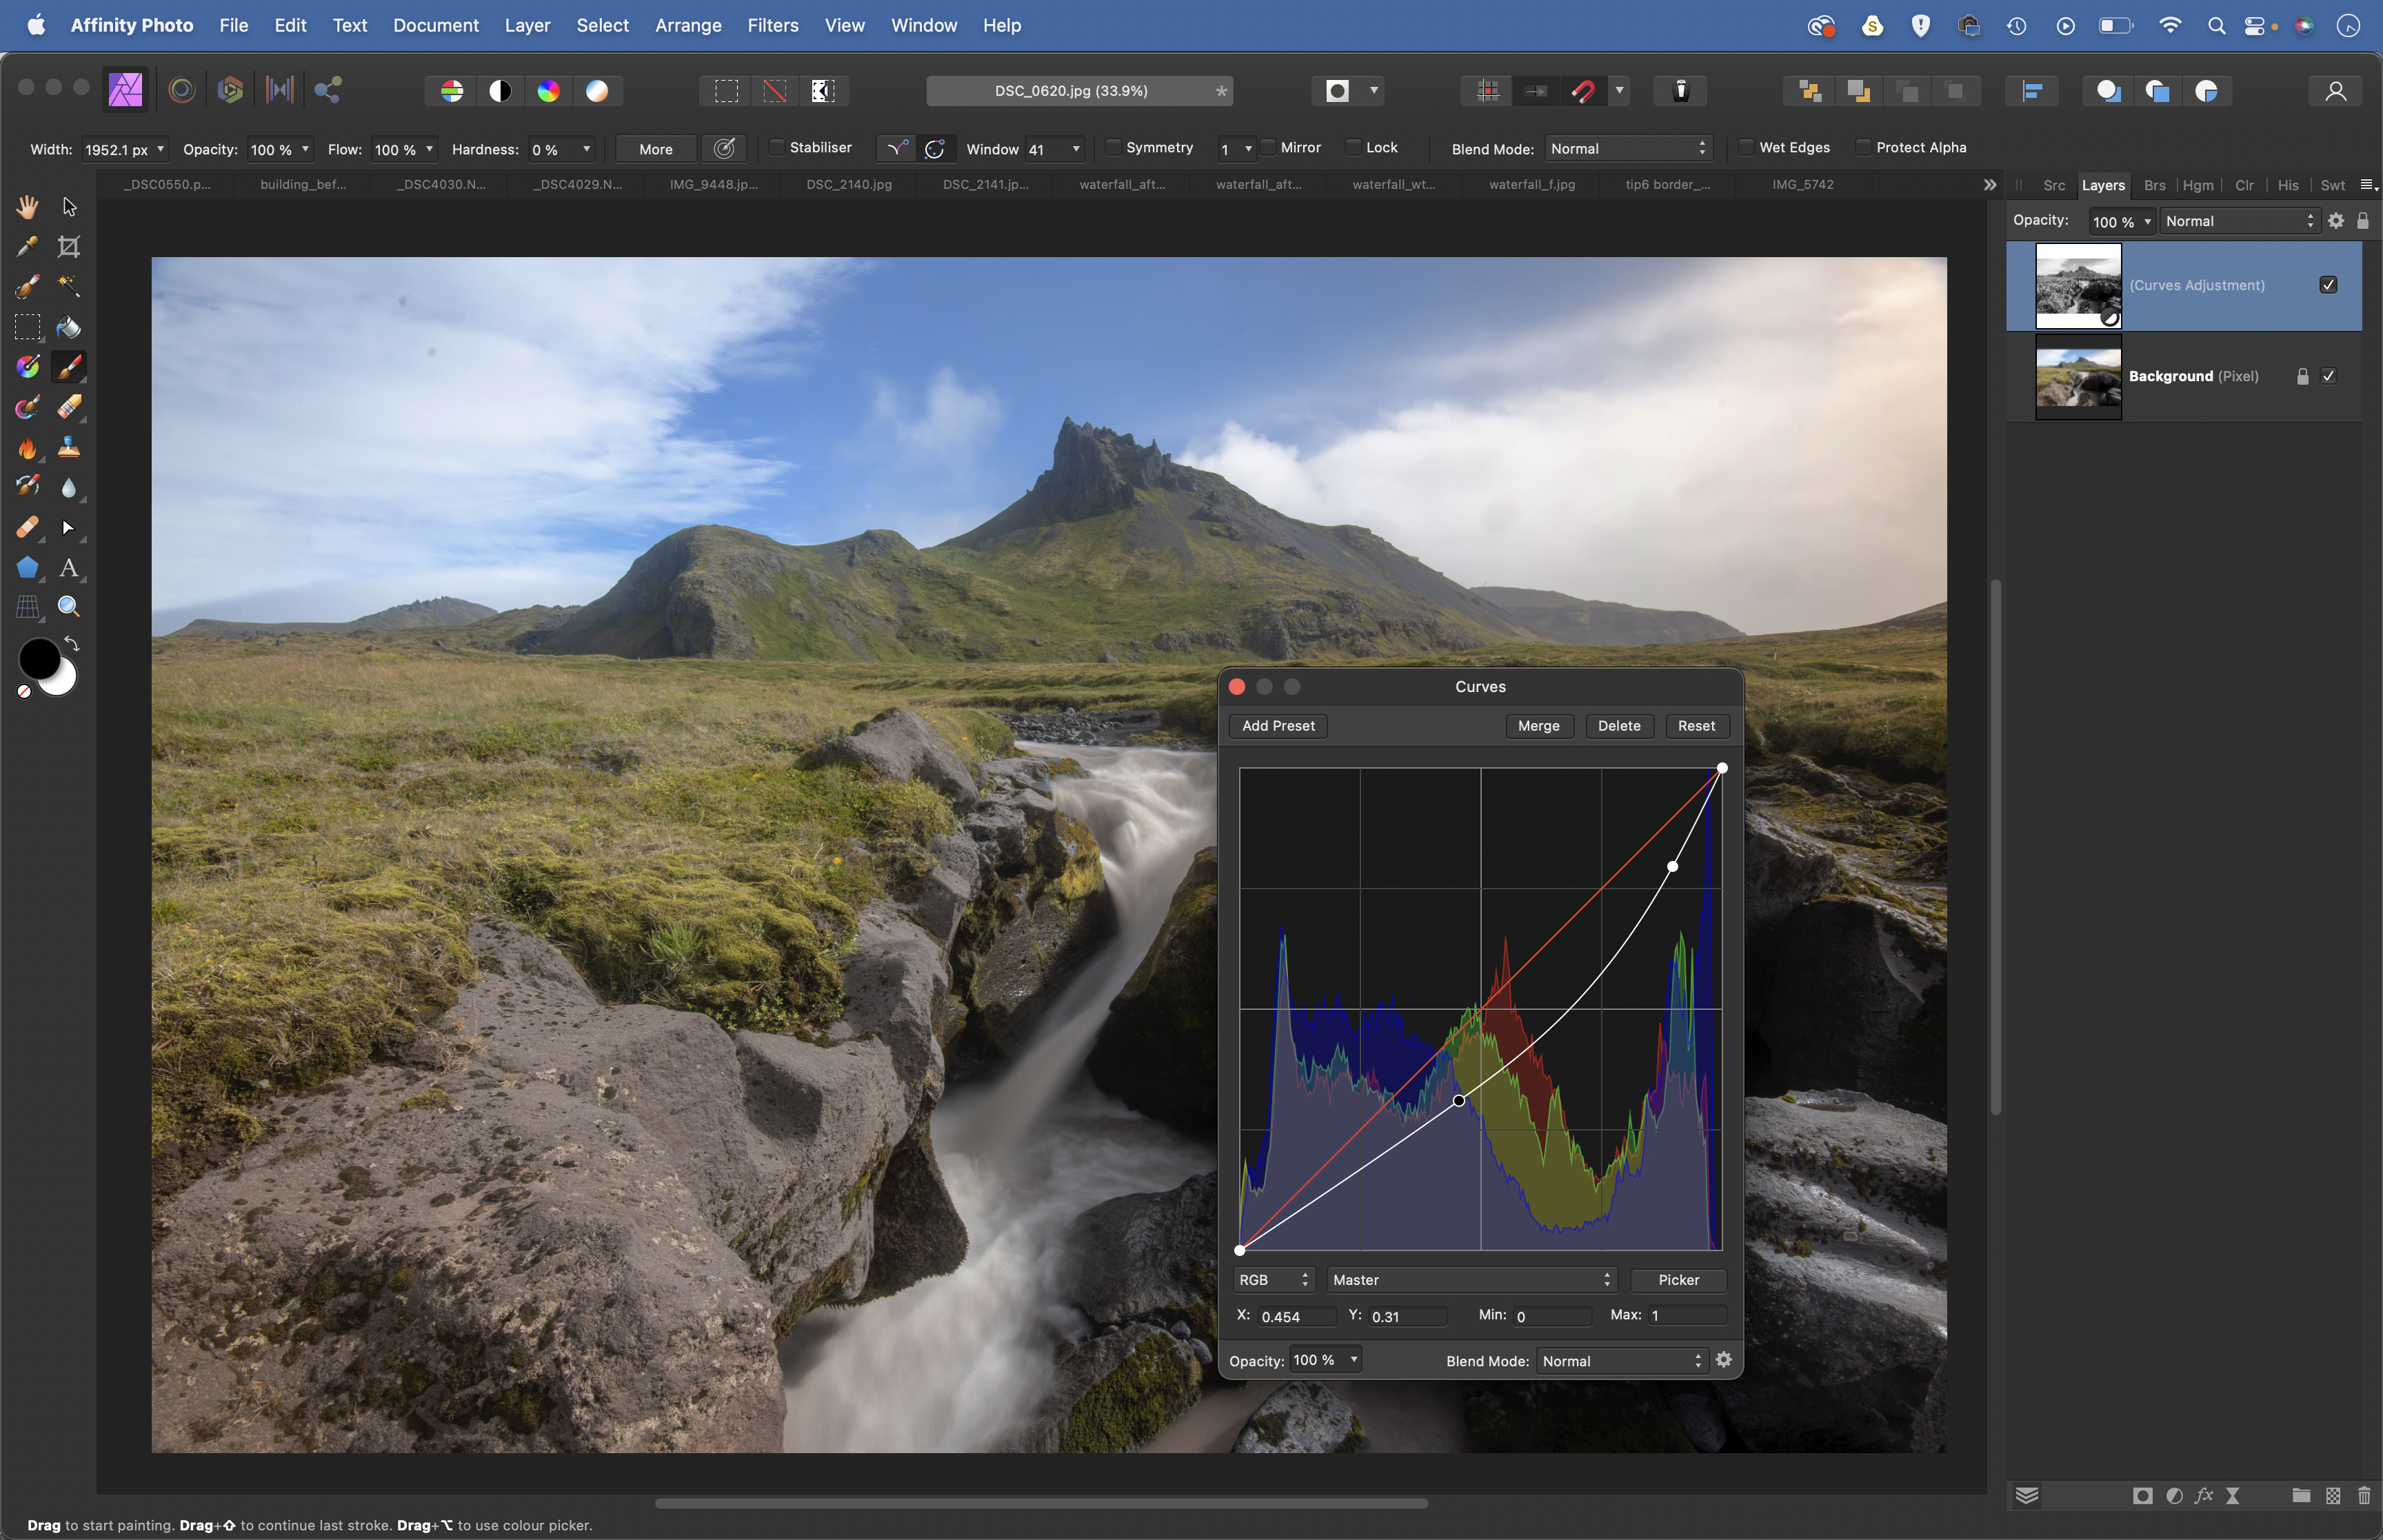
Hit Cmd/Ctrl + D to deselect, then drag down on the curve. As we targeted highlights, our adjustment affects them more than shadows, enabling us to darken the bright sky. Drag the top of the curve down more so the adjustment works more on the highlights.
3. Paint a mask
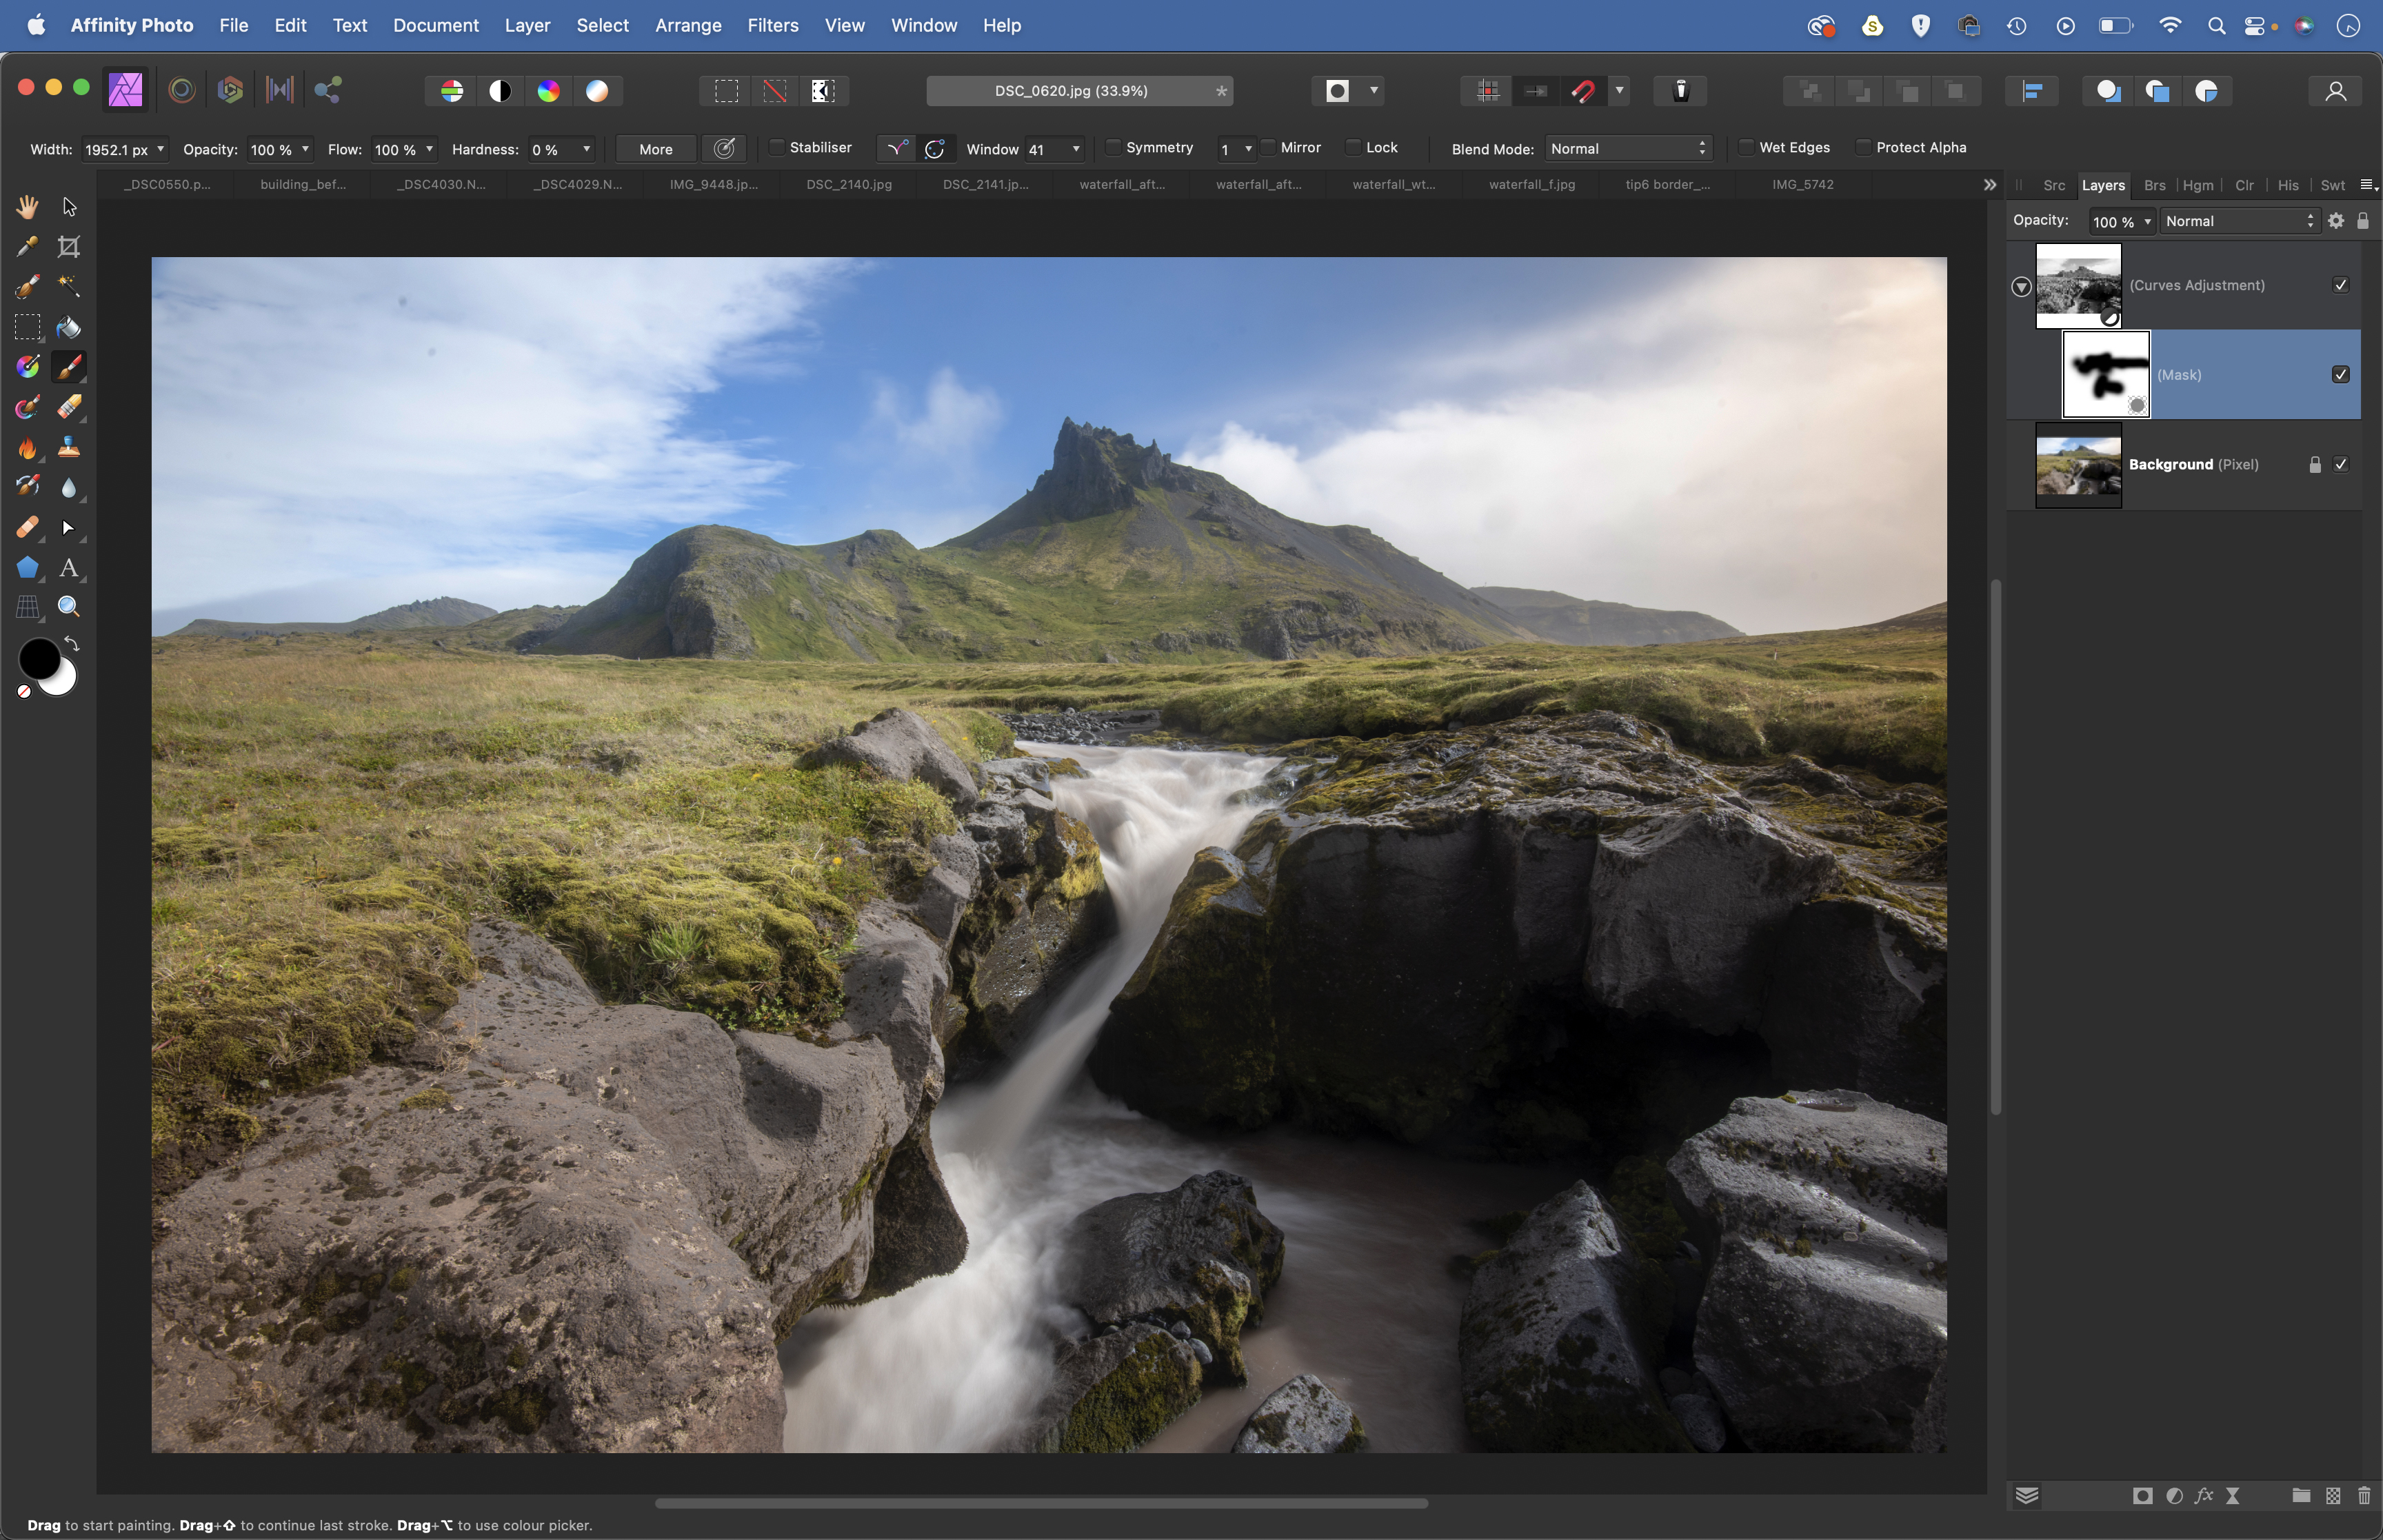
Our adjustment has darkened the highlights in the grass a little too much, but we can fix this with a quick layer mask. Click the Mask icon in the Layers panel, then grab the Brush tool and paint black over the foreground to hide the tonal effect in this area.
4. Selectively alter color saturation
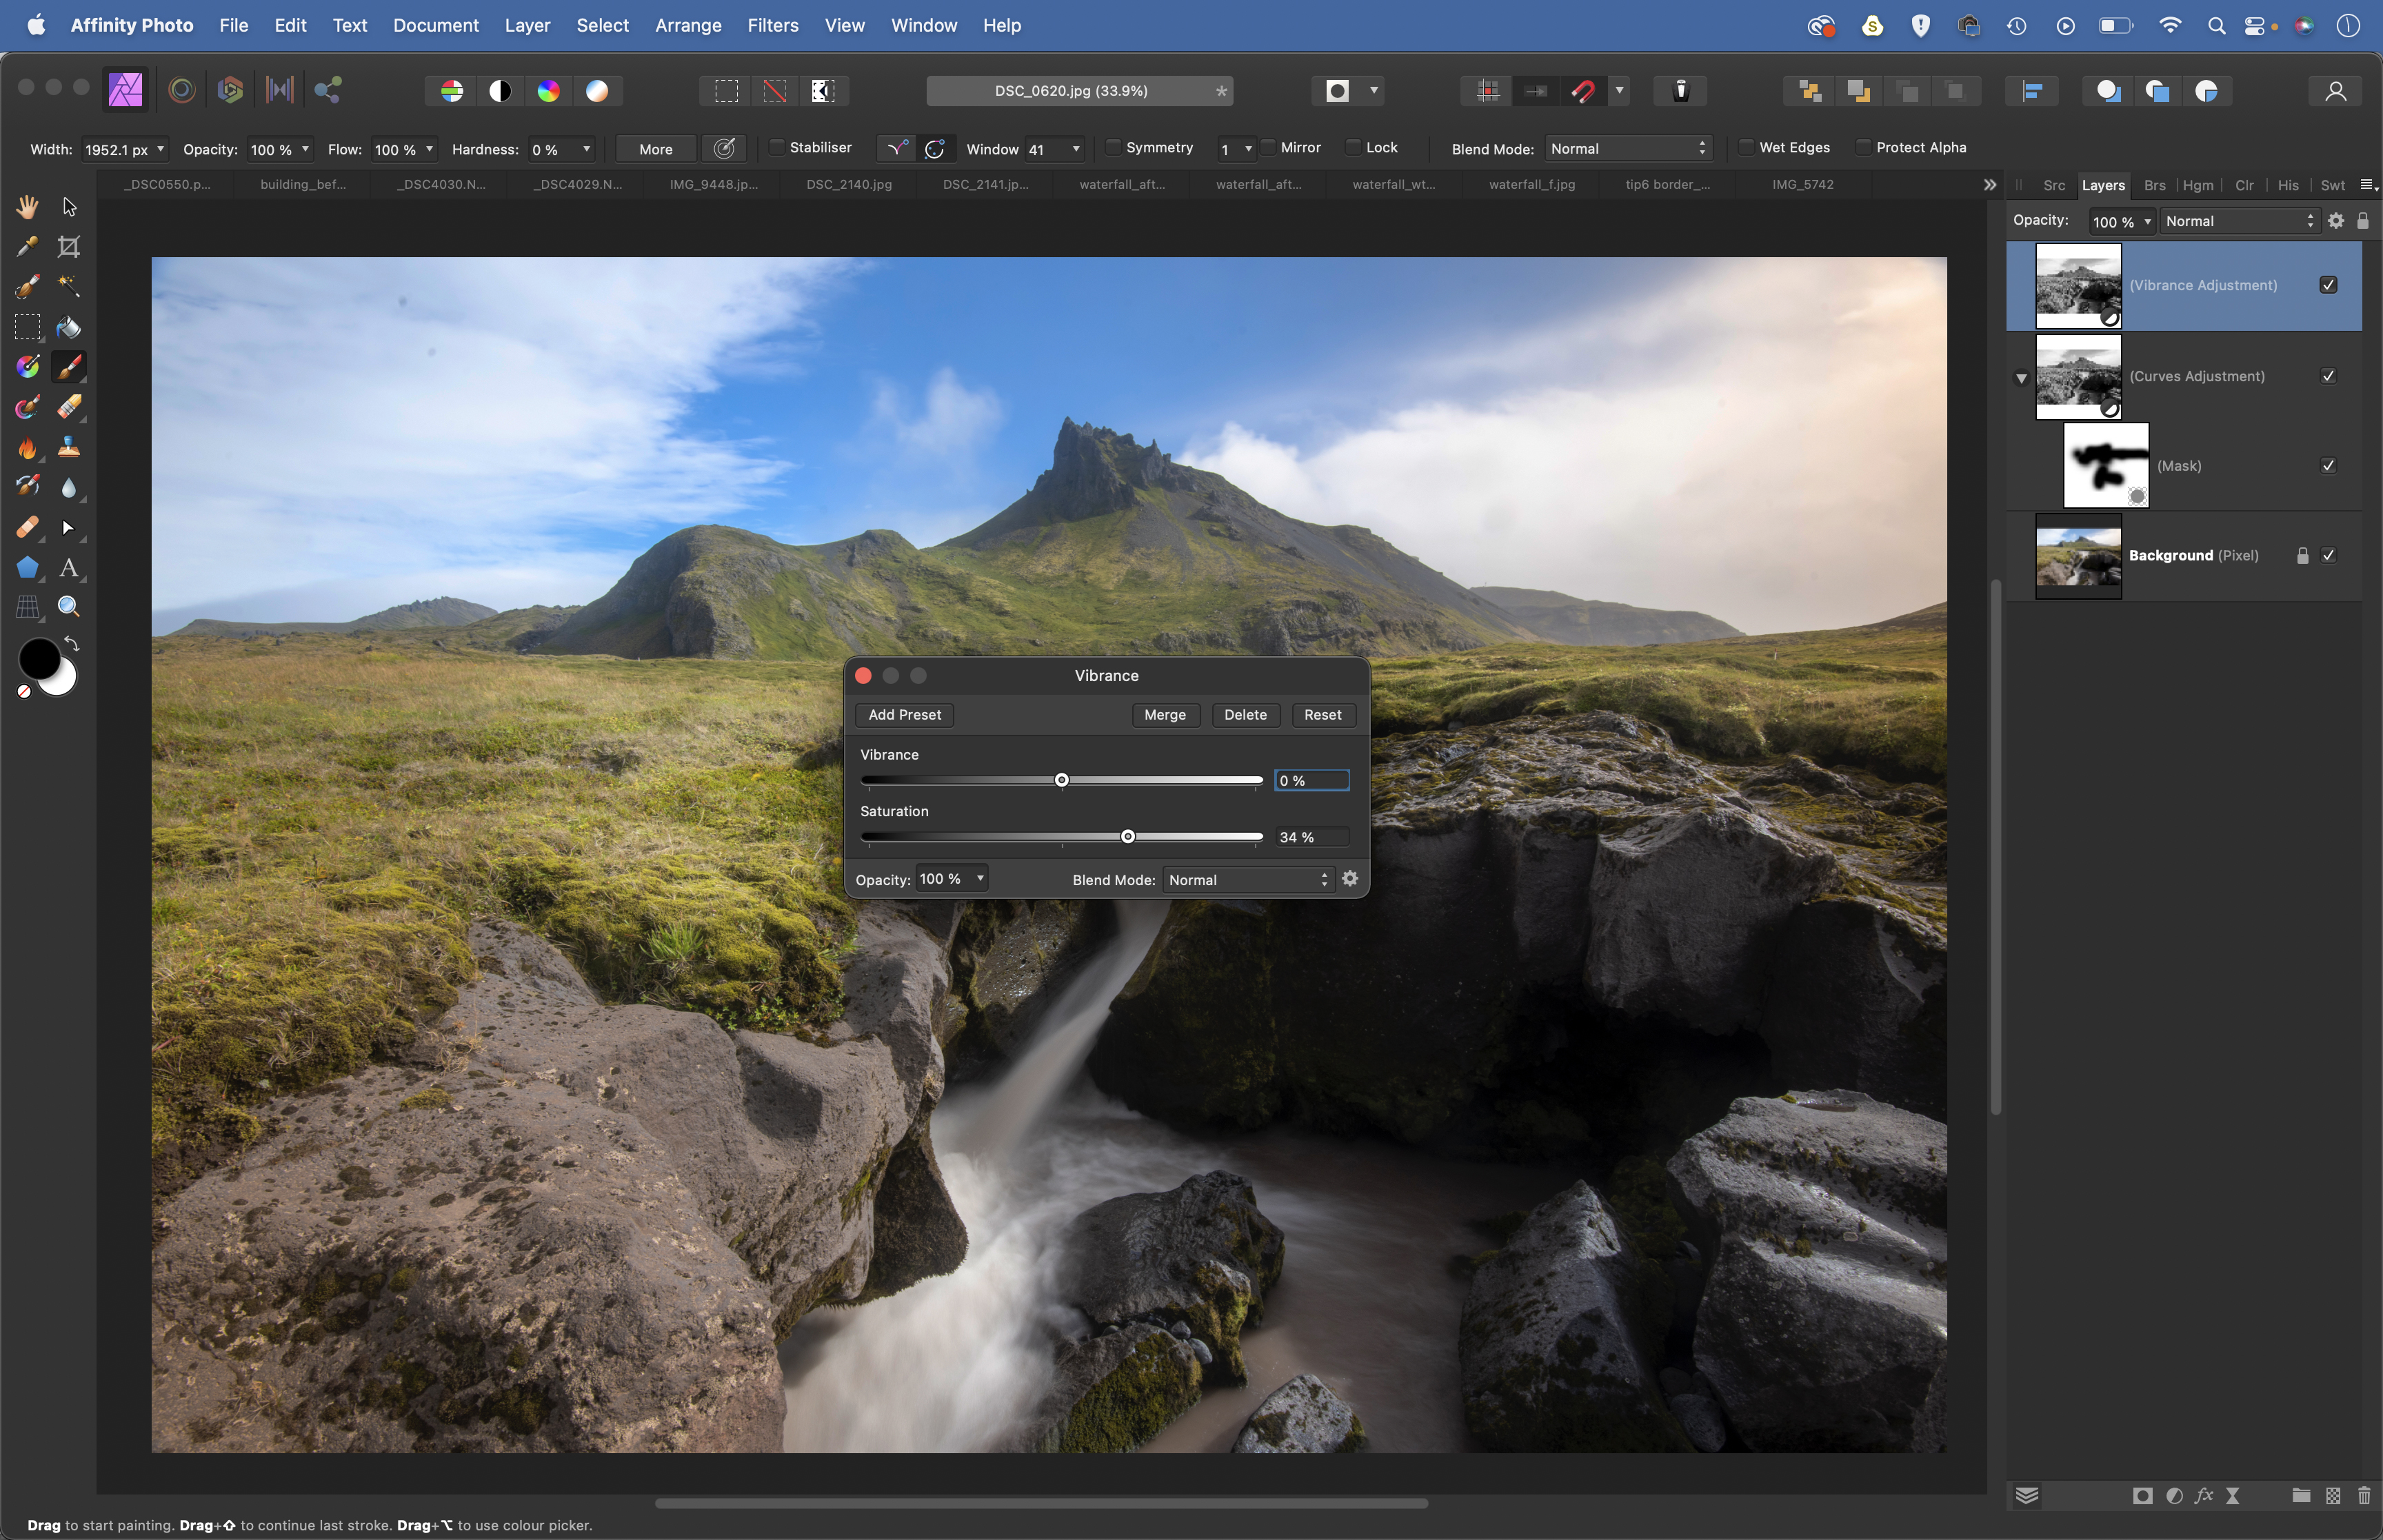
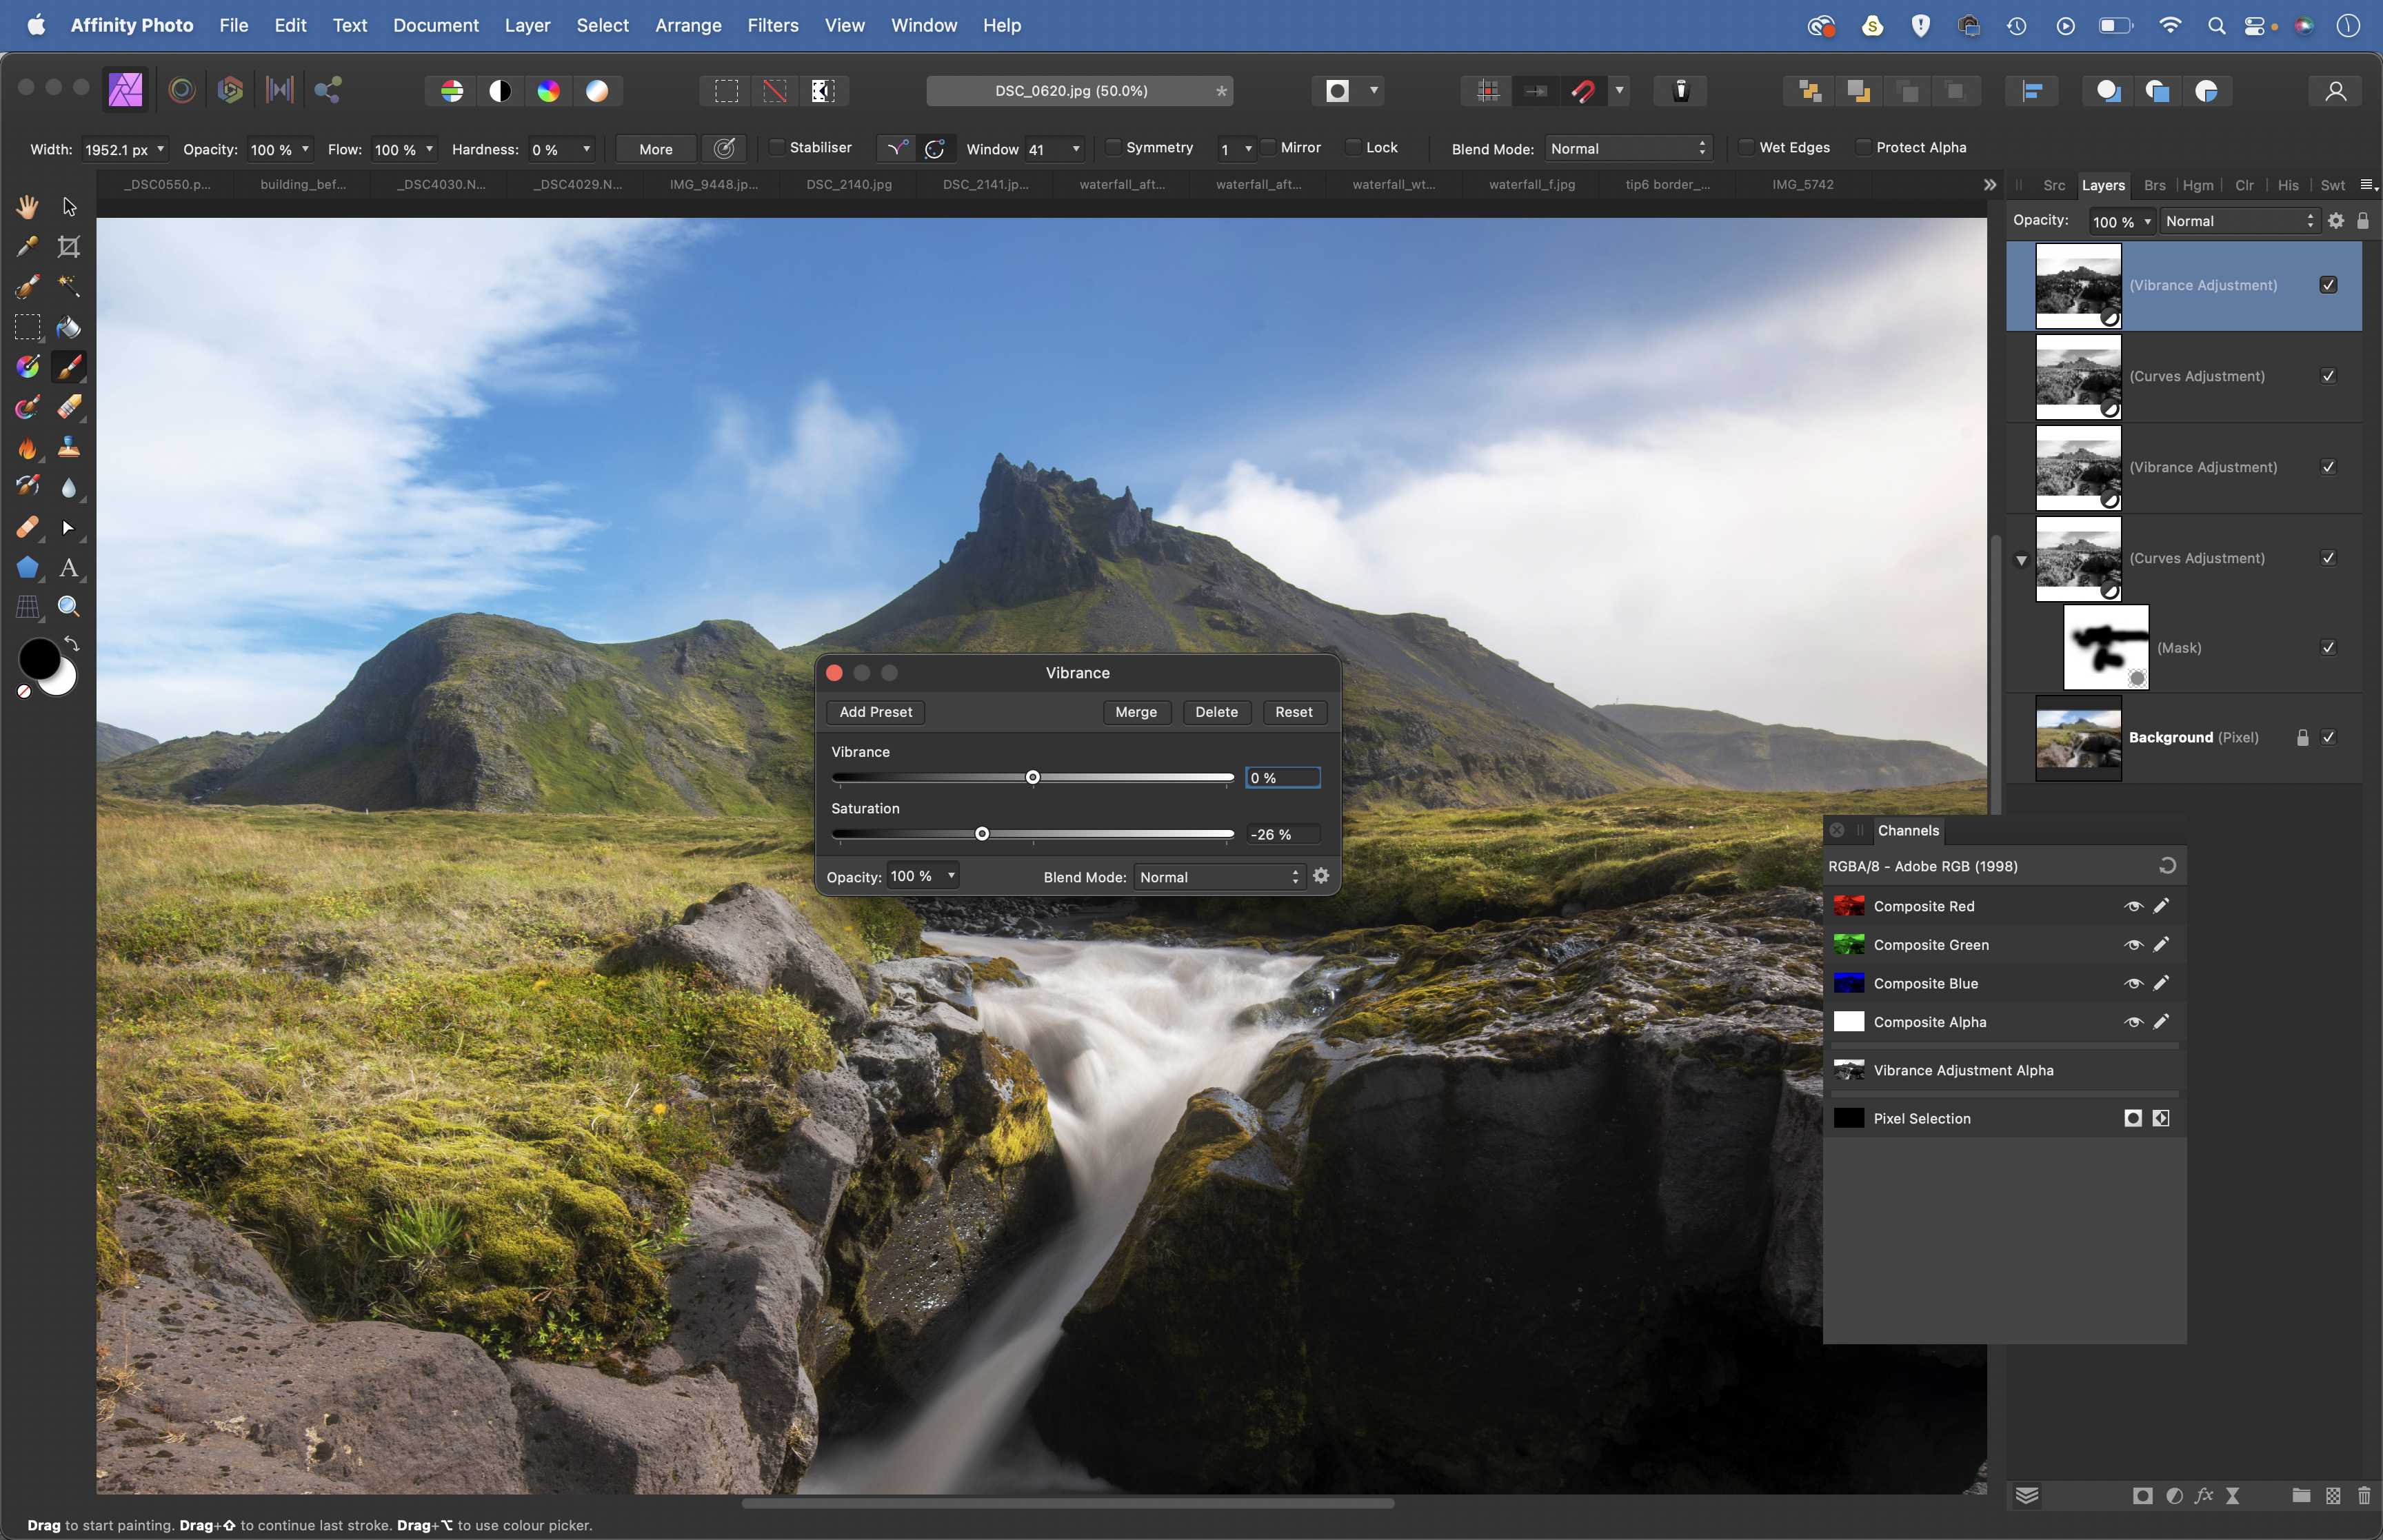
Cmd/Ctrl + Alt + click on the layer thumbnail of the bottom layer to load another luminosity selection, then click the Adjustment icon and choose Vibrance. Drag Saturation up to boost the colors in the highlights without affecting the shadows.
5. Enhance the greens
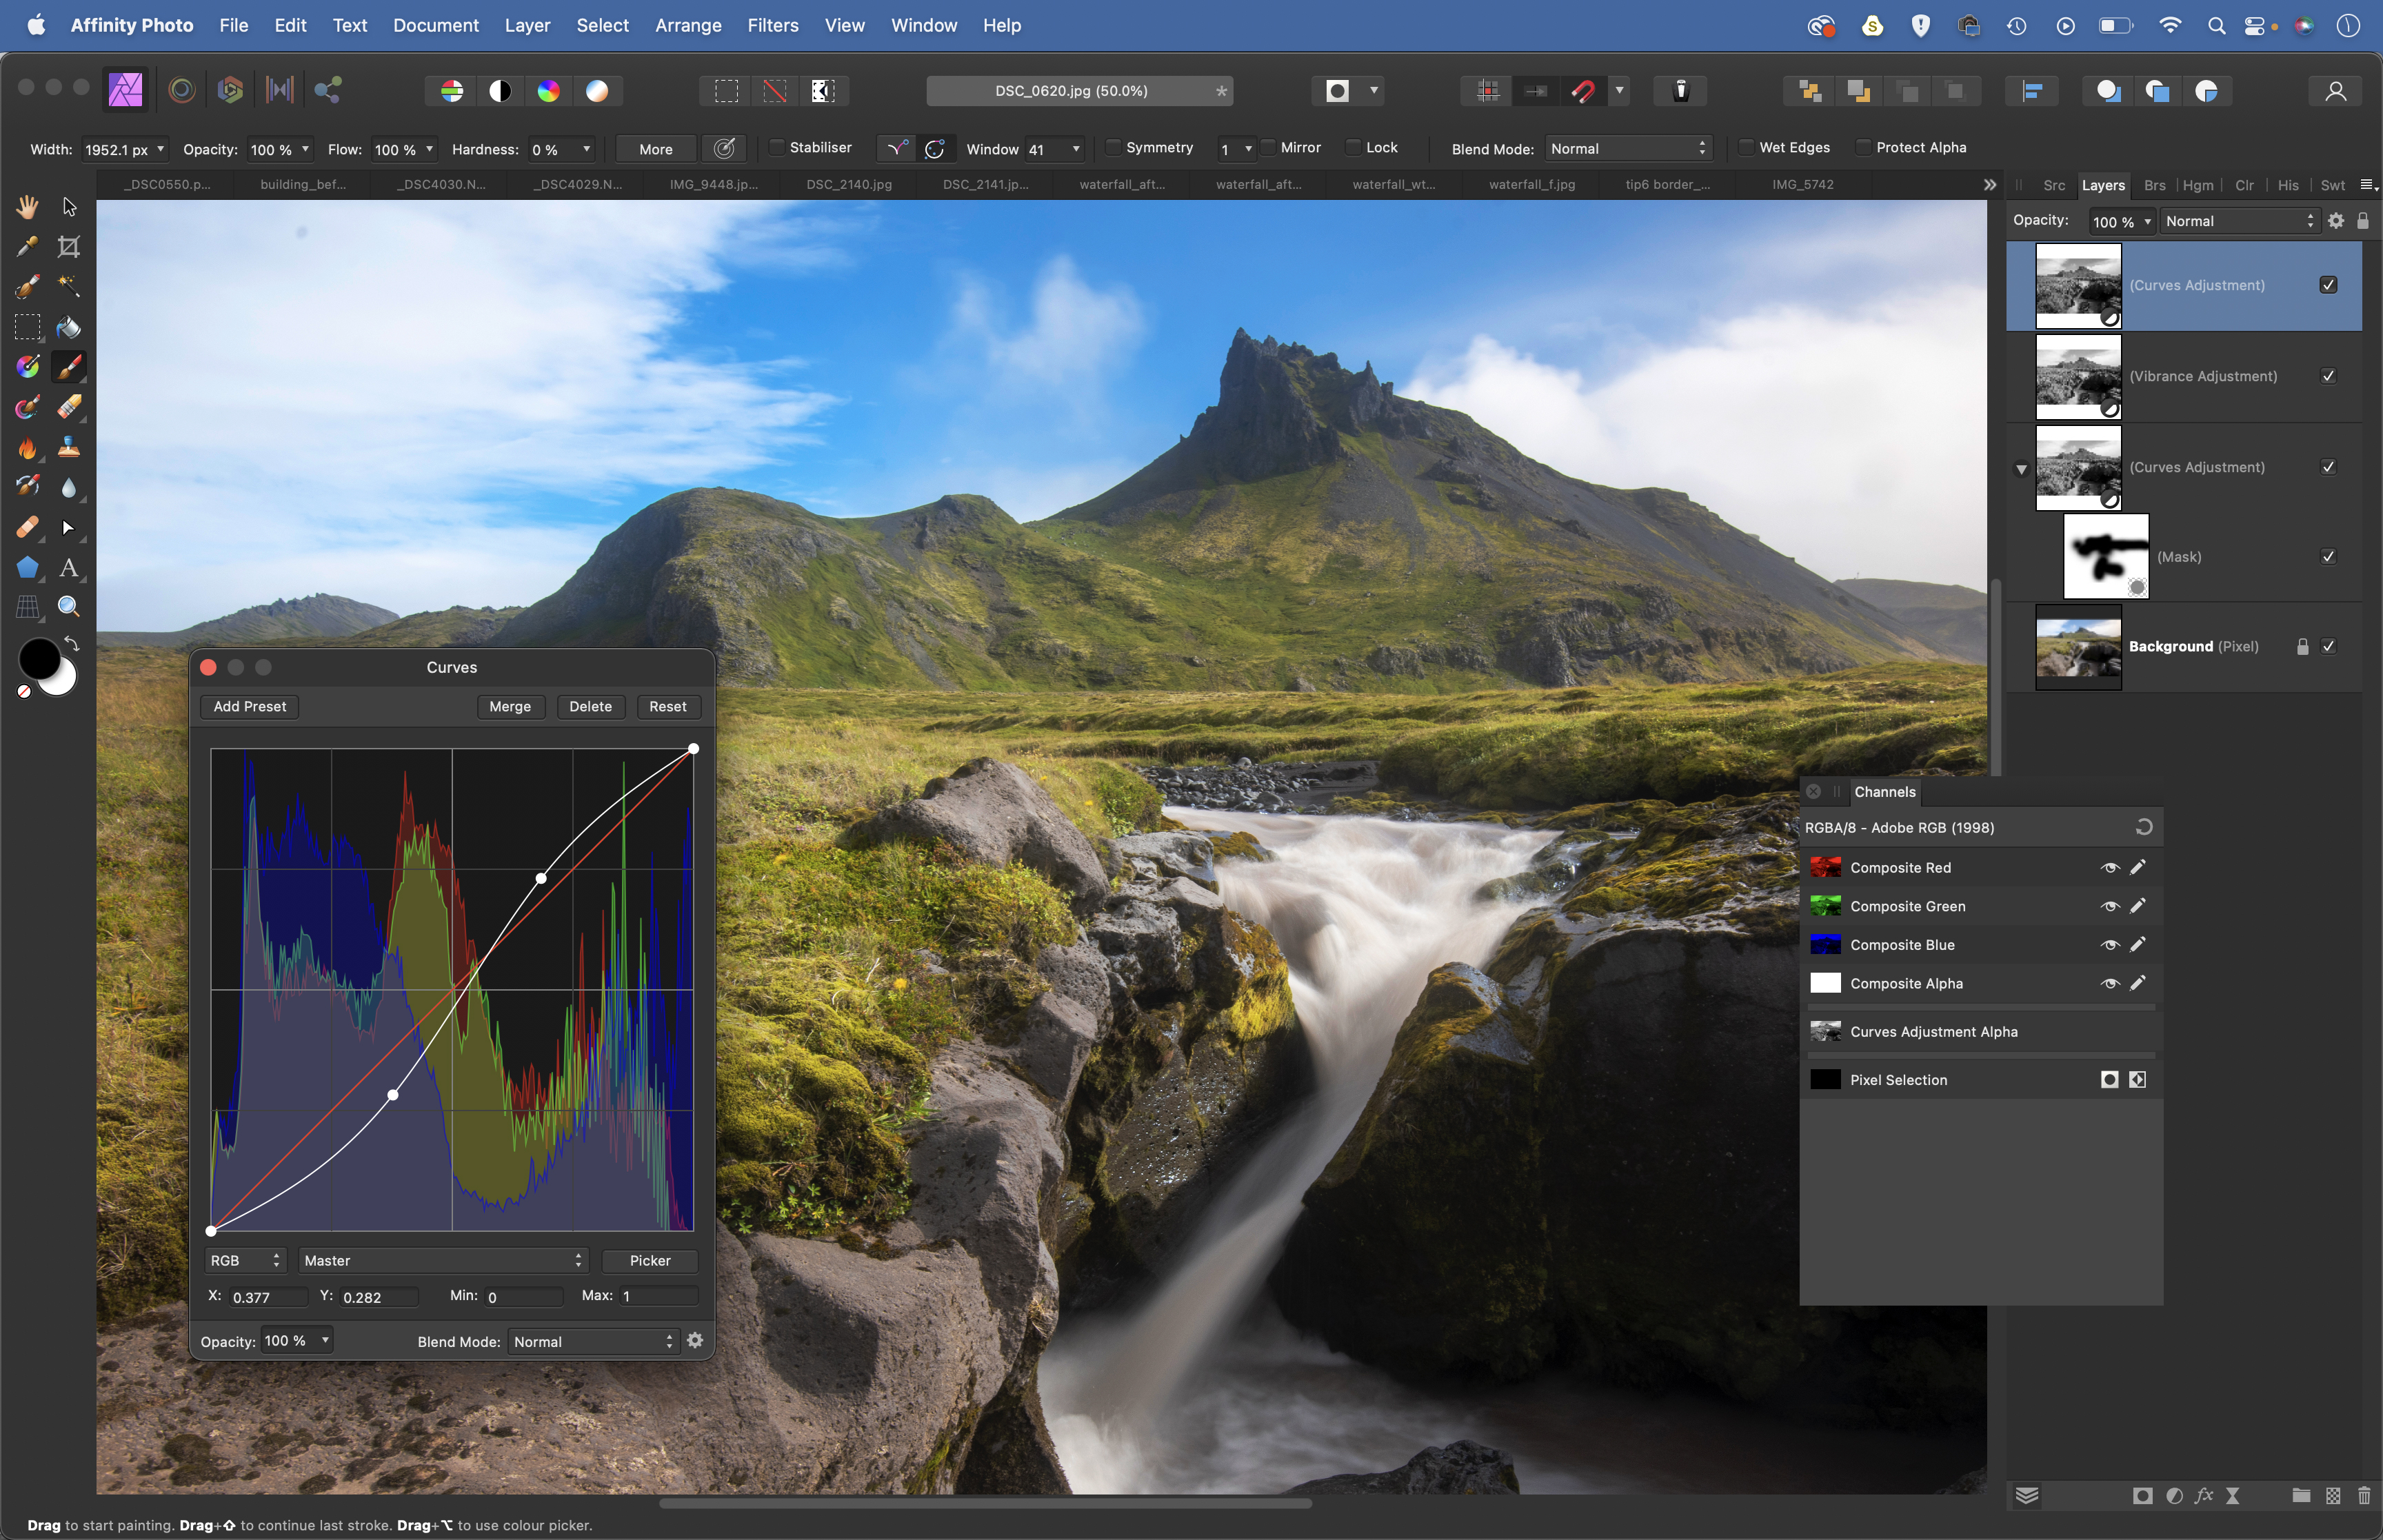
Go to the Channels panel (View > Studio > Channels). The green channel has the greatest contrast between the grass and the rest of the image. Right-click it and select Load To Pixel Selection. Make a Curves layer and plot an S-shaped curve to boost green contrast.
6. Lower the blues
If the water was too blue, you’d click the blue channel. Lighter areas are included in the selection. Right-click the channel, select Load to Pixel Selection, then turn other channels back on. Add a Vibrance adjustment layer, then drag down on Saturation to reduce blues.
• See more of our Affinity Photo tutorials
PhotoPlus: The Canon Magazine is the world's only monthly newsstand title that's 100% devoted to Canon, so you can be sure the magazine is completely relevant to your system.
Read more:
Best photo-editing laptops
Best photo editing software
Best online photography courses
The lead technique writer on Digital Camera Magazine, PhotoPlus: The Canon Magazine and N-Photo: The Nikon Magazine, James is a fantastic general practice photographer with an enviable array of skills across every genre of photography.
Whether it's flash photography techniques like stroboscopic portraits, astrophotography projects like photographing the Northern Lights, or turning sound into art by making paint dance on a set of speakers, James' tutorials and projects are as creative as they are enjoyable.
He's also a wizard at the dark arts of Photoshop, Lightroom and Affinity Photo, and is capable of some genuine black magic in the digital darkroom, making him one of the leading authorities on photo editing software and techniques.

