Portrait photography masterclass Part 1: Shoot a classically lit self-portrait
Natasha J Bella shows how to shoot brilliant self-portrait photography at home with a classic flash lighting setup
The best camera deals, reviews, product advice, and unmissable photography news, direct to your inbox!
You are now subscribed
Your newsletter sign-up was successful
Watch video: How to shoot classically lit self-portrait photography
In the first part of a brand-new series all about portraiture I’m going to teach you everything you need to know about taking perfect people pictures in the studio, from simple one-flash setups to more advanced techniques.
I’m kicking off with a classically lit portrait that you can achieve at home with a straightforward home studio setup and a single flash. You can use a basic flashgun and modifiers with some budget radio triggers to fire your flash remotely, though you’ll have better success with a dedicated flash head, which will generally have faster recycle times, more options for modifying and can be plugged into mains, meaning that you don’t need batteries – check out our guide to the best photography lighting kits for in-depth advice.
So follow me as I show you how to take great portraits at home all by yourself, with some simple flash accessories, a tripod, and your creative camera…
01 Set up on a tripod
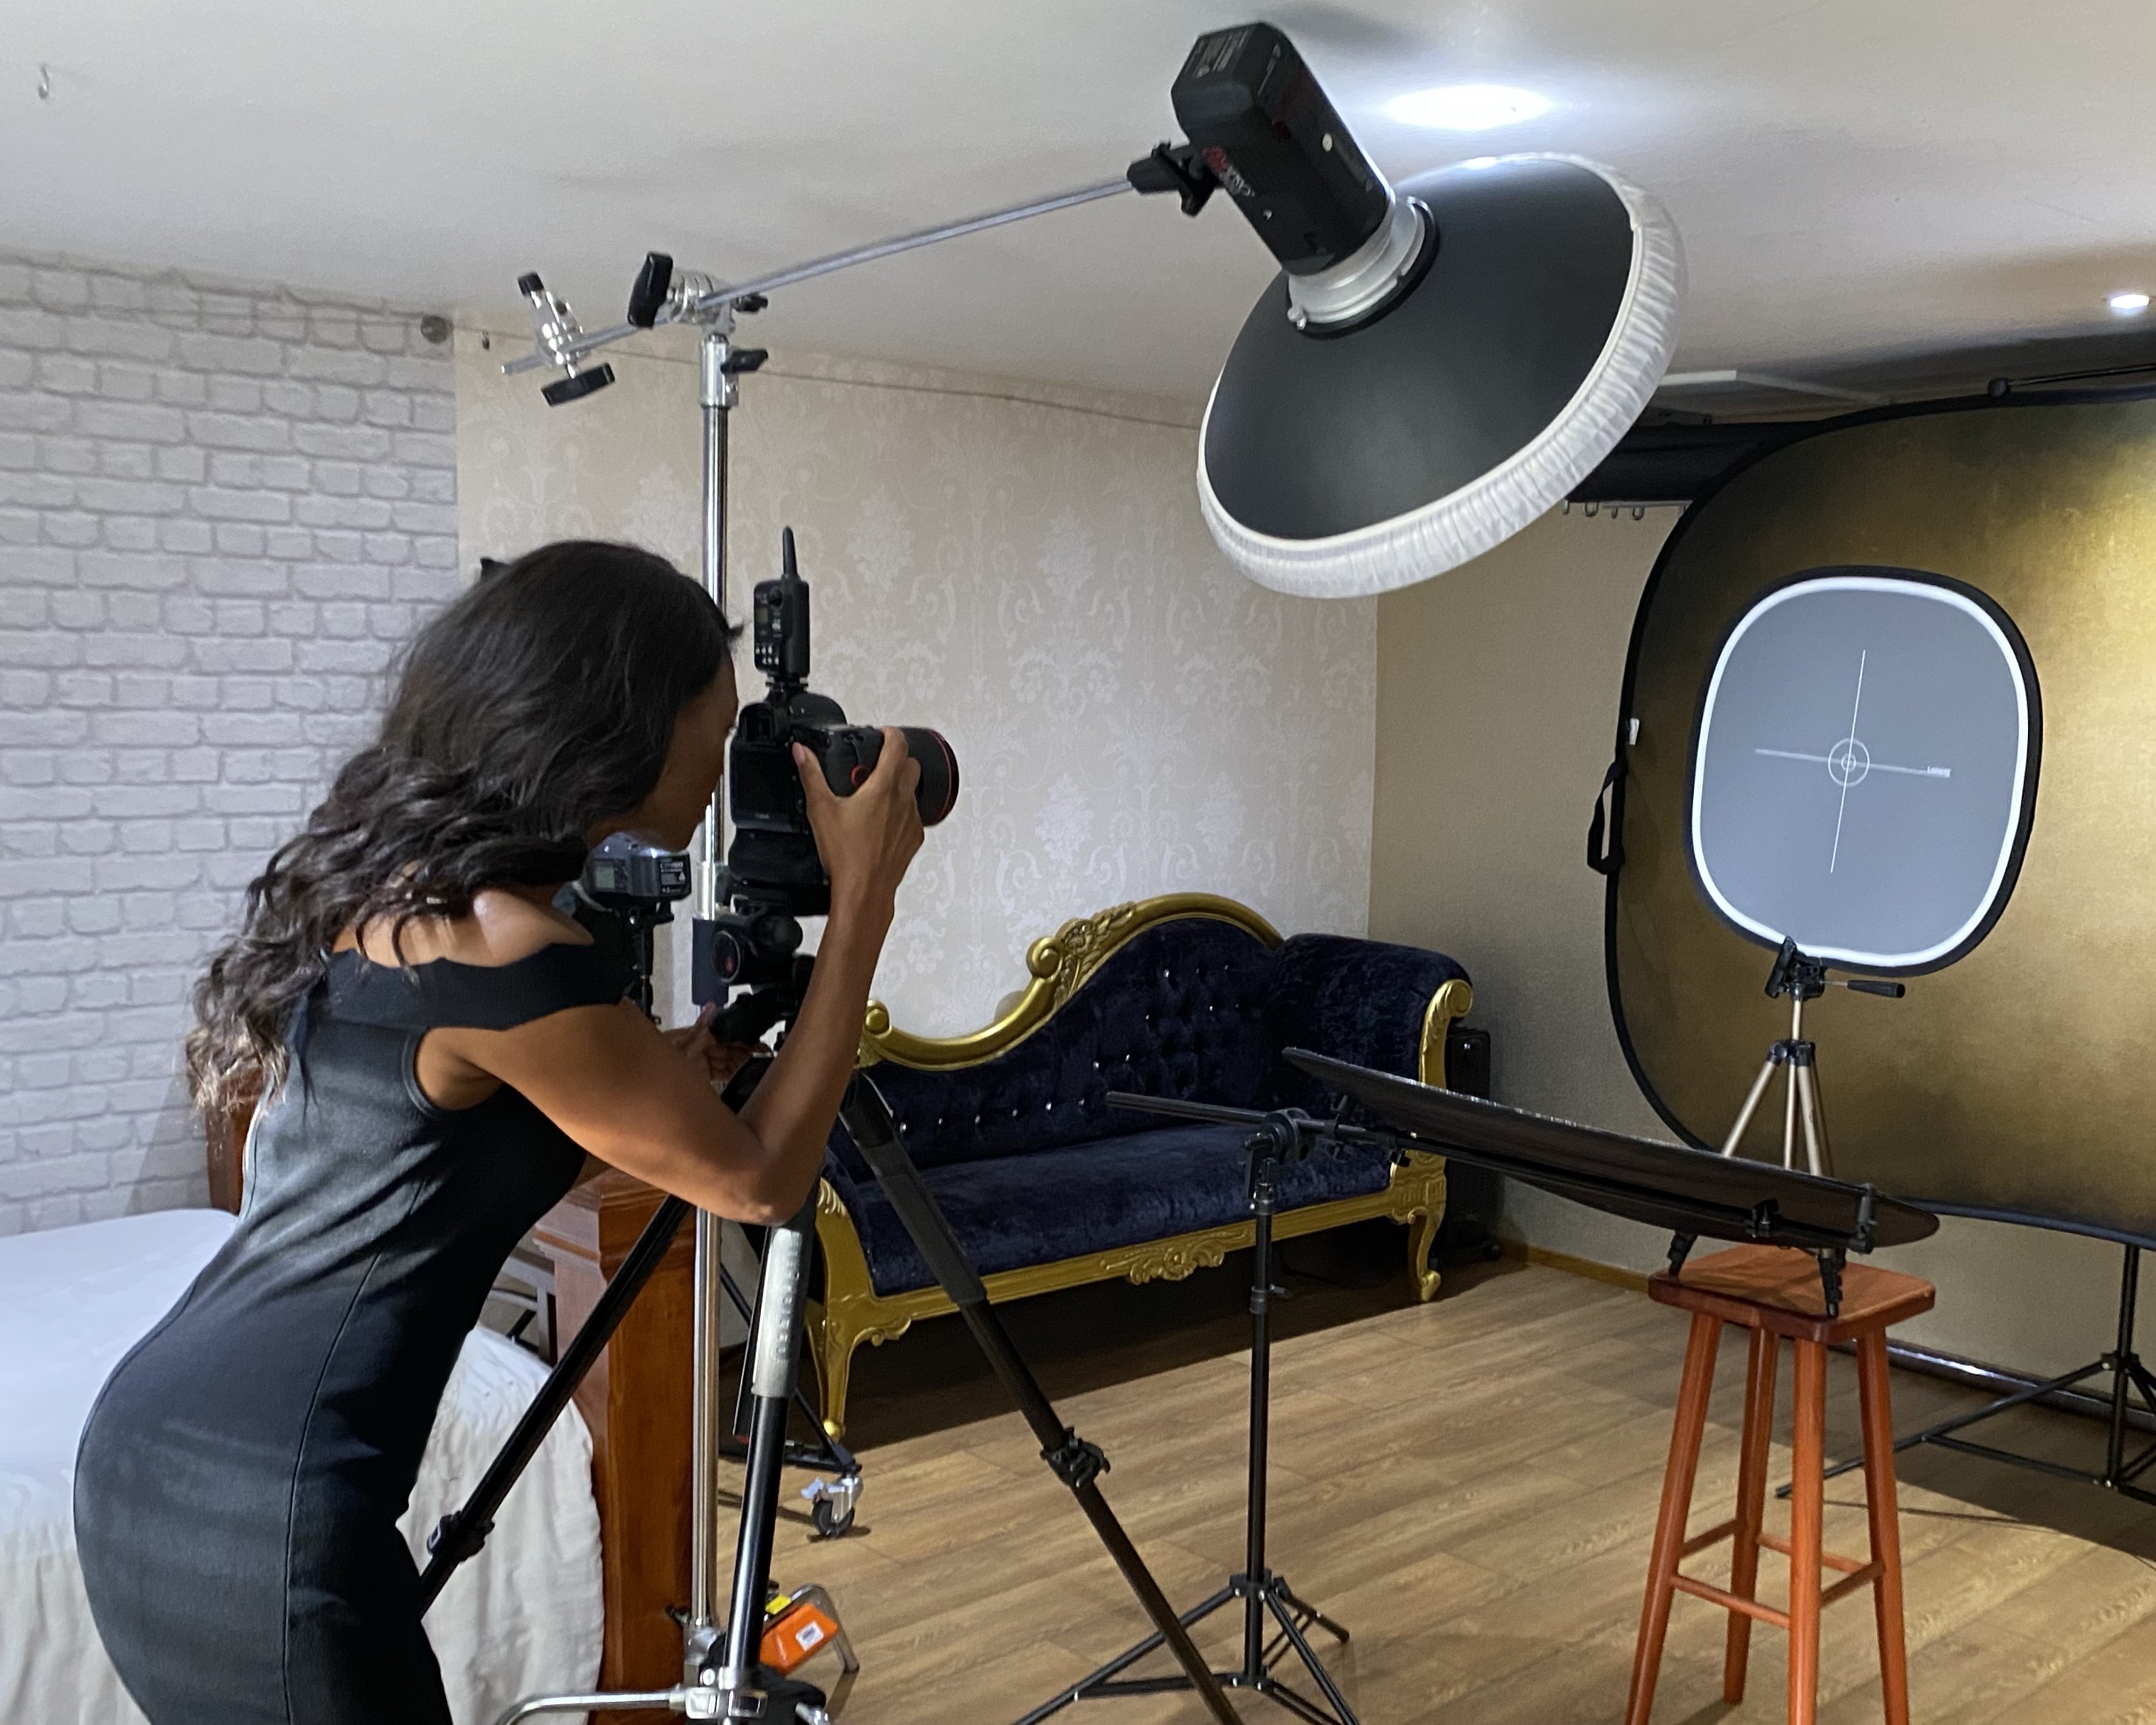
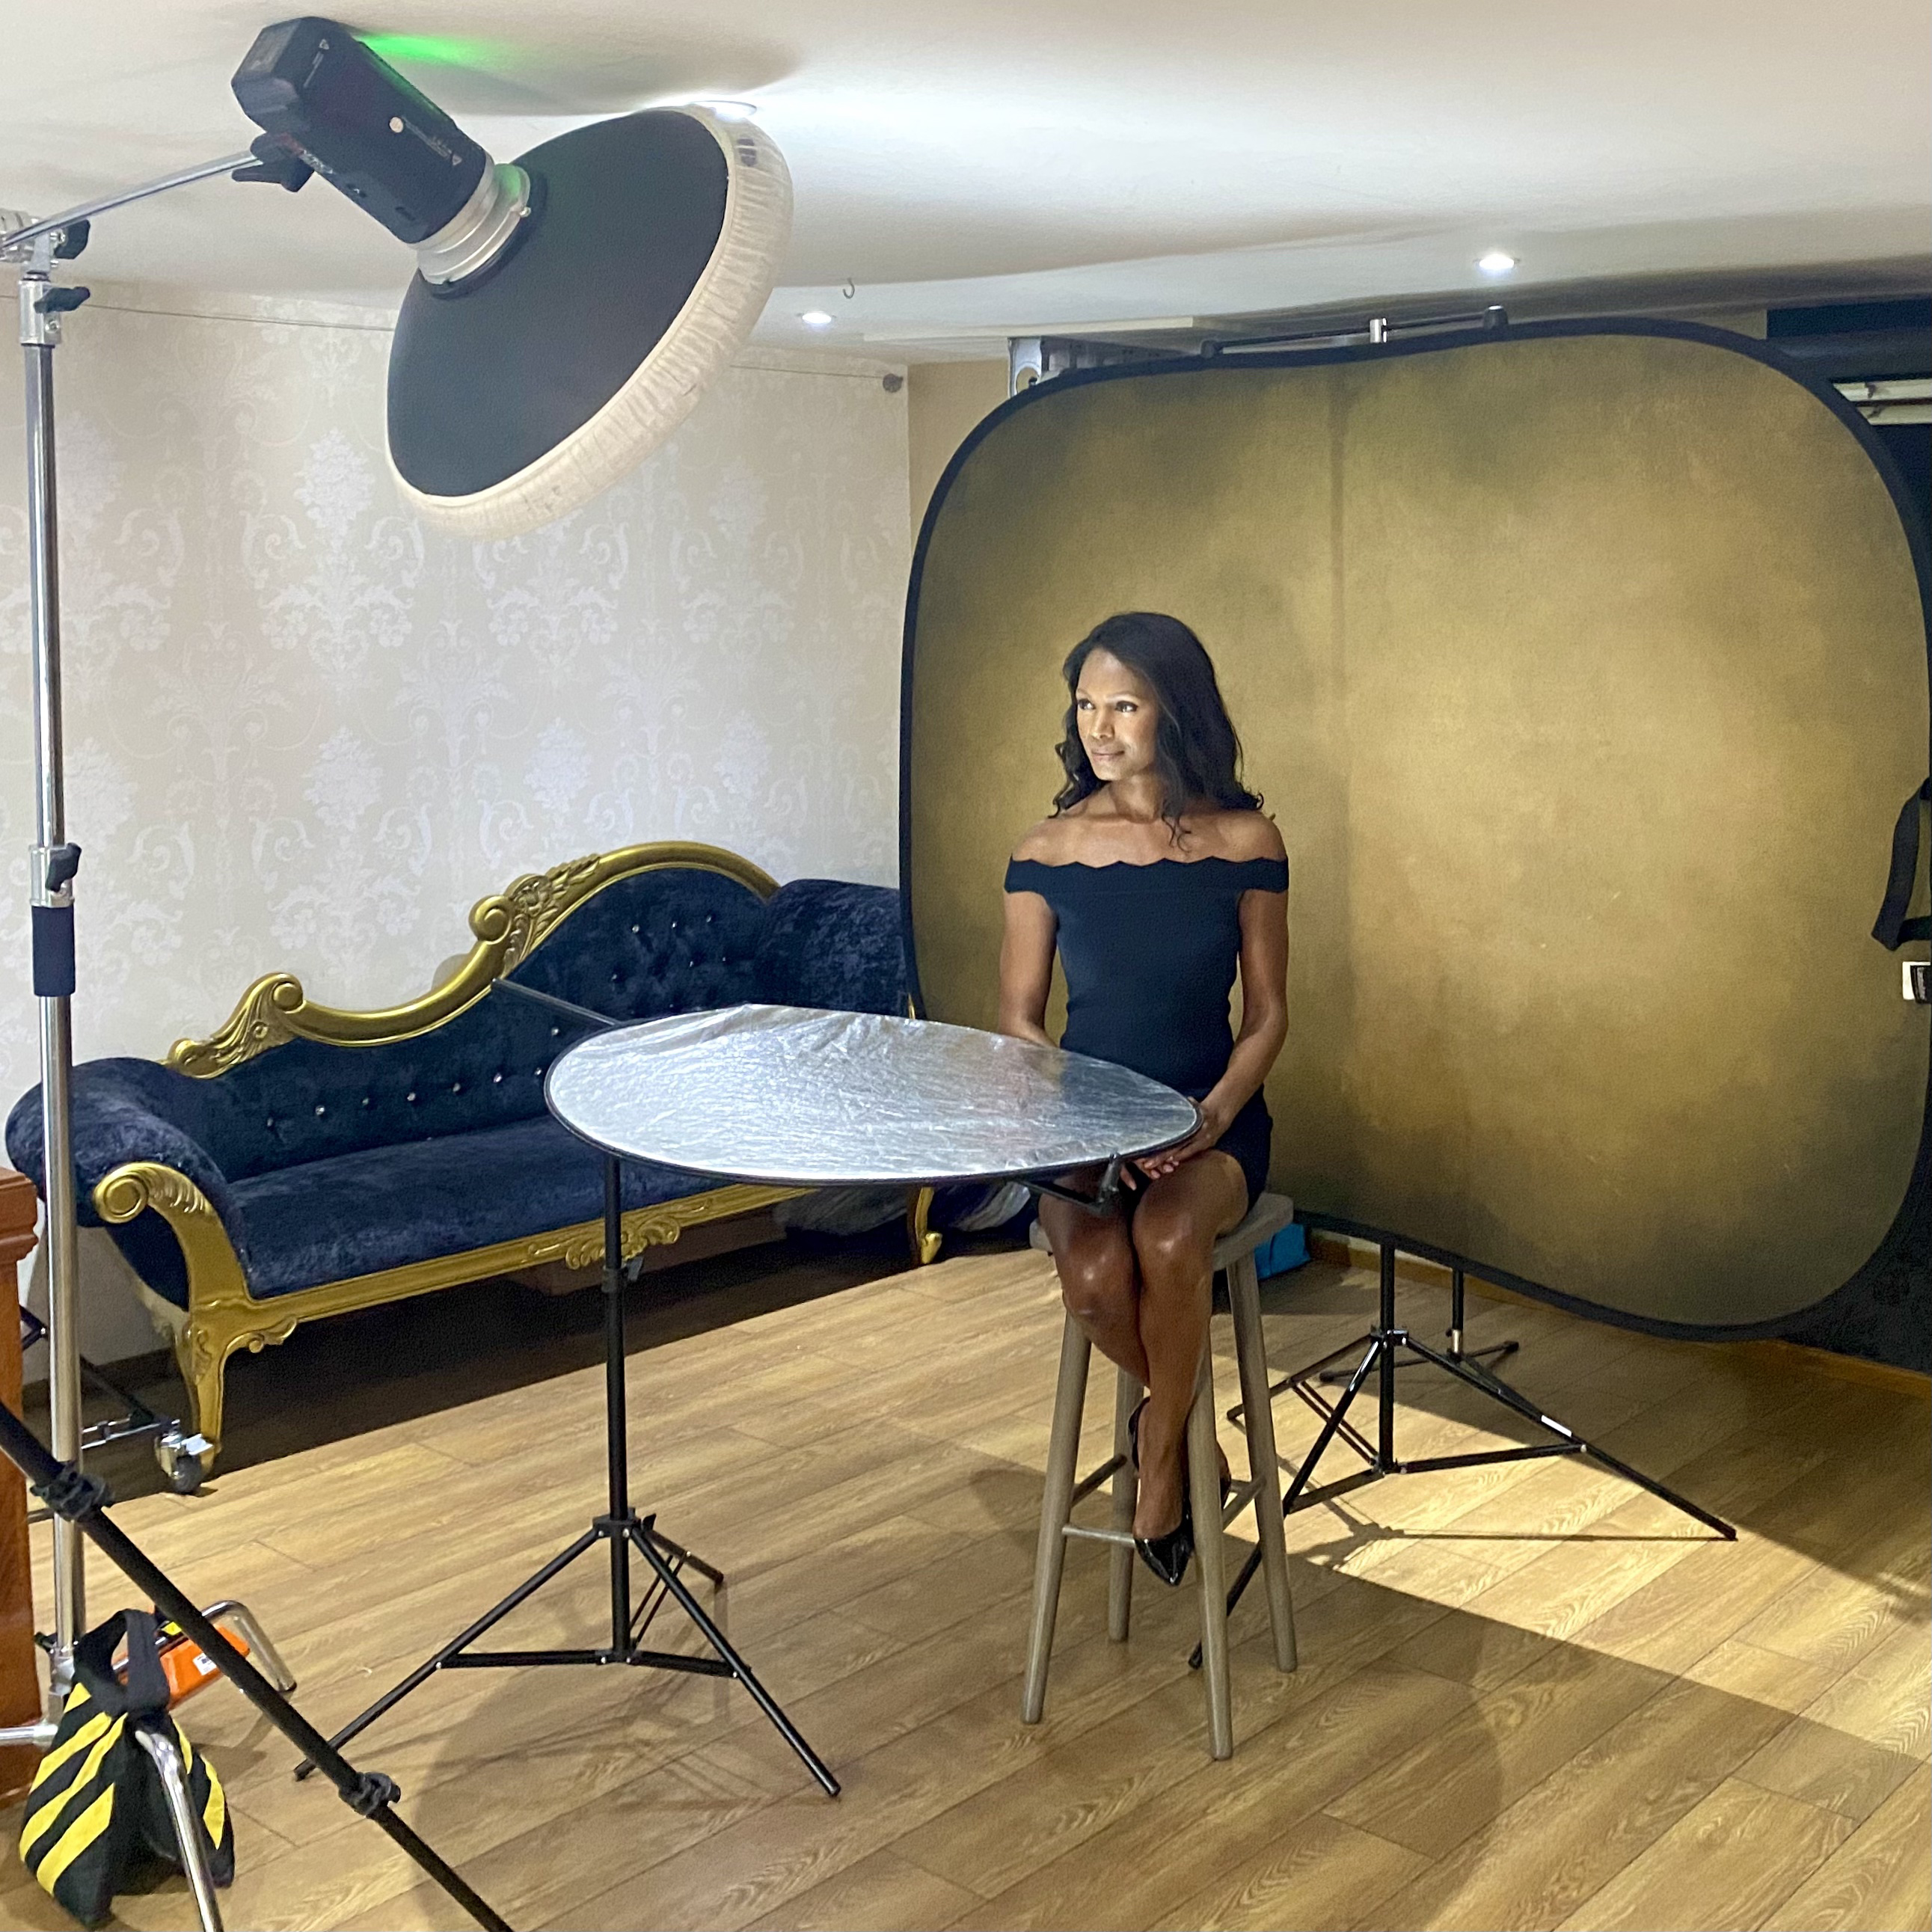
Have your model seated comfortably on a stool close to you. Shoot at eye level to maximize eye contact. I wanted to take this image as a self-portrait to show that you can even get great results when shooting on your own. I positioned my chair in front of the background where I wanted it to be and placed a grey card on it, so that I could focus on it and lock the focus off by setting it to manual focus.
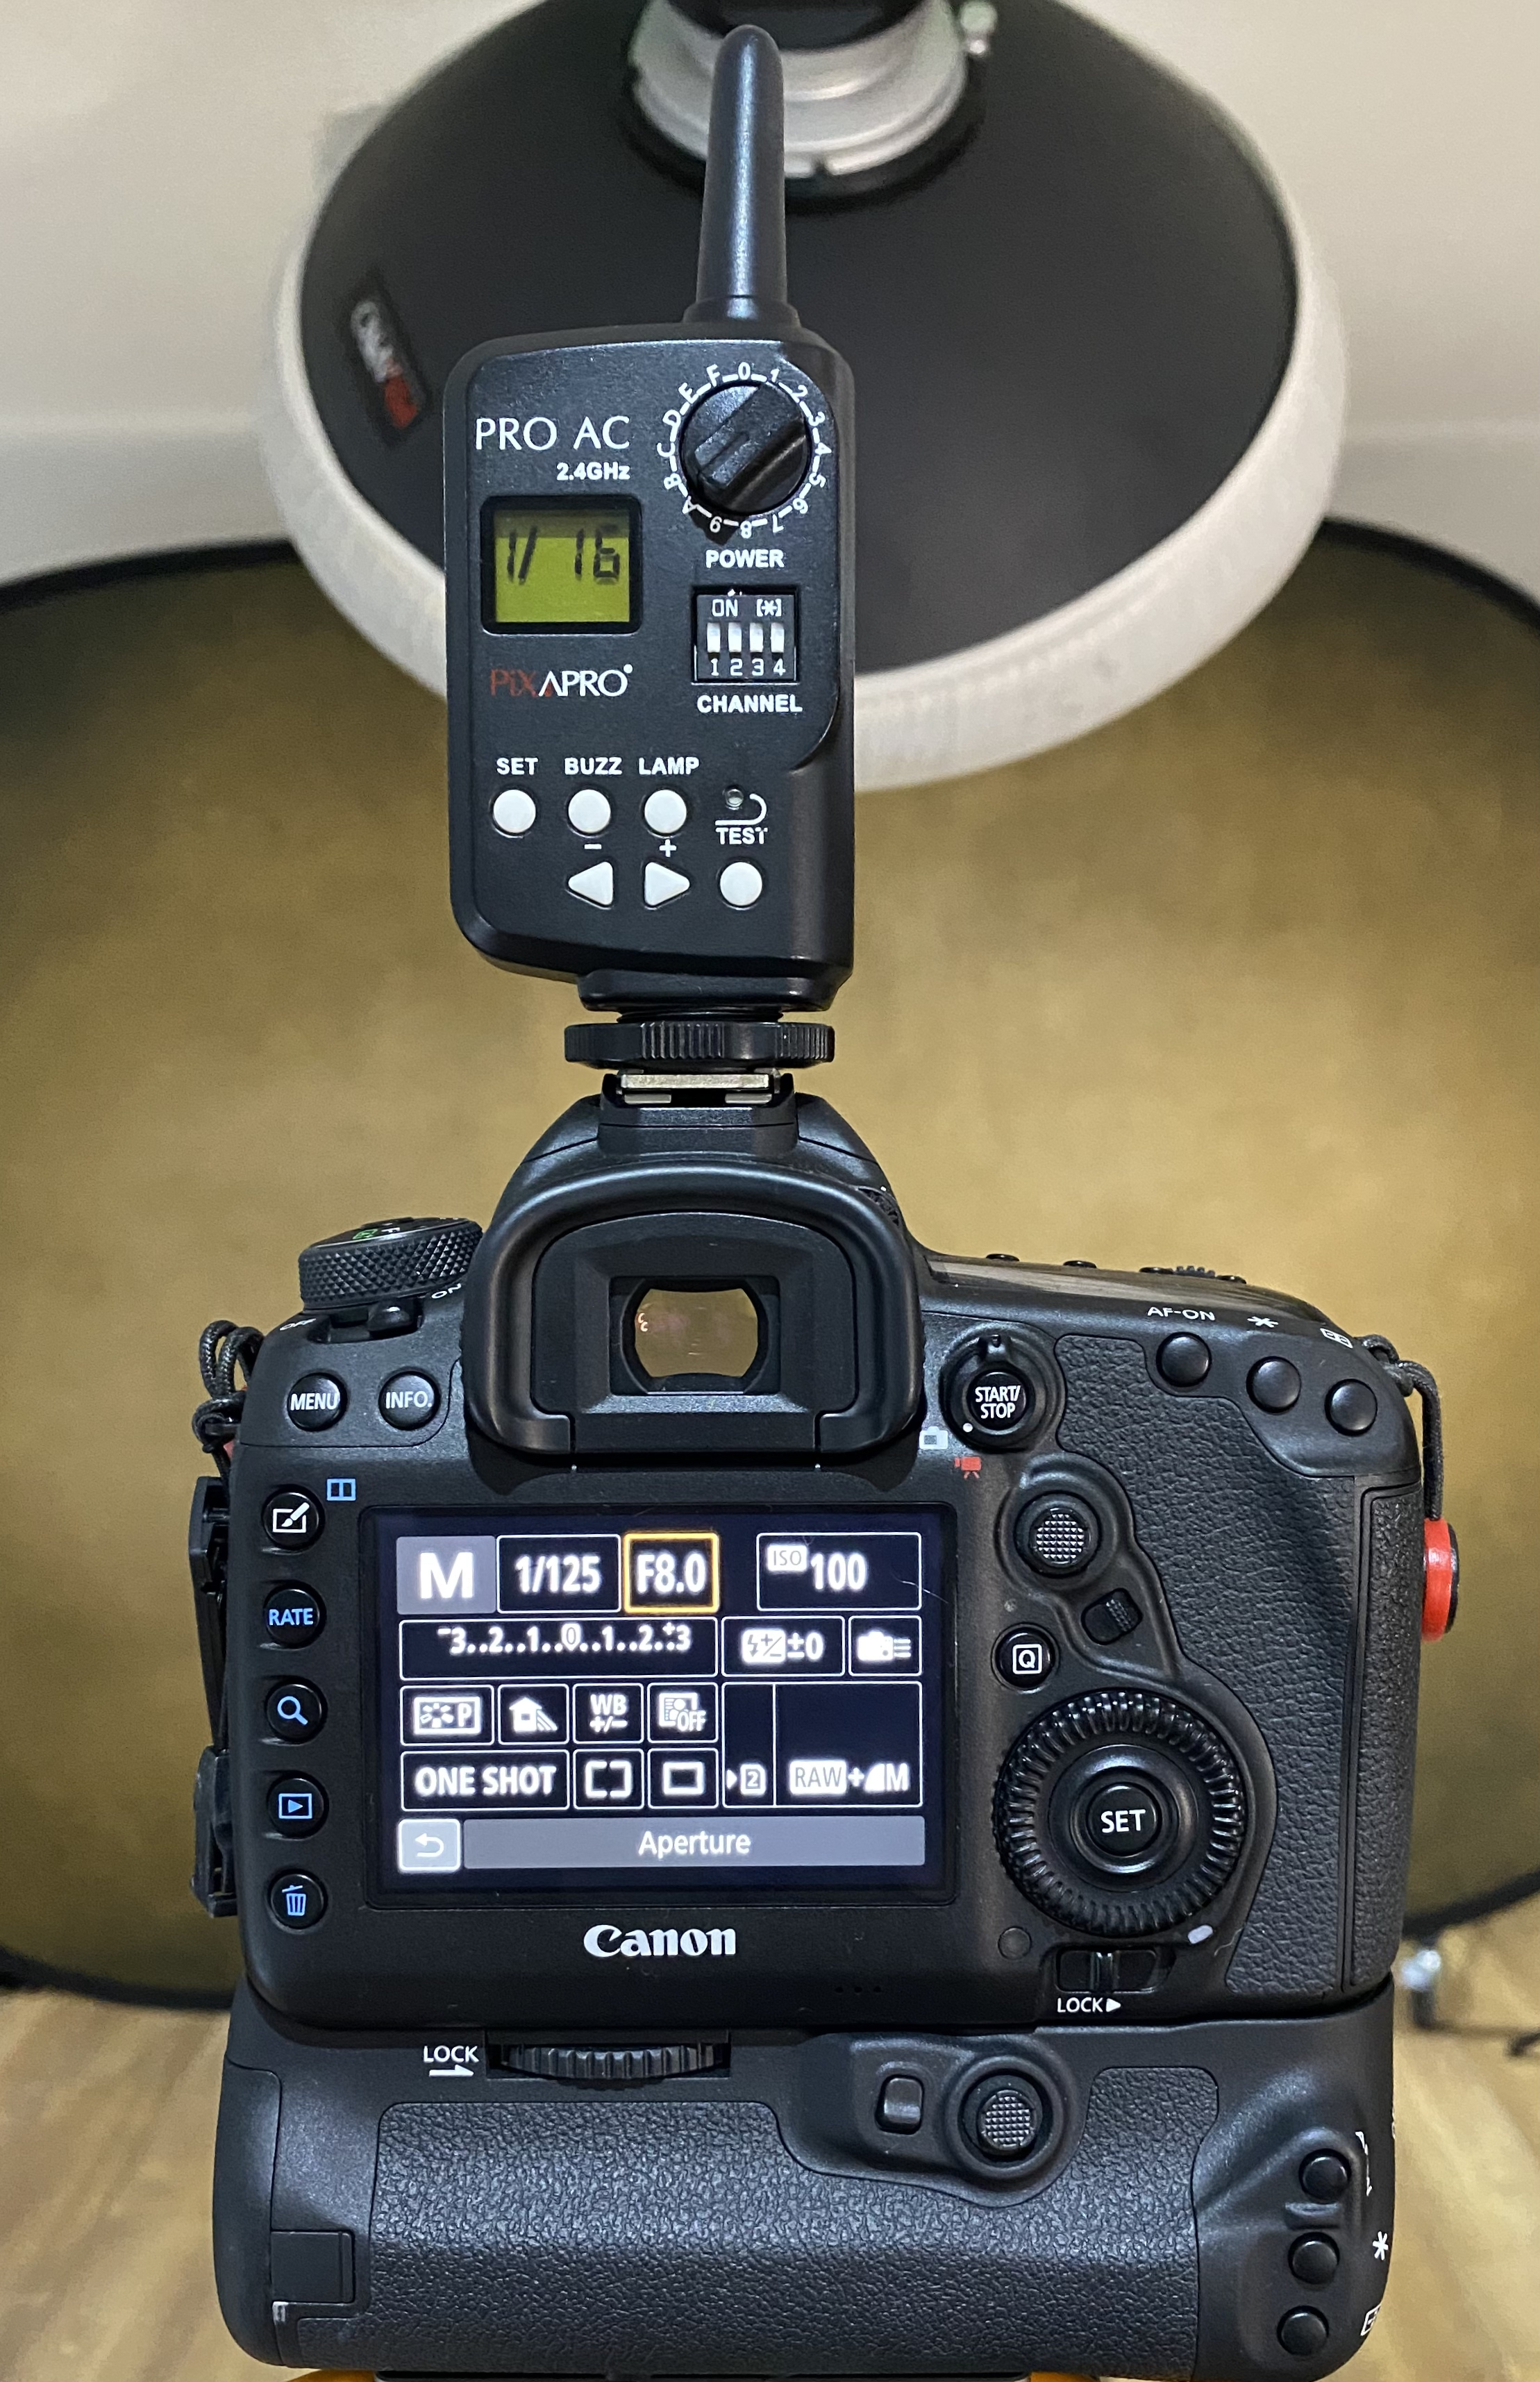
I then went into manual mode and dialled in a shutter speed of 1/125 sec, so that I didn’t run into sync speed issues, an ISO of 100, for the best image quality, and an aperture of f/8, for great sharpness throughout the portrait. Make sure you've got one of the best tripods to keep things nice and sturdy.
02 Set up the flash
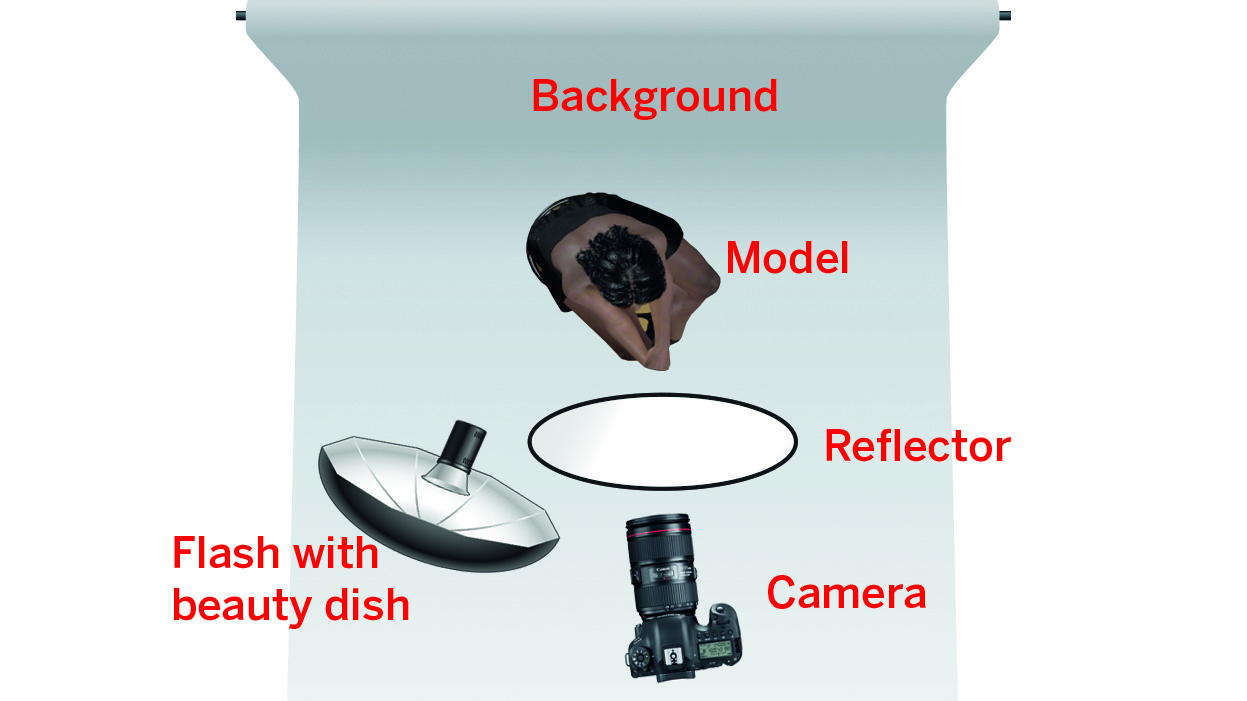
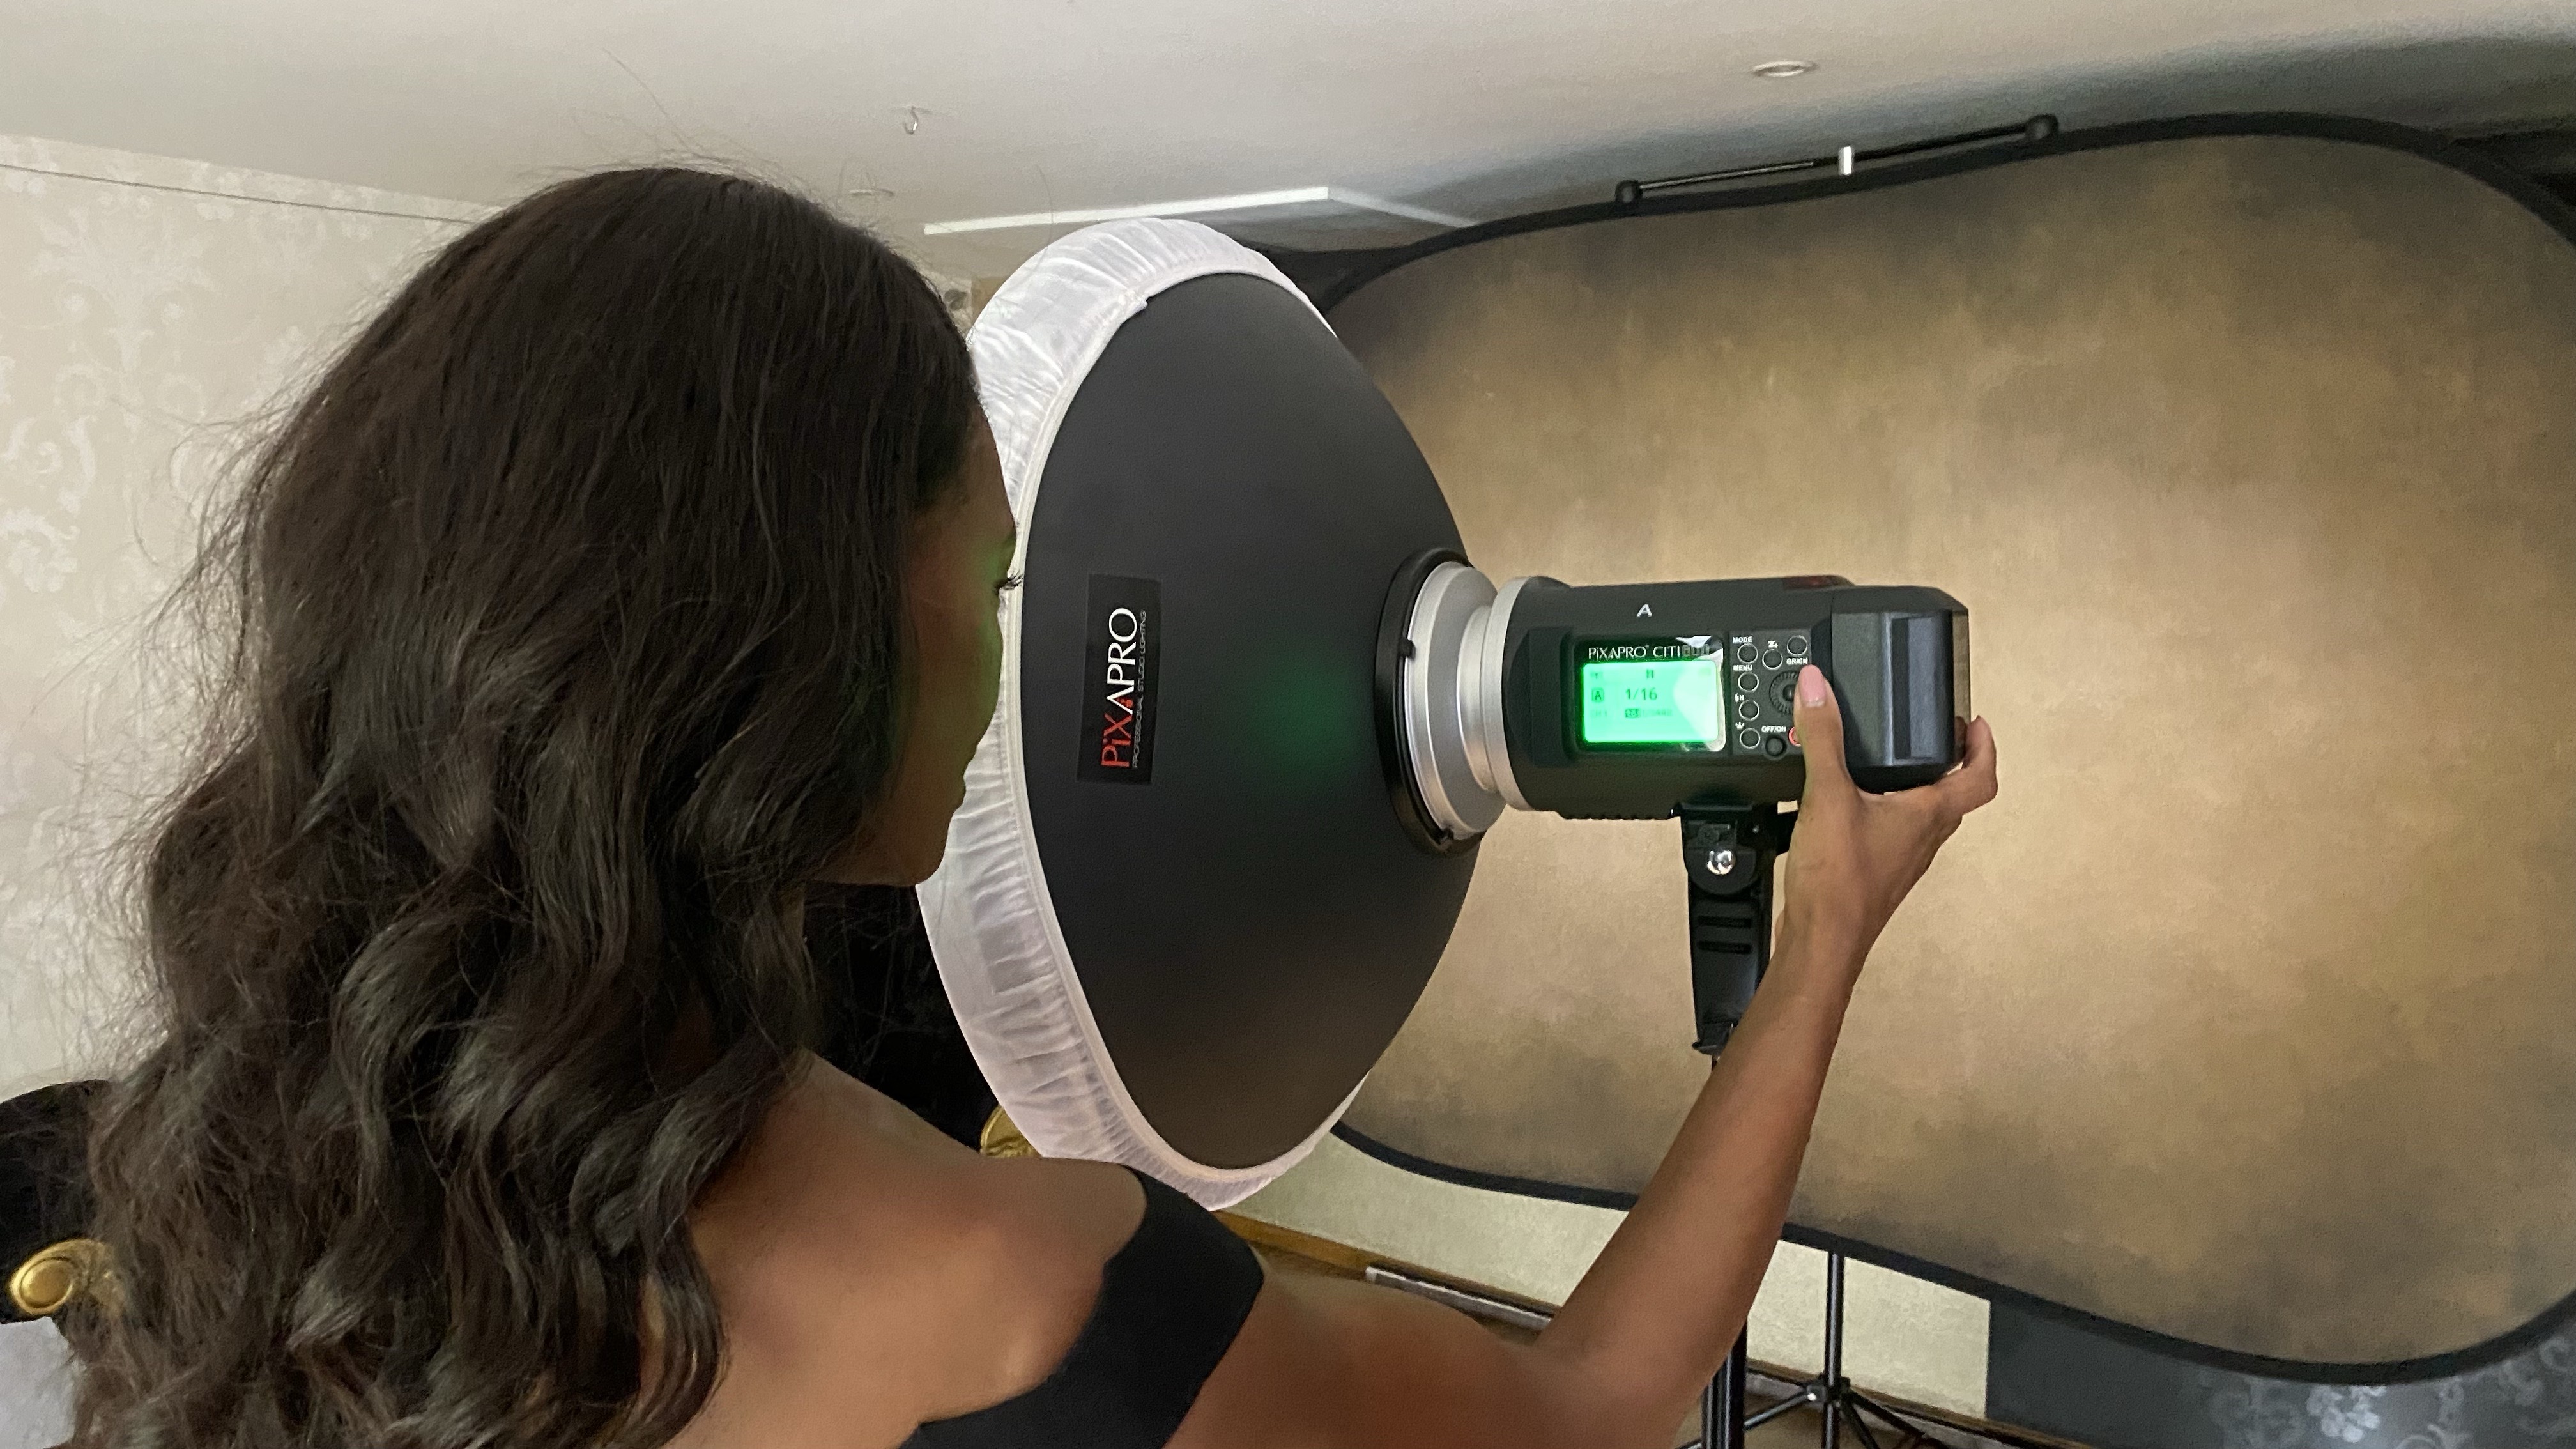
Set up your flash on a tall light stand, or boom arm, so that it’s pointing down at your model at a 45º angle. You’ll want to ensure you can attach a modifier, like a beauty dish, to it for a wider spread of light, which is less harsh. I added a semi-transparent diffuser to the front of the beauty dish to further soften the light, though a simple softbox would work well in a pinch.
The best camera deals, reviews, product advice, and unmissable photography news, direct to your inbox!
Start with 1/16th power on your flash and attach your flash triggers, so you can fire the flash from your camera remotely. Take a test shot and review it, if it’s too dark, you can open your aperture to let more light in, or increase the strobe power. If it’s too bright decrease the flash power or increase your aperture value.
03 Experiment with the White Balance
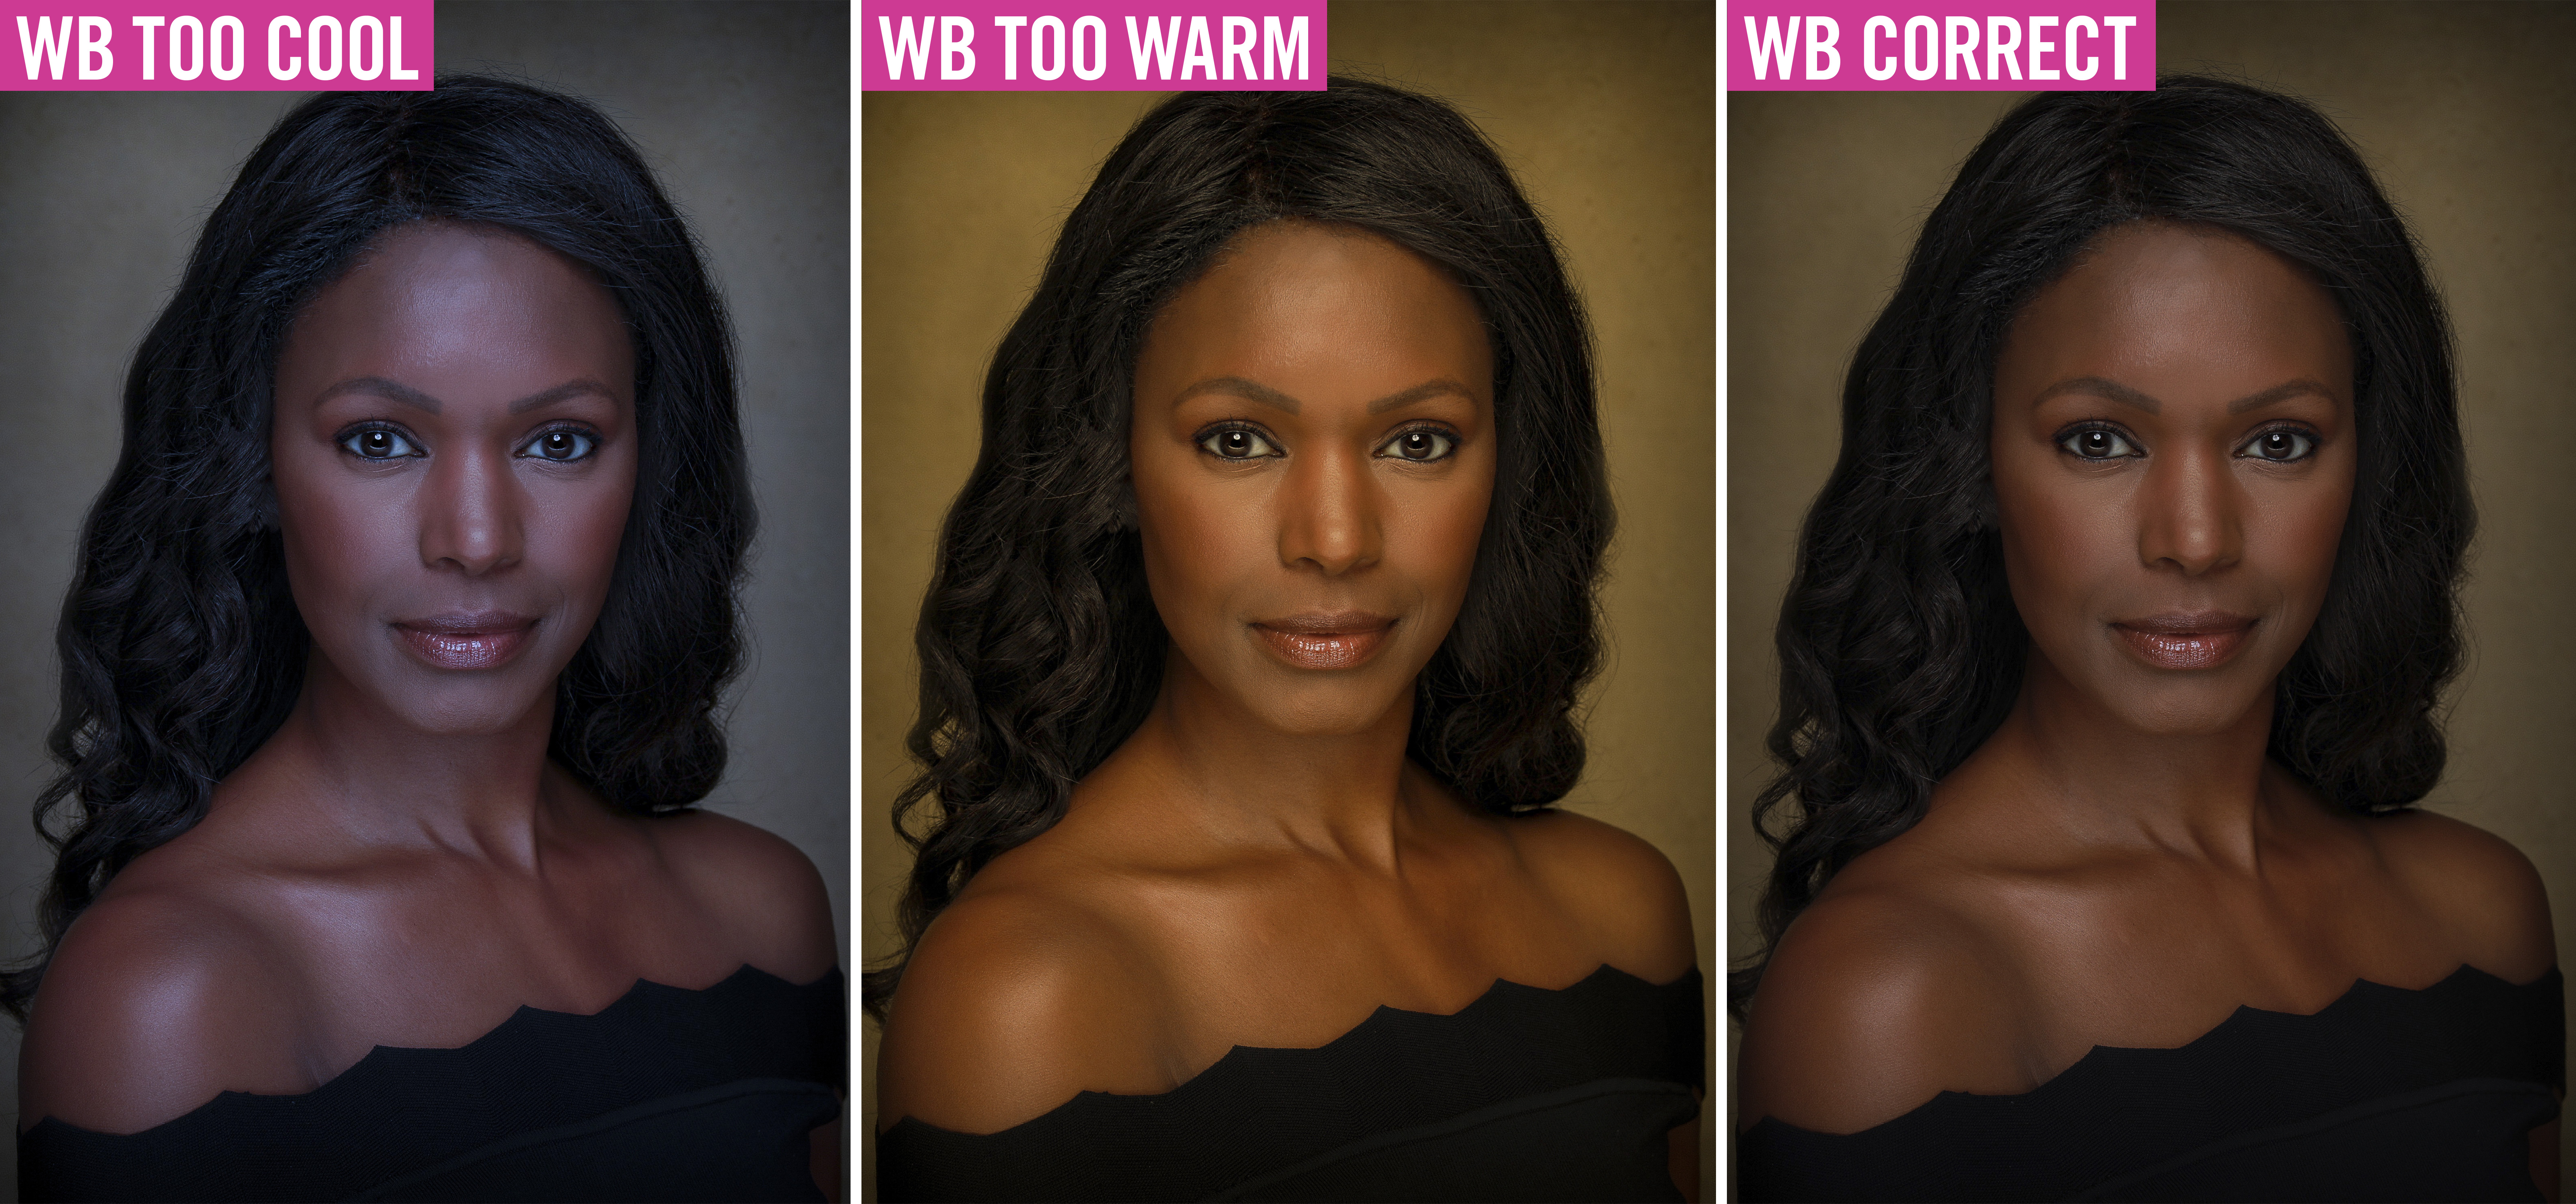
Setting the white balance will help get the color temperature right in camera, so that the image is not too warm or too cool. The aim here is to get the image close to what you can see with your eyes. A quick way to do this when using flash is to set your white balance to sunlight, which is 5200K (Kelvin) on my Canon camera – this will instantly look true to life on the back of the camera.
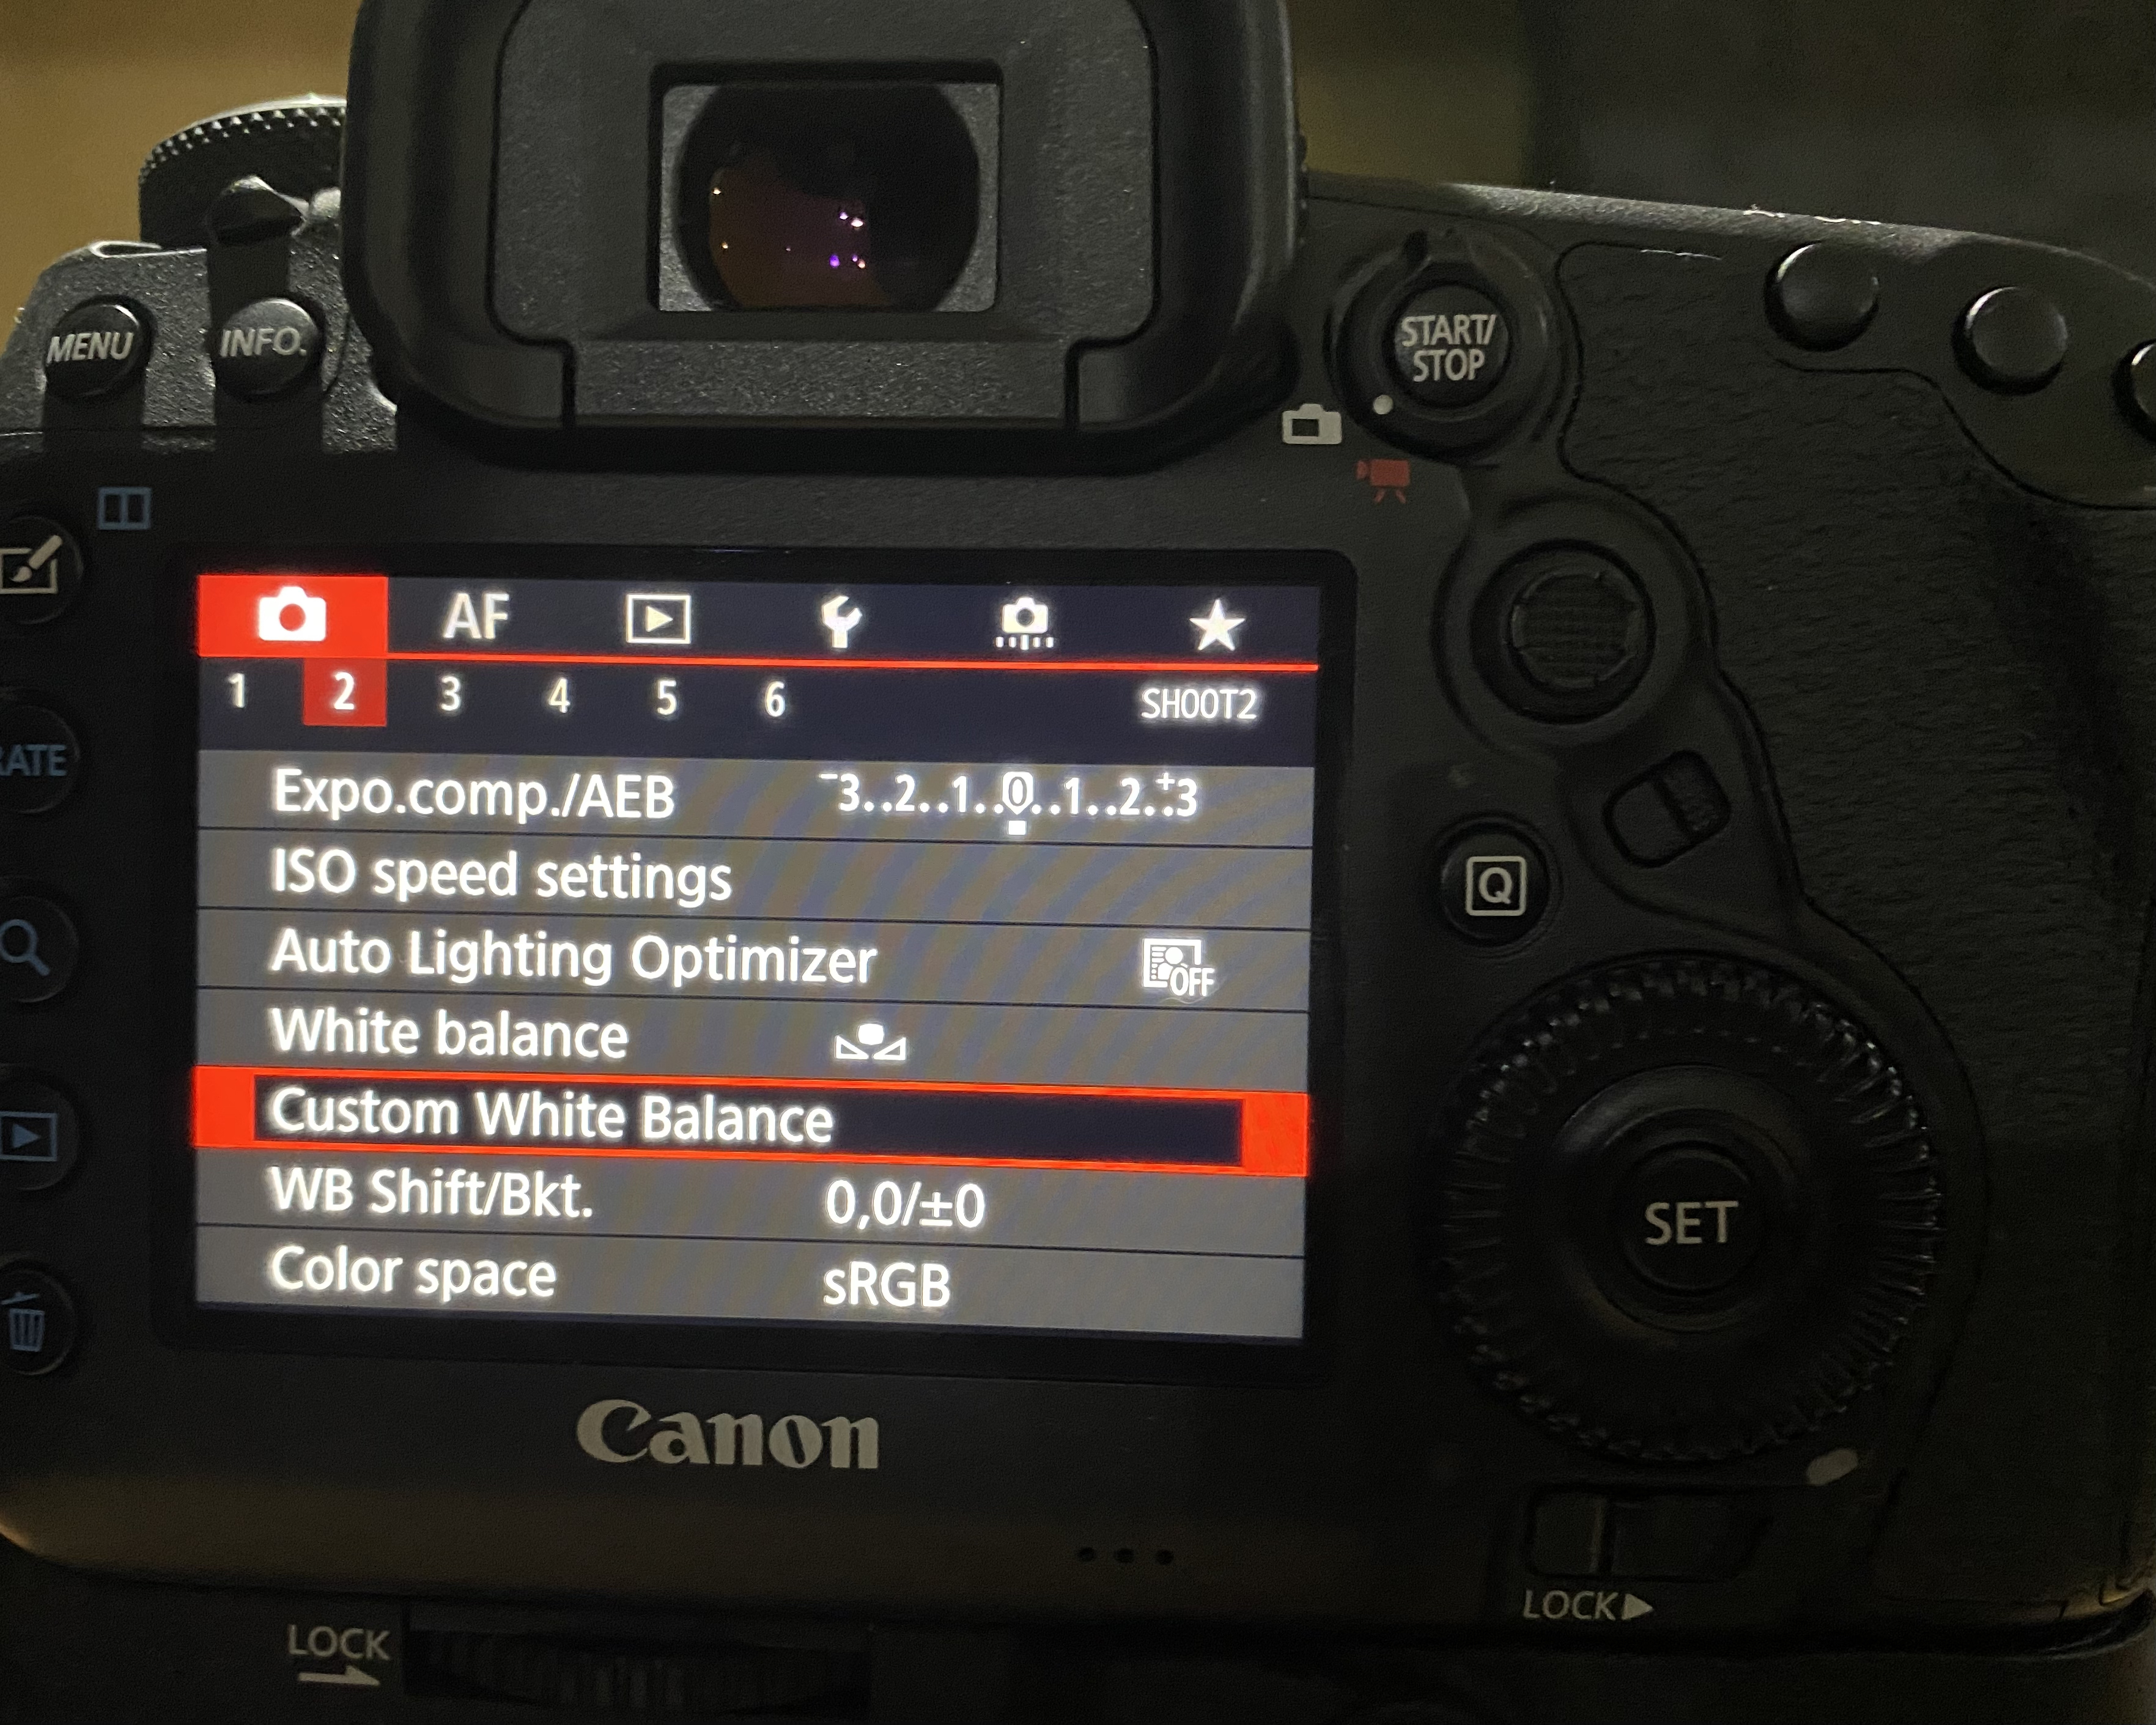
Alternatively, you can set a custom white balance using a grey card once your lighting is set and the model is in position. Take a picture of the grey card and then go into your Canon camera’s Custom White Balance option in the menu and click OK when you see ‘Use WB data from this image for Custom WB’ on your grey card image. This process may change a little if you use a different camera system.
04 Try a reflector
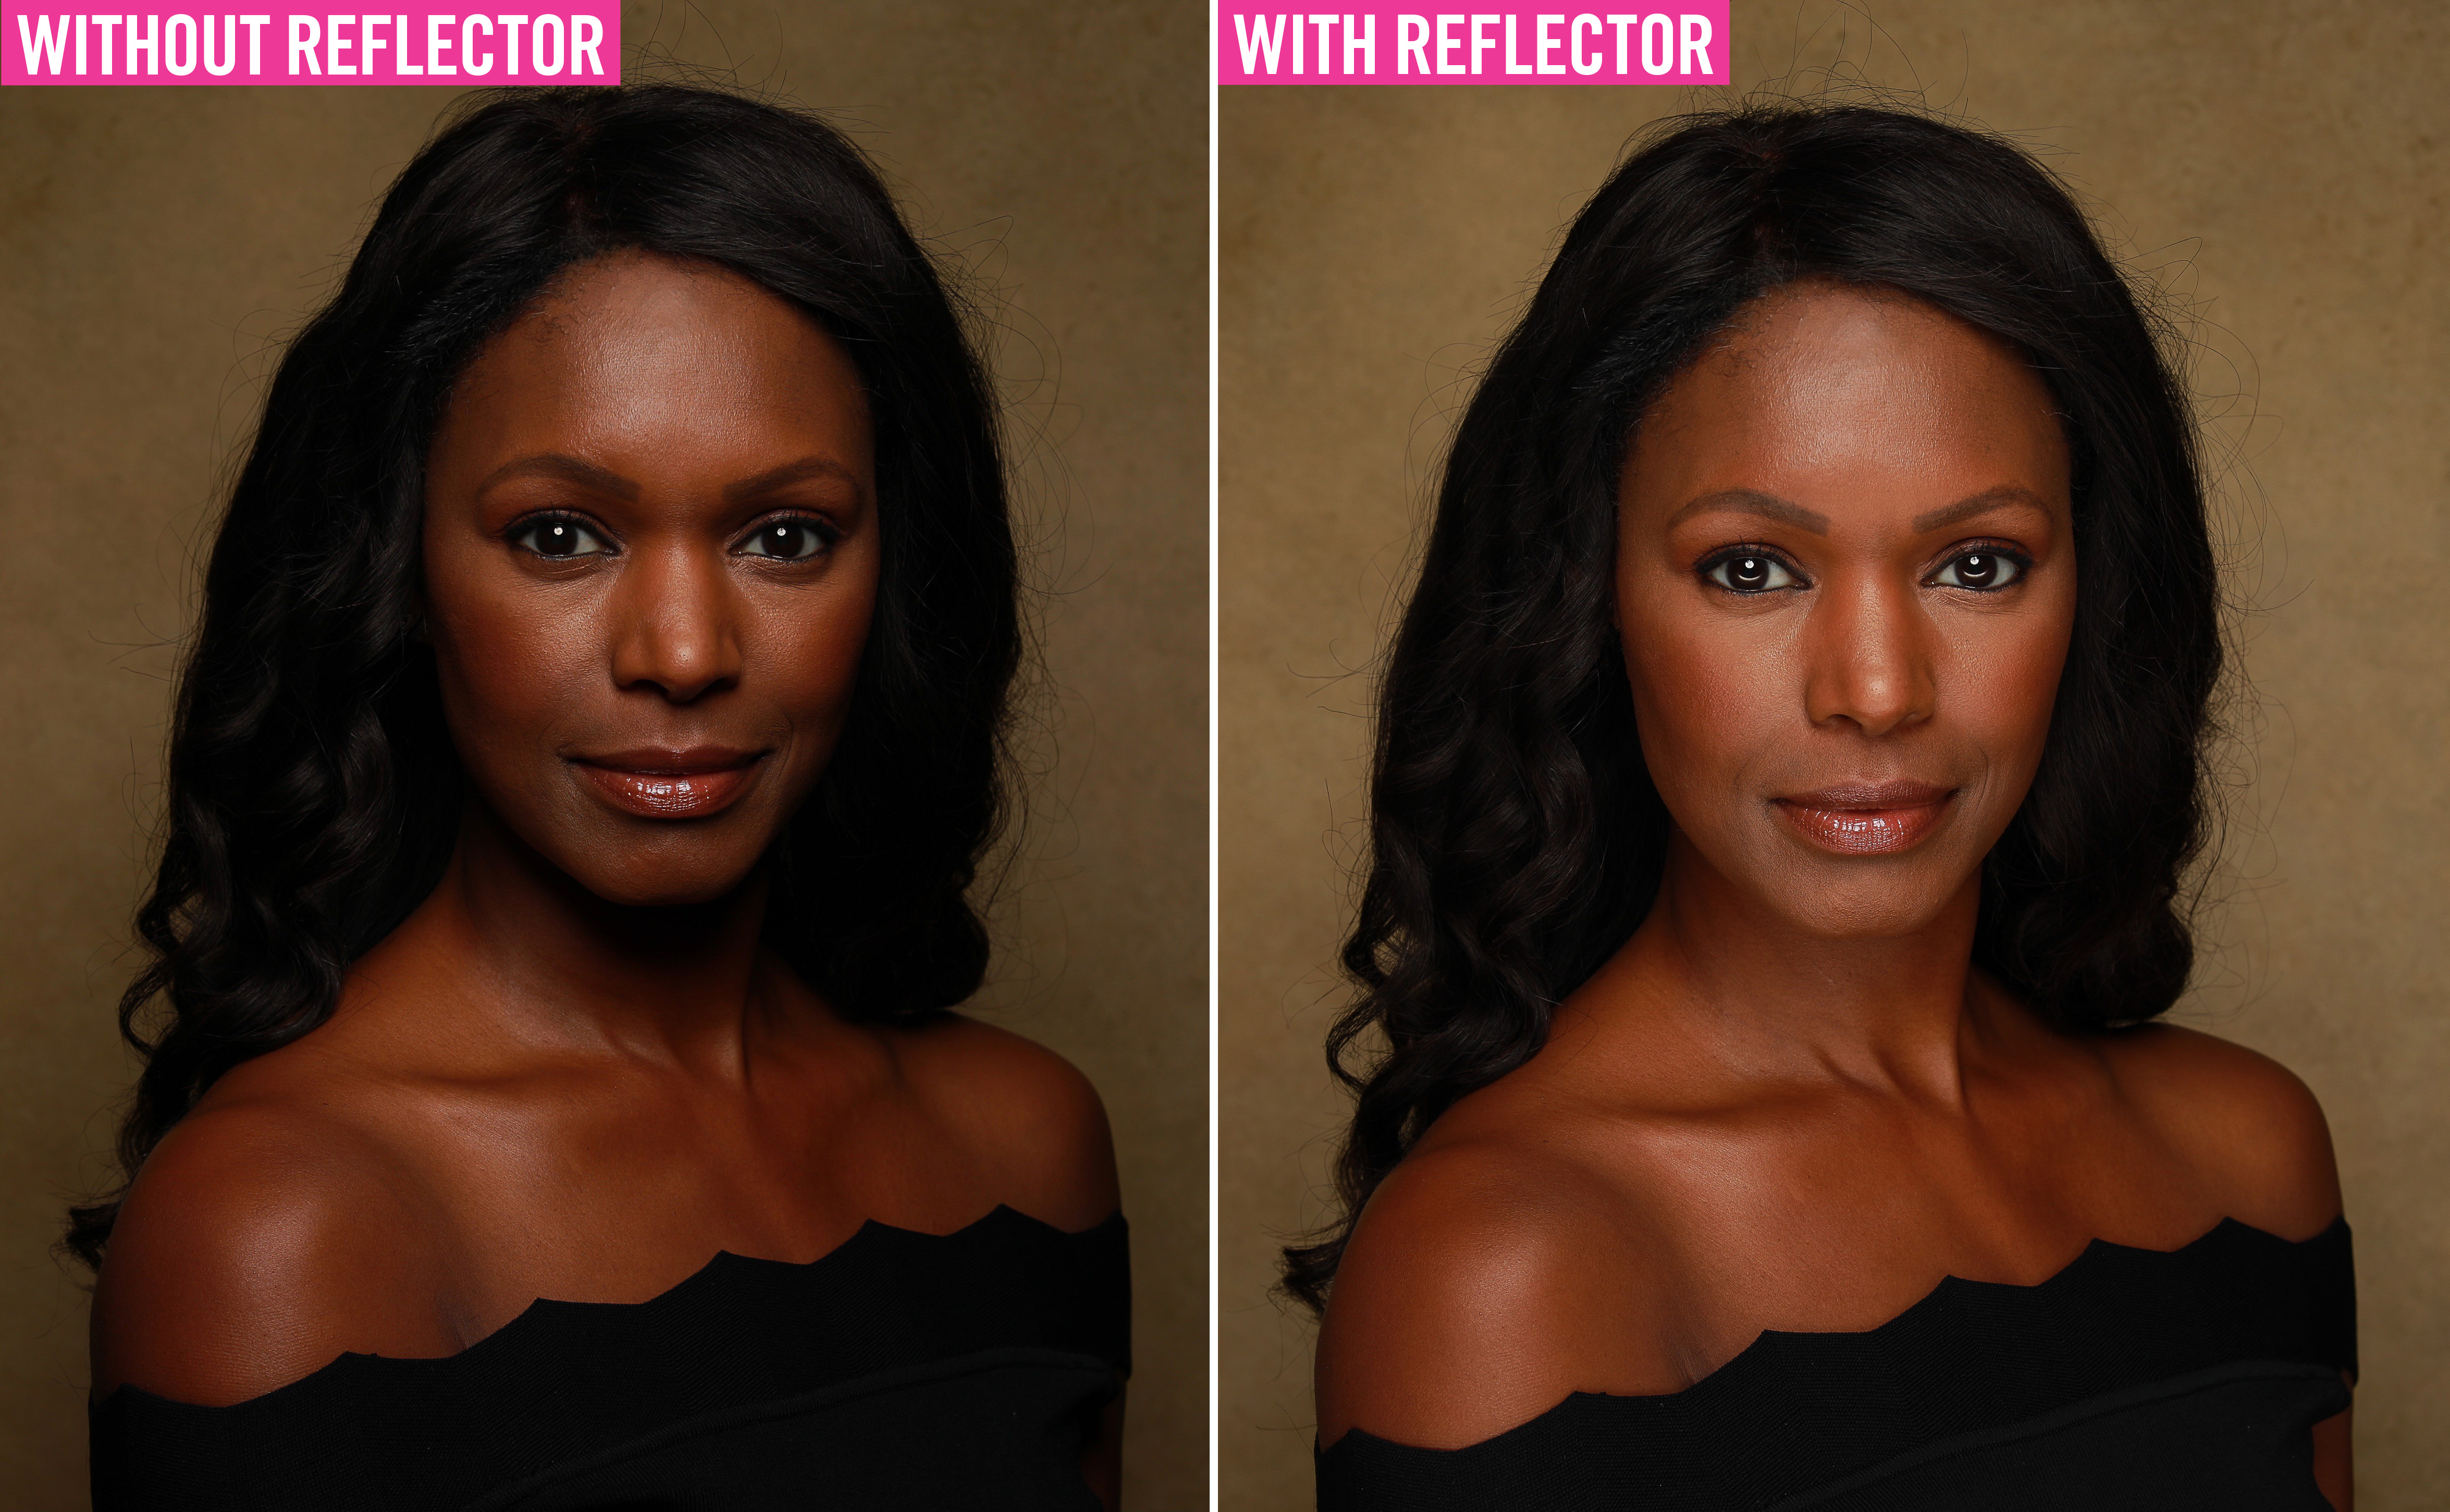
Once the model is seated you can position the reflector close to the model, at waist height, high enough to bounce light under the chin, through the face and brightening the under eye area. The reflector should be low enough to not be seen in your frame. Having the frame on a stand or propped up on another stool is a good idea to free up your model's hands.
Look at the shot on the LCD on the back of your camera and check that the exposure and focus are as expected. Zoom into the image on the LCD and check the details around the image, look closely at hair and clothing etc and ask the model to adjust anything out of place. Allow plenty of room around the model in the frame when composing, so you have sufficient space to crop and straighten in post-production.
PhotoPlus: The Canon Magazine is the world's only monthly newsstand title that's 100% devoted to Canon, so you can be sure the magazine is completely relevant to your system. Every issue comes with downloadable video tutorials too.
Read more:
Best cameras for portraits
Best portrait photography tips
The best flashgun or strobe
The best Canon flashguns
The best flash triggers for your camera
Best online photography courses
PhotoPlus: The Canon Magazine is the world’s only 100% Canon-focused title on the newsstand. Launched in 2007, for 14 years it has delivered news, reviews, buying guides, features, inspirational projects and tutorials on cameras, lenses, tripods, gimbals, filters, lighting and all manner of photography equipment.
Aimed squarely at enthusiast photographers who use the Canon DSLR or mirrorless camera systems, all content is tailored to Canon users – so everything from techniques to product tests are tailored to those using the EOS camera system.
Editor Peter Travers brings 14 years of experience as both a journalist and professional photographer, with Technique Editor Dan Mold shoring up the magazine with his 6 years of expertise.
