Photography cheat sheet: camera metering modes
Get your exposure spot on every time with our metering modes cheat sheet

The best camera deals, reviews, product advice, and unmissable photography news, direct to your inbox!
You are now subscribed
Your newsletter sign-up was successful
Measuring the brightness of the scene you are photographing is a crucial part of getting the right exposure for your pictures. Before you can start thinking about shutter speeds, apertures and exposure modes, you need to measure the brightness of the scene. This is where the camera's exposure meter comes in.
Your DSLR or mirrorless camera has a built-in meter, of course – but most cameras have three or four modes to choose from (a camera for beginners will likely do without the Spot metering option).
Each camera metering mode assumes there is an even spread of brightnesses through the area it is measuring from, which average out at a grey tone that reflects 18% of the light falling on this part of the scene. Every color is taken into account in this average brightness.
Some of these are better in some situations than others. But there is not a single right choice – which of the metering mode options you use in a given scenario depends just as much upon personal choice and personal experience as it does upon anything else.
Your camera's metering system is responsible for analyzing the scene and judging what settings would capture it best. This is particularly key if you shoot in `automatic mode or a semi-automatic mode like Aperture Priority mode.
Typically though, the meter will look at the extent of darkest areas, brightest areas, and everything in between to work out the aperture and shutter speed that will ensure that everything is kept balanced.
Of course, it should be noted that in-camera meters are far from ideal – they only measure reflected light, which changes according to the scene and what your subject is wearing, as opposed to incident light, which is an empirical measurement that only changes when the actual light changes.
To measure incident light, you need a handheld light meter. Find out how to use a light meter and check out our guide on the best light meters you can buy.
The best camera deals, reviews, product advice, and unmissable photography news, direct to your inbox!
Here, let's explore camera metering modes and when to use them.
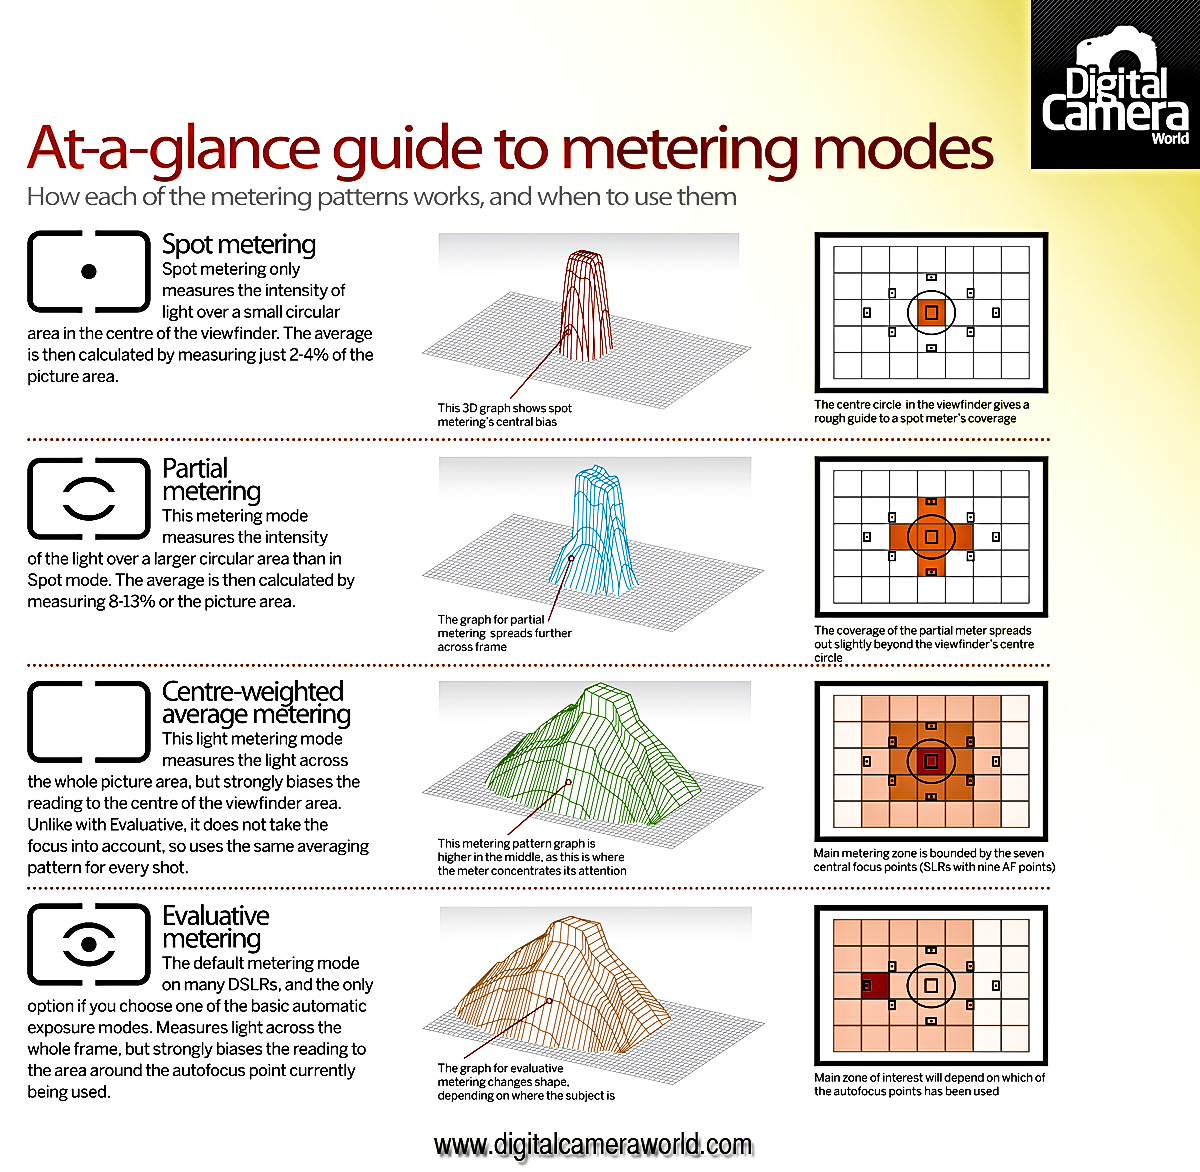
Photography cheat sheet: metering modes at a glance
Metering modes explained
Evaluative metering
The main metering mode, and the one that you will be set to when you take it out of the box, is Evaluative (sometimes referred to as Matrix metering). This is the only option that you will get in some exposure modes (you have to switch to M, Av, Tv, or P modes to get to use the other metering mode options).
Evaluative metering is by far the most sophisticated of the metering types. It looks at the scene in an intelligent fashion, trying to work out what sort of picture you are taking – then relaying its suggested average brightness used to create a shutter speed and aperture combination. This metering pattern breaks the scene into a number of zones – creating a range of readings, which are then analyzed to work out the type of picture you are taking.
Most importantly, it uses information from the autofocus system to work out where the subject is in the picture. So if the AF point on the left is used in a particular shot, it will pay more attention to this area when working out its average. If you use manual focus, it will bias the metering to the middle of the screen.
Center-weighted metering
Center-weighted metering mode biases the exposure average towards the center of the frame. This doesn’t take focusing into account and just assumes that the subject is in the middle.
It works well for most pictures – and it has the advantage that this is the metering system that many older photographers grew up with. It is also easier to predict when this metering mode will get things ‘wrong’ so you can anticipate when Exposure Compensation will be necessary. And if the subject is not slap-bang in the center of the frame, it can still be successful, simply by using it in conjunction with the Exposure Lock.
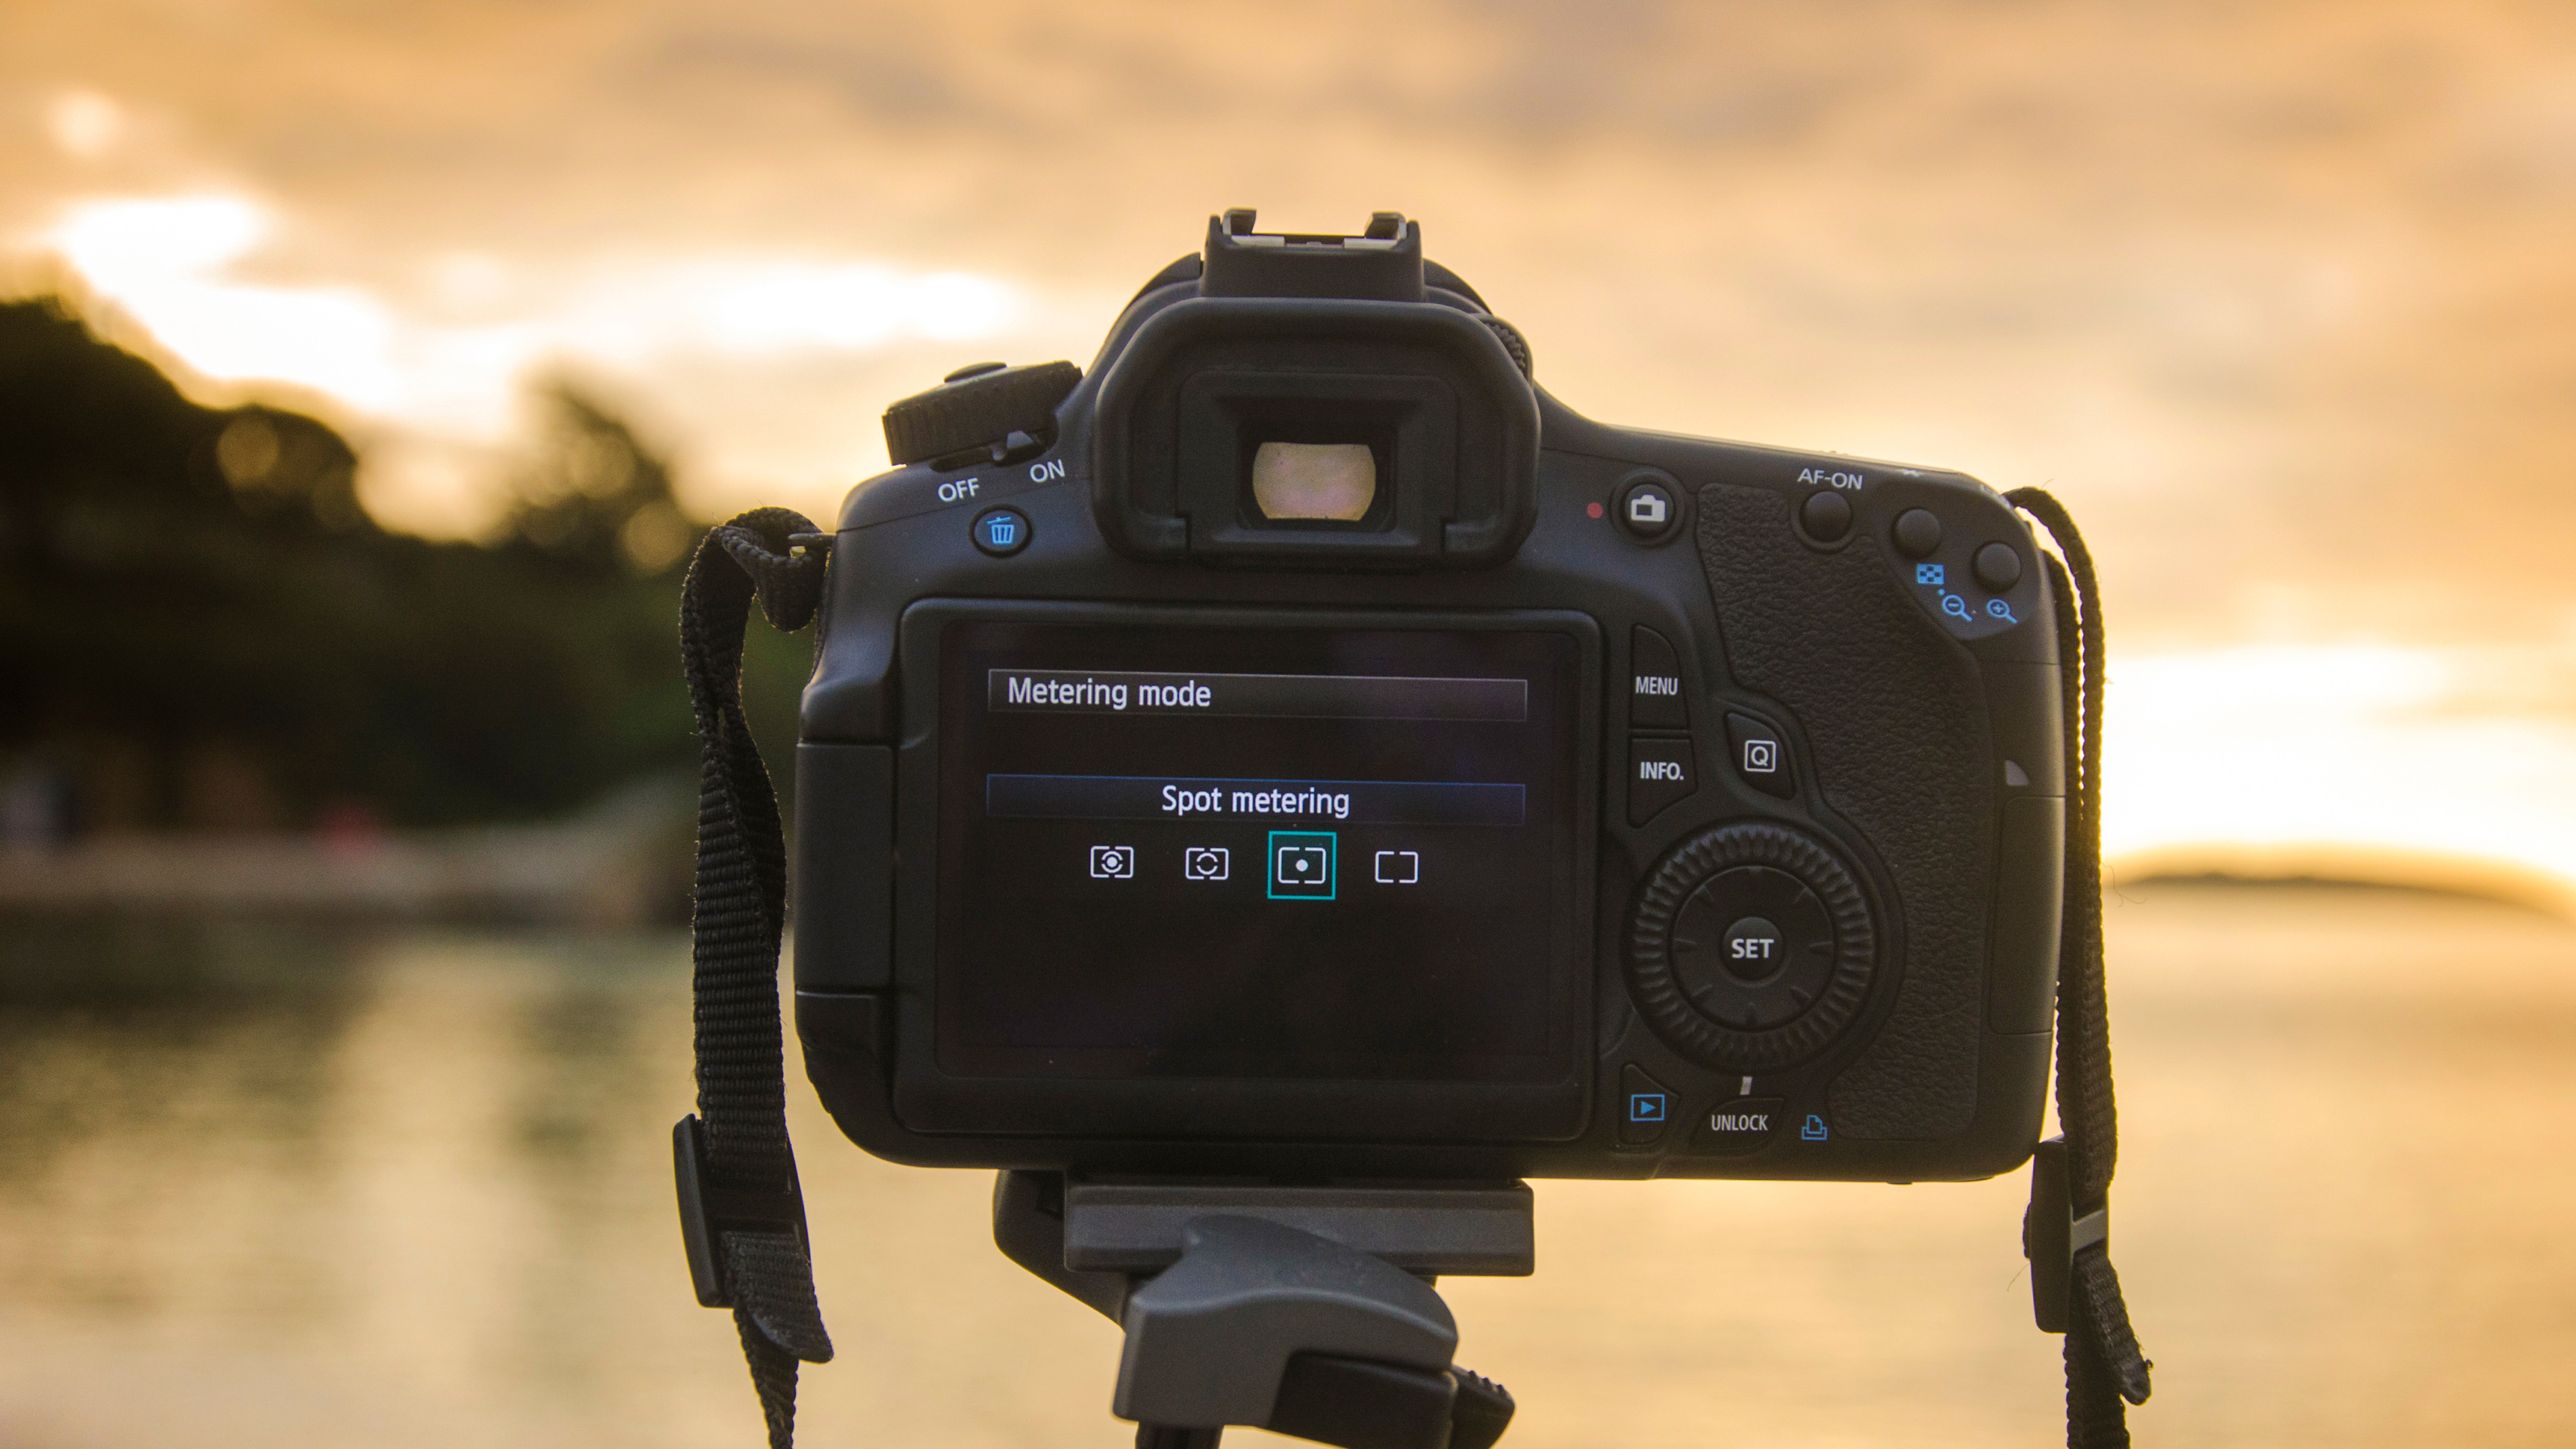
Spot and partial metering
The Partial and Spot metering modes take a much simpler approach and simply take a reading from a small area in the middle of the frame – ignoring everything else in the picture. The difference between the two is that the Partial metering area is about three times larger than that used by the Spot metering option. Spot metering is, therefore, the more precise of the two – but it is also harder to use – as you have to pick the spot that you use for the reading with care.
Both are best used along with the Exposure Lock function – and come into their own when shooting subjects where the background is significantly darker or lighter than the subject (such as when you’re photographing a spotlit actor on a stage, or when shooting a portrait of a skier surrounded by a snowy bright-white landscape).
Spot and partial metering modes are great for taking precise exposure readings – and can be a godsend when taking shots in tricky lighting conditions. The skill is in deciding which part of the scene to take the reading from in the first place.
You might like the rest of our photography cheat sheets, plus these lighting setups for pro portraits.

Chris George has worked on Digital Camera World since its launch in 2017. He has been writing about photography, mobile phones, video making and technology for over 30 years – and has edited numerous magazines including PhotoPlus, N-Photo, Digital Camera, Video Camera, and Professional Photography.
His first serious camera was the iconic Olympus OM10, with which he won the title of Young Photographer of the Year - long before the advent of autofocus and memory cards. Today he uses a Sony A7 IV, alongside his old Nikon D800 and his iPhone 15 Pro Max.
He is the author of a number of books including The Book of Digital Photography, which has been translated into a dozen different languages.
In addition to his expertise in photography and videomaking, he has written about technology for countless publications and websites including The Sunday Times Magazine, The Daily Telegraph, What Cellphone, T3 and Techradar.
- Lauren ScottFreelance contributor/former Managing Editor

