Watch video: Make hue / saturation Photoshop Elements adjustments
Photoshop Elements 2020 is the budget version of Adobe’s Photoshop CC, yet shares many of its bigger brother’s powerful features. One such feature is the ability to change the colors in your shots.
Let’s take a look at our portrait image, for example. We have a yellow background and the model is wearing a magenta top and headband. The great thing about Photoshop and Elements is that we can change these to other colors, if we change our minds after the shot has been taken. It only takes a few simple clicks back at your computer.
We’ll be solely using the Hue / Saturation Adjustment Layer to pull this off, and shift the color channels. This adjustment also comes with a built-in Layer Mask, and we’ll show you how to use this to restrict the effect so that it only affects the parts of your image that you want to, such as items of clothing.
01 Create an adjustment layer
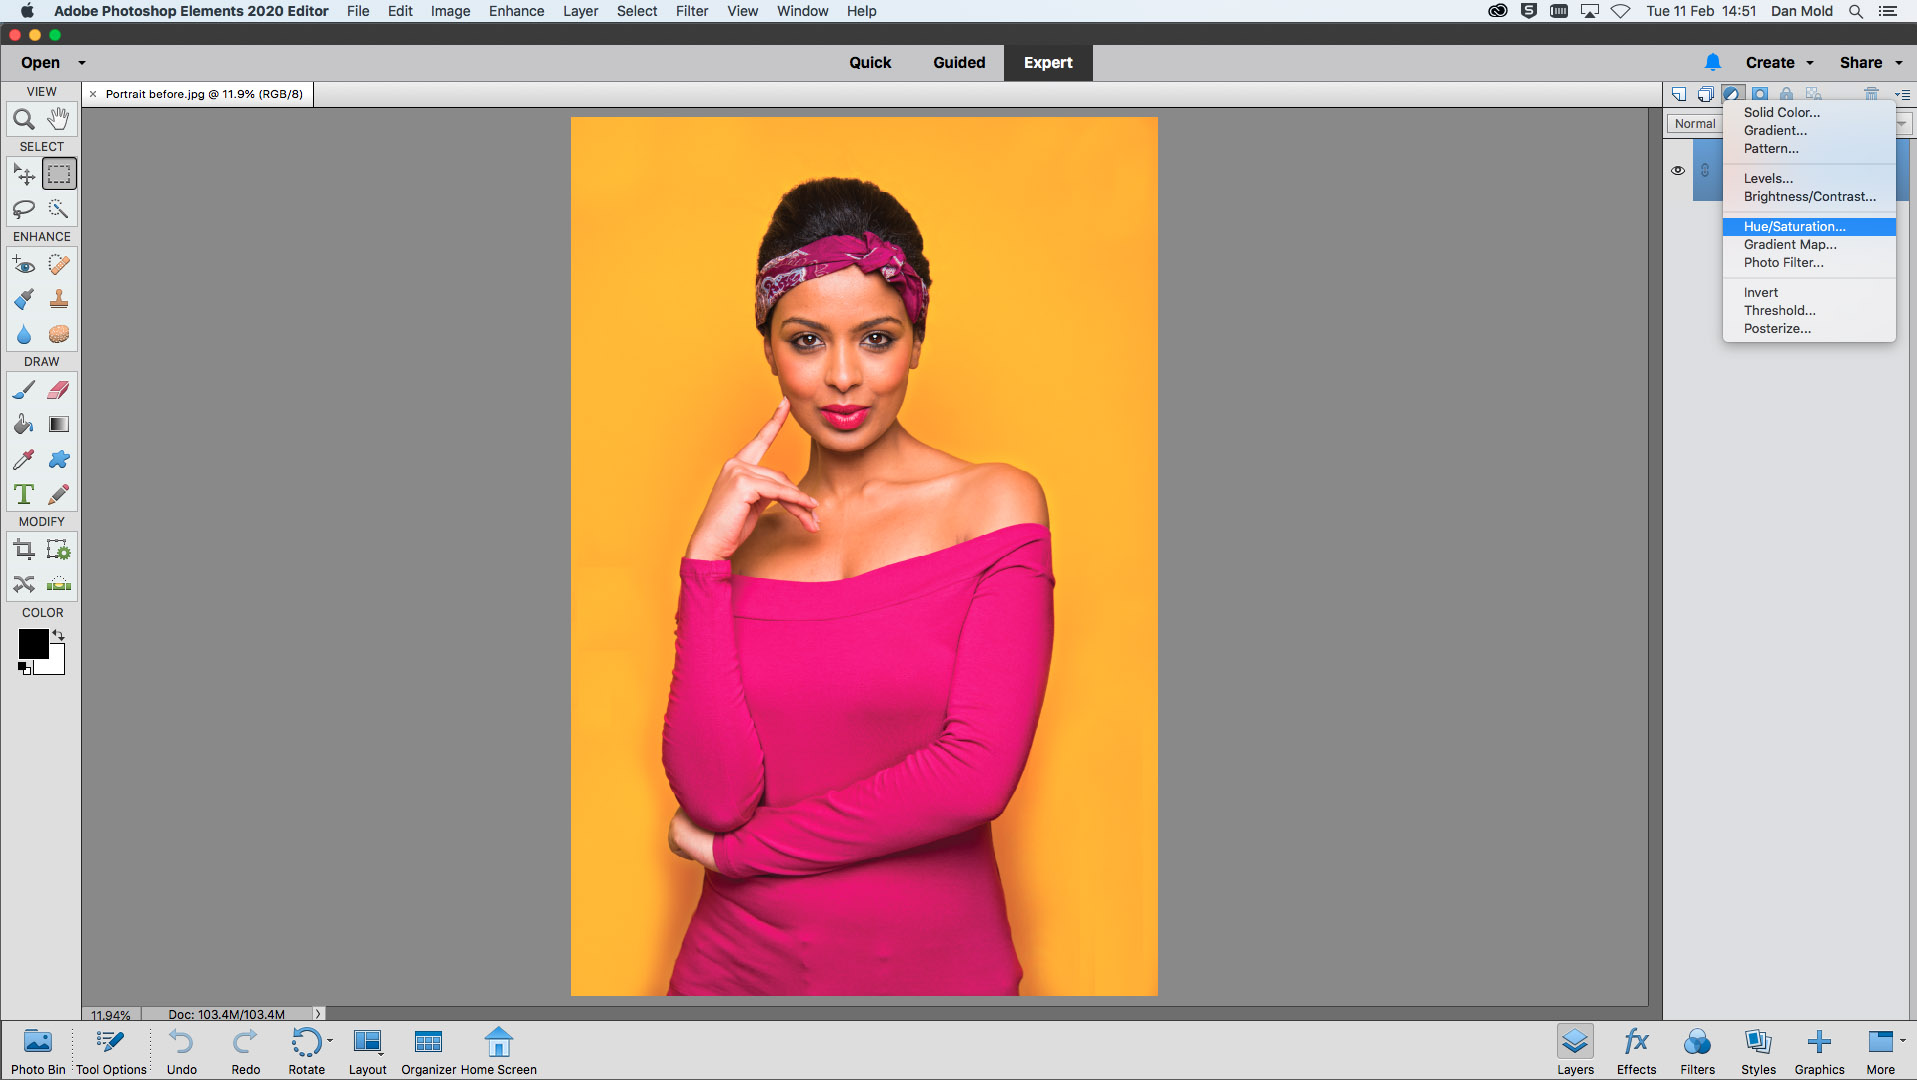
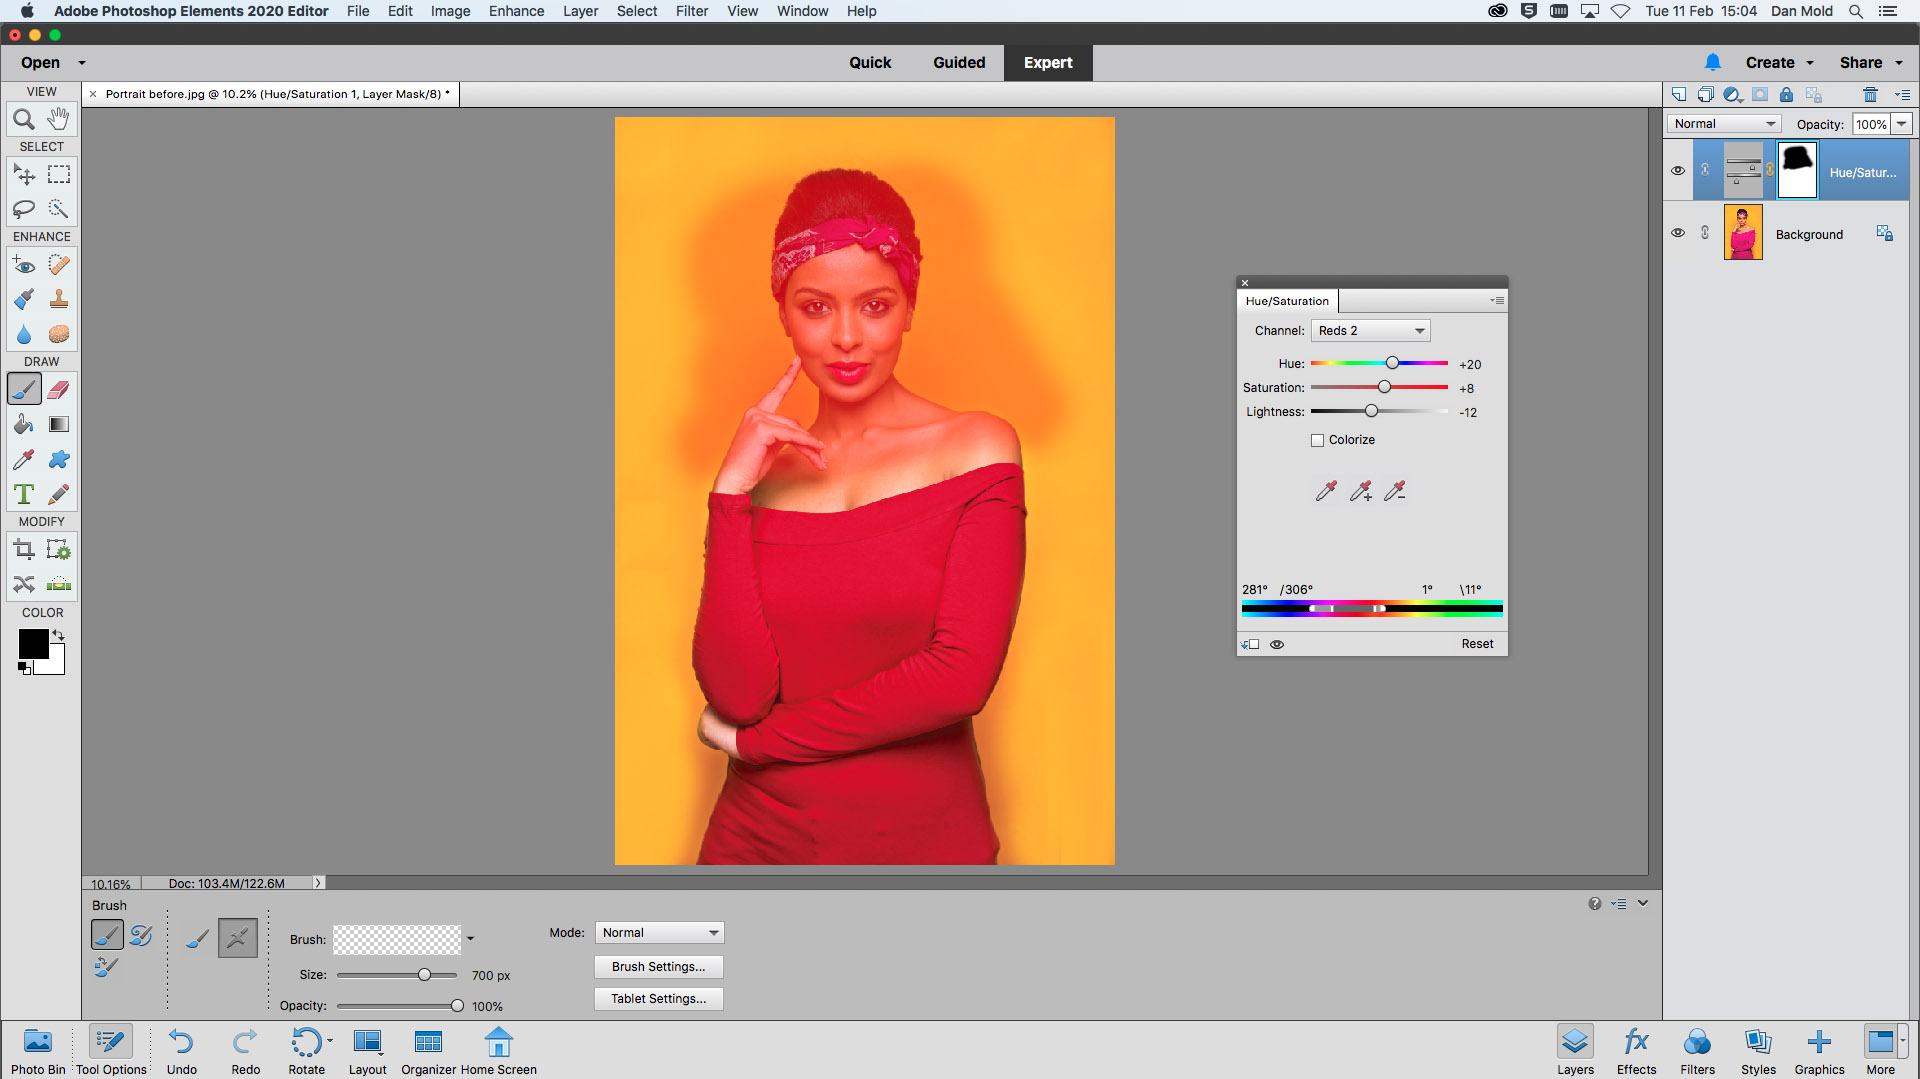
Open up your image into Elements, then go to the Layers panel (Window > Layers). Here, click on the Create new adjustment layer icon and choose Hue / Saturation from the list.
02 Choose a color channel
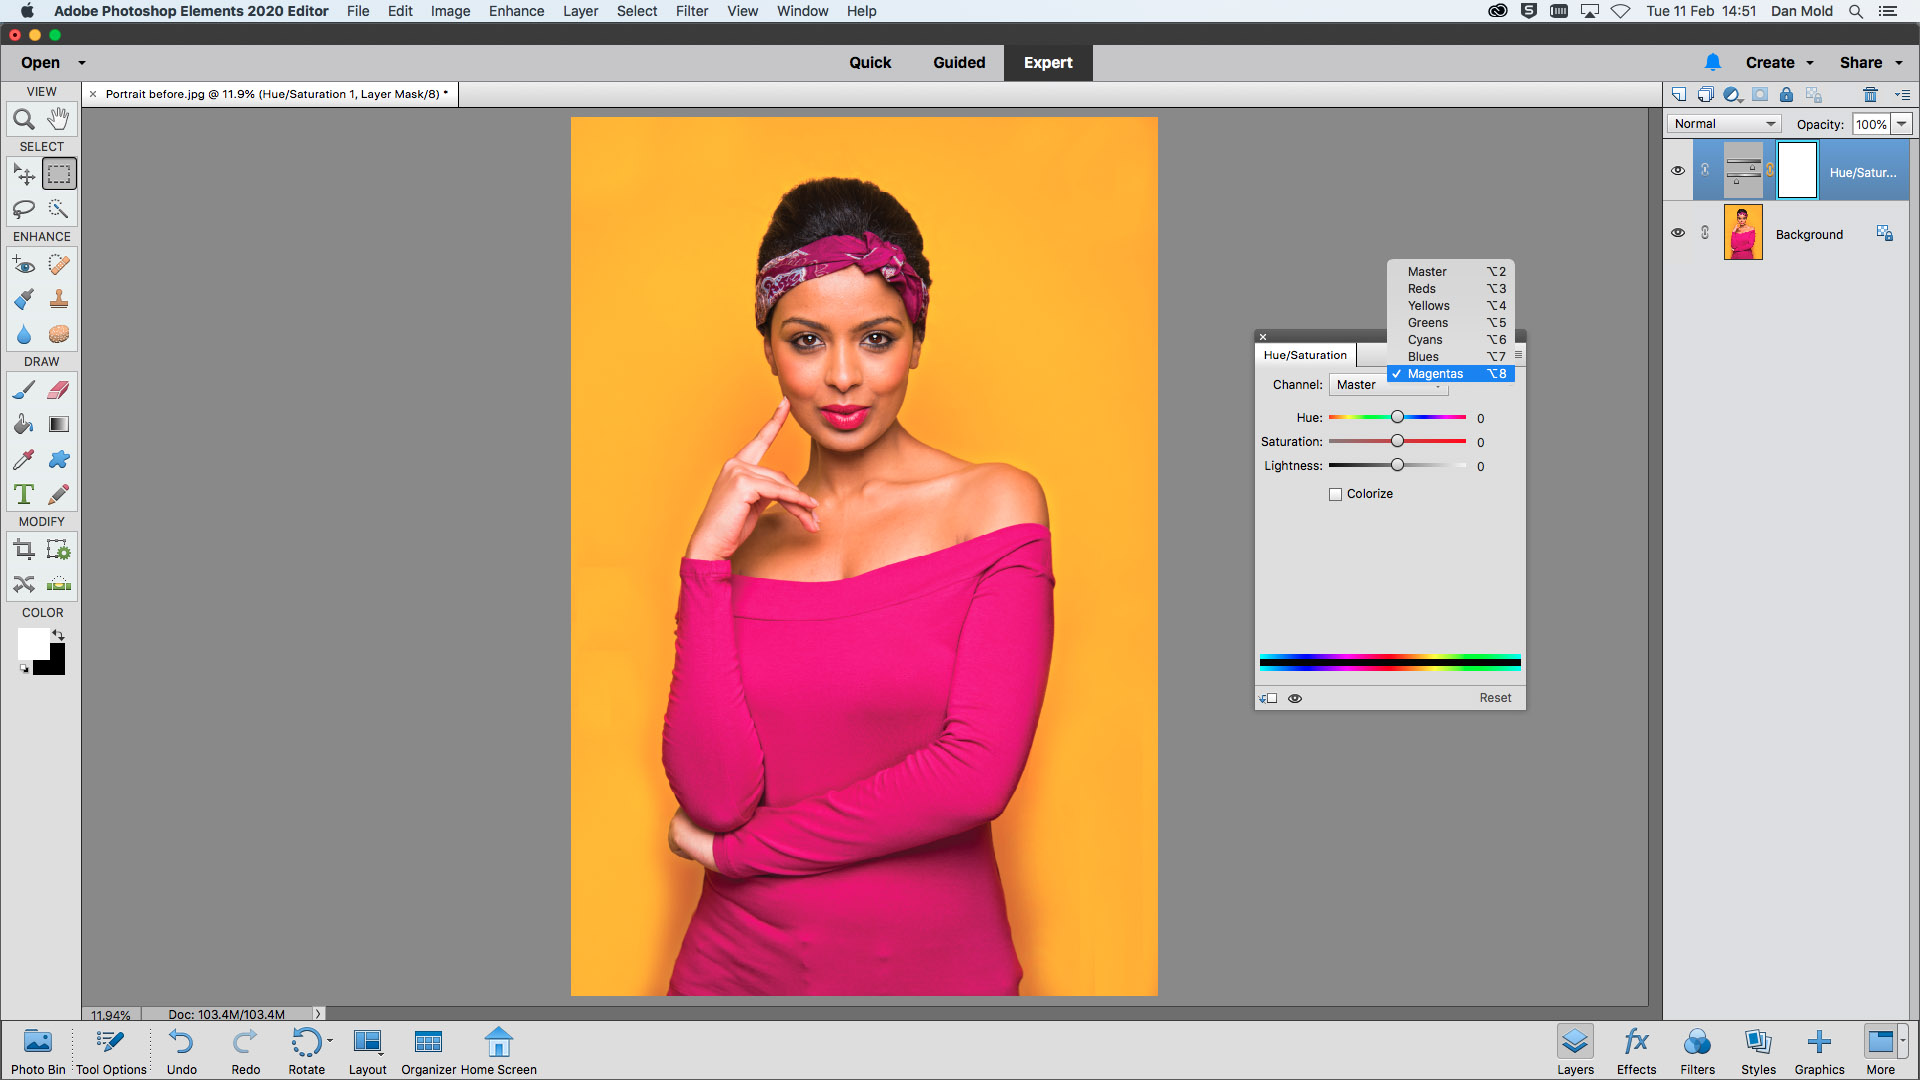
In the Hue / Saturation panel you’ll see that the channel will be set to Master by default, meaning that you’re affecting all the colors at once. It’s usually better to just choose the precise channel that you want to adjust.
The best camera deals, reviews, product advice, and unmissable photography news, direct to your inbox!
03 Tweak the HSL values
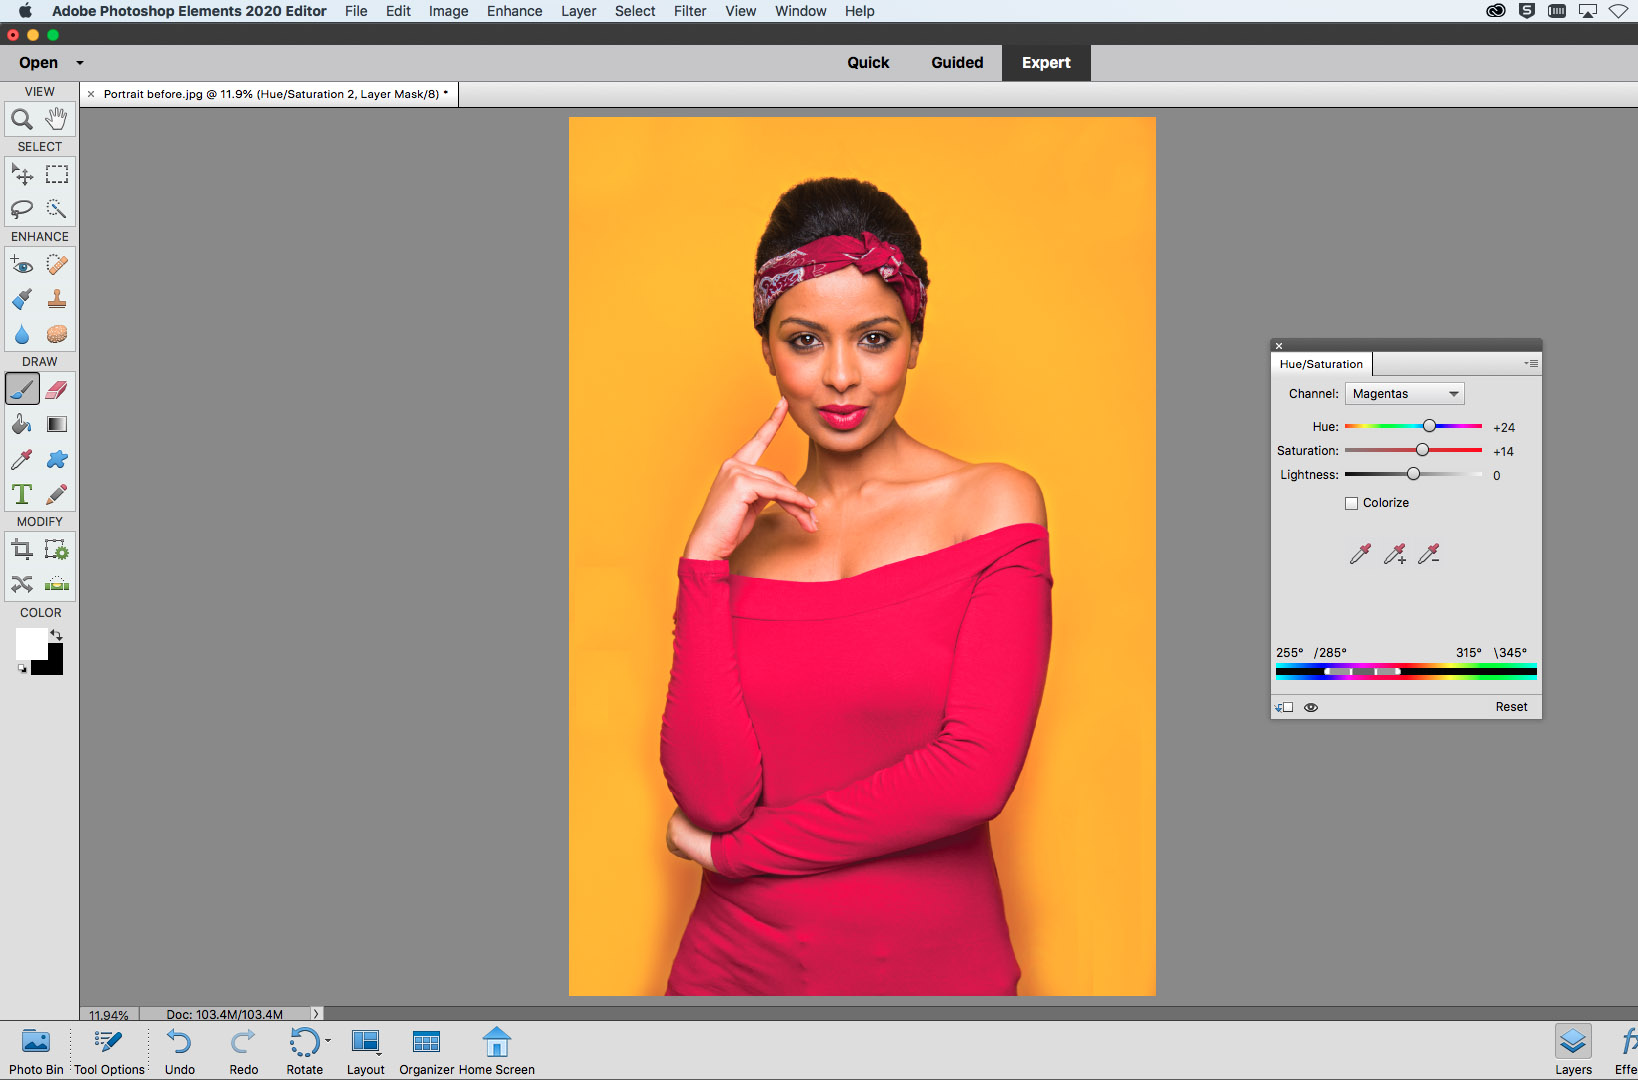
Now you can change the Hue (color), Saturation (color intensity) and Lightness (how bright the color is) using these three main sliders. We shifted Hue to the right, to make the magenta clothing more red.
04 Refine the adjustment area
At the bottom of the panel, arrows show which part of the color spectrum you’re affecting. If you’re not getting the desired results it’s often beneficial to expand these out a little to affect a broader range.
05 Use the provided layer mask
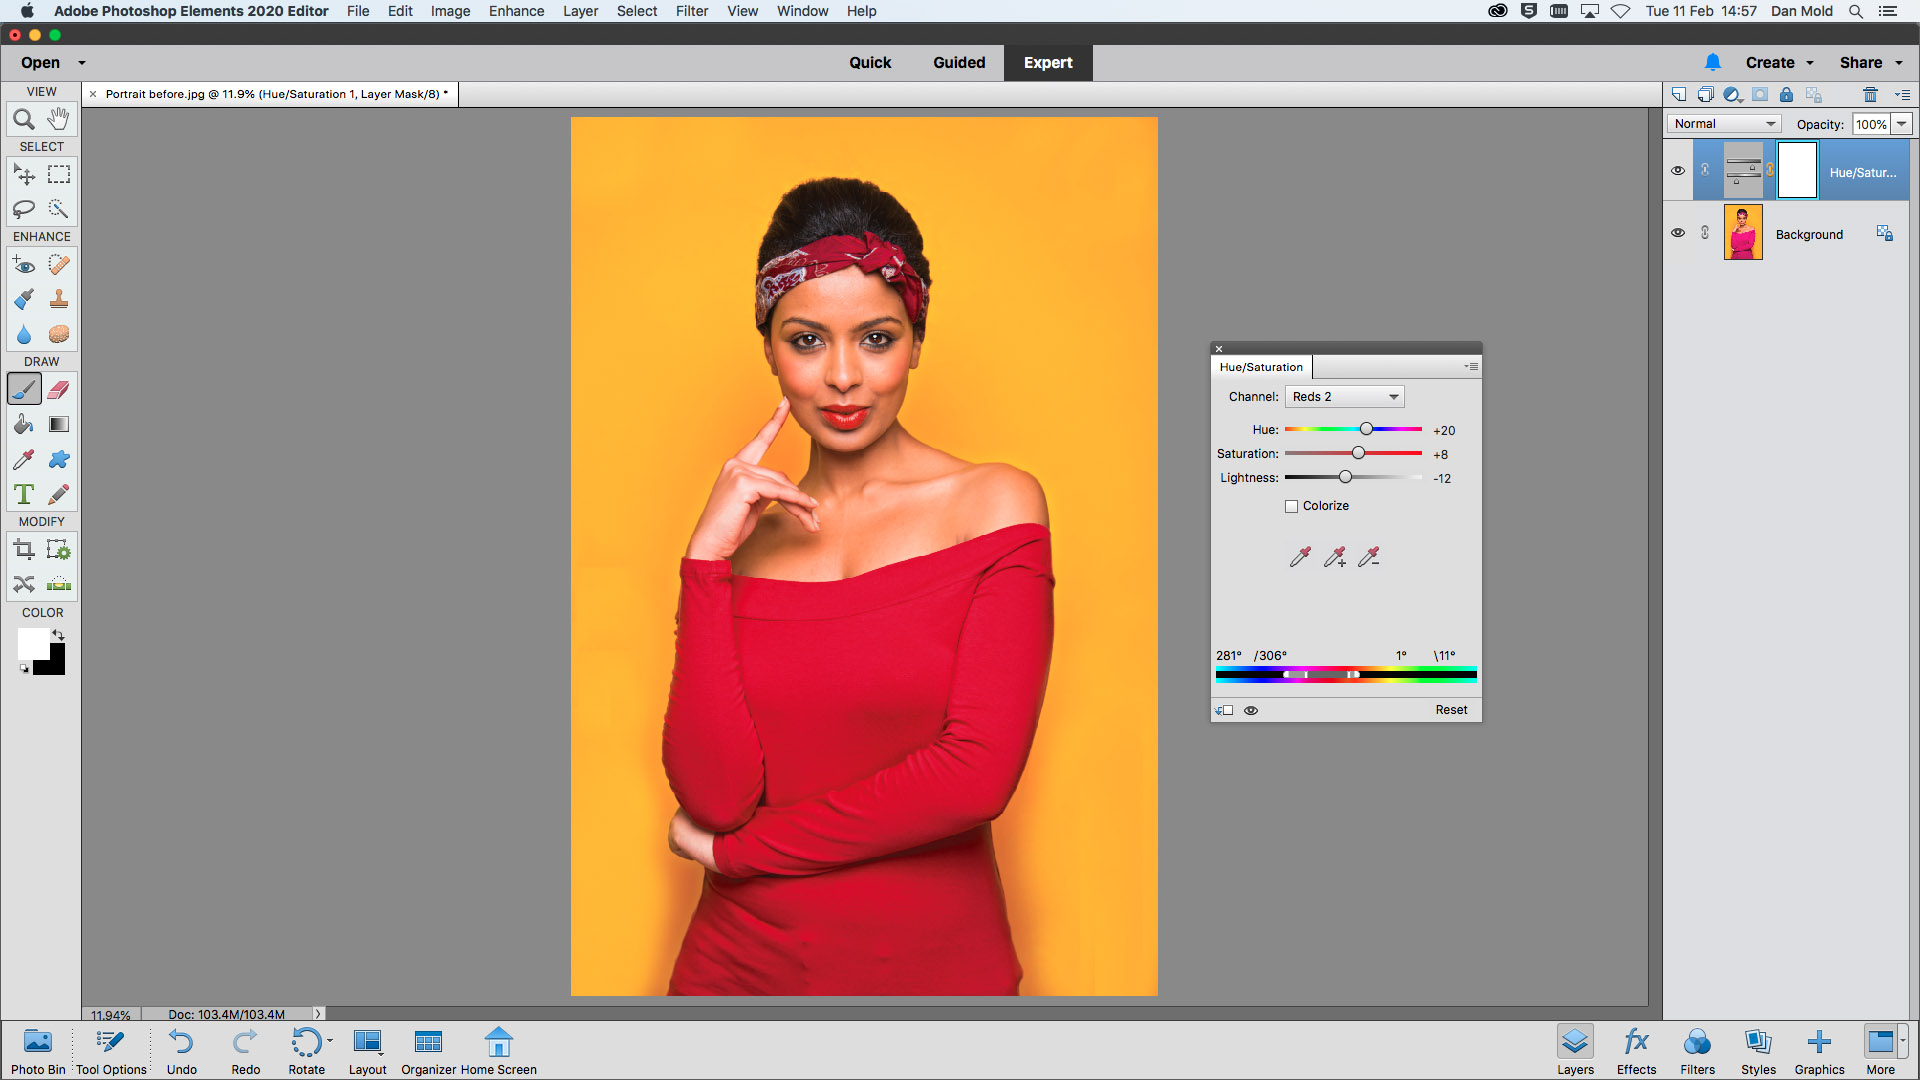
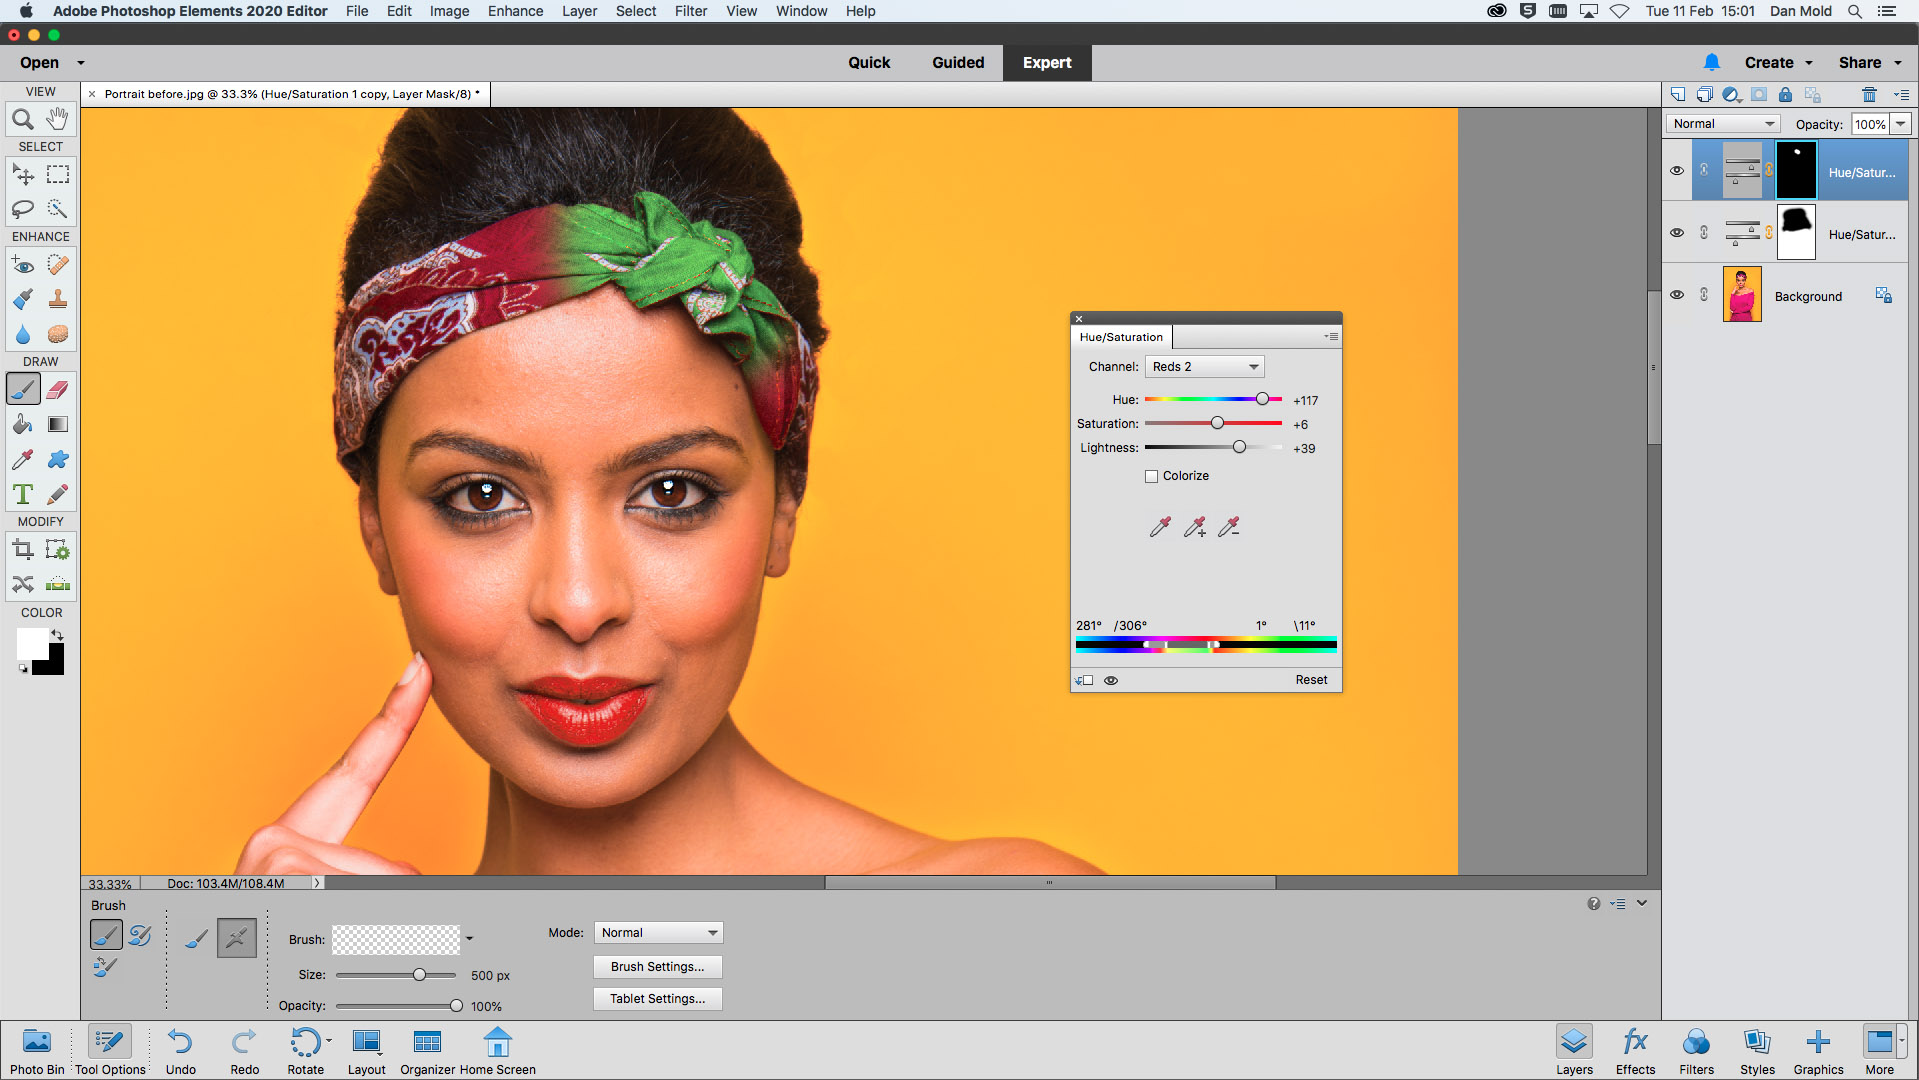
This adjustment layer comes with a Layer Mask. If you’re affecting colors that you’d rather leave alone, such as skin tones, you can paint over these with a black brush on the Layer Mask to restrict the effect.
06 Build up the effect
When you’ve tweaked one element of your shot you can add another Hue / Saturation adjustment layer and repeat to build up the effect. We added two more Hue / Saturation layers, one to change the headband and another to change the yellow background to a vibrant purple.
PhotoPlus: The Canon Magazine is the world's only monthly newsstand title that's 100% devoted to Canon, so you can be sure the magazine is completely relevant to your system.
Read more:
The best photo editing software: image editors for novices through to pros
The best photo-editing laptops in 2020: top laptops for photographers
10 best online photography courses – from beginner guides to masterclasses
In addition to being a freelance photographer and filmmaker, Dan is a bona fide expert on all things Canon and Adobe. Not only is he an Adobe-certified Photoshop guru, he's spent over 10 years writing for specialist magazines including stints as the Deputy Editor for PhotoPlus: The Canon Magazine, Technical Editor for Practical Photography and Photoshop Editor on Digital Photo.
