How to use Photoshop's Polygon tool to revamp portraits
Learn how to transform your portraits into something special with this neat Photoshop tool
Download project files here
Tips and tutorials
• How to download Photoshop
• 100 Photoshop tips!
• 15 top Photoshop fixes
• More Photoshop tutorials
• Photoshop Elements tutorials
Free Photoshop stuff
• 55 free Photoshop brushes
• 63 free Photoshop templates
• 52 free Photoshop plug ins
• 63 free Photoshop actions
• Free textures for Photoshop
• Free frames and borders
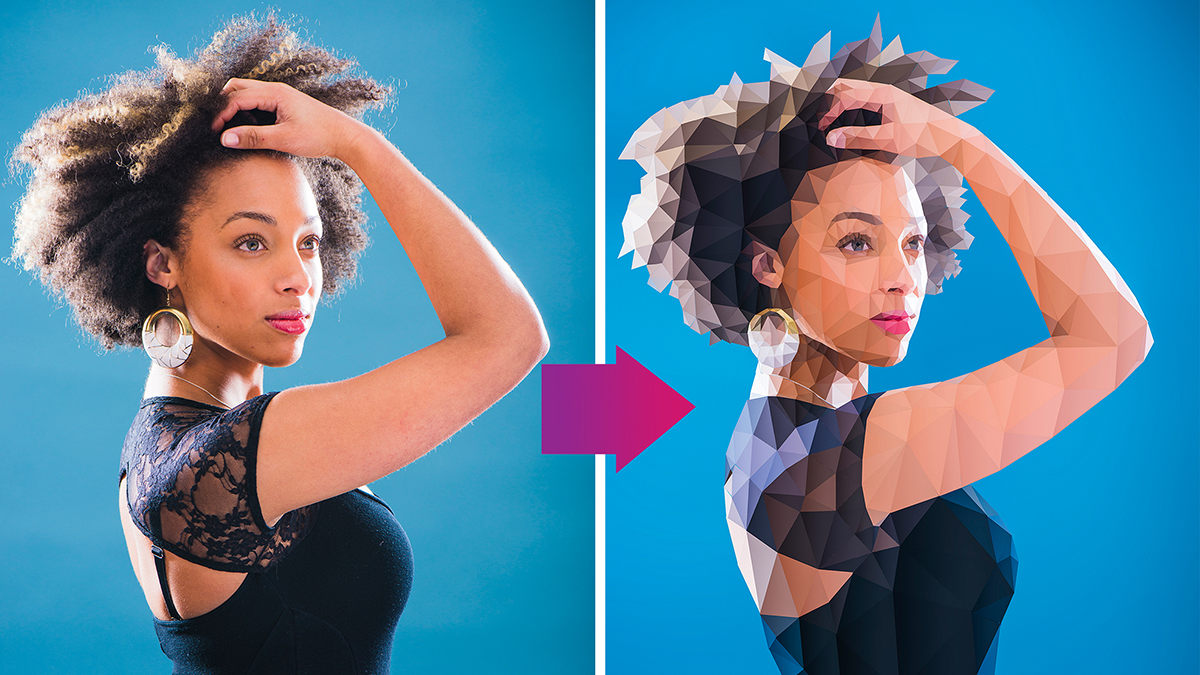
Polygon portraits like this are very popular at the moment, but before we get stuck into this tutorial, first a warning: it’s going to take a while.
There aren’t any magic filters that will do the job. Instead, each triangular shape you see in the image here has been patiently plotted out by hand, so it’ll take at least an hour or two to achieve a decent level of detail.
Article continues belowThankfully, once the initial steps are out of the way and everything is set up, plotting the triangles is the kind of repetitive job that can be done while listening to the radio or even half-watching TV. All that effort only serves to make the finished effect more rewarding too.
We’ve supplied some starting images, but it's far better to use one of your own shots. Any portrait will do, and it doesn’t necessarily have to be a person – animals and pets could work just as well.
Read more: The best photo-editing apps for iOS and Android devices
The basic technique here is very simple. First, we select a triangular portion of the portrait. Then we apply the Average filter, which comes up with an average for all the colours within the selection, as if mixing them together in a big pot. Then we simply repeat this process until it's finished.
The best camera deals, reviews, product advice, and unmissable photography news, direct to your inbox!
Thankfully, we can save time by simply recording a quick Photoshop Action to do all the really hard work for us. We can even assign this Action to a keyboard shortcut, so that the only thing we have to do manually is plot out each of the triangles.
• Get more photoshoot ideas
Step-by-step guide: Get into shape in Photoshop
Learn how to create the low-poly effect and discover how actions can be a huge timesaver
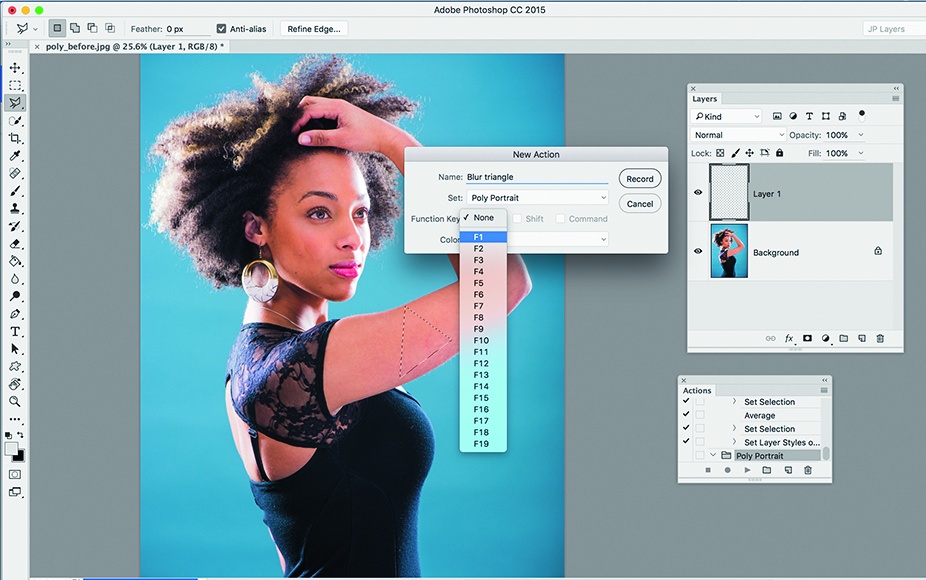
1. Set up and action
Open your image, and in the Layers panel click New Layer. Grab the Polygonal Lasso tool and make a random triangle shape. Go to Window>Actions, click the New Set icon and name it, then click the New Action icon. Name the action, assign a function key and hit Record.
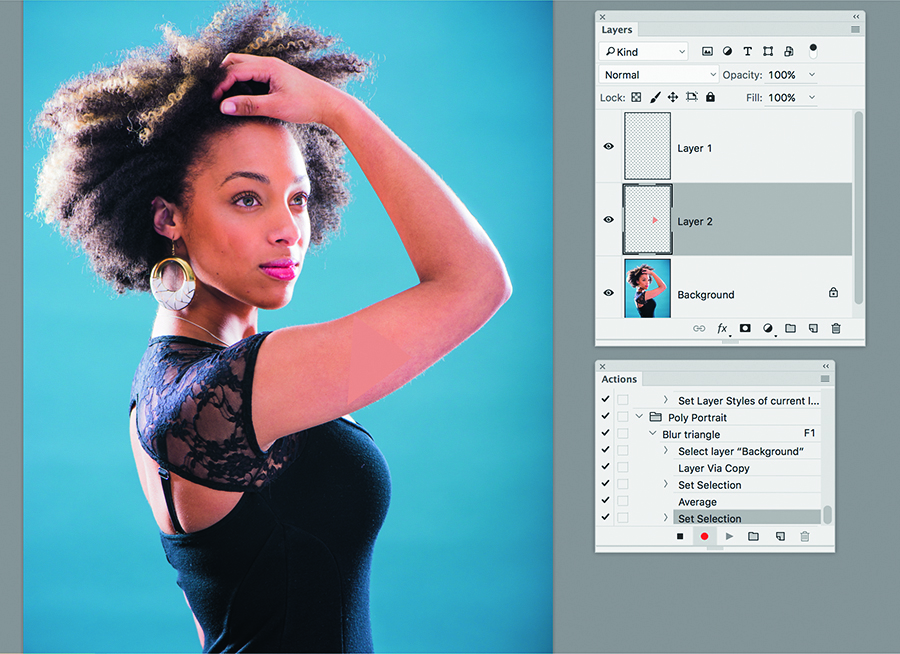
2. Blur to average
Follow this bit precisely. Click on the ‘Background’ layer, then hit Ctrl+J to copy the selection to a new layer. Go to the Layers panel, Ctrl-click the thumbnail on the triangle layer to load the shape as a selection. Go to Filter>Blur>Average, then hit Ctrl+D to deselect.
3. Make the edges clearer
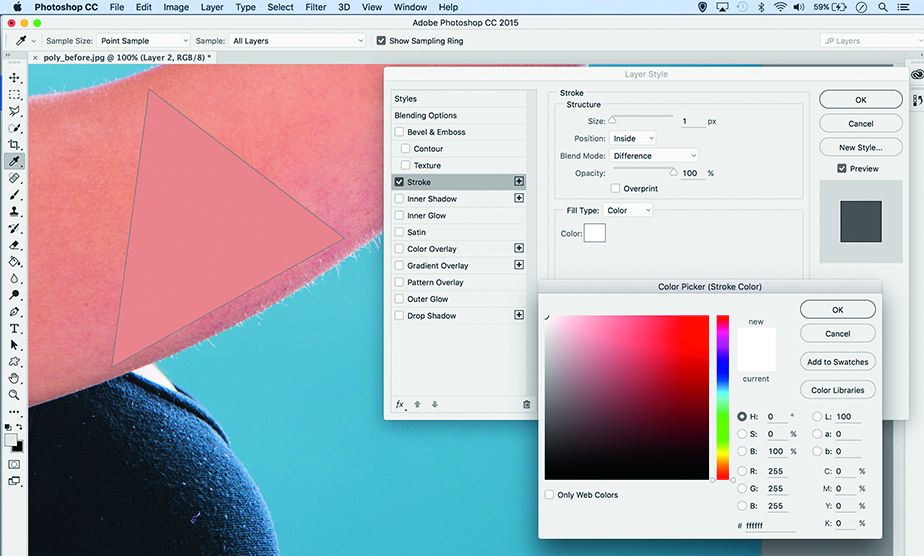
Click the Fx button in the Layers panel and choose Stroke. Set Size: 1, Position: Inside, Blending Mode: Difference, Opacity: 100%, and set colour to white to make the edges clearer. Hit OK, then click Stop in the Actions panel. Drag the top two layers to the trash.
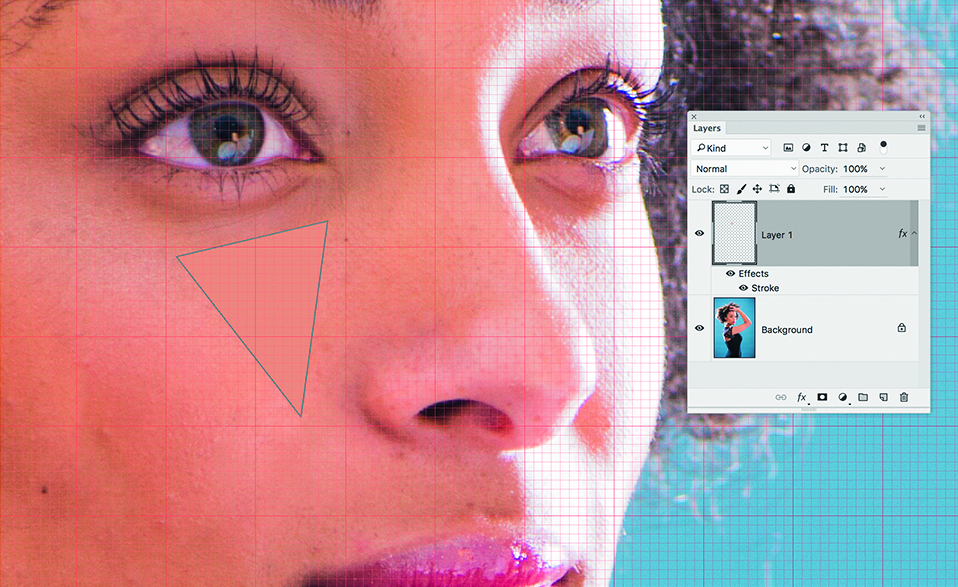
Using the Polygonal Lasso tool, double-click to send the selection back to the start point. Backspace deletes a previous point.
4. Enable the grid
Go to Preferences and click Guides, Grids and Slices. Set a suitable Grid Size, such as 5 pixels. Go to View> Show>Grid, then View>Snap To and check Grid. Make a triangular selection with the Polygonal Lasso – it should snap to the grid. Hit the Action shortcut key.
5. Fill the portrait
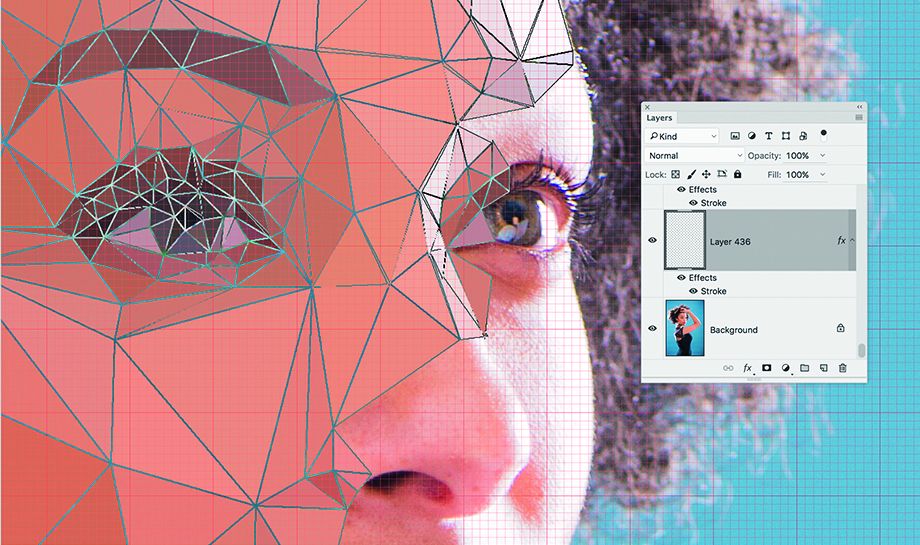
Select a triangle, run the action and repeat until finished. Try to divide the face into different patches of tonality and detail. Each triangle should meet at the corner points of the one beside it, so the sides match. Use smaller triangles in areas of detail, like the eyes.
6. Adjust the styles
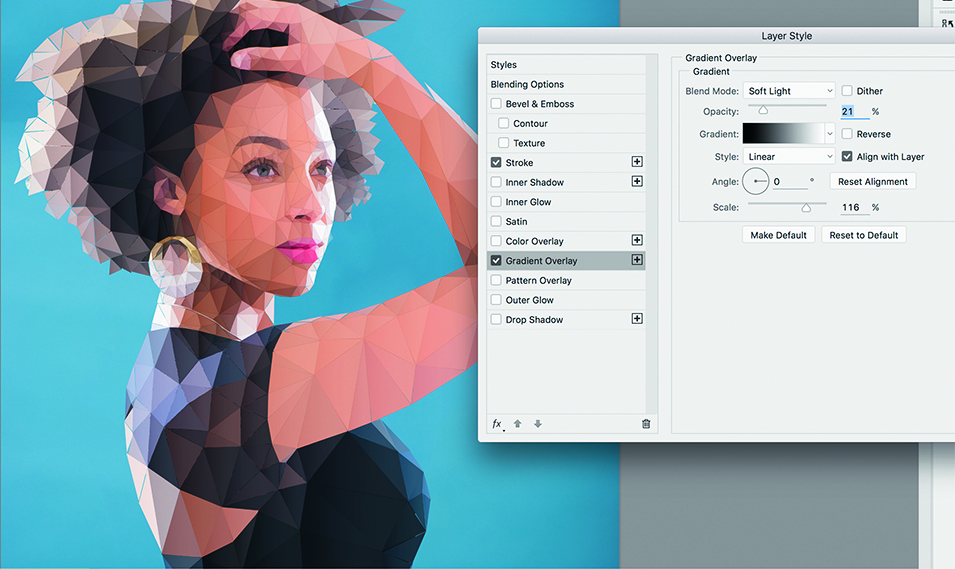
Double-click Stroke Style. Set Blending Mode: Multiply, Opacity: 10%. Click Gradient Overlay, choose ‘Black to White’, Blending Mode: Soft Light, Opacity: 20%. Right-click>Copy Layer Style, Shift-click top and bottom triangle layers, right-click>Paste Layer Style.
Getting it right
For the low-poly effect to look right, each triangle shape needs to be neatly butted up against the one beside it, with the points lined up so that no triangle intersects the side of another. We also need to make sure that everything is joined up neatly. This is why we enable ‘snap to grid’ so that grid points become slightly sticky. It still takes plenty of patience to plot each point precisely (especially in a portrait like this, which has over a thousand layers). Examine the image once complete and if you spot any gaps then delete the layer and redo the selection.
Read more: How to remove and replace a sky in Photoshop
The lead technique writer on Digital Camera Magazine, PhotoPlus: The Canon Magazine and N-Photo: The Nikon Magazine, James is a fantastic general practice photographer with an enviable array of skills across every genre of photography.
Whether it's flash photography techniques like stroboscopic portraits, astrophotography projects like photographing the Northern Lights, or turning sound into art by making paint dance on a set of speakers, James' tutorials and projects are as creative as they are enjoyable.
He's also a wizard at the dark arts of Photoshop, Lightroom and Affinity Photo, and is capable of some genuine black magic in the digital darkroom, making him one of the leading authorities on photo editing software and techniques.

