How to remove dust spots using Lightroom’s Spot Removal tool
Eliminate sensor spots and other dust marks in just a few clicks
Watch the video - how to remove dust spots in Lightroom
Despite our best efforts to keep our lenses and cameras clean, we may find that some photos suffer from sensor spots. When you swap lenses on location, tiny fragments of dirt and dust can enter the camera body and adhere to the sensor.
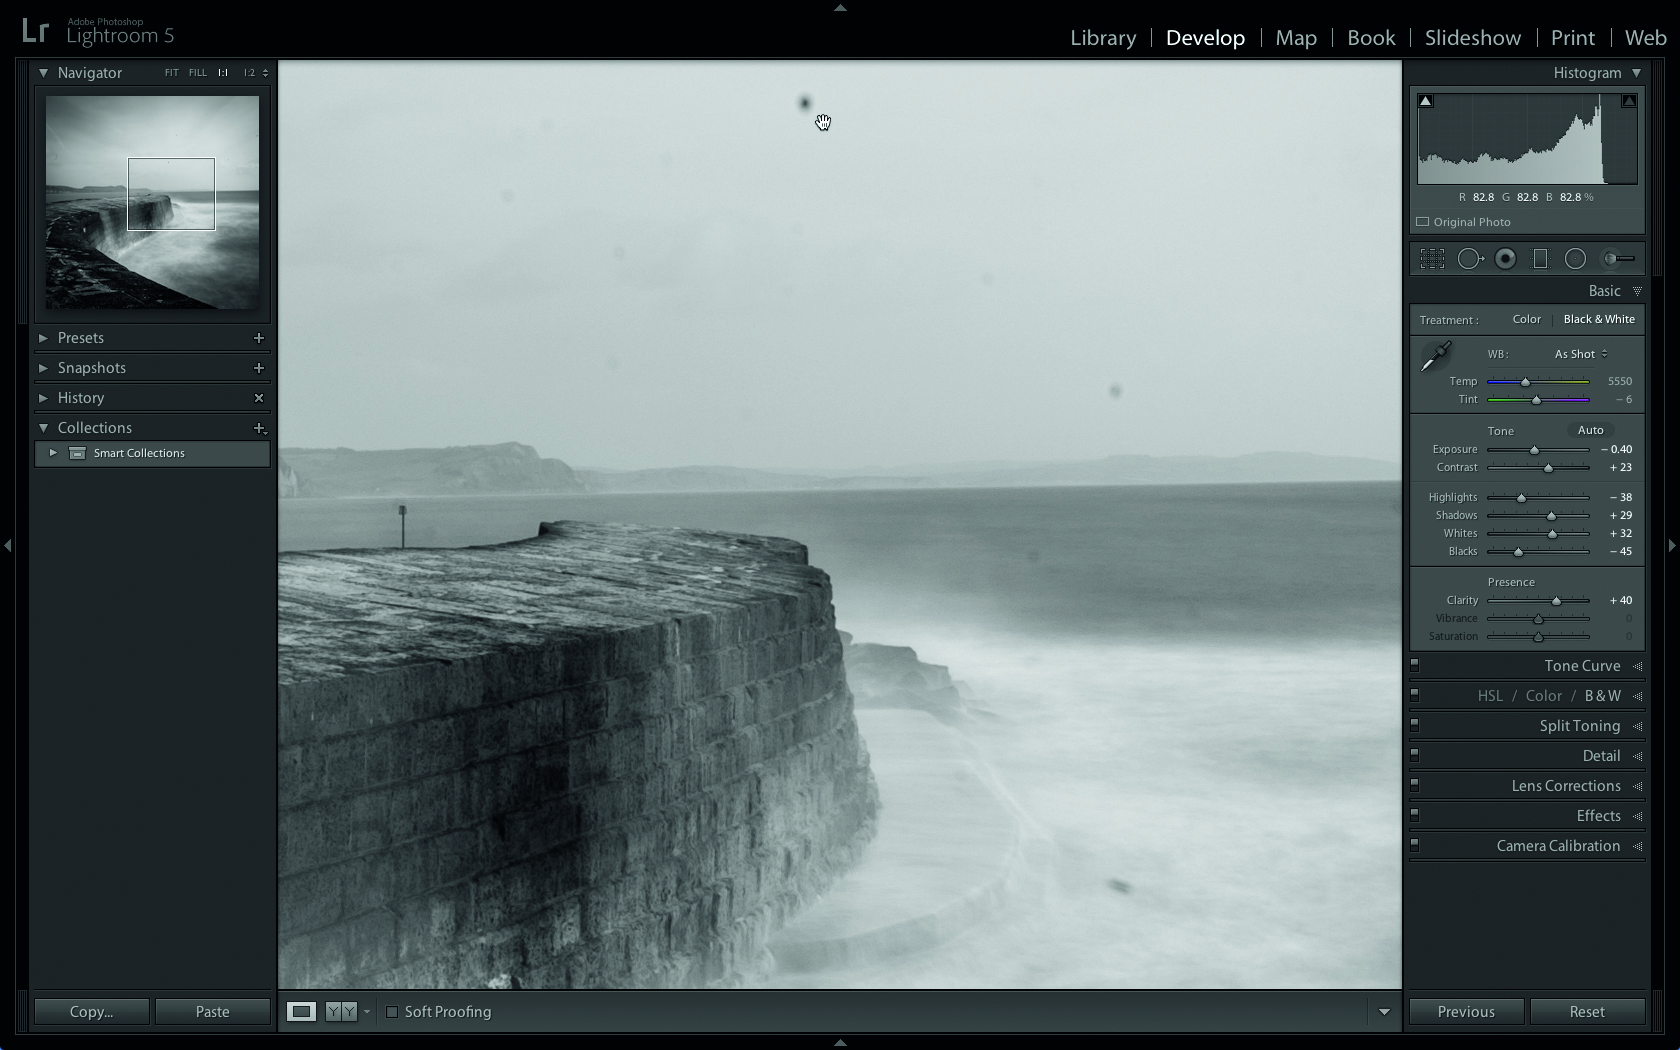
These sensor spots can then show up in a photograph as small, soft, dark blobs. These blobs are particularly annoying because they appear in the same parts of every photo from a shoot. They are particularly noticeable in clean, smooth areas of an image, such as skies (as you can see in our ‘before’ image).
Your DSLR attempts to shake dust from the sensor by vibrating it every time you switch the camera off, but this automatic mechanical technique may not remove more stubborn bits of debris.
For a more thorough clean you can activate the camera’s sensor cleaning feature. This locks up the mirror and enables you to use a blower brush to dislodge particles. It’s worth nipping sensor spots in the bud, as this will save you lots of time ‘dust busting’ in Lightroom’s digital darkroom.
However, even after cleaning your sensor in this way you may find that some sensor spots still remain visible. In this instance you’ll need to take the photo into Lightroom’s Develop module and remove the blobs with a few clicks of the Spot Removal tool.
This powerful tool samples clean sections of the image that are adjacent to a sensor spot. The sampled pixels are then transplanted over the unwanted spot to hide it and are blended seamlessly with their new surroundings to create an invisible edit, as you’ll see.
The best camera deals, reviews, product advice, and unmissable photography news, direct to your inbox!
• See also: Why I dumped Lightroom CC and went back to Lightroom Classic
Step by step: Bust that dust!
Download project files to your computer here
1. Import the image
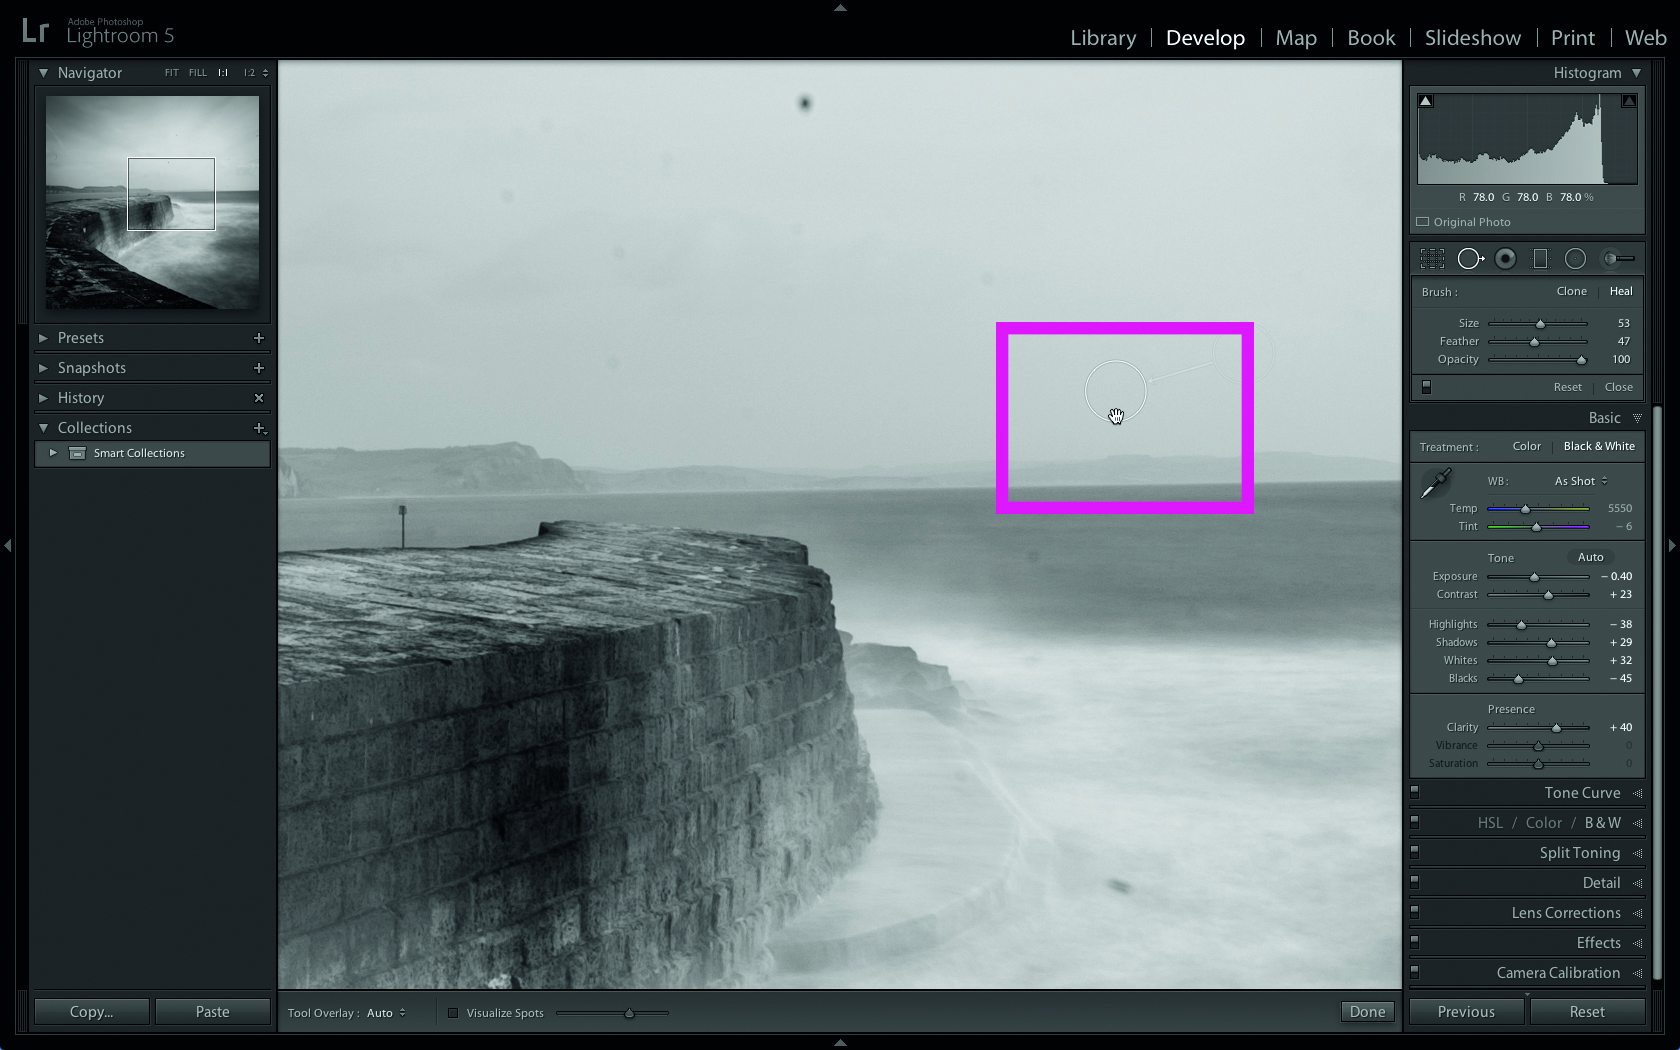
Take sensor_spot.jpg into the Develop module. Go to the Navigator panel on the left and click on 1:1 to take a closer look. Now the Hand tool is active; click-and-drag the mouse to look at sections of the photo. Dark sensor spots are most noticeable in light areas.
Press the Q button for a keyboard shortcut to activate the Spot Removal tool
2. Visualise the spots
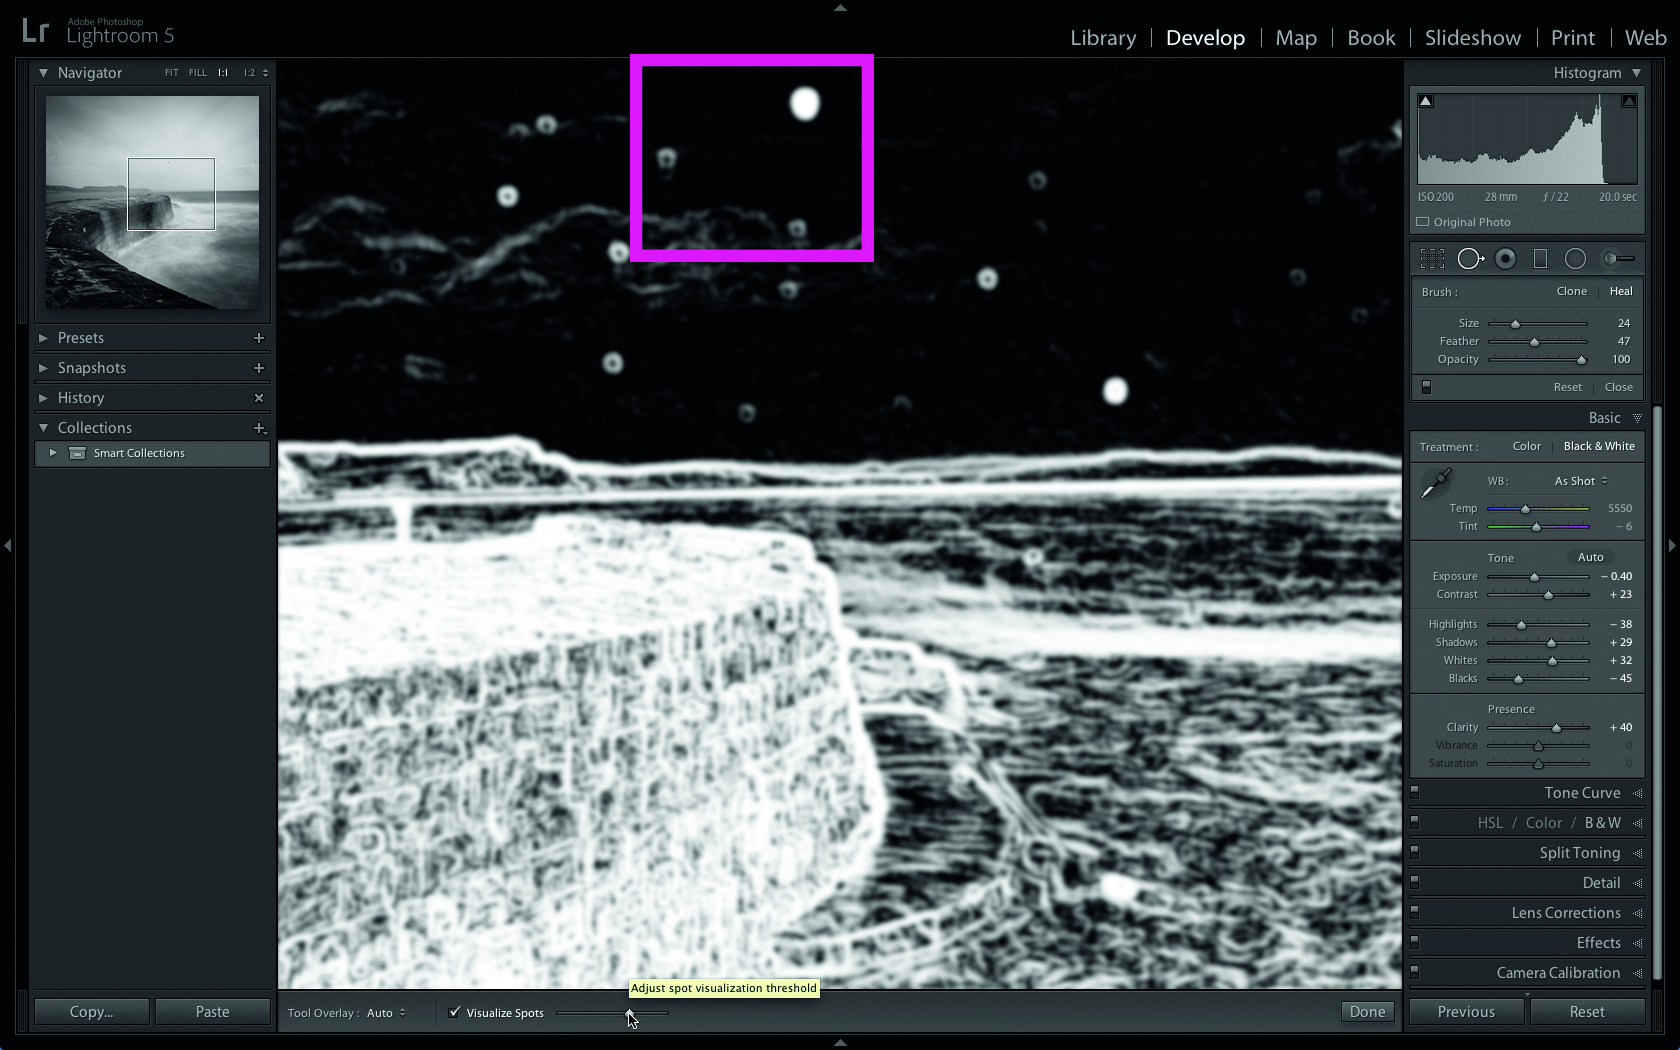
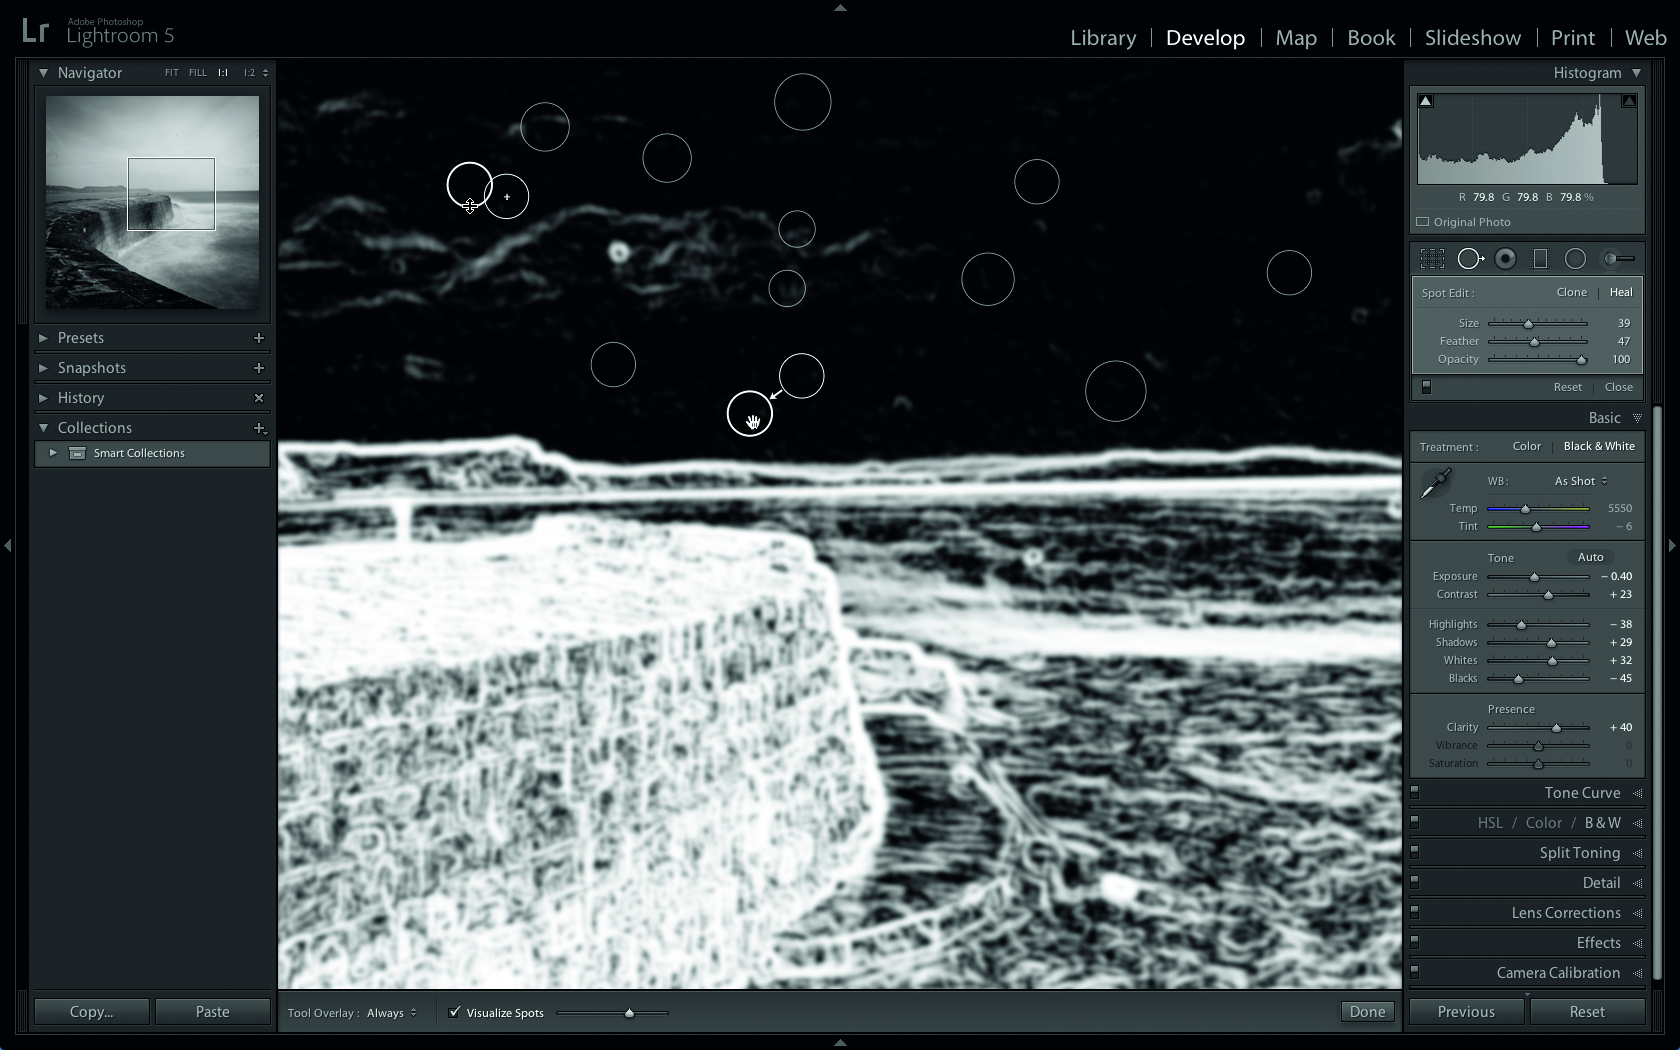
Go to the Develop module’s toolbar and click the Spot Removal tool icon. Tick the Visualize Spots box; this creates a greyscale preview. Drag the Visualize Spots slider right to make grey spots easier to see. The cursor becomes a target-shaped overlay.
3. Set up the brush
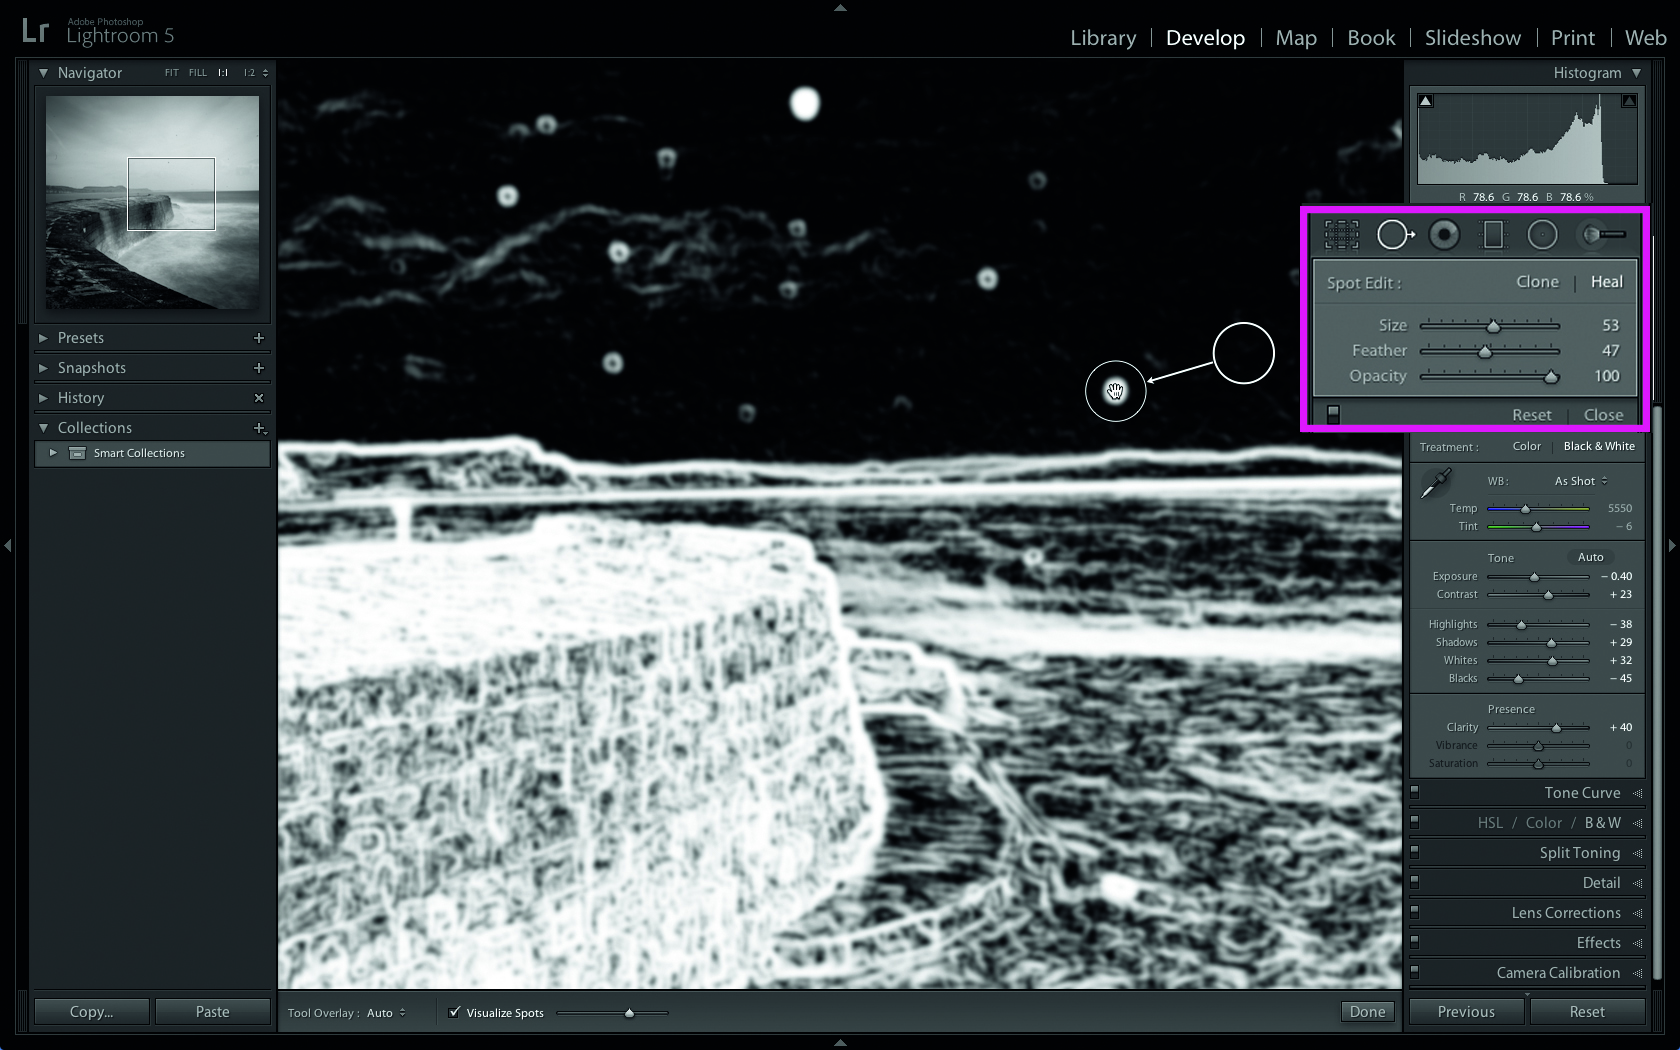
Some spots are larger than the Spot Removal tool’s overlay, so go to the section below the toolbar and set the Size slider to 53. Set Feather to 47 for a soft edge. Click on the Heal option – it produces an invisible edit. Place the overlay over a white spot and click.
You can tap the left square bracket key on your keyboard to shrink the Spot Removal tool’s overlay so that it can deal with smaller spots. By tapping the right square bracket key you can enlarge the overlay.
4. Remove the spots
The Spot Removal tool will sample a patch of clean sky and put it over the spot. An arrow indicates the transplant. The white Visualize Spot warning will turn black to show that the spot is no longer visible. Clear Visualize Spots to see how effective the tool has been.
5. Fine-tune the overlays
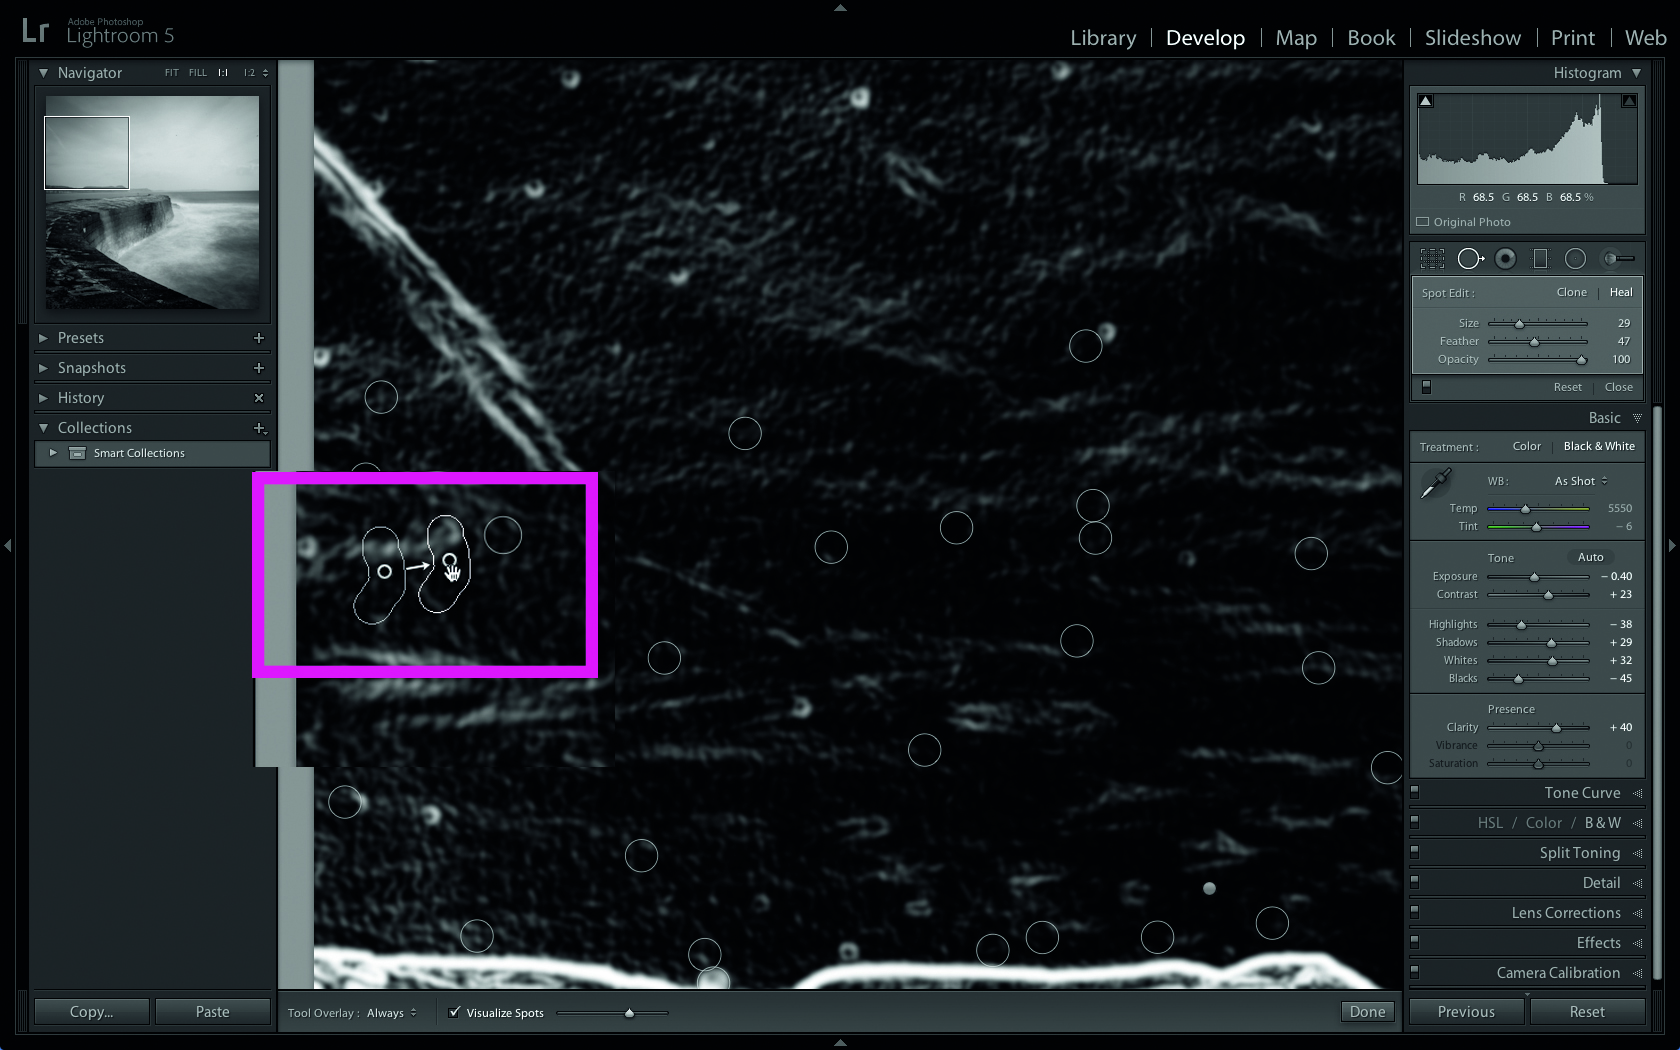
Turn Visualize Spots back on. Click to heal other white and grey spots. To see all the Overlays you create, set the Tool Overlay drop-down menu to Always. You can drag inside an overlay to fine-tune its position. Drag the edge of an overlay to shrink or enlarge it.
6. Create irregular overlays
There’s a stray hair on the left. Set Size to 29 and drag to paint the Spot Removal tool over it. This creates an irregular overlay that will hide the hair. When hiding spots on the sea you may need to manually reposition the source overlay. Click on Done to finish.
Read more:
George has been freelancing as a photo fixing and creative tutorial writer since 2002, working for award winning titles such as Digital Camera, PhotoPlus, N-Photo and Practical Photoshop. He's expert in communicating the ins and outs of Photoshop and Lightroom, as well as producing video production tutorials on Final Cut Pro and iMovie for magazines such as iCreate and Mac Format. He also produces regular and exclusive Photoshop CC tutorials for his YouTube channel.

