How to process Dual Pixel Raw images in Canon's free Digital Photo Pro software
Capture images with Dual Pixel Raw shooting and use Canon’s DPP to refine the point of focus
The best camera deals, reviews, product advice, and unmissable photography news, direct to your inbox!
You are now subscribed
Your newsletter sign-up was successful
Dual Pixel Raw capability first arrived with the Canon EOS 5D Mark IV, and many of the latest EOS R mirrorless models also have the option. When active, the camera stores the readout from both of the photo sensors that are within each pixel. Similarly to how we see slightly different images from left and right eyes, dual pixels capture different views of the same subject which can then be manipulated with DPP’s Dual Pixel Raw tool.
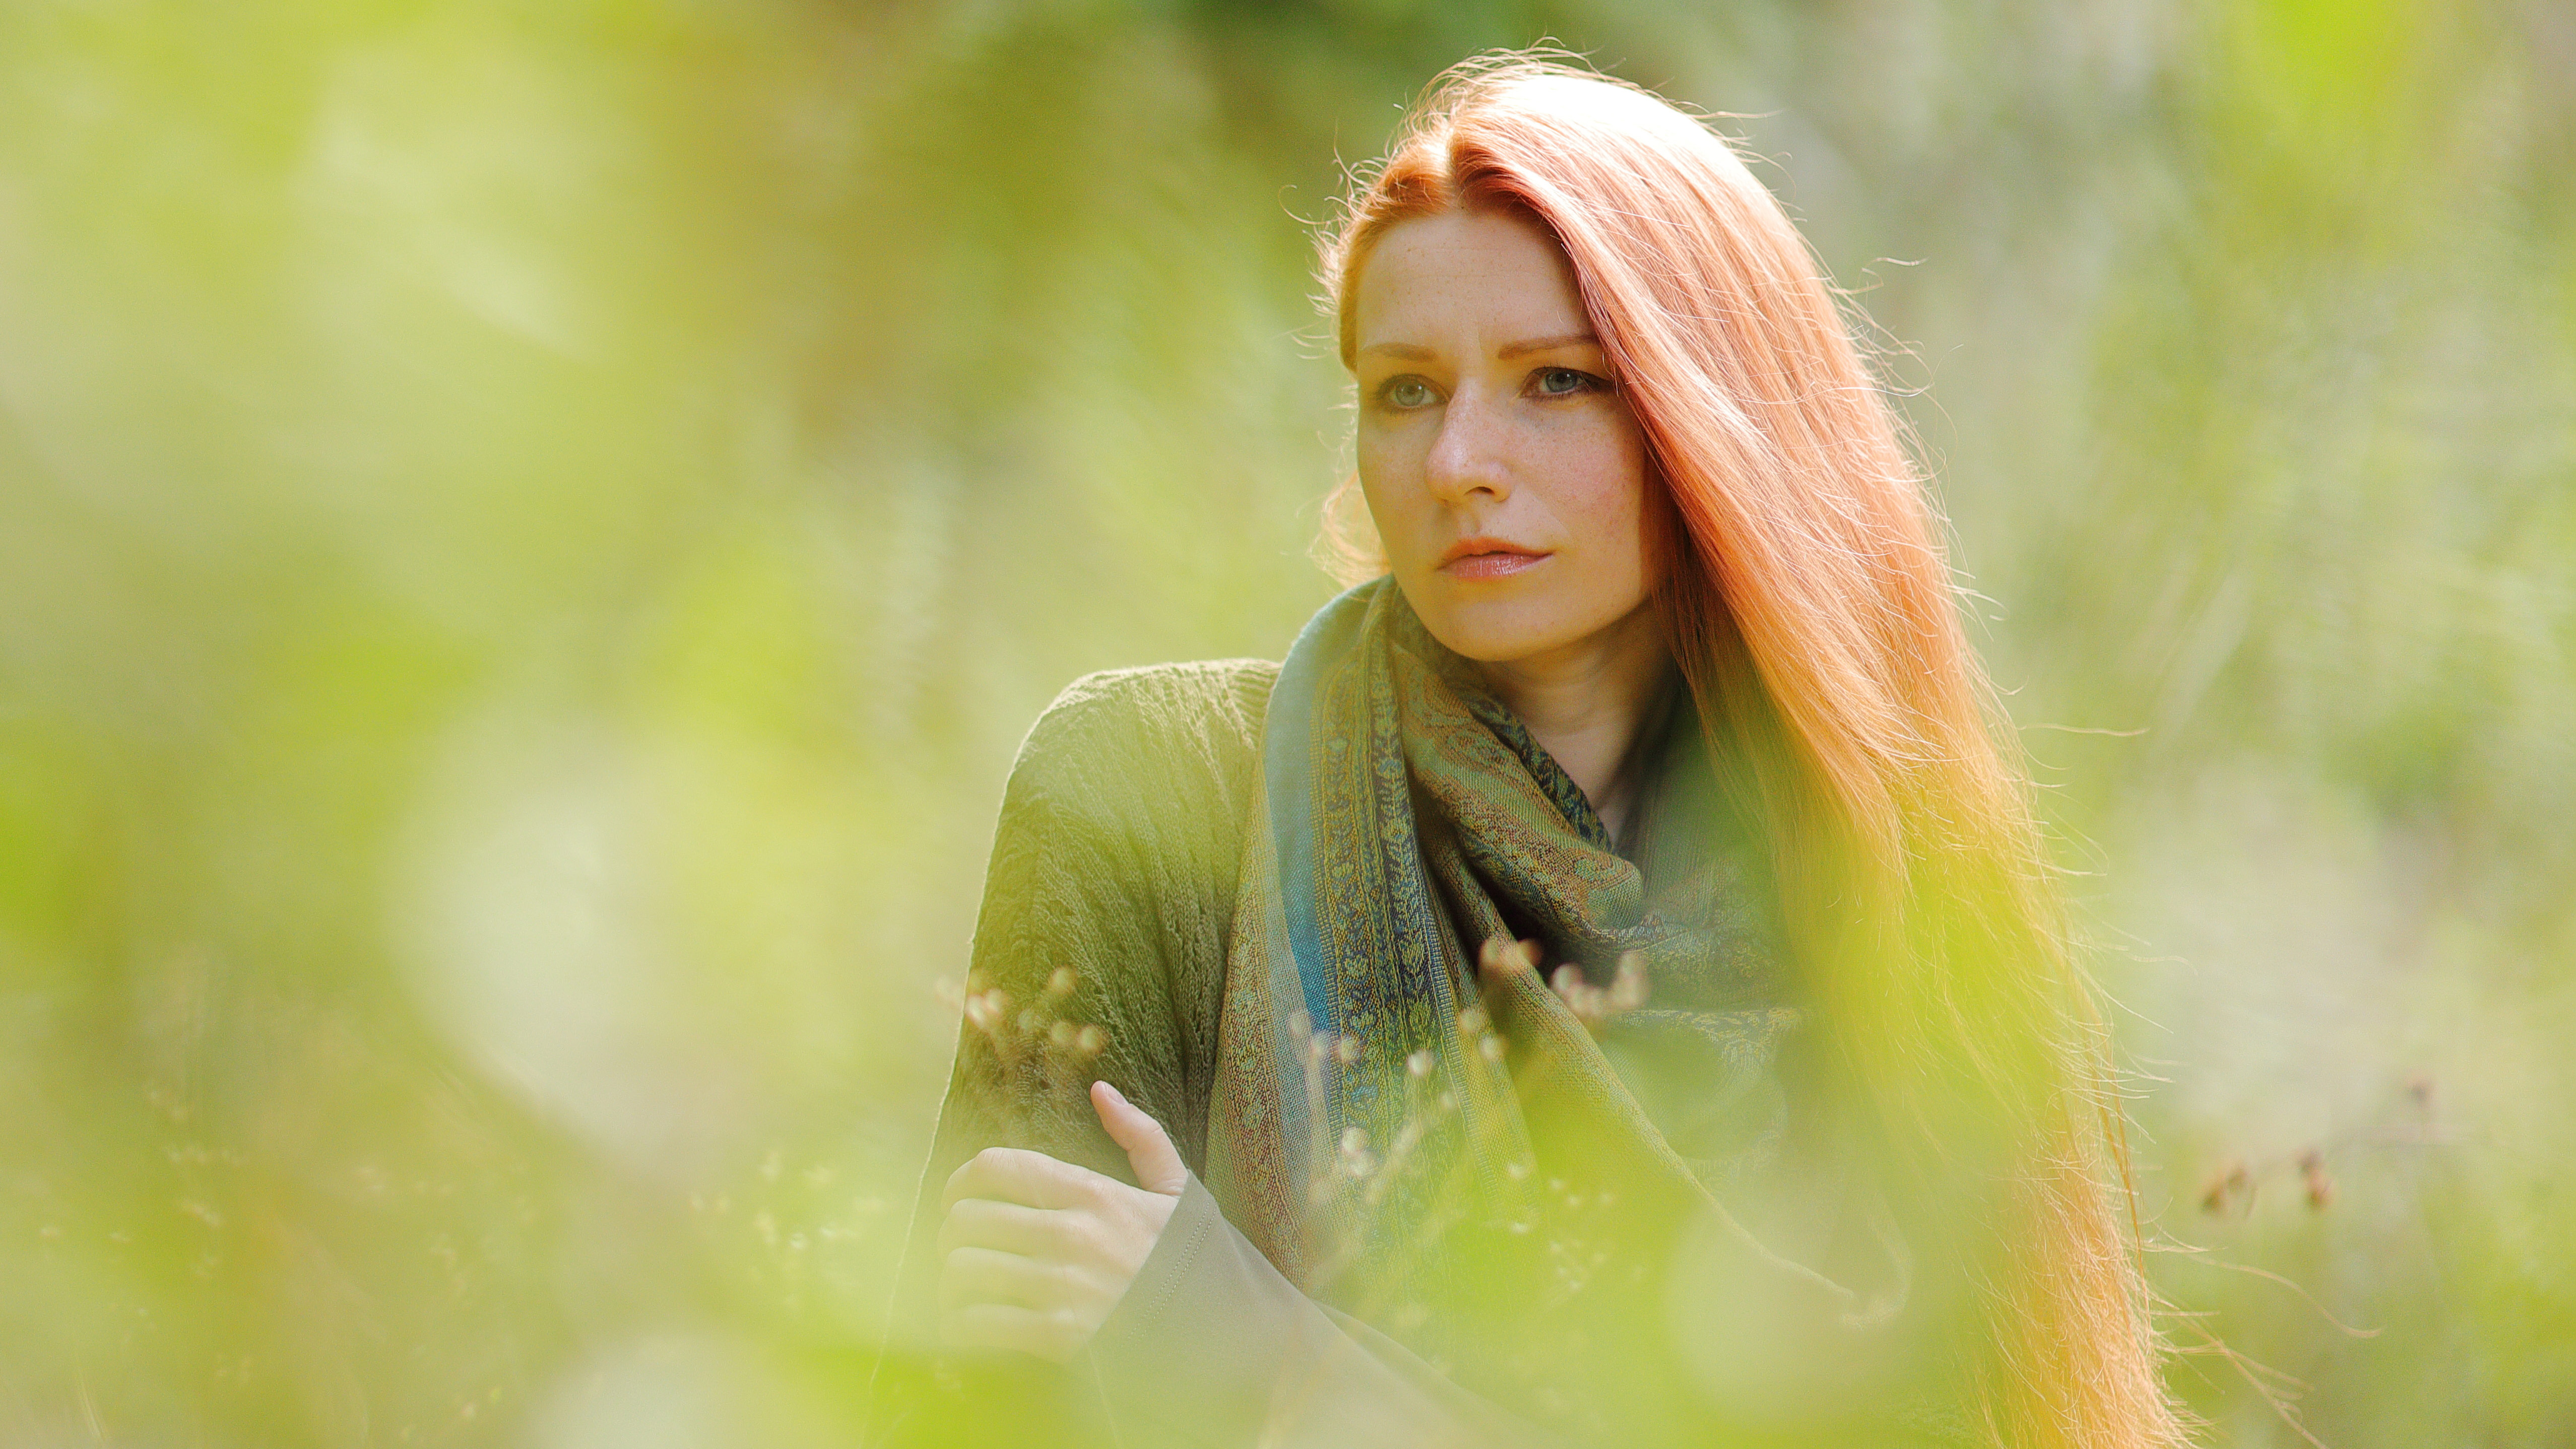
Using DPP, Canon's free Digital Photo Professional software, to adjust Dual Pixel Raw images, you can slightly move the point of sharpness, it’s almost as if you get to slightly change the focus ring after the shot. Micro adjustment is better suited to portrait images, as the amount of adjustment is dependent on the depth of field captured, so with macro subjects there’s little adjustment possible.

Brian is a freelance photographer and photo tutor, based in Oxfordshire. He has unrivaled EOS DSLR knowledge, after working for Canon for over 15 years, and is on hand to answer all the EOS and photographic queries in Canon-centric magazine PhotoPlus.
Visit Brian's website
Bokeh shift and flare and ghosting reduction makes use of the two slightly different perspectives of the separate photodiodes in each pixel. Adjusting bokeh shift changes the balance of left and right viewpoints causing out-of-focus elements in the foreground and background to appear to rotate around the subject. Its effect is most readily seen when images are taken with a fast standard or short telephoto lens with the aperture wide open. Flare and ghosting reduction also makes use of the dual perspective.
Read more: Digital Photo Professional tutorials
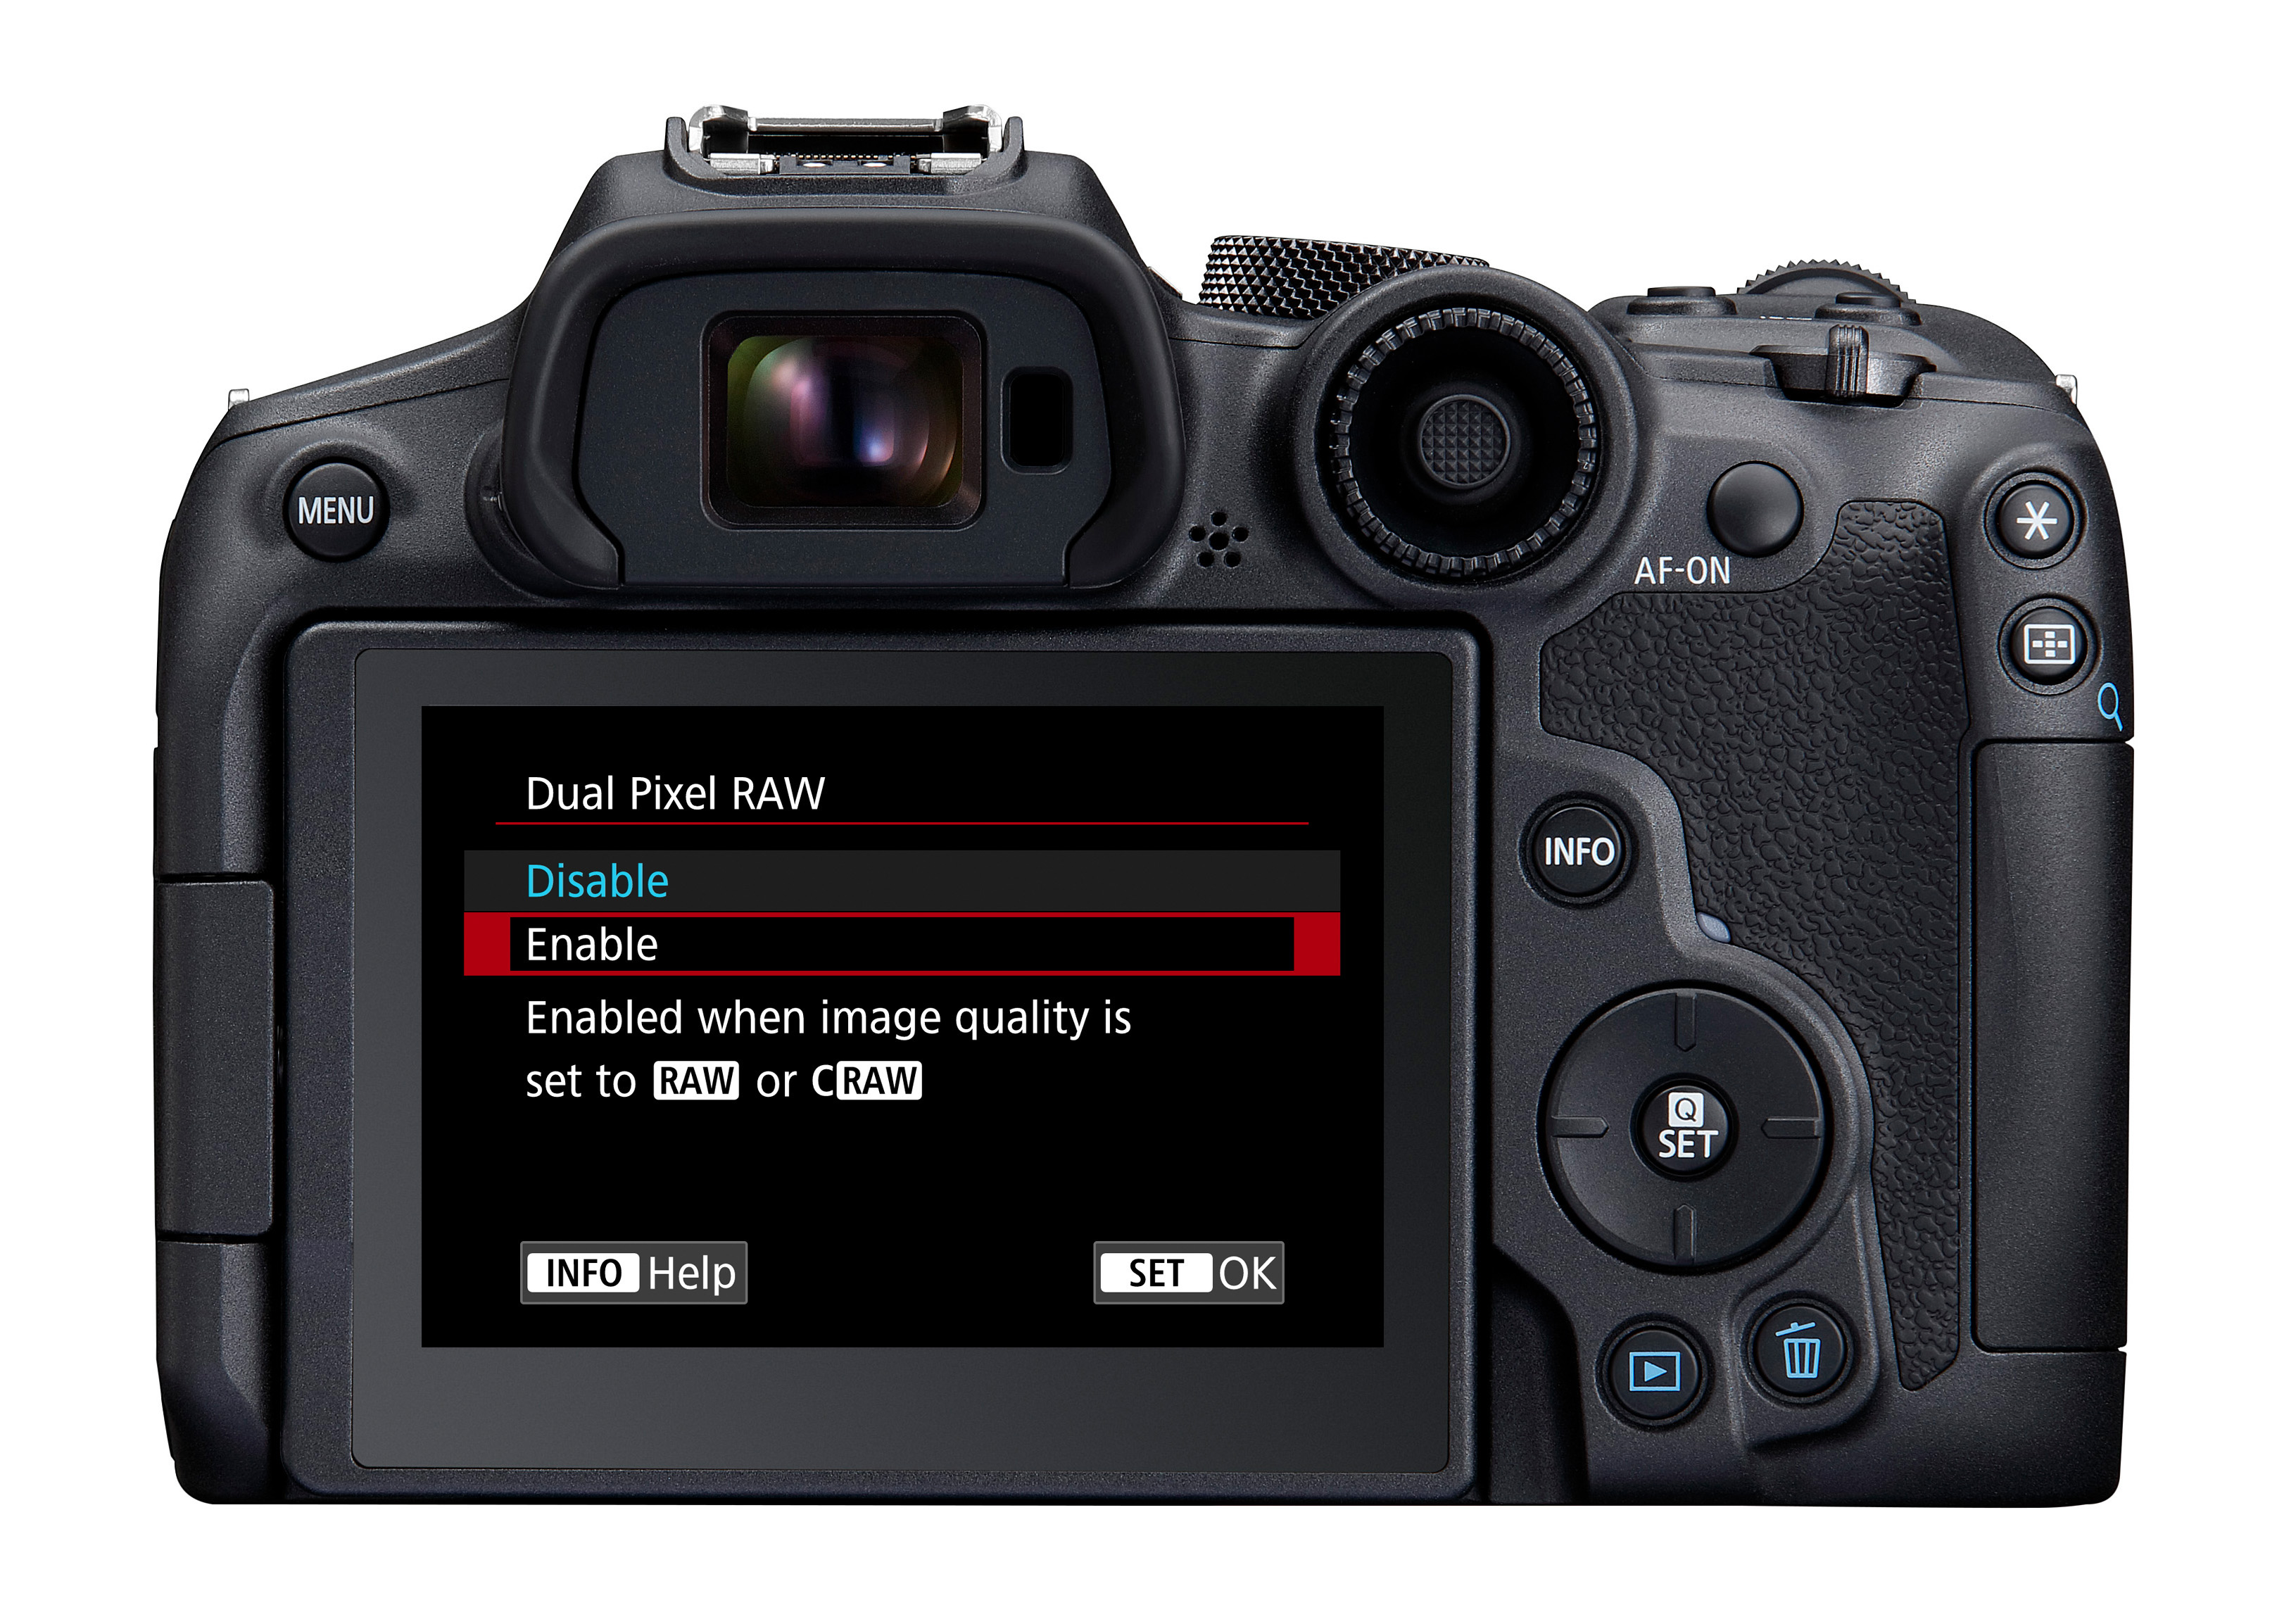
01 Switch on Dual Pixel Raw
If your Canon EOS camera has Dual Pixel Raw, it needs to be switched on from the camera menu, so that the data from each photo diode is stored in the Raw image. It goes without saying it’s also necessary to shoot in the Raw image format, as JPG and HEIF images cannot store multiple values from each individual pixel.
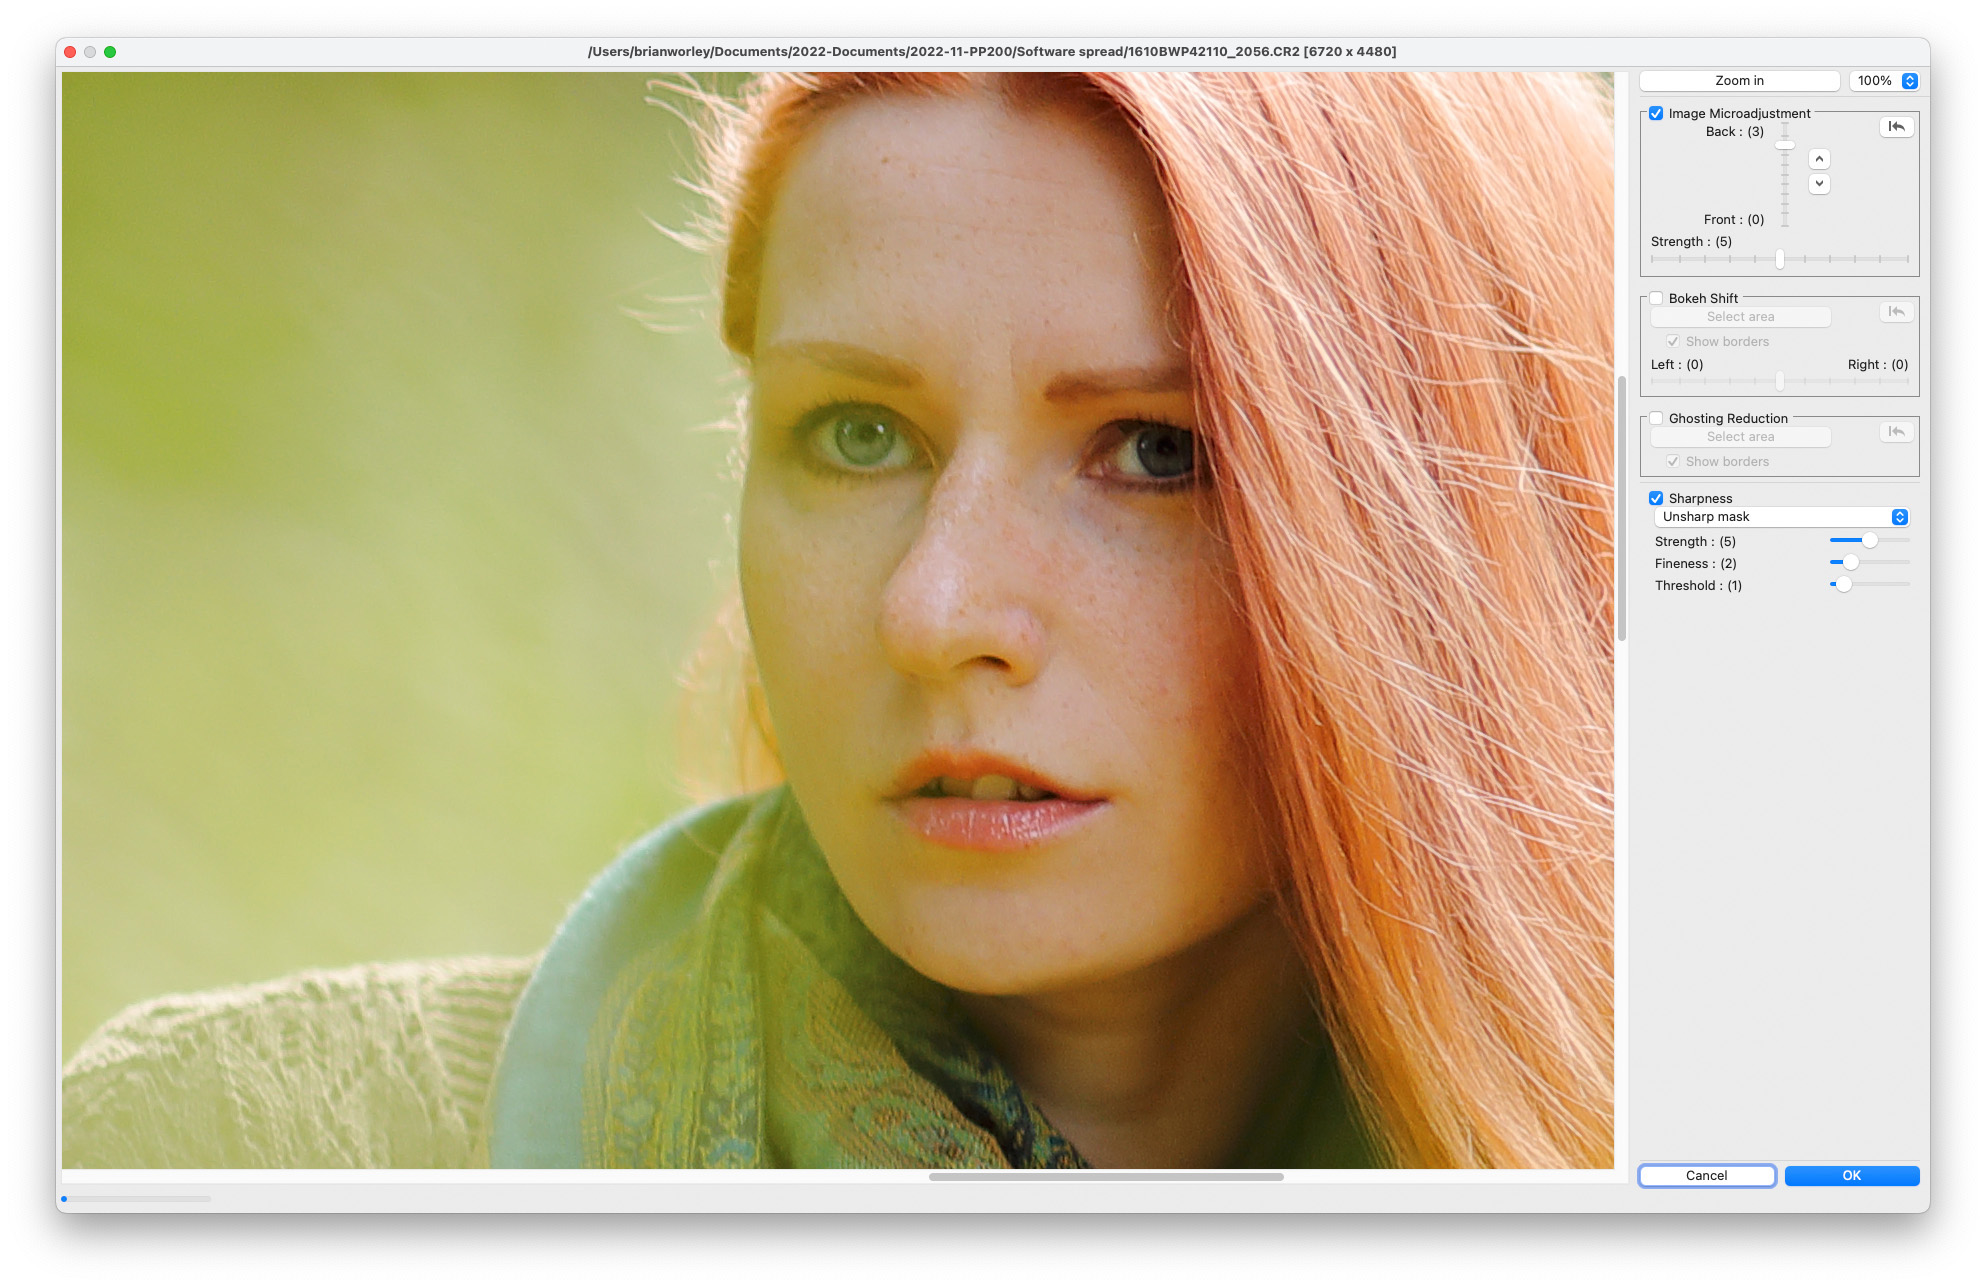
02 Image micro adjustment
In DPP, select an image, and from the menu select Tools > Start Dual Pixel Raw optimizer. Check the image micro adjustment then adjust the point of focus. Zoom in to 100% helps you to see the change in focus point. Moving the slider to the extreme end of the adjustment makes it simple to see which way to adjust the image.
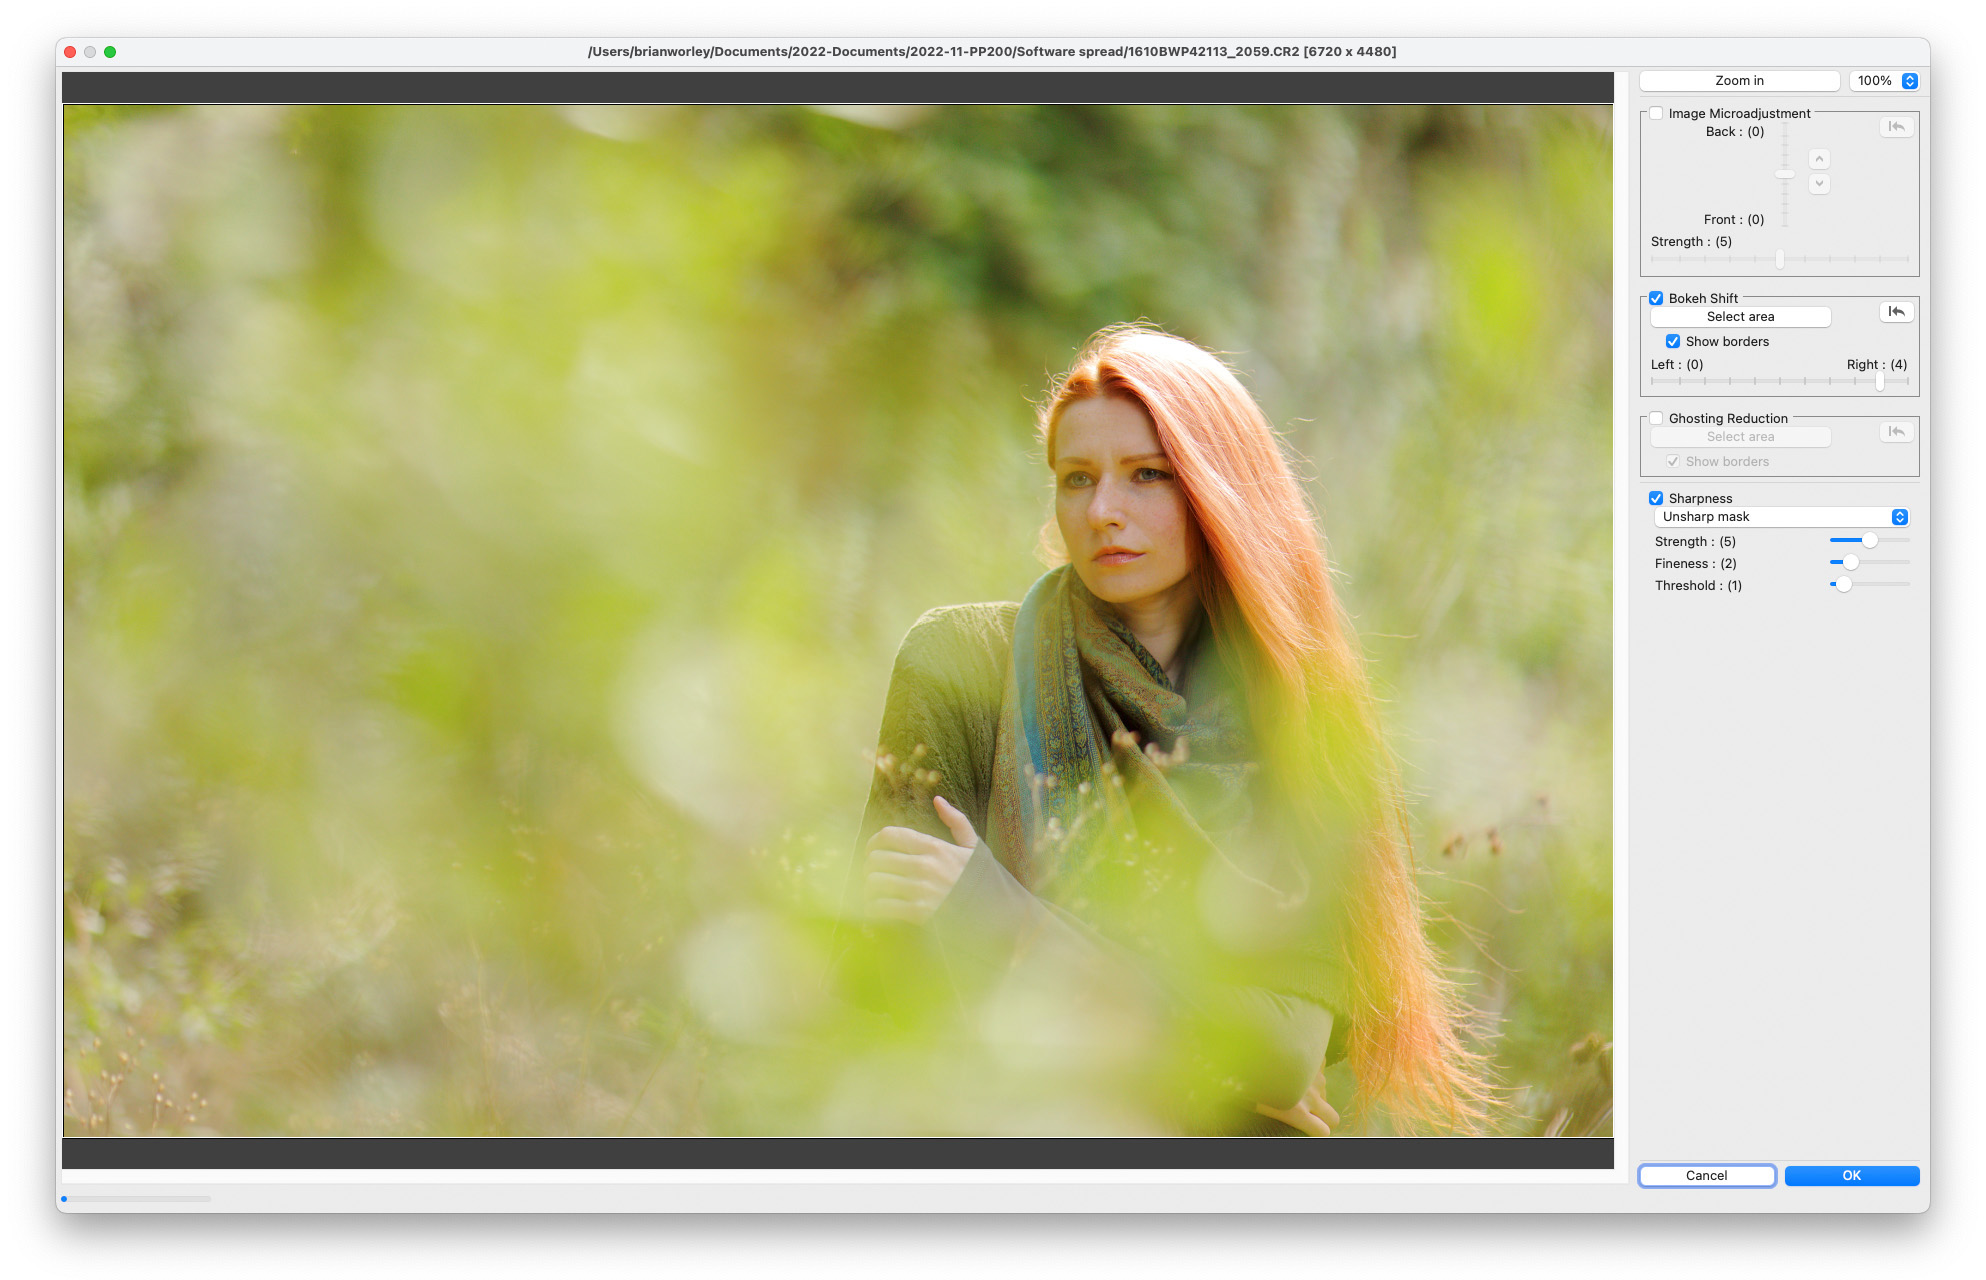
03 Bokeh shift
Bokeh shift moves the viewpoint around the main subject and can be used to move out of focus elements in-front of or behind the main subject. Move the slider to the left to shift background bokeh to the left and foreground bokeh to the right. Maximise the shift to determine the optimum direction, before more considered adjustment.
The best camera deals, reviews, product advice, and unmissable photography news, direct to your inbox!
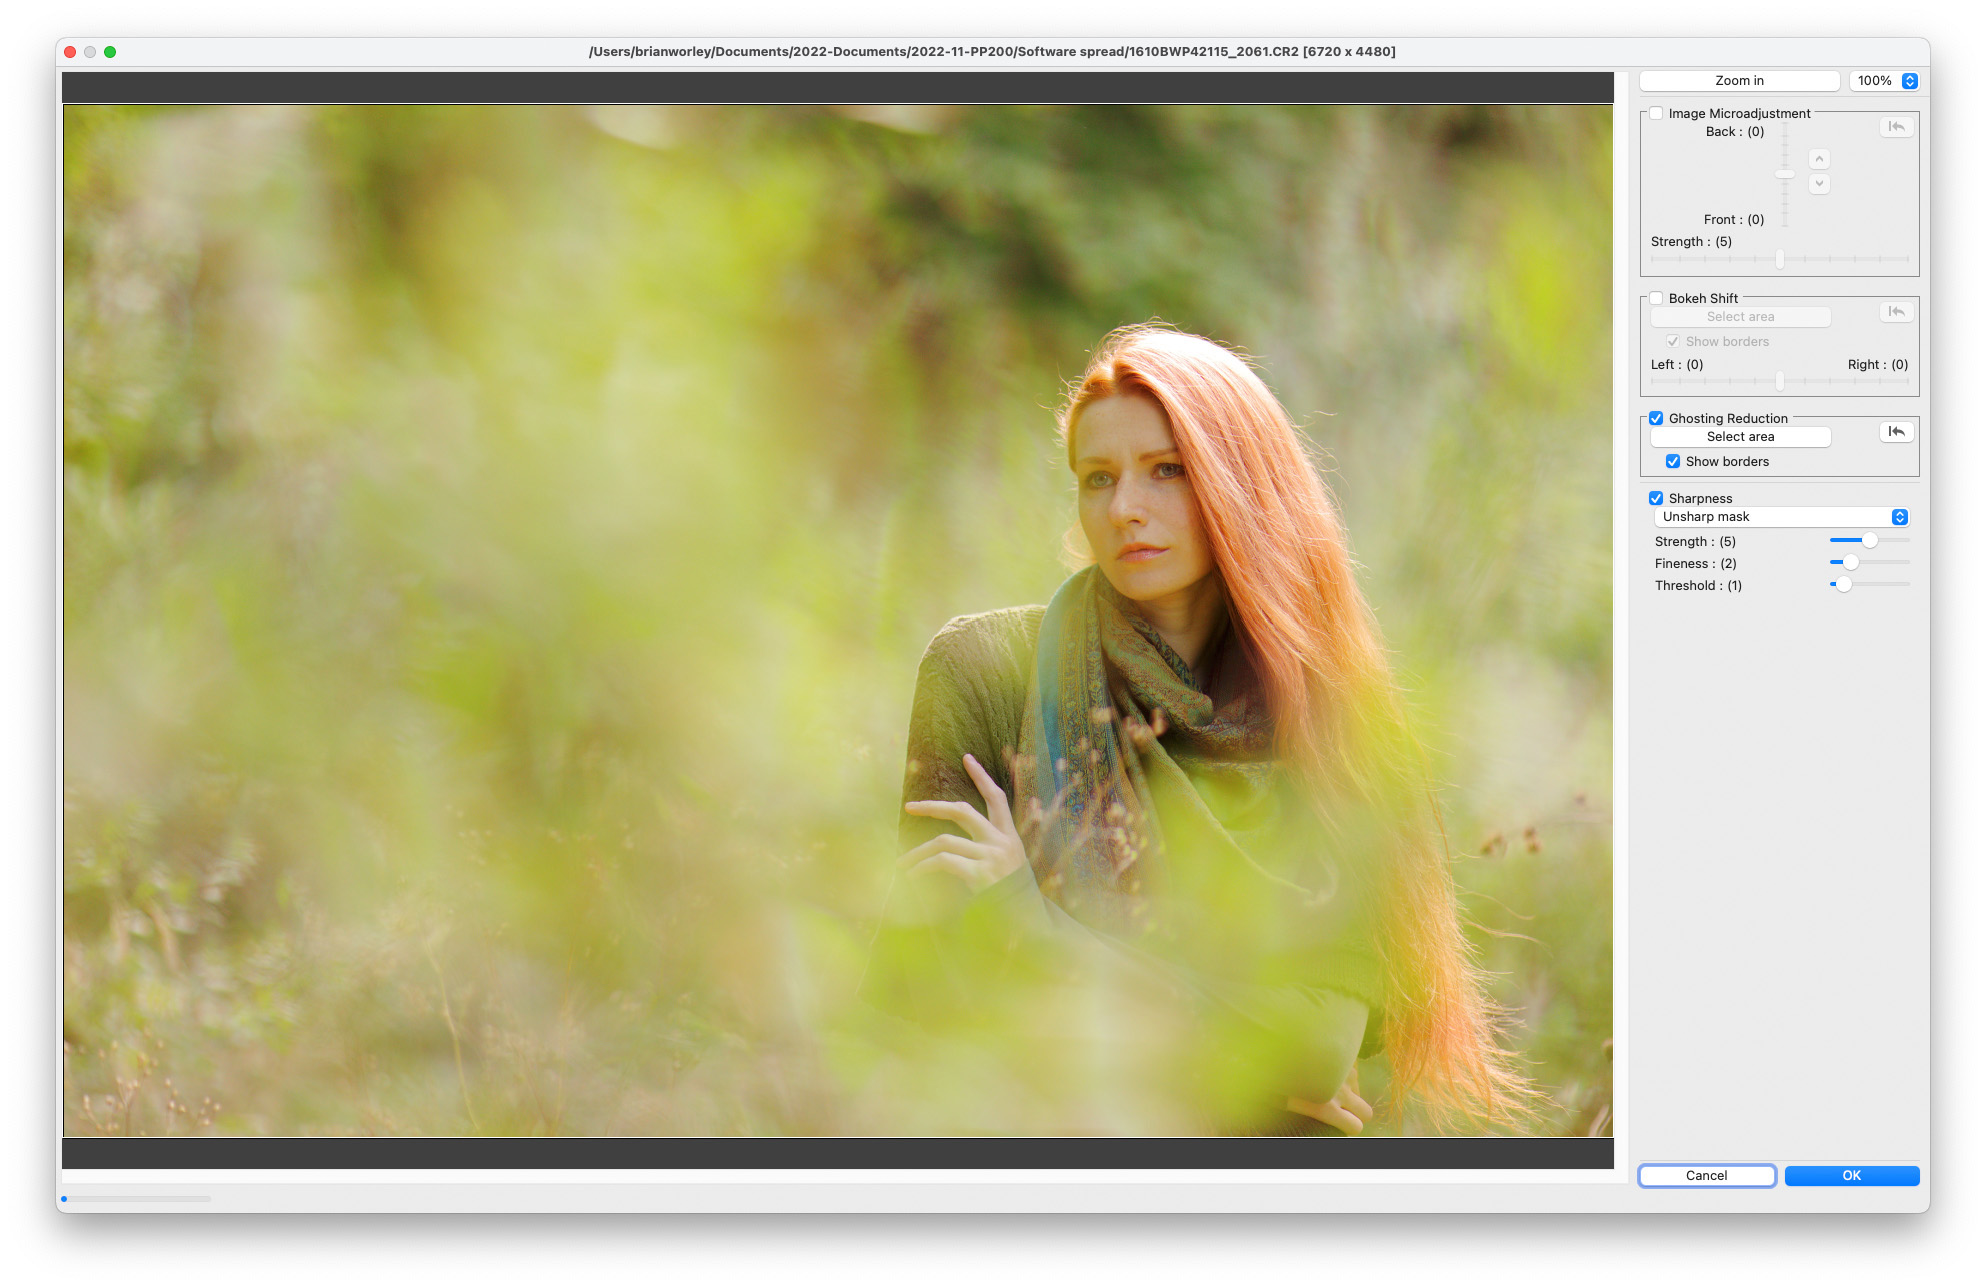
04 Ghosting reduction
Ghosting reduction decreases the appearance of artefacts caused by bright light source. Check ghosting reduction, and the software analyses left and right views before selectively swapping then to reduce the presence of flare spots and ghosting. You can optionally select a specific part of the picture where you want to apply the correction.
PhotoPlus: The Canon Magazine is the world's only monthly newsstand title that's 100% devoted to Canon, so you can be sure the magazine is completely relevant to your system. Every issue comes with downloadable video tutorials too.
You might also like the best Canon lenses and the Canon EOS R10 review.
Brian is a freelance photographer and photo tutor, based in Oxfordshire. He has unrivaled EOS DSLR knowledge, after working for Canon for over 15 years, and is on hand to answer all the EOS and photographic queries in Canon-centric magazine PhotoPlus.
