Watch video: How to add replace a sky in Photoshop Elements
Even the most advanced digital cameras on the market will struggle to handle the exposure between a bright sky and the foreground, as they have to meter to expose for one or the other. This often leads to sky details being blown out and lost, but fear not, you can replace the sky in Photoshop Elements 2020 to save it!
We’ve been busy shooting a sky library compiled of 50 sky images that you can download for free here and add to your landscapes to save a great shot that just happens to have an overexposed sky in it.
Weather is such a varied part of landscape photography that you could turn up to a fantastic location only to have no clouds in sight, or have it be totally overcast, both of which can make your scene look flat. Ideally, you want a good mix of cloud and blue sky to give your landscapes a good punchy contrast. So adding a new sky to shots like this will also help breathe new life into them - here's how to do it!
01 Open up your picture and a suitable sky
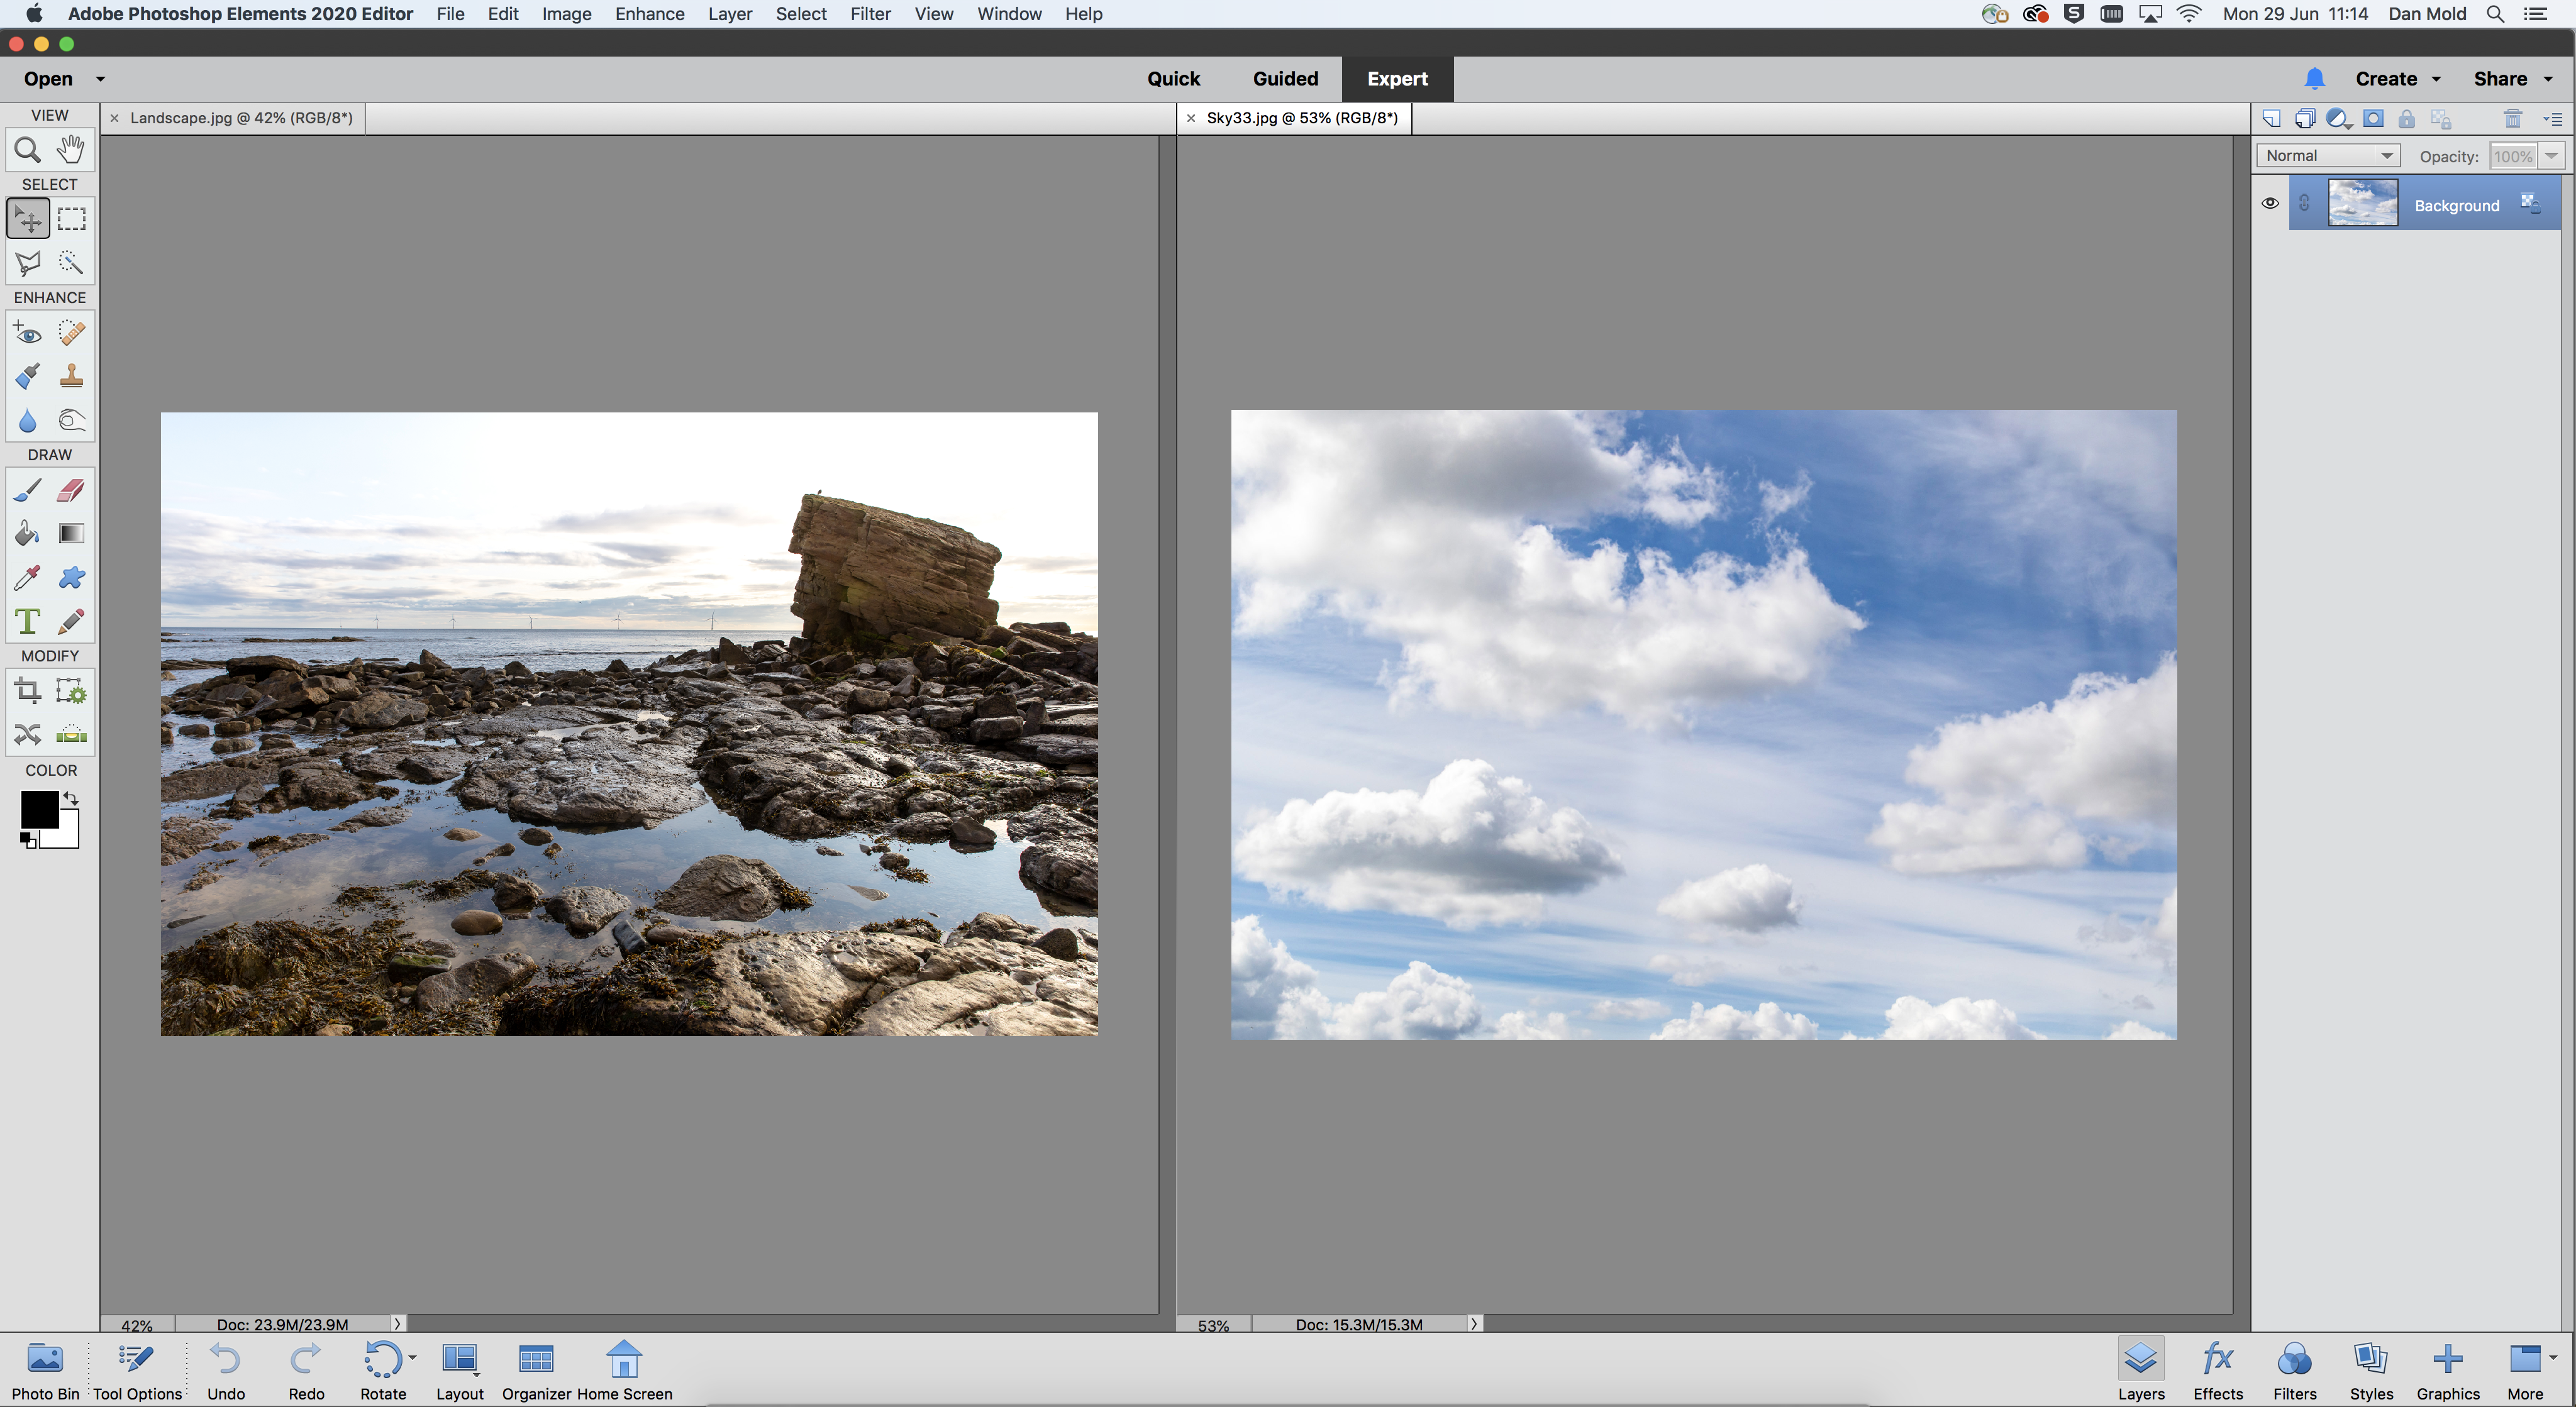
Open up a landscape shot into Elements that you think would work well with a sky replacement. Then go back to File>Open, this time navigating to the folder of free sky images from the Resources folder (download here) and open one you like the look of.
02 Paste the sky in and resize it
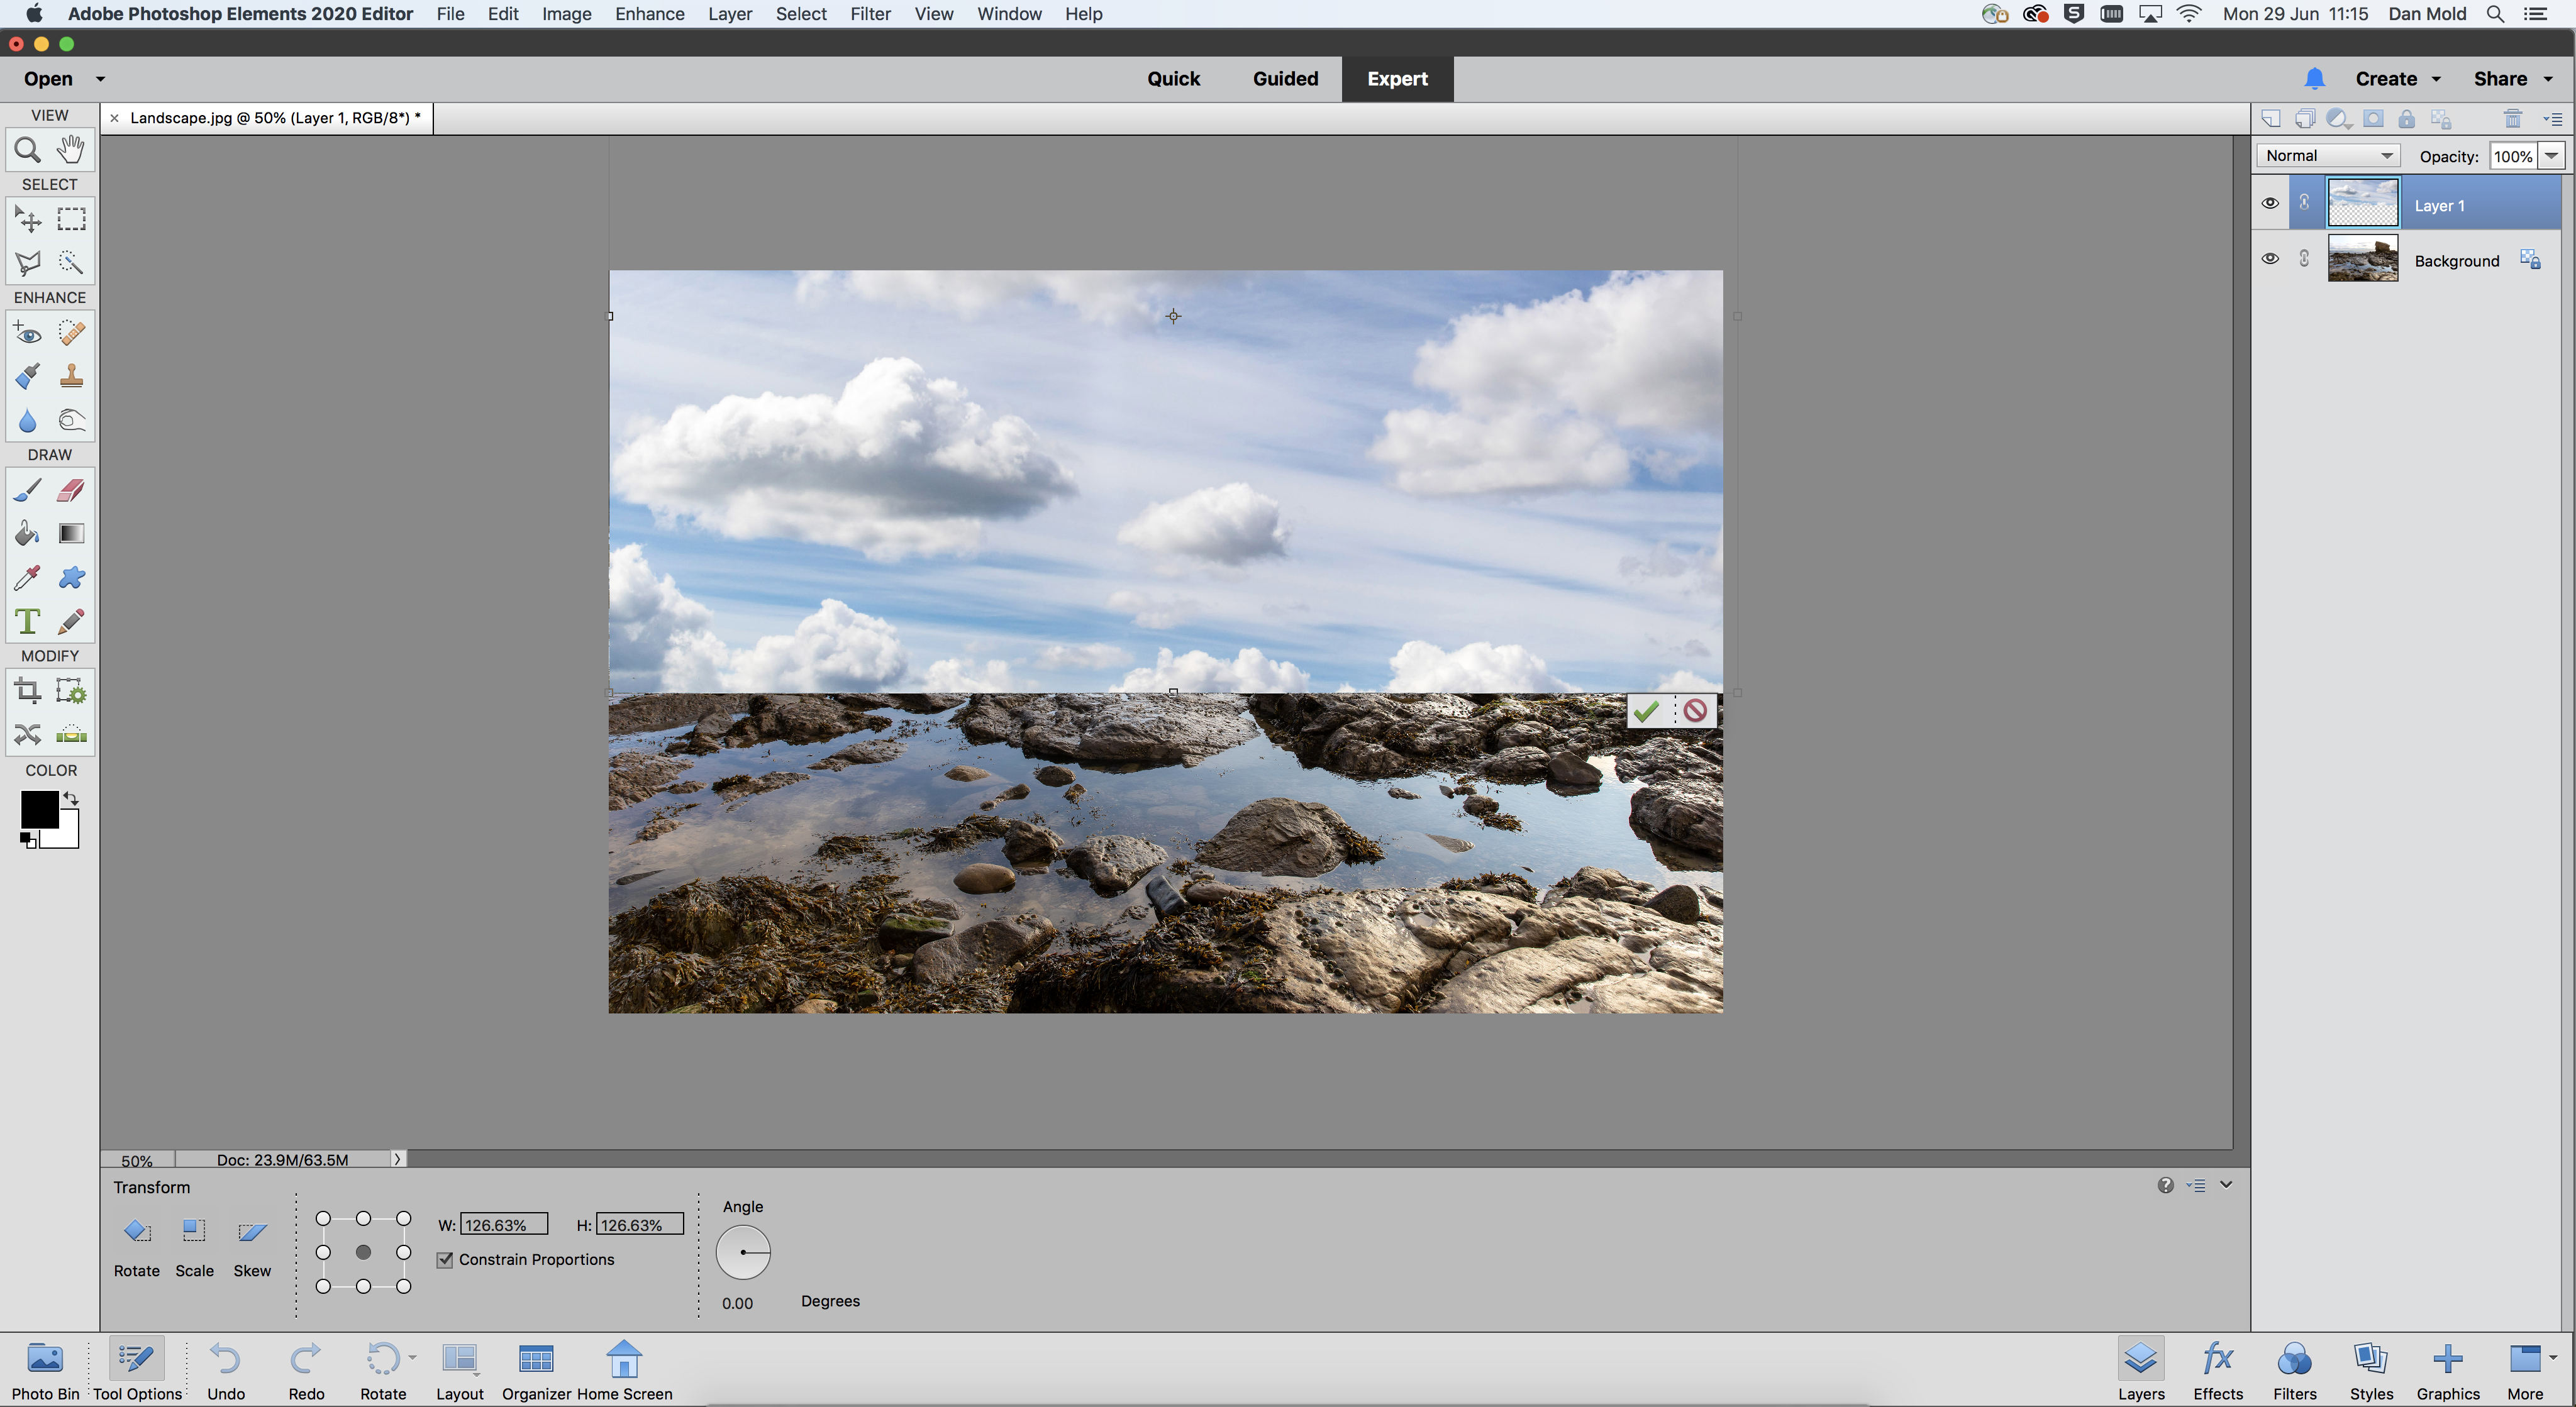
In the sky image hit Ctrl/Cmd+A to select it, Ctrl/Cmd+C to copy it, then in your landscape shot hit Ctrl/Cmd+V to paste it in. It’ll need resizing so hit Ctrl/Cmd+T to go into Free Transform mode and make sure it’s covering the top portion of the shot.
The best camera deals, reviews, product advice, and unmissable photography news, direct to your inbox!
03 Extend the canvas if needed
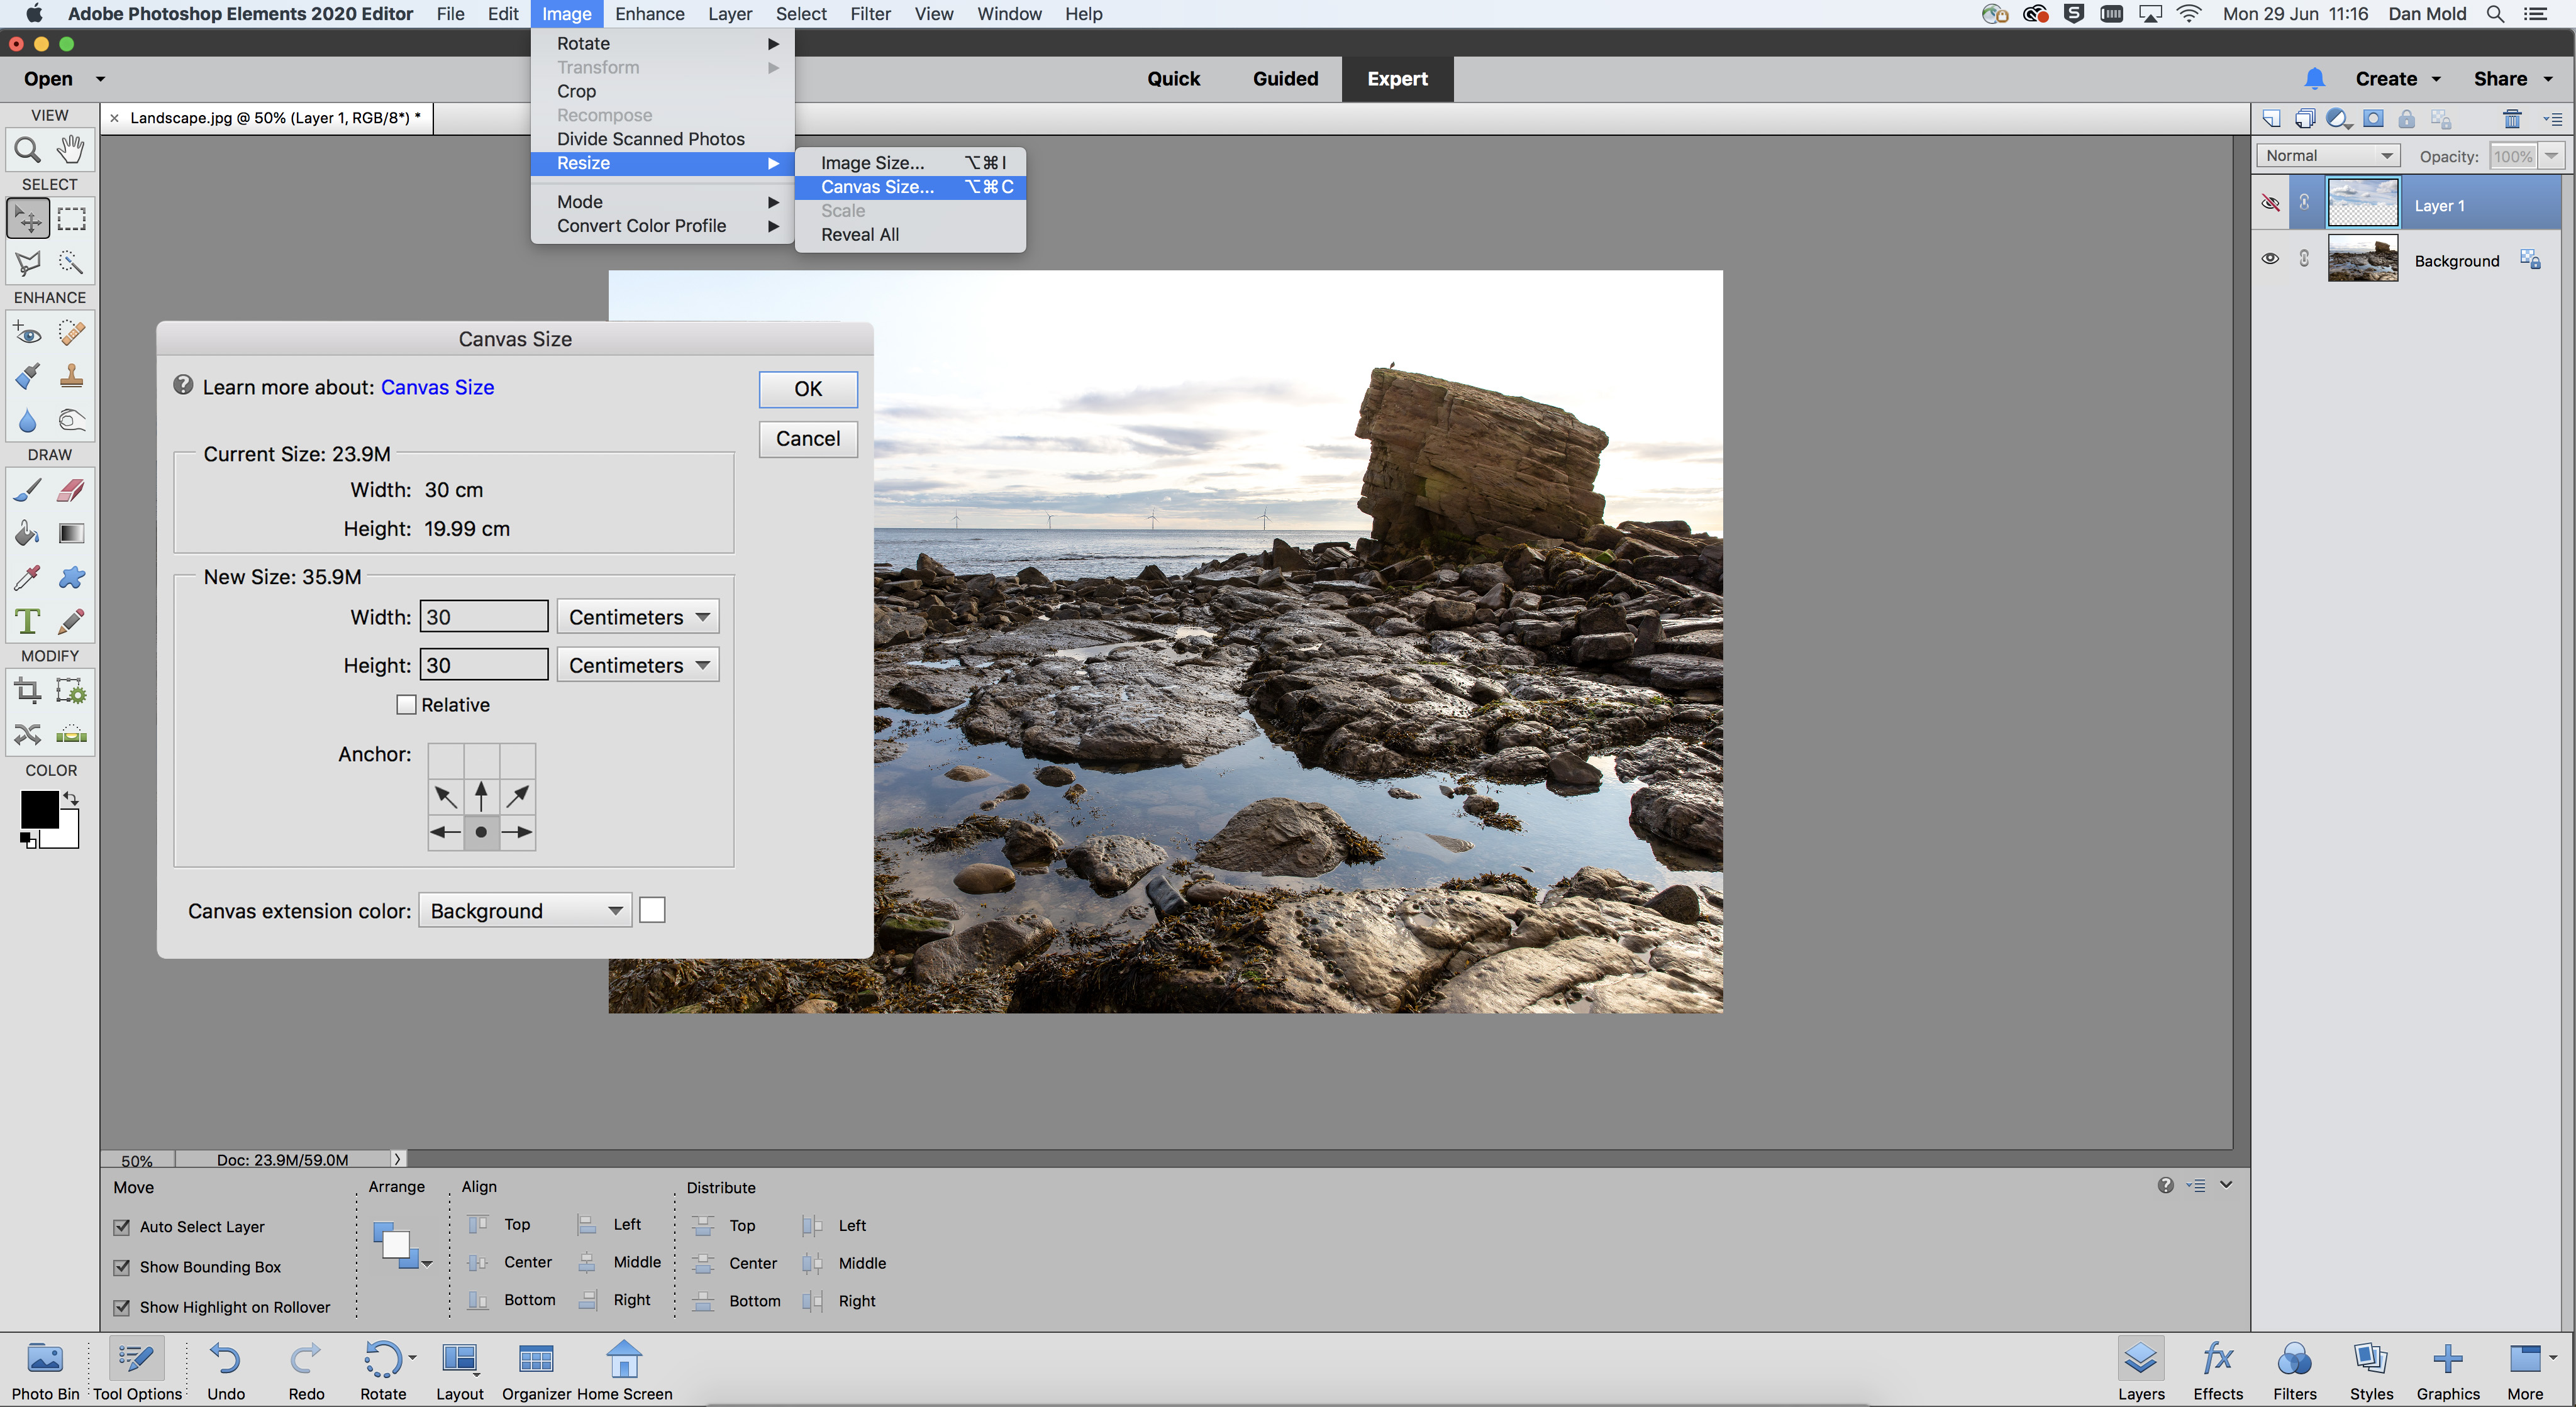
For our shot I’d like the image to actually have a larger area for the sky so I need to extend the frame upward. To do this I went to Image>Resize>Canvas Size, then set the Anchor to the bottom middle point and entered a larger value in the Height box and hit OK.
04 Select the foreground
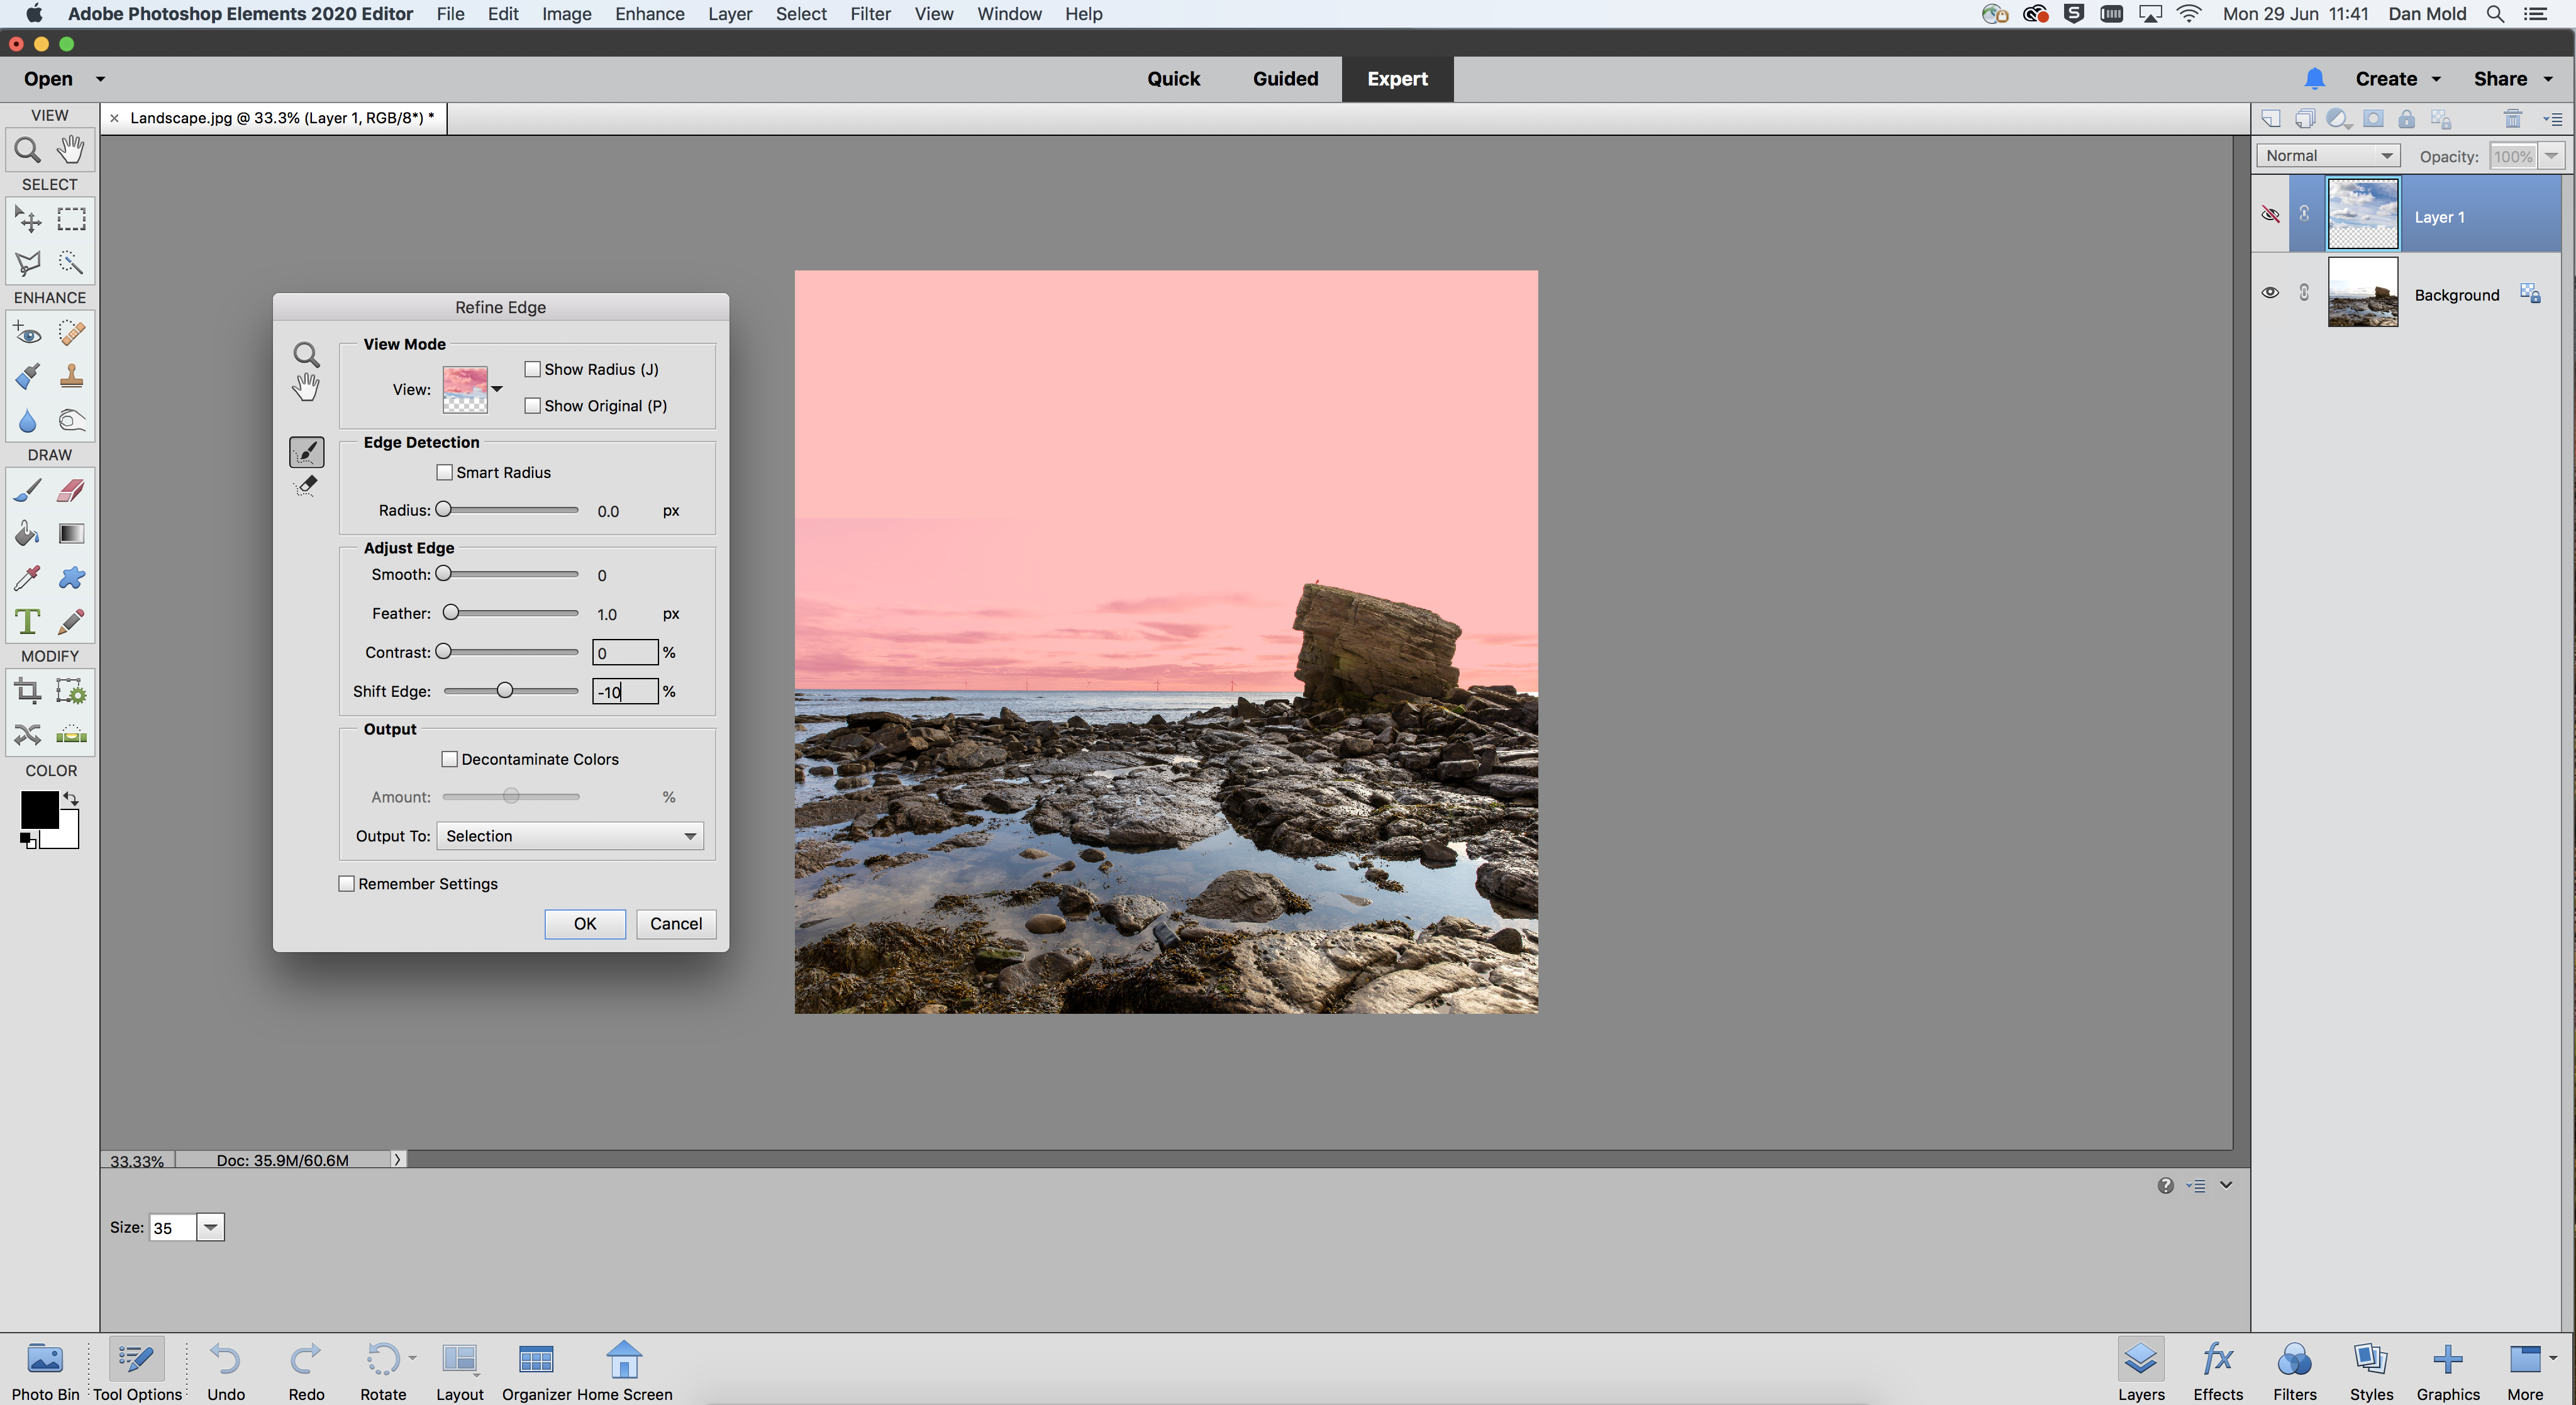
Click on the Background Layer to make it active then grab the Polygonal Lasso Tool from the Toolbox and carefully click all the way around the foreground. Now click Refine Edge in the Tool Options and set the Feather to 1px and set Output To>New Layer.
05 Add a blank white layer
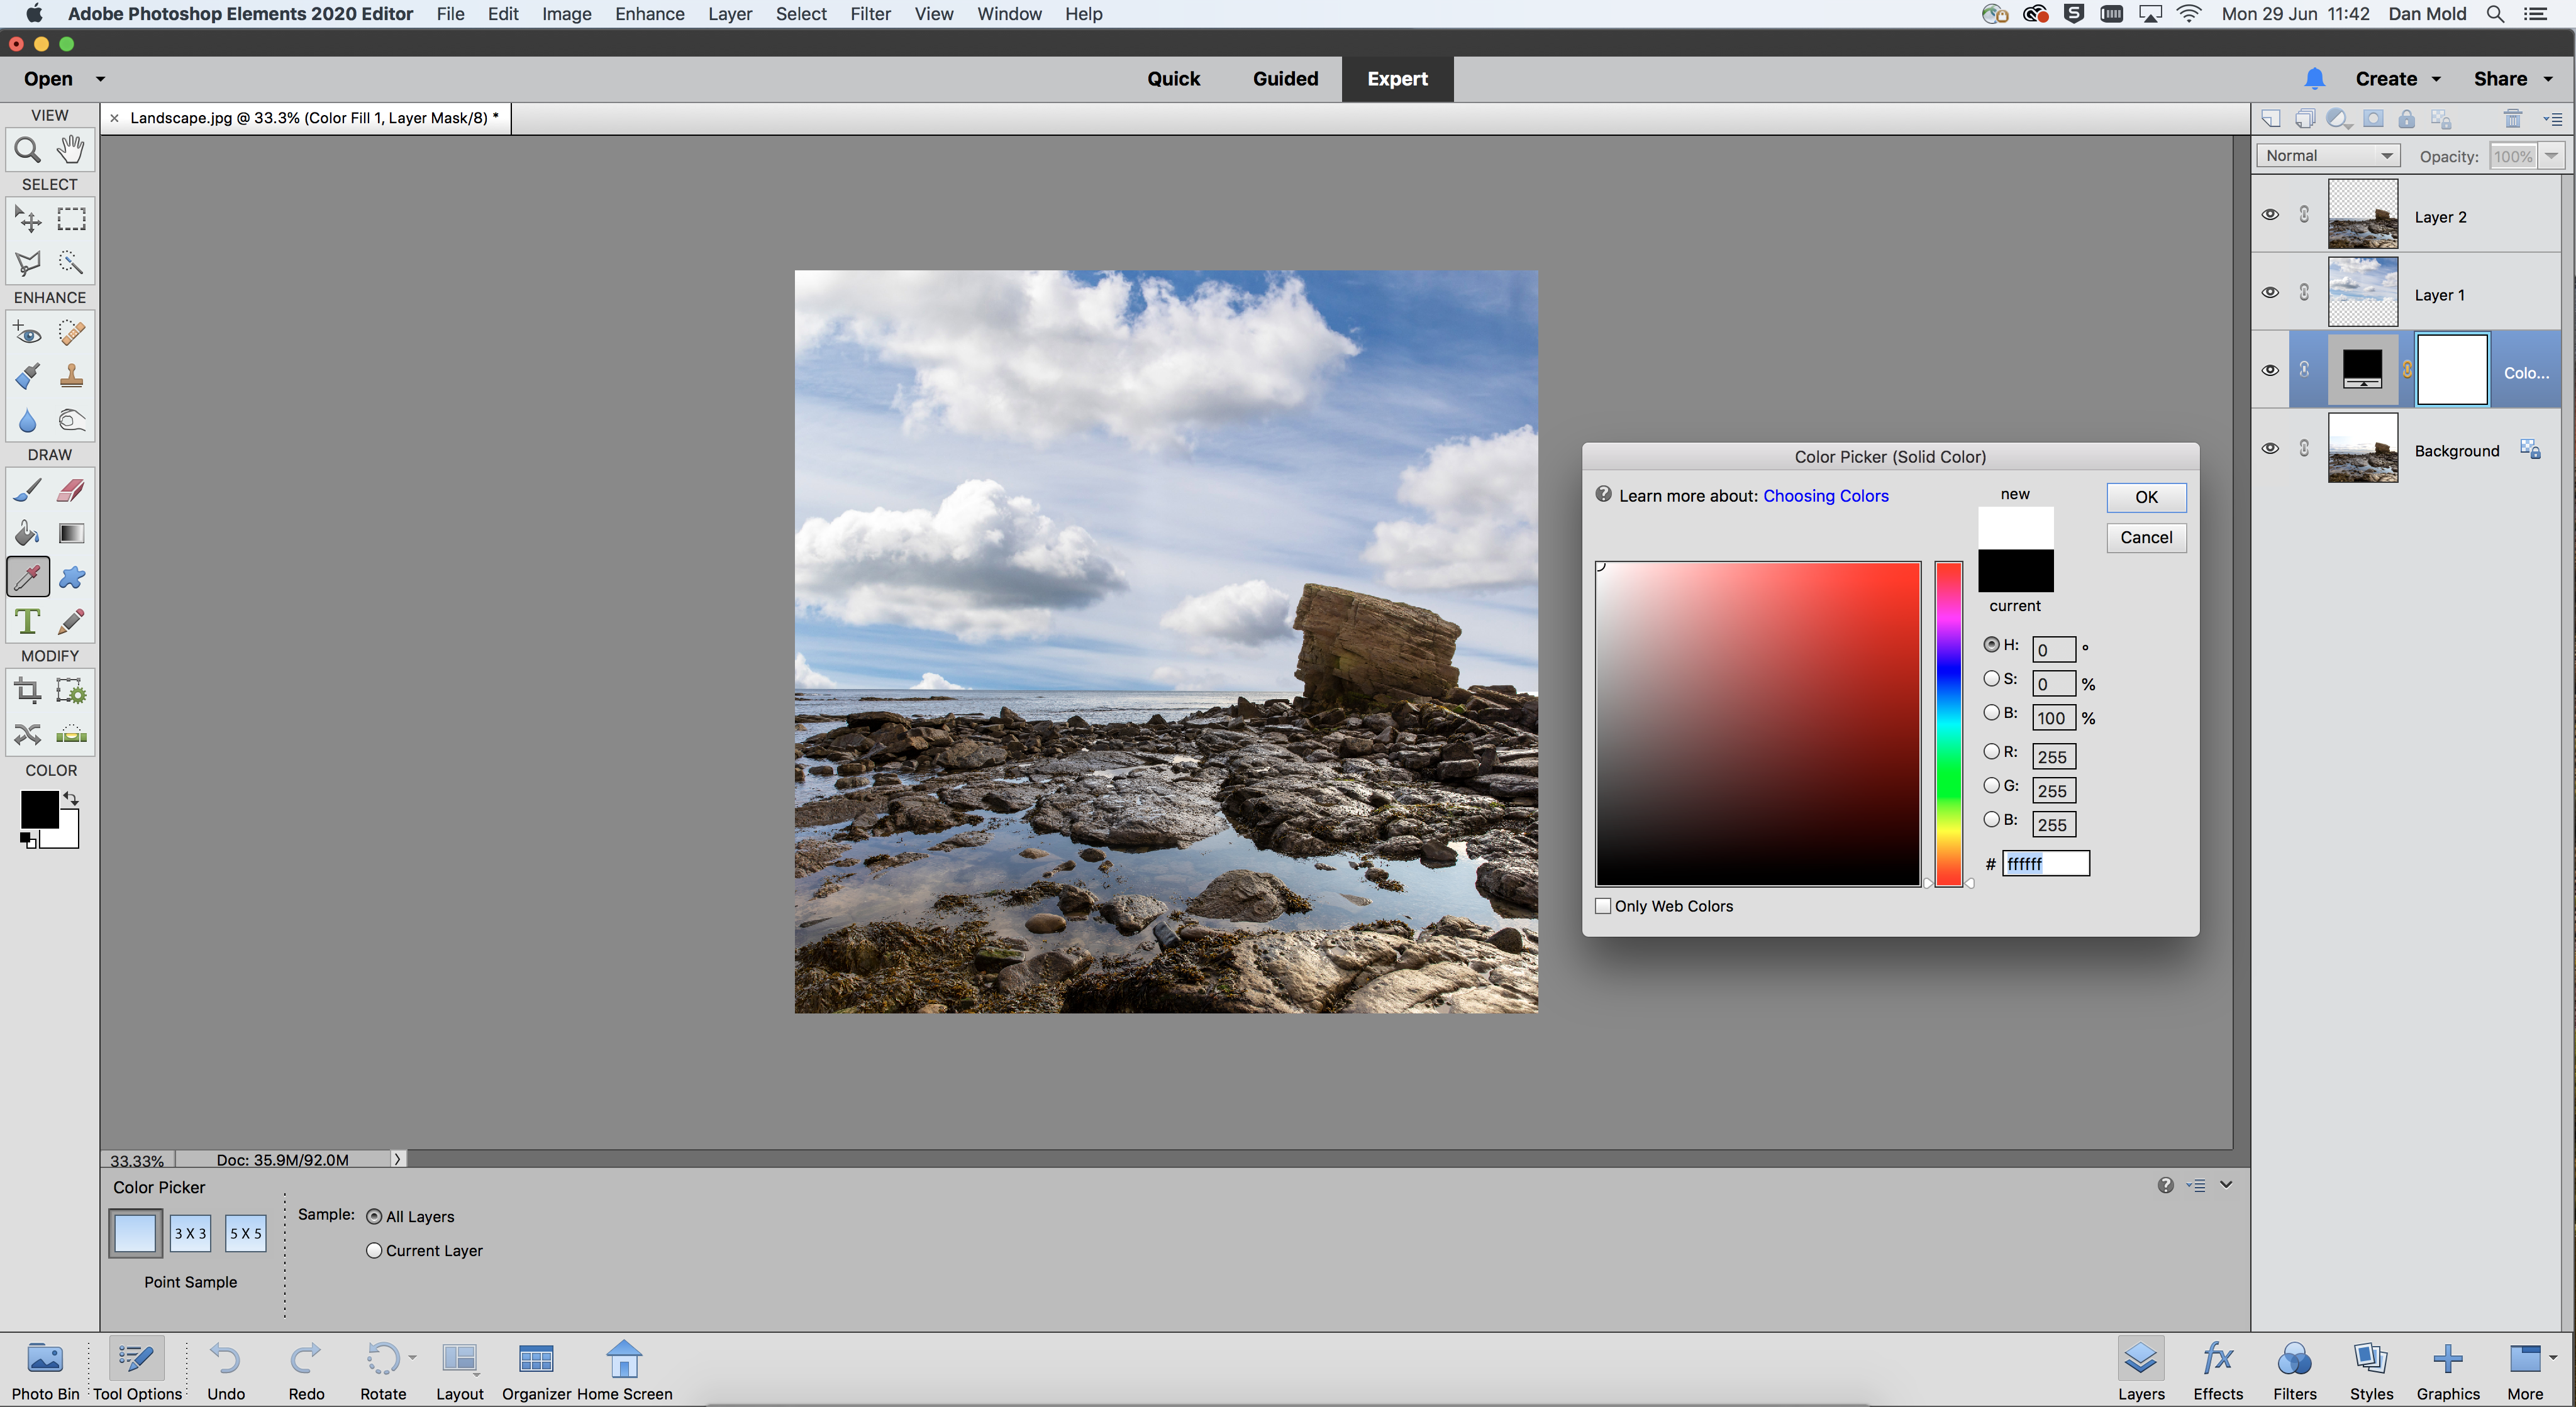
Drag your foreground layer to the top of the layers stack, then click on the Create new adjustment layer icon and choose Solid Color from the list. Click in the top left for a white colour and hit OK, then drag this layer so it sits below the sky layer.
06 Fade the sky in
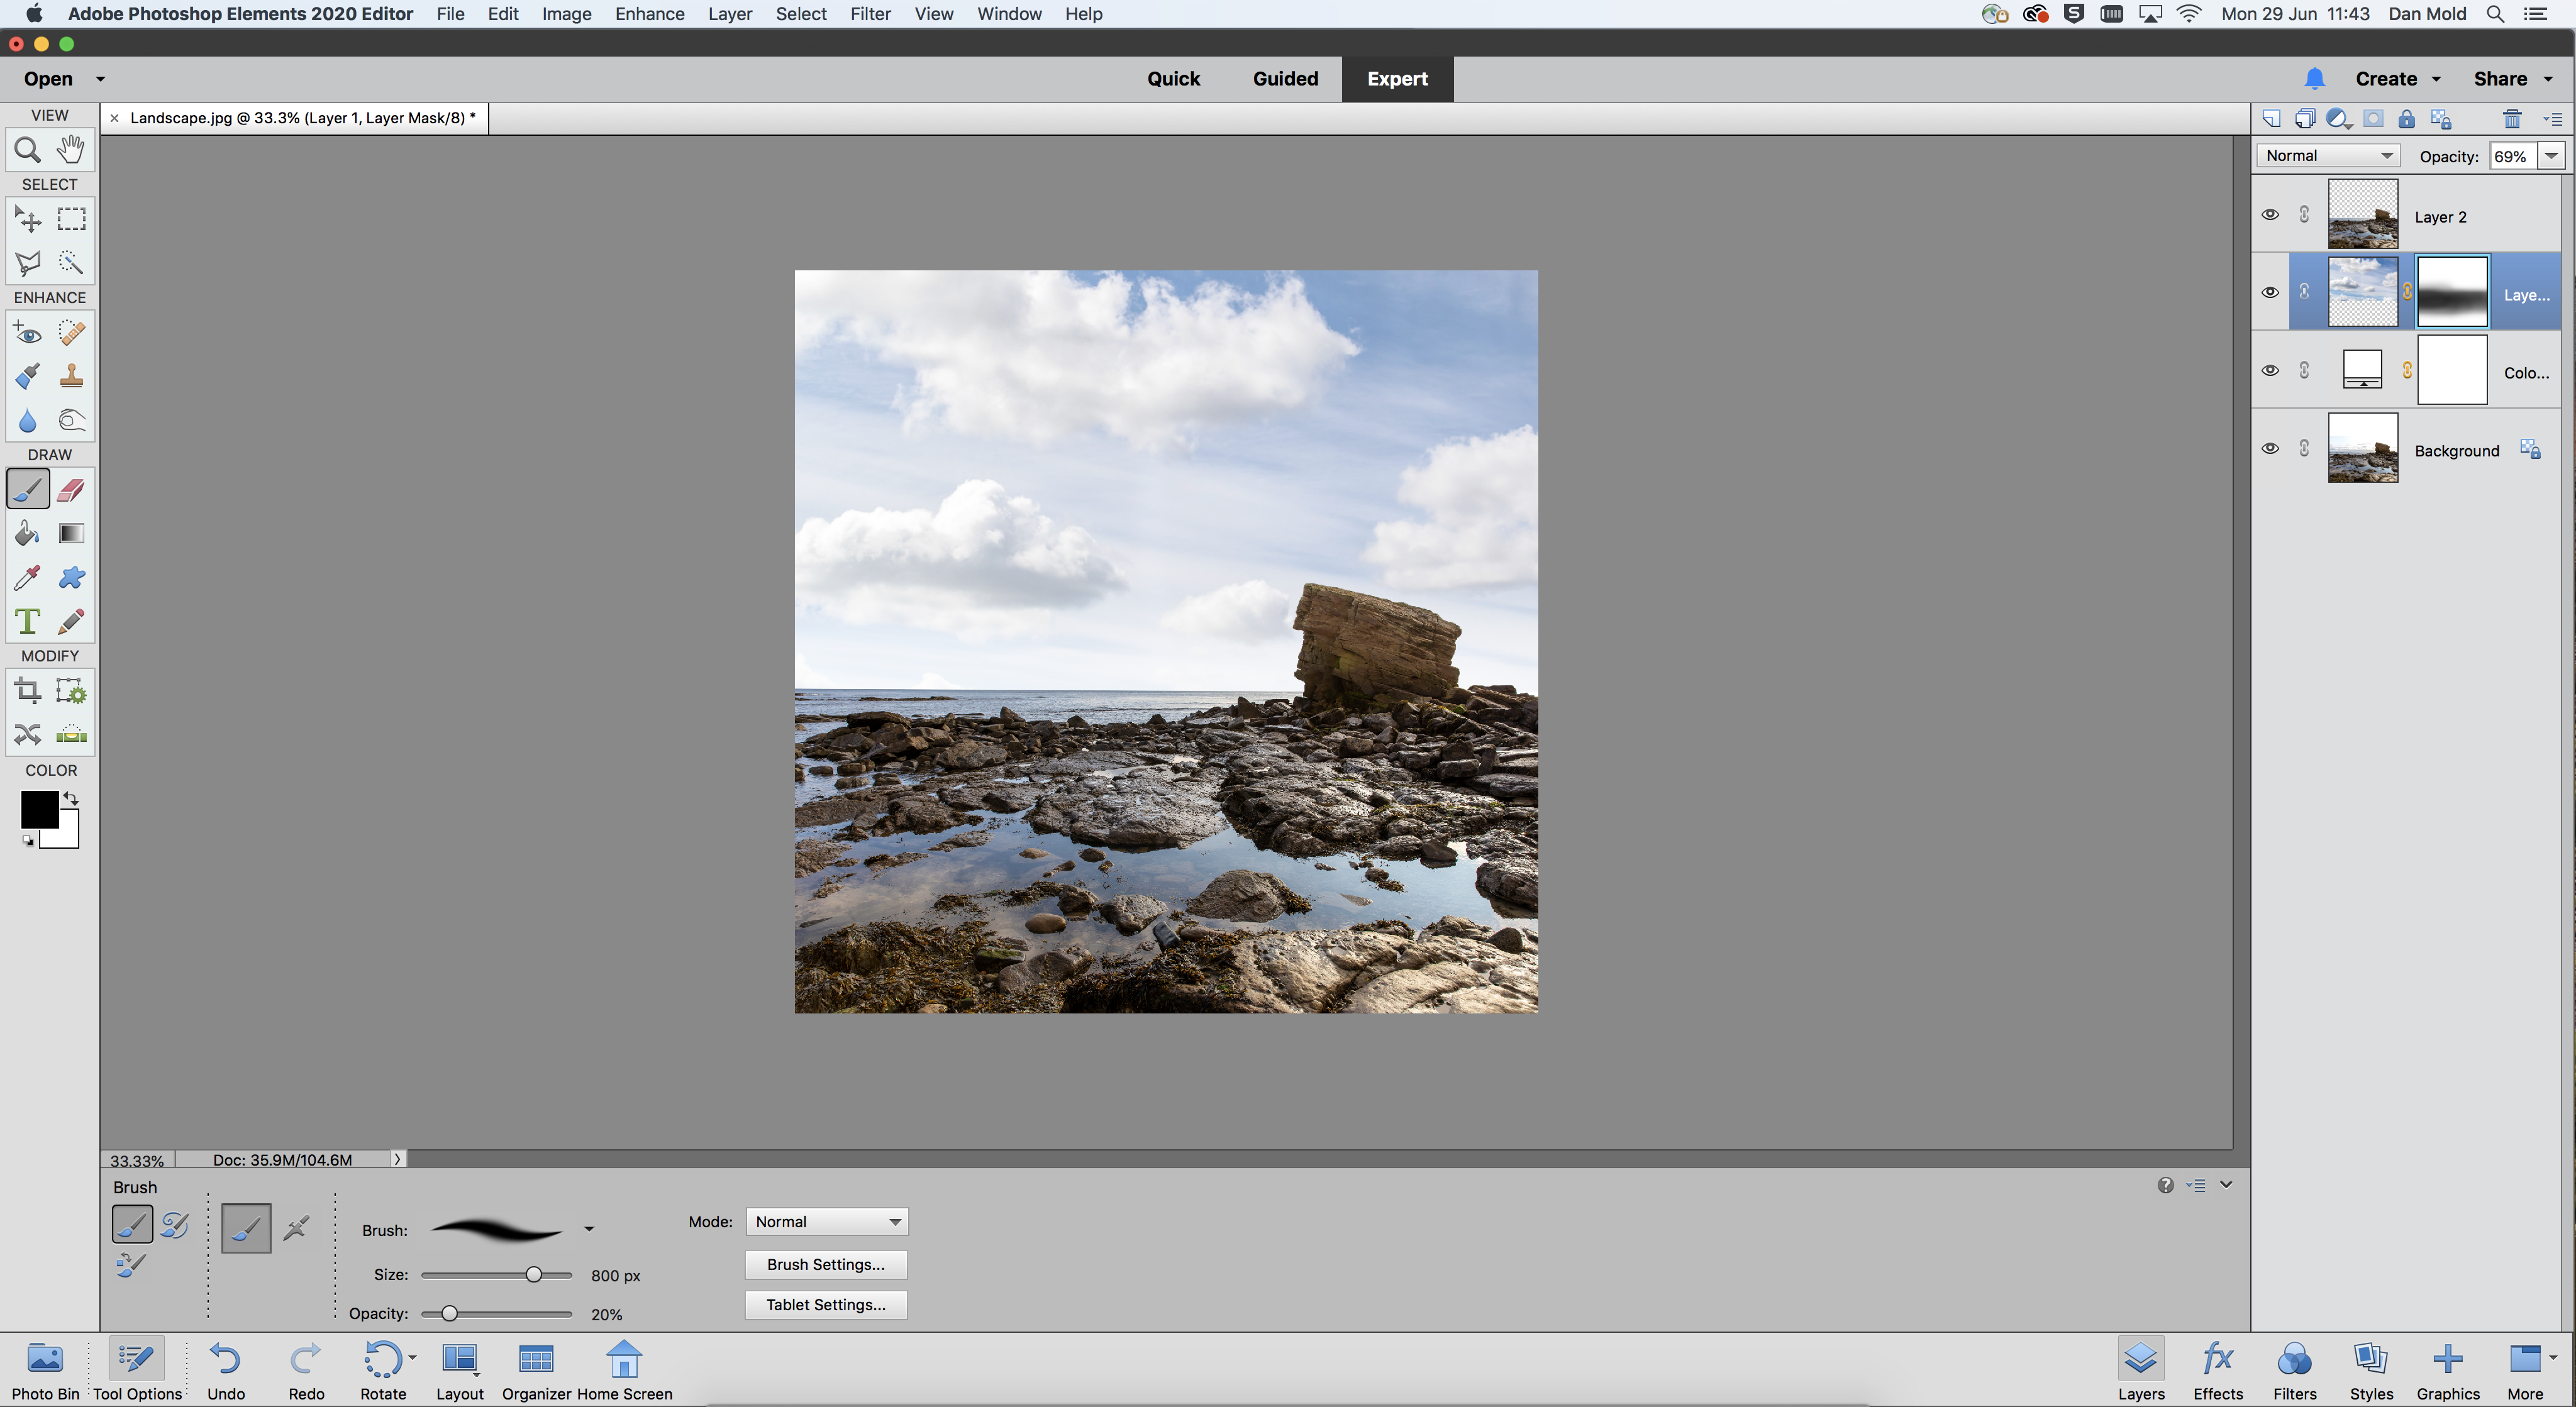
In the layers panel you can now lower the Opacity of your sky layer to make it appear more subtle, revealing more of the white layer below. You can also fade it into the foreground too using a Layer Mask and painting with black over the horizon to fade it in.
PhotoPlus: The Canon Magazine is the world's only monthly newsstand title that's 100% devoted to Canon, so you can be sure the magazine is completely relevant to your system.
Read more:
The best photo editing software: image editors for novices through to pros
The best photo-editing laptops in 2020: top laptops for photographers
10 best online photography courses – from beginner guides to masterclasses

In addition to being a freelance photographer and filmmaker, Dan is a bona fide expert on all things Canon and Adobe. Not only is he an Adobe-certified Photoshop guru, he's spent over 10 years writing for specialist magazines including stints as the Deputy Editor for PhotoPlus: The Canon Magazine, Technical Editor for Practical Photography and Photoshop Editor on Digital Photo.
