Colorize old photos: use Photoshop to hand tint portraits of your ancestors
How to colorize old photos in a simple, non-destructive way, using Photoshop selections and Adjustment Layers
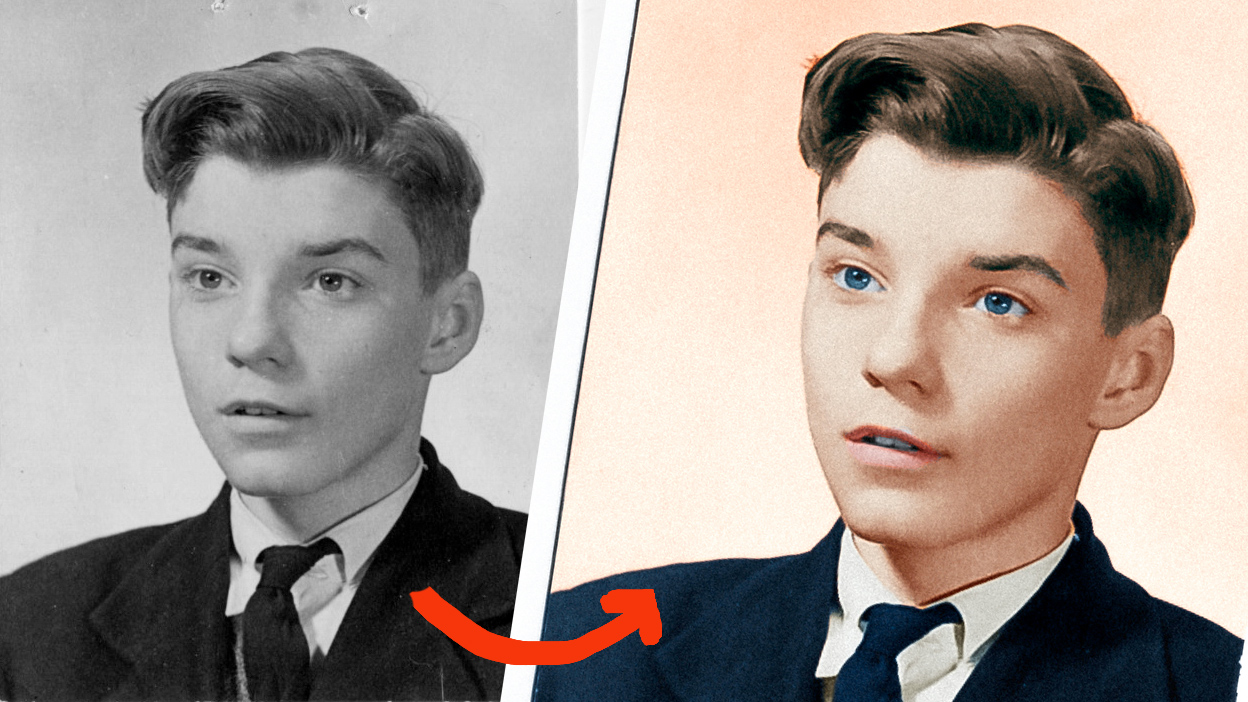
Many of us are finding time to look through old photographs whilst stuck at home in lockdown. And whilst going through the family albums (or that shoebox at the back of the cupboard), you may well find old black-and-white photographs or your ancestors.
Don't have Photoshop? You can get a 7-day Adobe Creative Cloud trial to try Photoshop and other Adobe software for free.
• Download Photoshop
• Download Lightroom
• Download Premiere Pro
Before, color photography became popular it was common for people to have portraits hand-tinted. But nowadays you don't need special paints and a steady hand to do this job... You can colorize old photos using a photo-editing software, such as the market-leading Photoshop CC.
First of all you need to digitize your picture. If you have a print you can scan this (affordable all-in-one printers have the ability to do this) - or better still if you have the negative, use a specialist film scanner. Alternatively you can digitize your print using your own camera.
Article continues belowOnce in Photoshop, the process of colorizing your old photo is a matter of doing everything a step of the time.... using masks and layers to isolate the area of the portrait that you are working on. Working in this way, it is easy to correct any mistakes - and to make subtle alterations to what you have done at any stage.
• Get more photoshoot ideas
Here is our step-by-step guide to colorizing our black-and-white portrait…
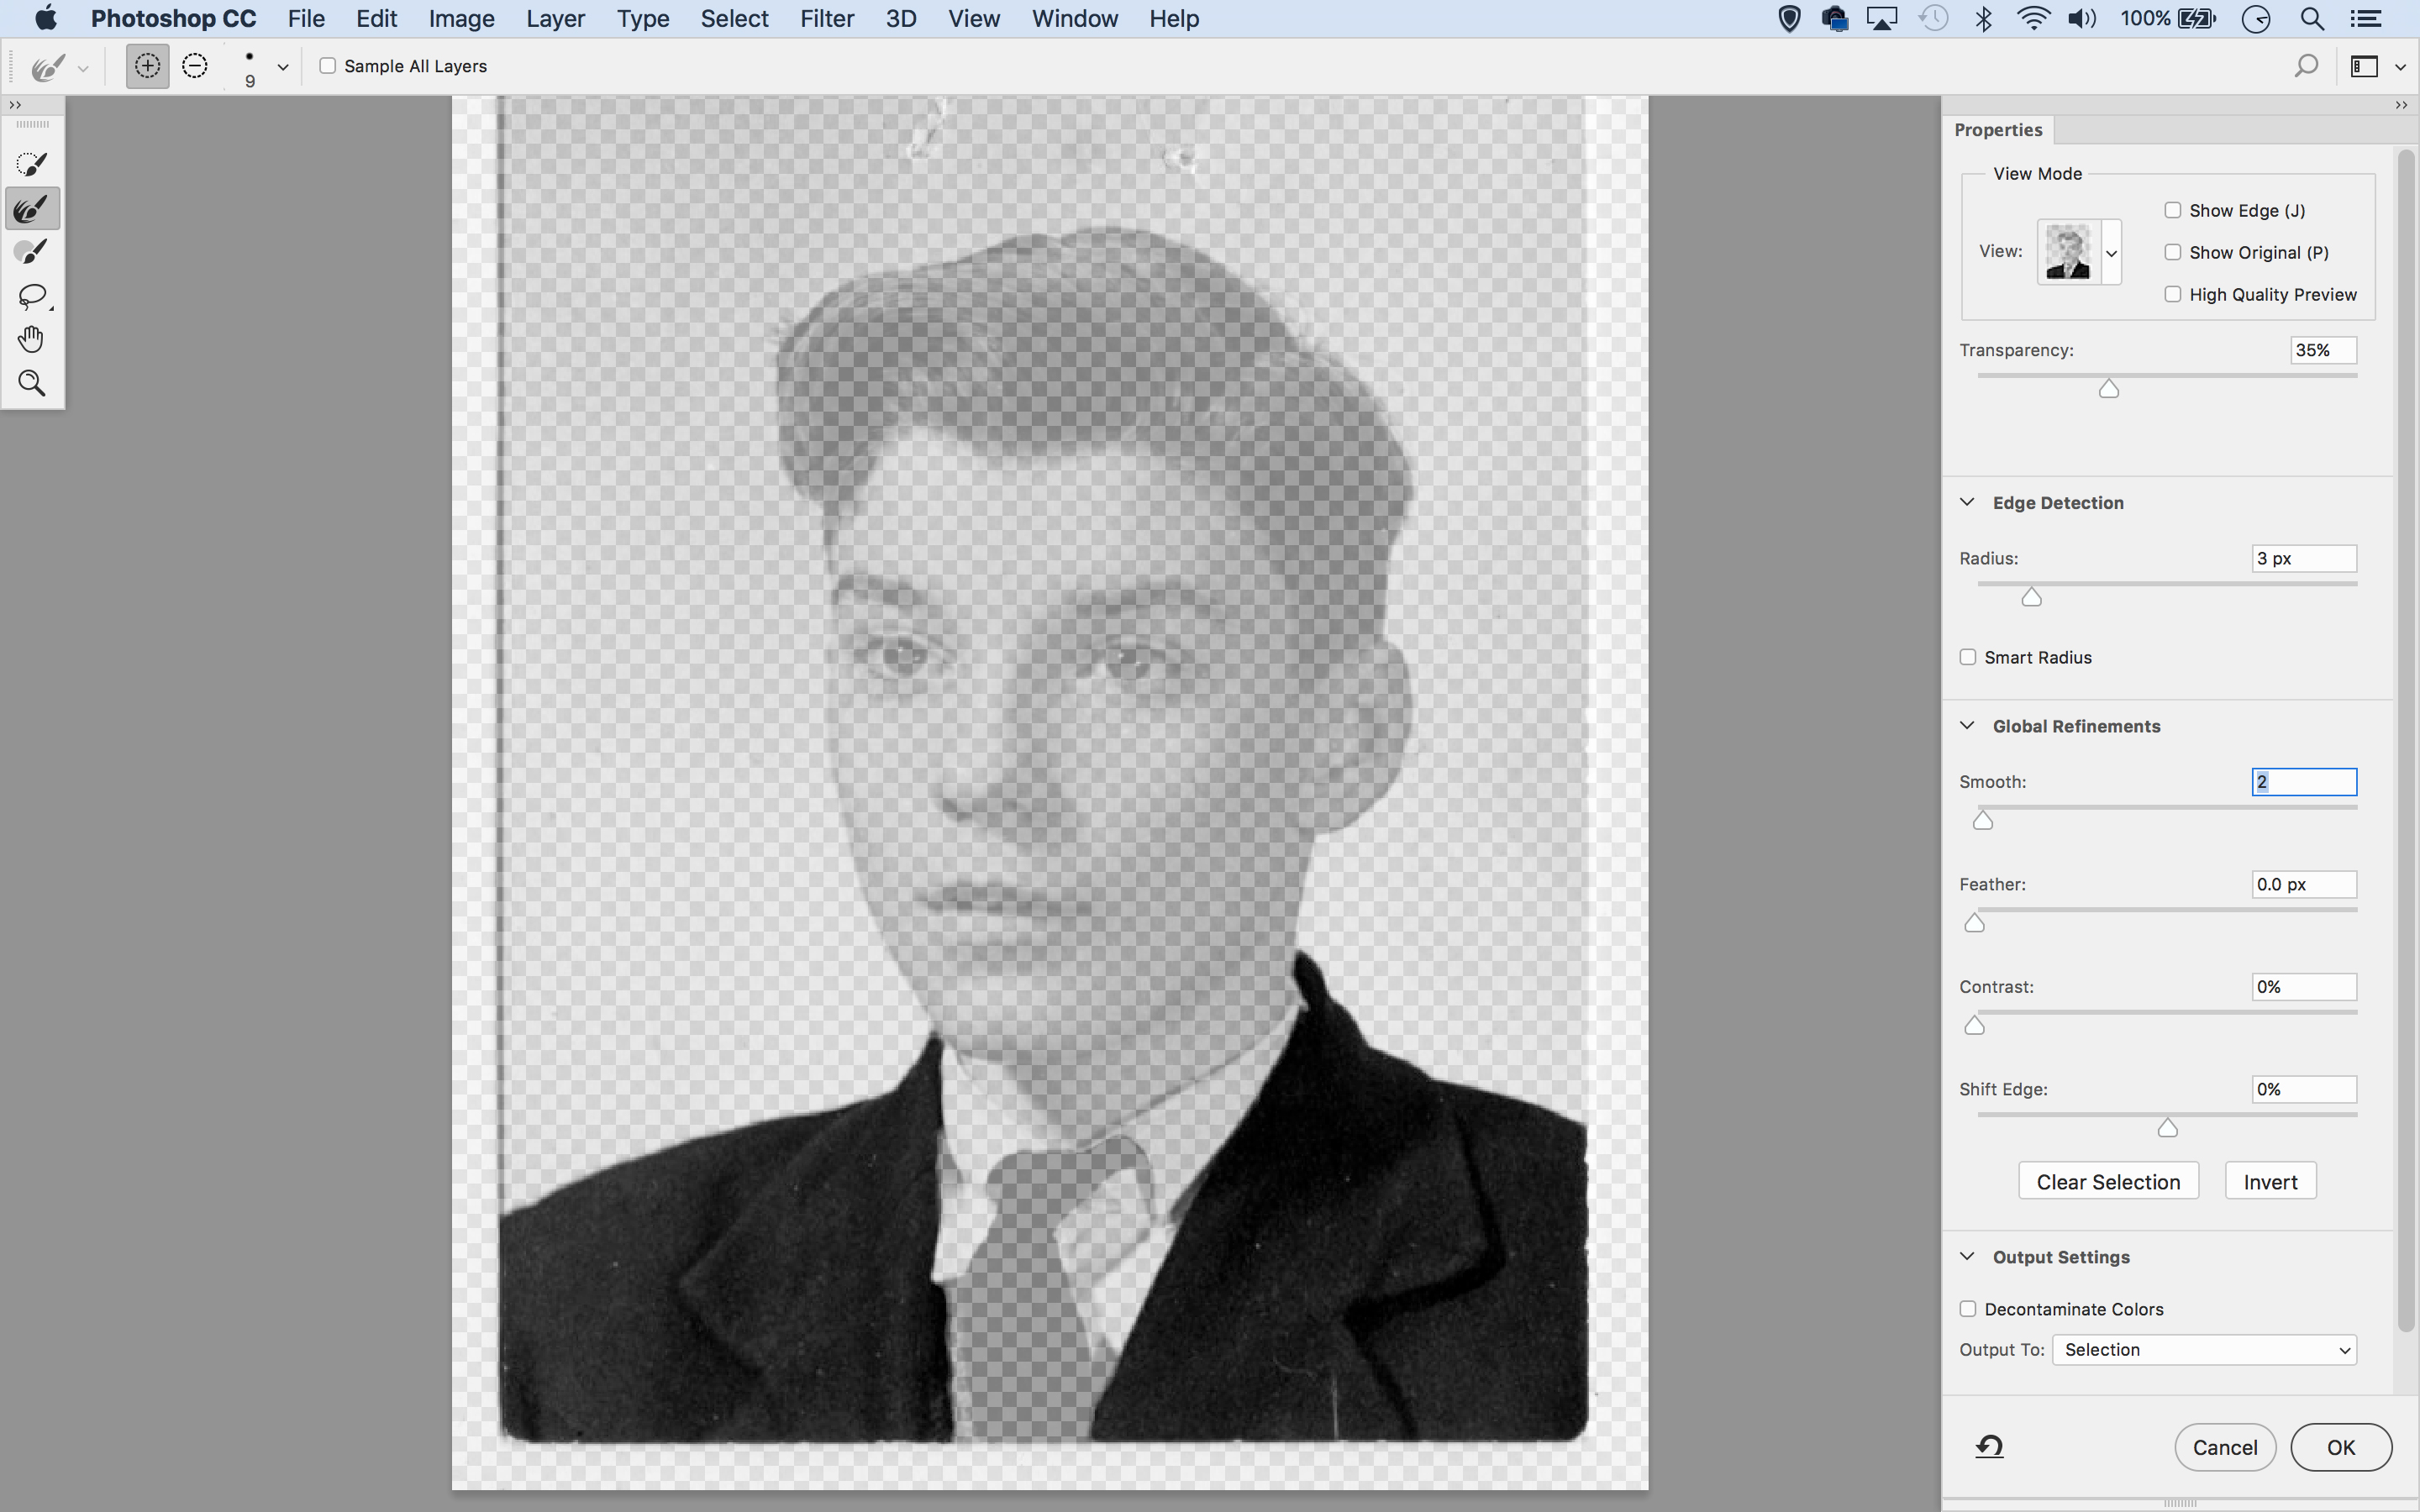
01: Select the jacket
Grab the Quick Selection tool from the Tools panel and paint over the jacket (or any portion of the image to be singularly colored). Hold Alt to subtract if the tool goes wrong at all. To get a smoother edge, go to Select > Select And Mask and increase the Radius and Smooth sliders.
The best camera deals, reviews, product advice, and unmissable photography news, direct to your inbox!
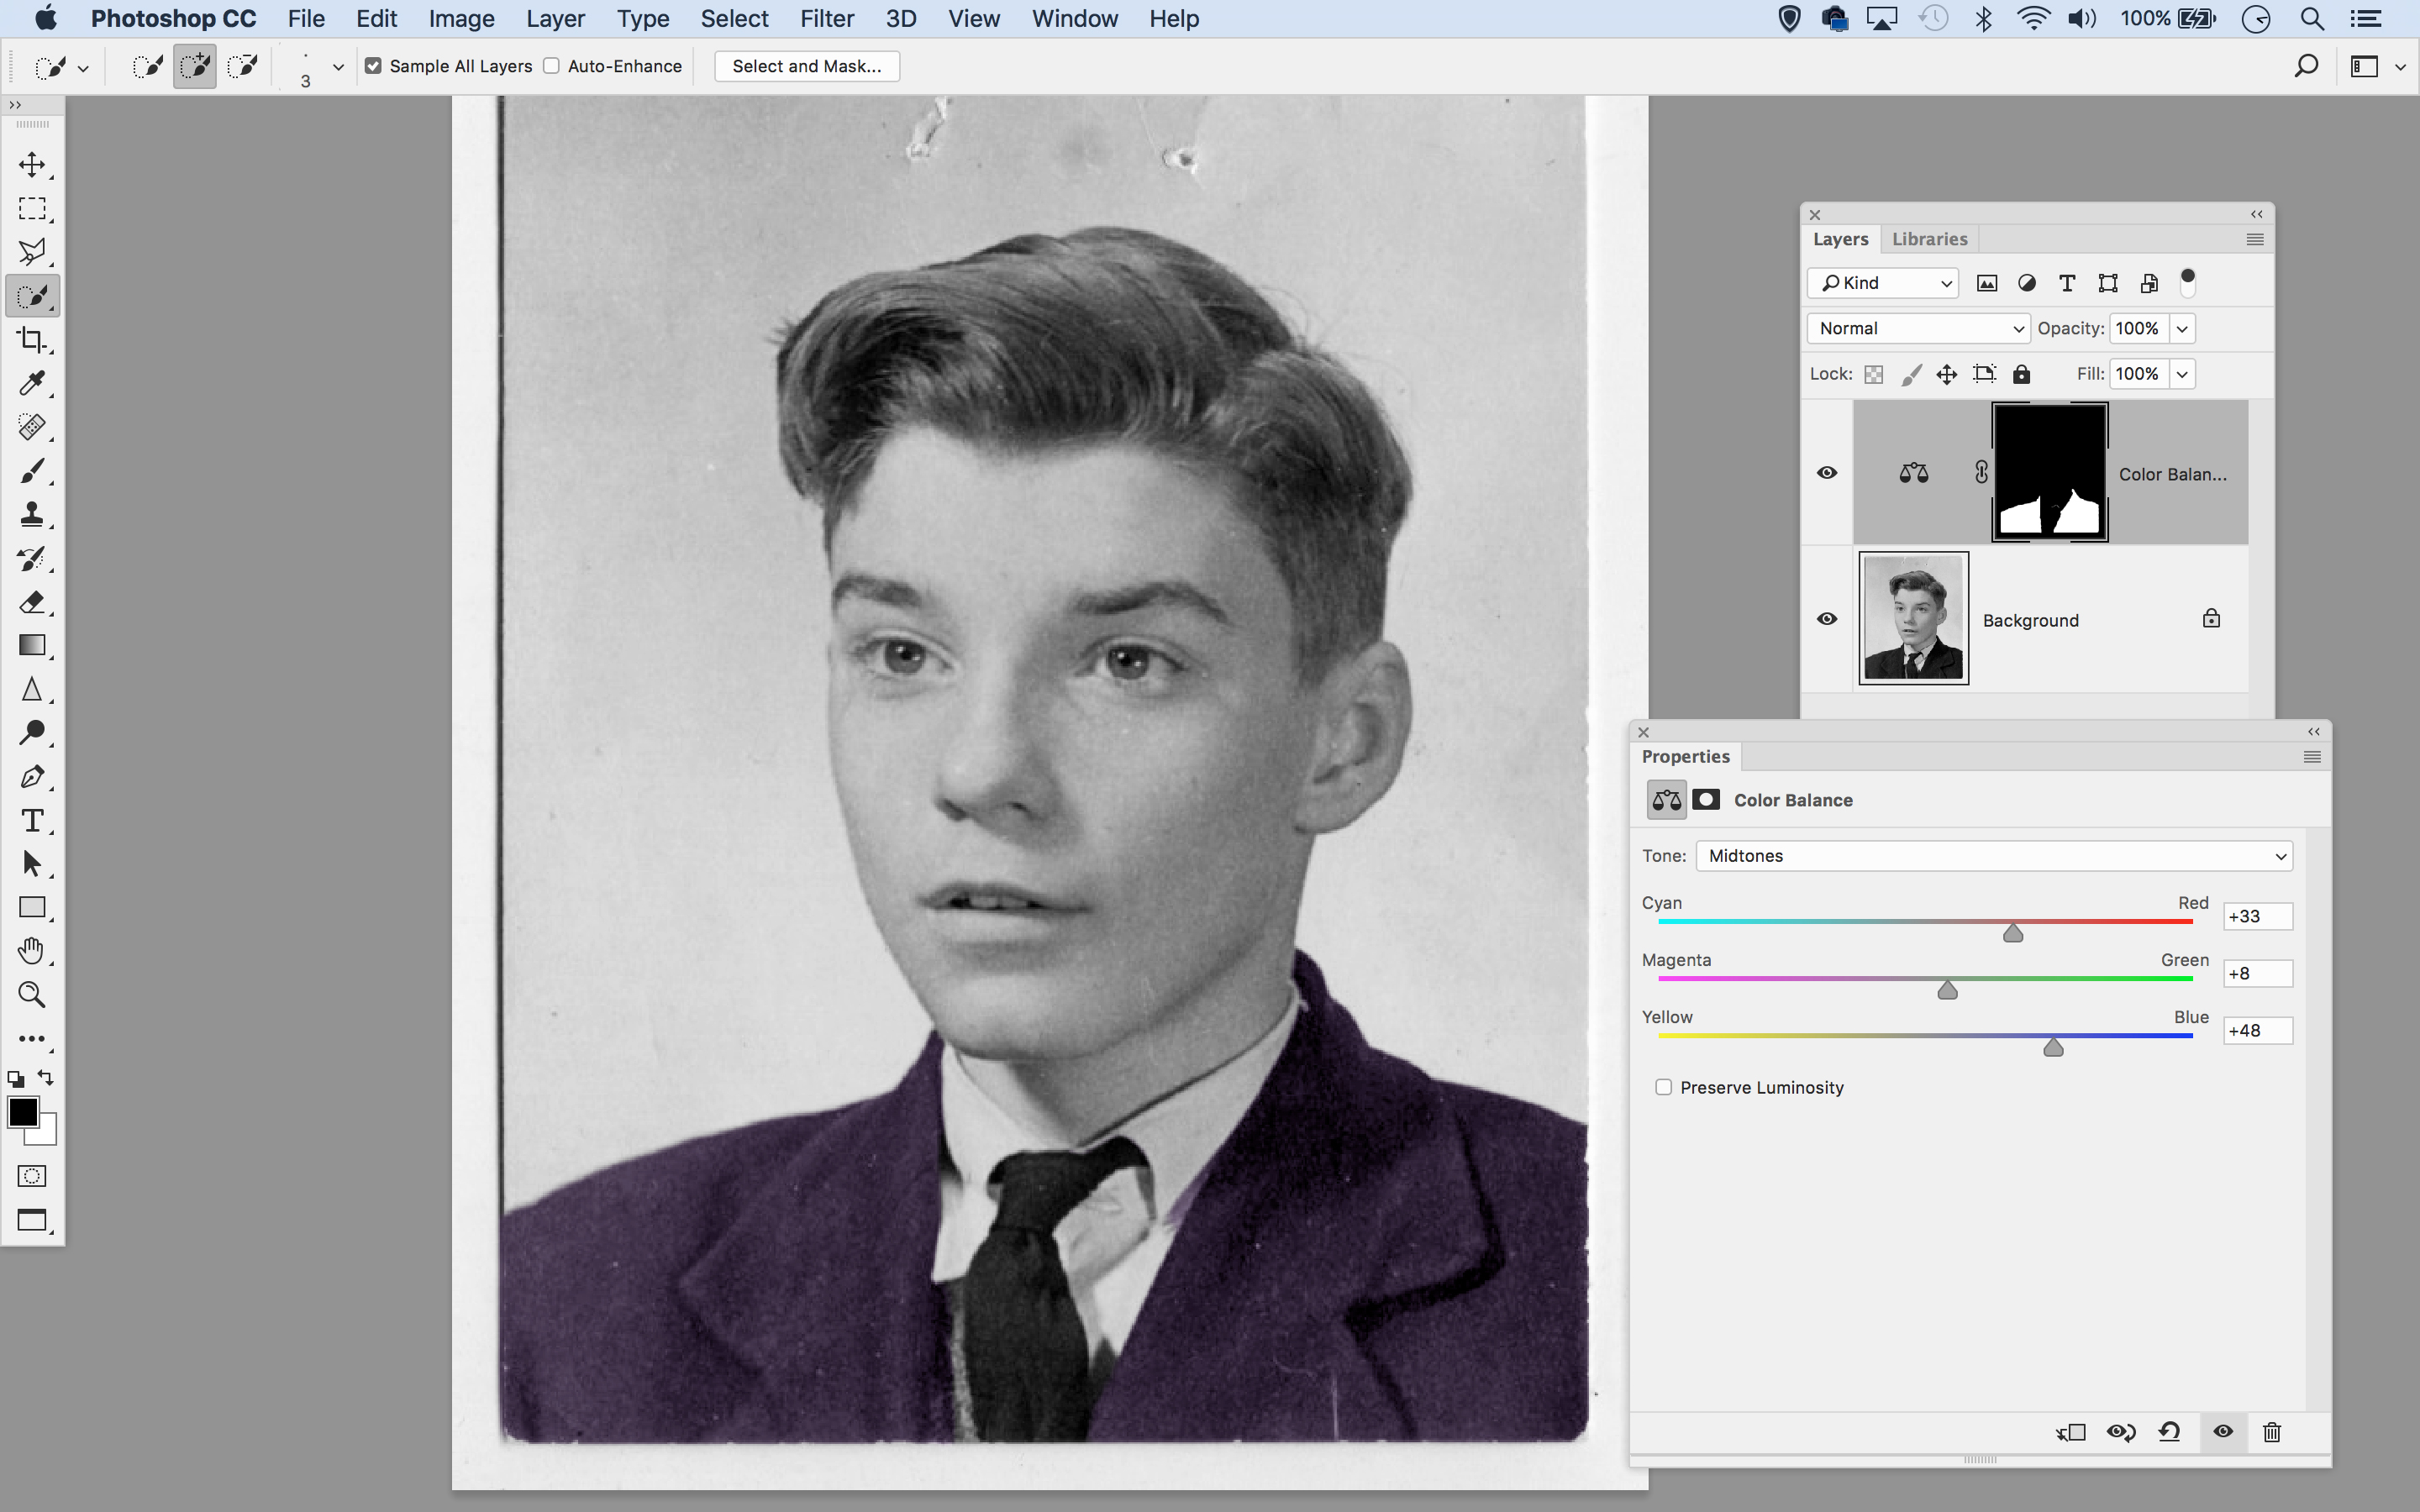
02: Tint the area
Go to the Layers panel (Window > Layers) click the Create Adjustment Layer icon at the bottom, and choose Color Balance. Experiment with the sliders to add a tint. For extra control, target the Highlights, Midtones and Shadows and experiment with color shifts. Try unchecking Preserve Luminosity too.
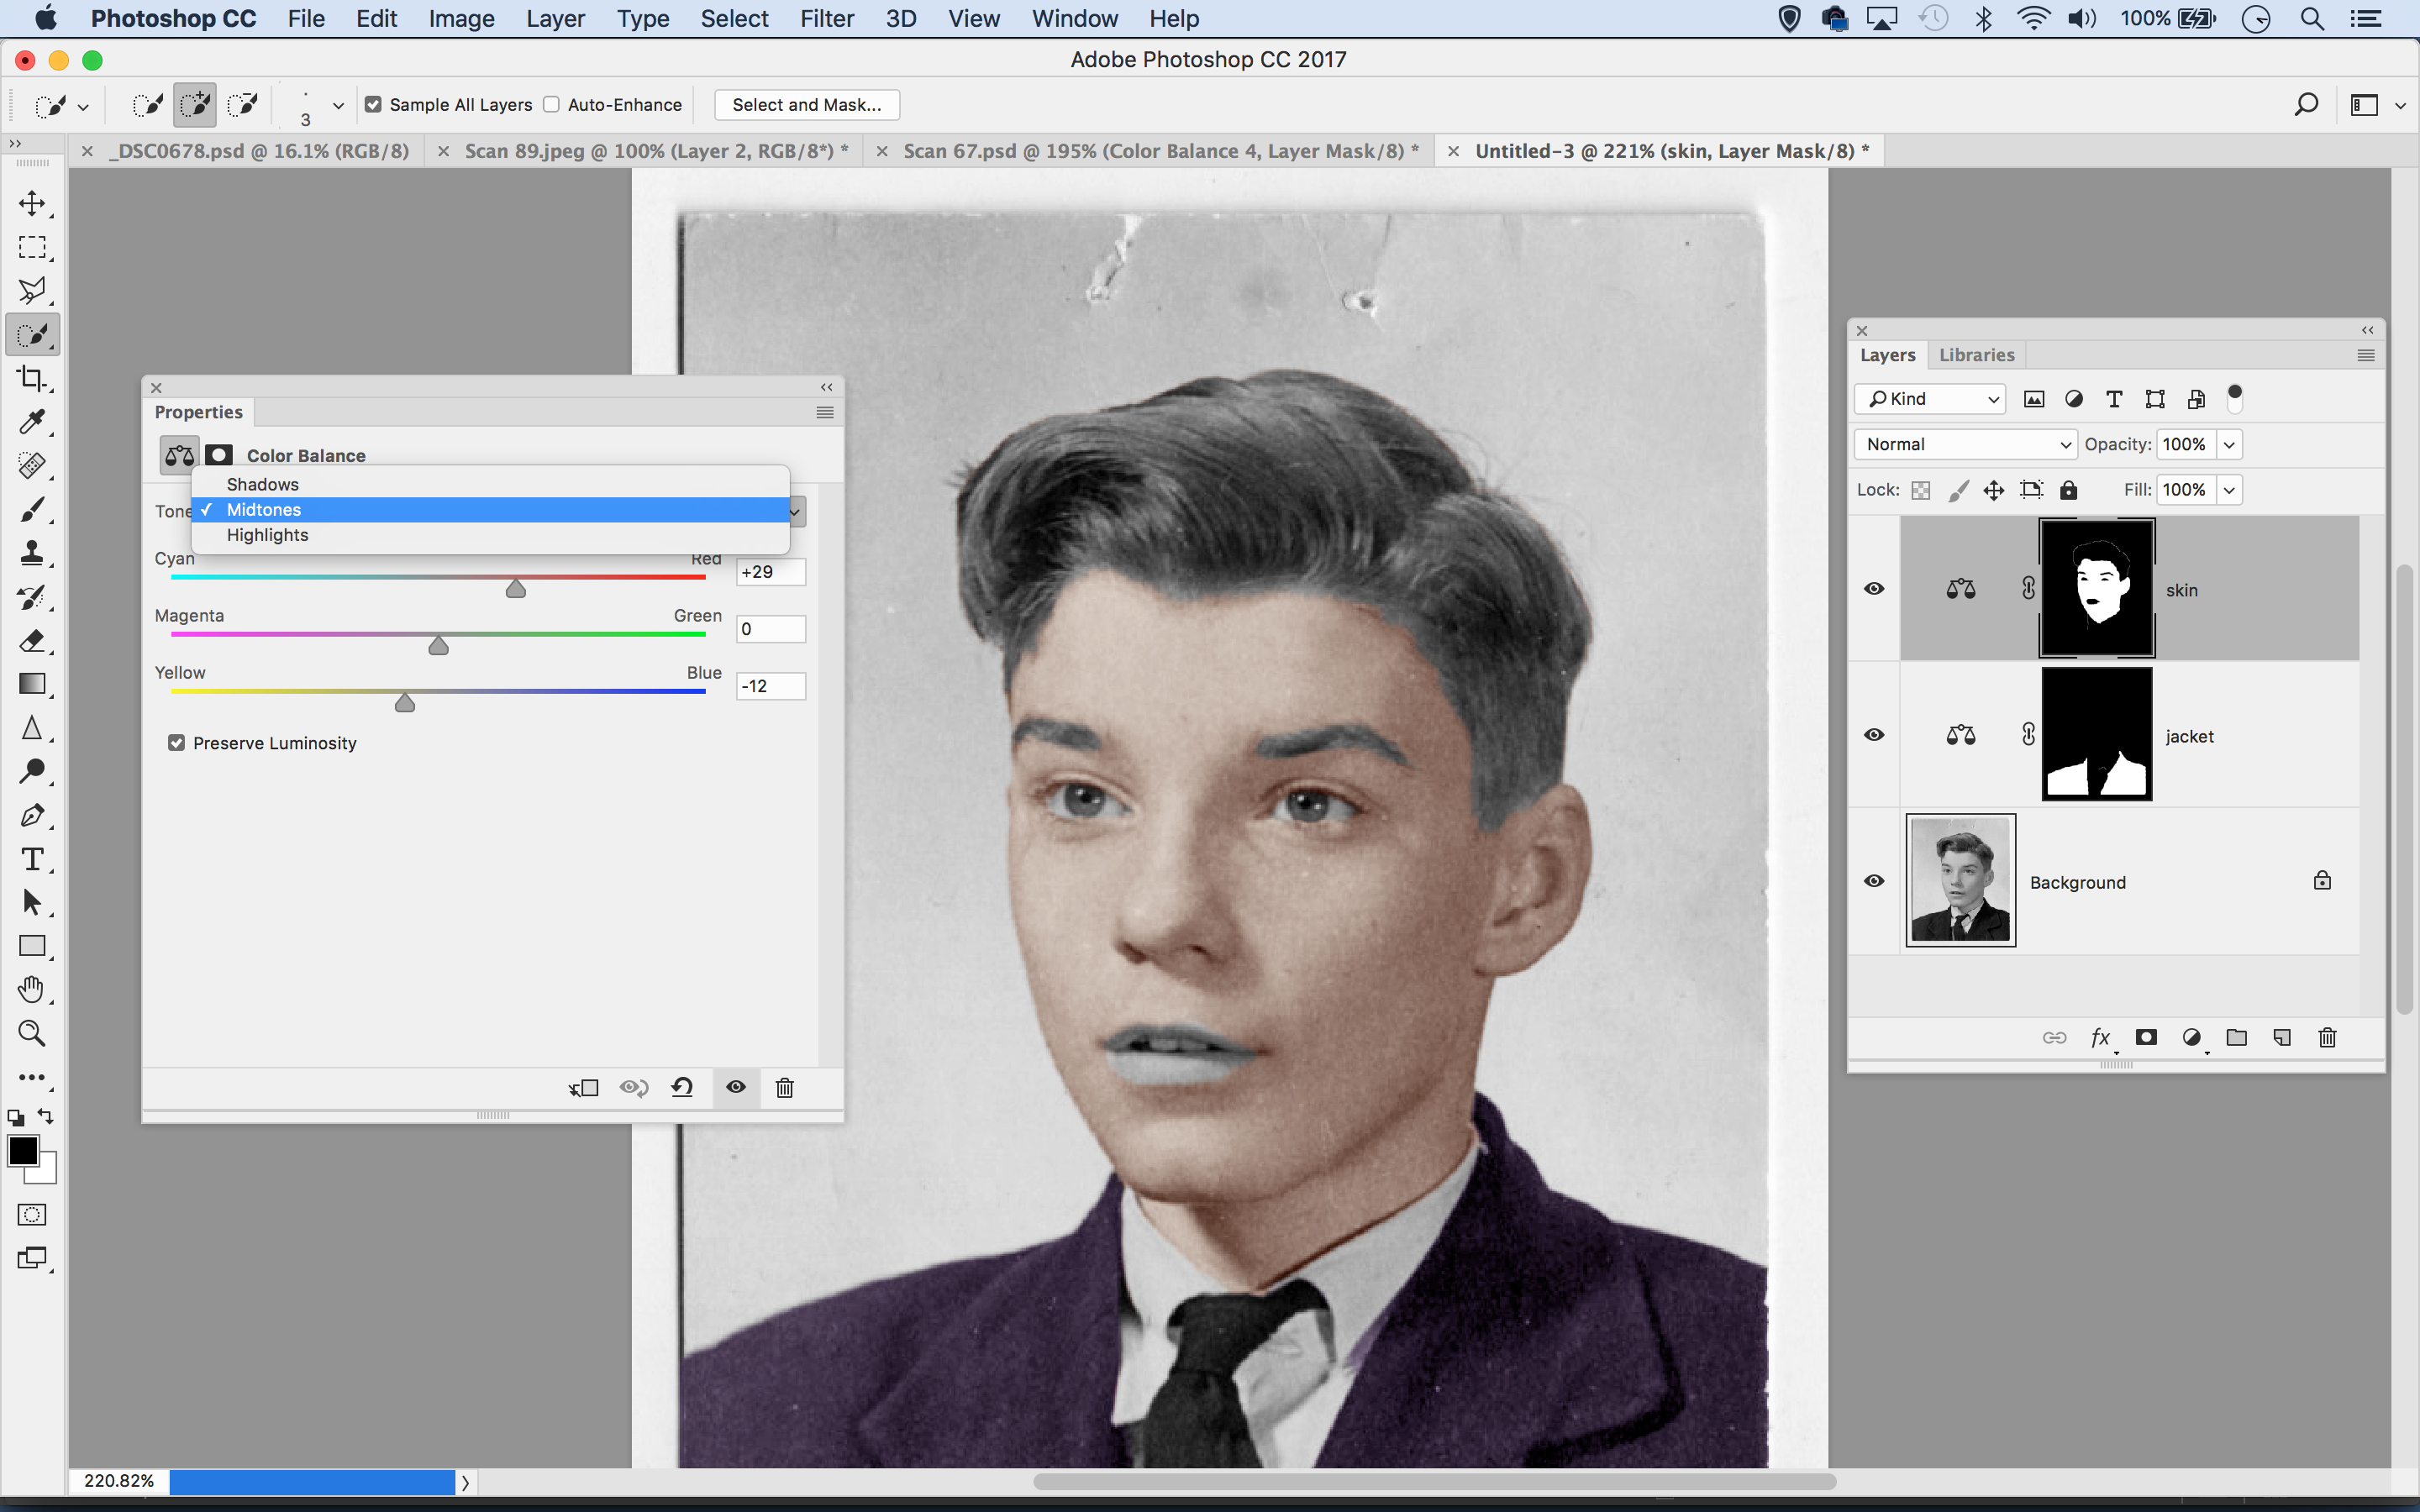
03: Color the face
Highlight the bottom layer, then make a selection of a different area. We’ve selected the skin (except the lips, eyes and eyebrows). For a nice skin tone for this portrait, we set the following color values
Midtones: Cyan-Red +29, Yellow-Blue -12.
Highlights: Cyan-Red +2, Yellow-Blue -8.
Shadows: Cyan-Red +11, Magenta-Green -4, Yellow-Blue -6.
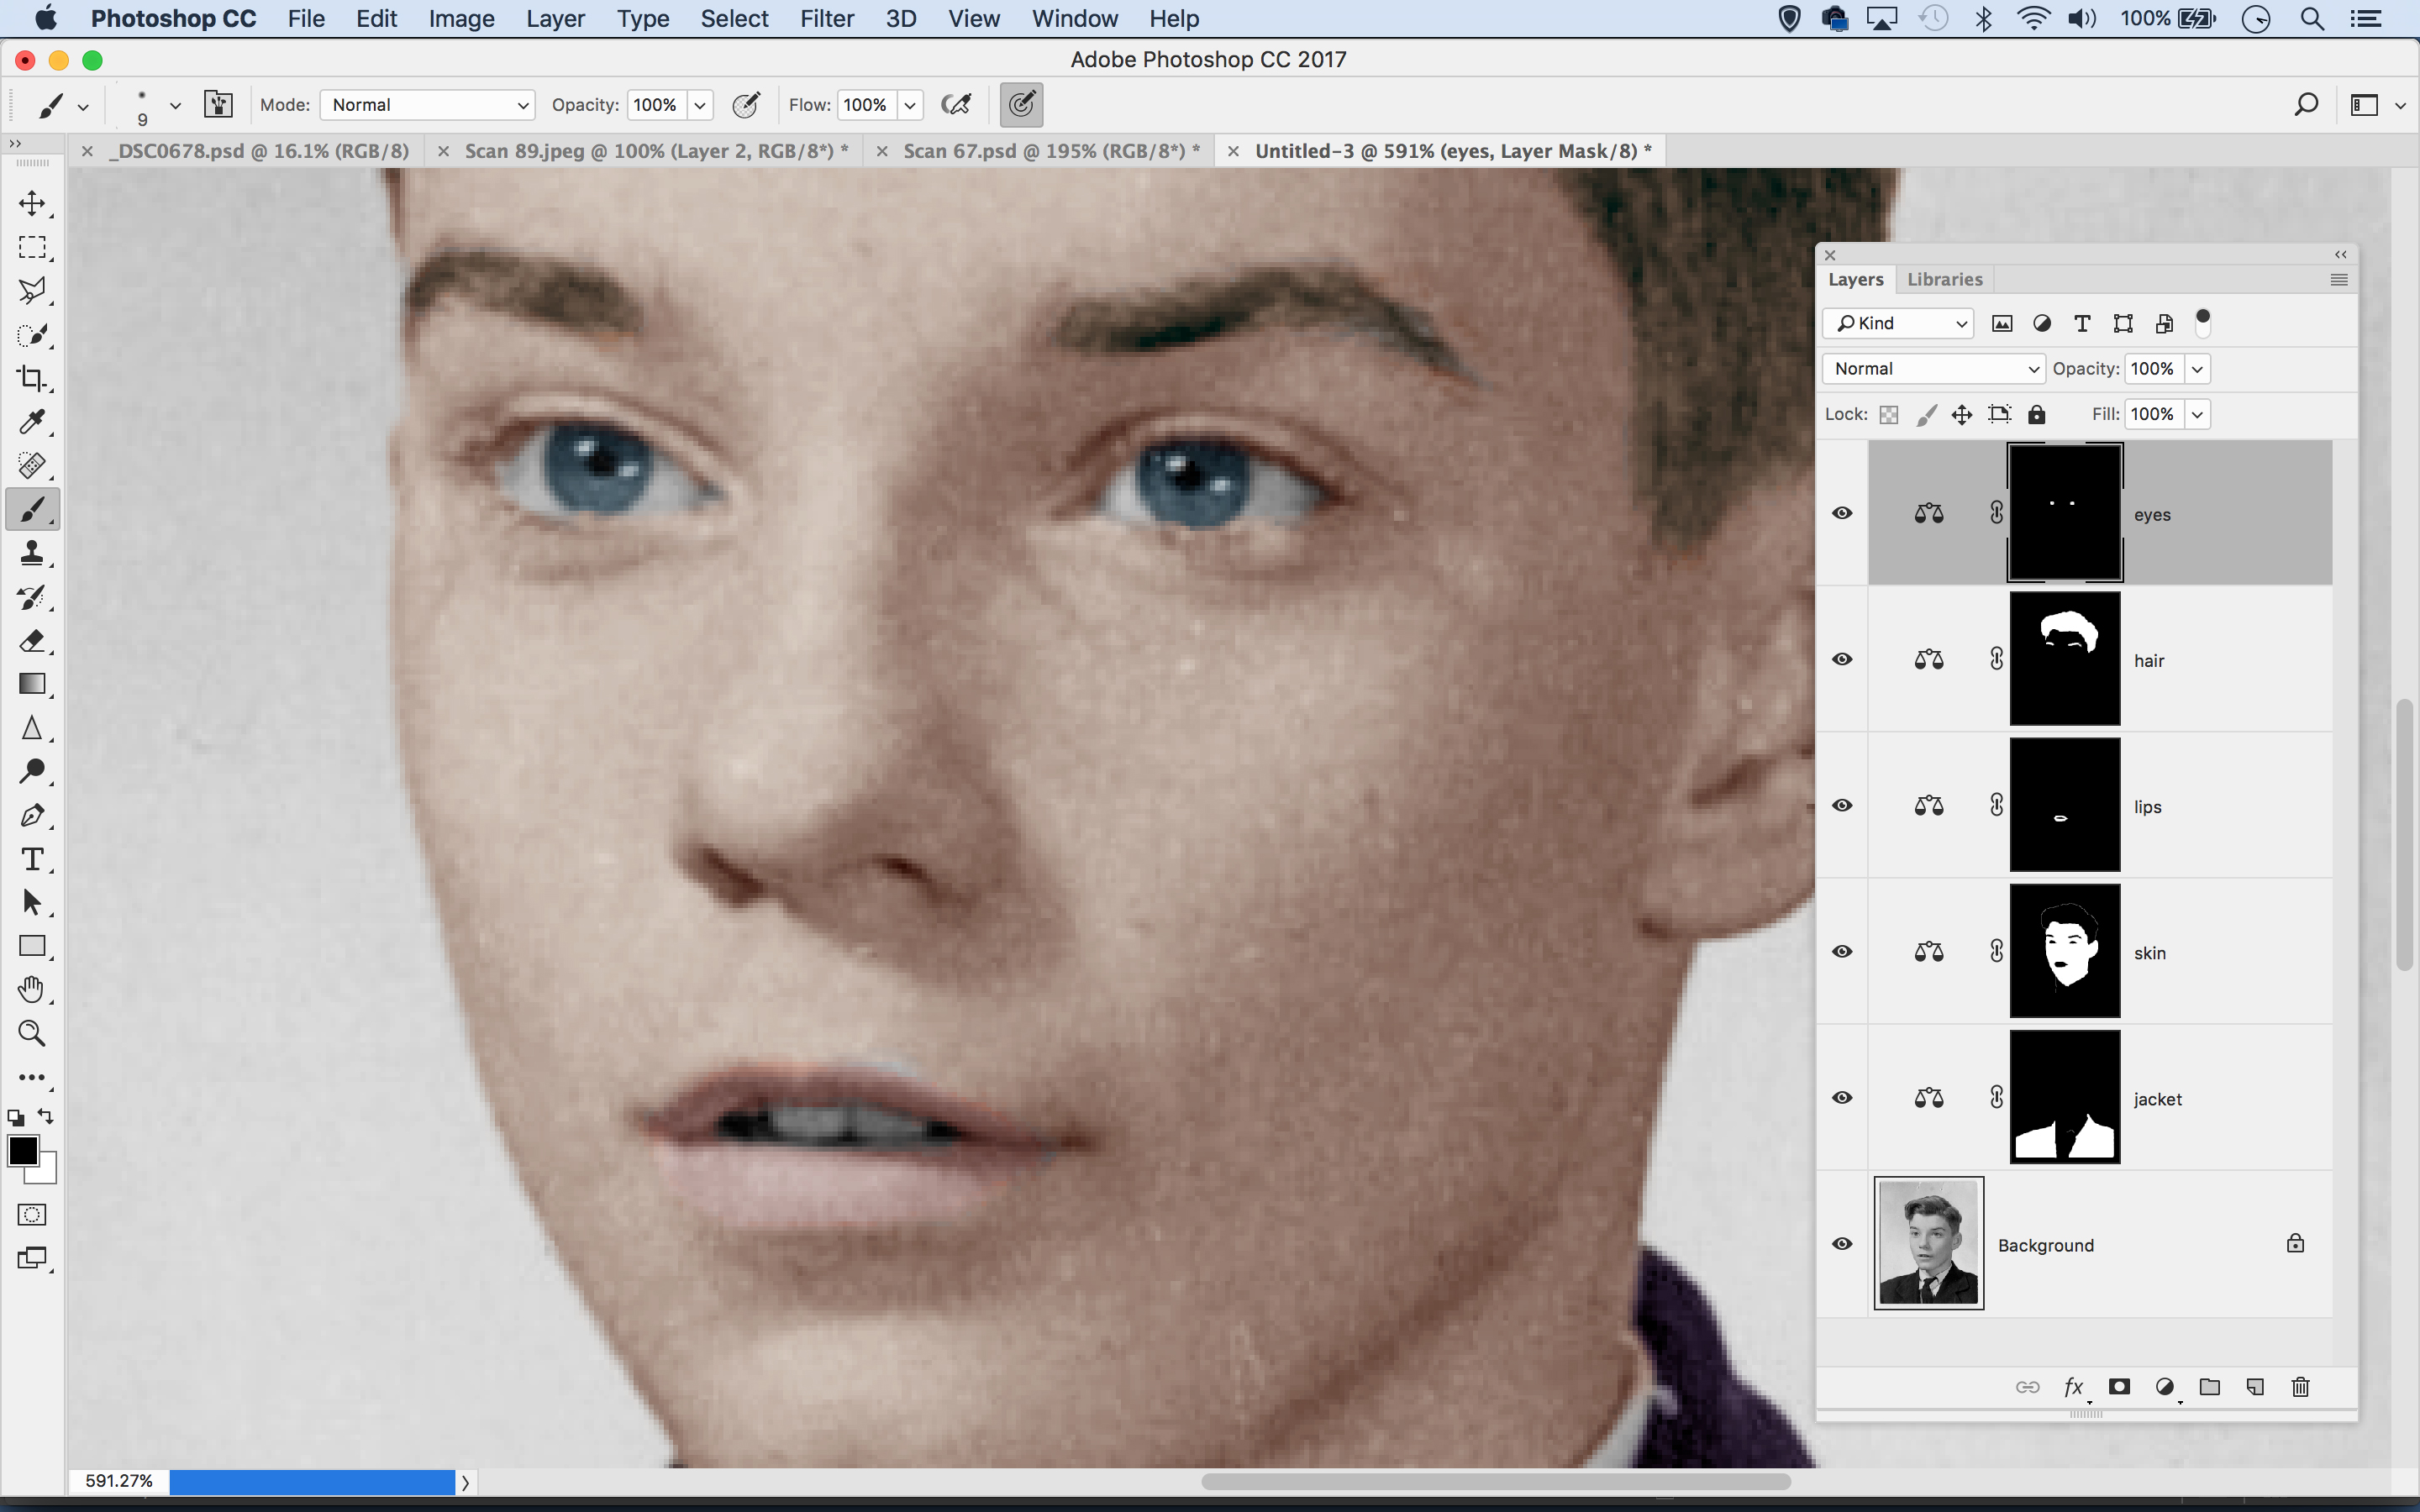
04: Add more tints
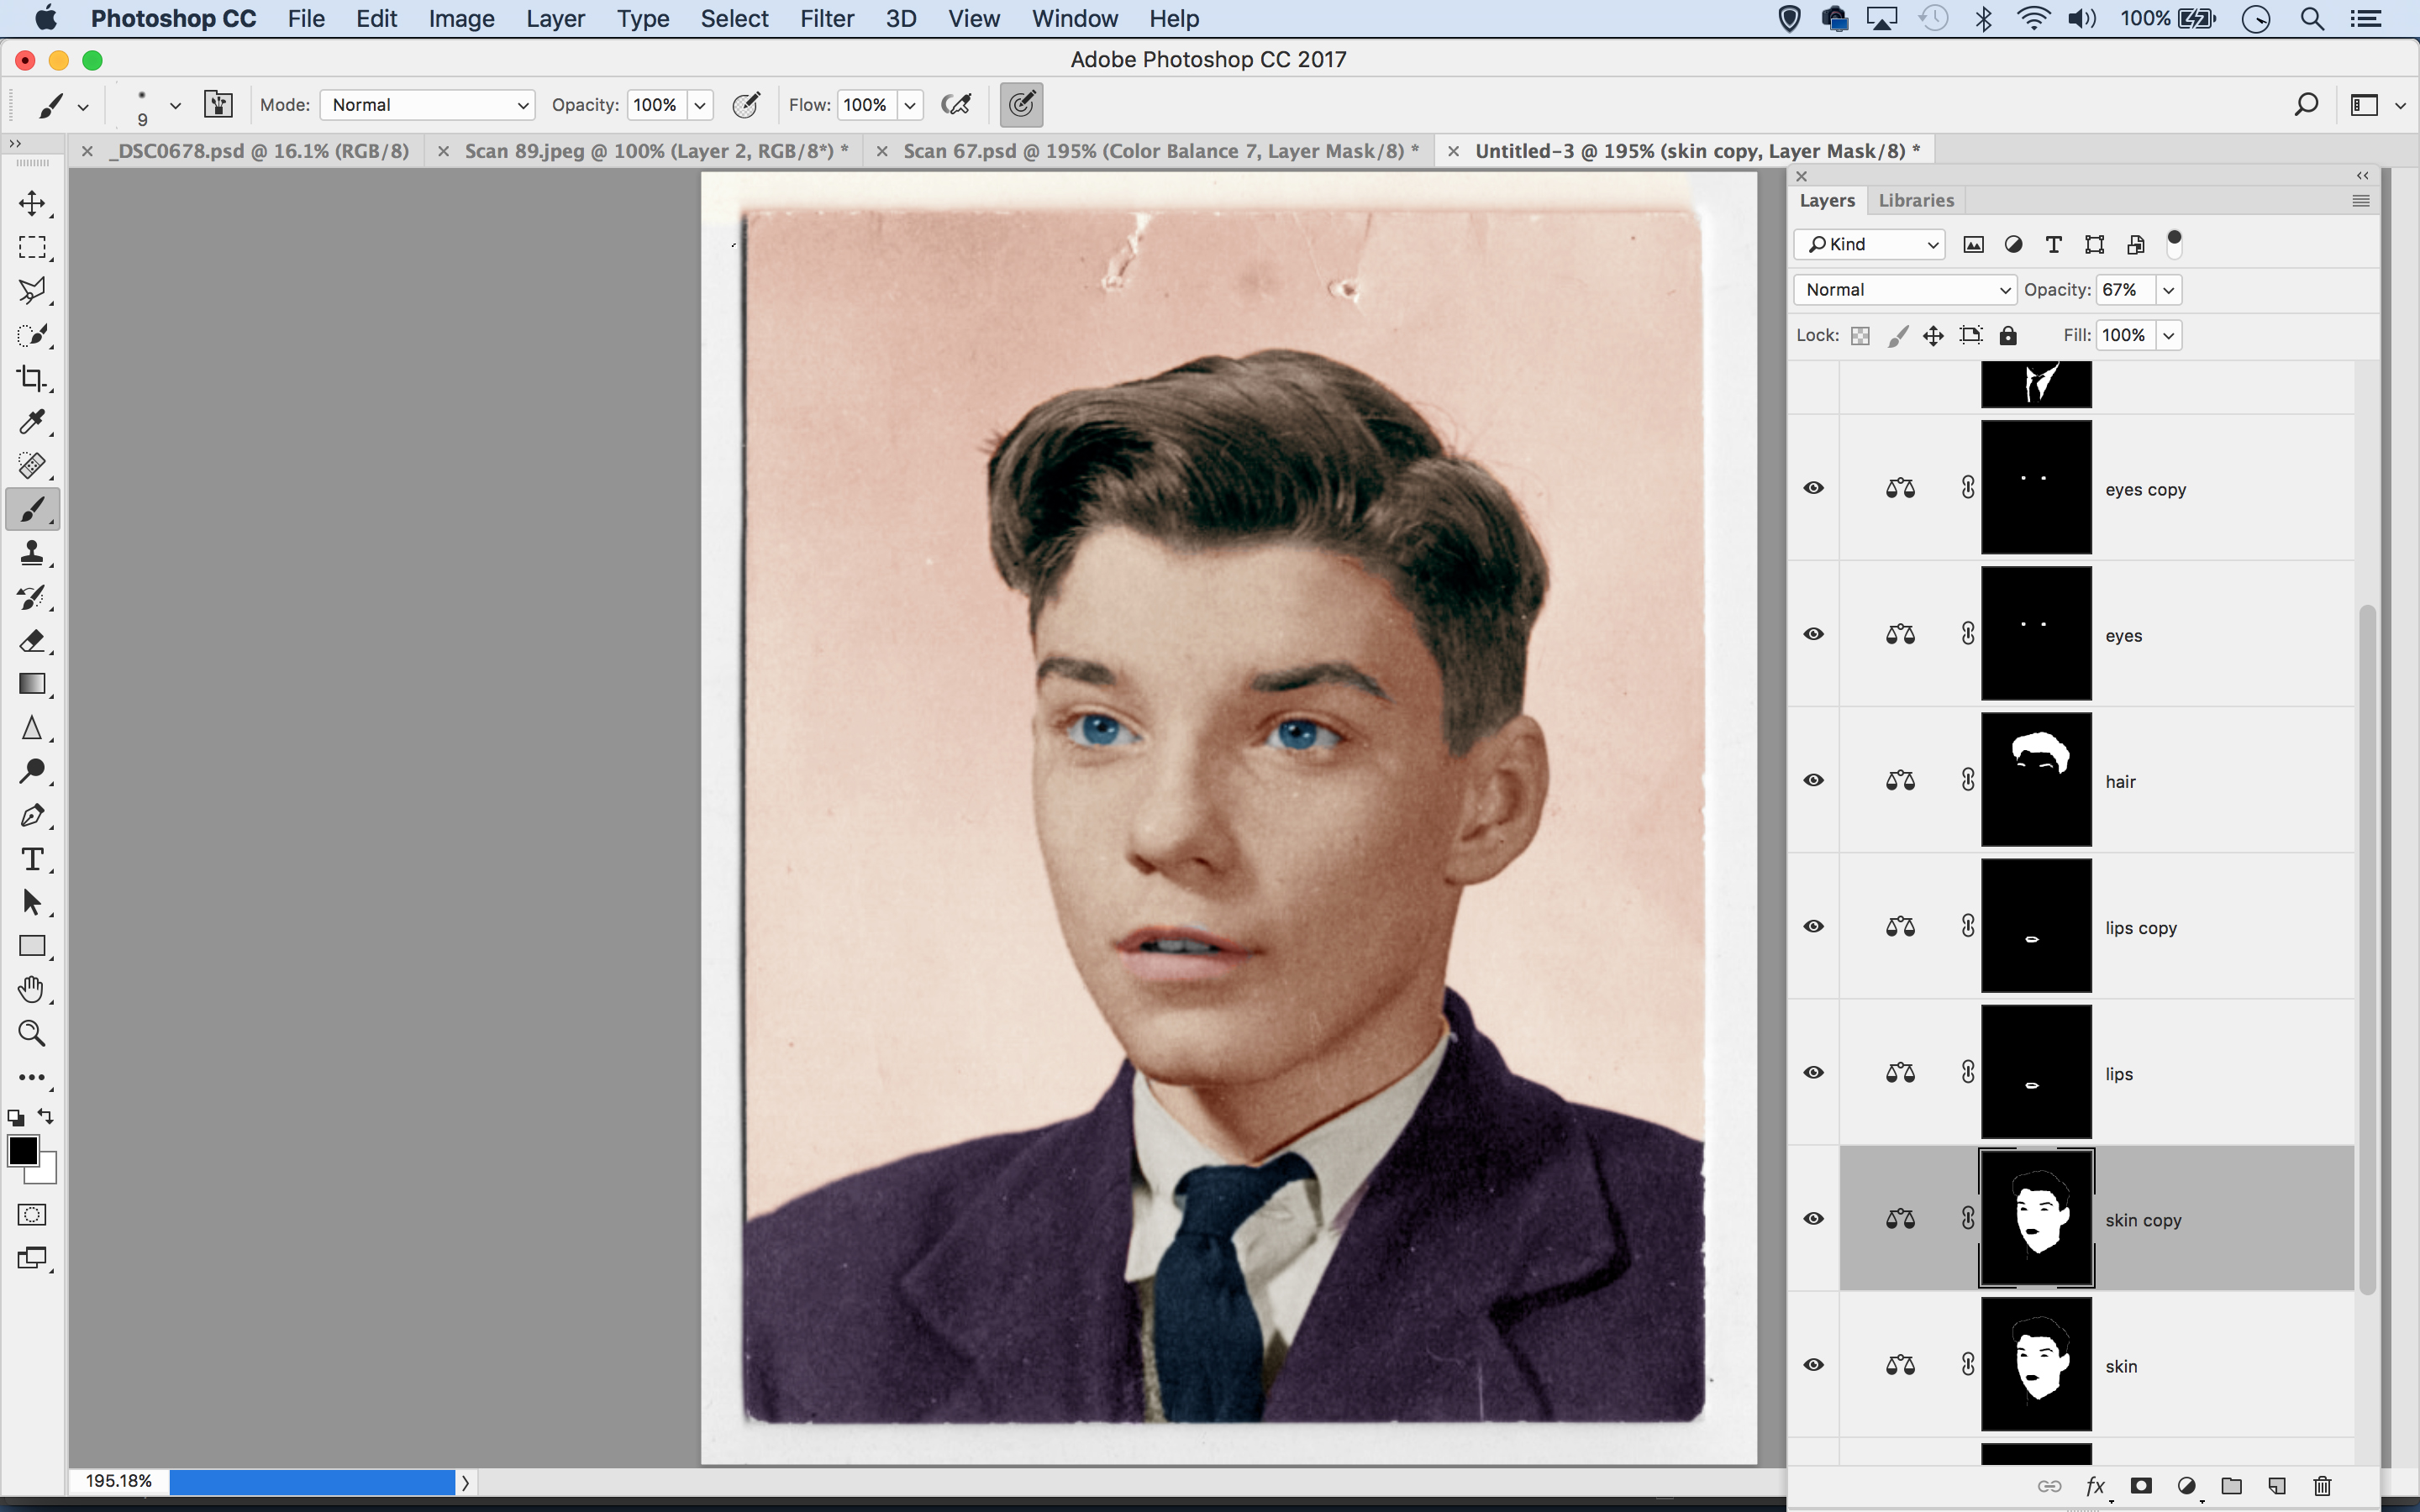
Continue selecting other areas of the image and coloring them in different ways, naming the layers for parts of the face as you go. If you need to fine-tune an area that’s covered, highlight the mask thumbnail of the corresponding Color Balance layer, then paint with white to reveal more color or black to hide it.
05: Strengthen or weaken
Once all parts are done, tweak the settings until everything gels. If you need to tone a color down, lower the layer opacity of the Color Balance layer. To strengthen a color, duplicate the Color Balance layer with Ctrl/Cmd+J. Here we duplicated the skin and lips layers.’
06: Finishing touches
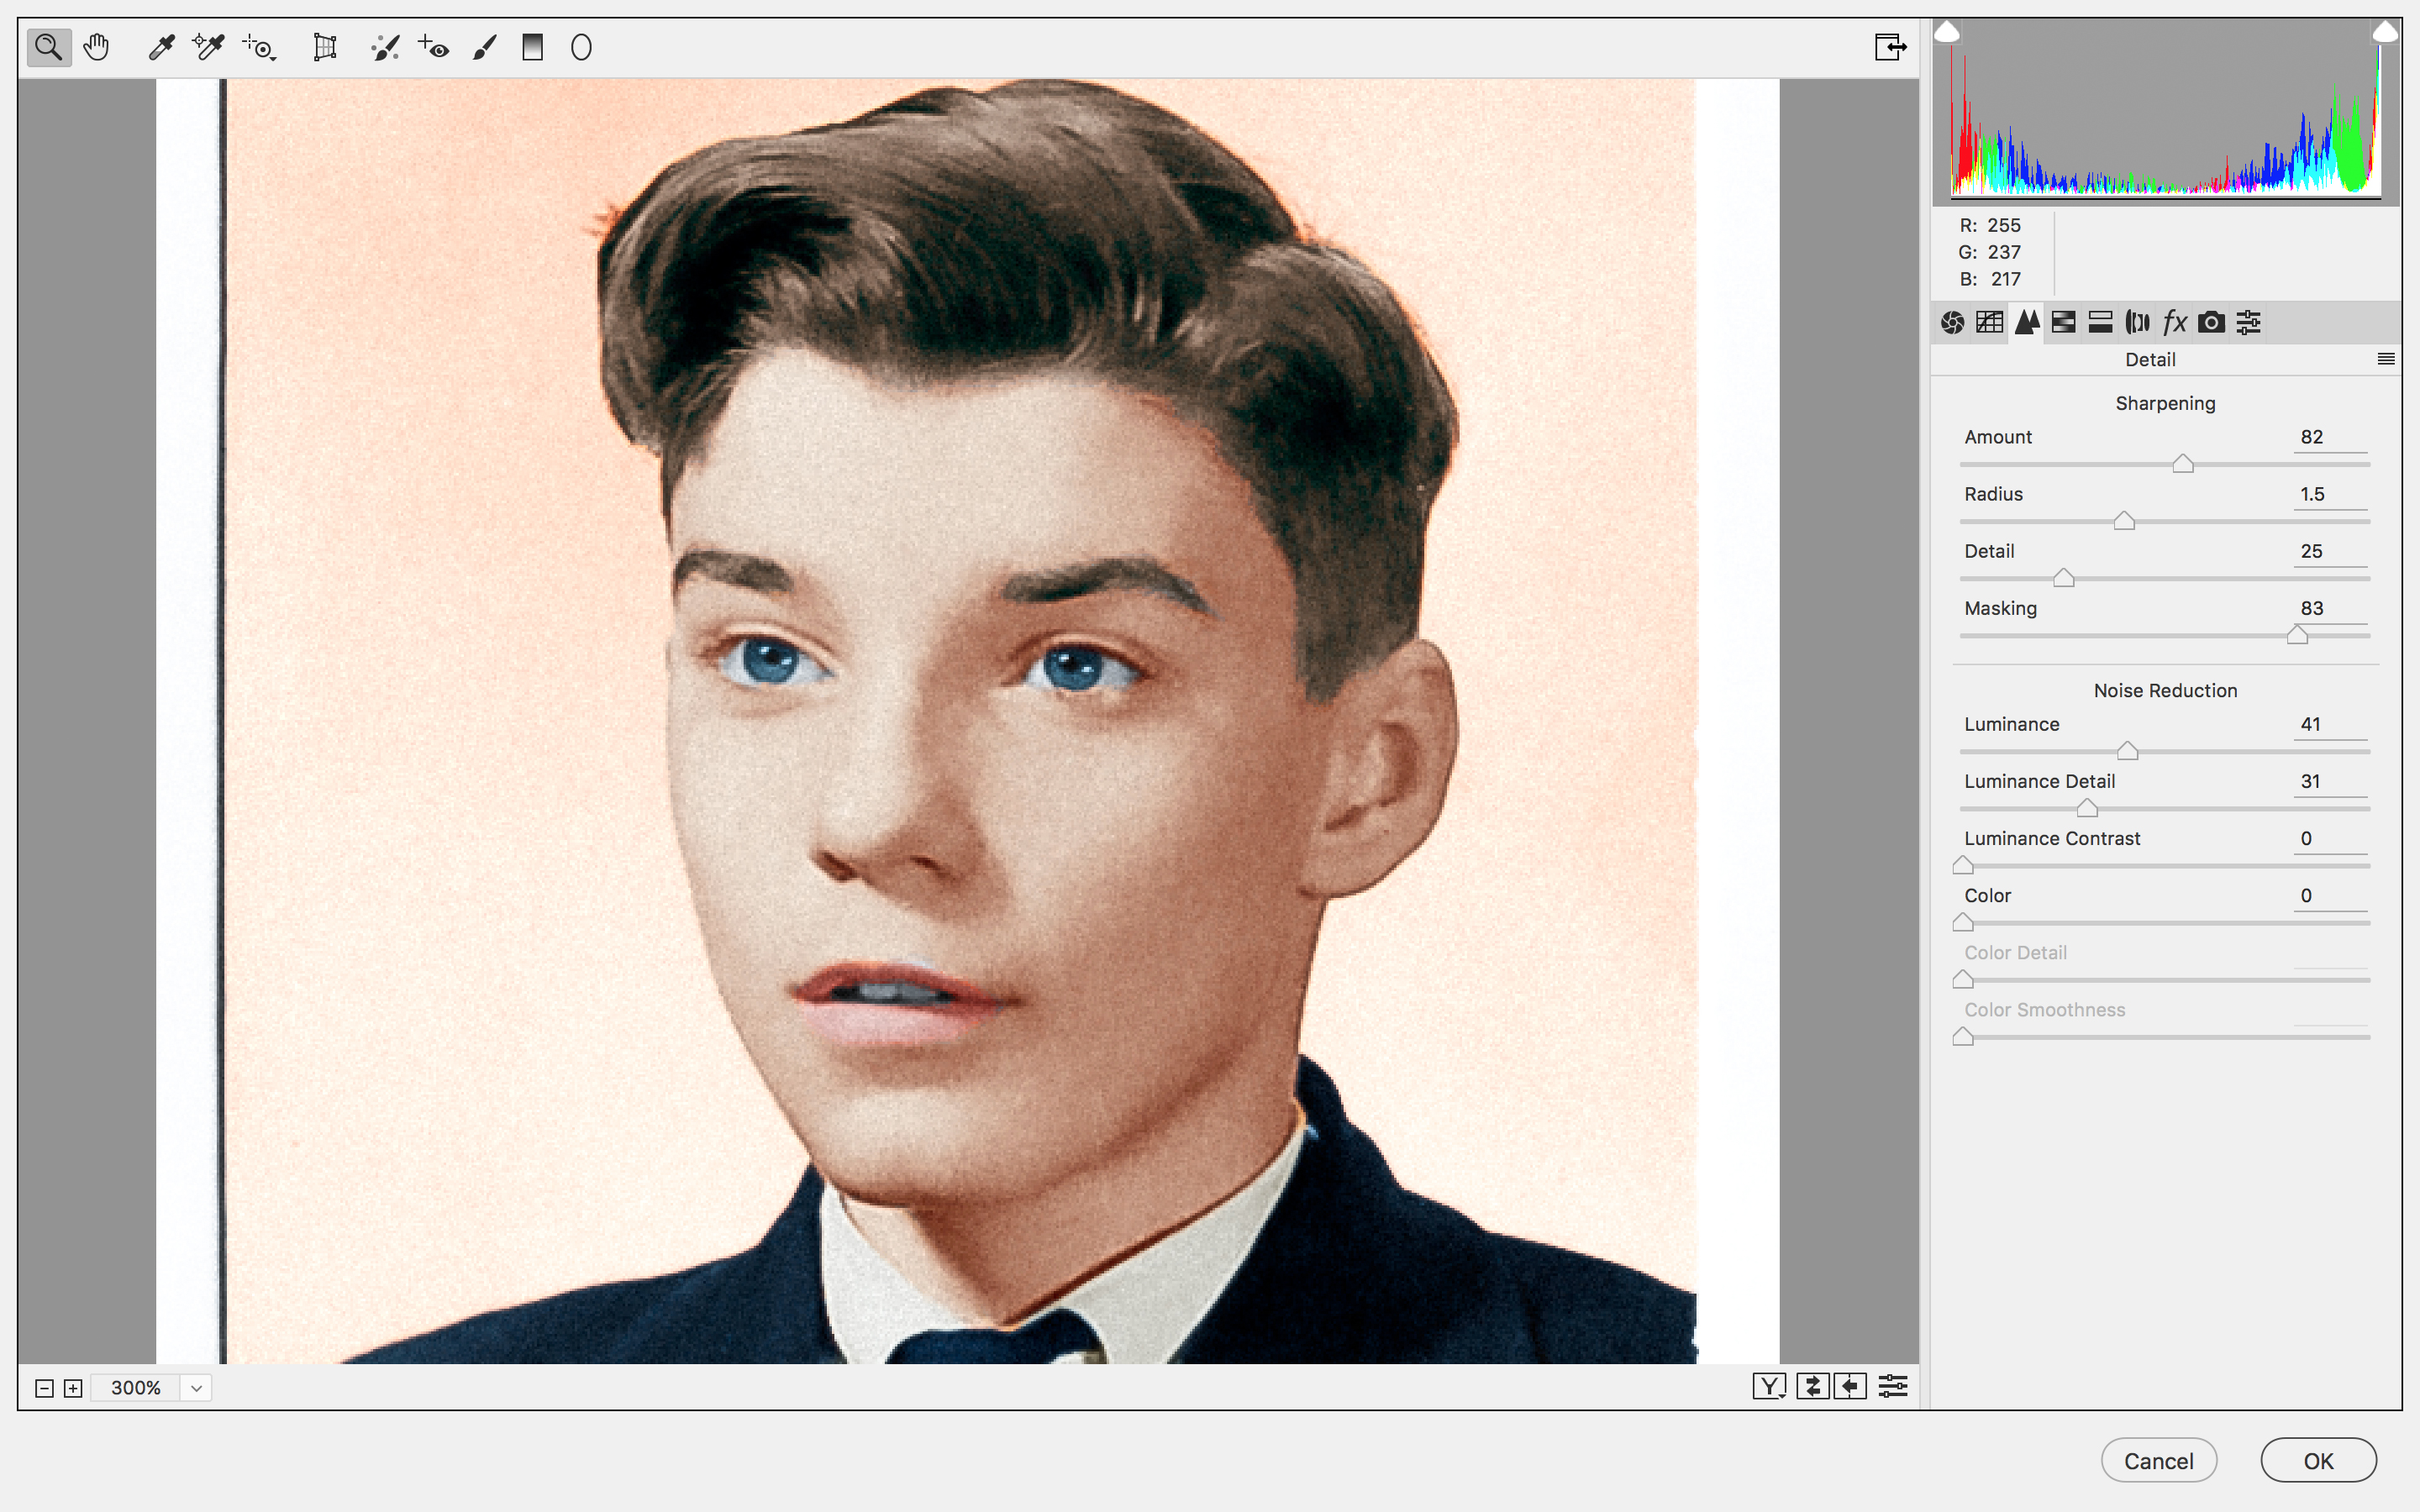
To sharpen and enhance the details, highlight the top layer then press Ctrl/Cmd+Shift+Alt+E to merge a copy of all layers. Go to Filter > Camera Raw Filter. Use the Basic tonal controls to add contrast. Next, go to the Detail panel. Apply Sharpening and Noise Reduction to finish off the image.
Read more:
How to download Photoshop and try it for free
15 Photoshop fixes: solve common photo problems with these Photoshop CC tips
The best photo editing software today
The lead technique writer on Digital Camera Magazine, PhotoPlus: The Canon Magazine and N-Photo: The Nikon Magazine, James is a fantastic general practice photographer with an enviable array of skills across every genre of photography.
Whether it's flash photography techniques like stroboscopic portraits, astrophotography projects like photographing the Northern Lights, or turning sound into art by making paint dance on a set of speakers, James' tutorials and projects are as creative as they are enjoyable.
He's also a wizard at the dark arts of Photoshop, Lightroom and Affinity Photo, and is capable of some genuine black magic in the digital darkroom, making him one of the leading authorities on photo editing software and techniques.
